This guide covers deploying a Graphiant Edge on a KVM hypervisor. Package names and firmware paths differ between Debian/Ubuntu and CentOS/RHEL; both are covered below. See Virtual Machine Formats for Graphiant Service for supported interface counts and general VM requirements.
Download the Edge Image
- Sign in to https://portal.graphiant.com
- Navigate to Maintain > Device Lifecycle > Provisioning
- Under System Images, download the Edge
.qcow2image for your release - Copy it to the hypervisor
Install the Required Packages
Debian / Ubuntu
sudo apt update
sudo apt install -y qemu-kvm qemu-utils libvirt-daemon-system \
  libvirt-clients virtinst ovmf swtpm swtpm-tools bridge-utils cpu-checker

sudo systemctl enable --now libvirtd
sudo usermod -aG libvirt,kvm $USER
CentOS / RHEL
sudo dnf install -y epel-release
sudo dnf install -y qemu-kvm libvirt libvirt-daemon-kvm libvirt-client \
  virt-install edk2-ovmf swtpm swtpm-tools bridge-utils \
  cloud-utils-growpart genisoimage

sudo systemctl enable --now libvirtd
sudo usermod -aG libvirt,qemu $USER
Note:
cloud-localdsis not packaged for CentOS Stream 10 / RHEL 10. Usegenisoimageinstead — see Onboard the Edge.
Create the Virtual Networks
Create the local-management and LAN networks before deploying the VM:
DEVICE=<edge-name>
sudo mkdir -p /var/lib/libvirt/images/$DEVICE

for lan in lan_1 lan_local-mgmt; do
  echo "<network><name>${DEVICE}_${lan}</name></network>" | sudo tee /var/lib/libvirt/images/$DEVICE/${lan}.xml > /dev/null
  sudo virsh net-define /var/lib/libvirt/images/$DEVICE/${lan}.xml
  sudo virsh net-start ${DEVICE}_${lan}
  sudo virsh net-autostart ${DEVICE}_${lan}
done
Caution: If this KVM host is itself a VM (nested virtualization on ESXi/vSphere), the outer hypervisor's virtual switch port group must have Promiscuous Mode, MAC Address Changes, and Forged Transmits set to Accept. Otherwise the guest's bridged traffic is silently dropped, which presents as a DNS or onboarding failure inside the guest.
Deploy the VM
BASE_DISK=/var/lib/libvirt/images/gnos_base/<image>.qcow2

sudo virt-install --name "$DEVICE" \
  --virt-type kvm --machine q35 --osinfo debiantesting \
  --cpu=host-model --features acpi=on,apic=on,pae=on \
  --tpm backend.type=emulator,backend.version=2.0,model=tpm-tis \
  --graphics vnc,listen=0.0.0.0 \
  --memory 4096 --vcpus 2 \
  --install no_install=yes \
  --disk path=/var/lib/libvirt/images/$DEVICE/$DEVICE.qcow2,size=10,backing_store=$BASE_DISK,bus=virtio,cache=none \
  --boot loader=<OVMF_CODE>,loader.readonly=yes,loader.type=pflash,nvram.template=<OVMF_VARS>,loader_secure=no \
  --autoconsole none --console=pty,target_type=serial \
  --network bridge=br0,mac=RANDOM,model=virtio \
  --network network=${DEVICE}_lan_local-mgmt,model=virtio \
  --network network=${DEVICE}_lan_1,model=virtio
| OS | <OVMF_CODE> |
<OVMF_VARS> |
|---|---|---|
| Debian/Ubuntu | /usr/share/OVMF/OVMF_CODE_4M.fd |
/usr/share/OVMF/OVMF_VARS_4M.fd |
| CentOS/RHEL | /usr/share/edk2/ovmf/OVMF_CODE.fd |
/usr/share/edk2/ovmf/OVMF_VARS.fd |
This deploys a virtual Edge with three interfaces. Additional interfaces can be added after deployment.
Caution: Power down the virtual device before adding or deleting an interface. Doing so while running results in undefined behavior and may cause loss of connectivity to the Graphiant Core.
Verify the VM is running and its interfaces are attached:
sudo virsh list
sudo virsh domiflist $DEVICE
Onboard the Edge
Manual Onboarding (OAuth / QR Code)
With no cloud-init image attached, the VM boots straight into onboarding and prints an authorization URL and QR code to the serial console:
sudo virsh console $DEVICE
- Scan the QR code, or open the printed URL in a browser
- Sign in to the Graphiant Portal
- Authorize the device onto your network
The same authorization URL is also available under Device Details > Onboarding URL in the Local Web Server dashboard (see Local Management Access) — useful if console access isn't convenient.
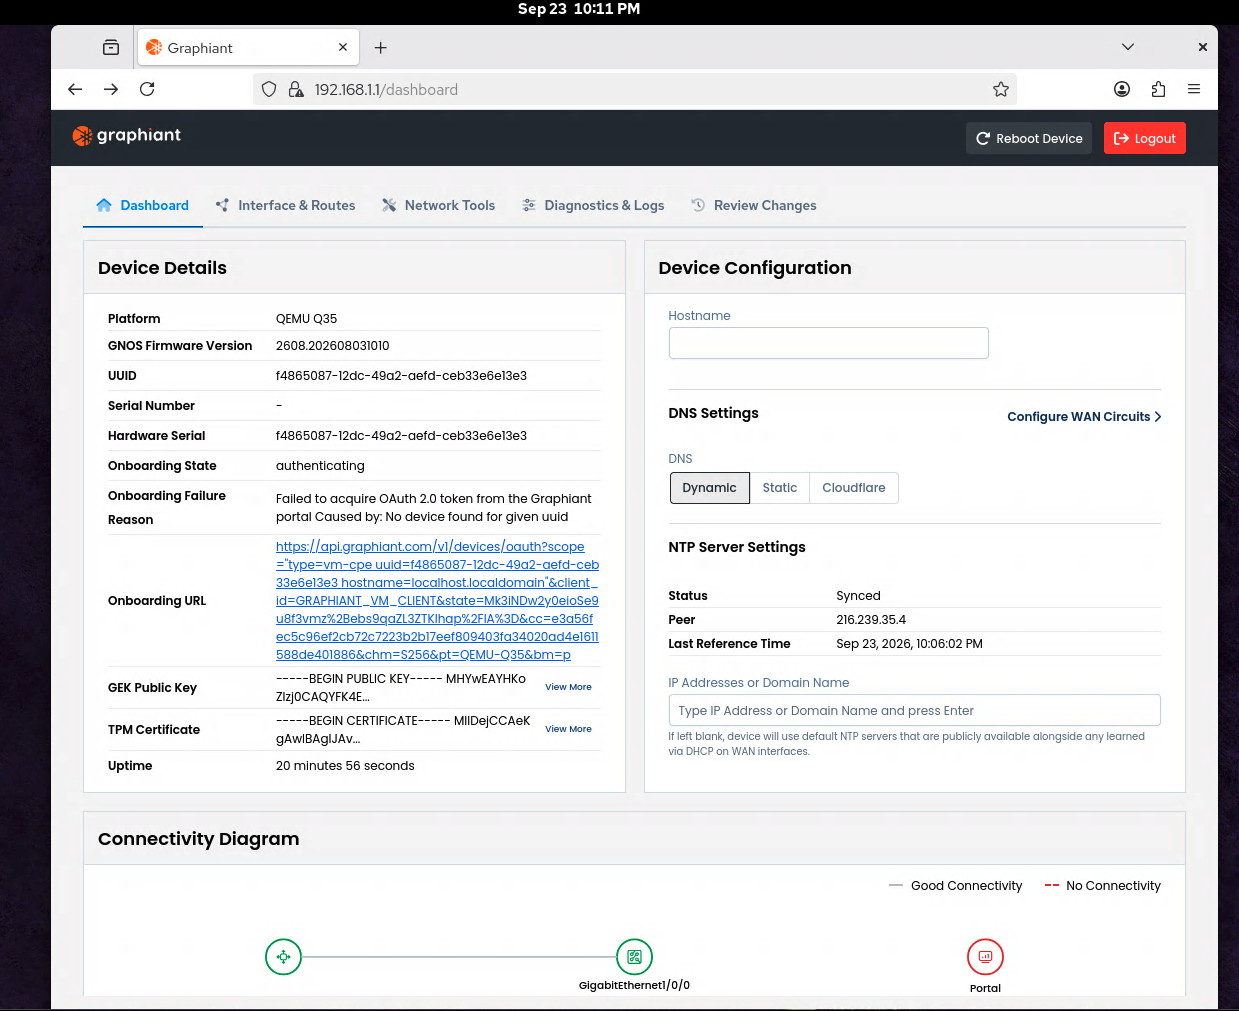
The console shows onboarding progress, ending with:
onboarding: transitioning to state: Onboarded
Zero-Touch Provisioning (ZTP) via Cloud-Init
Uses the same Bootstrap Token and user-data/meta-data files as Onboarding Your Graphiant Edge Using ZTP, delivered on a cidata-labeled ISO instead of a USB drive.
-
Navigate to Maintain > Device Lifecycle > Provisioning > Bootstrap Tokens; click Generate Token
-
Download and extract the token package; copy its contents into a
user-datafile -
Create a
meta-datafile:instance-id: gnos local-hostname: gnos -
Build the seed ISO:
# Debian/Ubuntu cloud-localds --disk-format iso cloud-init.iso user-data meta-data # CentOS/RHEL genisoimage -output cloud-init.iso -volid cidata -joliet -rock user-data meta-data -
Add
--cdrom /path/to/cloud-init.isoto thevirt-installcommand above -
On boot, the Edge consumes the token automatically — no manual authorization step is required
Verify Onboarding
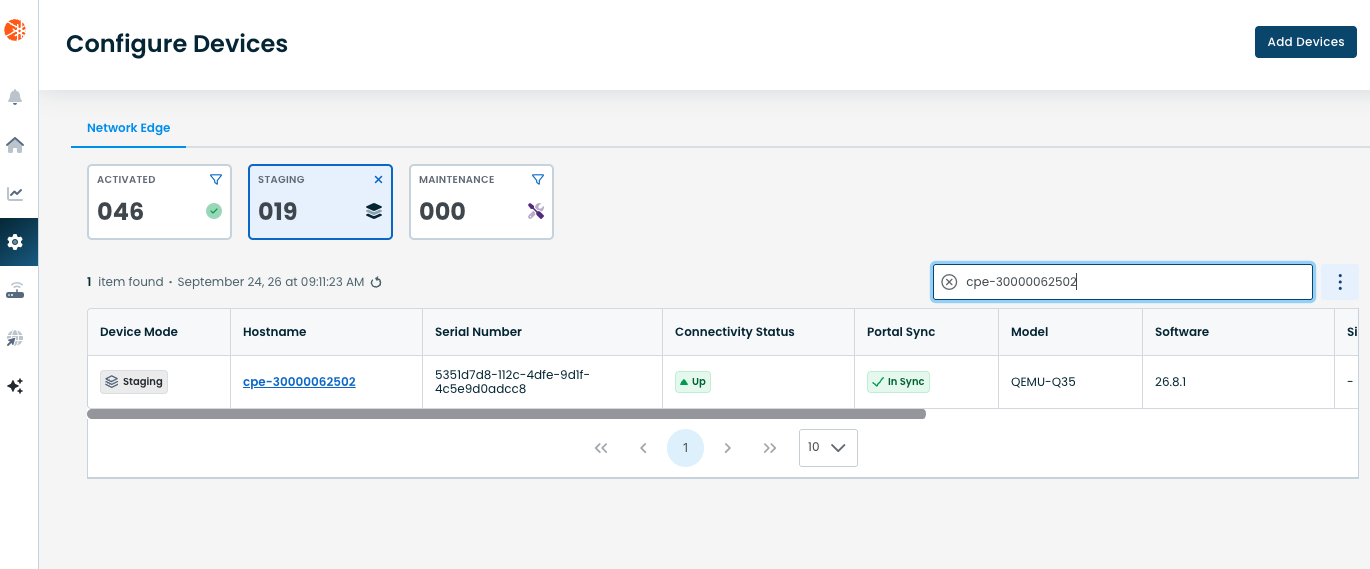
In the Graphiant Portal, navigate to Configure > Configure Devices. The device appears with mode Staging and connectivity status Up.
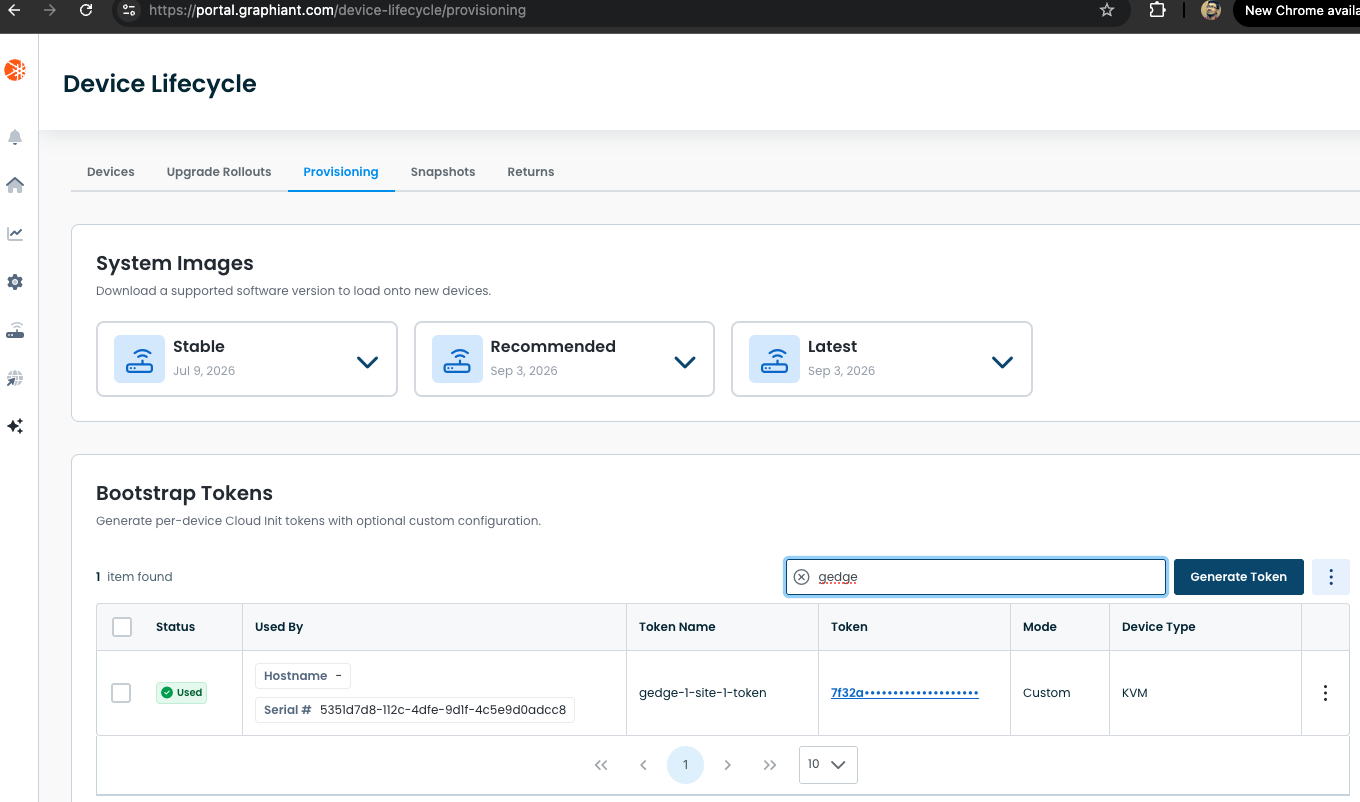
Under Maintain > Device Lifecycle > Provisioning, a Bootstrap Token used for ZTP shows status Used.
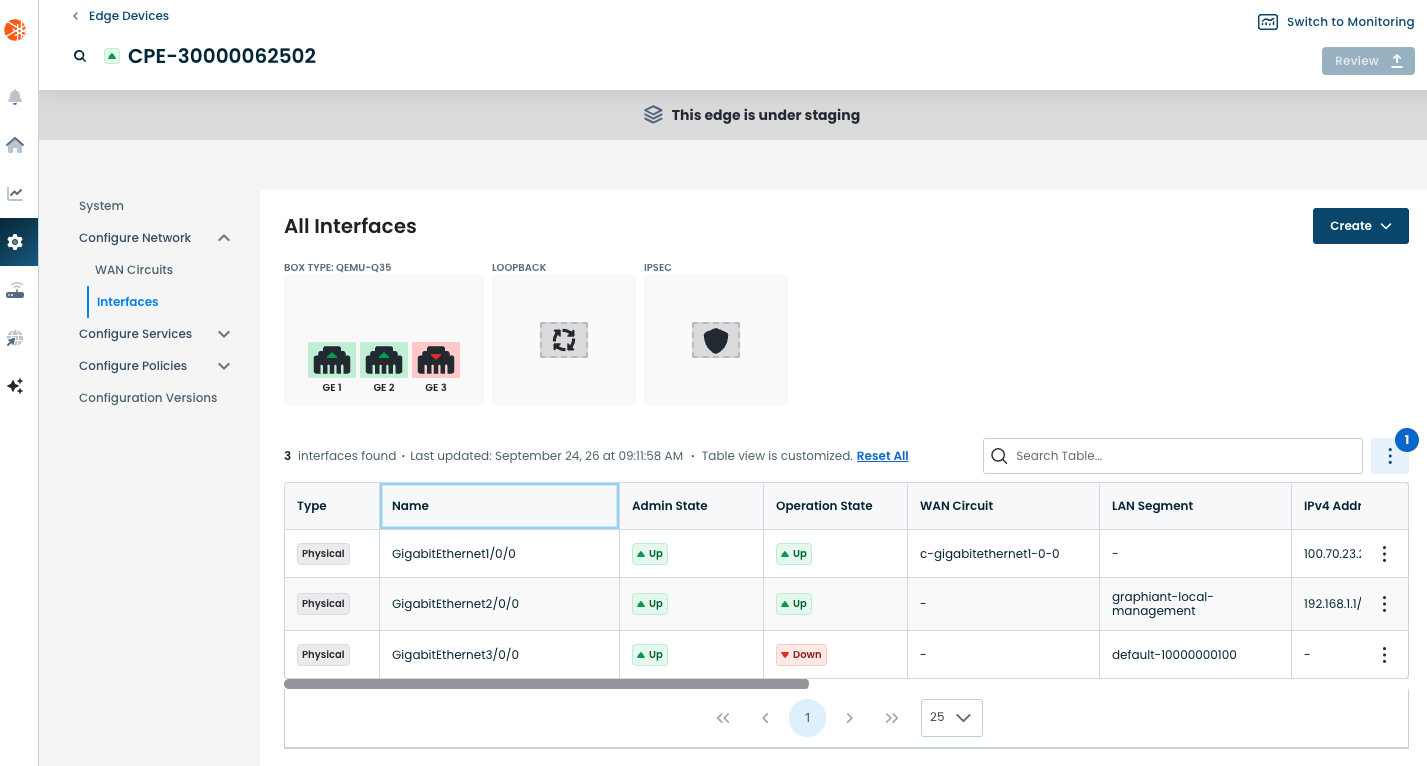
Select the device, then Configure Network > Interfaces to confirm all interfaces are in the expected admin/operation state.
Local Management Access
The local-management interface (GigabitEthernet2/0/0) defaults to a static 192.168.1.1/24 address and does not support a default gateway — you must be on the 192.168.1.0/24 network to reach it.
Note: On physical Edges, a DHCP server runs on the local-management interface until the device connects to the Portal. On virtual Edges (KVM and ESXi), this DHCP server is disabled by design, regardless of Portal connectivity state. See Troubleshooting Using the Local Web Server.
Assign a static IP to the bridge or interface connected to the Edge's management port:
sudo ip addr add 192.168.1.2/24 dev <bridge-name>
sudo ip link set <bridge-name> up
Browse to https://192.168.1.1. Accept the security warning (Graphiant uses a self-signed certificate), then log in to view the Local Web Server dashboard.
Troubleshooting
| Issue | Resolution |
|---|---|
Permission denied on disk access (CentOS/RHEL) |
Store VM disks and cloud-init files under /var/lib/libvirt/images/, which already carries the correct SELinux virt_image_t context. Do not disable SELinux to work around this. |
| Onboarding fails with DNS errors despite host connectivity | If the KVM host is itself a VM, check the outer hypervisor's virtual switch security settings (see Create the Virtual Networks). |
| "No interfaces ready for use for onboarding" | Confirm the VM has at least one kernel-managed management NIC and one VPP-managed WAN NIC with real upstream connectivity. |