What is DIA?
Traditional WAN deployments, especially deployments using MPLS send all branch traffic to a DC before sending it over the internet to its destination. This approach can be costly when using SaaS applications such as O365, Salesforce, zoom, since all this traffic from al network branches needs to be sent to the DC first before going out over the internet. Direct Internet Access (DIA) is a solution that allows you to send chosen SaaS/application traffic directly on to the internet, from the branch, without needing to backhaul it to the DC. This reduces the bandwidth capacity at the DC while improving latency for the internet bound applications.
The Graphiant Edge supports Direct Internet Access using two different modes:
Traffic policies
Static routes
Step 1: DIA Setup Recommendation
The recommended approach for setting up DIA is to use a static default route, and then use traffic policies to match specific applications and send them over the Graphiant network. This is due to corner cases with DPI first packet classification. When performing application classification, using DPI, the Graphiant Edge uses DNS requests to perform first packet classification. This first packet classification can fail if DNS requests are encrypted (DNSSEC), which in turn causes the traffic policy match to fail. Using a default static route in conjunction with traffic policies allow you to avoid issues due to these corner cases.
Configuring DIA in the Graphiant Portal
From the Home screen, navigate to the Edge Configuration screen by one of the following:
Locate the "Configurations" section within the “Quickstart” area of the screen; select 'Configure Edges'.
or
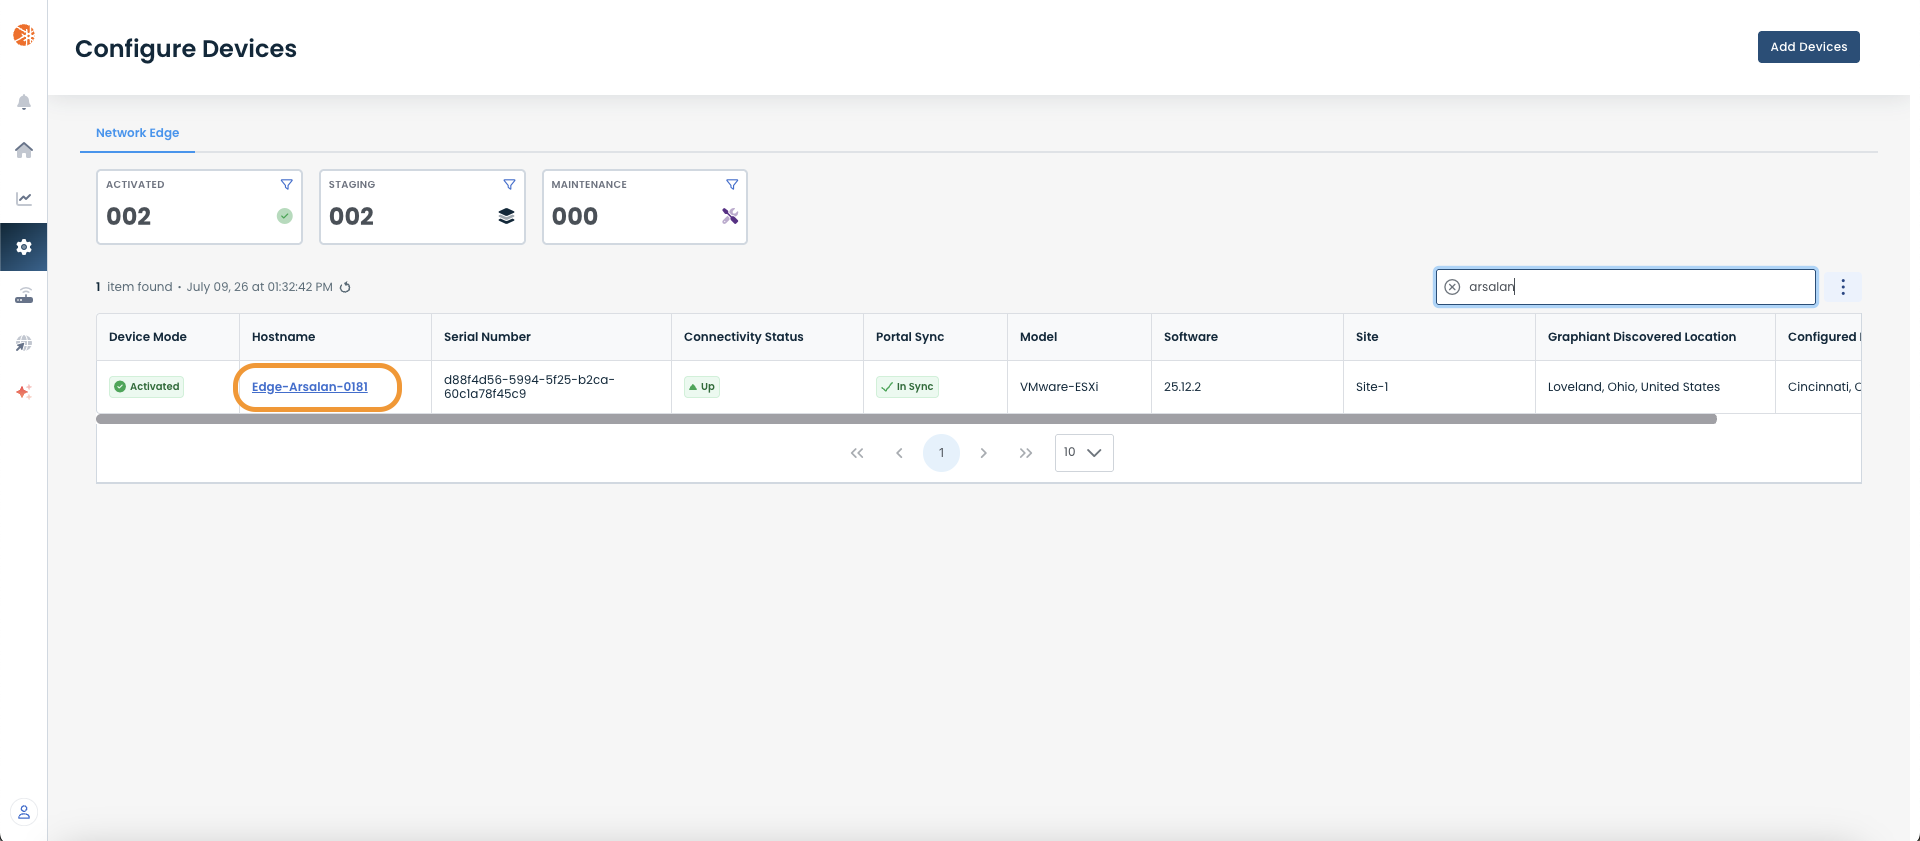
Click 'Configure' in the sidebar; select 'Devices'.
.png)
This will take you to the ‘Configuration’ page of the Graphiant Portal where you can view all active, staged, and deactivated Edges. From here you will be able to select among the active Edges which Edge(s) you would like to configure.
On the left-hand side, select and click the Edge you wish to manage under the column 'Hostname.'
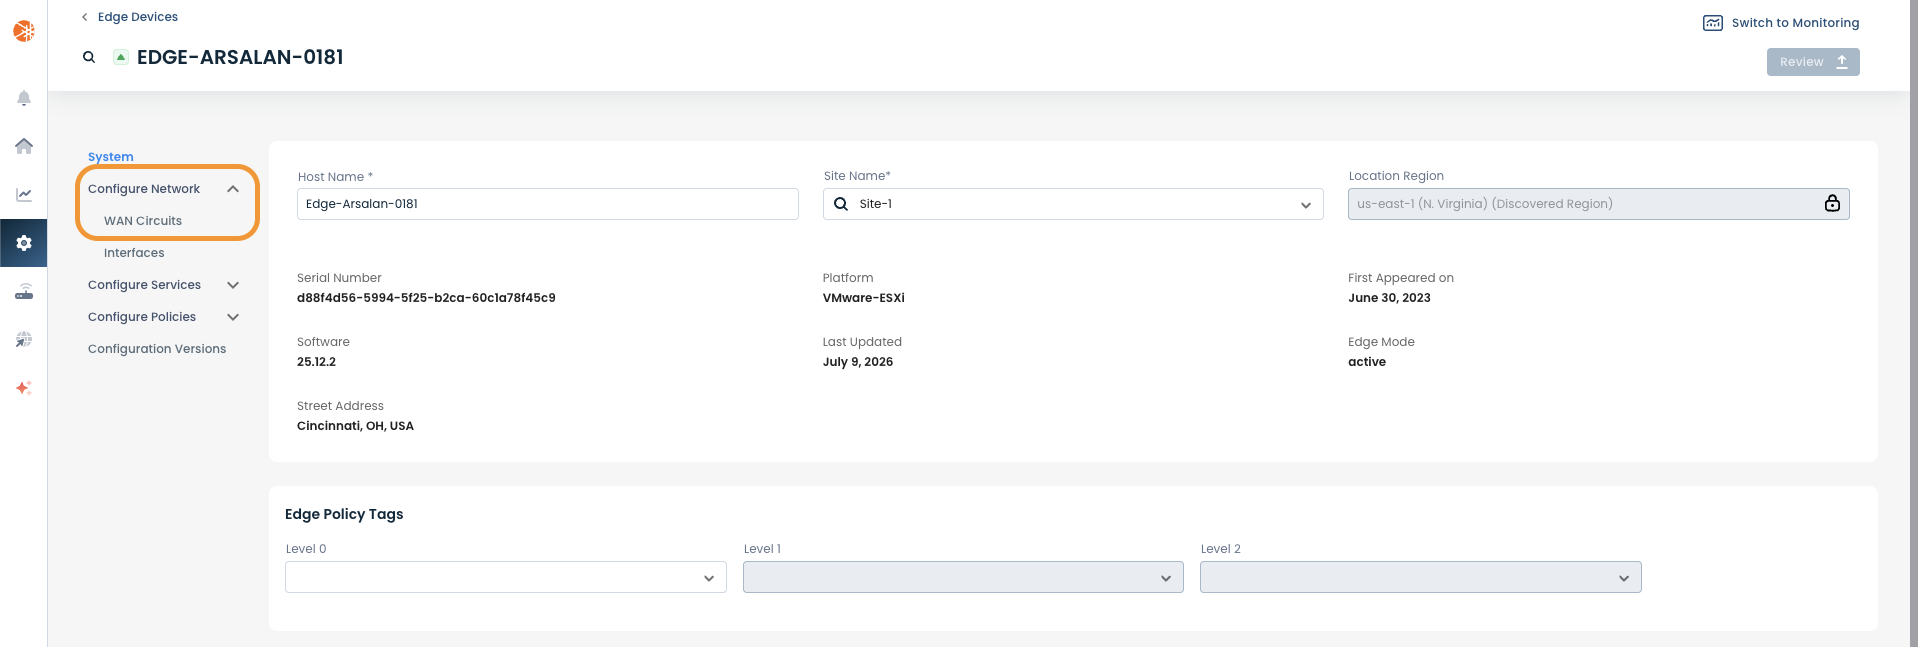
This will take you onto a Configuration page with a focus on the Edge you have just chosen.
Here you will see a list of headers along the lefthand side of the page, such as ‘Configure Network’, ‘Configure Services’, ‘Configure Policies’, etc.
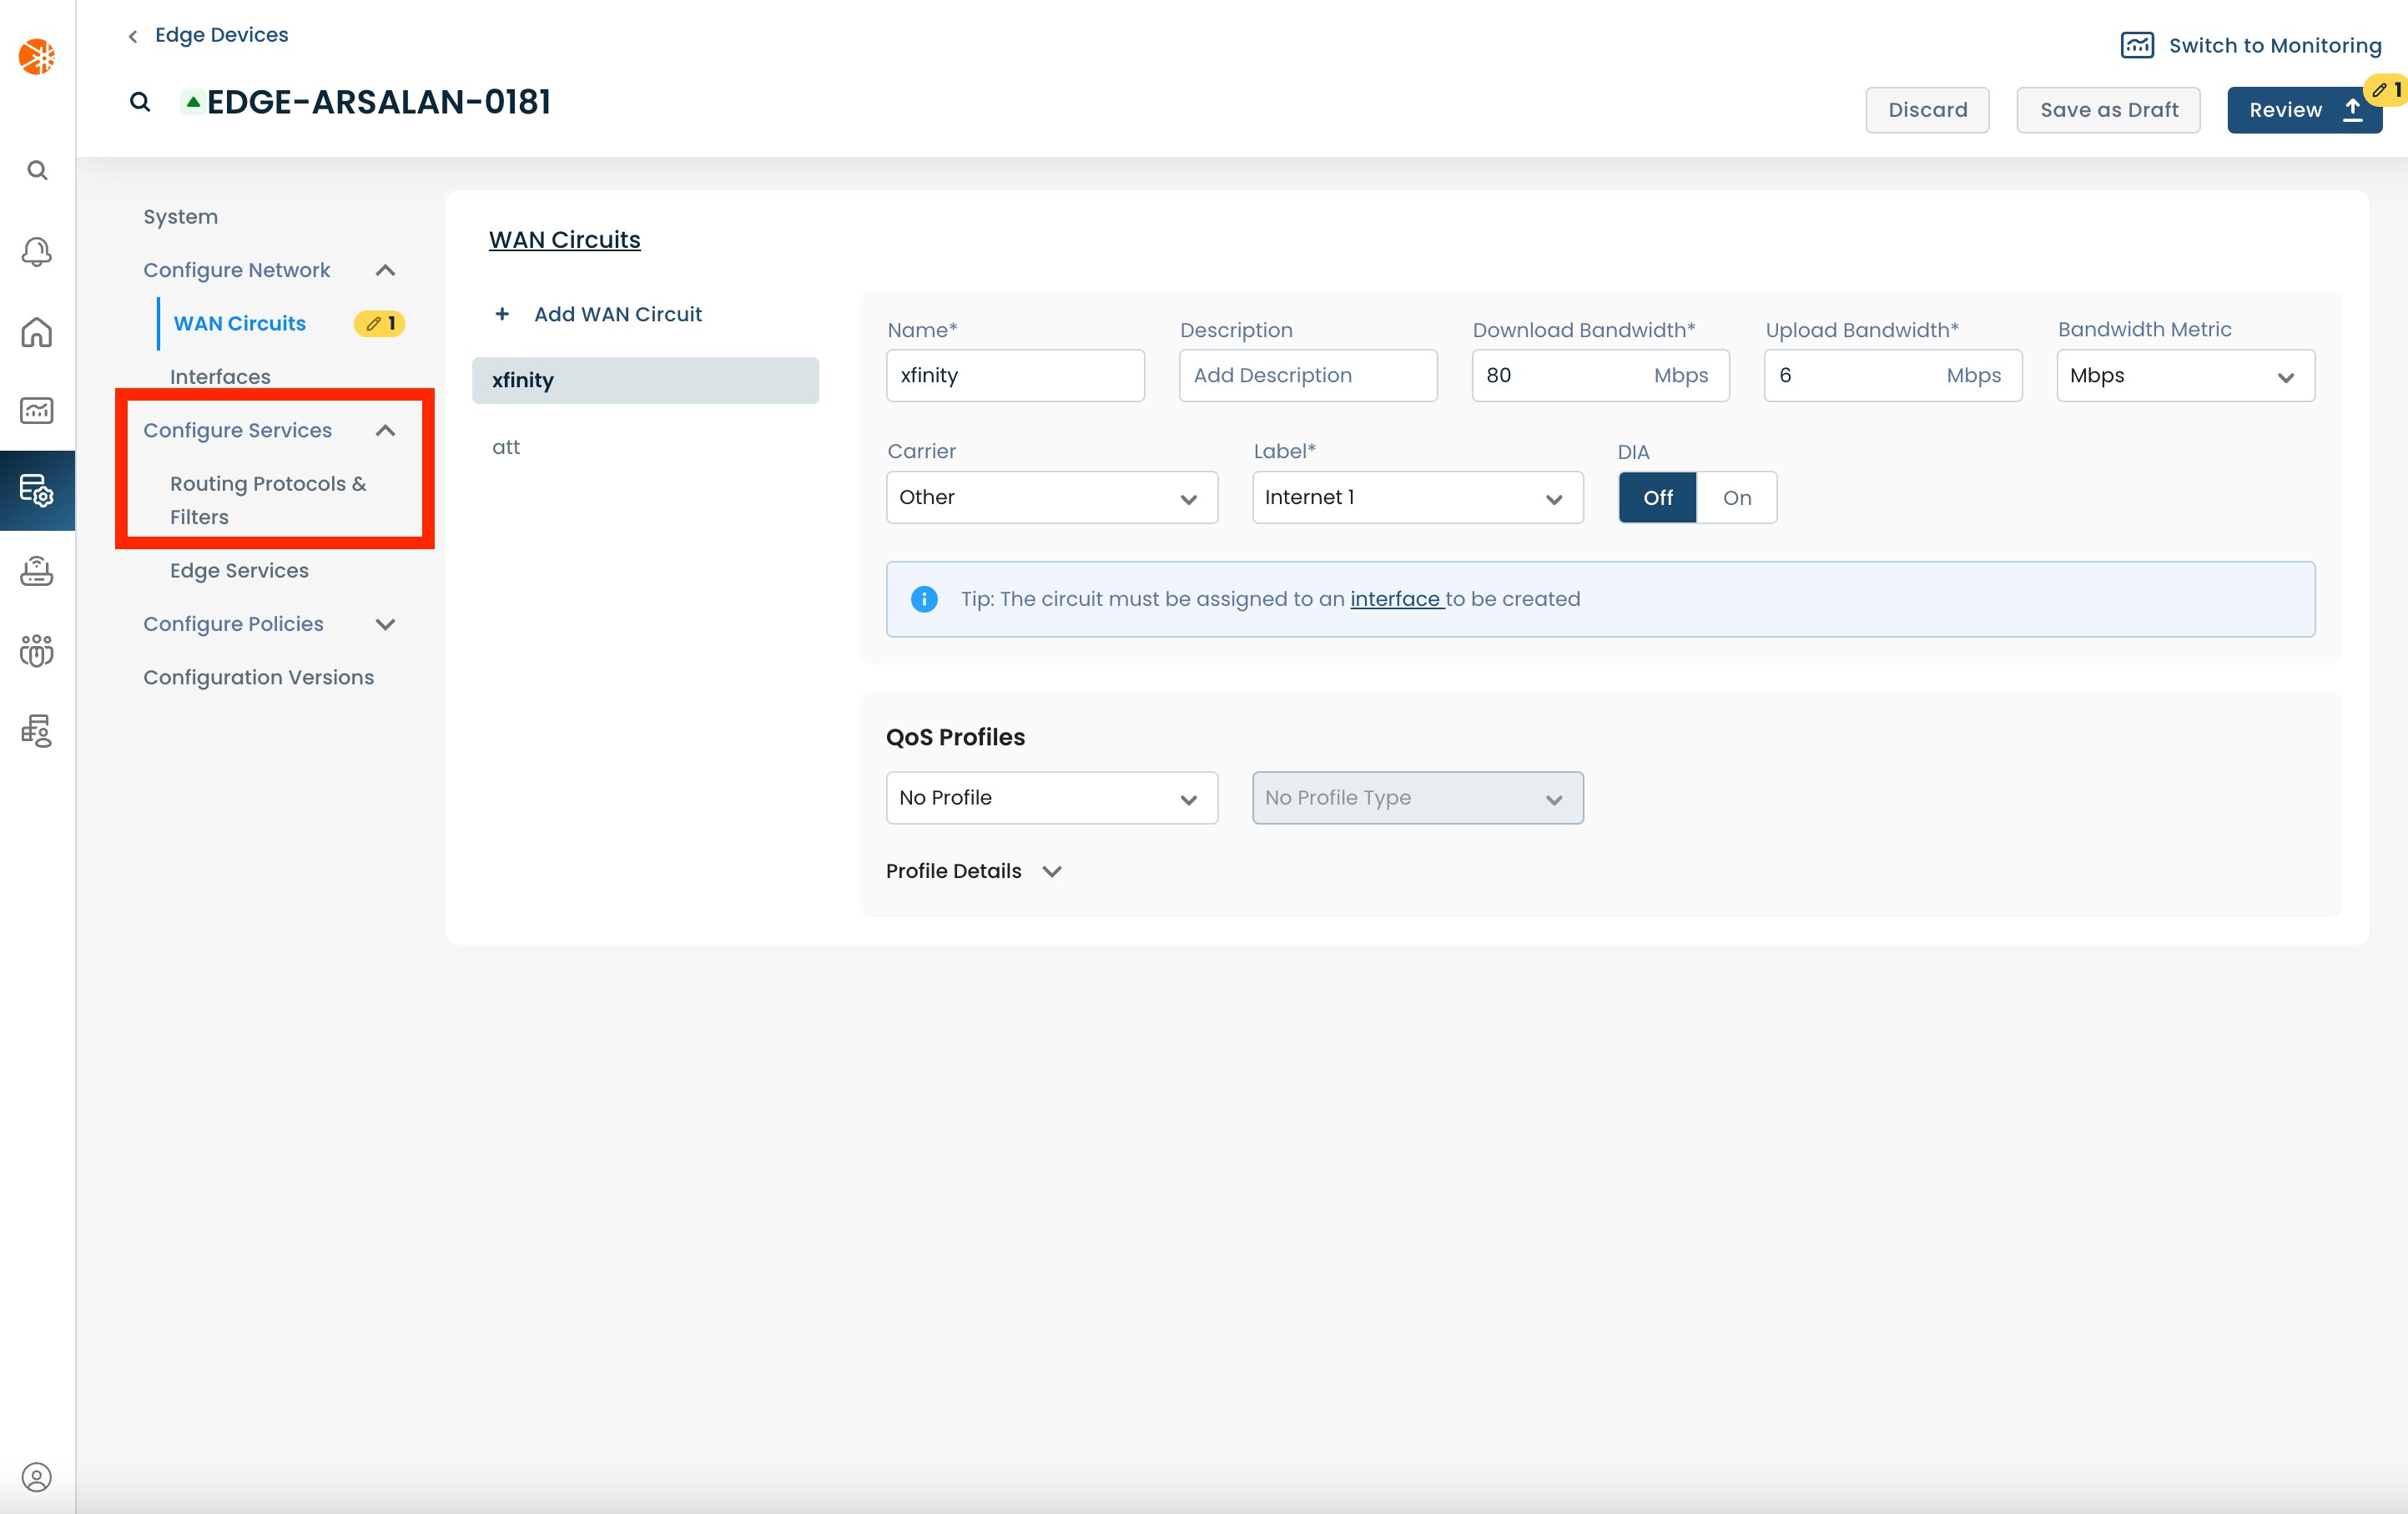
From here, select and click ‘Configure Network’, and from the dropdown menu select and click ‘WAN Circuits’.
On the 'WAN Circuits' page, you will see the list of all existing WAN circuits.
.png)
Select the WAN circuit on which you would like to enable DIA and then toggle DIA to ‘On’.
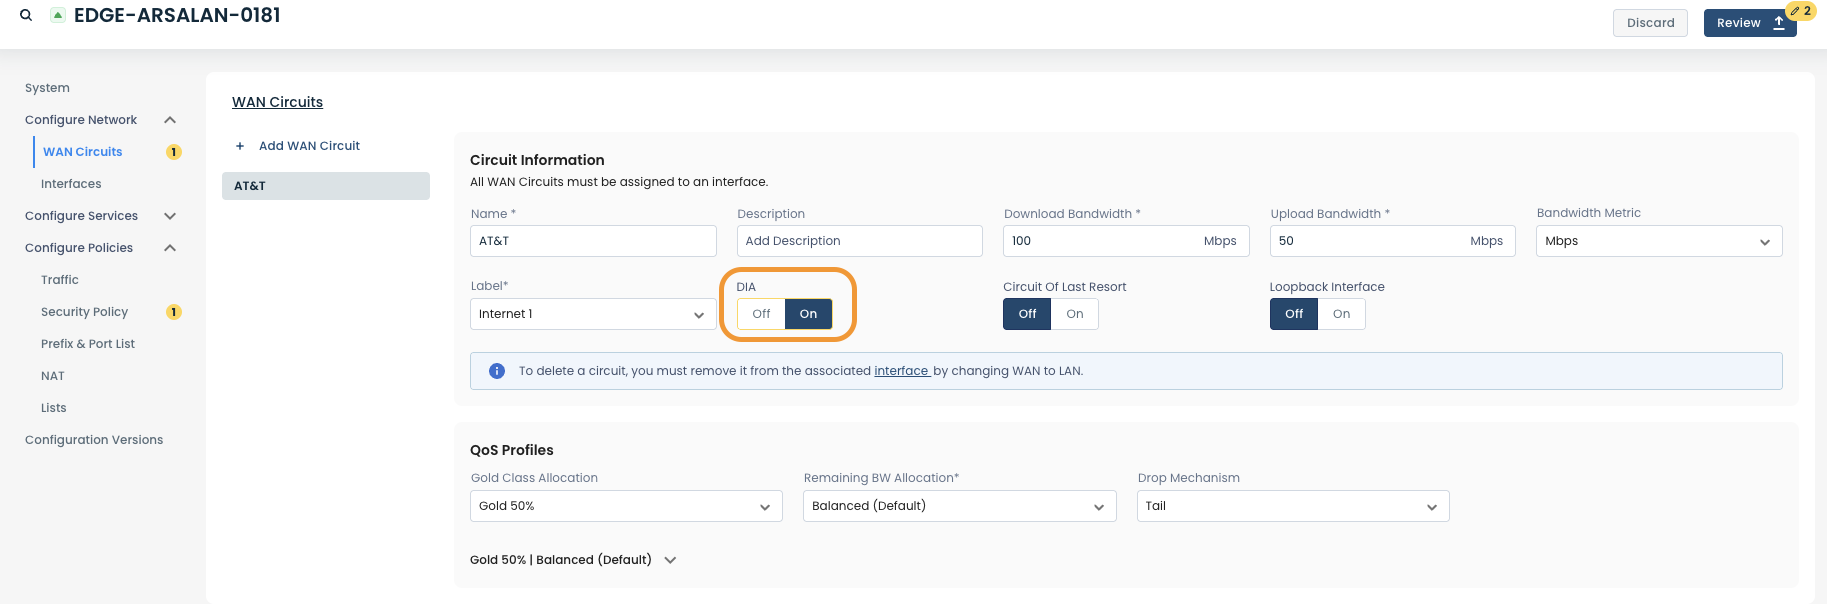
Now you're ready to select which apps/traffic should use DIA.
Option 1: Configuring DIA Using Policy
Sending traffic via DIA can be achieved by using traffic policies. Once you've set up at least one WAN circuit to support DIA (using the approach mentioned above) you can define a traffic policy to match traffic and send it via DIA instead of using the Graphiant Core.
From the left navigation menu, select and click ‘Configure Policies’ and from the dropdown menu select and click ‘Traffic’.

Option 1A: Local Traffic Policy
This will take you to the 'Traffic Policy' page. From there, navigate to the 'Local Configuration' tab.
To add a Rule to the Rule set, select and click the (+) icon on the right-hand side. Since nothing is currently configured on the LAN segment, you can also select 'Add Local Traffic Ruleset'.

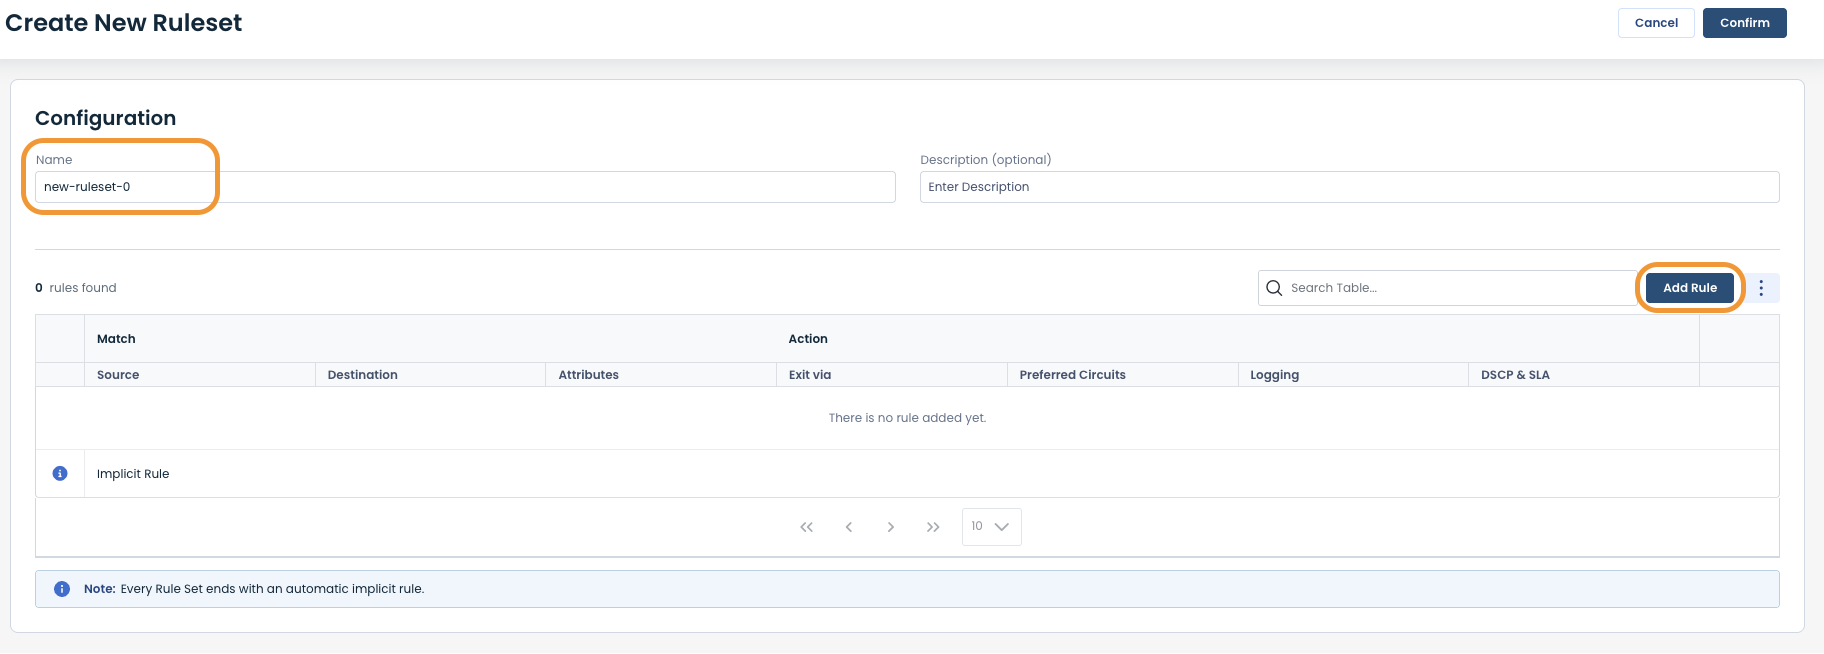
Add a Ruleset name, and if desired, a description. Additionally, select 'Add Rule' on the right-hand side.
.png)
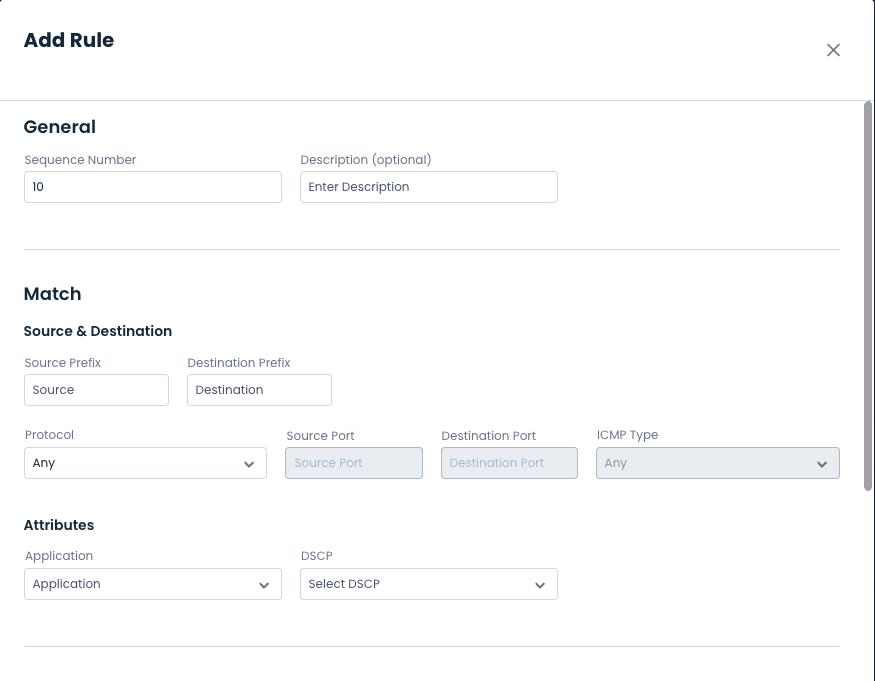
This will take you to a popup to create a new Rule. Configure the ruleset to match the flow or application you want; for details on how to configure rules in a traffic policy take a look at 'Configuring Traffic Policies'.
DIA for Specific Apps:
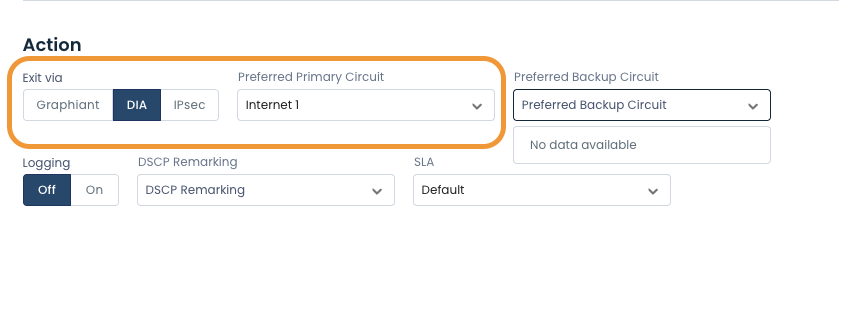
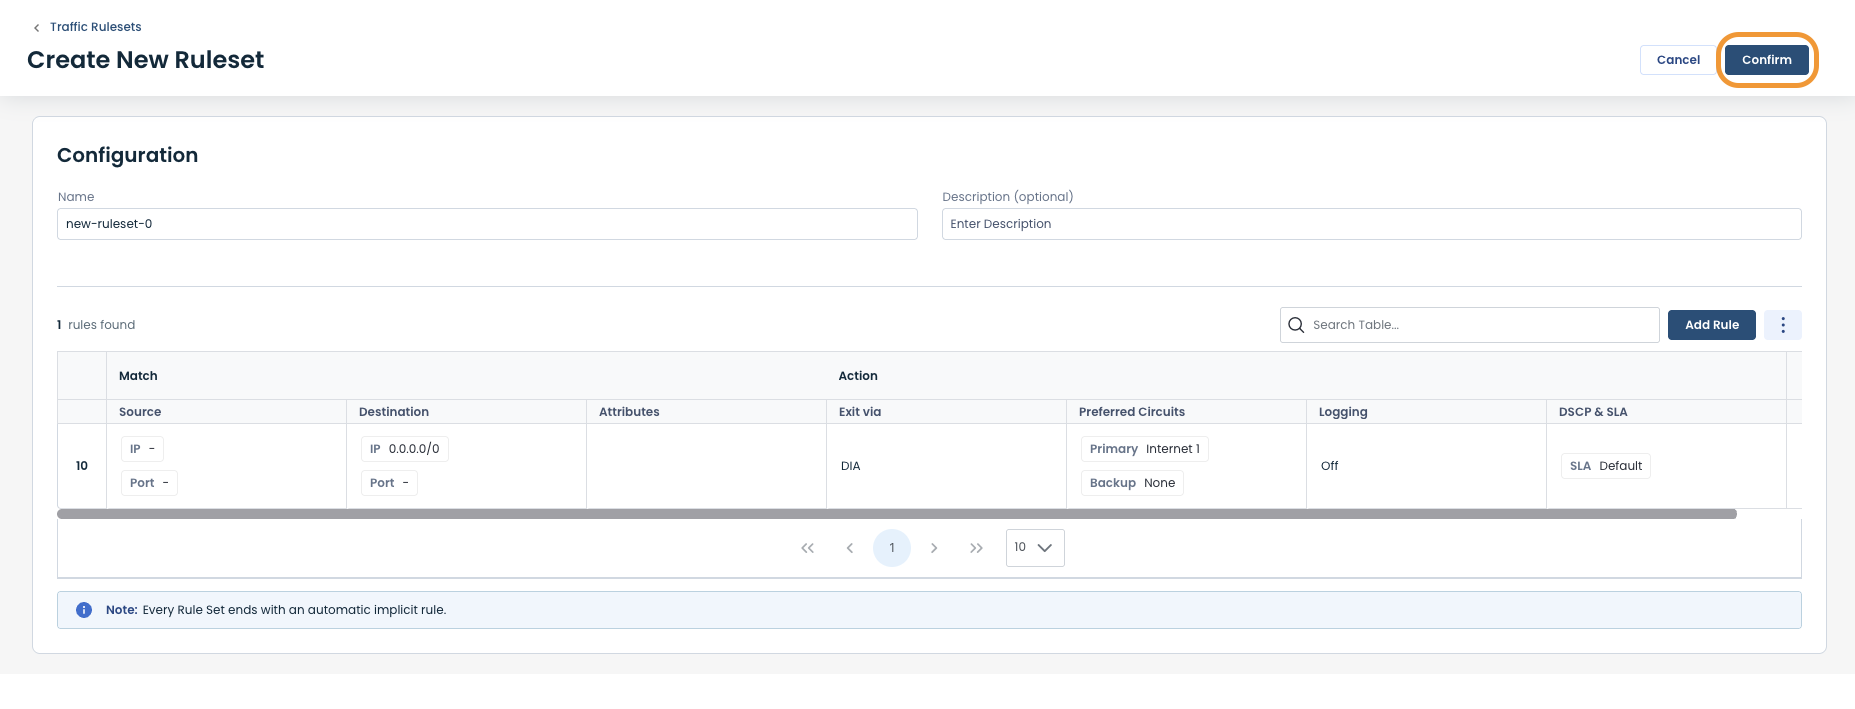
After configuring the match criteria, scroll down to the 'Action' section.
In this tab, switch ‘Exit via’ to DIA.
Choose the WAN circuit you want to use for DIA in the 'Preferred Primary Circuit' dropdown.
Note:
Using a default static route with traffic policies to send specific applications over the Graphiant network is the recommended setup for DIA.
For additional details please look at the DIA setup recommendation section.
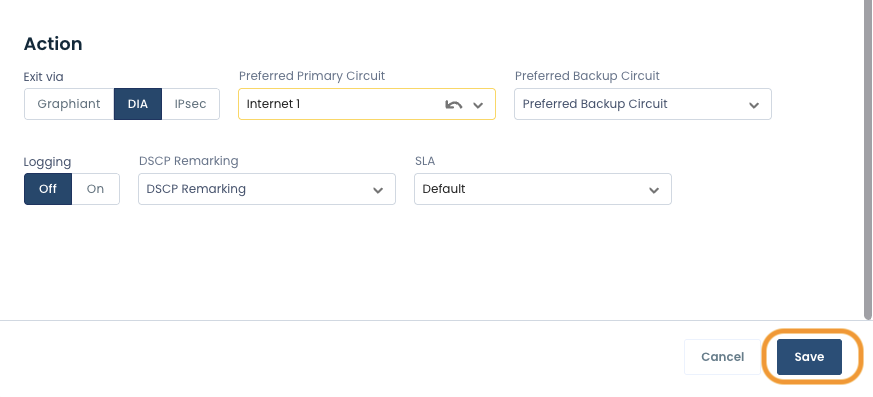
After setting the 'Preferred Primary Circuit' you can optionally set the 'Preferred Backup Circuit'. The backup circuit will be used in case the primary circuit is unavailable.
Next, click 'Save' in the popup and on the main configuration page.
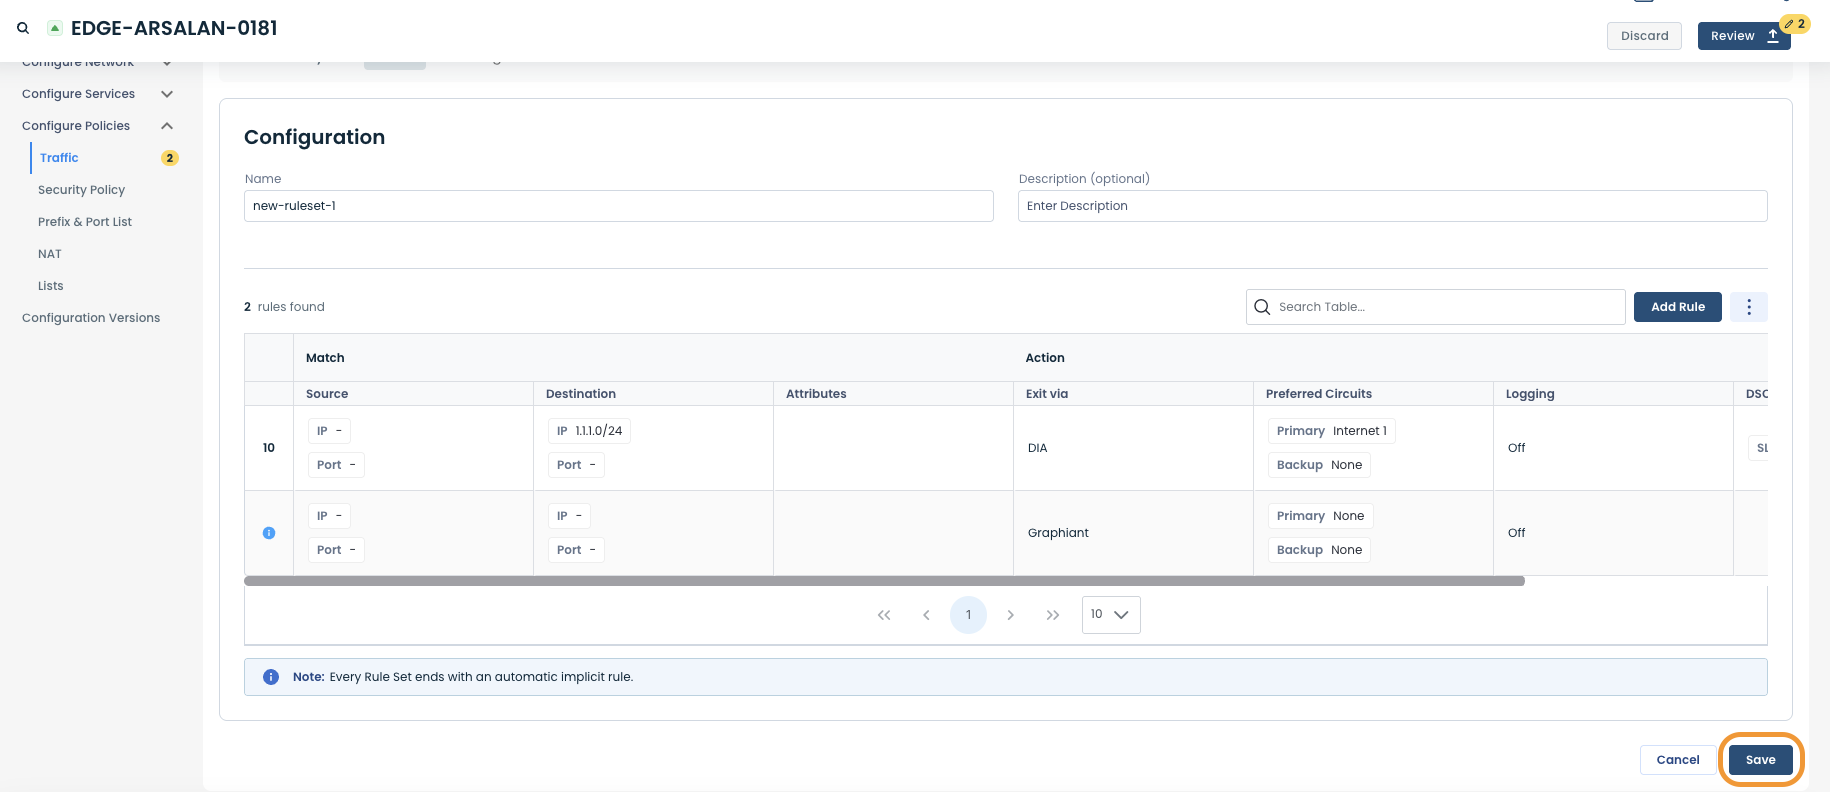
After saving the new Rule Set, switch to the 'Lan Segments' Tab.
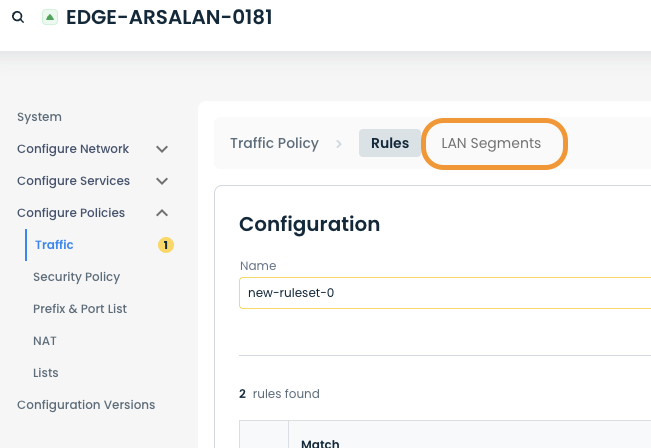
Select the desired LAN Segment to which the Rule will be applied.
.png)
Click 'Select Rule Set' if there are no rules to be shown yet, and select the Rule set to apply to the LAN segment.
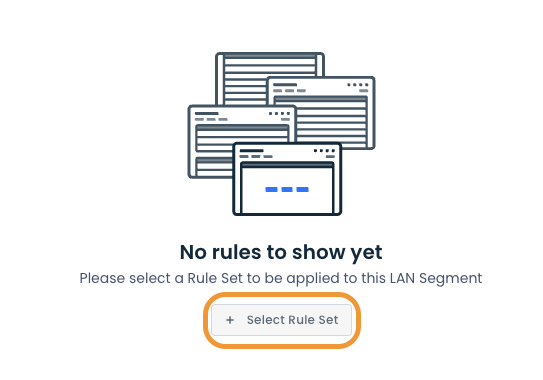
Select the Rule Set that was just created and select 'Apply’.
.png)
Once you review and apply these changes , the chosen flow/ application will start using DIA, on this Edge.
Matching O365 for DIA
Microsoft O365 is a special use case, and requires matching multiple underlying applications for all the capabilities to work.
Note:
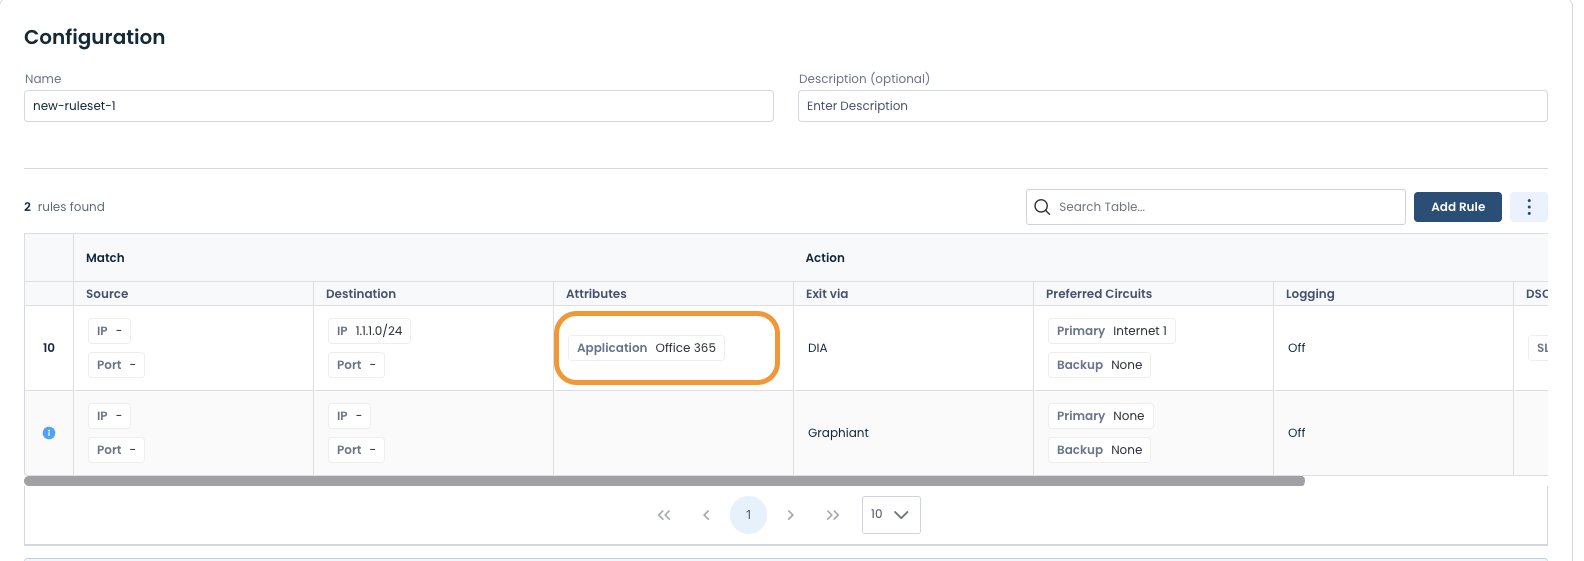
In order to match O365 using a traffic policy you will need to configure the policy to match both Office 365 and Microsoft Services.
In the 'Attributes' section of ‘Match’ critera, select ‘Office 365’.
.png)
After completing the configuration and saving the Rule, it will now be seen in the list.
To add the next application, select 'Add Rule' once more, and select Microsoft Services in the 'Application' dropdown.
After saving the rule, both Microsoft Rules are now seen in the Rules list.
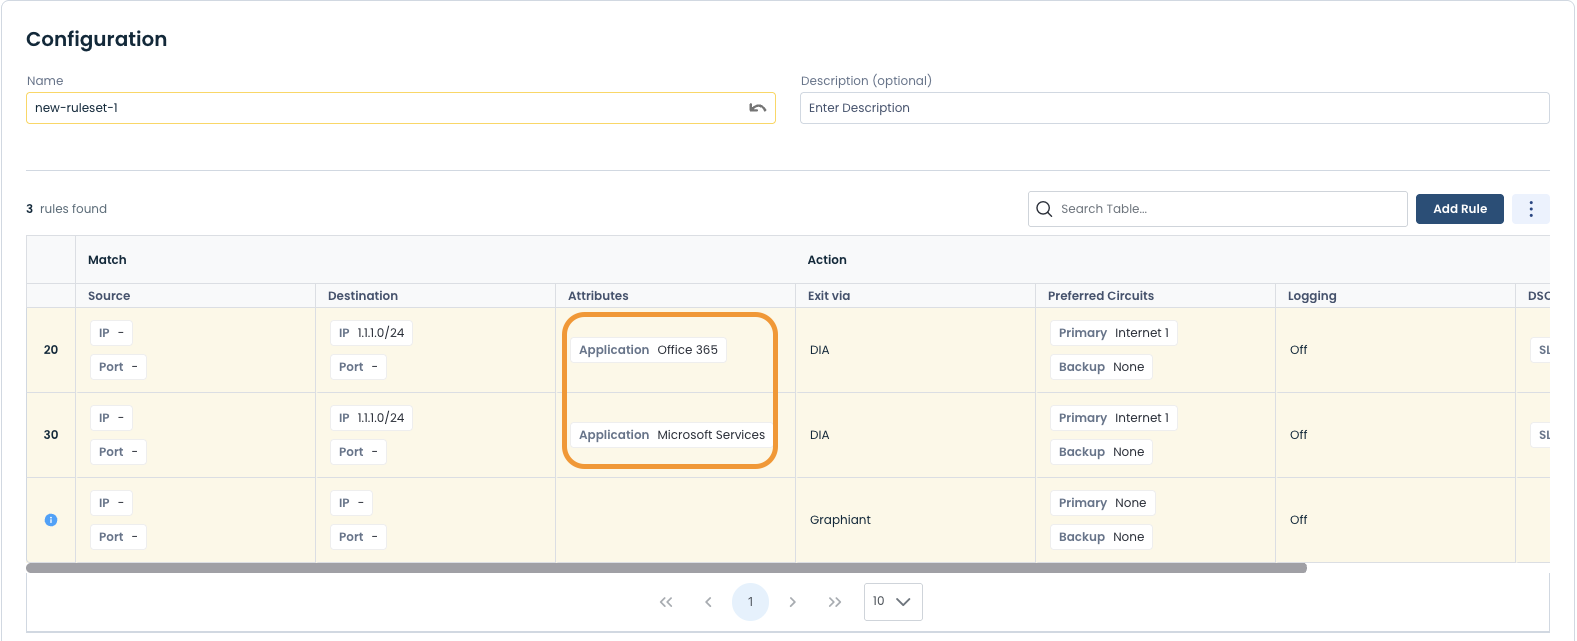
Once you review and apply these changes (as described in Step 2), Office 365 will start using DIA, on this Edge.
DIA for All Apps:
Configuring DIA for all apps, using a traffic policy, is a straight forward process.
You will need to add a new rule to the ruleset, then:
Switch to the 'Match Source & Dest' tab and set the 'Prefix Destination' to "0.0.0.0/0".
Note:
Using a default static route with traffic policies to send specific applications over the Graphiant network is the recommended setup for DIA.
For additional details please look at the DIA setup recommendation section

The procedure for applying the rule to the LAN segment is identical to the steps outlined above. Once you review and apply these changes (as described in Step 2), the all flows/ applications will start using DIA, on this Edge.
Option 1B: Global Traffic Policy
From the 'Traffic Policy' page, navigate to the 'System Objects' tab and select 'View Rule Set Configuration'.
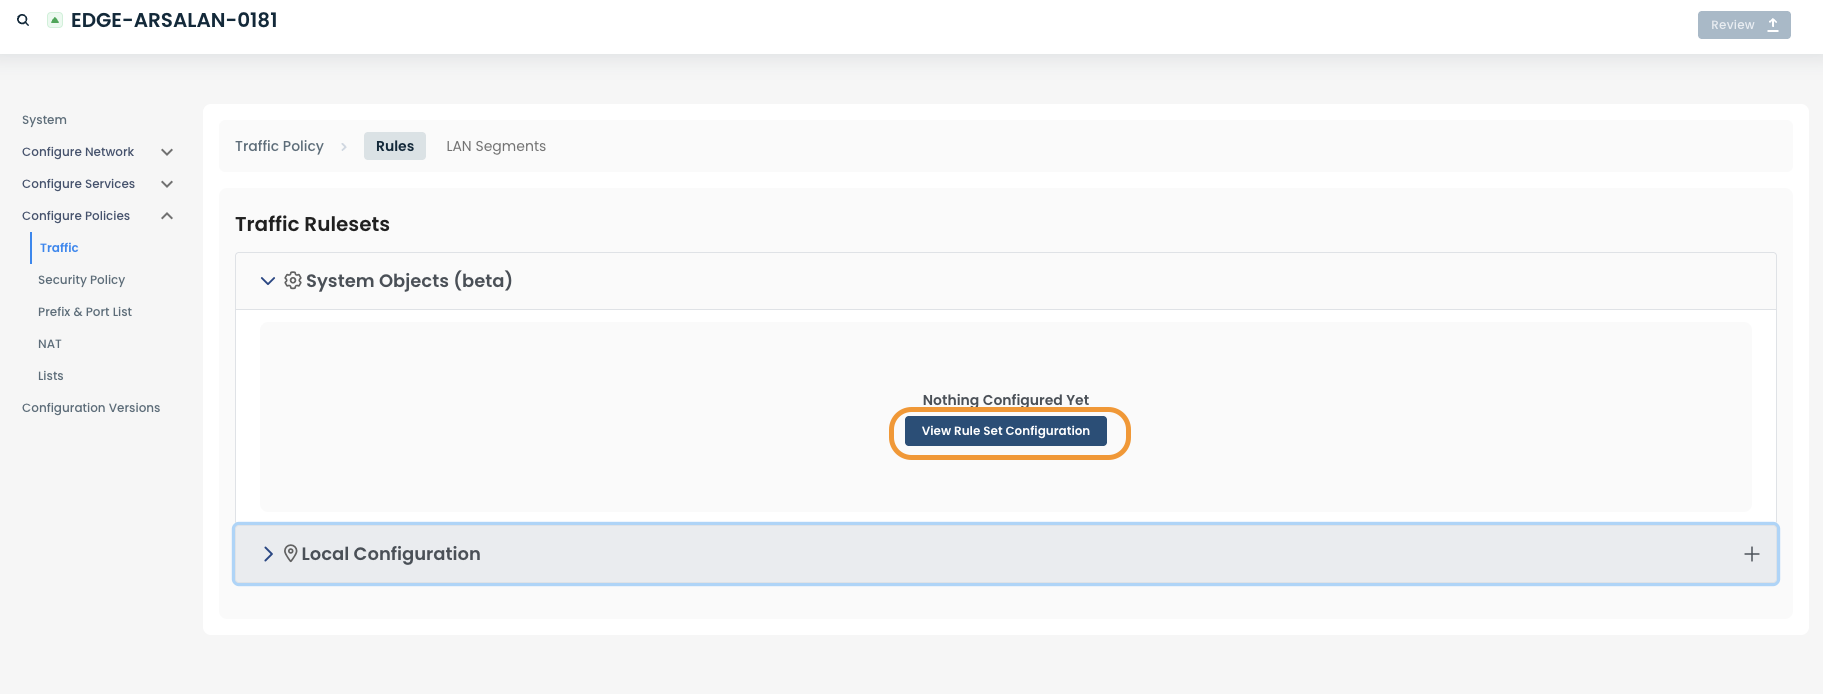
On the right-hand side at the top of the page, select 'Create Traffic Ruleset'.

Add a Ruleset name, and if desired, a description. Additionally, select 'Add Rule' on the right-hand side.
After saving the Rule with parameters as desired, select 'Confirm' on the right-hand side at the top of the page.
Saving the Ruleset and apply it to the desired LAN segment.
Once you review and apply these changes (as described in Step 2), the all flows/ applications will start using DIA, on this Edge.
Option 2: Configuring DIA Using Static Routes
The other way to configure traffic to use DIA is by using static routes. This approach works well for traffic where the destination IP addresses are well known.
Note:
Please use traffic policies for DIA if you're setting it up for an application.
From the left navigation menu, select and click ‘Configure Services’, and from the dropdown menu select and click ‘Routing Protocols & Filters’.
DIA for Specific Routes:
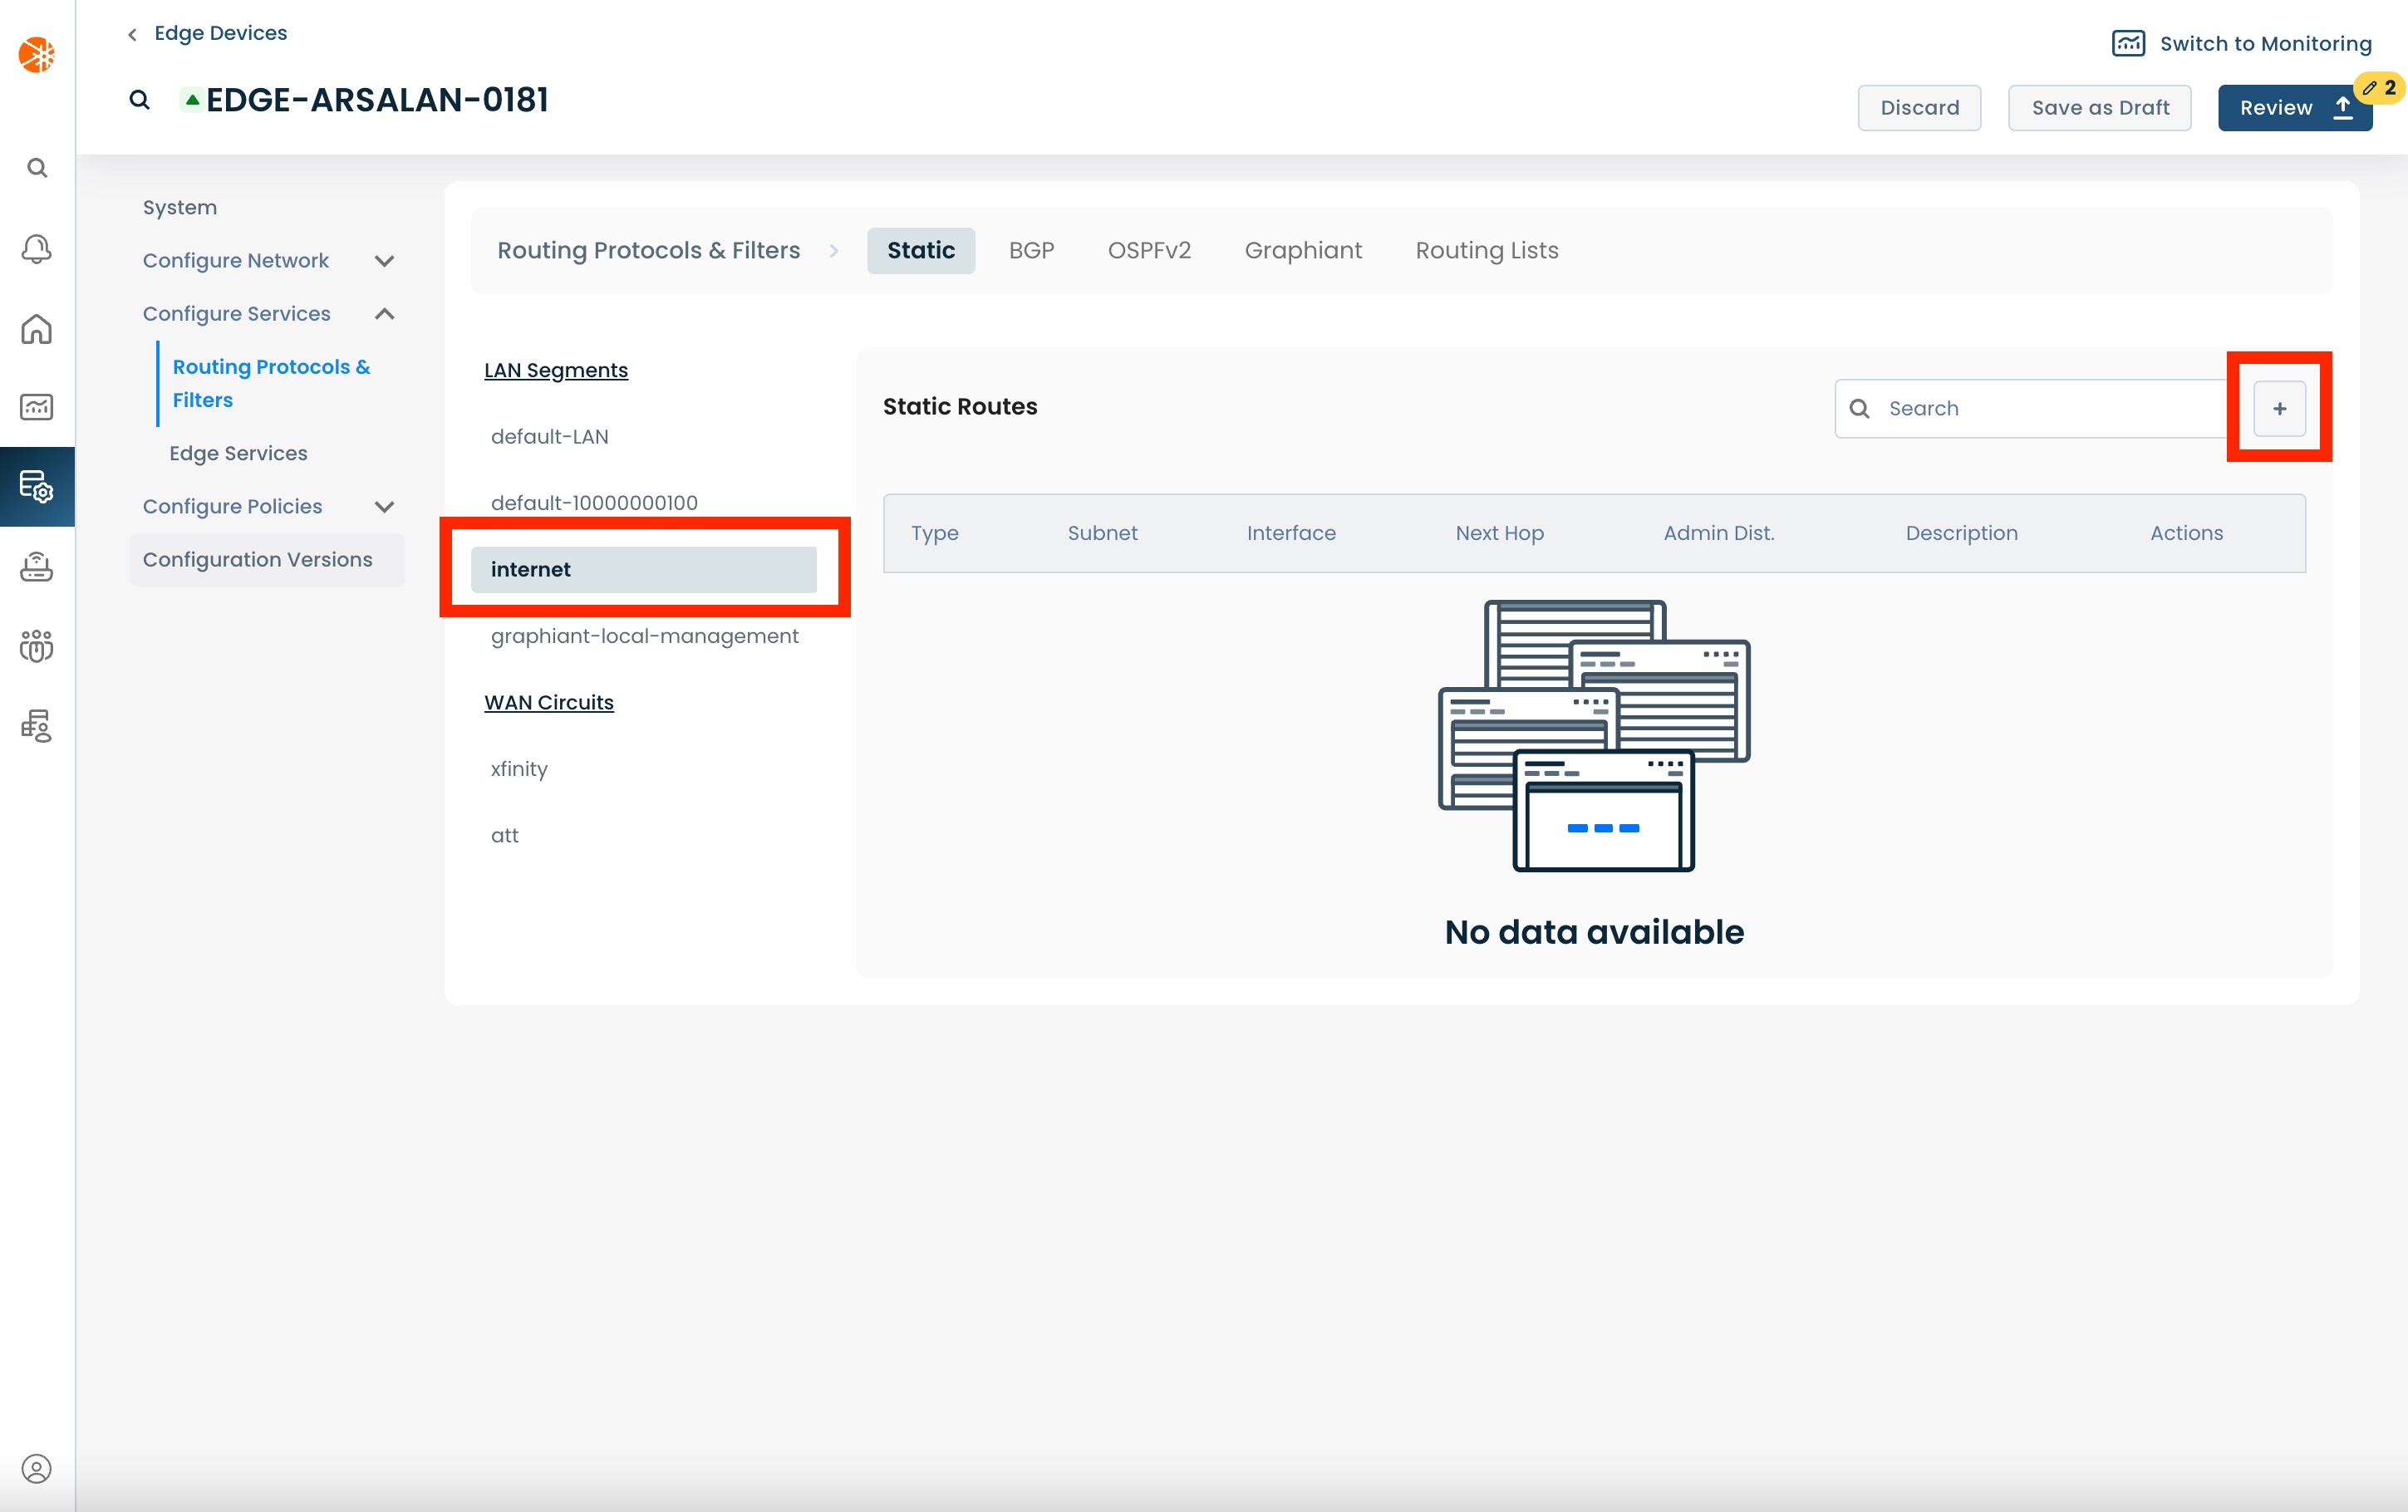
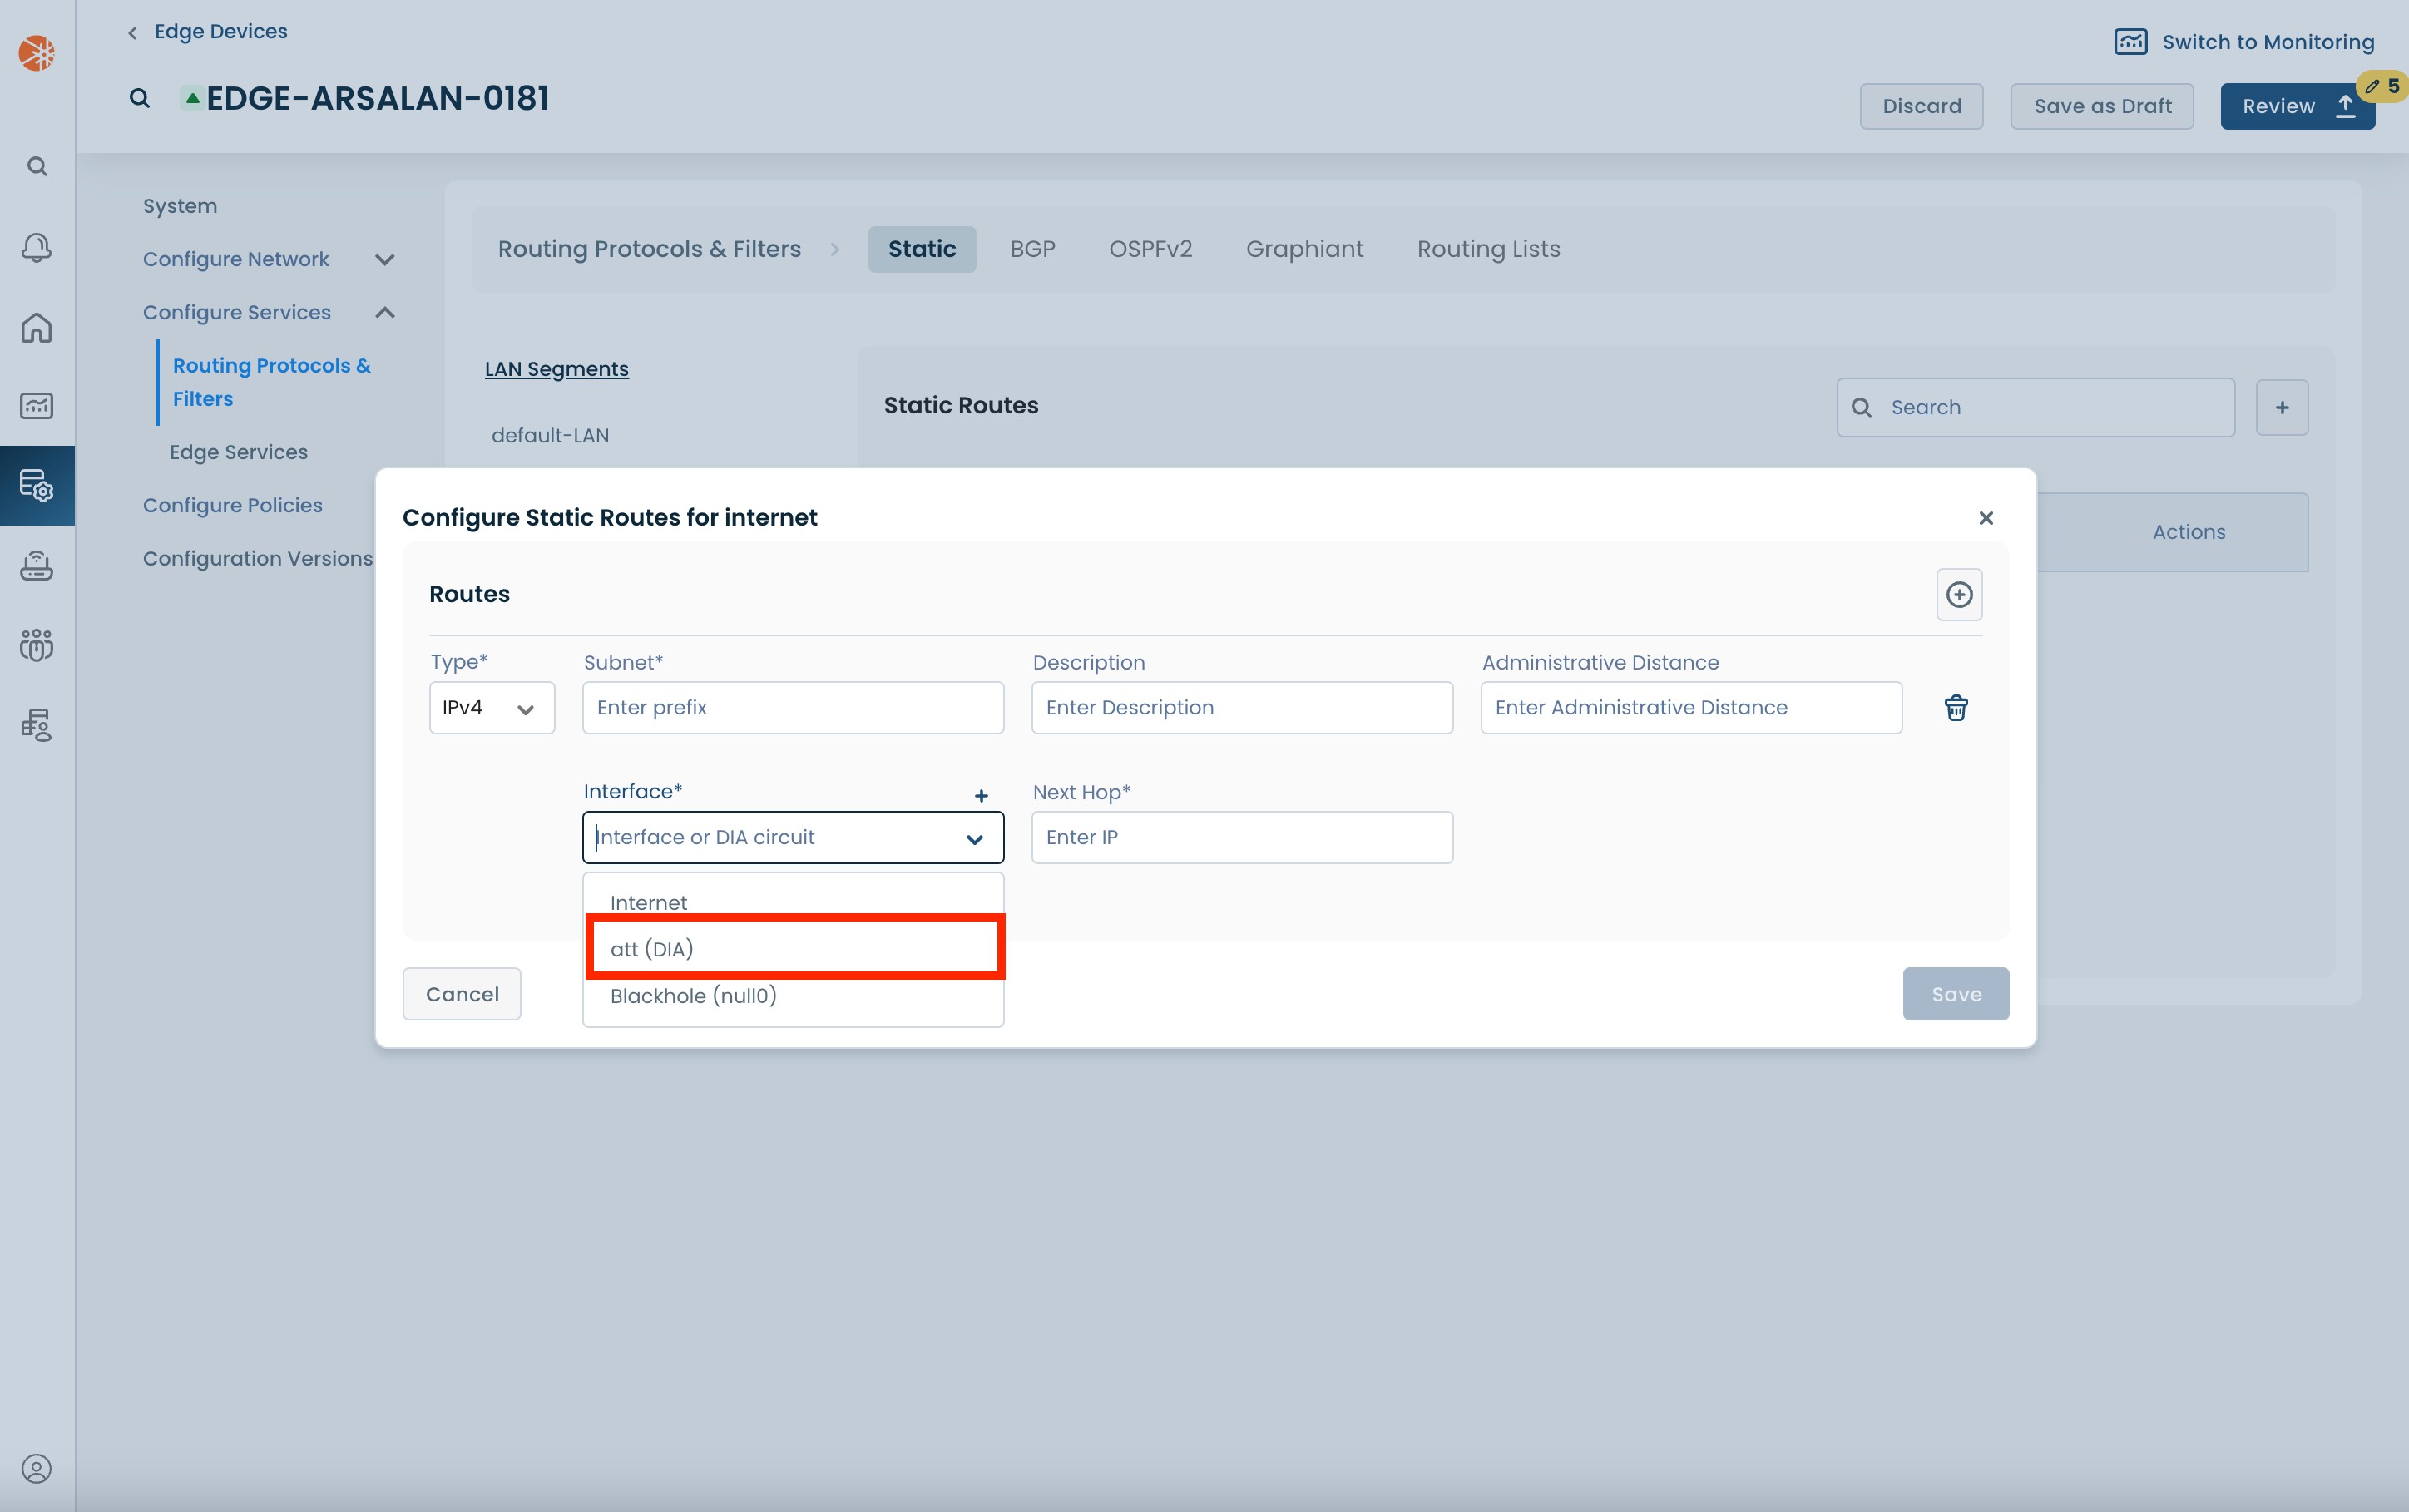
On the 'Routing Protocols & Filters’ page, under the 'Static' tab:
Choose the relevant LAN segment from the left hand menu.
Then add a new static route using the '+' button on the right .
The new static route will be below any existing static routes.
Note:
Using a default static route with traffic policies to send specific applications over the Graphiant network is the recommended setup for DIA. For additional details please look at the DIA setup recommendation section
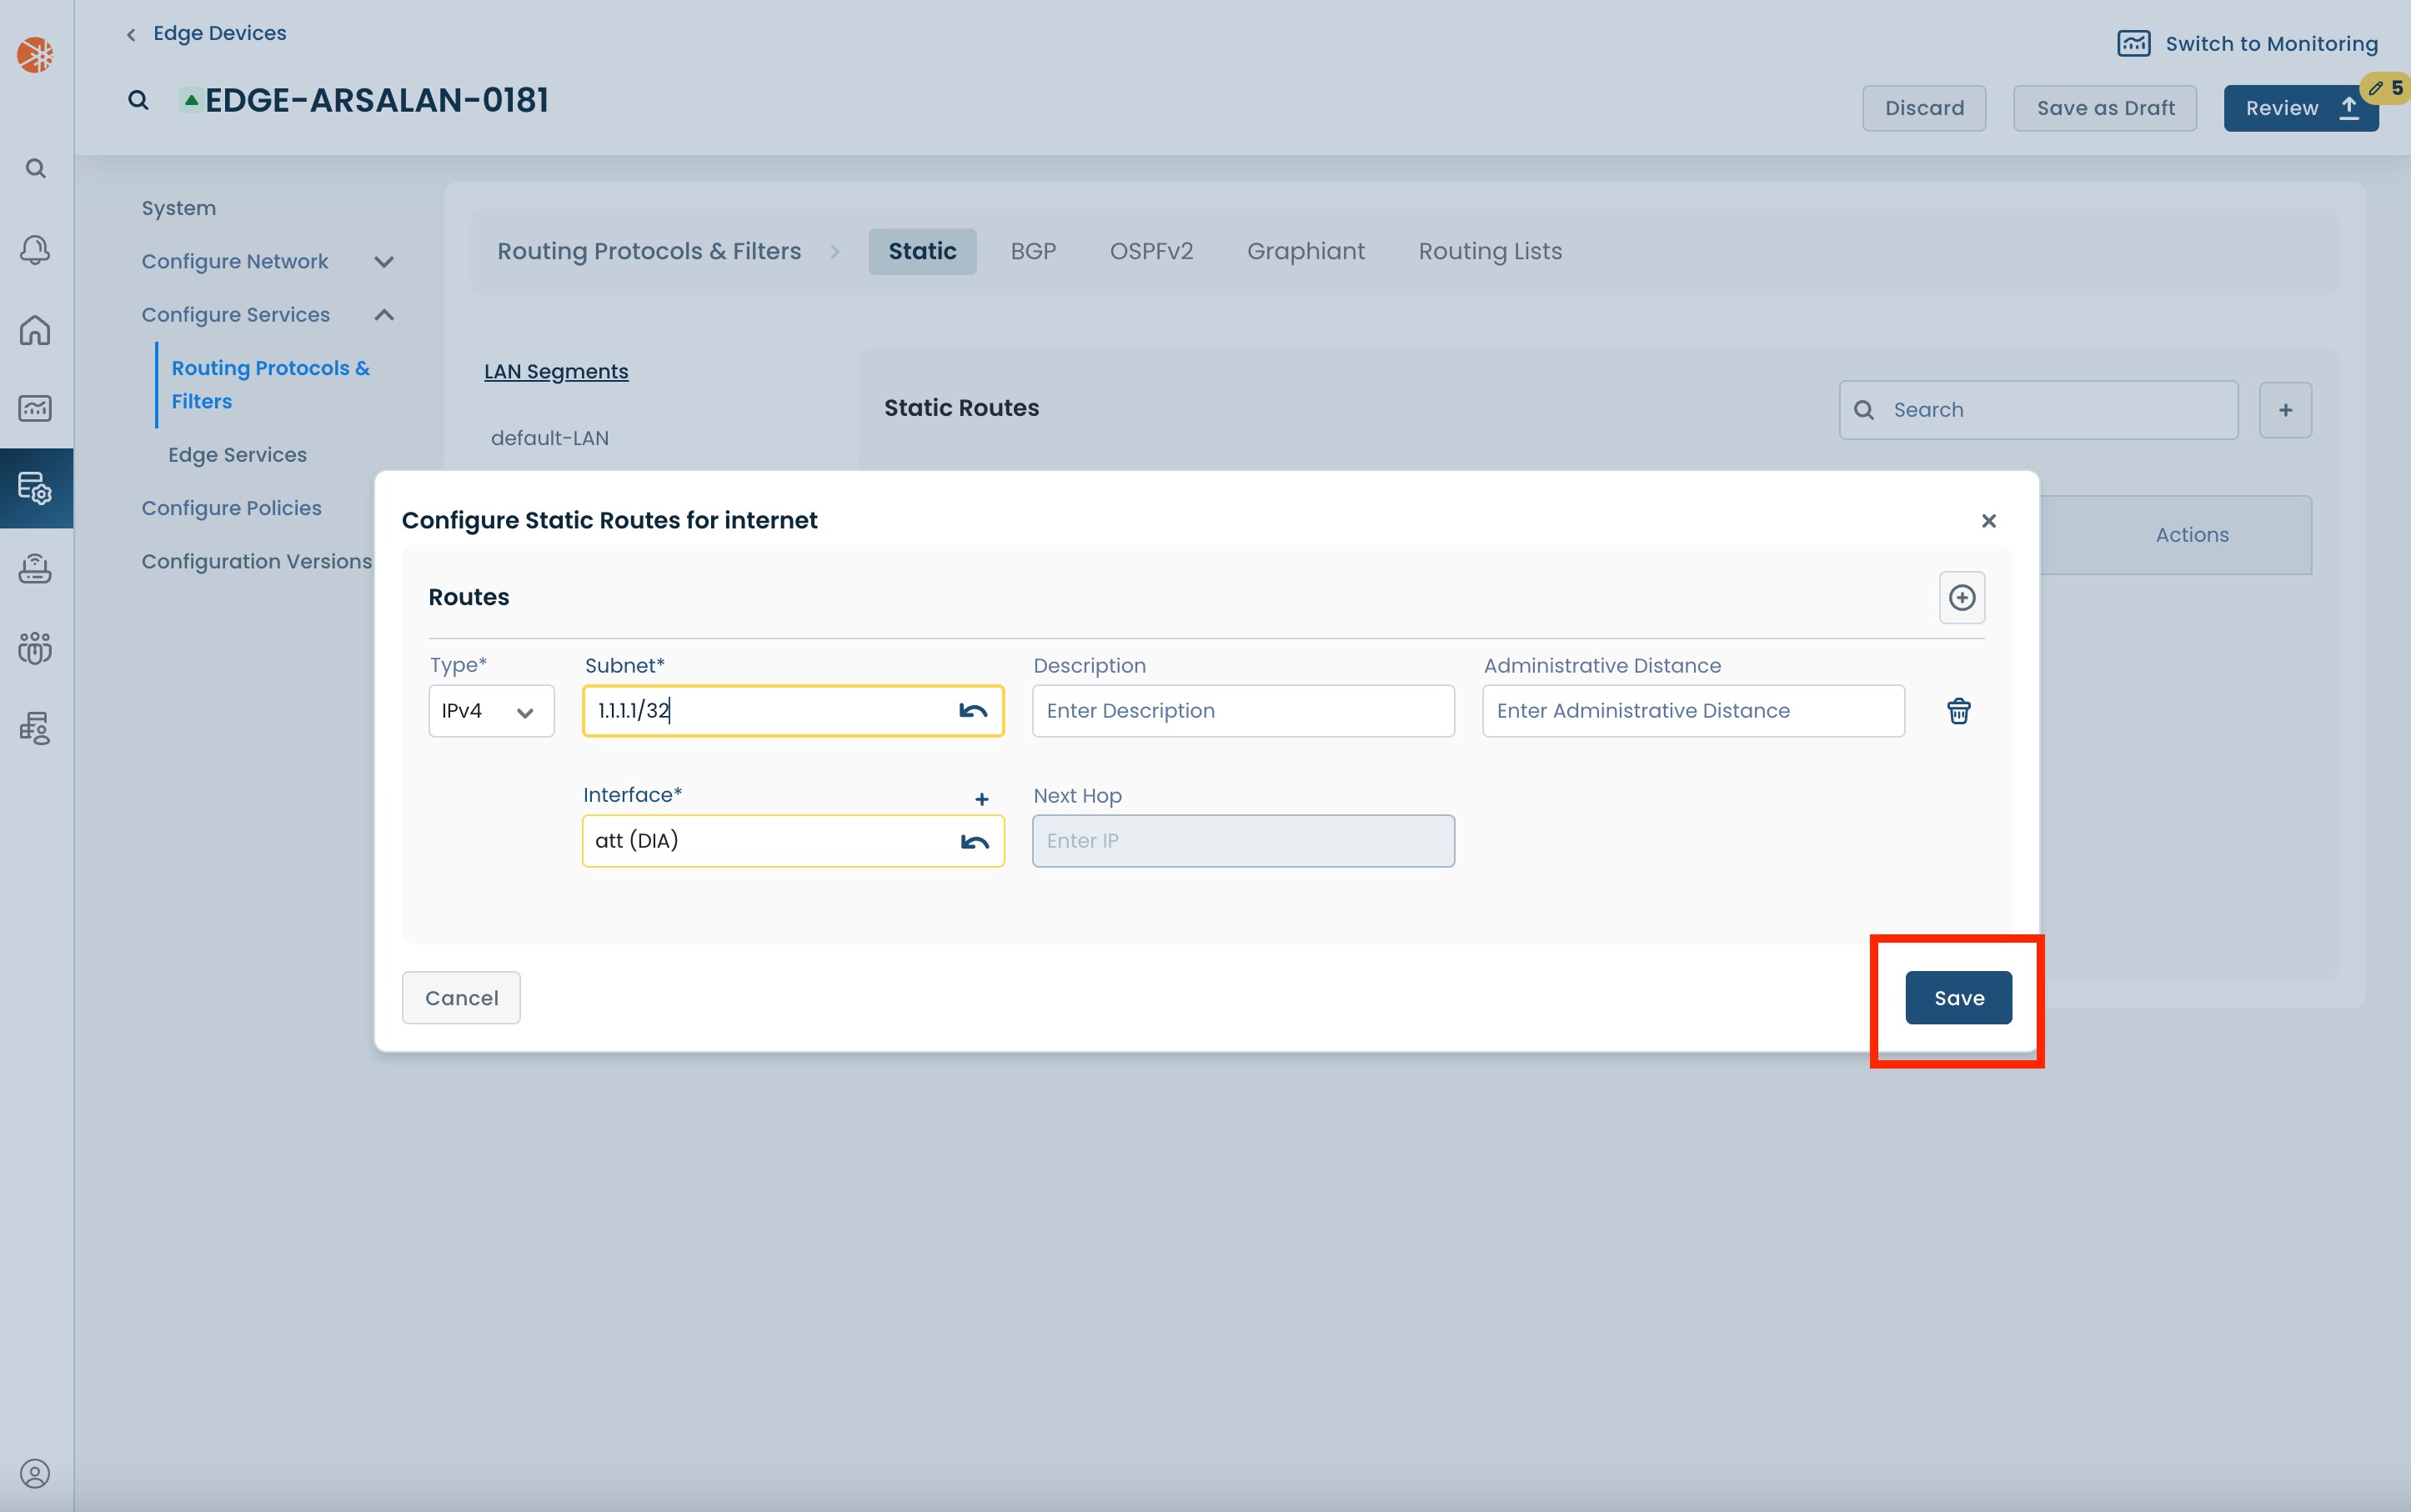
Enter the 'Subnet' for the static route, and then choose the DIA WAN circuit as the 'Interface'.
Click 'Save'.
Once you review and apply these changes (as described in Step 2), the traffic destined for the chosen subnet will start using DIA, on this Edge.
DIA for All Traffic:
DIA for all traffic using static routes can be achieved by setting up an appropriate default route.
Note:
Using a default static route with traffic policies to send specific applications over the Graphiant network is the recommended setup for DIA. For additional details please look at the DIA setup recommendation section
On the “Routing Protocols & Filters” page, under the 'Static' tab:
Choose the relevant LAN segment from the left hand menu.
Then add a new static route using the '+' button on the right.
The new static route will be below any existing static routes.

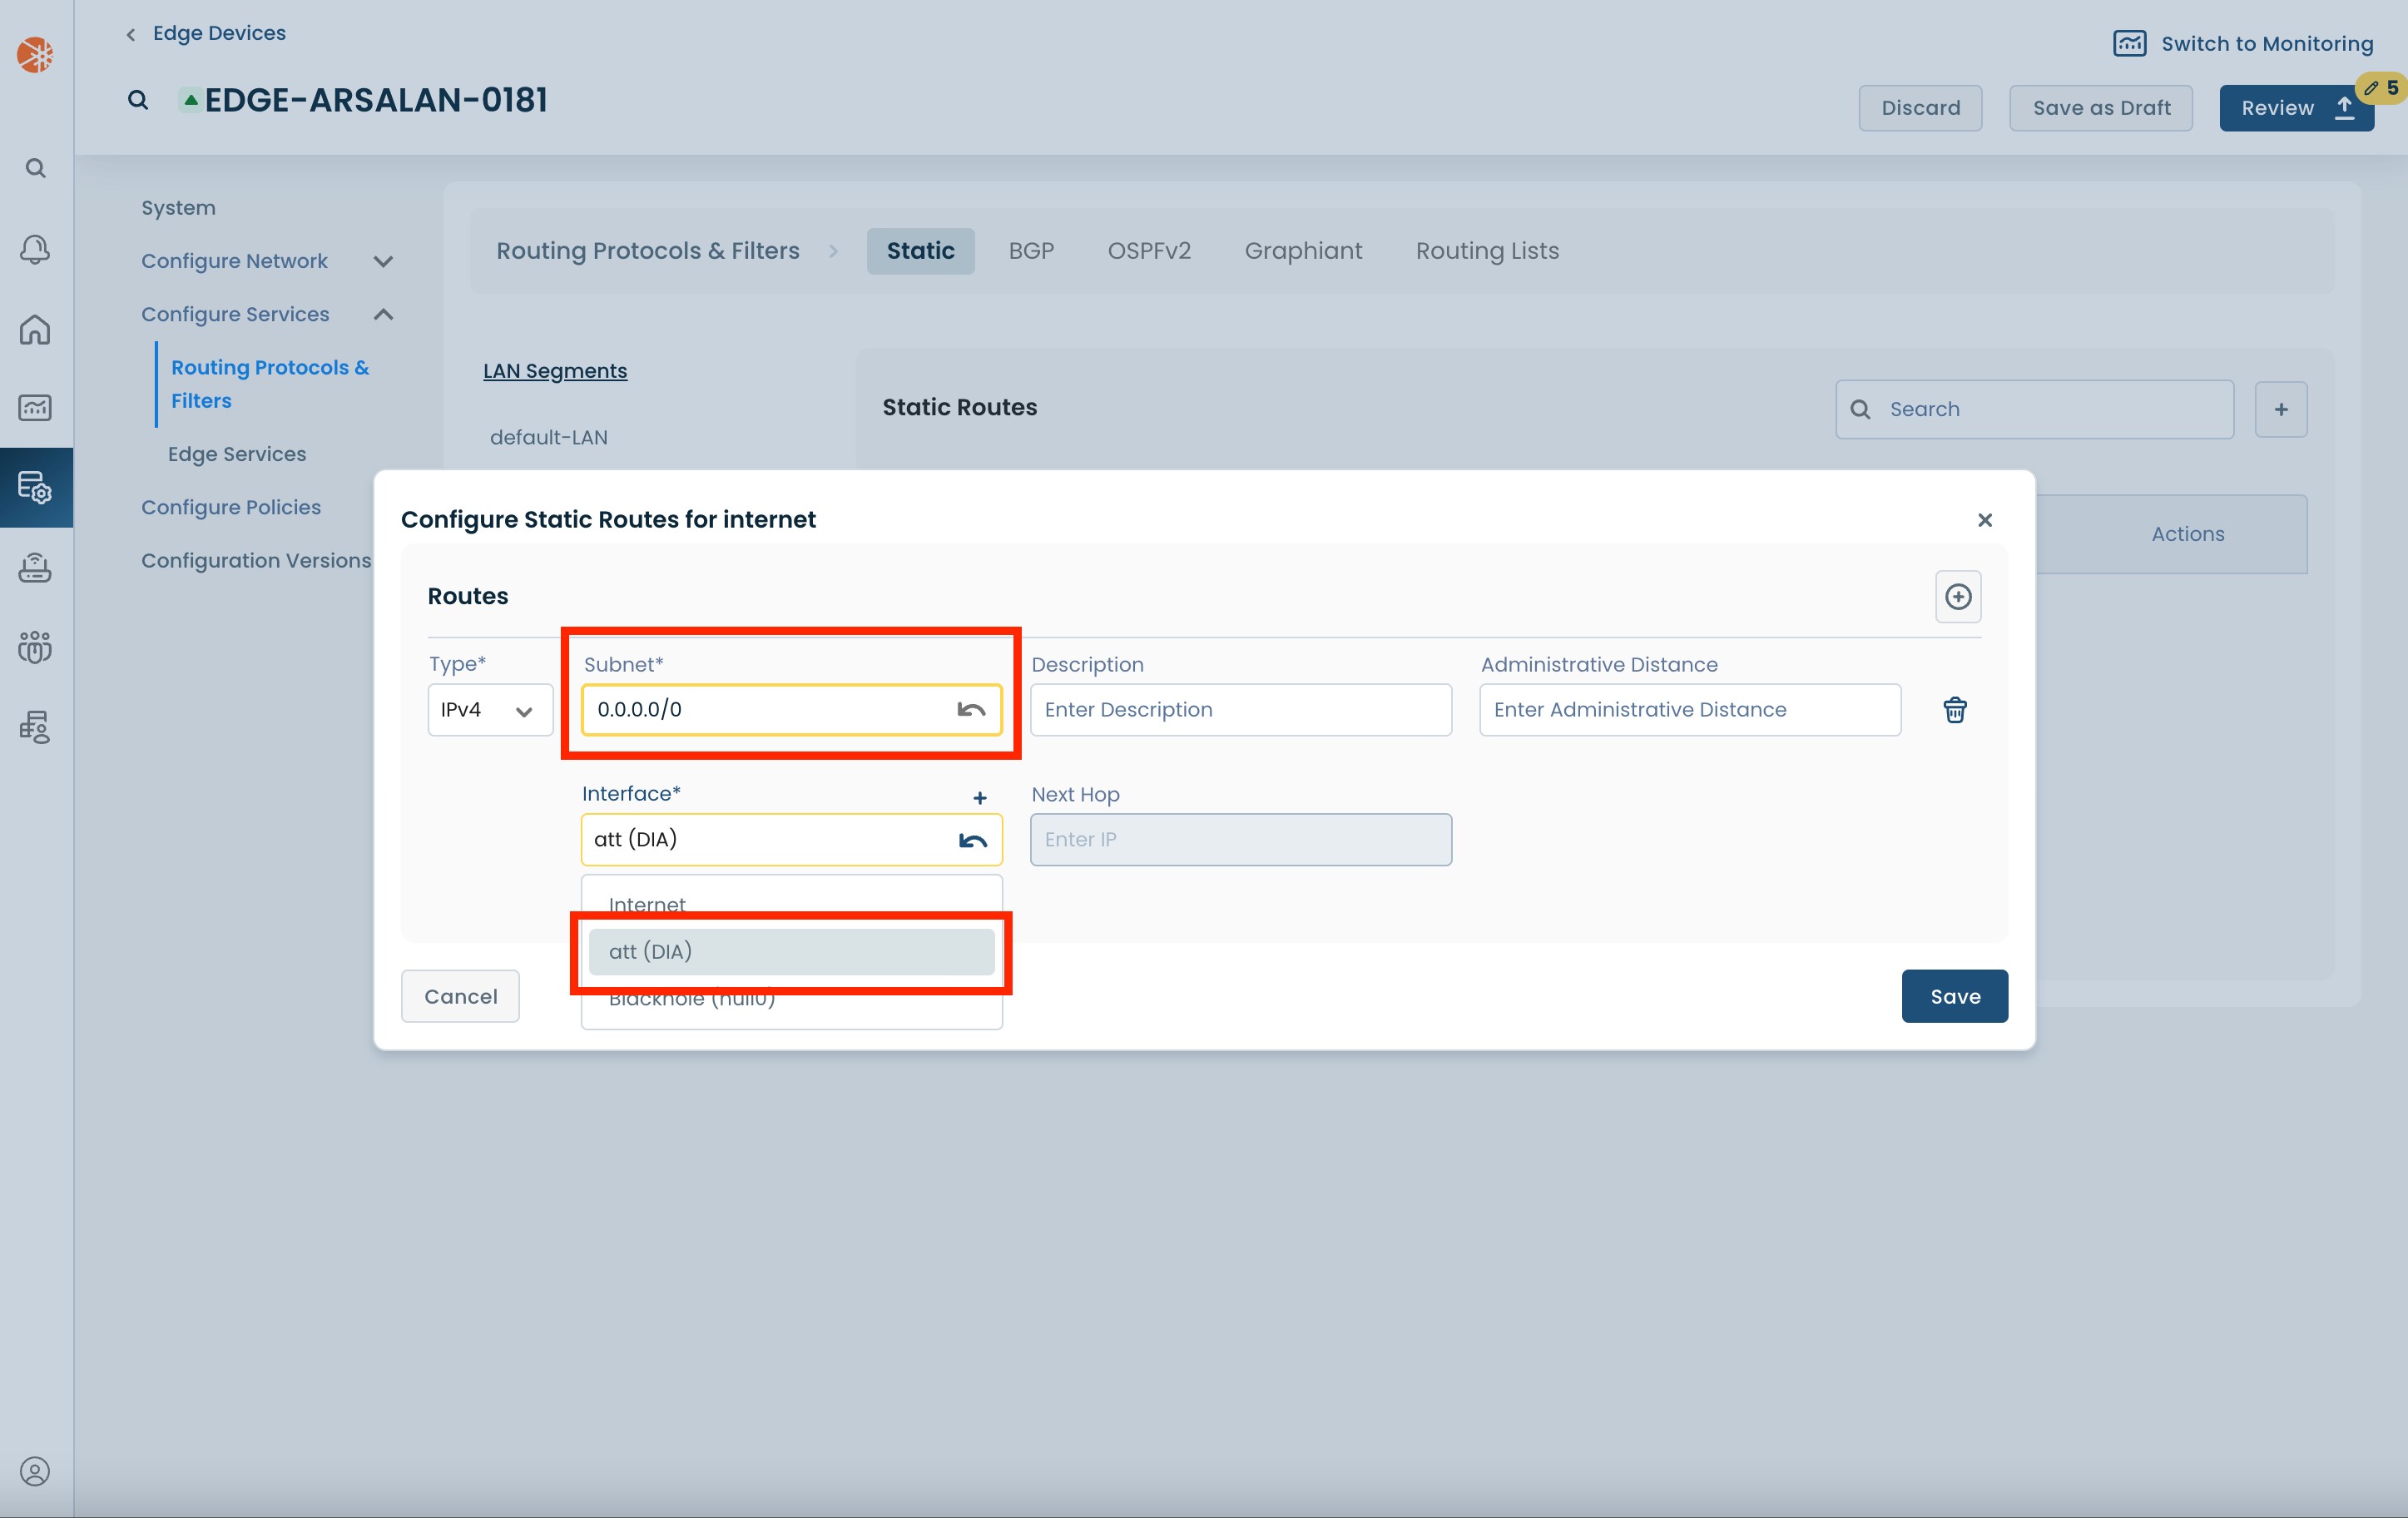
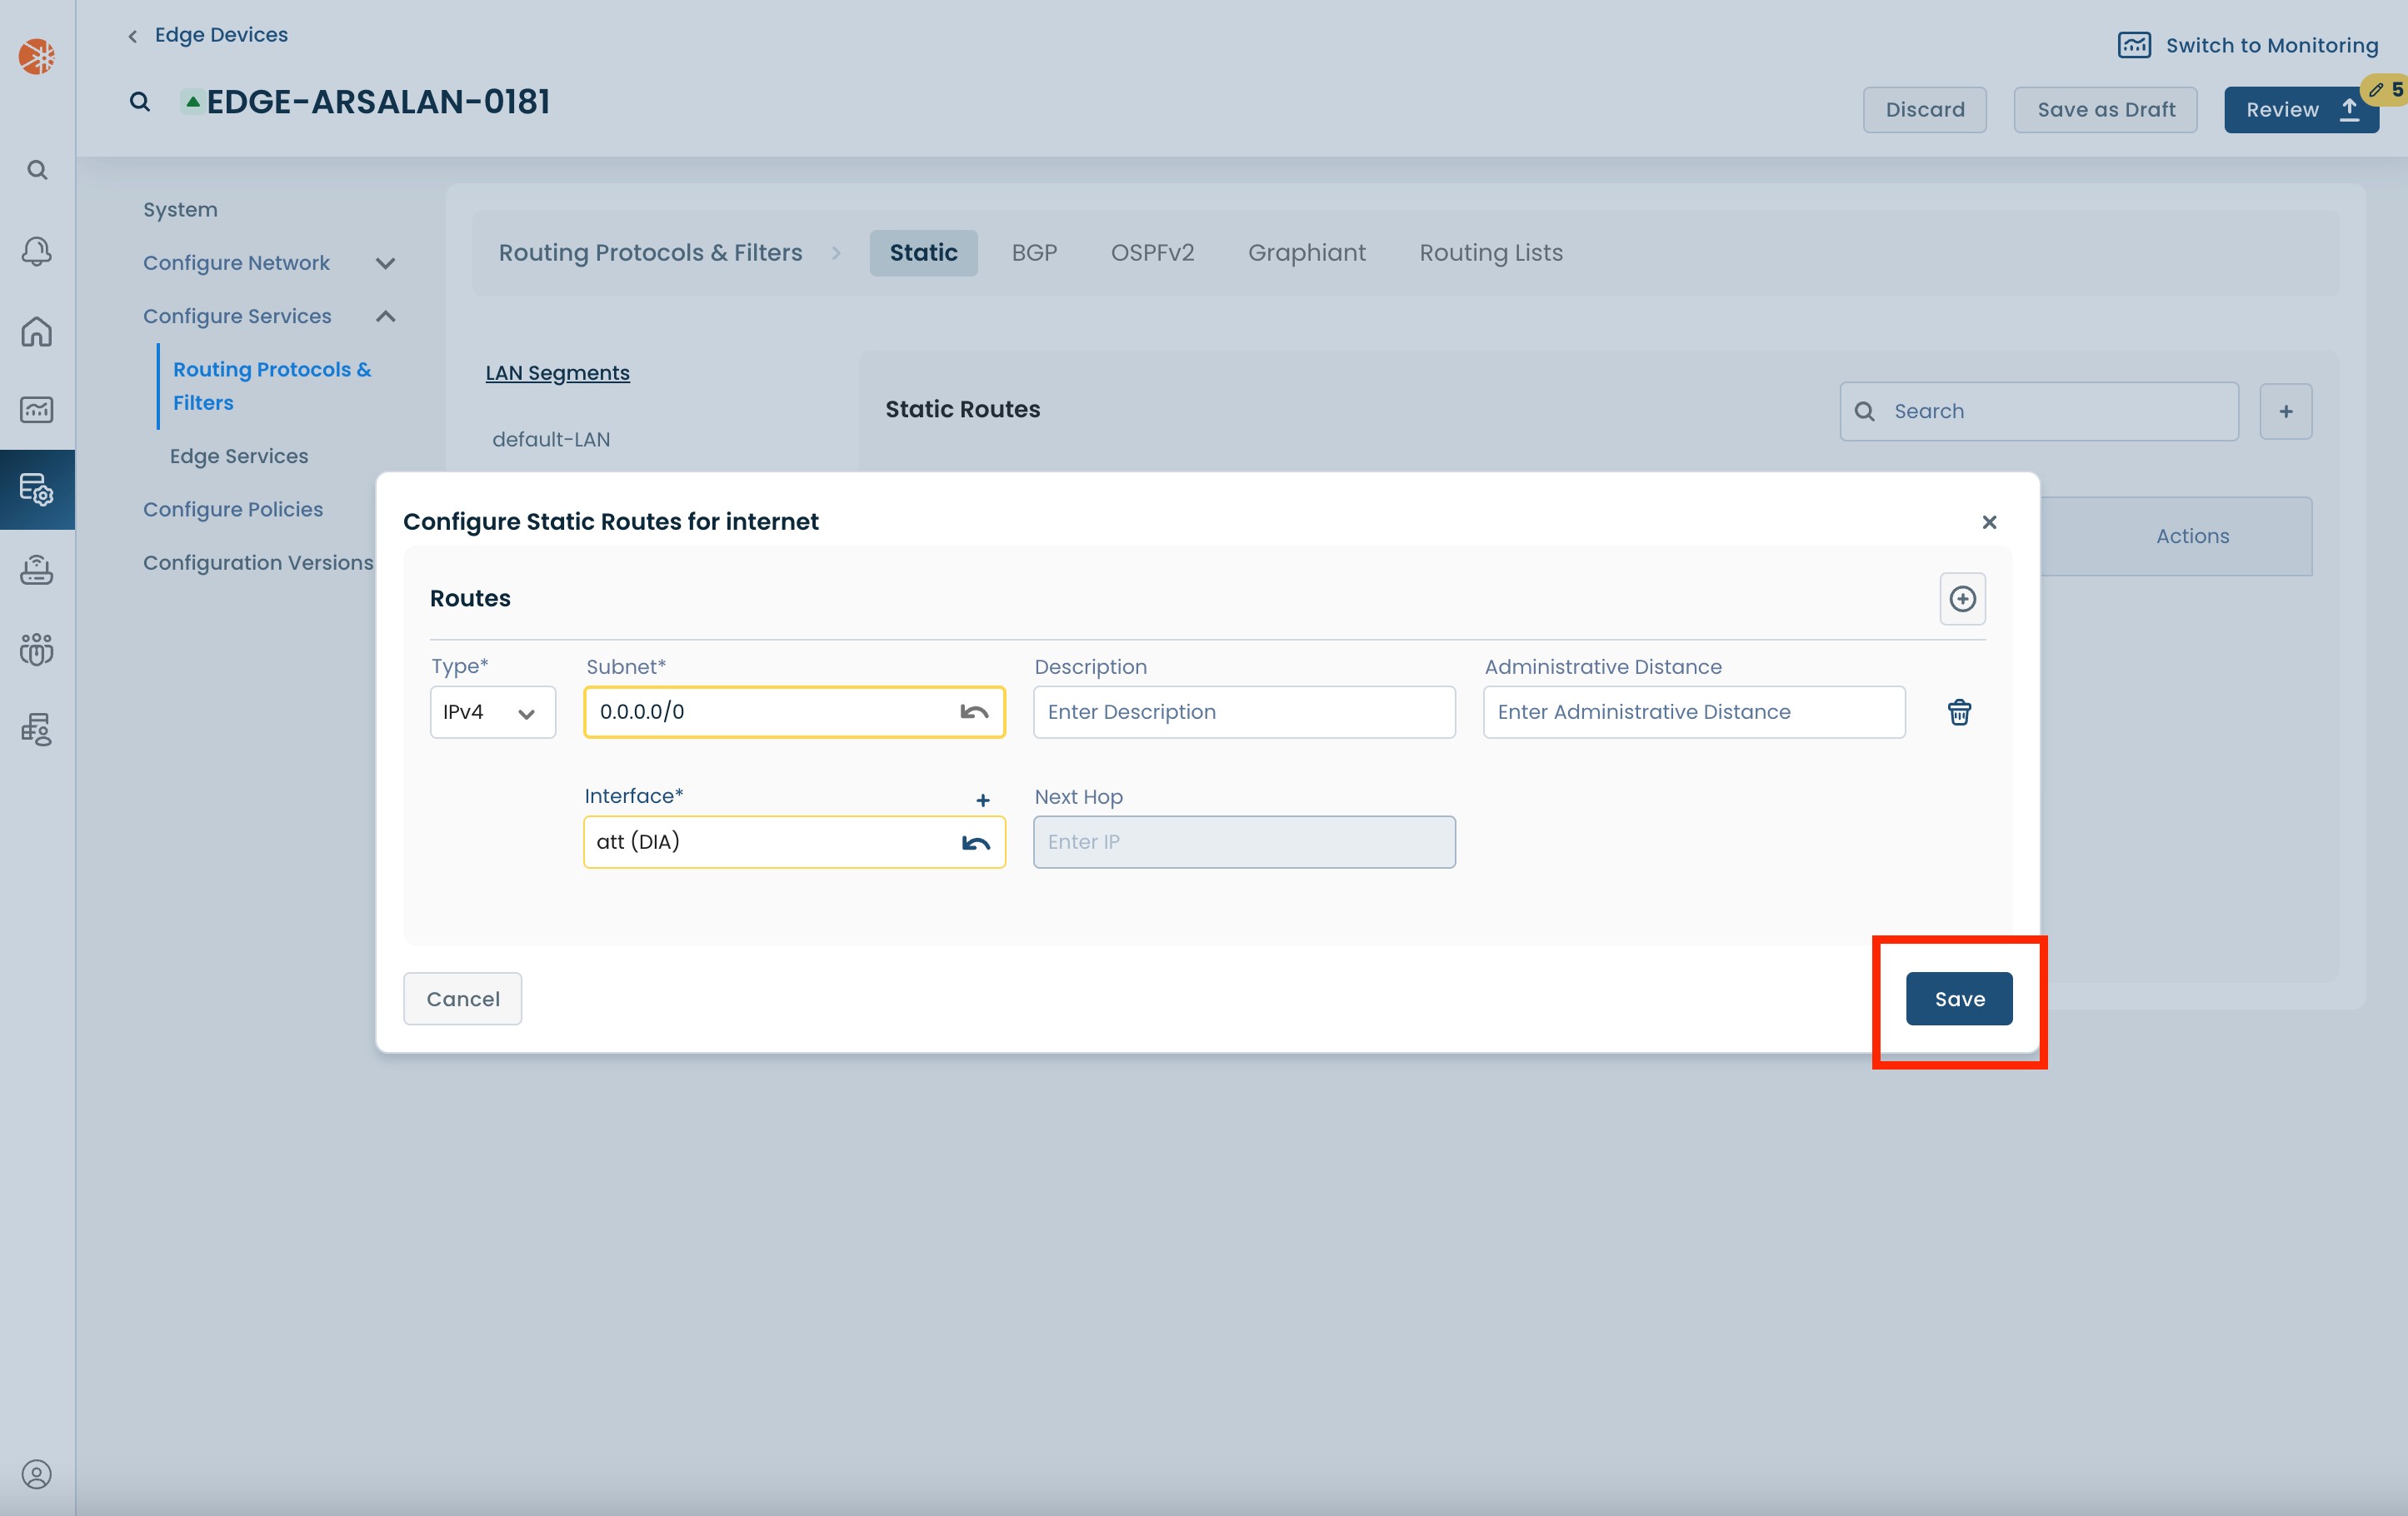
Enter "0.0.0.0/0" as the 'Subnet' for the static route.
Then choose the DIA WAN circuit as the 'Interface'.
Click 'Save'
Once you review and apply these changes (as described in Step 2), the traffic destined for the chosen subnet will start using DIA, on this Edge.
Step 2: Review & Apply
Once the above fields are filled in, DIA will be ready to use, however you will first need to review and approve all changes made.
.png)
On the top right hand corner, choose from the following options:
‘Discard’ to discard changes made.
‘Save as Draft’ to save changes made to be implemented at a later time.
‘Review’ to review and apply changes made for immediate deployment.