How Does NAT in the Graphiant Solution Work?
With the prevalent use of RFC-1918 address space in private networks, there are many use cases where IP addresses need to be NAT’ed. These include mergers and acquisitions, B2B Extranet, or traffic going from the private zone to Internet.
The Graphiant network and Edge device supports policy based Network Address Translation and automatic advertisement of the NAT’ed address pool. Supported methods are:
Source NAT 1:1
Source PAT
Source PAT DIA (Direct Internet Access)
Moreover, the Graphiant network supports automatic advertisement of post-NAT’ed address pool, as well as the option to advertise pre-NAT’ed network segment address to support sites which do not need NAT services to reach the Server.
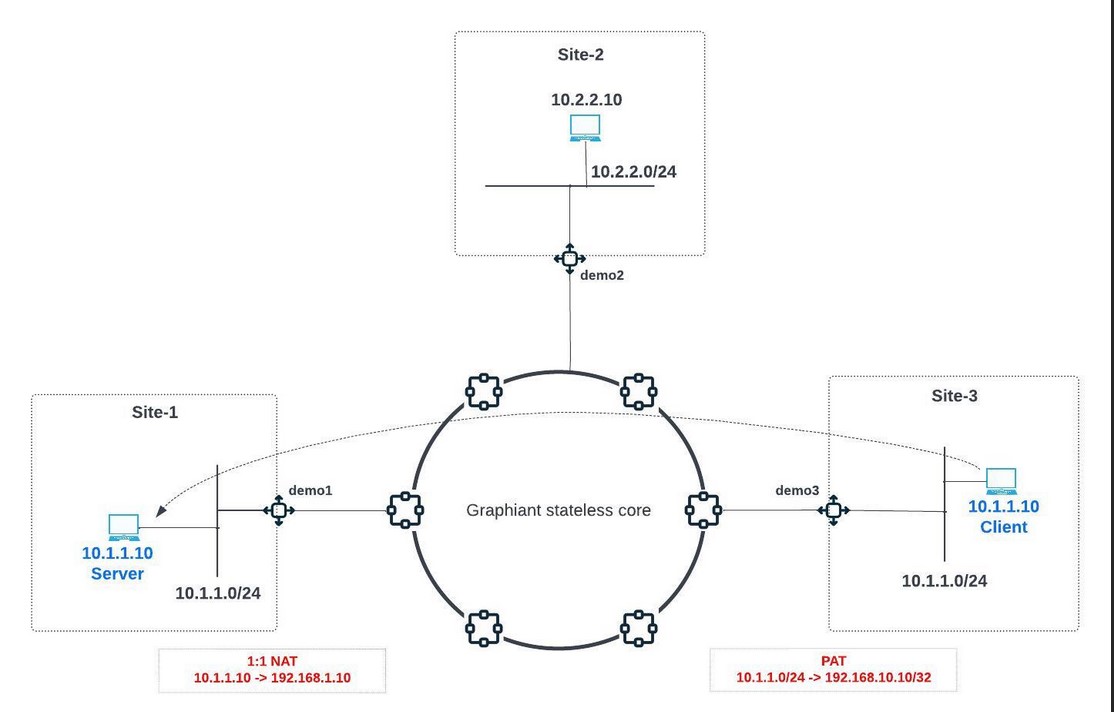
The below illustration shows a use case where site-1 and site-3 have overlapping IP address subnets.
For Clients at site-3 to access the server at site-1, NAT must be performed at both site-1 and site-3 so that:
Site-1’s server must be reachable by clients at site-3 using an IP address that does not conflict with site-3’s IP addressing plan
Site-3’s client must use a NAT’ed IP address that does not conflict with site-1’s IP addressing plan in order to access the server at site-1
Site-2 doesn’t need to NAT to access the server at site1, so in this case NAT is not implemented for clients at site-2 to access the server at site-1
NAT in the Graphiant Portal
Step 1: Locating NAT in the Graphiant Portal
From the Home screen, navigate to the Edge Configuration screen by one of the following:
Locate the "Configurations" section within the “Quickstart” area of the screen; select 'Configure Edges'.
or
Click 'Configure' in the sidebar; select 'Devices'.
.png)
This will take you to the ‘Configuration’ page of the Graphiant Portal where you can view all active, staged, and deactivated Edges. From here you will be able to select among the active Edges which Edge(s) you would like to configure.
On the left-hand side, select and click the Edge you wish to manage under the column 'Hostname.'
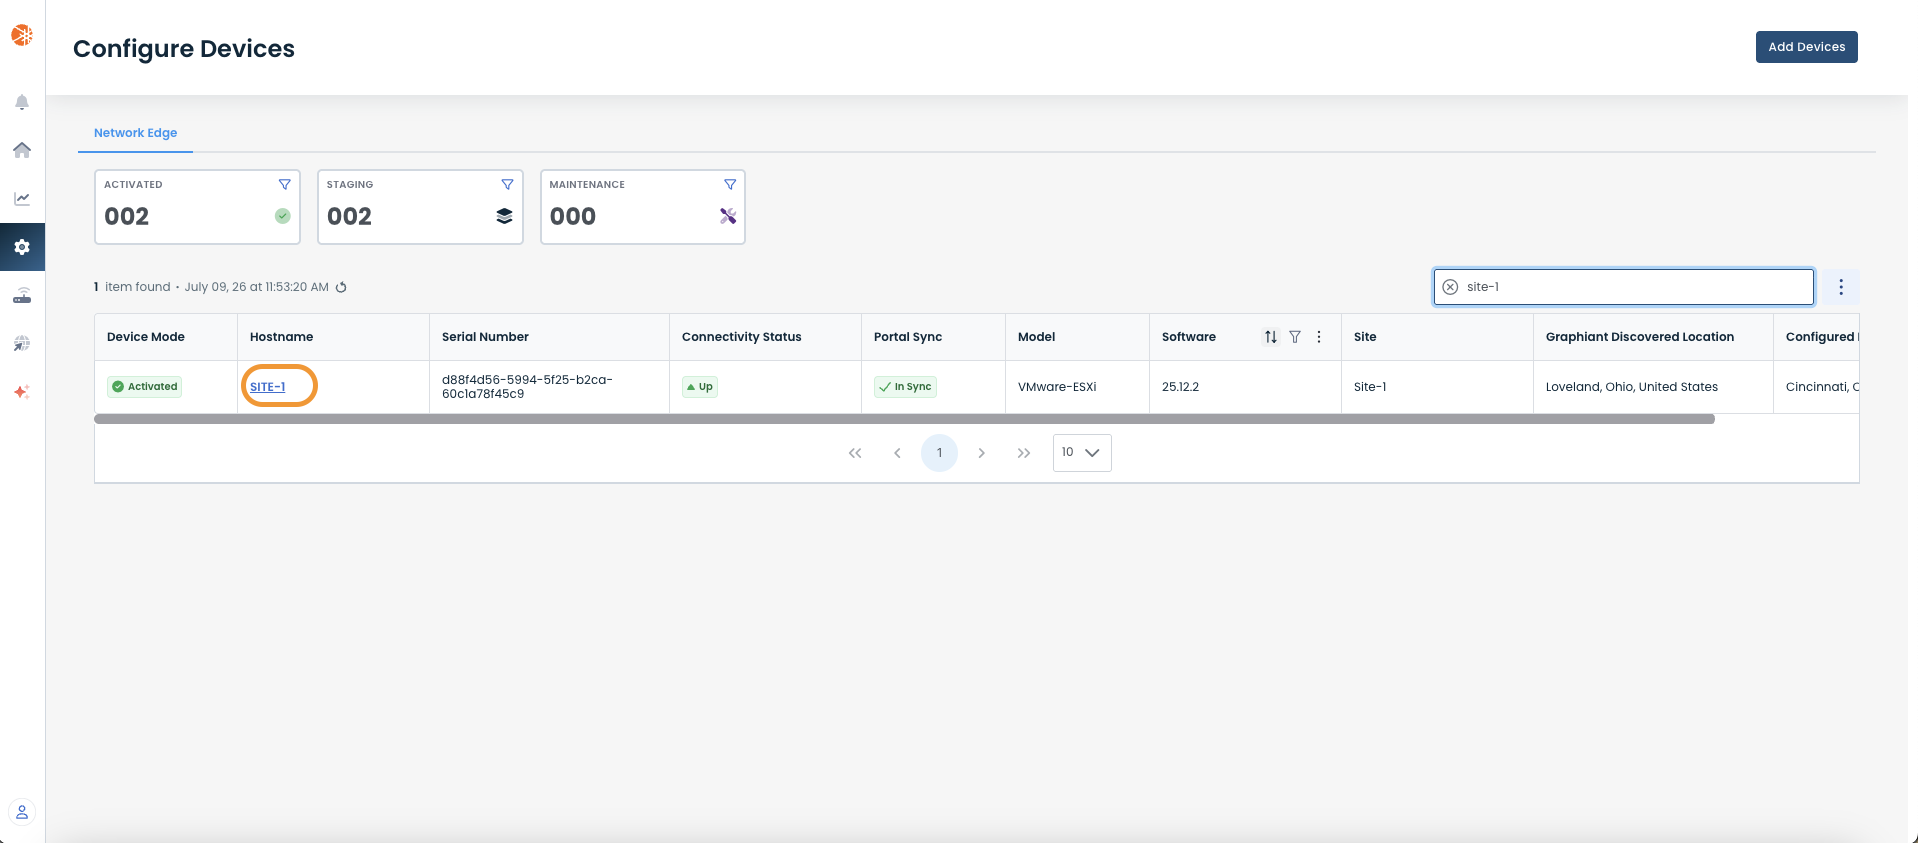
This will take you onto a Configuration page with a focus on the Edge you have just chosen.
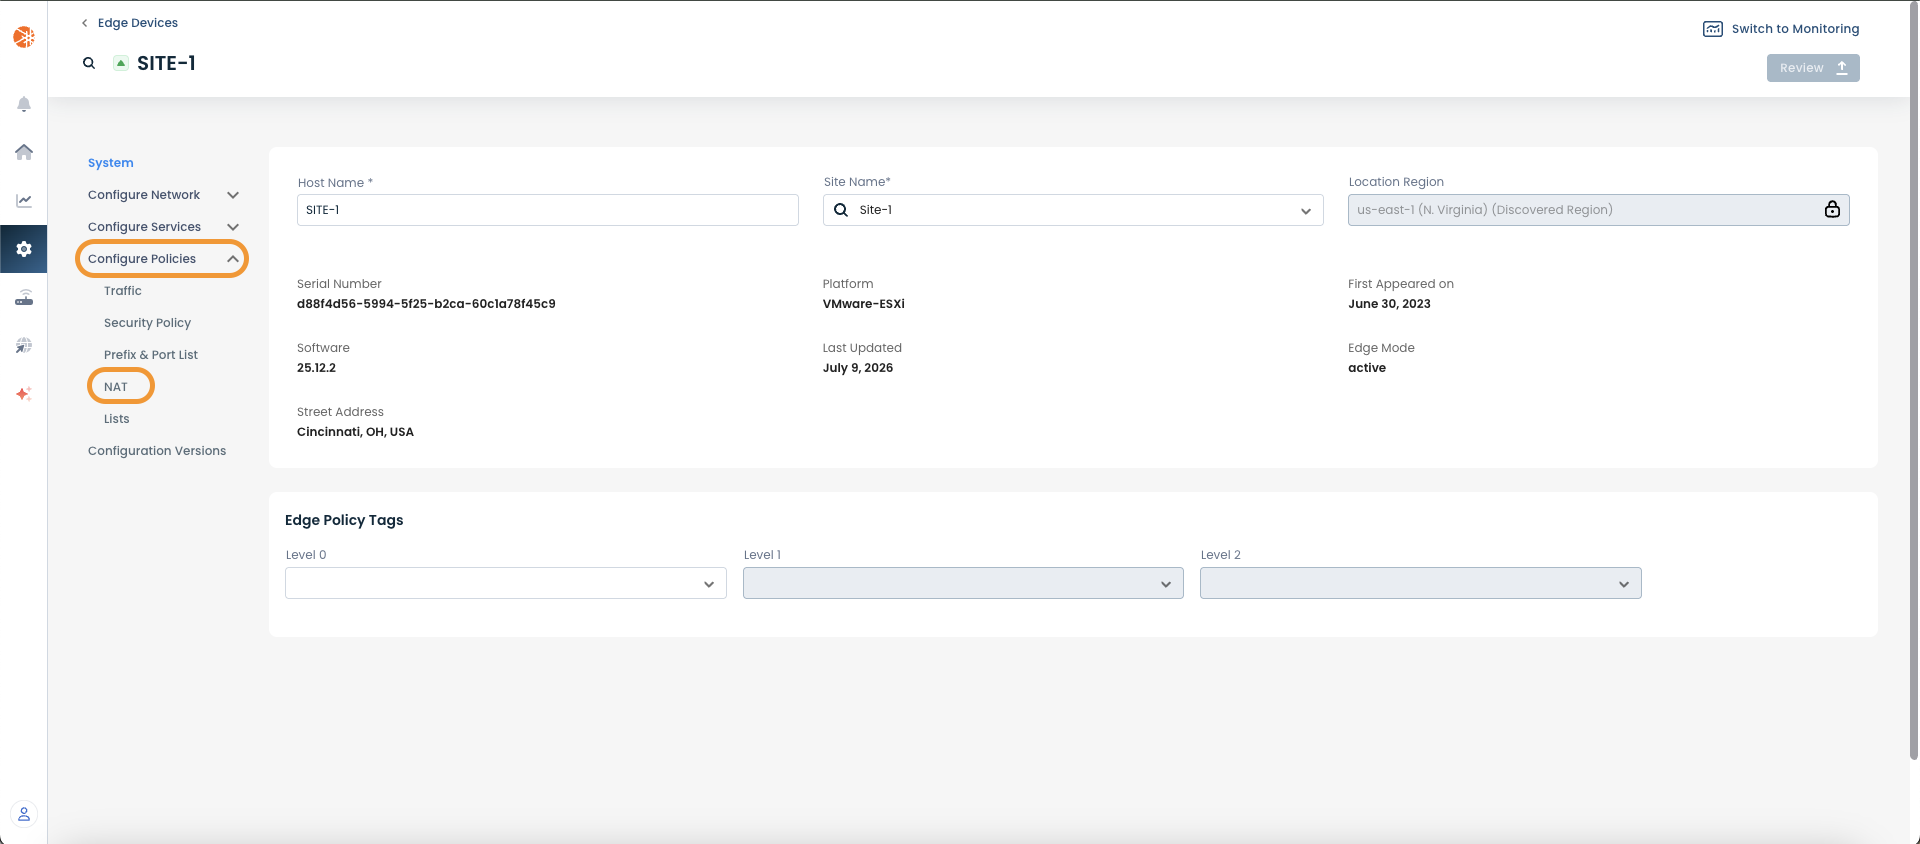
Here you will see a list of headers along the left hand side of the page, such as ‘Configure Network’, ‘Configure Services’, ‘Configure Policies’, etc.
From here, select and click ‘Configure Policies’, and from the dropdown menu select and click ‘NAT’.
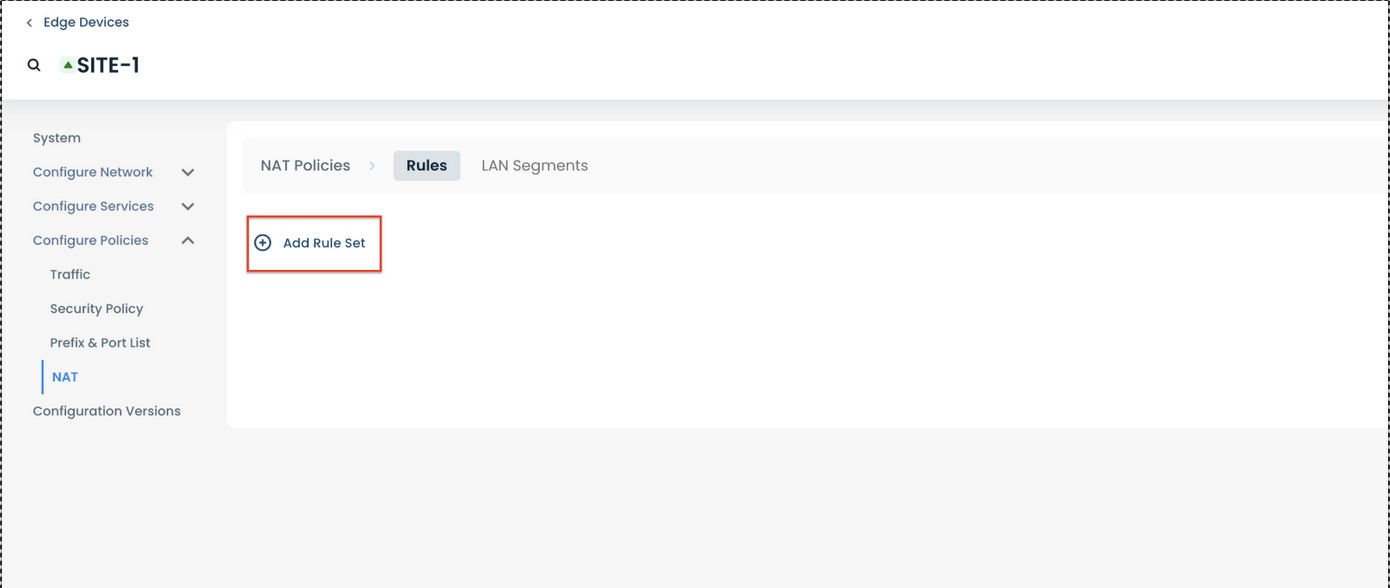
Step 2: Configuring NAT in the Graphiant Portal
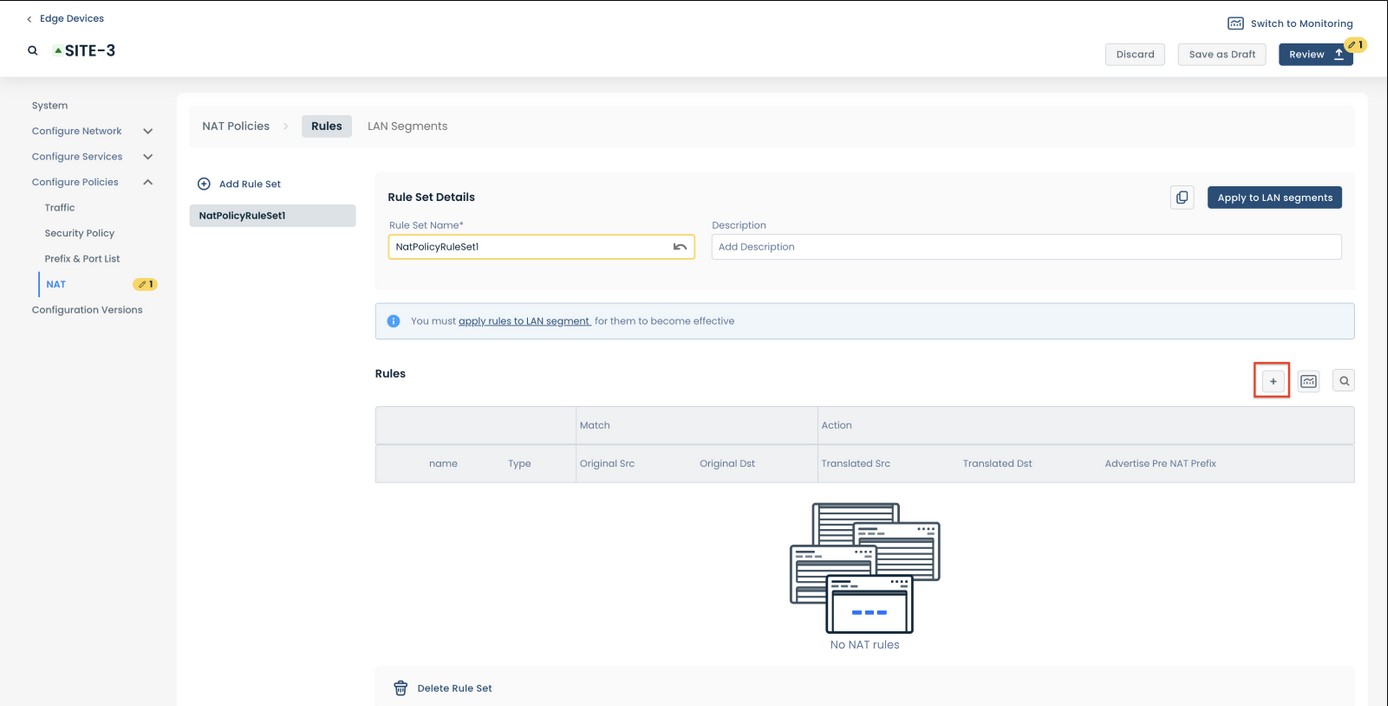
To add a Rule Set, select and click ‘(+) Add Rule Set’.
Use the (+) sign to add a new rule.
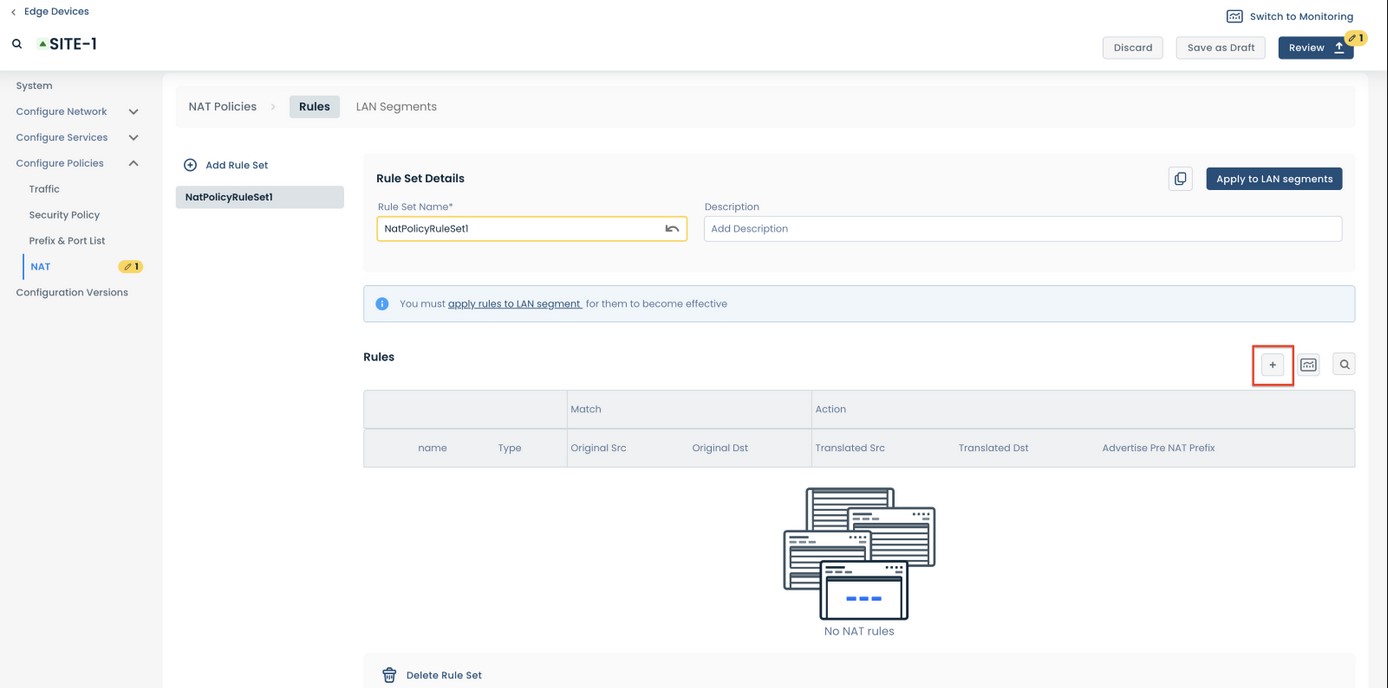
At site-1, we will use 1:1 NAT to translate the server IP address.

Click Next.
Then under Match Details, put in the Original Source IP address of the Server to NAT, and the Original Destination IP (this need to be the NAT’ed IP address of the client from site-3).
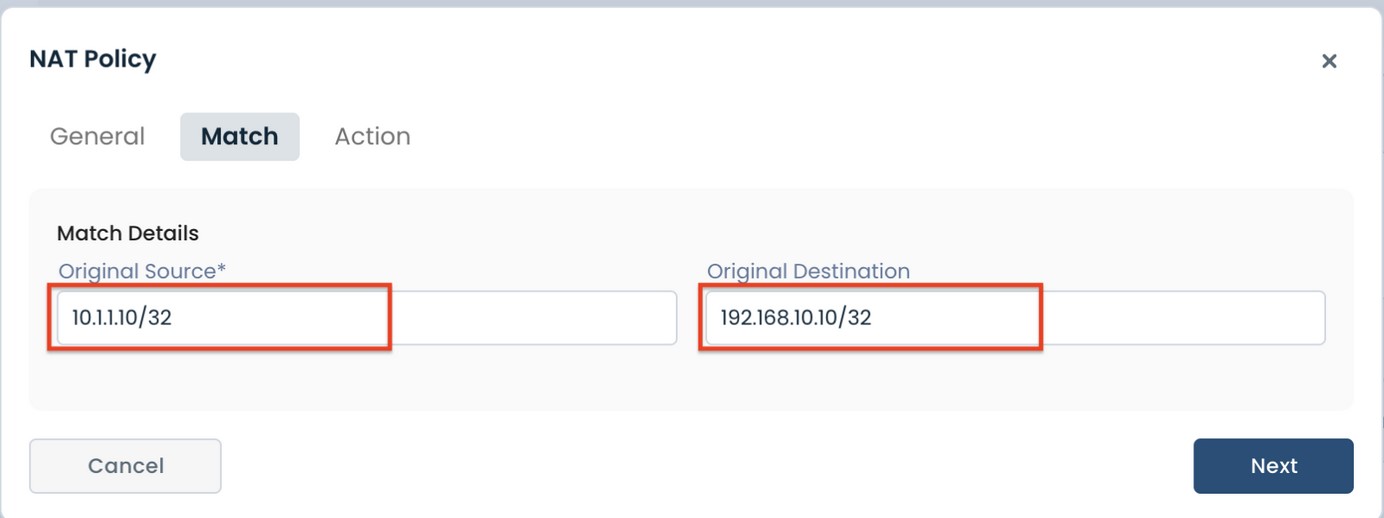
Click 'Next'.
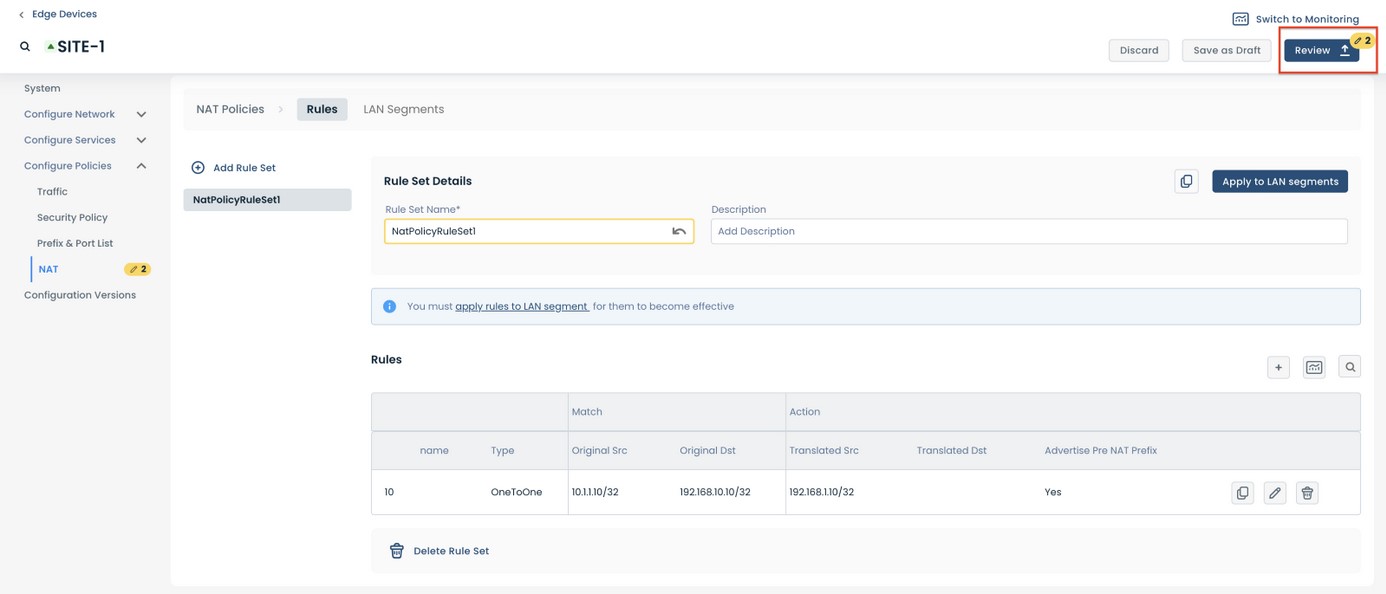
Here, let’s specify the Translated Source IP address of the server as it will appear to site-3; and we will select ‘Advertise Pre NAT Prefixes’, so that site-2 can access the Pre NAT IP.
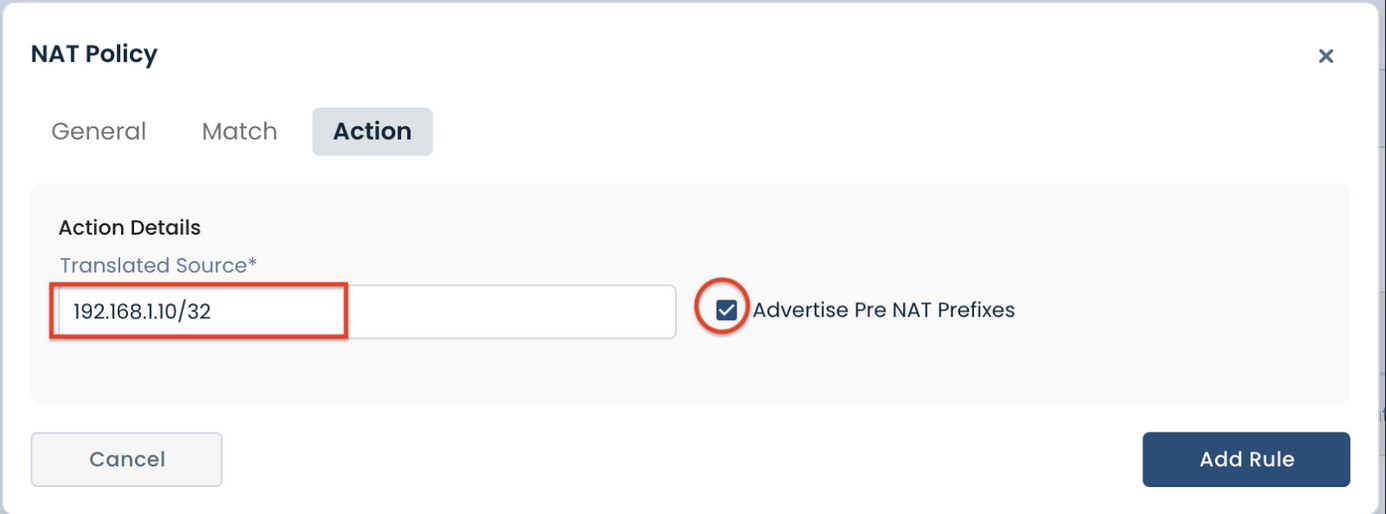
Click “Add Rule”. Now the rule is complete.
Click on “Apply to LAN Segments”.
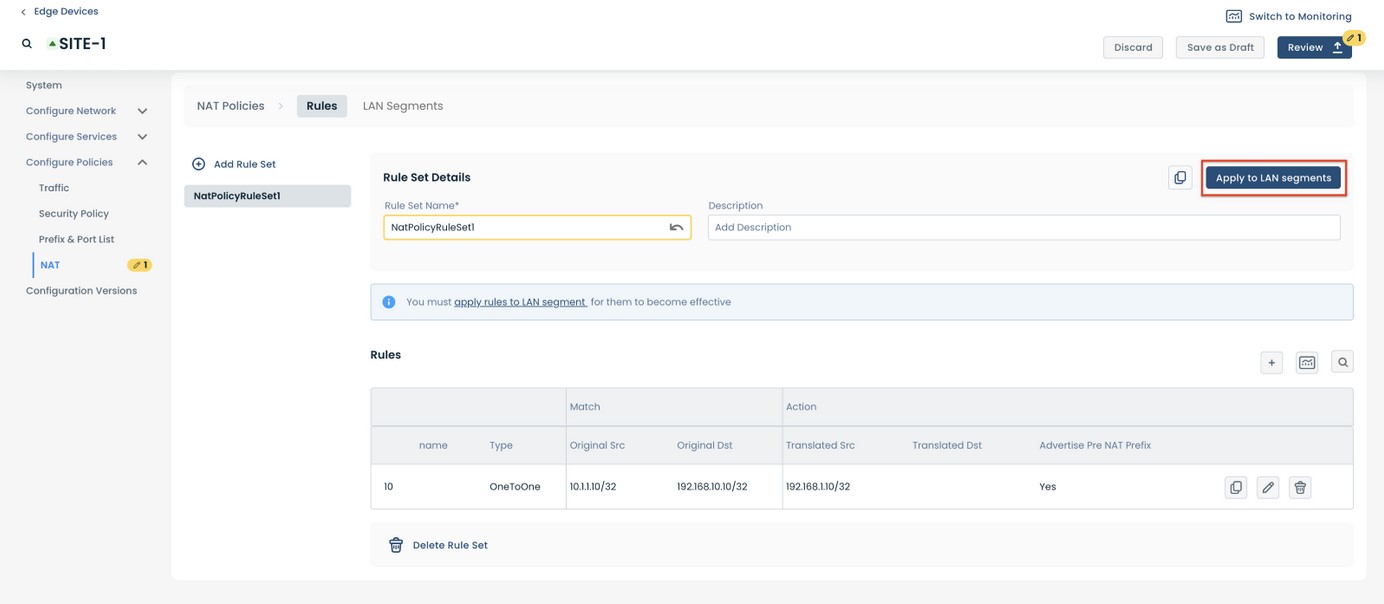
Select the LAN Segment to which this NAT rule will be applied.
Then click “Review” -> “Apply”.
 Site-1 configuration is complete!
Next, to configure NAT at site-3:
From the left sidebar, select:
‘Configure’
‘Edge Devices’
Select the Edge to be configured (site-3)
Select:
"‘Configure Policies’
‘NAT’
‘Add Rule Set’
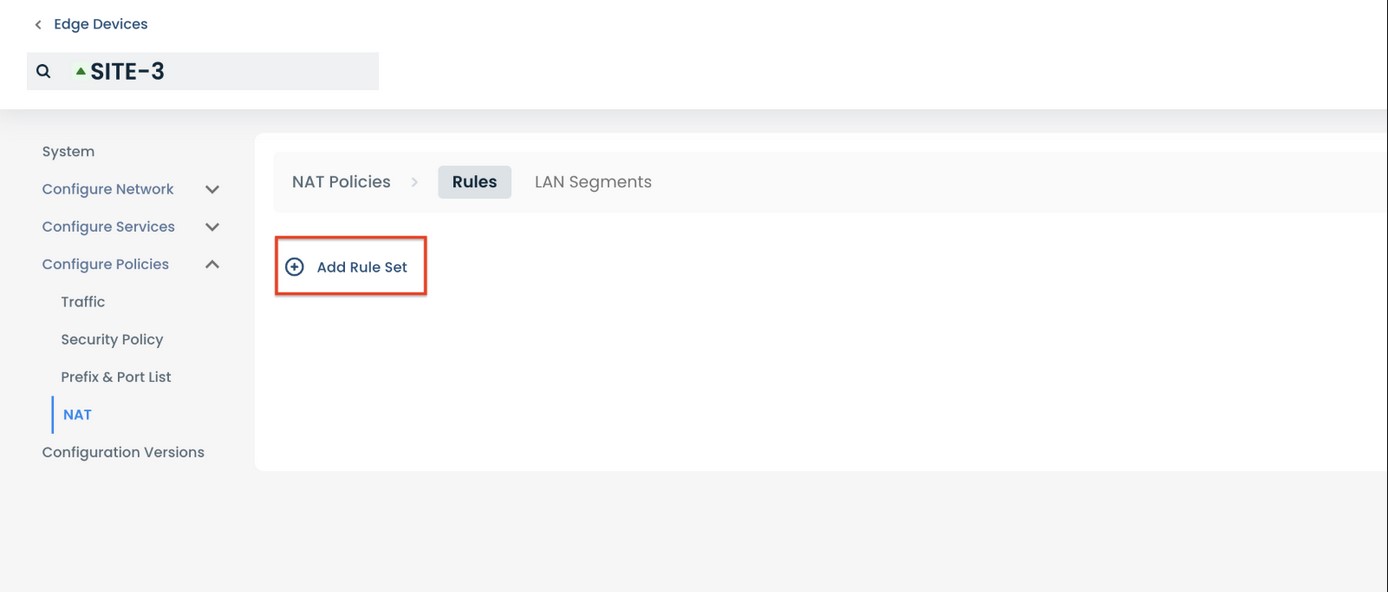
Use the (+) sign to add a rule.
At site-3, we will use PAT to hide the clients’ IP address behind a single IP address:
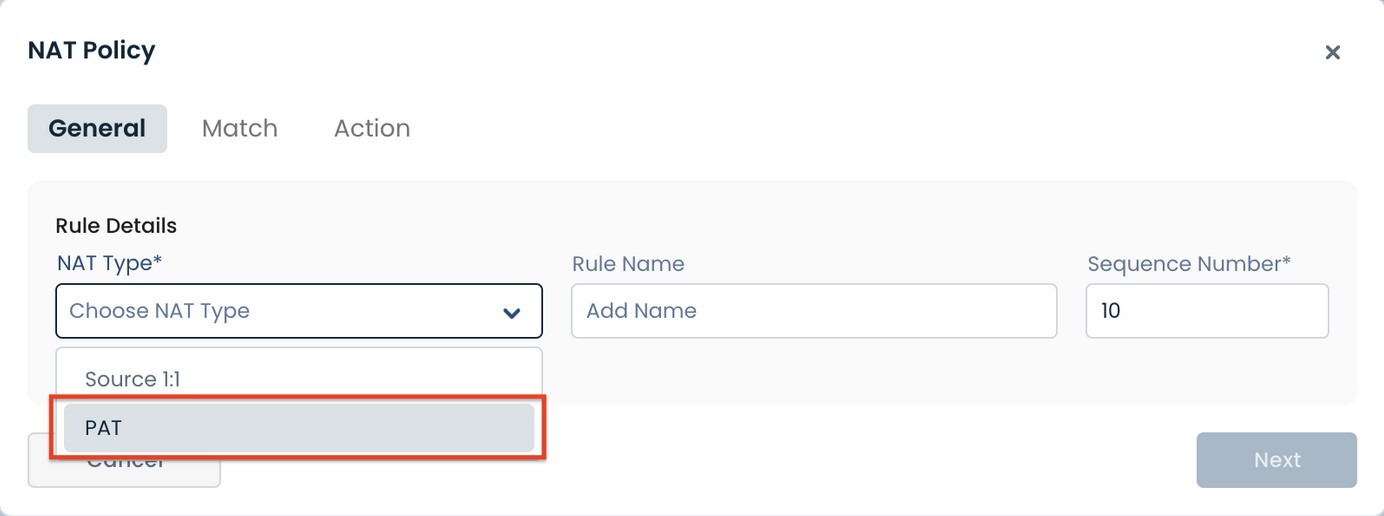
Click “Next”.
Then under Match Details, put in the Original Source IP address of the Client (subnet) to PAT, and the Original Destination IP (this need to be the NAT’ed IP address of the server from site-1).
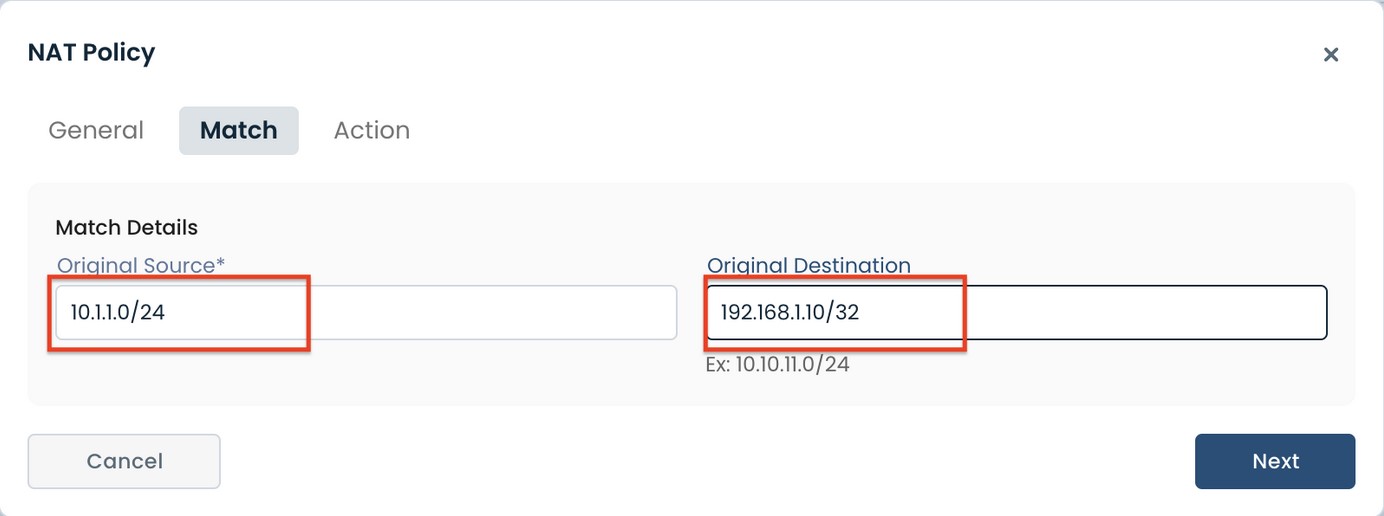
Click “Next”.
Here we specify the Translated Source IP address of the client as it will appear to site-1; and we will not select “Advertise Pre NAT Prefixes”, since no other sites will communicate with site-3 using the Pre NAT IP address.
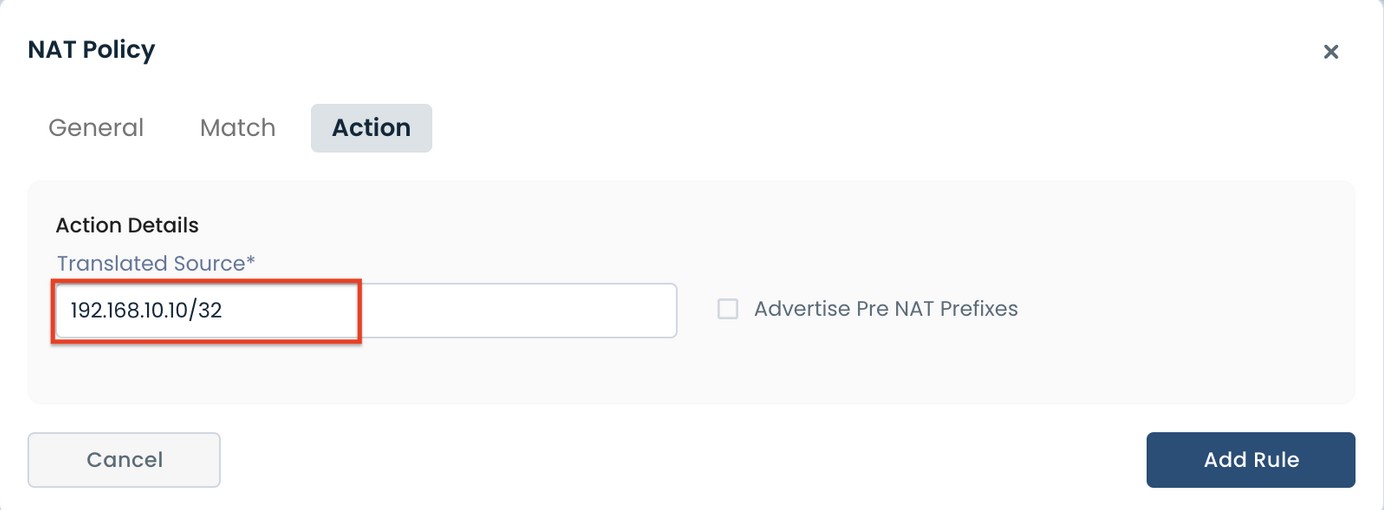
Click “Add Rule”.
Now the rule is complete.
Click “Apply to LAN Segments”.
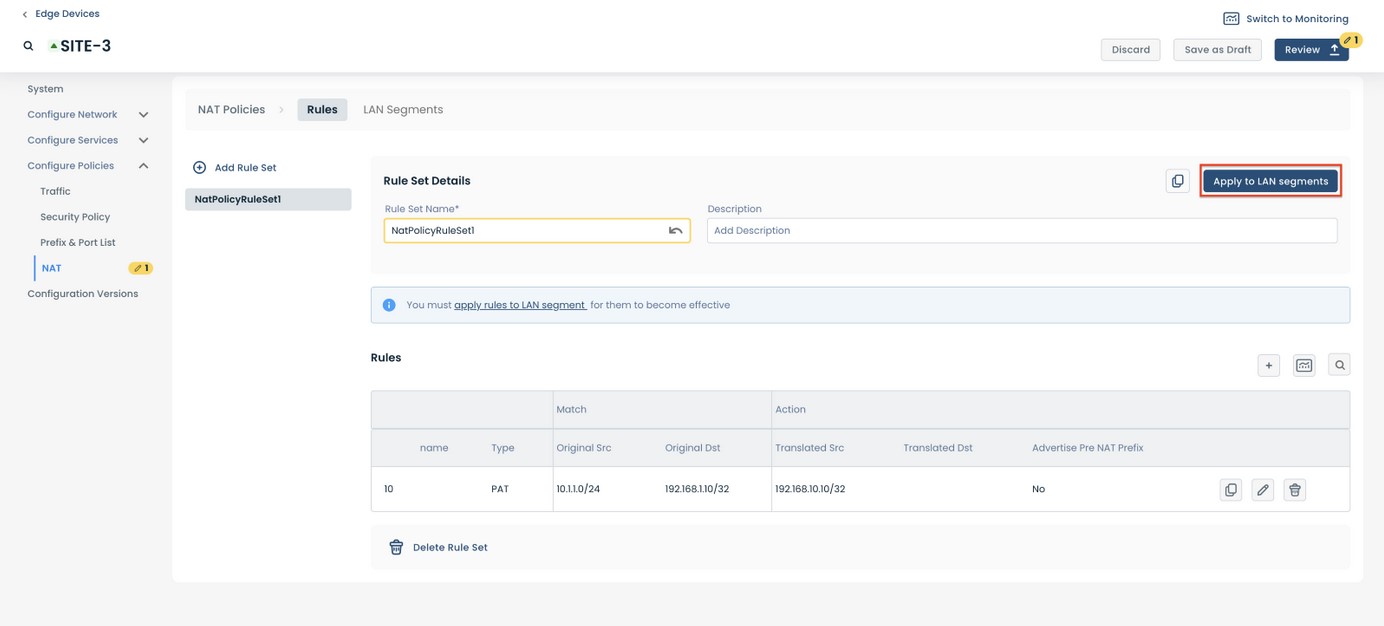
Select the LAN Segment to Apply this NAT rule.

Then click 'Apply'.
Site-3 configuration is complete!
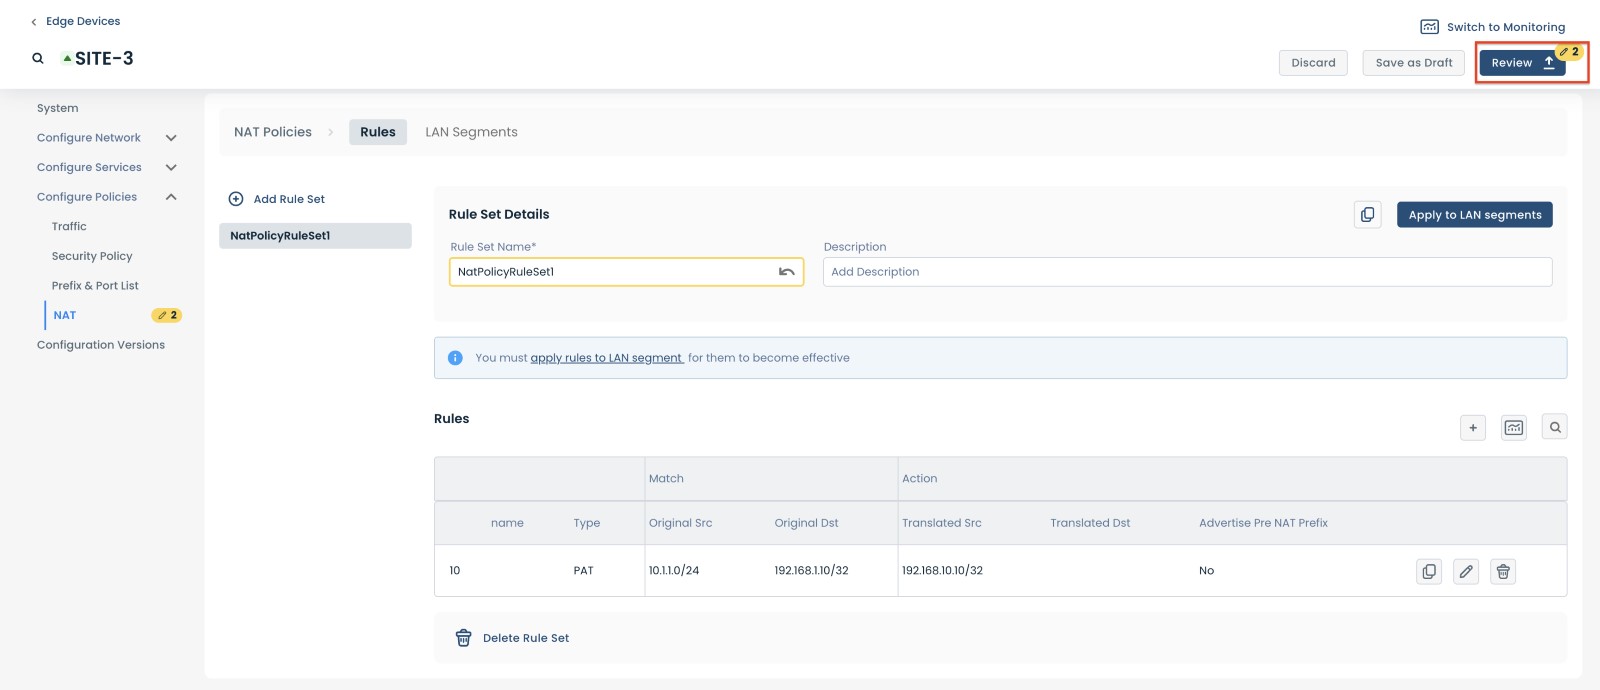
Step 3: Review & Apply
Once the the NAT configuration is complete you will need to review and approve all the changes made.

At the top right hand corner, choose from the following options:
‘Select’ to discard changes made
‘Save as Draft’ to save changes made to be implemented at a later time
‘Review’ to review and apply changes made for immediate deployment