Traffic Policies in the Graphiant Portal
From within the Graphiant Portal, you can configure and deploy Traffic Policies between your network Edge and the WAN.
Step 1: Locating Traffic Policies in the Graphiant Portal
From the Home screen, navigate to the Edge Configuration screen by one of the following:
Locate the "Configurations" section within the “Quickstart” area of the screen; select 'Configure Edges'.
or
Click 'Configure' in the sidebar; select 'Devices'.
.png)
This will take you to the ‘Configuration’ page of the Graphiant Portal where you can view all Active, Staged, and Deactivated Edges. From here you can select among the Active Edges which Edge(s) you would like to be configured with Traffic Policies.
On the left-hand side, select and click the Edge you wish to manage under the column 'Hostname.'
.png)
This will take you onto a Configuration page for the Edge you chose.
Here you will see a list of headings along the left hand side of the page, such as ‘Configure Network’, ‘Configure Services’, ‘Configure Policies’, etc.
Select and click ‘Configure Policies’ from here, and a dropdown menu will appear.
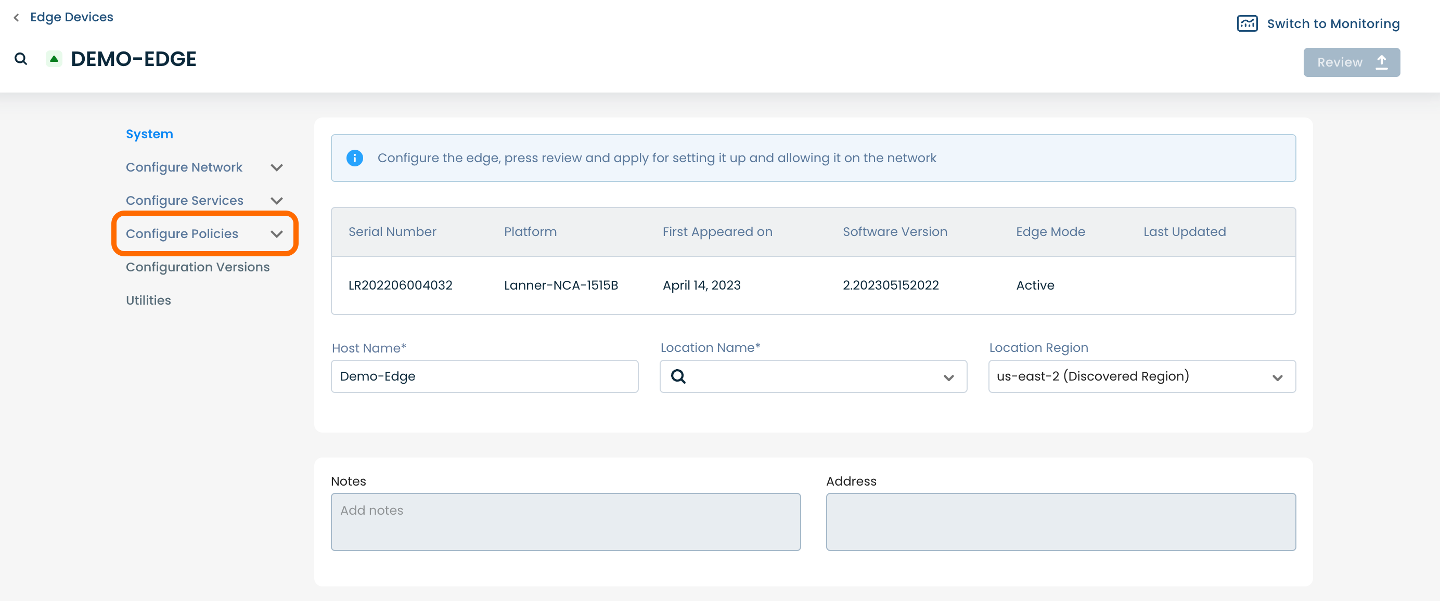
From the dropdown menu, select and click ‘Traffic’.
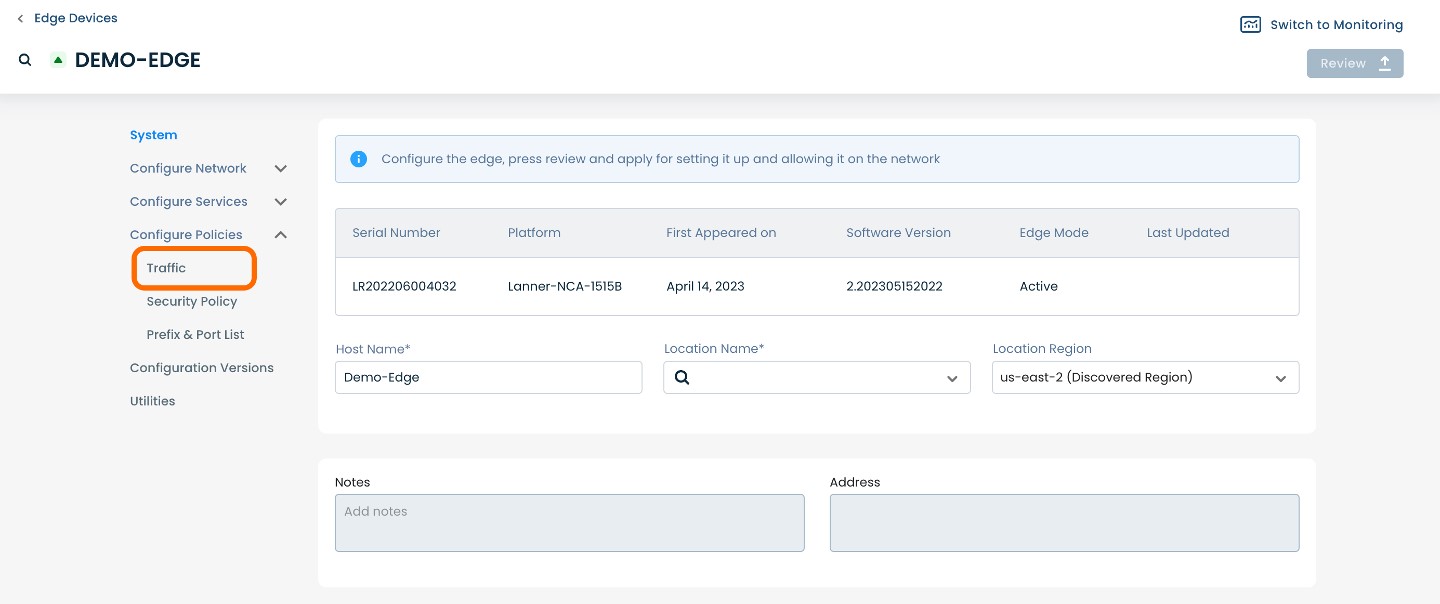
This will take you onto a Traffic page dedicated to the chosen Edge.
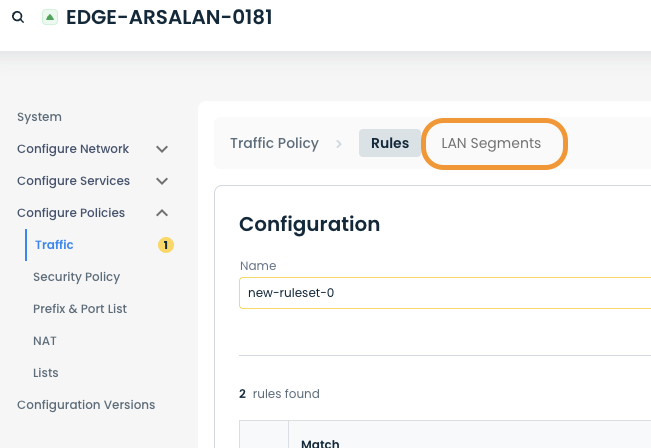
On the Traffic page, you will see two available headings along the top: ‘Rules’ and ‘LAN Segments’.
Select and click ‘Rules’.
.png)
Step 2: Setting Up Traffic Policy Rules in the Graphiant Portal
Option 2A: Local Traffic Policy
This will take you to the 'Traffic Policy' page. From there, navigate to the 'Local Configuration' tab.
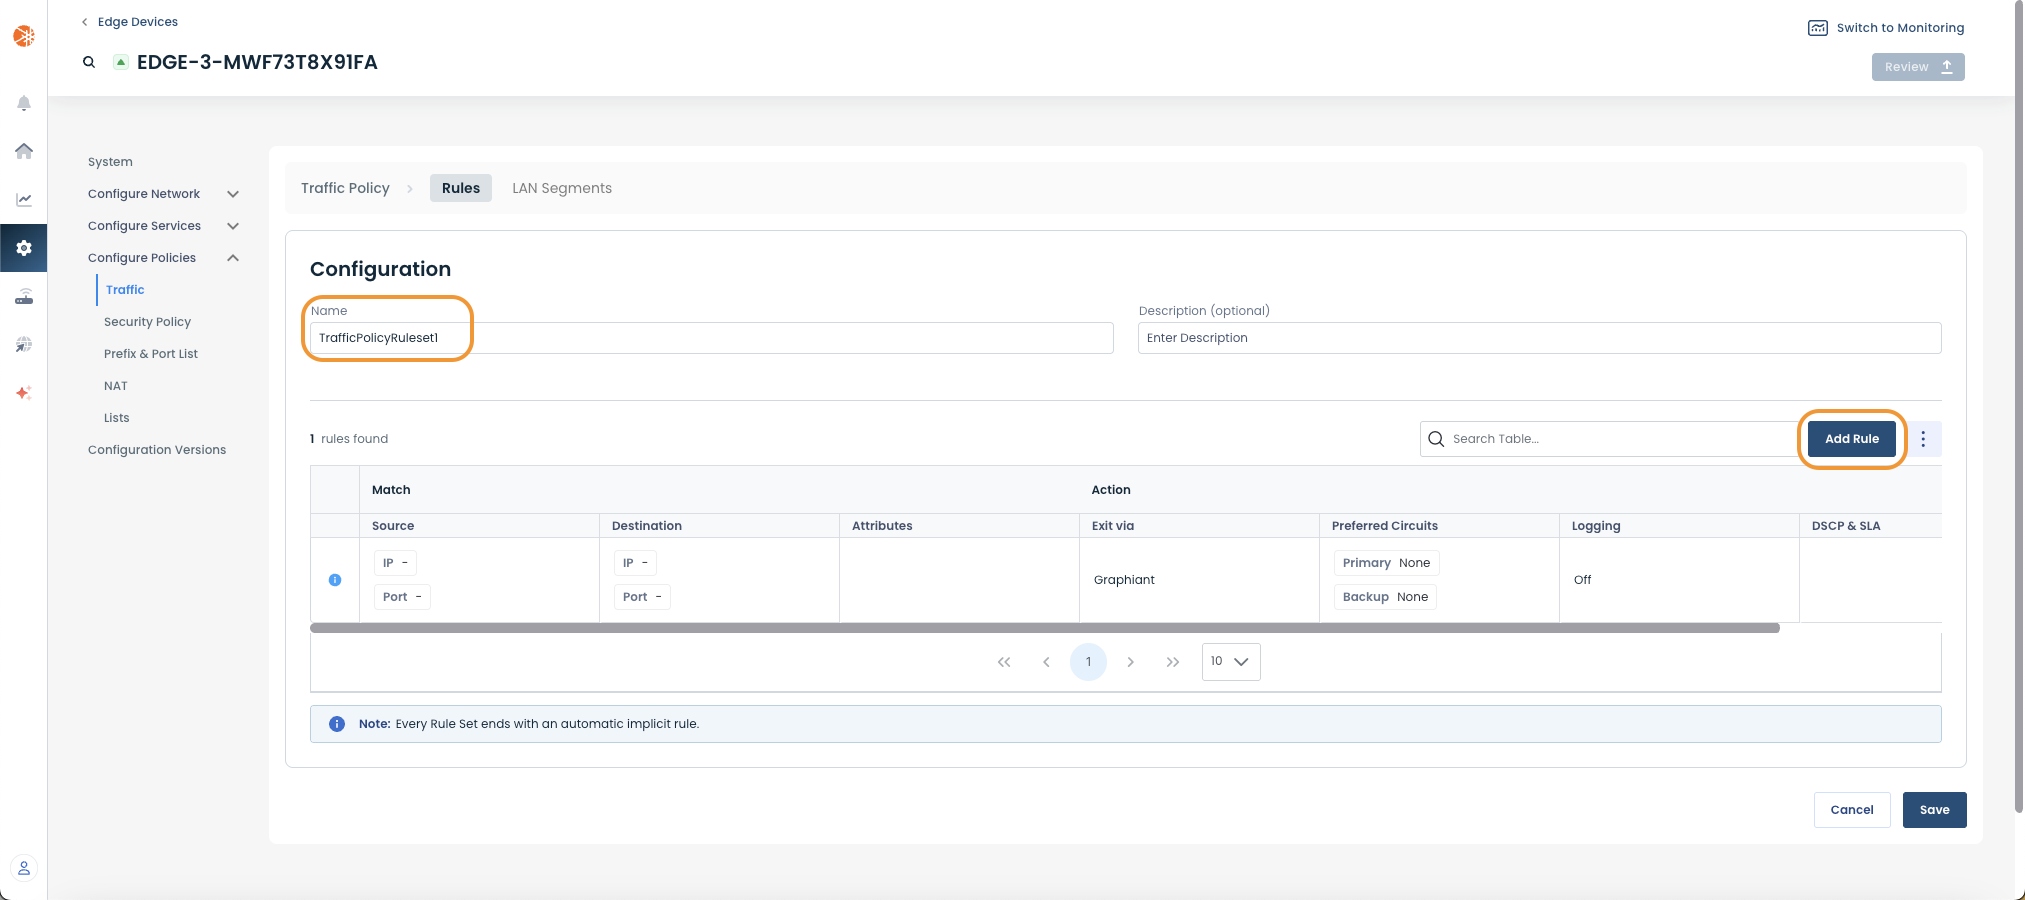
To add a Rule to the Rule set, select and click the (+) icon on the right-hand side. Since nothing is currently configured on the LAN segment, you can also select 'Add Local Traffic Ruleset'.
.png)
Add a Ruleset name (required), and if desired, a description. Additionally, select 'Add Rule' on the right-hand side.
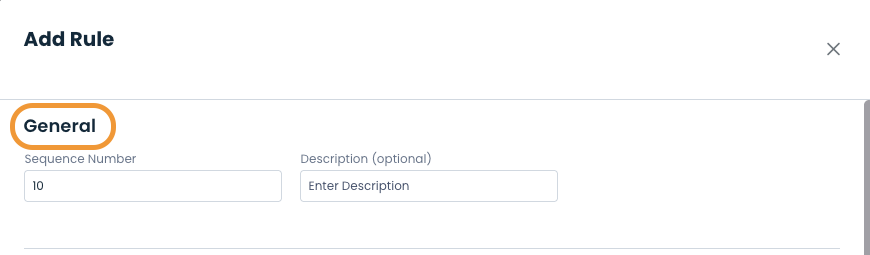
Whether adding a new Rule or editing an existing Rule, a pop-up window will appear containing four headings: ‘General’, ‘Match Source & Dest’, Match Application’, and ‘Action’. Each heading pertains to a separate set of required fields.
The first heading you will need is ‘General’.
Below are descriptors for each of the fields required.
(An * indicates a required field.)
Rule Details
Sequence Number: Choose a desired sequence number for the Rule.
The next heading is ‘Match’.
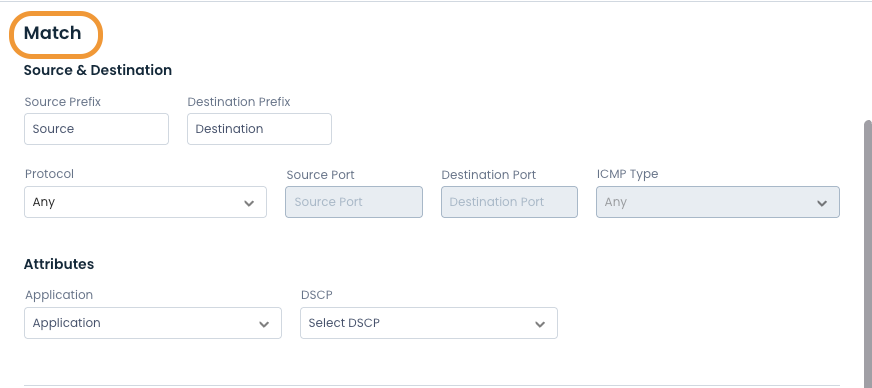
For Source & Dest: below are descriptors for each of the fields required.
(An * indicates a required field.)
Prefix*
Source*: Enter the Source IP Address
Protocol: Choose the desired Protocol from the dropdown menu
Destination: Enter the Destination IP Address
DSCP: Choose the desired DSCP (values 0-63)
Note:
The fields below will be either permitted/blocked depending on the choices made in the Prefix section above.
Port
Source*: Enter the Source Port number
ICMP Type: Choose the desired ICMP Type; If not choosing
Destination: Enter the Destination Port number
For ‘Match Application’, below are descriptors for each of the fields required.
Application: Choose the desired Application from the dropdown menu.
DSCP: Choose the desired DSCP (values 0-63)
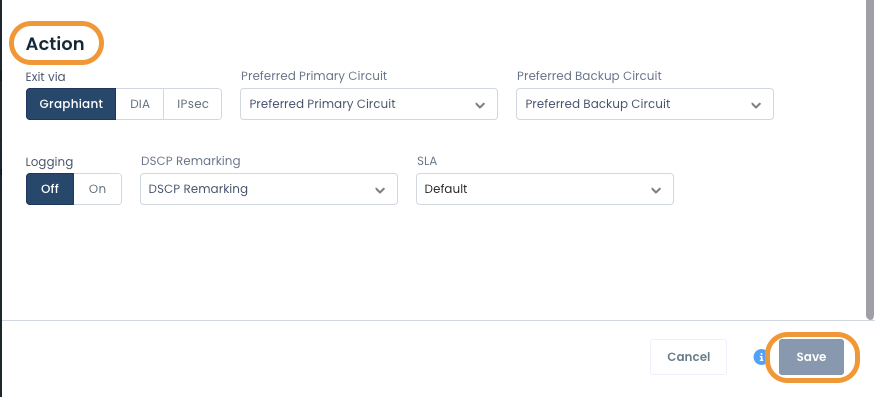
For the final heading of ‘Action’, below are descriptors for each of the fields required.
Logging: Choose either ‘Off’ or ‘On’.
DSCP Remarking: Enter the desired DSCP Remarking (value 0-63).
Service Class: Choose the desired Service Class from the dropdown menu.
WAN Circuits: Choose either ‘Graphiant Core’ or ‘DIA’.
Preferred Primary Circuit: Choose the desired Circuit from the dropdown menu.
Preferred Backup Circuit: Choose the desired Backup Circuit from the dropdown menu. If only 1 circuit was present for selection in 'Preferred Primary Circuit', this field will not be active.
Once you have filled-in the required fields for each of the four headings described above, select and click ‘Save’ in the bottom right-hand corner of the window.
Option 2B: Global Traffic Policy
From the 'Traffic Policy' page, navigate to the 'System Objects' tab and select 'View Rule Set Configuration'.
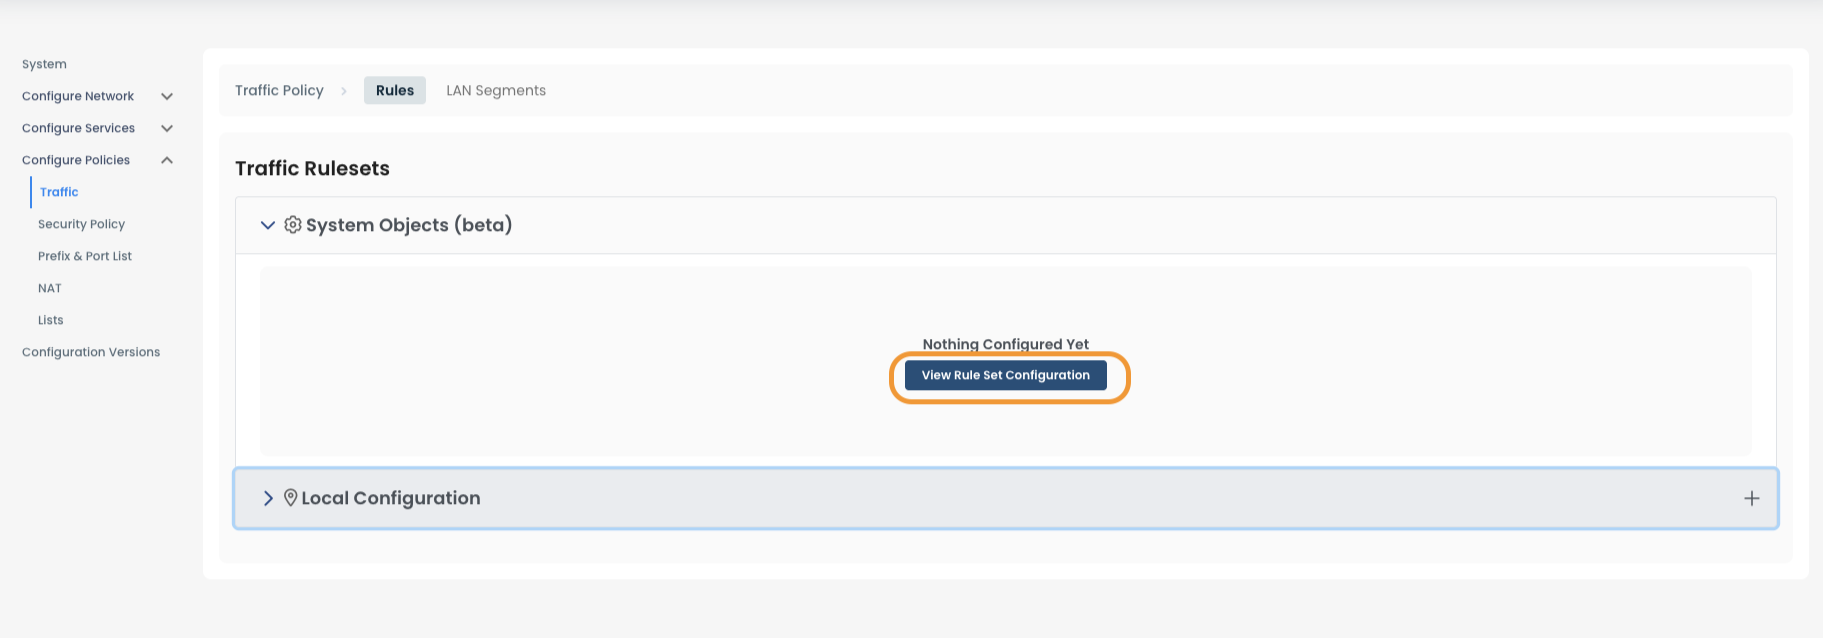
On the right-hand side at the top of the page, select 'Create Traffic Ruleset'.
.png)
Add a Ruleset name, and if desired, a description. Additionally, select 'Add Rule' on the right-hand side, and continue creating the ruleset as described in Section 2A.
Applying a Rule Set to a LAN segment
After saving the new Rule Set, switch to the 'Lan Segments' Tab.
Select the desired LAN Segment to which the Rule will be applied.
.png)
Click 'Select Rule Set' if there are no rules to be shown yet, and select the Rule set to apply to the LAN segment.
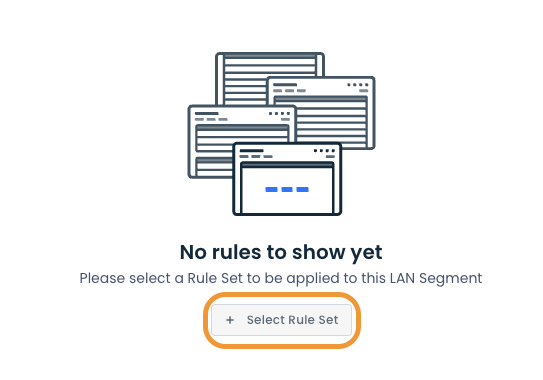
Select the Rule Set that was just created and select 'Apply’.
.png)
Step 3: Review & Apply
Once all required fields are filled in, the selected Edge will be ready to begin utilizing Traffic Policies, however you will first need to review and apply all changes made.

On the top right hand corner, choose from the following options:
‘Discard’ to discard changes made
‘Save as Draft’ to save changes made to be implemented at a later time
‘Review’ to review and apply changes made for immediate deployment
Matching O365 for Traffic Policies
Microsoft O365 uses multiple underlying applications for all the capabilities to work. In order to match O365 using a traffic policy you will need to configure the policy to match both Office 365 and Microsoft Services.
Navigate to the traffic policies page in the Graphiant Portal (For details please look at the Locating Traffic Policies section).
You can either create a new Rule Set or edit one of your existing Rule Sets.
To add a Rule to the Rule Set, select and click the (+) plus icon on the right hand side of the page within the lower section.
A pop-up window will appear containing four headings : ‘General’, ‘Match Source & Dest’, Match Application’, and ‘Action’.
In the General section add a Rule Name* and if desired, add a Description.
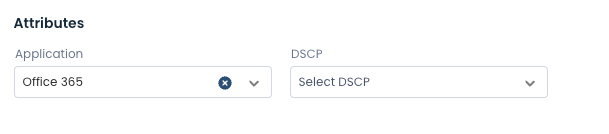
Switch over to the Match Application tab, and select Office 365; click ‘Add Rule’.
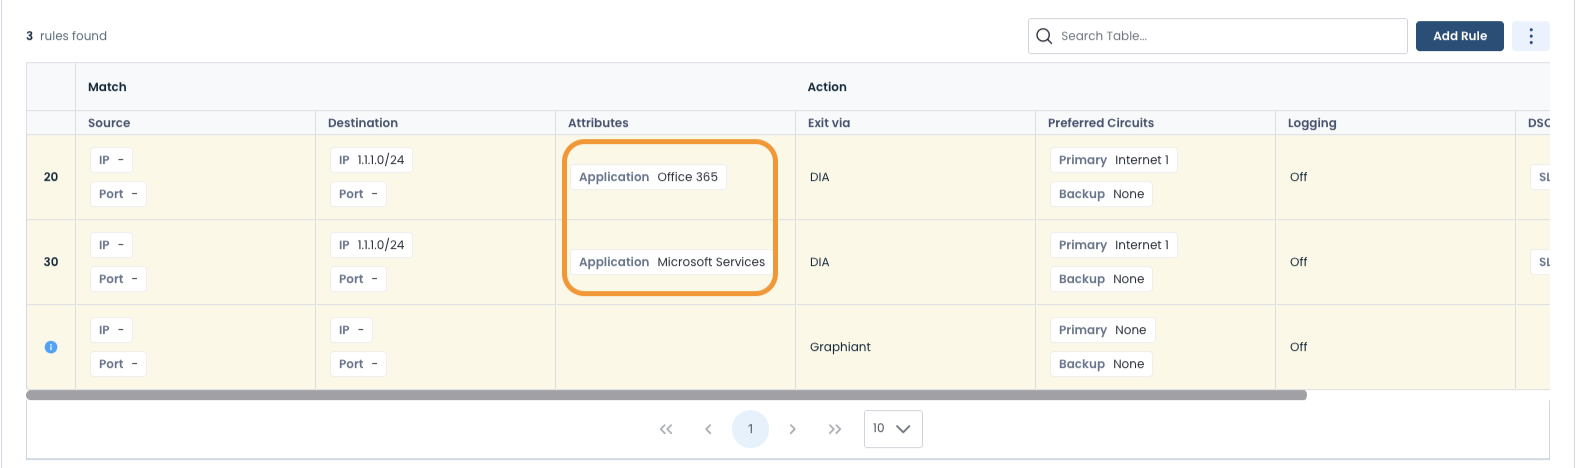
The Office 365 Rule is now seen in the list of rules.

Select and click 'Add Rule' again to add the Microsoft Services application.
In the General section add a Rule Name and if desired, add a Description.
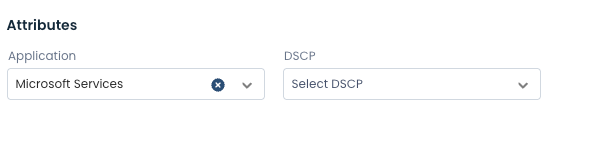
Switch over to the Match Application tab; select ‘Microsoft Services’.
Click 'Add Rule'.
You will now see both Office applications present in the Rule list.
Once all required fields are filled in, the selected Edge will be ready to begin utilizing Traffic Policies, however you will first need to review and apply all changes made.

On the top right hand corner, choose from the following options:
‘Discard’ to discard changes made.
‘Save as Draft’ to save changes made to be implemented at a later time.
‘Review’ to review and apply changes made for immediate deployment.