Security Policies in the Graphiant Portal
The Graphiant Edge supports a Next Gen Firewall (NGFW) that allows you to control traffic within a zone as well as traffic between different zones. A security policy defines the conditions that the data traffic flow, from the source zone to the destination zone, must match and how it must be processed. From within the Graphiant Portal, you will be able to create Security Policies for managing the firewall on your Graphiant Edge.
Security Policy Rules in the Graphiant Portal
Step 1: Locating Security Policy Rules in the Graphiant Portal
From the Home screen, navigate to the Edge Configuration screen by one of the following:
Locate the "Configurations" section within the Quickstart area of the screen; select 'Configure Edges'.
or
Click 'Configure' in the sidebar; select Devices'.
.png)
This will take you to the ‘Configuration’ page of the Graphiant Portal where you will be able to view all Active, Staged, and Deactivated Edges. From here you will be able to select among the Active Edges which Edge(s) you would like to be configured with Firewall.
On the right hand side, select and click ‘Configure’ in tandem with the Edge you wish to manage.
.png)
This will take you onto a Configuration page with a focus on the Edge you have just chosen.
Here you will see a list of headings along the left hand side of the page, such as ‘Configure Network’, ‘Configure Services’, ‘Configure Policies’, etc.
From here, select and click ‘Configure Policies’, and a dropdown menu will appear.
From the dropdown menu, select and click ‘Security Policy'.
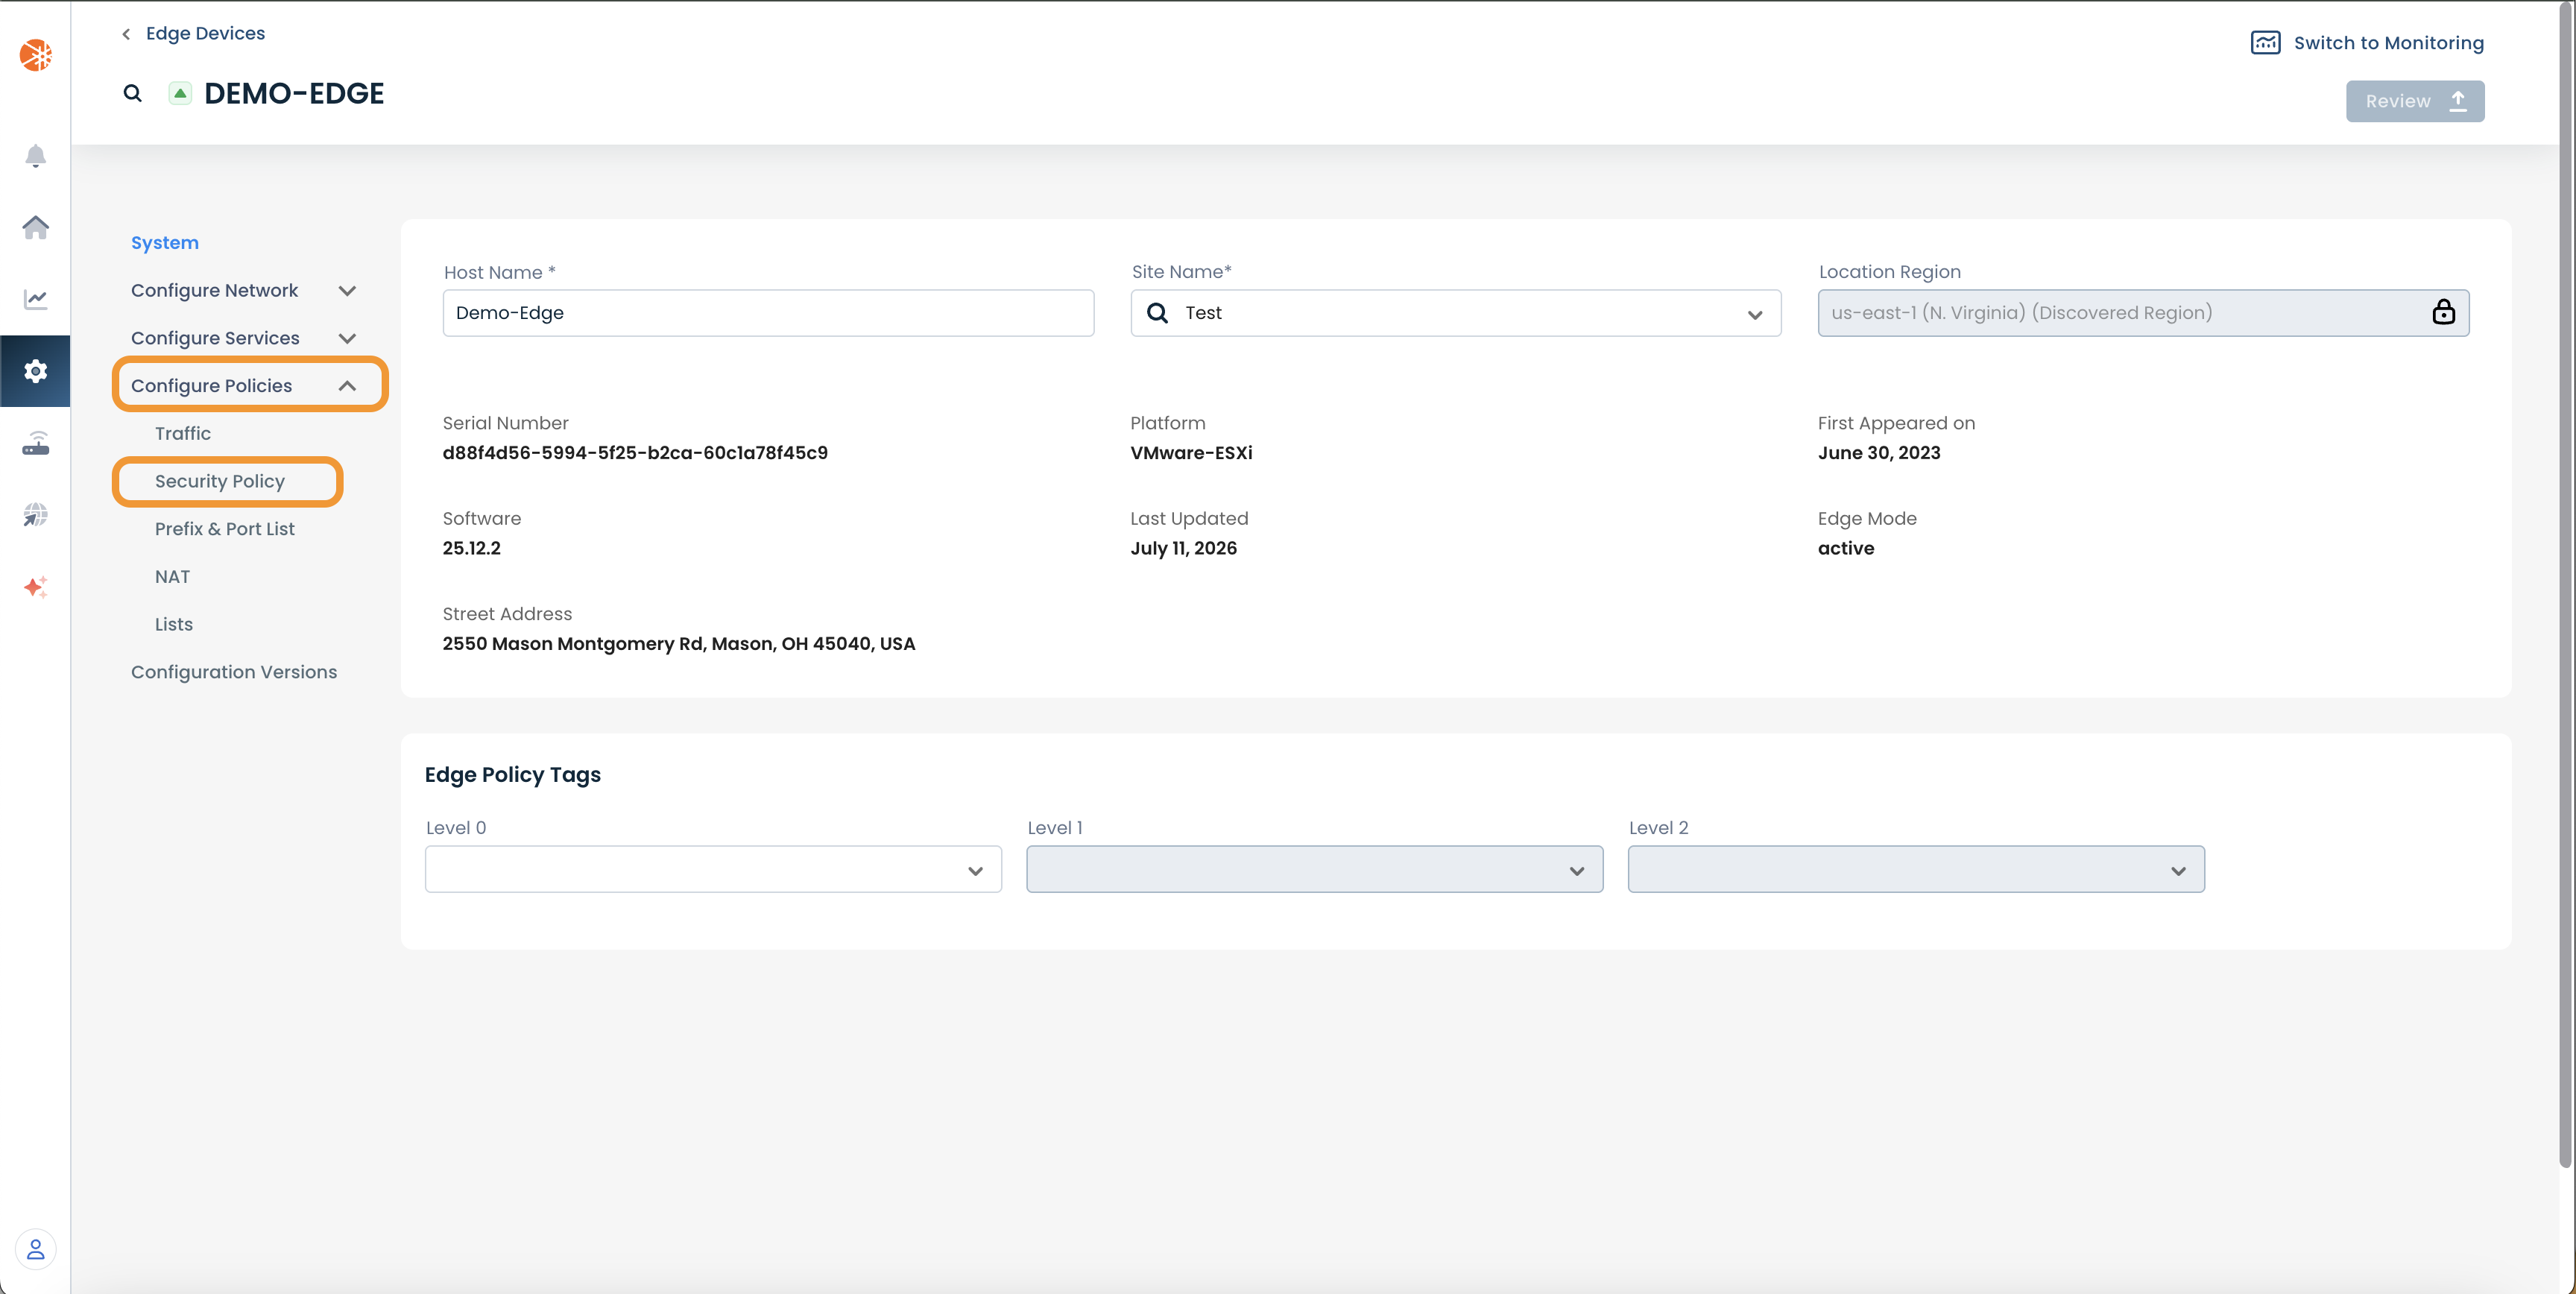
This will take you onto a Security Policies page dedicated to the chosen Edge.
On the Security Policies page, you will see three available headings along the top of the page: ‘Zone Settings’, ‘Zone Pairs’ and ‘Rules’.
Select and click ‘Rules’.
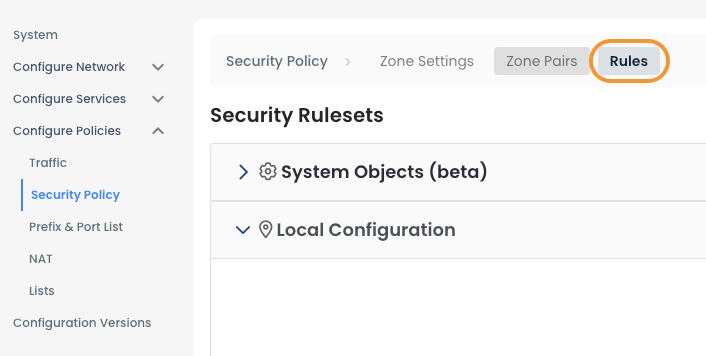
Step 2: Setting Up Security Policy Rules in the Graphiant Portal
A Rule Set defines the security rules to apply to the network traffic. You can define match criteria to identify flows and then choose what actions to take on those flows. A Rule Set does not specify any Zone information, which means the same Rule Set can be re-used for different Zone Pairs.
From within “Configure Policies” on the Security Policy page, select ‘Rules’ amongst the available headings along the top of the page.
Step 2A: Local Security Policy
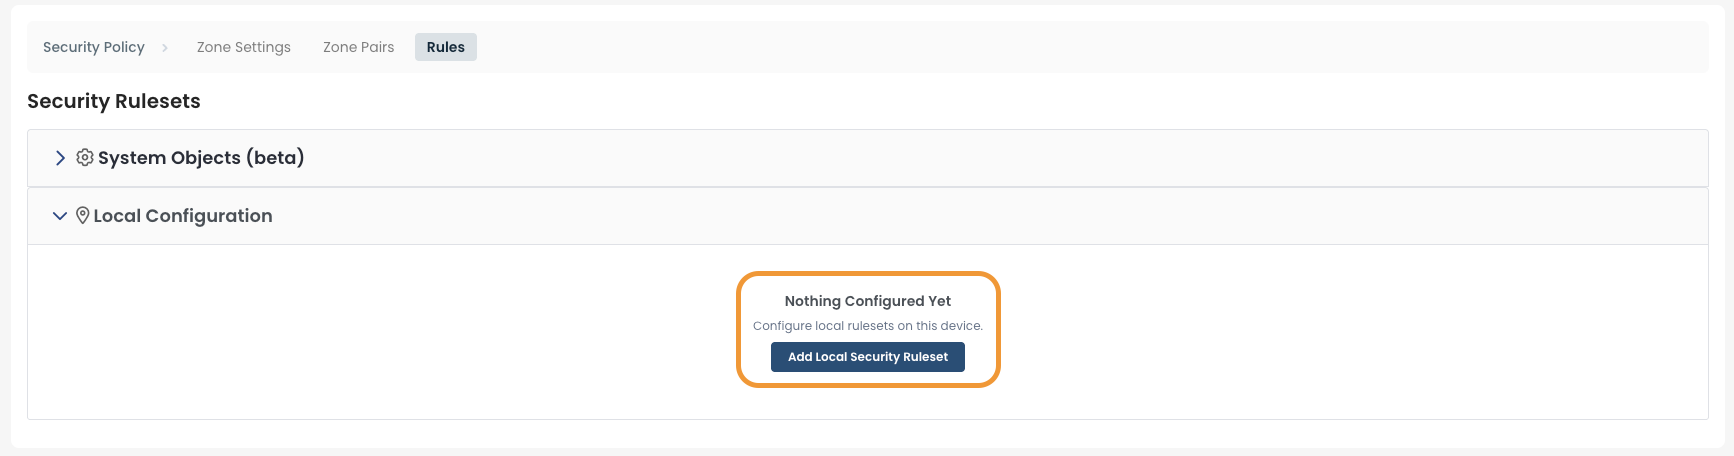
Since nothing is currently configured on the LAN segment, you can also 'Add Local Security Ruleset'.
Add a Ruleset name (required), and if desired, a description. Additionally, select 'Add Rule' on the right-hand side.
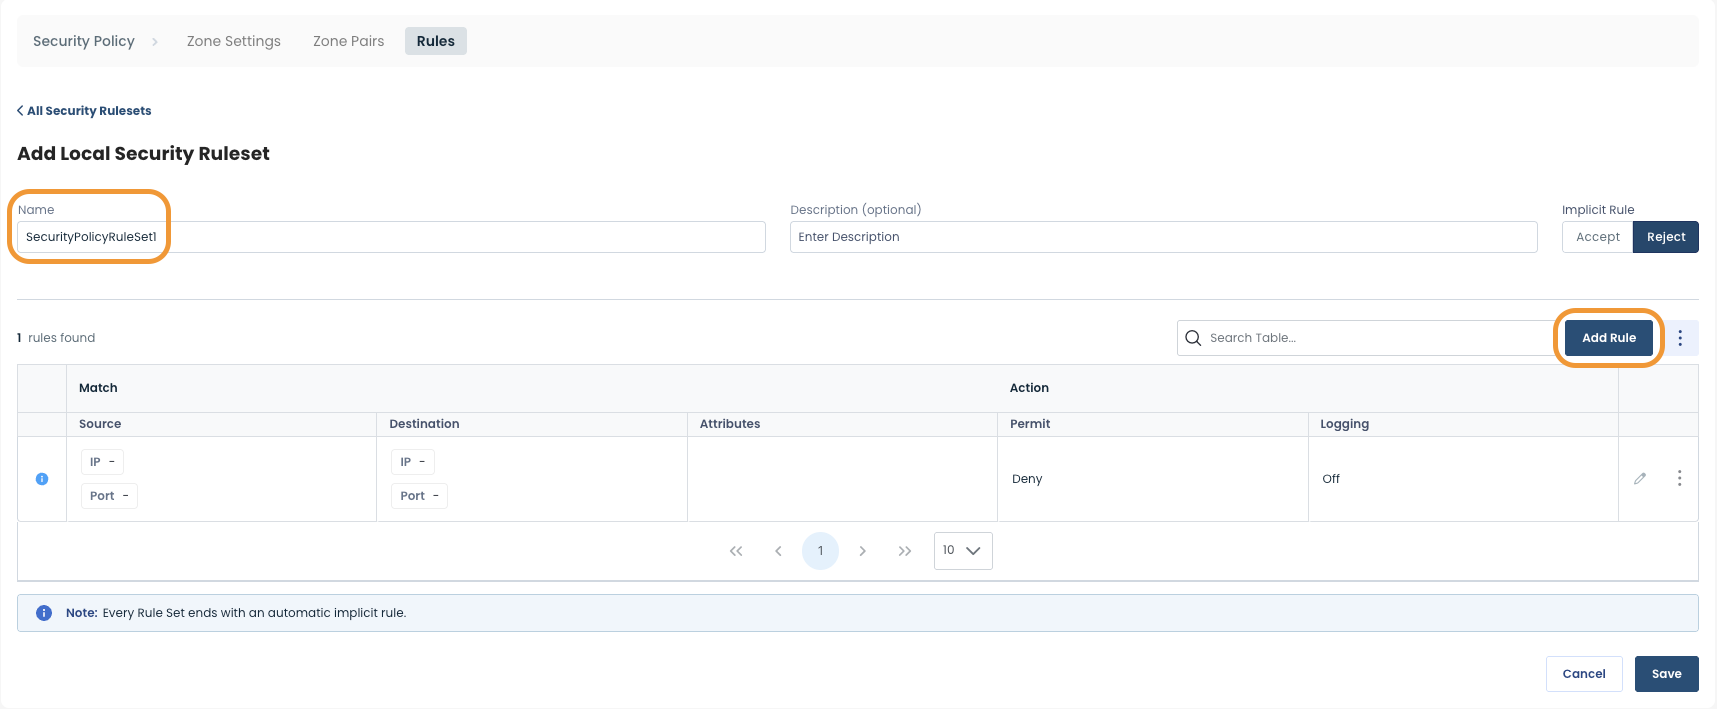
After you have filled in the required fields in the uppermost section, you will be able to add Rules to the Rule Set, as well as edit existing Rules.
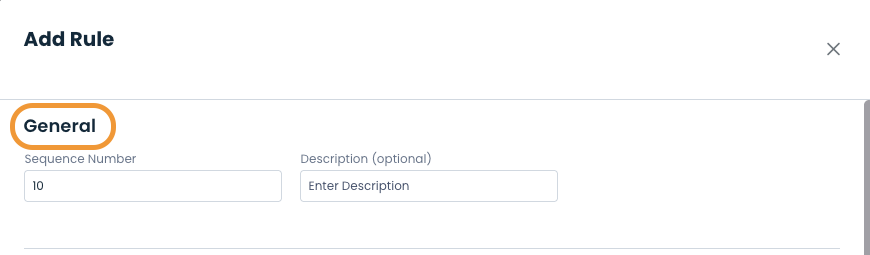
Whether adding a new Rule or editing an existing Rule, a pop-up window will appear containing three headings: ‘General’, ‘Match’, and ‘Action’. Each heading pertains to a separate set of required fields.
The first heading you will need is ‘General’.
Below are descriptors for each of the fields required.
(An * indicates a required field.)
Rule Details
Sequence Number: Choose a desired sequence number for the Rule.
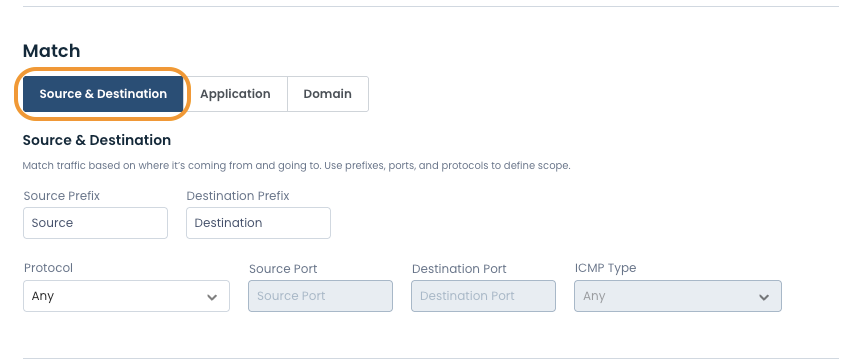
The next heading is ‘Match’. Click on the first subheading 'Source & Dest'.
Below are descriptors for each of the fields required:
(An * indicates a required field.)
Prefix*
Source*: Enter the Source IP Address
Protocol: Choose the desired Protocol from the dropdown menu
Destination: Enter the Destination IP Address
DSCP: Choose the desired DSCP (values 0-63)
Note:
The fields below will be either permitted/blocked depending on the choices made in the Prefix section above.
Port
Source*: Enter the Source Port number
ICMP Type: Choose the desired ICMP Type; If not choosing
Destination: Enter the Destination Port number
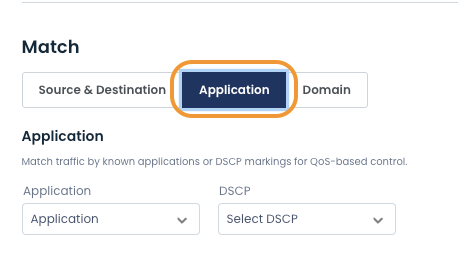
Then click the next subheading ‘Application’.
Below are descriptors for each of the fields required.
Application: Choose the desired Application from the dropdown menu
DSCP: Choose the desired DSCP (values 0-63)
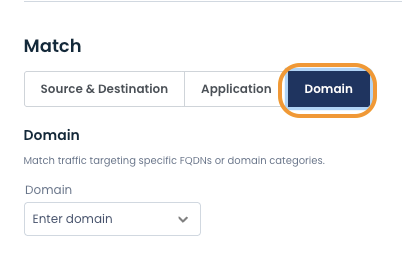
Then click the final subheading ‘Domain’.
Below are descriptors for each of the fields required.
Domain: Choose the desired Domain
The final heading is ‘Action’.
Here you will be able to specify criteria to match particular flows, and take the following actions on the matching traffic:
Deny: Drops the matching traffic and sends an ICMP error message to the sender
Drop: Drops the matching traffic without sending any errors to the sender
Allow: Accepts the matching traffic. The implicit rule for a rule set is to Reject all traffic. Any traffic that needs to be accepted must be explicitly matched and accepted.
Inspect: Allows the you to define the initiation of a session. If the packet is seen in this direction for a session, then the return traffic in the reverse direction is automatically allowed in without any explicit rule.
Below are descriptors for each of the fields required:
Permit: Choose either ‘Deny’, ‘Drop’, ‘Allow’, or 'Inspect'.
Logging: Choose either ‘Off’ or ‘On’.
Once you have filled in the required fields for each of the four headings as described above, select and click ‘Save’ in the bottom righthand corner of the window.
.png)
Step 2B: Global Security Policy
From the 'Security Policy' page, navigate to the 'System Objects' tab and select 'View Rule Set Configuration'.
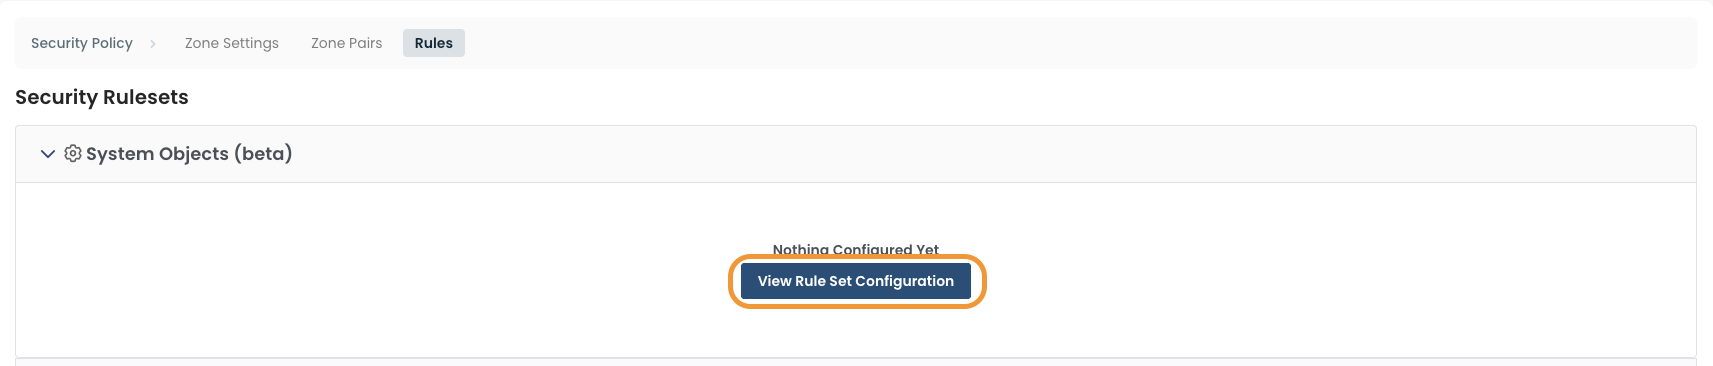
On the right-hand side at the top of the page, select 'Create Traffic Ruleset'.

Add a Ruleset name, and if desired, a description. Additionally, select 'Add Rule' on the right-hand side, and continue creating the ruleset as described in Section 2A.
Step 3: Review & Apply
Once all required fields are filled in, the selected Edge will be ready to begin utilizing Firewall, however you will first need to review and apply all changes made.

On the top righthand corner, choose from the following options:
‘Discard’ to discard changes made.
‘Save as Draft’ to save changes made to be implemented at a later time.
‘Review’ to review and apply changes made for immediate deployment.
Security Policy Zones in the Graphiant Portal
Understanding Zones
The Graphiant Edge has an in-built concept of security zones. These zones have a 1-to-1 mapping to LAN segments allowing you to control how traffic across LAN segments is treated. When a LAN segment is configured on a device, a zone is automatically created for that LAN segment and appears under the security policy view. This zone can be used to apply security policies to traffic of this LAN segment.
The Graphiant Edge has some special zones to handle special use cases:
Zone-Self: A special zone that applies to any traffic destined to the Edge CPU
Zone-DIA: A special zone that applies to any traffic using Direct Internet Access
NGFW with Other Features
NGFW and Extranet
The Extranet service requires the NGFW to be explicitly configured by the user. By default, when the Extranet service is enabled the NGFW drops all Extranet traffic with its implicit rule. To allow Extranet traffic through, you will need to configure the NGFW appropriately.
NGFW and Control Plane
When applying security policy rules to the 'Zone-Self' the rules also apply to control traffic. Control plane protocol traffic such as BGP, OSPF, VRRP needs to be explicitly allowed if the NGFW is configured for the 'Zone-Self' and the zone where these control protocols are running.
NGFW Default Rule Matrix
The following matrix shows the default rule action, in a security policy, for different zone pairs. Zone A and Zone B are example user zones; Zone Self and Zone DIA are special Graphiant zones.
Zone A | Zone B | Zone Self | Zone DIA | |
Zone A | Accept | Reject | Accept | Accept |
Zone B | Reject | Accept | Accept | Accept |
Step 1: Locating Security Policy Zones in the Graphiant Portal
From the Home screen, navigate to the Edge Configuration screen by one of the following:
Locate the "Configurations" section within the Quickstart area of the screen; select 'Configure Edges'.
or
Click 'Configure' in the sidebar; select 'Devices'.
.png)
This will take you to the ‘Configuration’ page of the Graphiant Portal where you will be able to view all Active, Staged, and Deactivated Edges. From here you will be able to select among the Active Edges which Edge(s) you would like to be configured with Firewall.
On the left-hand side, select and click the Edge you wish to manage under the column 'Hostname.'
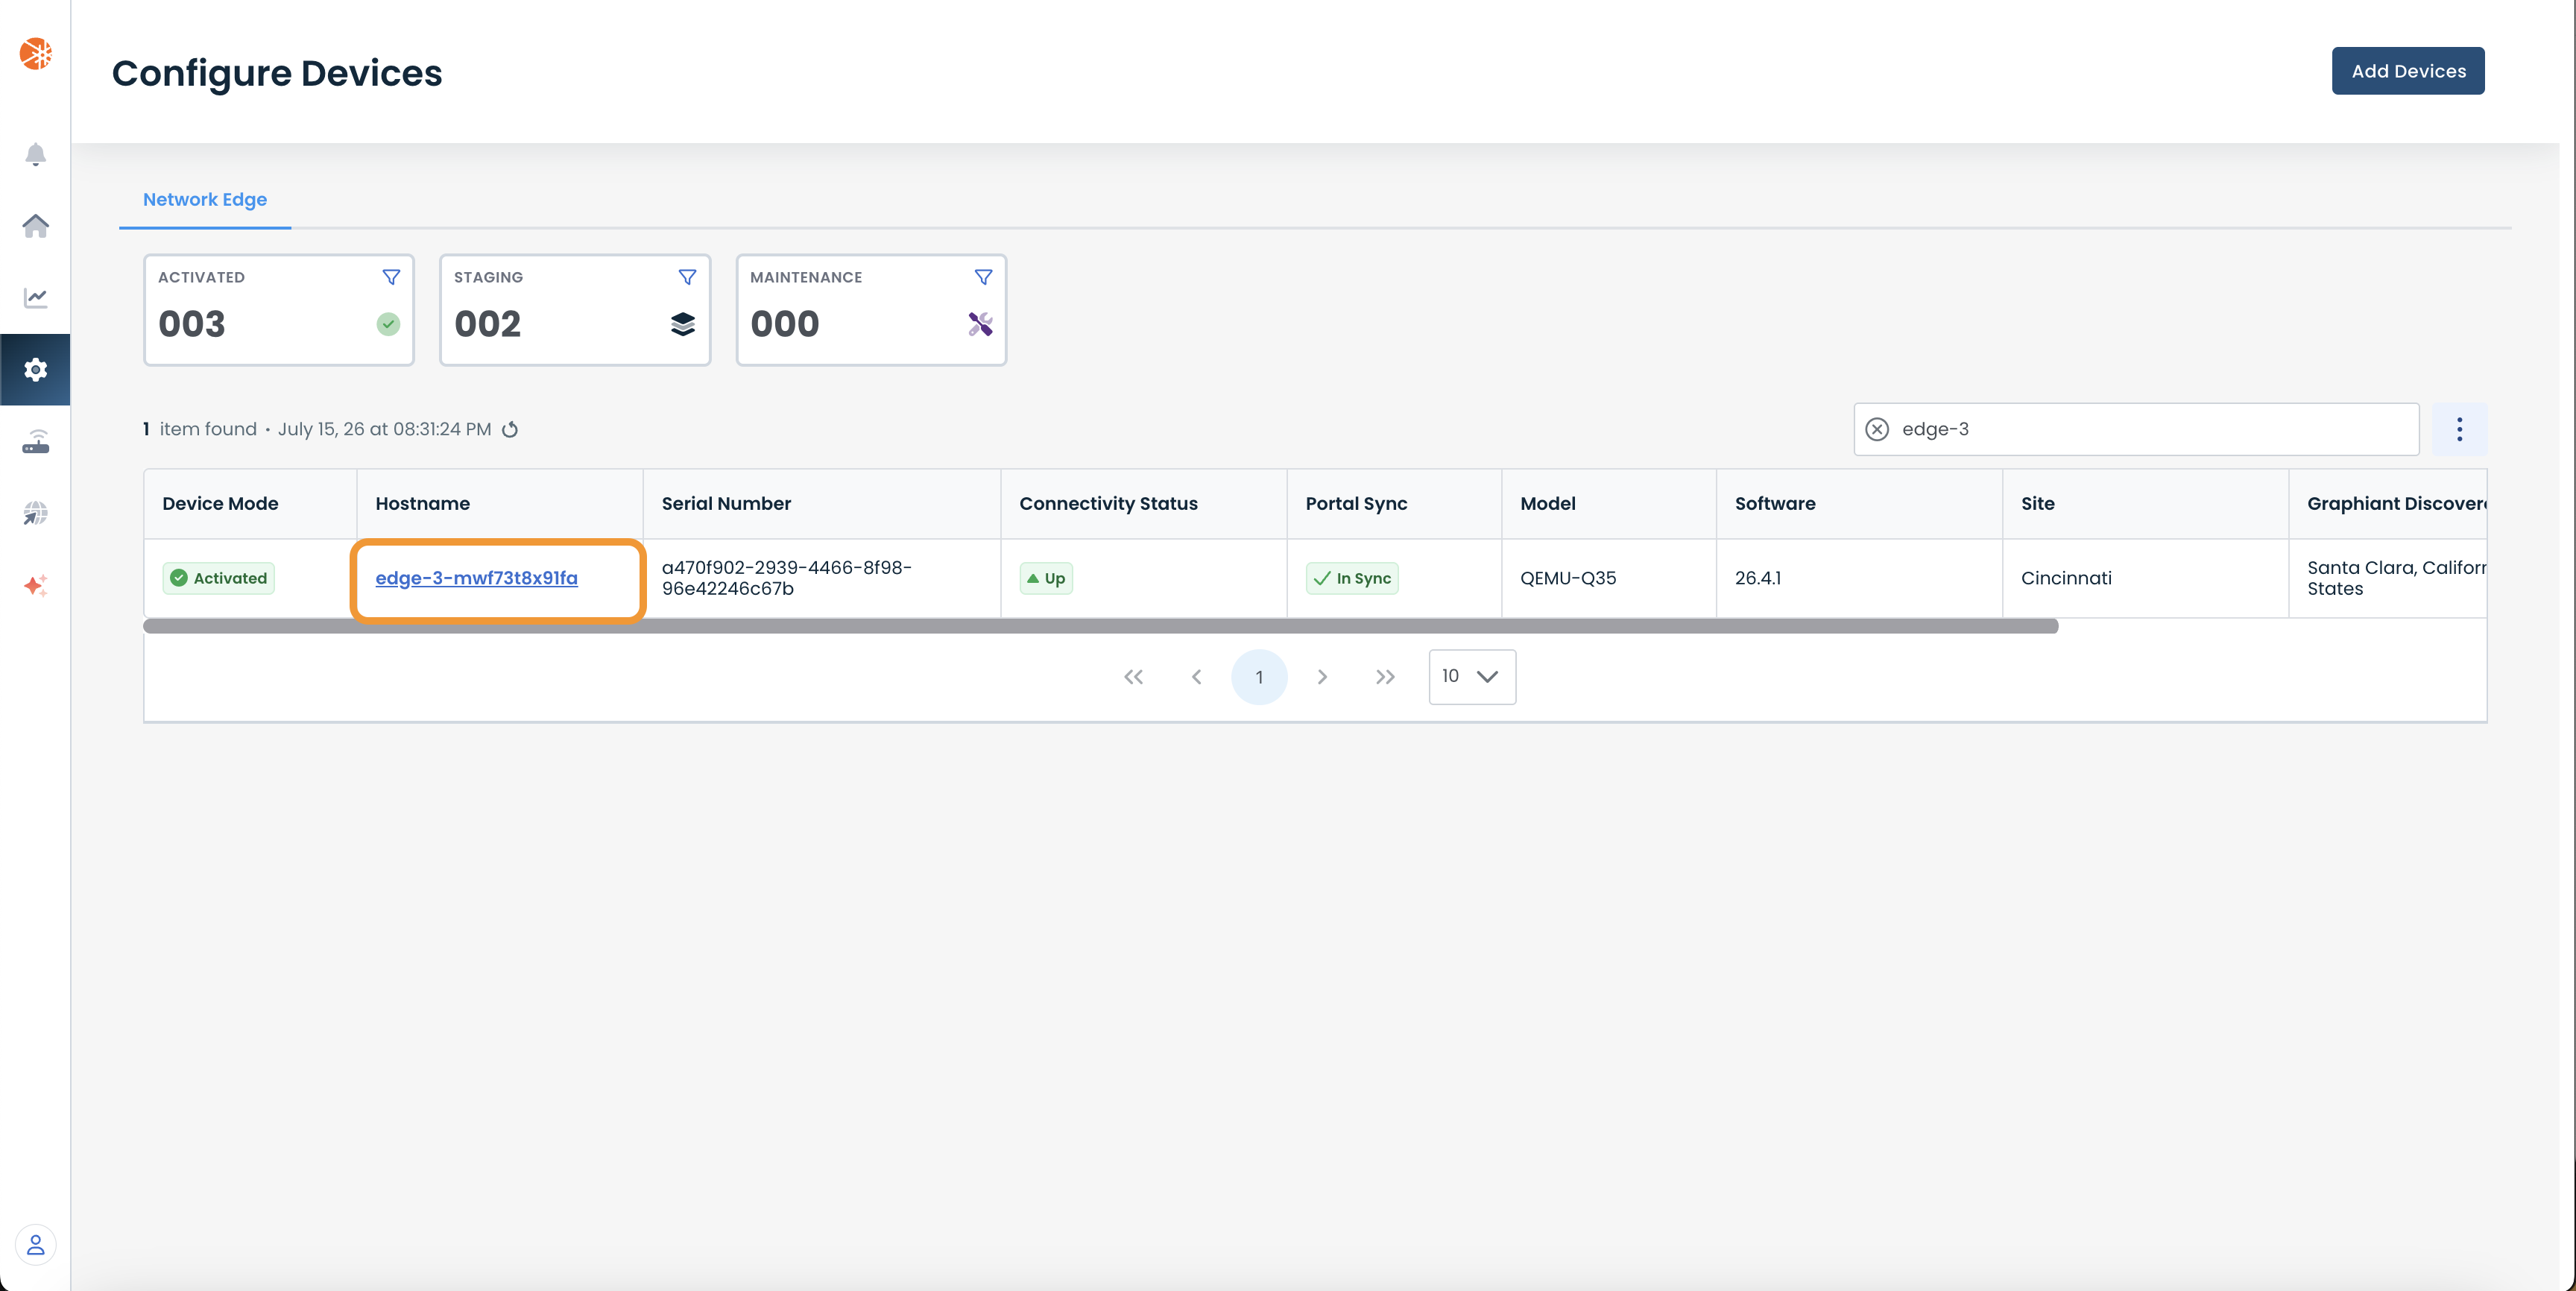
This will take you onto a Configuration page with a focus on the Edge you have just chosen.
Here you will see a list of headings along the lefthand side of the page, such as ‘Configure Network’, ‘Configure Services’, ‘Configure Policies’, etc.
From here, select ‘Configure Policies’ and select ‘Security Policy’ from the dropdown menu.
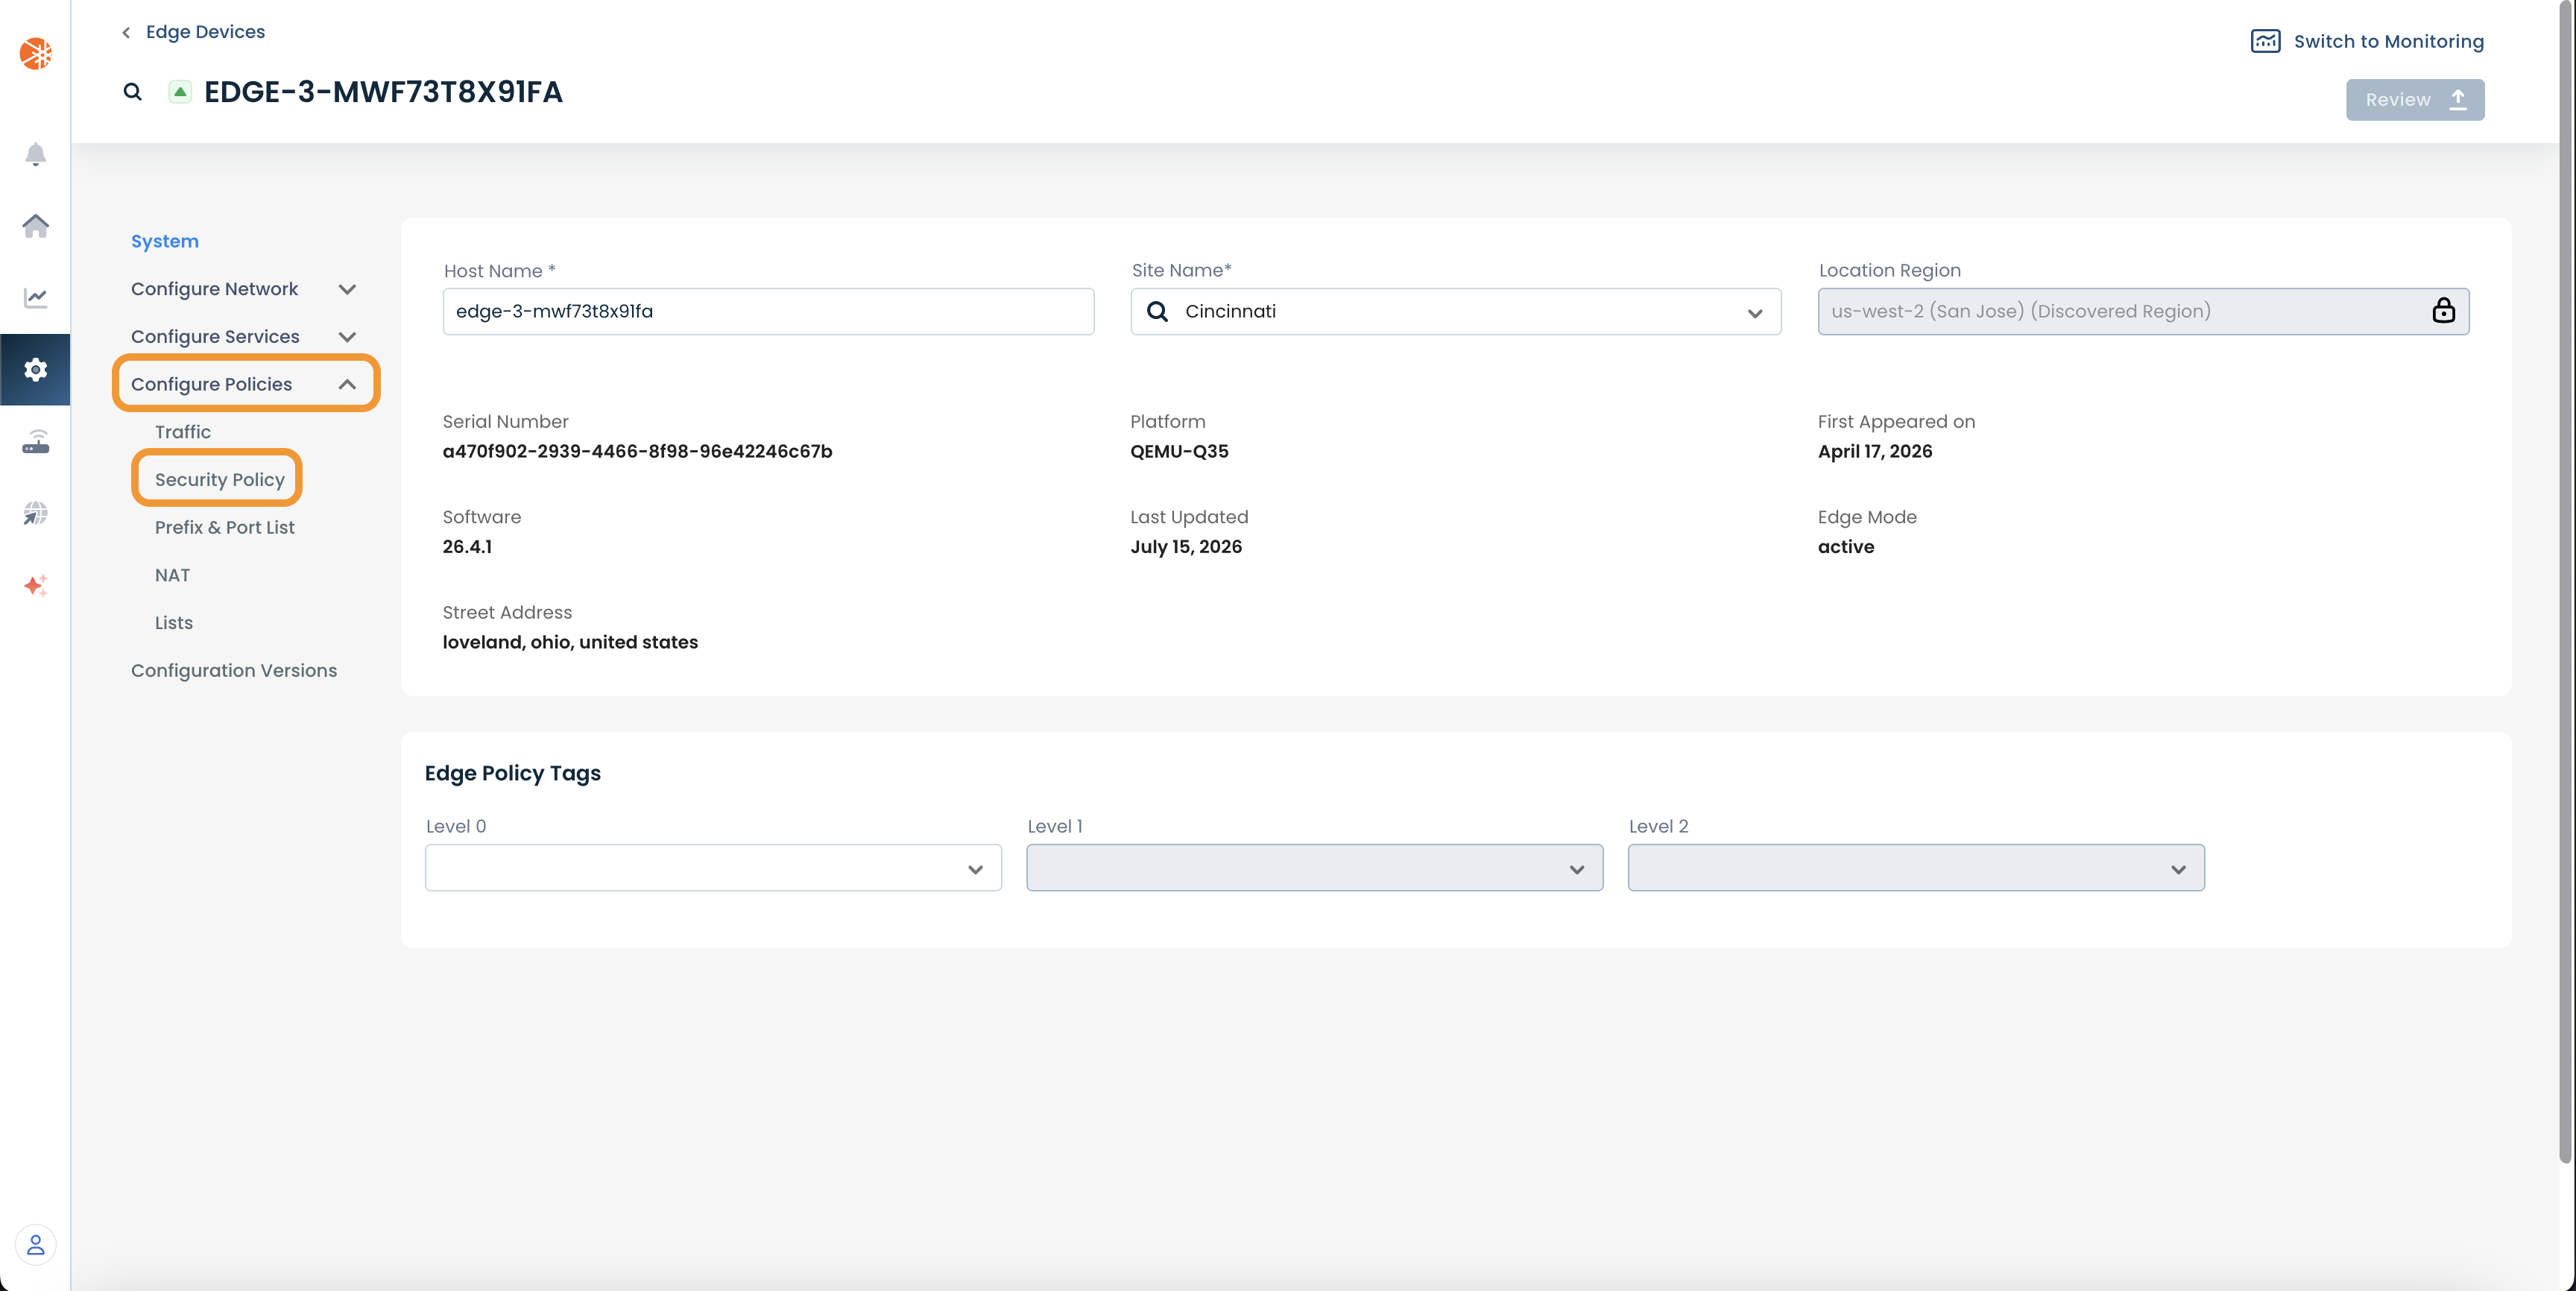
This will take you onto a Security Policies page dedicated to the chosen Edge.
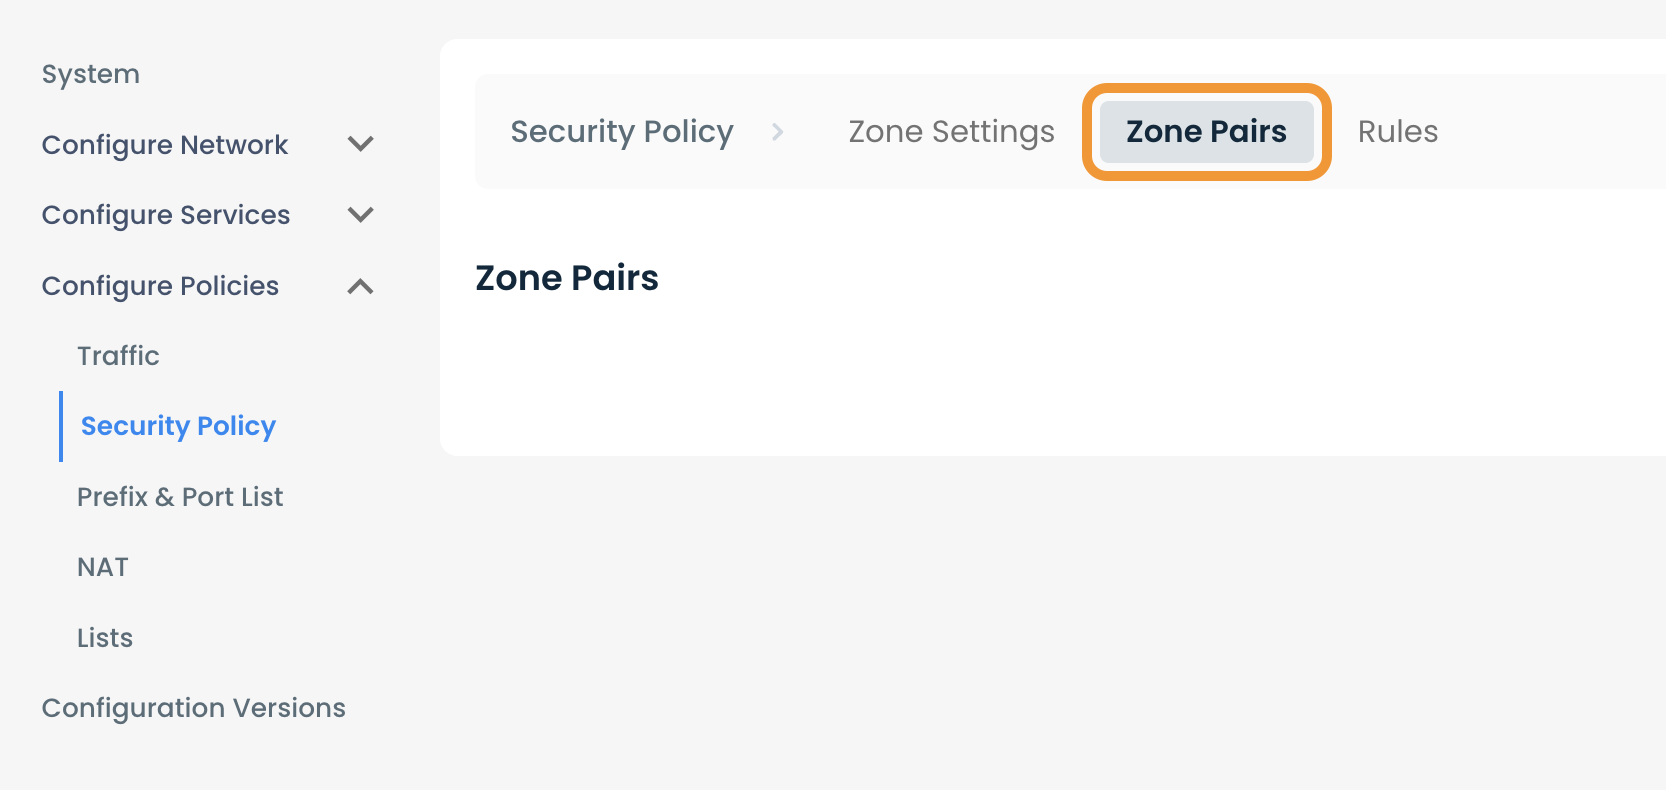
On the Security Policies page, you will see three available headings along the top of the page: ‘Zone Settings’, ‘Zone Pairs’ and ‘Rules’.
To manage Zone Firewall settings, select and click ‘Zone Settings’.
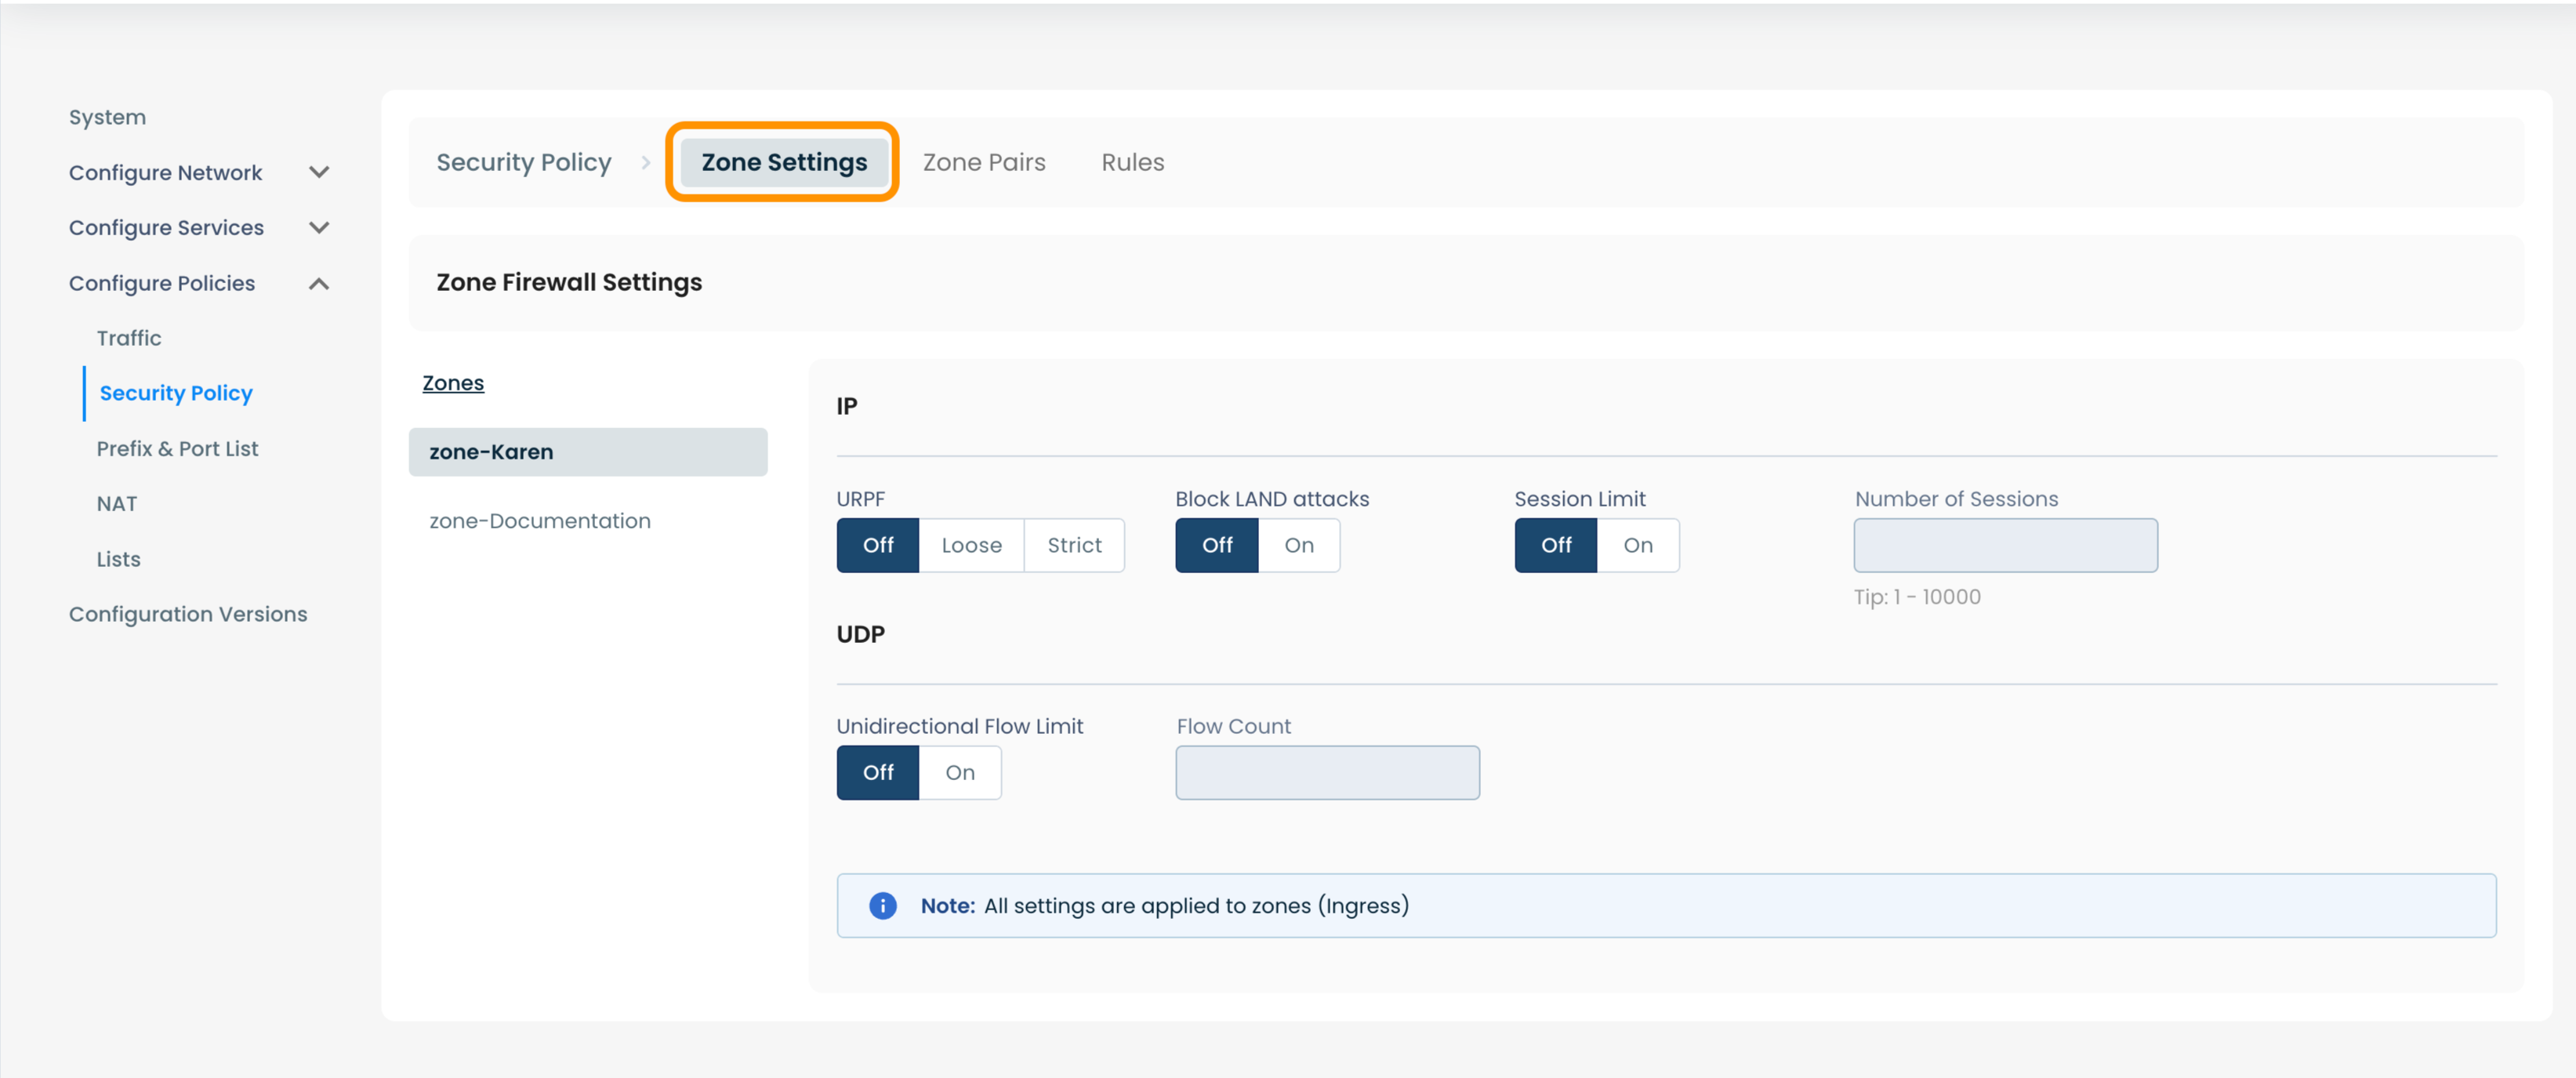
Here you will be able to manage the settings for each of the Zones you create.
To manage and create Zone Pairs, select and click ‘Zone Pairs’.
Step 2: Setting Up Security Policy Zones in the Graphiant Portal
Zone Pairs
In order for a Rule Set to take effect it must be associated to a Zone Pair. A Zone Pair is a set of the source and destination zones for the traffic referenced by the Rule Set. The zone pair also specifies the direction of the traffic; A → B is different from B → A. When a Zone Pair is created, the portal automatically creates a zone pair in the reverse direction as most use cases require rules to exist in both directions.
From within ‘Configure Policies’ on the ‘Security Policy’ page, select ‘Zone Pairs’ amongst the available headings along the top of the page.
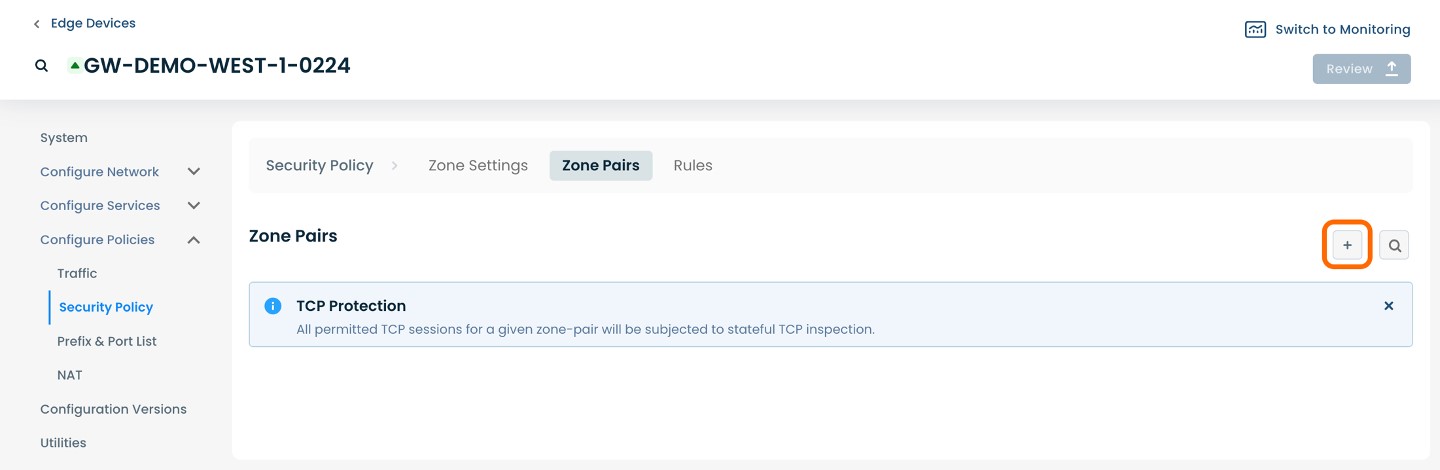
To add a Zone Pair, select and click the (+) icon on the righthand side.
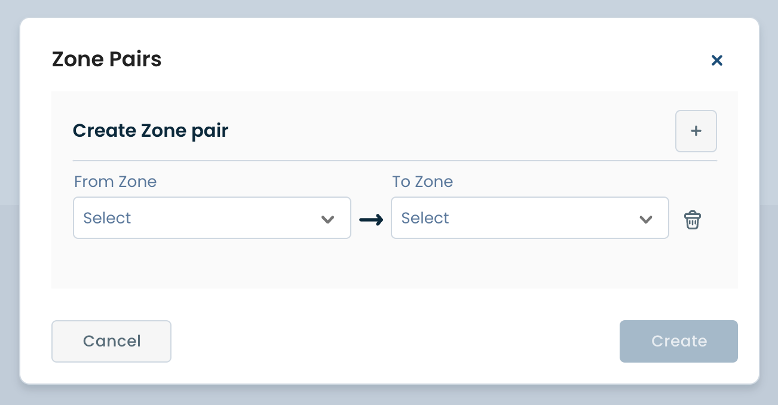
The page will propagate with a window of required fields; below are descriptors for each of the fields required.
(An * indicates a required field.)
From Zone*: Choose a source zone from which the packet is originating.
To Zone*: Choose a destination zone from which the packet is destined.
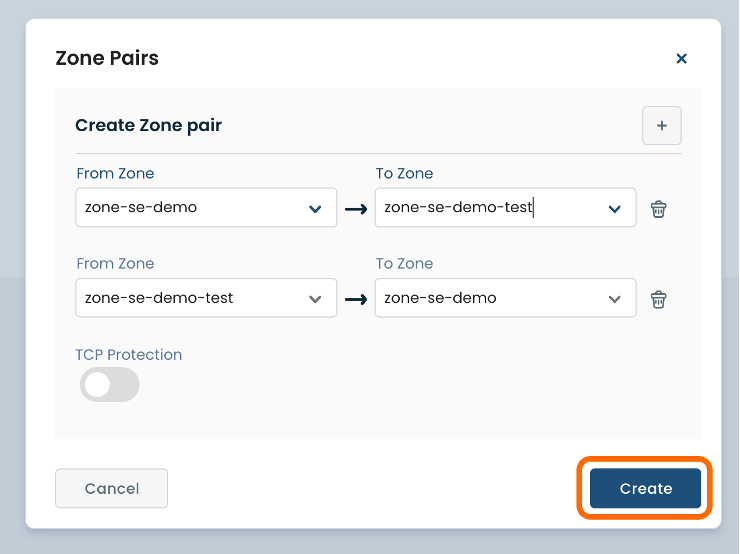
Once these fields have been filled in, fields of the reverse direction zone pair are also automatically brought up and propagated.
Note:
Here, you will also be able to toggle On/Off TCP Protection, which enables stateful TCP inspection.
After you have filled in the required fields, select ‘Create’ to finalize.
The ‘Security Policy’ page dedicated to ‘Zone Pairs’ will now display the created Zone Pair.
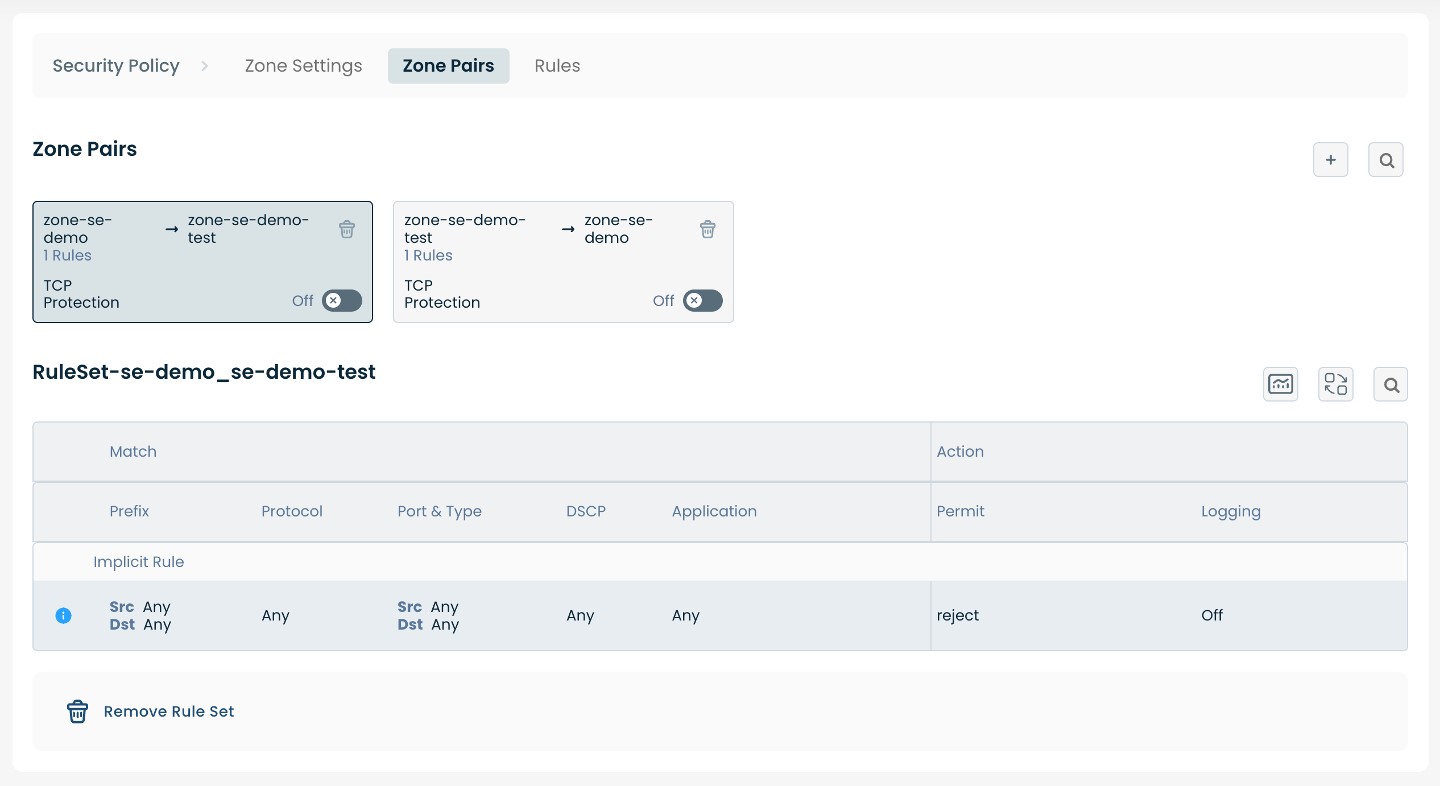
Here you will be able to toggle On/Off TCP Protection for each perspective Zone Pair, edit/remove any existing Zone Pairs, as well as manage Rule Sets associated.
Zone Settings
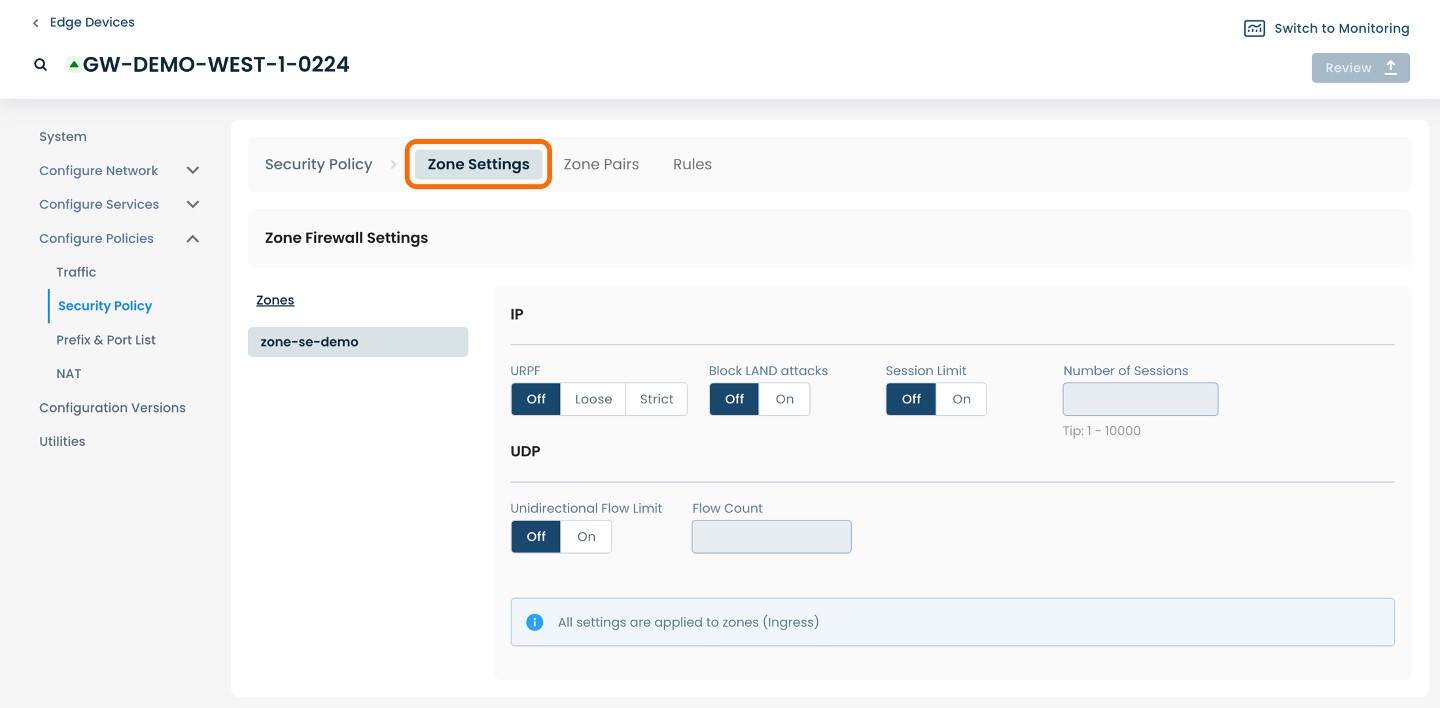
From within ‘Configure Policies’ on the ‘Security Policy’ page, select ‘Zone Settings’ amongst the available headings along the top of the page.
The page will propagate two sections of required fields pertaining to Zone Firewall Settings.
These settings apply to traffic that is originating or terminating in the chosen zone. These settings apply regardless of whether the traffic goes from one zone to another or stays within the zone.
Below are descriptors for each of the fields required.
IP
URPF: Enable URPF to prevent spoofing attacks; choose either Loose mode, Strict mode, or toggle ‘Off’.
Block LAND attacks: block LAND DoS attacks (a LAND attack is a type of DoS where the send sets the source and destination addresses of a packet to be the same); choose either ‘Off’ or ‘On’.
Session Limit: Whether or not to add a limit for the number of active IP sessions in this zone.
Number of Sessions: If the IP session limit is enabled, specify here the number to be used for the limit.
UDP
Unidirectional Flow Limit: Whether or not to add a limit for the number of UDP flows in this zone.
Flow Count: If the UDP flow limit is enabled, specify here the number to be used for the limit.
Step 3: Review & Apply
Once all required fields are filled in, the selected Edge will be ready to begin utilizing Firewall, however you will first need to review and apply all changes made.

On the top right hand corner, choose from the following options:
‘Discard’ to discard changes made.
‘Save as Draft’ to save changes made to be implemented at a later time.
‘Review’ to review and apply changes made for immediate deployment.