What is Extranet?
The extranet service allows users to connect multiple LAN segments together while providing secured, controlled access between the LAN segments. The service can be used to provide connectivity between different departments or to provide access to trusted customers, partners and businesses. There are two different types of extranet services supported in the Graphiant Portal:
Local: This type of extranet allows you to connect multiple LAN segments in the same site.
Enterprise: This type of extranet allows you to connect multiple LAN segments in different sites.
Extranet in the Graphiant Portal
Step 1: Locating Extranet in the Graphiant Portal
From the Home screen, you can navigate to the Extranet Service screen by one of the following:
Locate the "Services" section within the “Quickstart” area of the screen; select 'Create Extranet Service'.
or
Click 'Services' in the sidebar; select 'Extranet'.
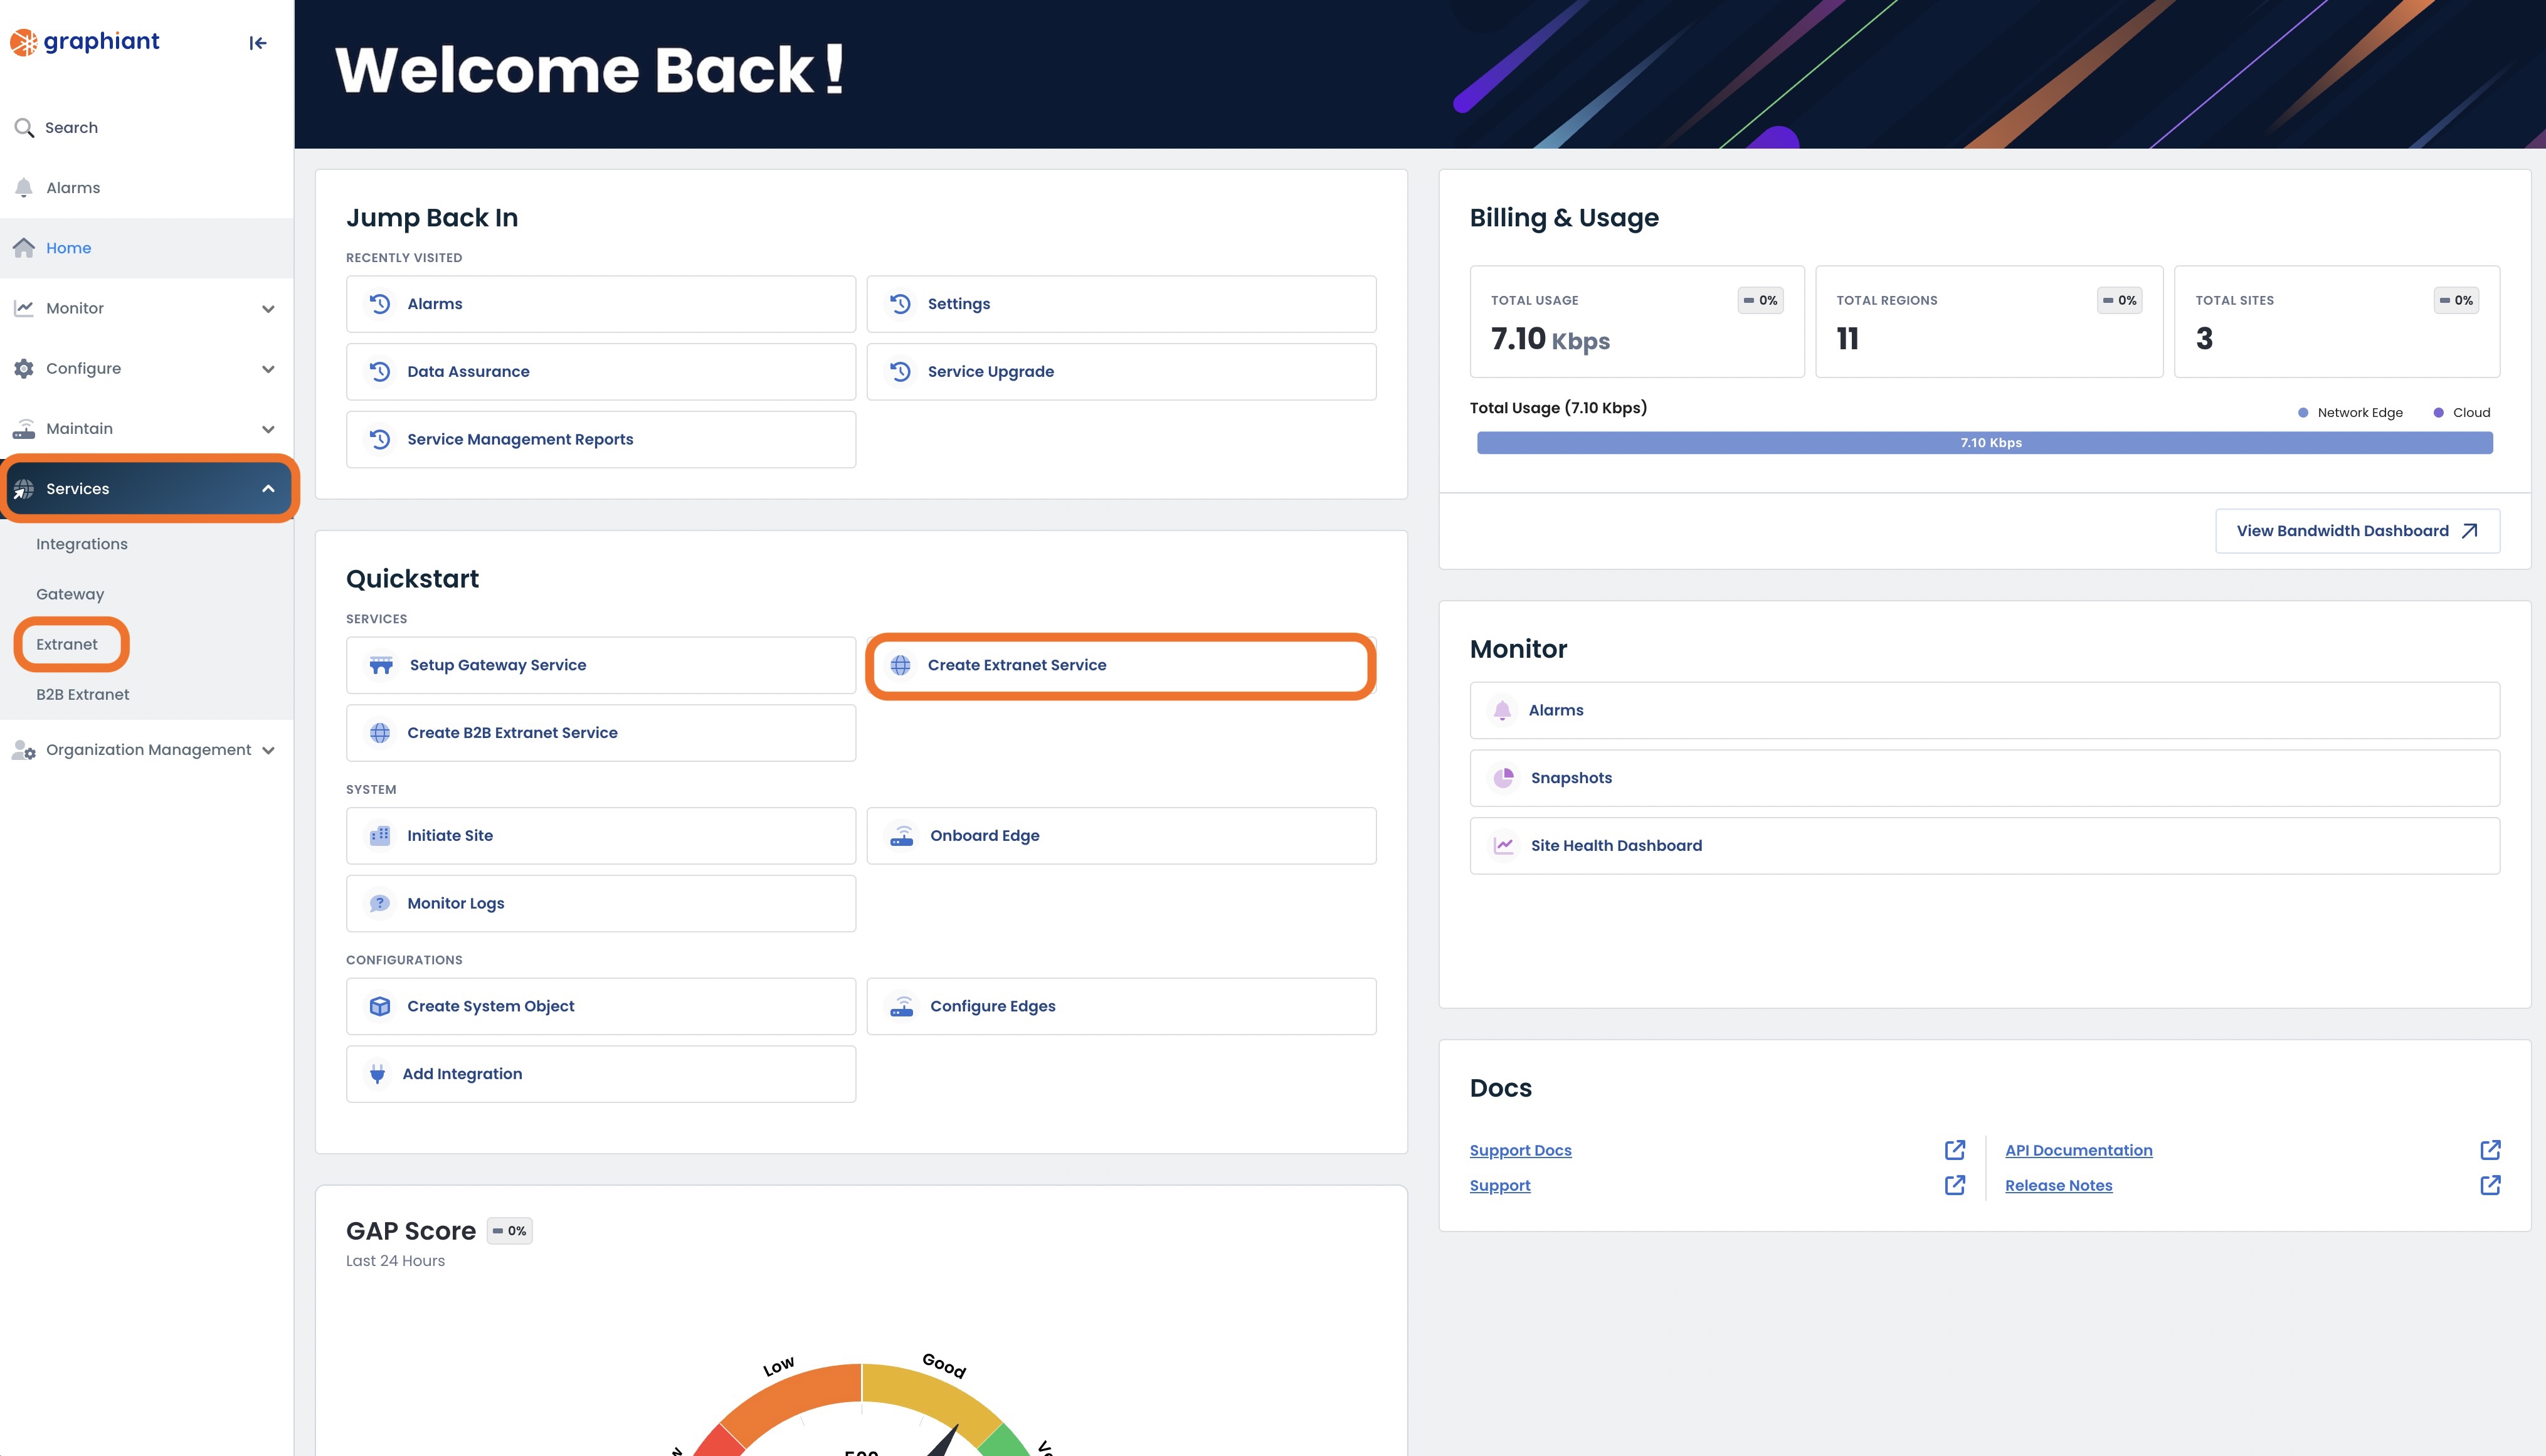
This will take you to the ‘Extranet’ page of the Graphiant Portal where you will be able to view existing extranet policies as well as create new ones.
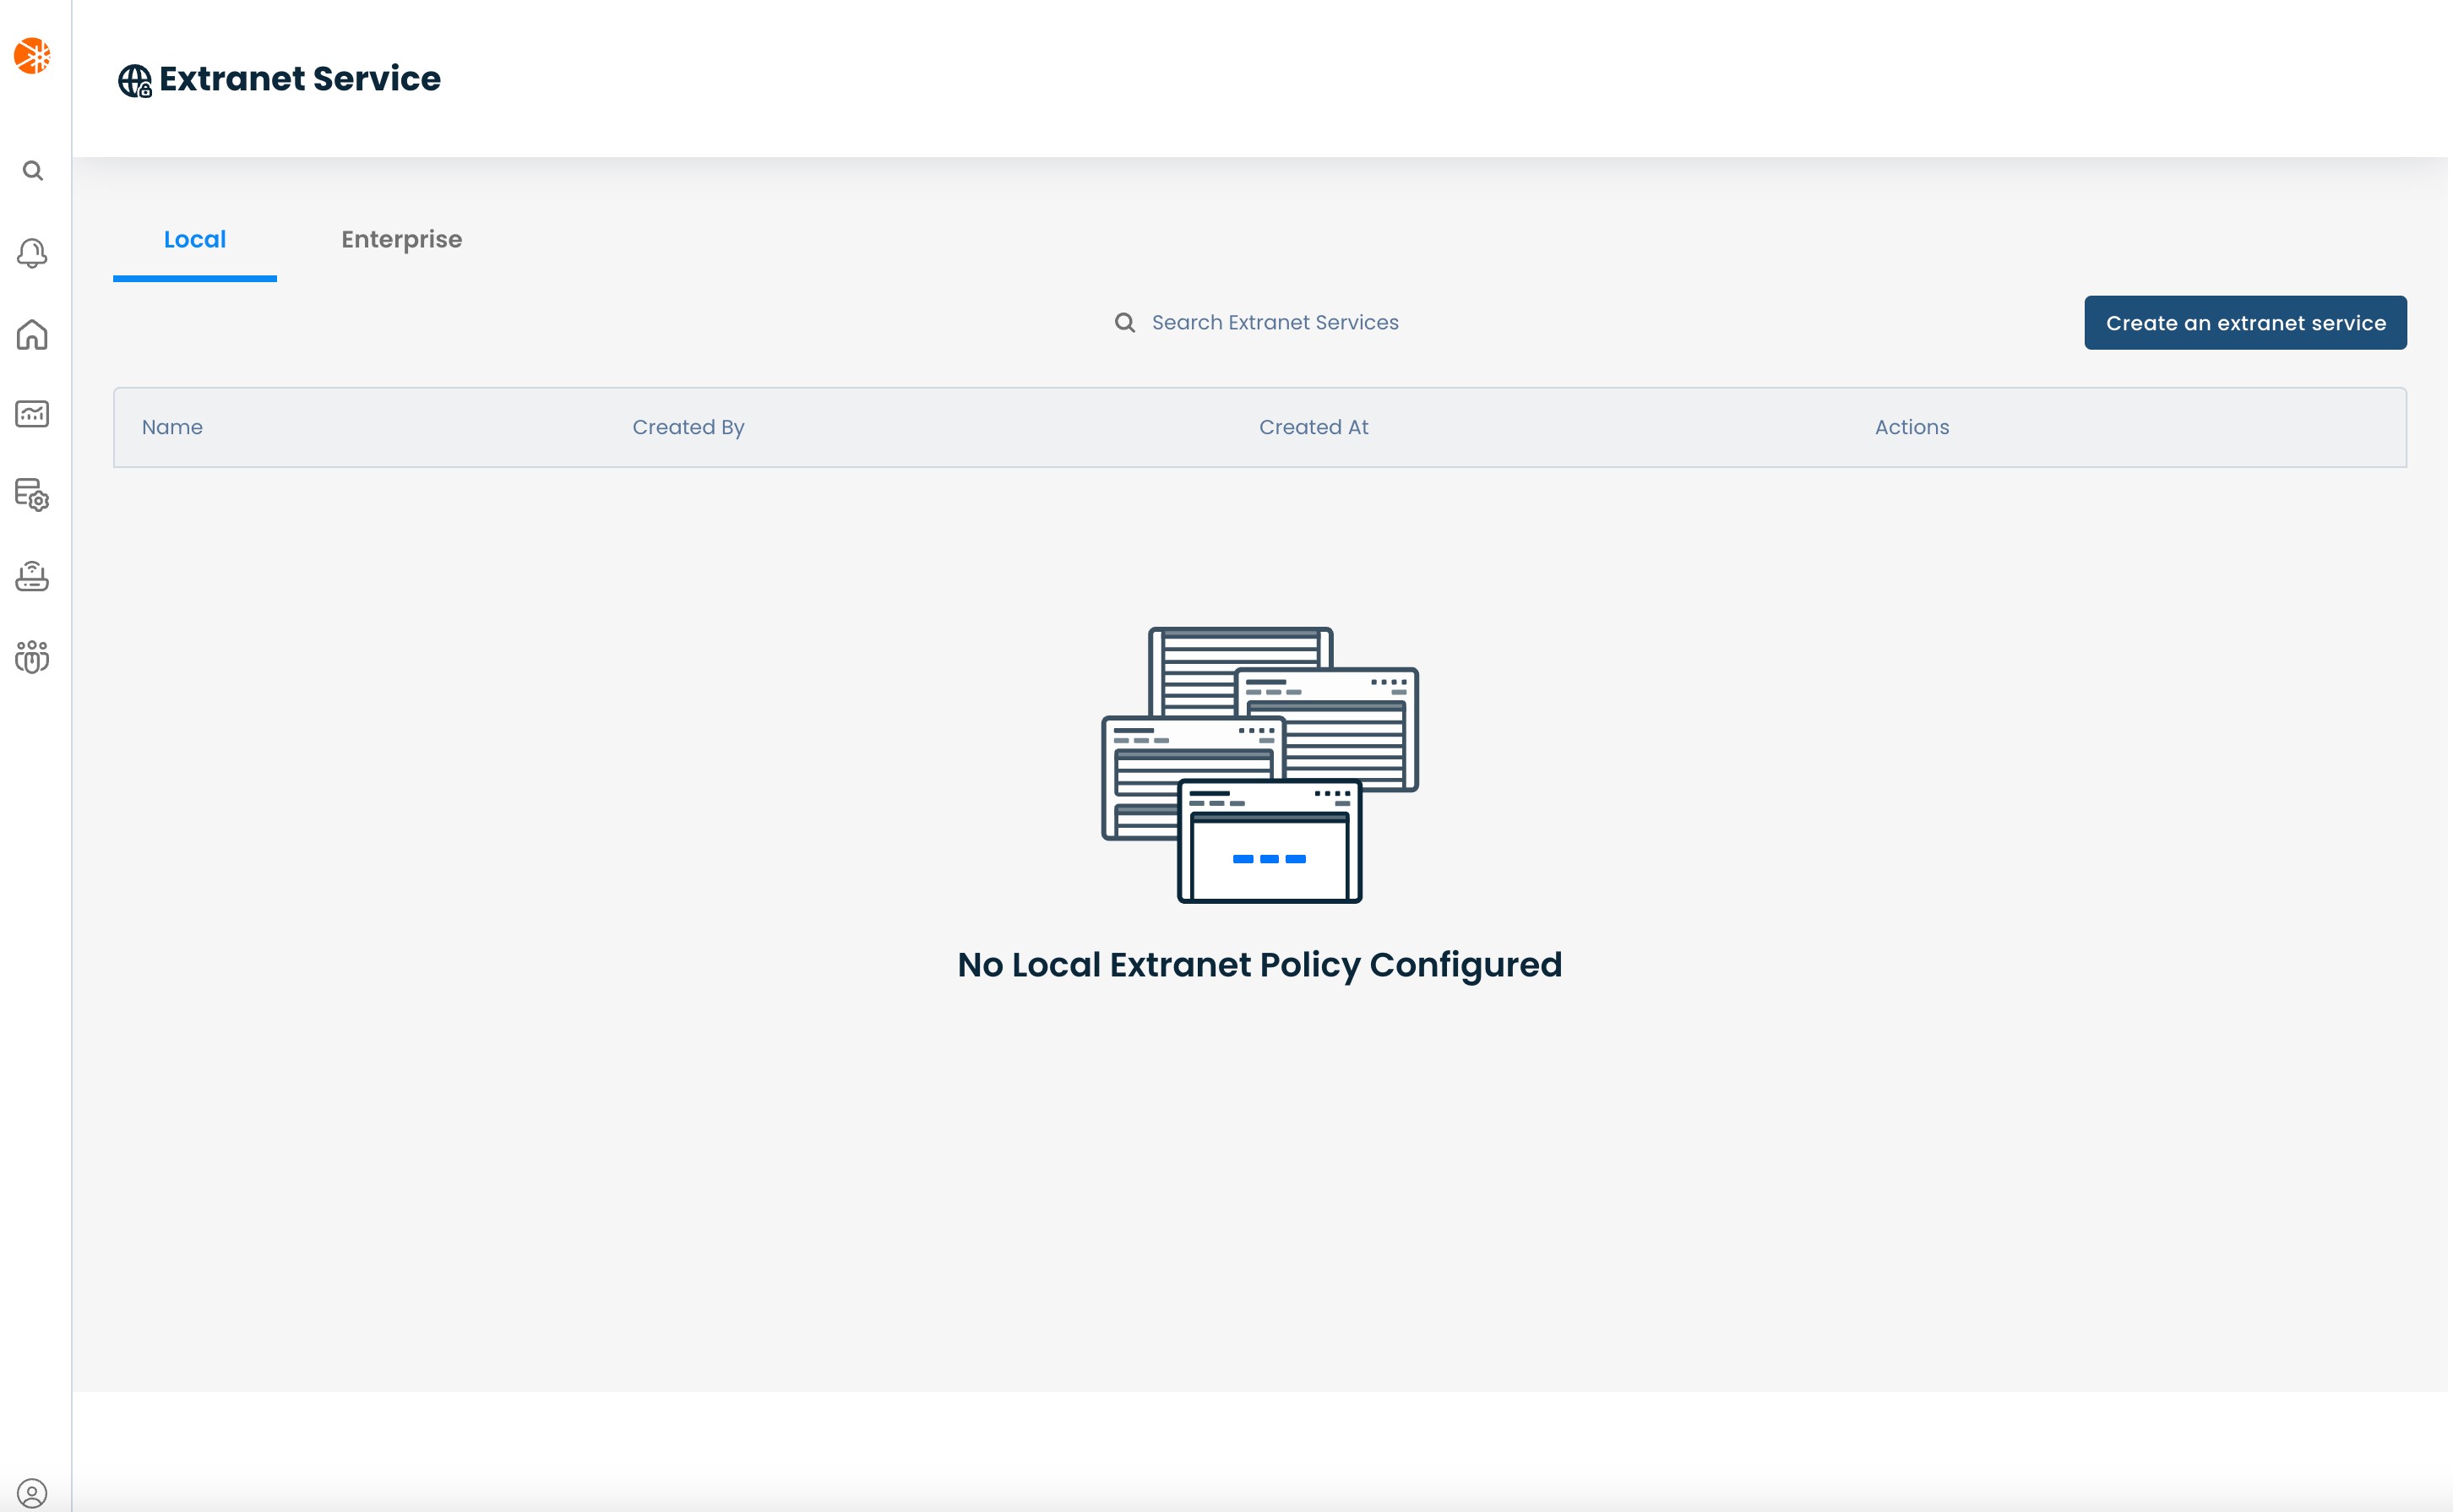
Step 2: Configuring Extranet in the Graphiant Portal
The extranet service is configured at a site level and not at an edge level; this means that the service policy is applied to a site and is inherited by all the Edges which are a part of that site.
Before configuring the extranet service you will need to make sure you have sites configured for the Edges.
You can configure the site for an edge in the 'System' section of the Edge configuration.
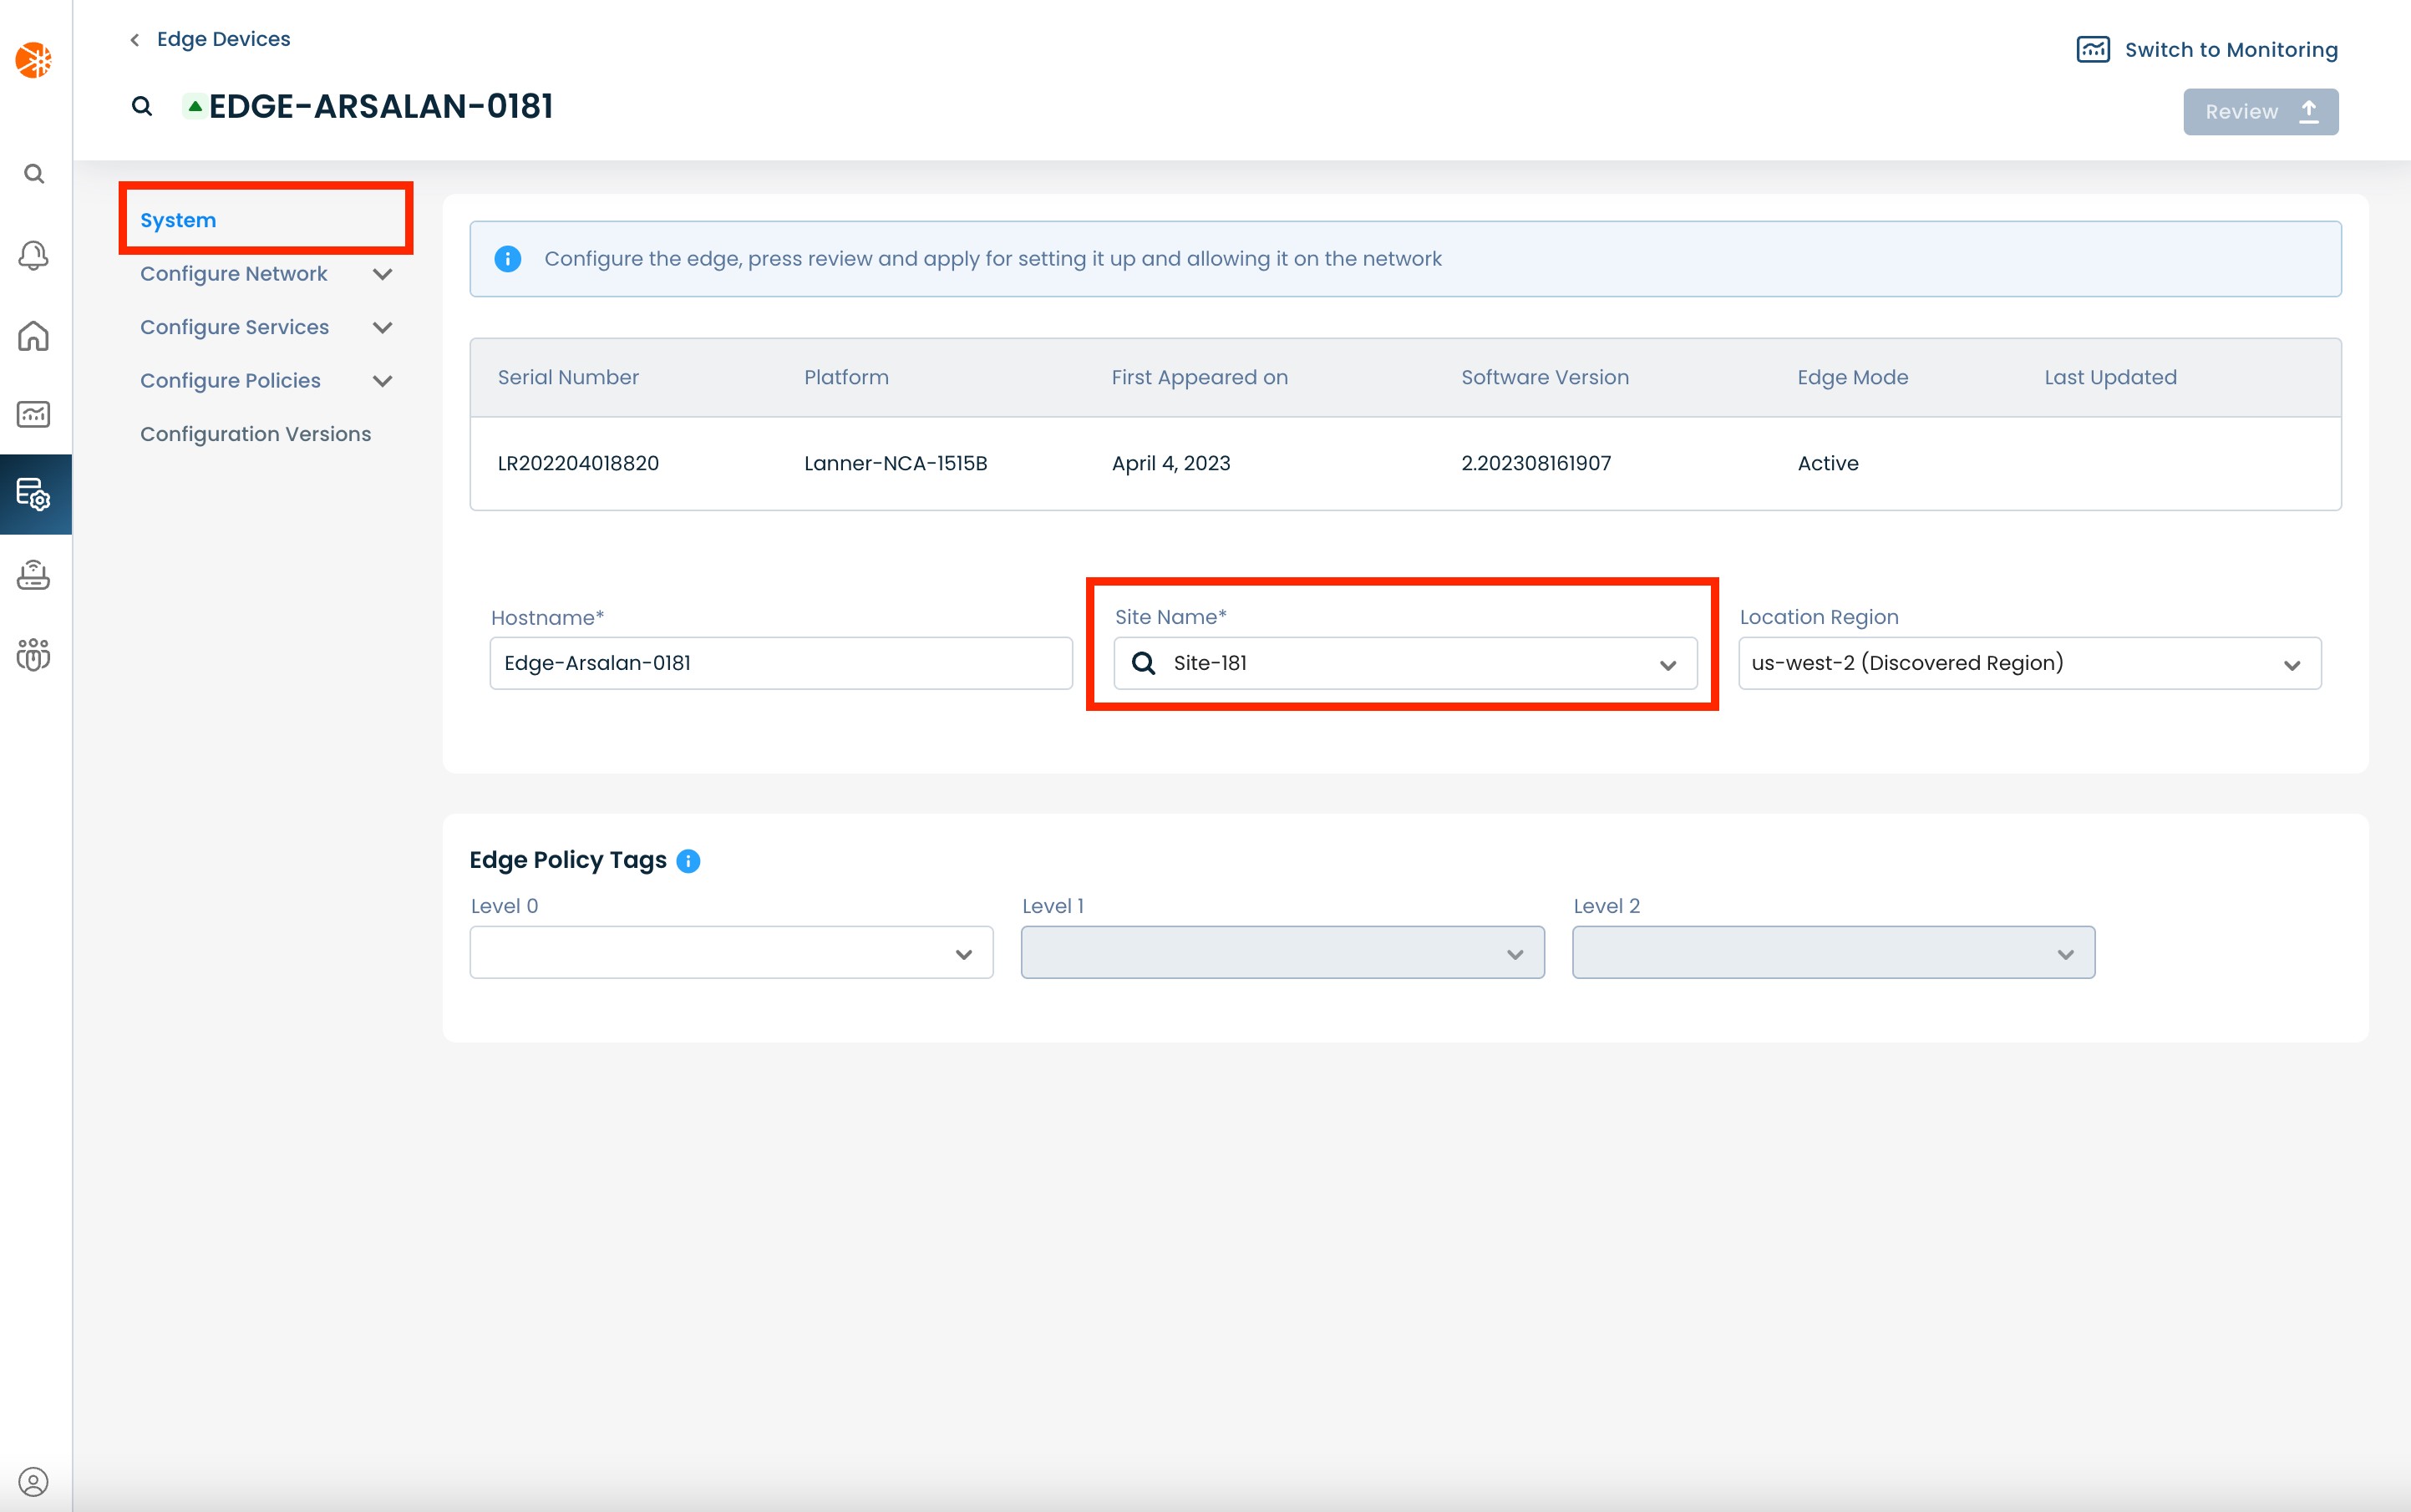
Step 2a: Configuring Local Extranet
To configure a 'Local' extranet service make sure you're on the 'Extranet' page and are on the 'Local' tab.
Then click the 'Create an extranet service' button.
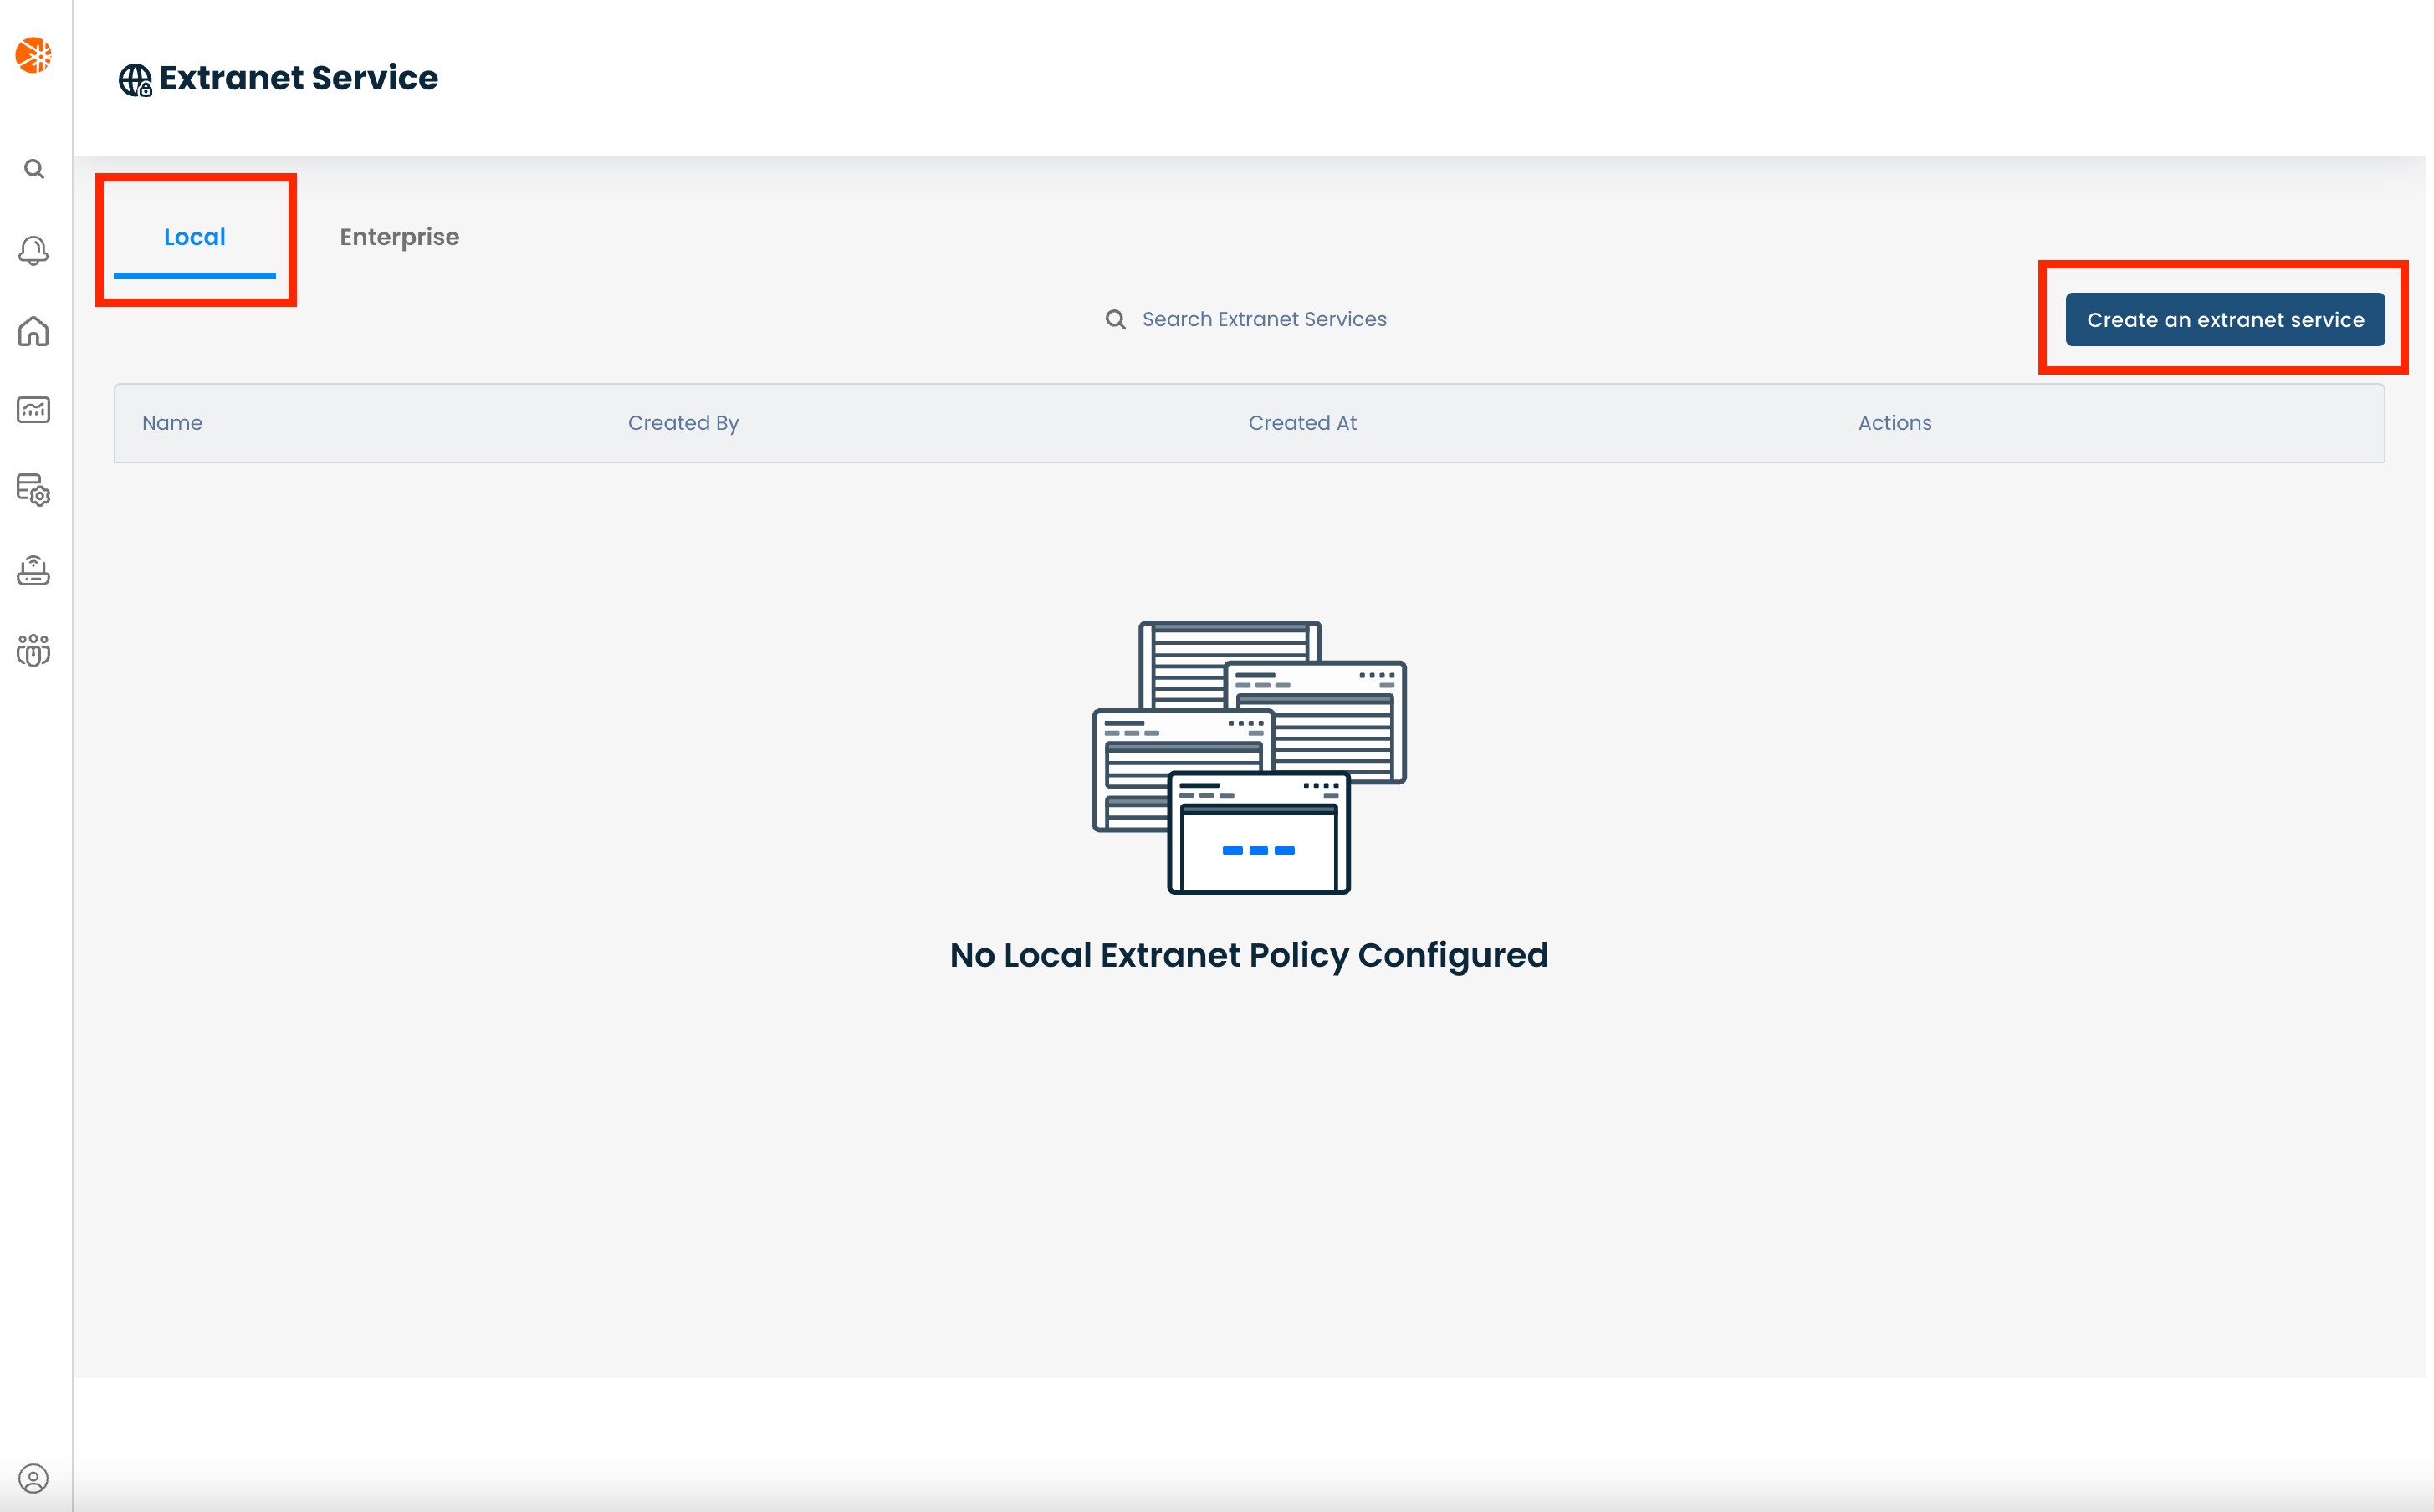
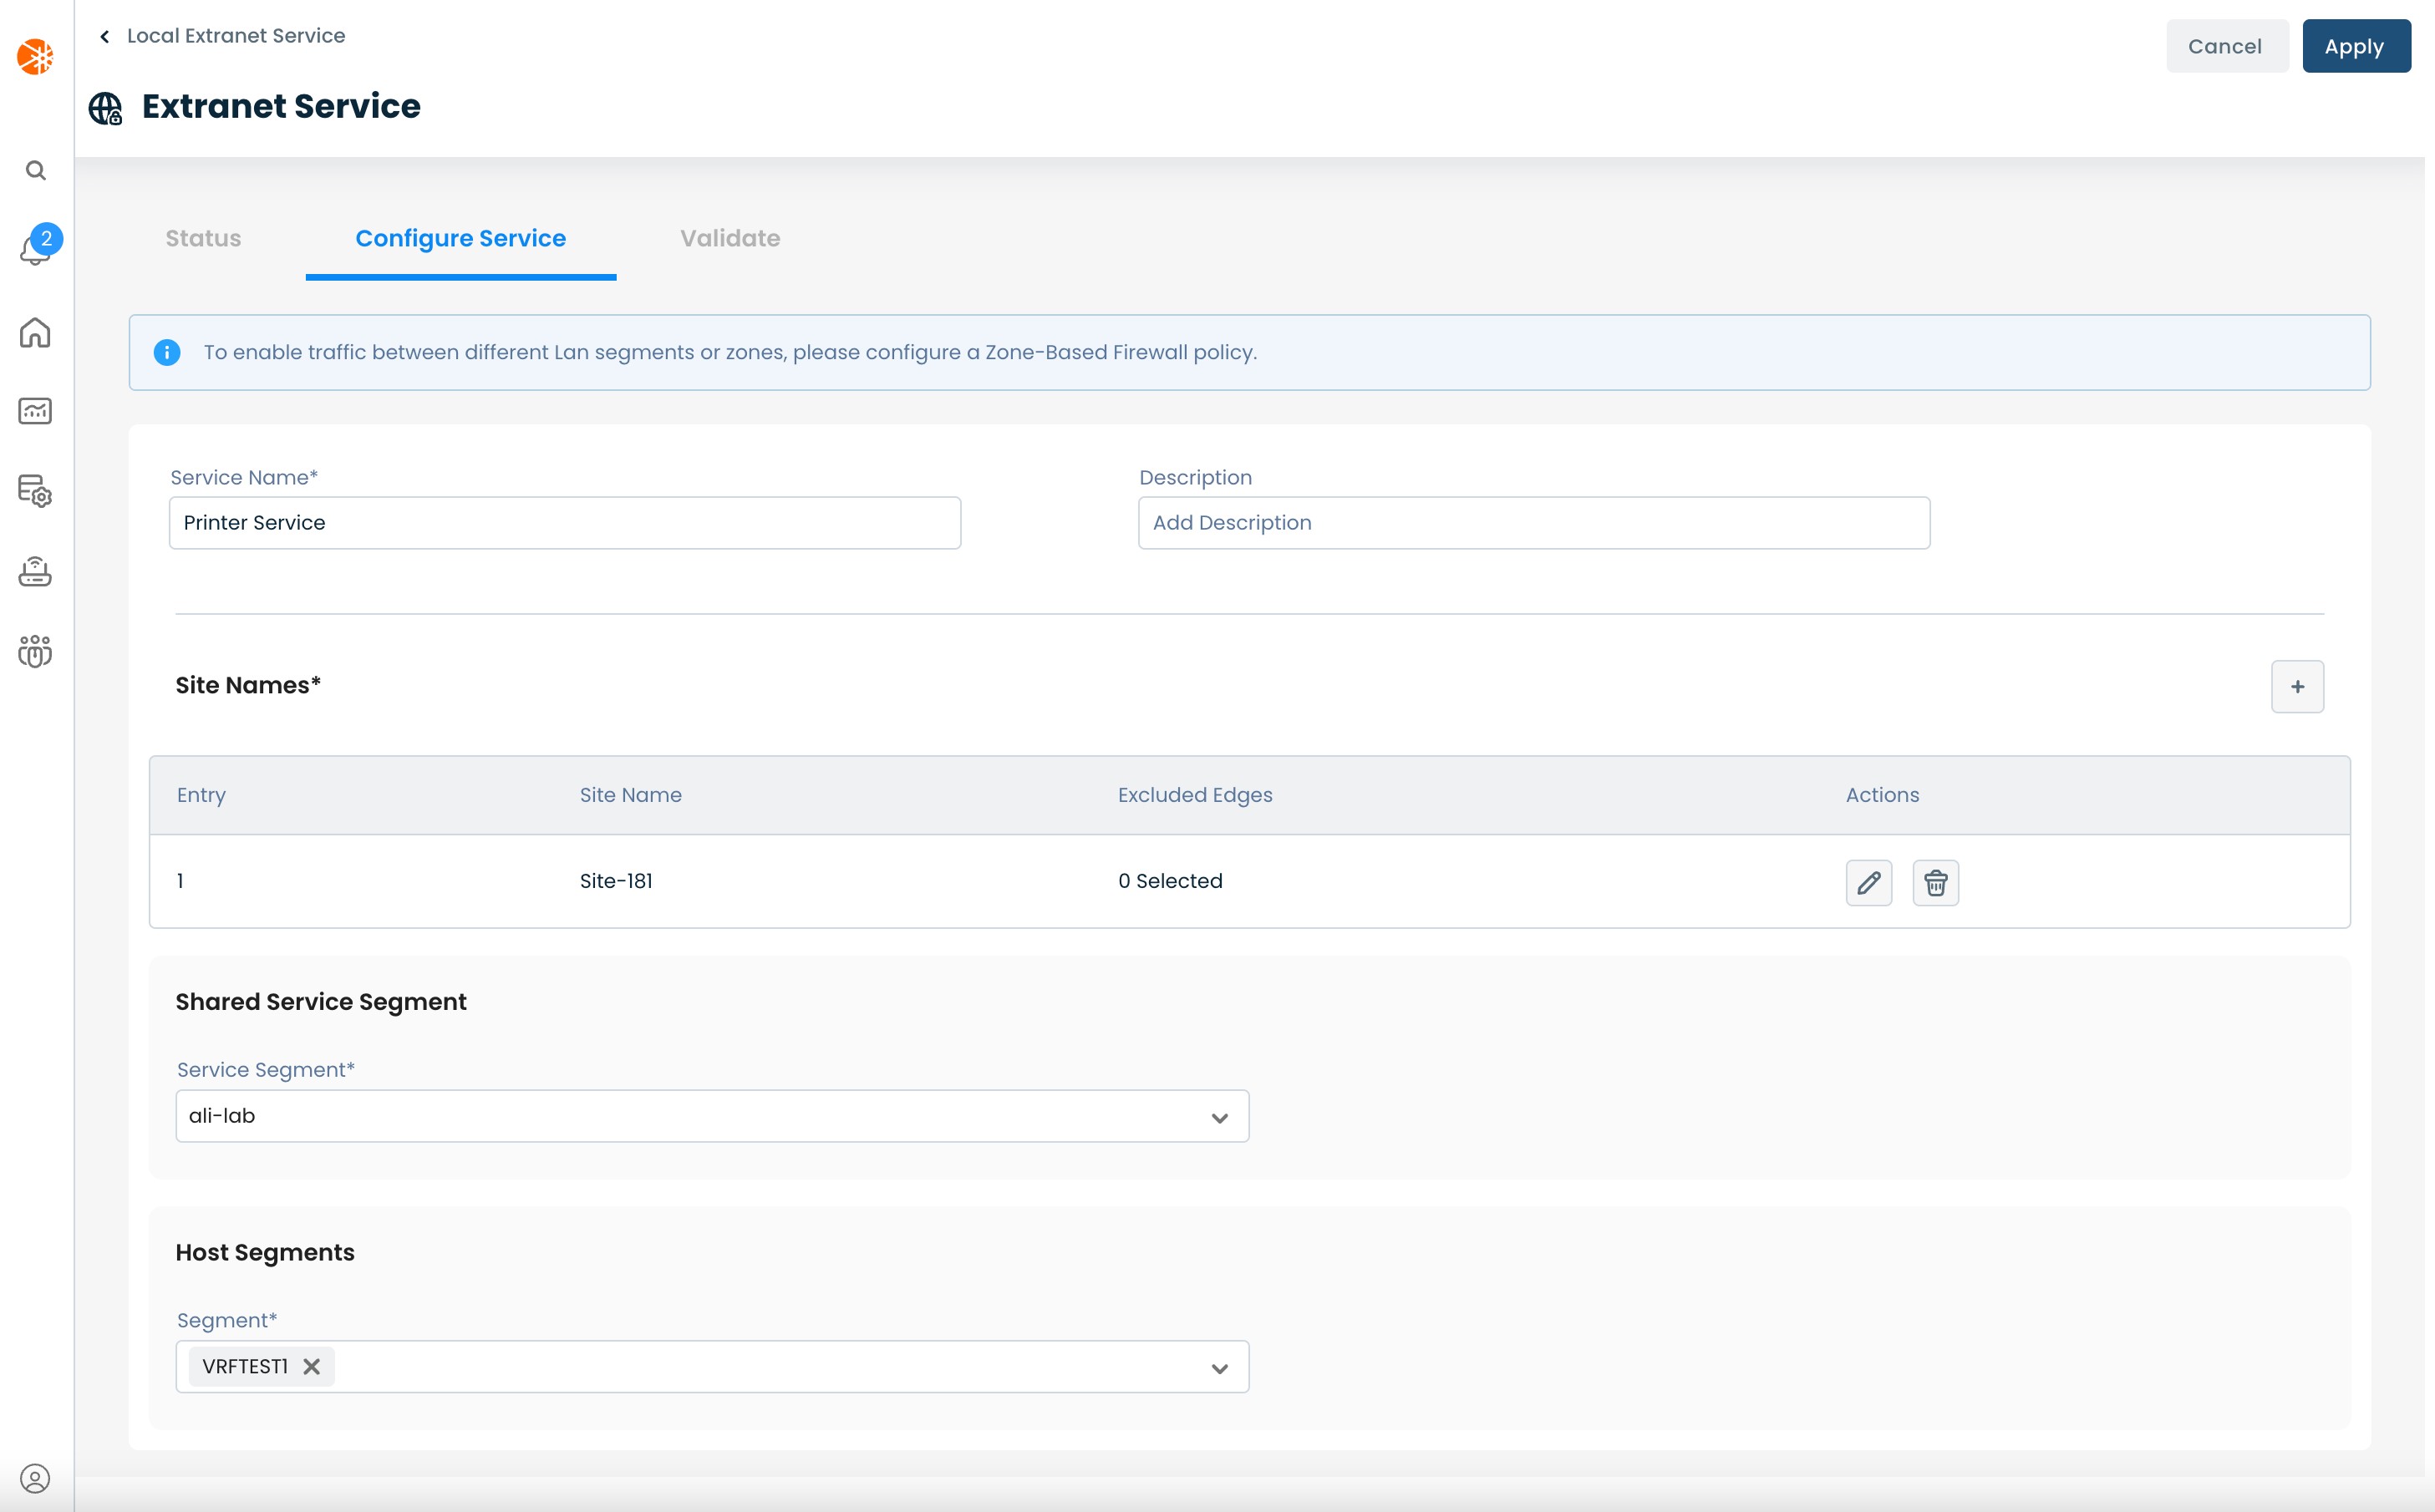
This will bring you to the “Configure Service” screen. This configuration has the following fields:
Service Name: User-defined name to use for the extranet service instance
Description: User-defined description to assign to this service
Site Names: The (+) button for this field only becomes available once you provide a service name. This brings up a pop-up modal which lets you choose sites, where you can enable this service. The modal provides a dropdown list of existing sites to choose from. While the 'Local' extranet service is local to a site you can choose multiple sites in the modal, this replicates the same extranet service to all the chosen sites while still enabling the service locally on the site.
Shared Service Segment: The LAN segment containing the shared service which other LAN segments need to access (for e.g: the printer segment); you can only choose one 'Shared Service Segment'. This dropdown is auto populated with LAN segments which are available in all the chosen sites.
Host Segments: The LAN segments which have hosts that need to access the shared service (for e.g: users at a branch); you can have multiple host segments all of whom need access to the same service segment. This dropdown is auto populated with LAN segments which are available in all the chosen sites.
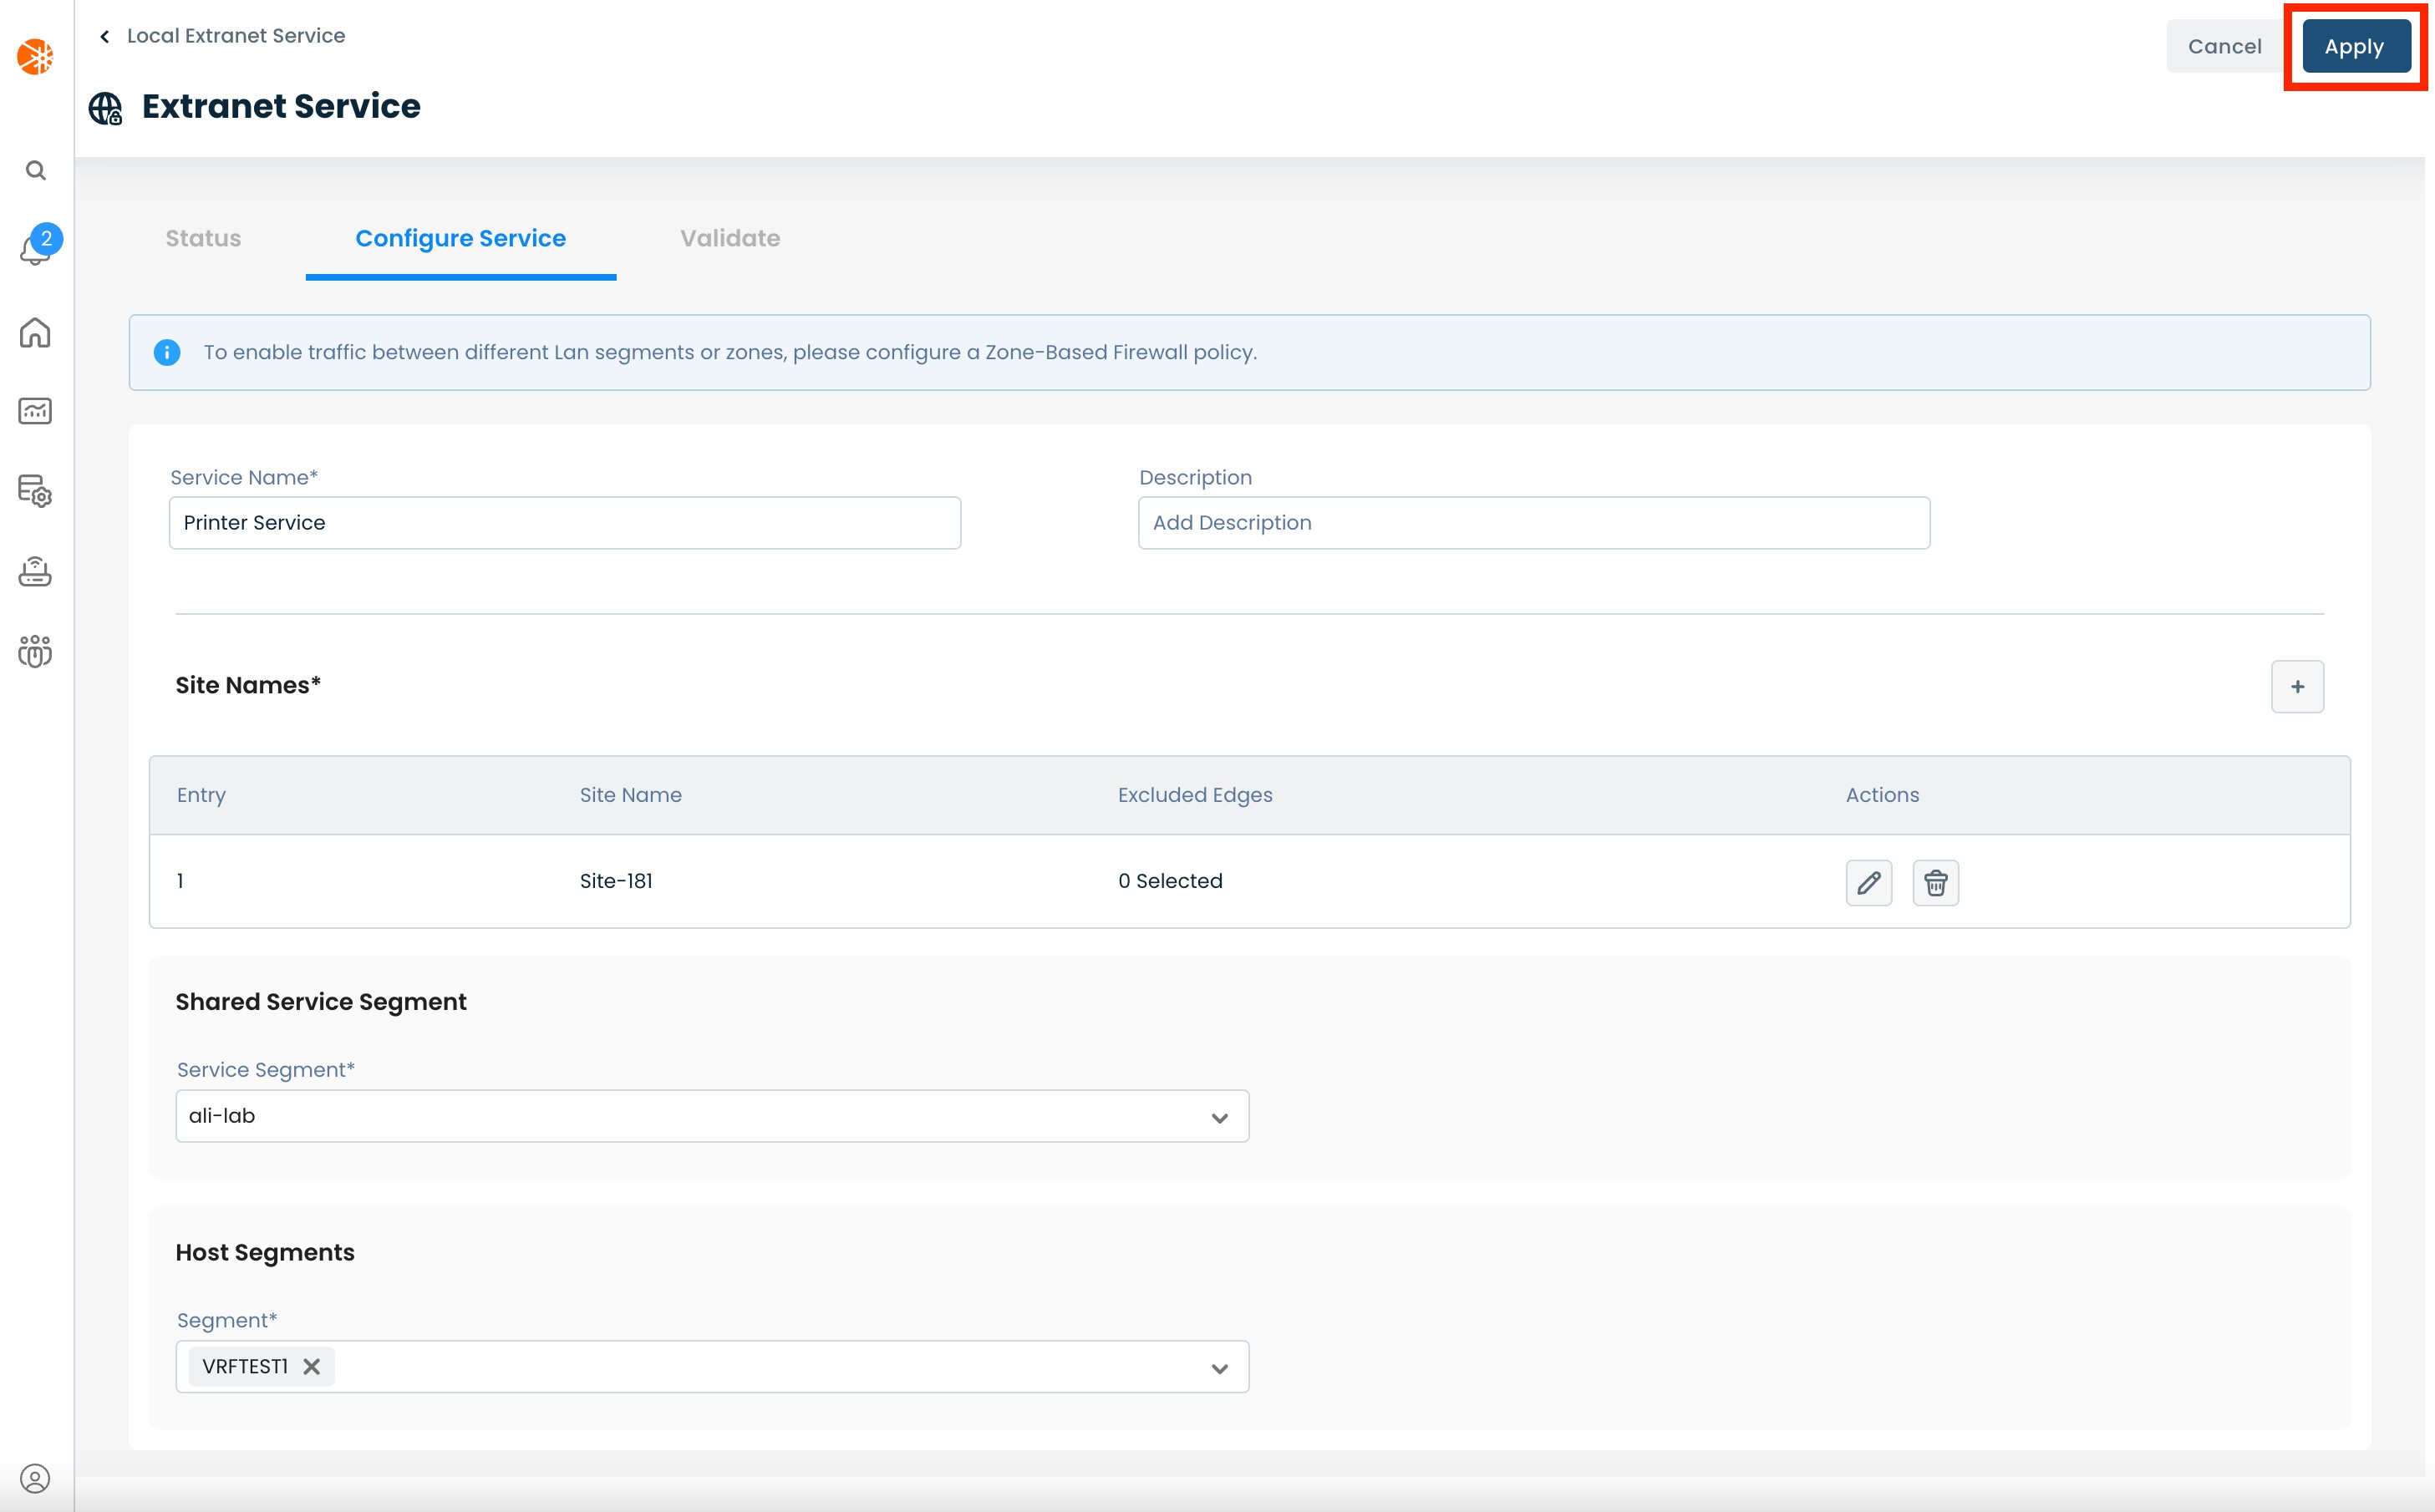
After you have filled out all the required fields, click the 'Apply' button to enable the policy.
Once the service has been enabled, you can check the status of the individual sites under the 'Status' tab.
After the extranet service is enabled, you will have routes being exchanged between the chosen LAN segments but you won't be able to send any data traffic between the LAN segments. This is because of the NGFW on the Graphiant Edges which drop all intra-LAN segment traffic by default.
In order to enable the data traffic, you need to setup security policies on the Edges to allow traffic between the relevant LAN segments. To learn how to configure a security policy, take a look at Configuring Security Policies.
Step 2b: Configuring Enterprise Extranet
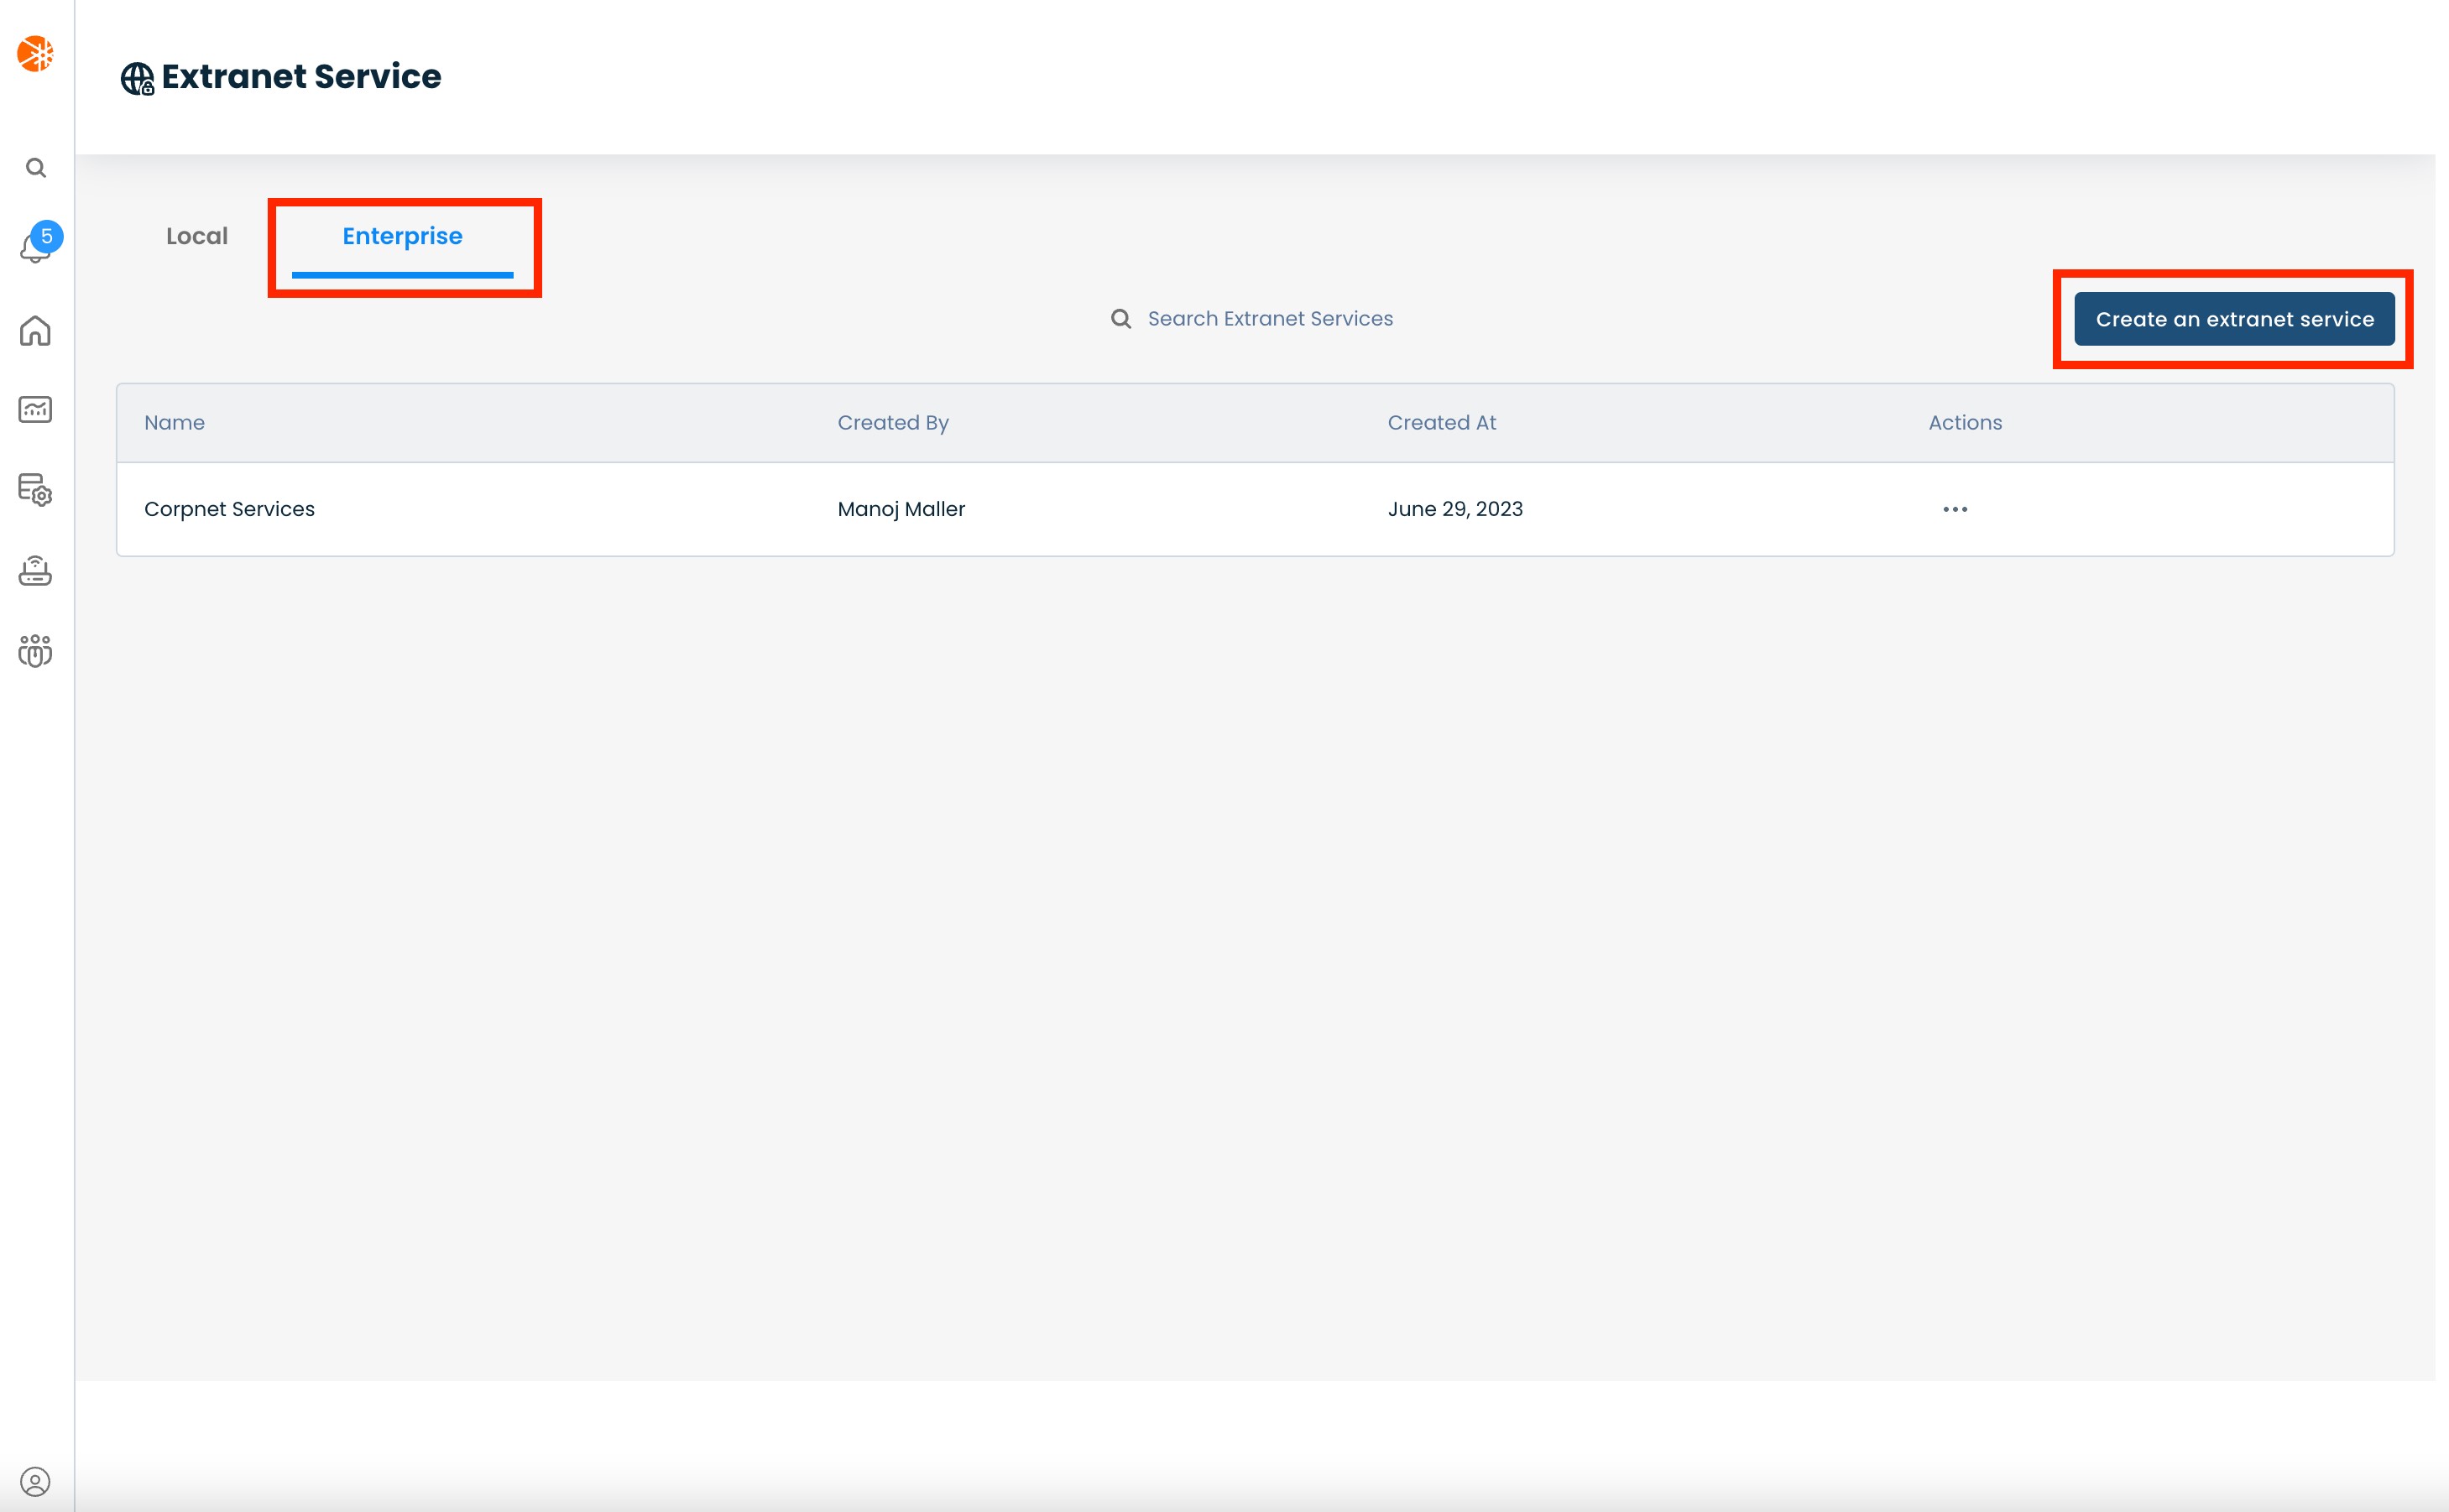
To configure an 'Enterprise' extranet service make sure you're on the 'Extranet' page and are on the 'Enterprise' tab.
Then click the 'Create an extranet service' button.
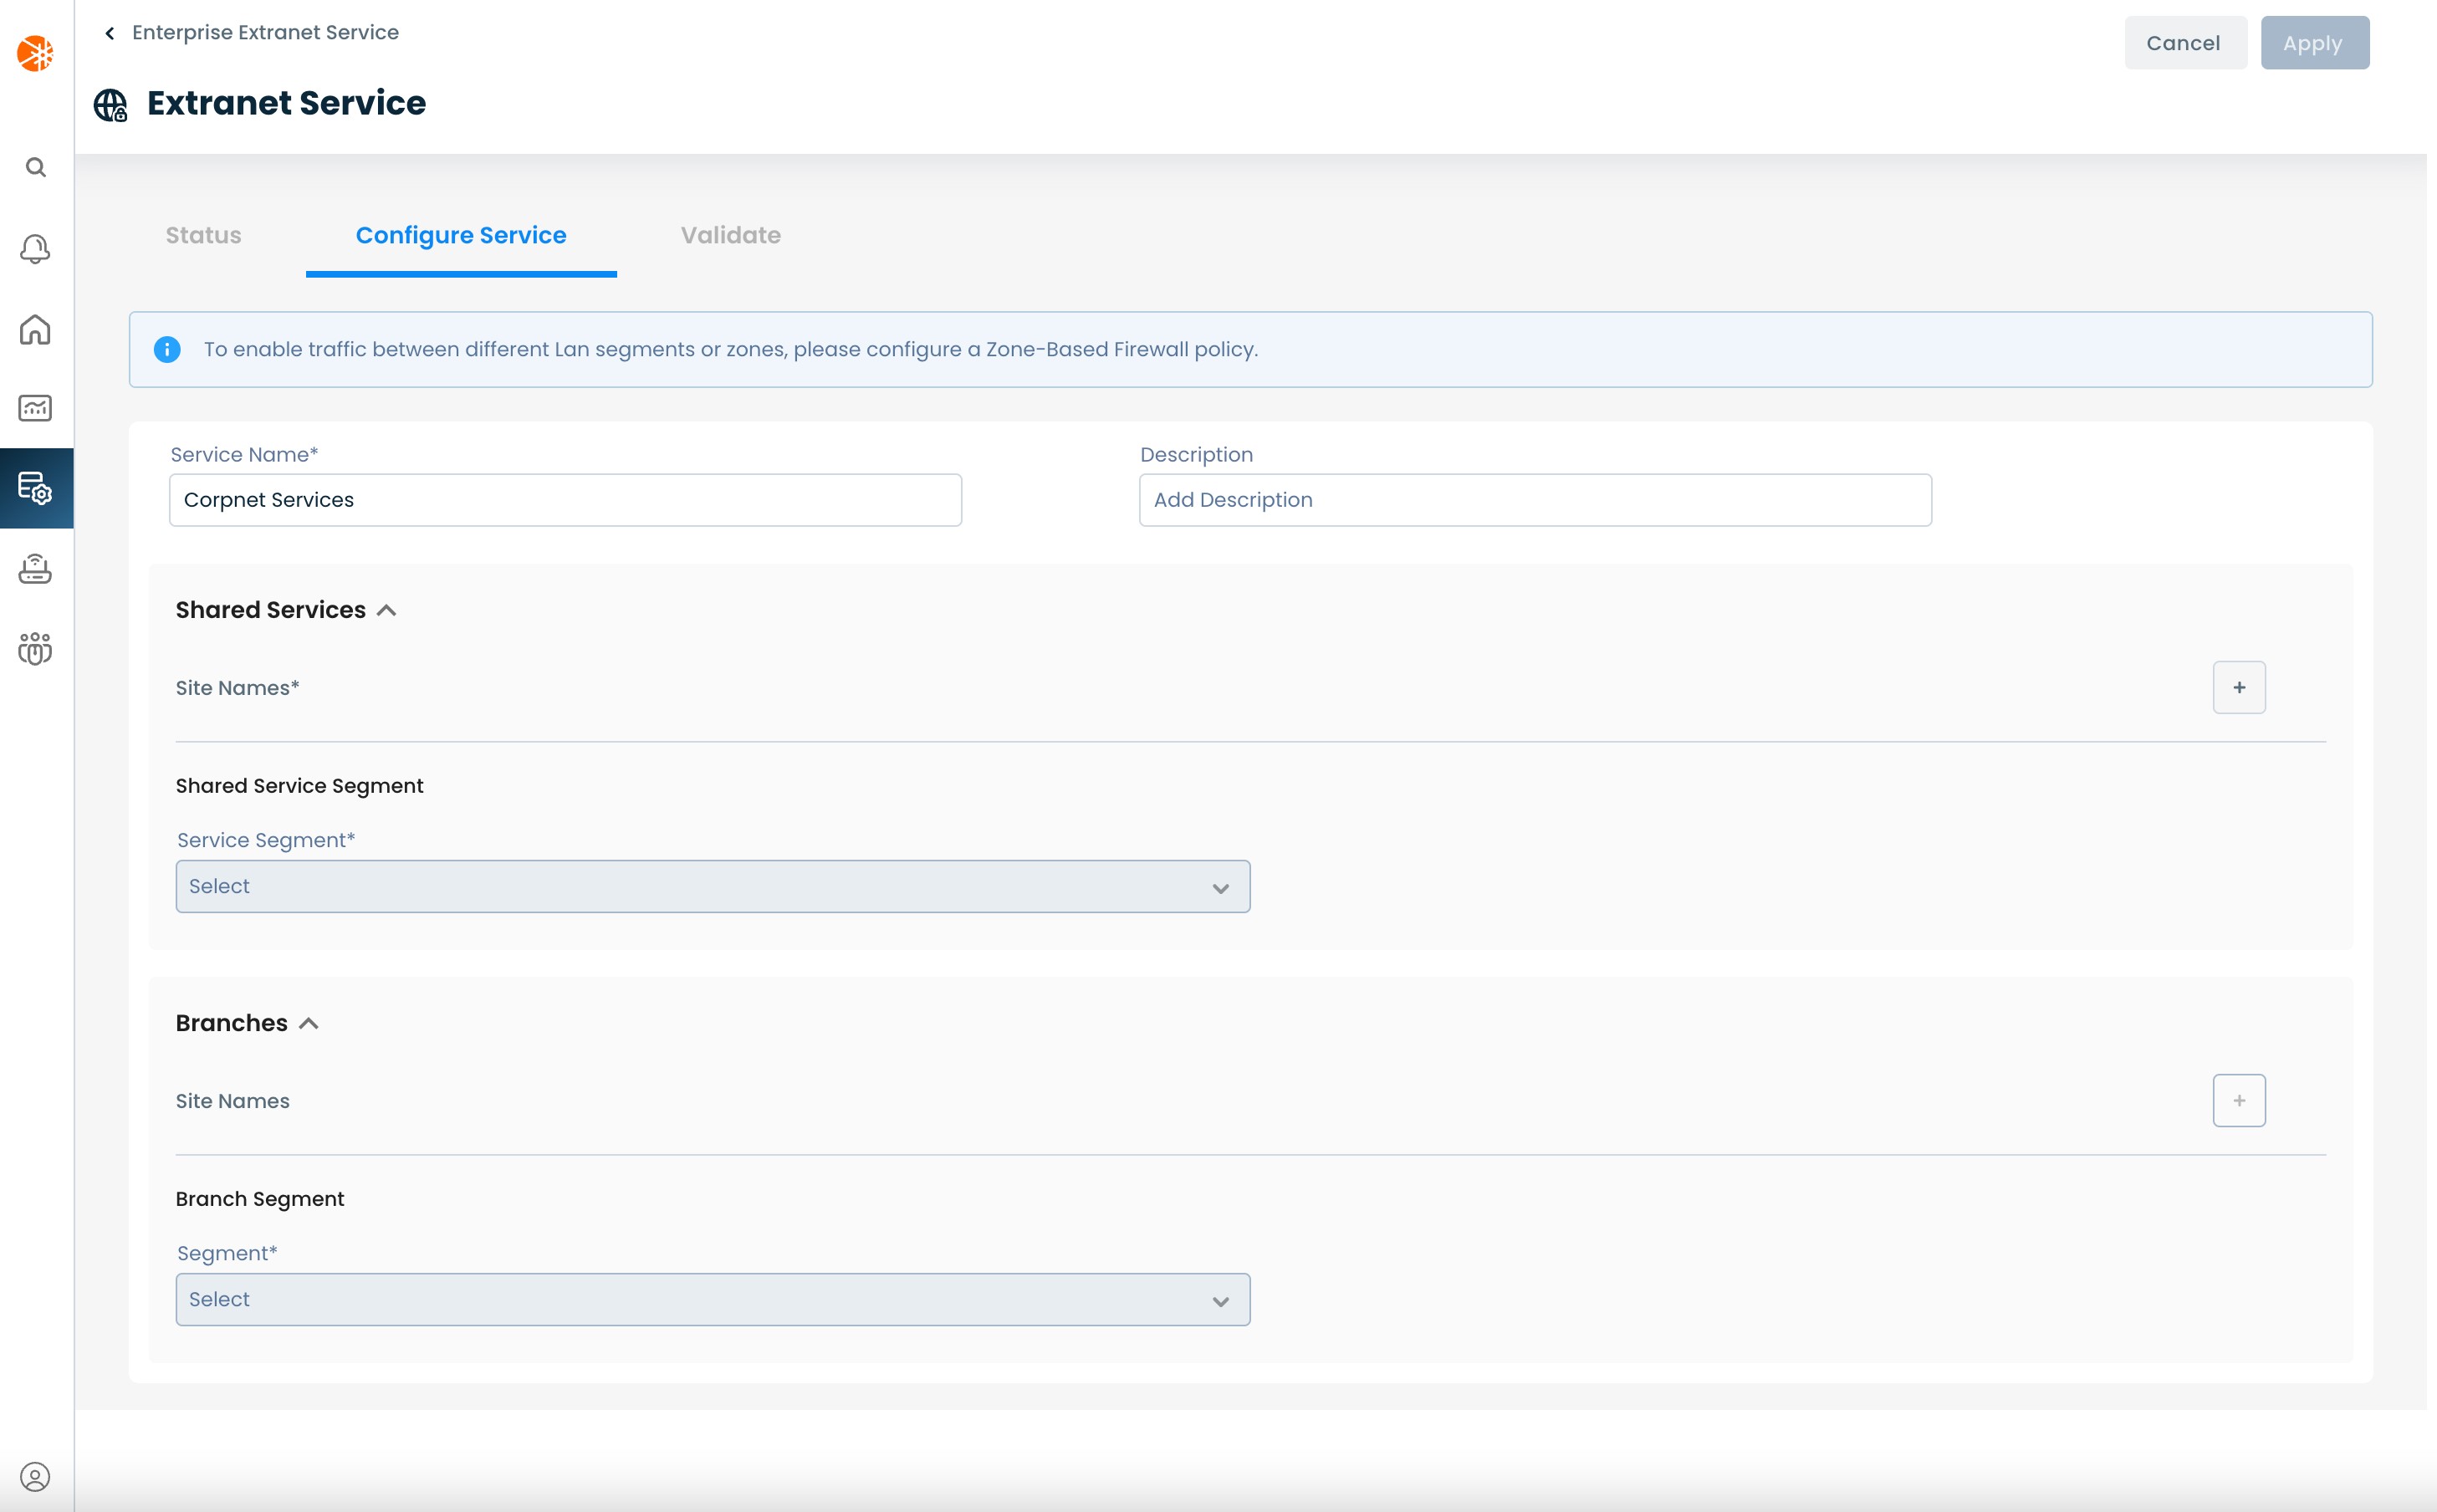
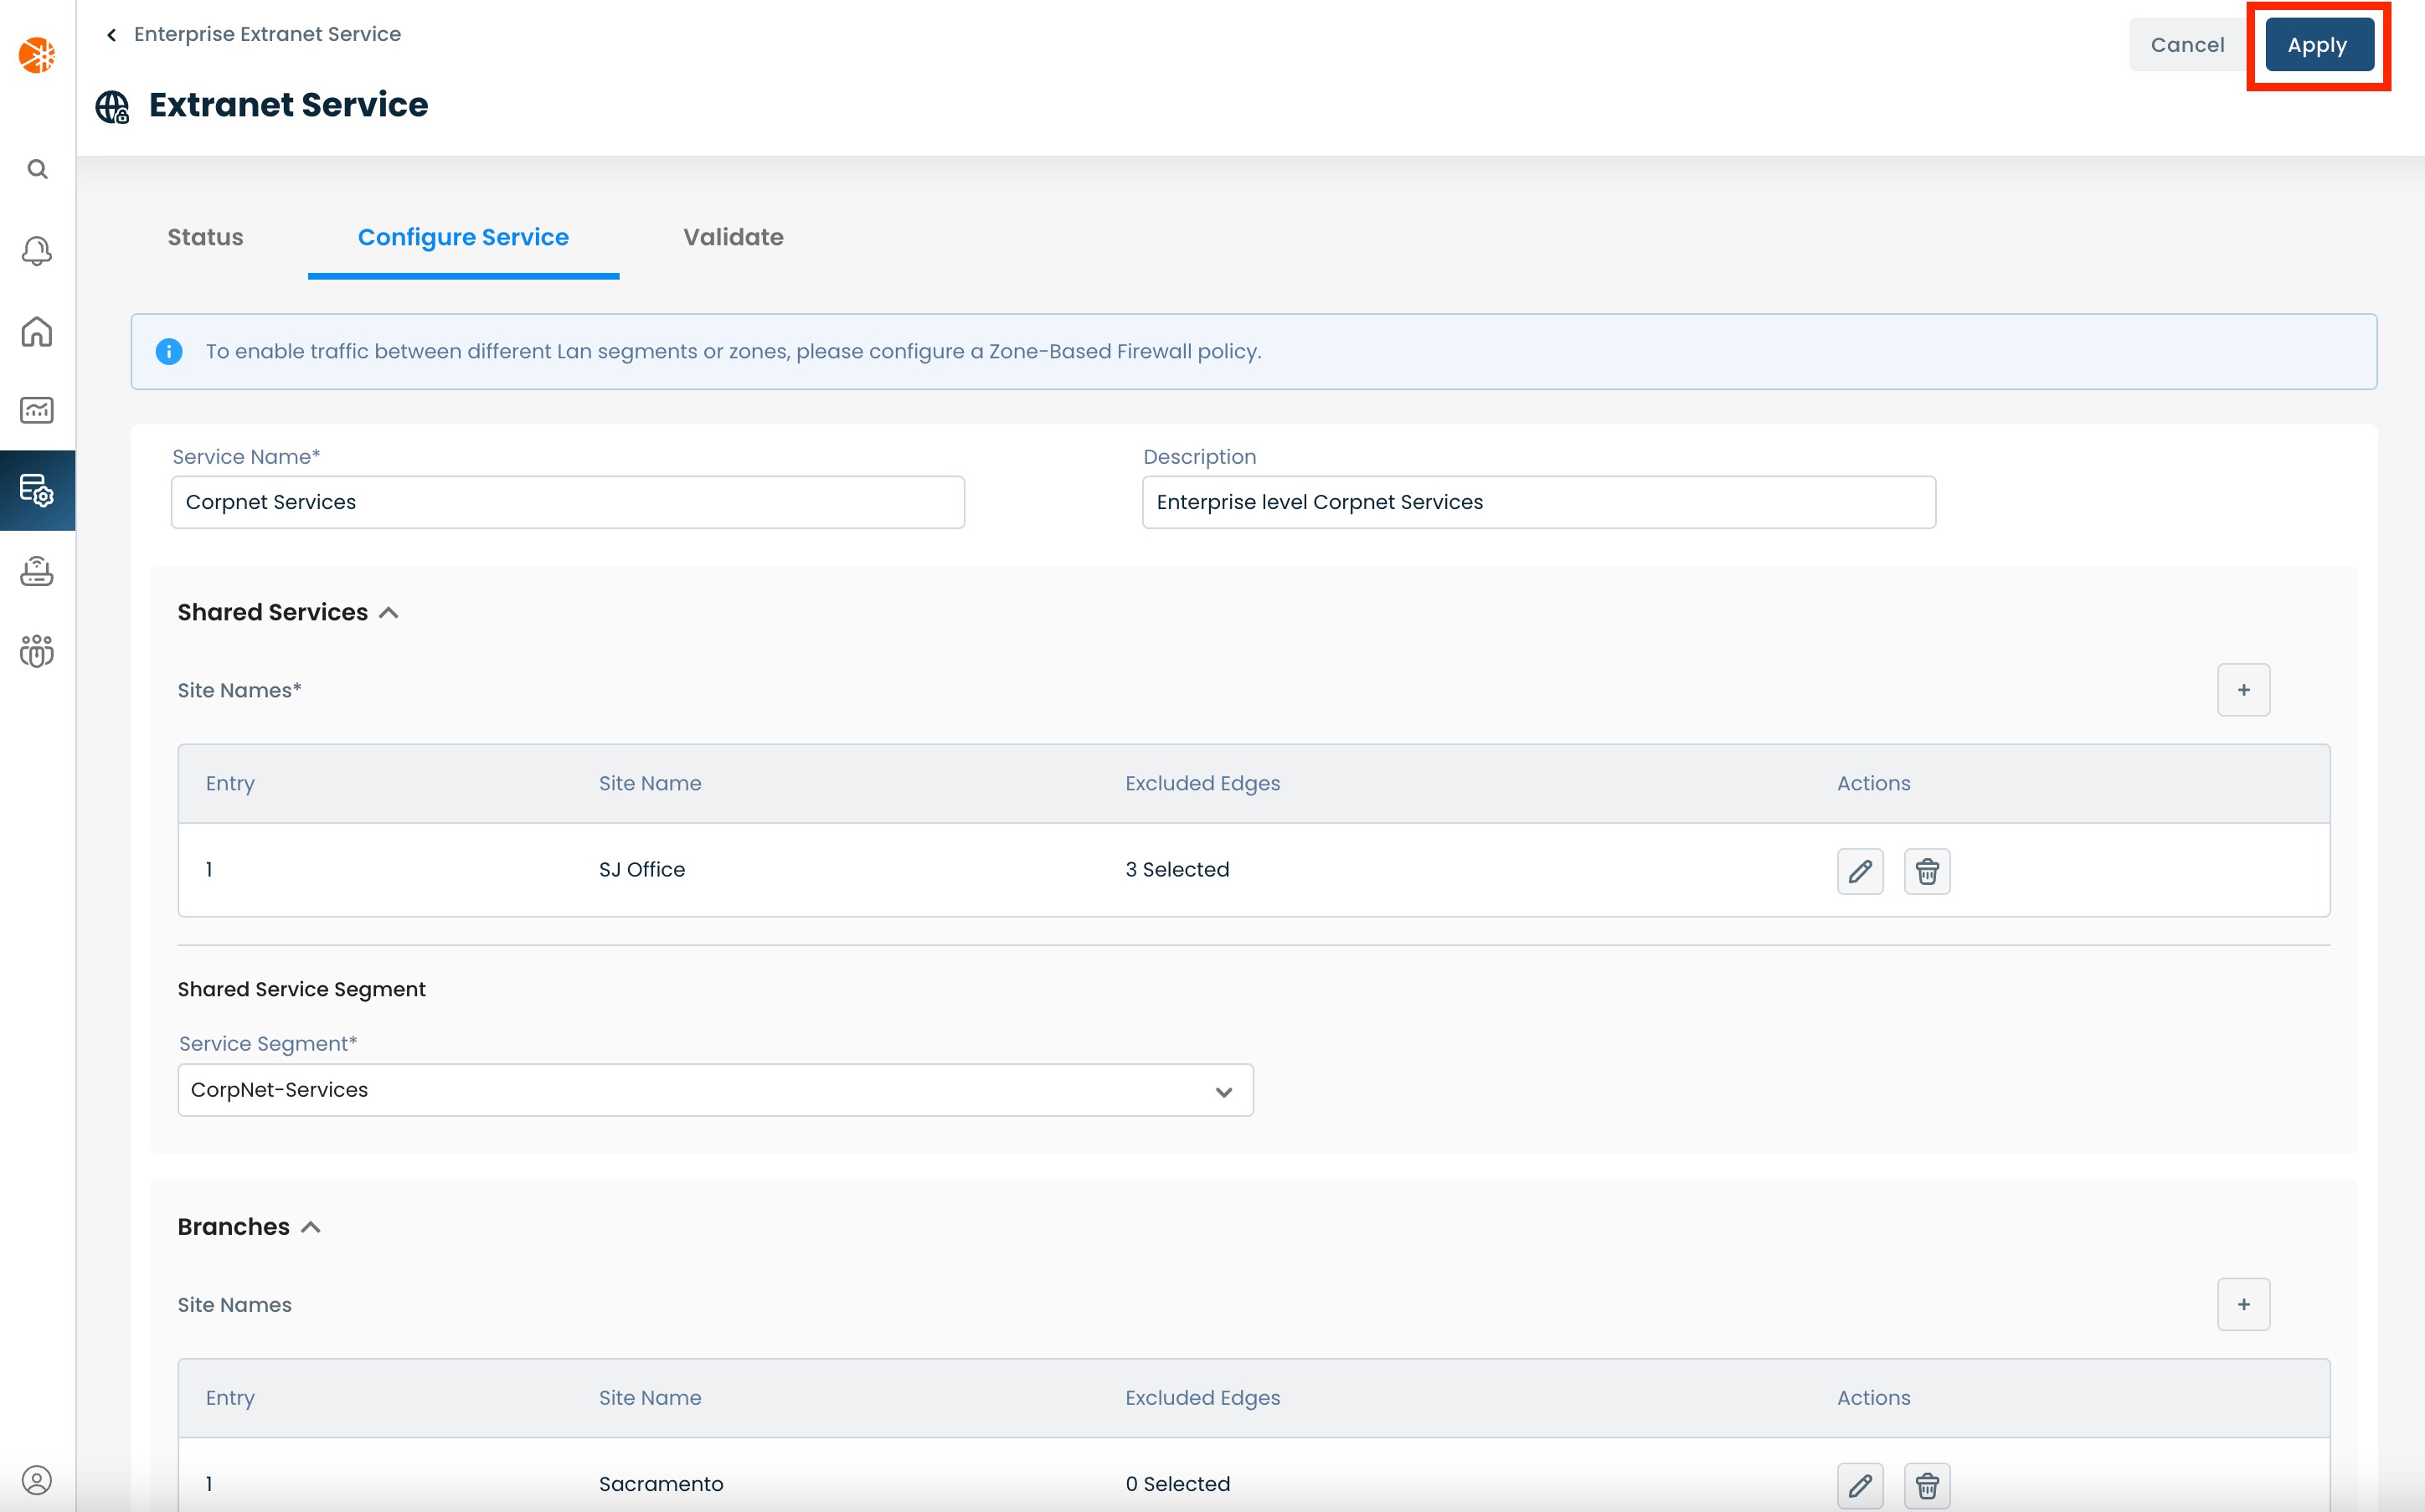
This will bring you to the “Configure Service'“ screen. This configuration has the following fields:
Service Name: User-defined name to use for the extranet service instance
Description: User-defined description to assign to this service
Shared Services:
Site Names: The (+) button for this field only becomes available once you provide a service name. This brings up a pop-up modal which lets you choose sites, where the shared service is available. The modal provides a dropdown list of existing sites to choose from. You can use the modal to select multiple sites allowing you to choose all the sites that offer the shared service.
Shared Service Segment: The LAN segment containing the shared service which other LAN segments need to access (for e.g: the active directory); you can only choose one 'Shared Service Segment'. This dropdown is auto populated with LAN segments which are available in all the chosen sites.
Branches:
Site Names: The (+) button for this field only becomes available once you complete the 'Shared Services' section. This brings up a pop-up modal which lets you choose sites, from where you want to reach the shared service. The modal provides a dropdown list of existing sites to choose from. You can use the modal to select multiple sites allowing you to choose all the sites that need to consume the shared service.
Branch Segments: The LAN segments, present on the branches, which have hosts that need to access the shared service (for e.g: users at a branch); you can have multiple branch segments, all of whom need access to the same service segment. This dropdown is auto populated with LAN segments which are available in all the chosen branch sites.
After you have filled out all the required fields, click the 'Apply' button to enable the policy.
Once the service has been enabled, you can check the status of the individual sites under the 'Status' tab.
After the extranet service is enabled you will have routes being exchanged between the chosen LAN segments, but you won't be able to send any data traffic between the LAN segments. This is because of the NGFW on the Graphiant Edges which drop all intra-LAN segment traffic by default.
In order to enable the data traffic you need to setup security policies on the Edges to allow traffic between the relevant LAN segments.
To learn how to configure a security policy, take a look at Configuring Security Policies.