What is Included in Settings?
The Settings area of the Graphiant Portal include account information such as Name, ID, and Admin Email, along with the ability to set preferences for the environment.
Settings include:
Profile: User-level information
General: Company-level information
Billing: Credit and Allocation information
Note:
This is a walk-through of the complete Settings options
Only administrators will have full access to all of the settings
Should you need to change a setting that you do not have access to, please contact your administrator
Locating Settings in the Graphiant Portal
From the Graphiant Portal Home Page, click the carat at the bottom left of the screen next to your profile.
Select ‘Settings'.
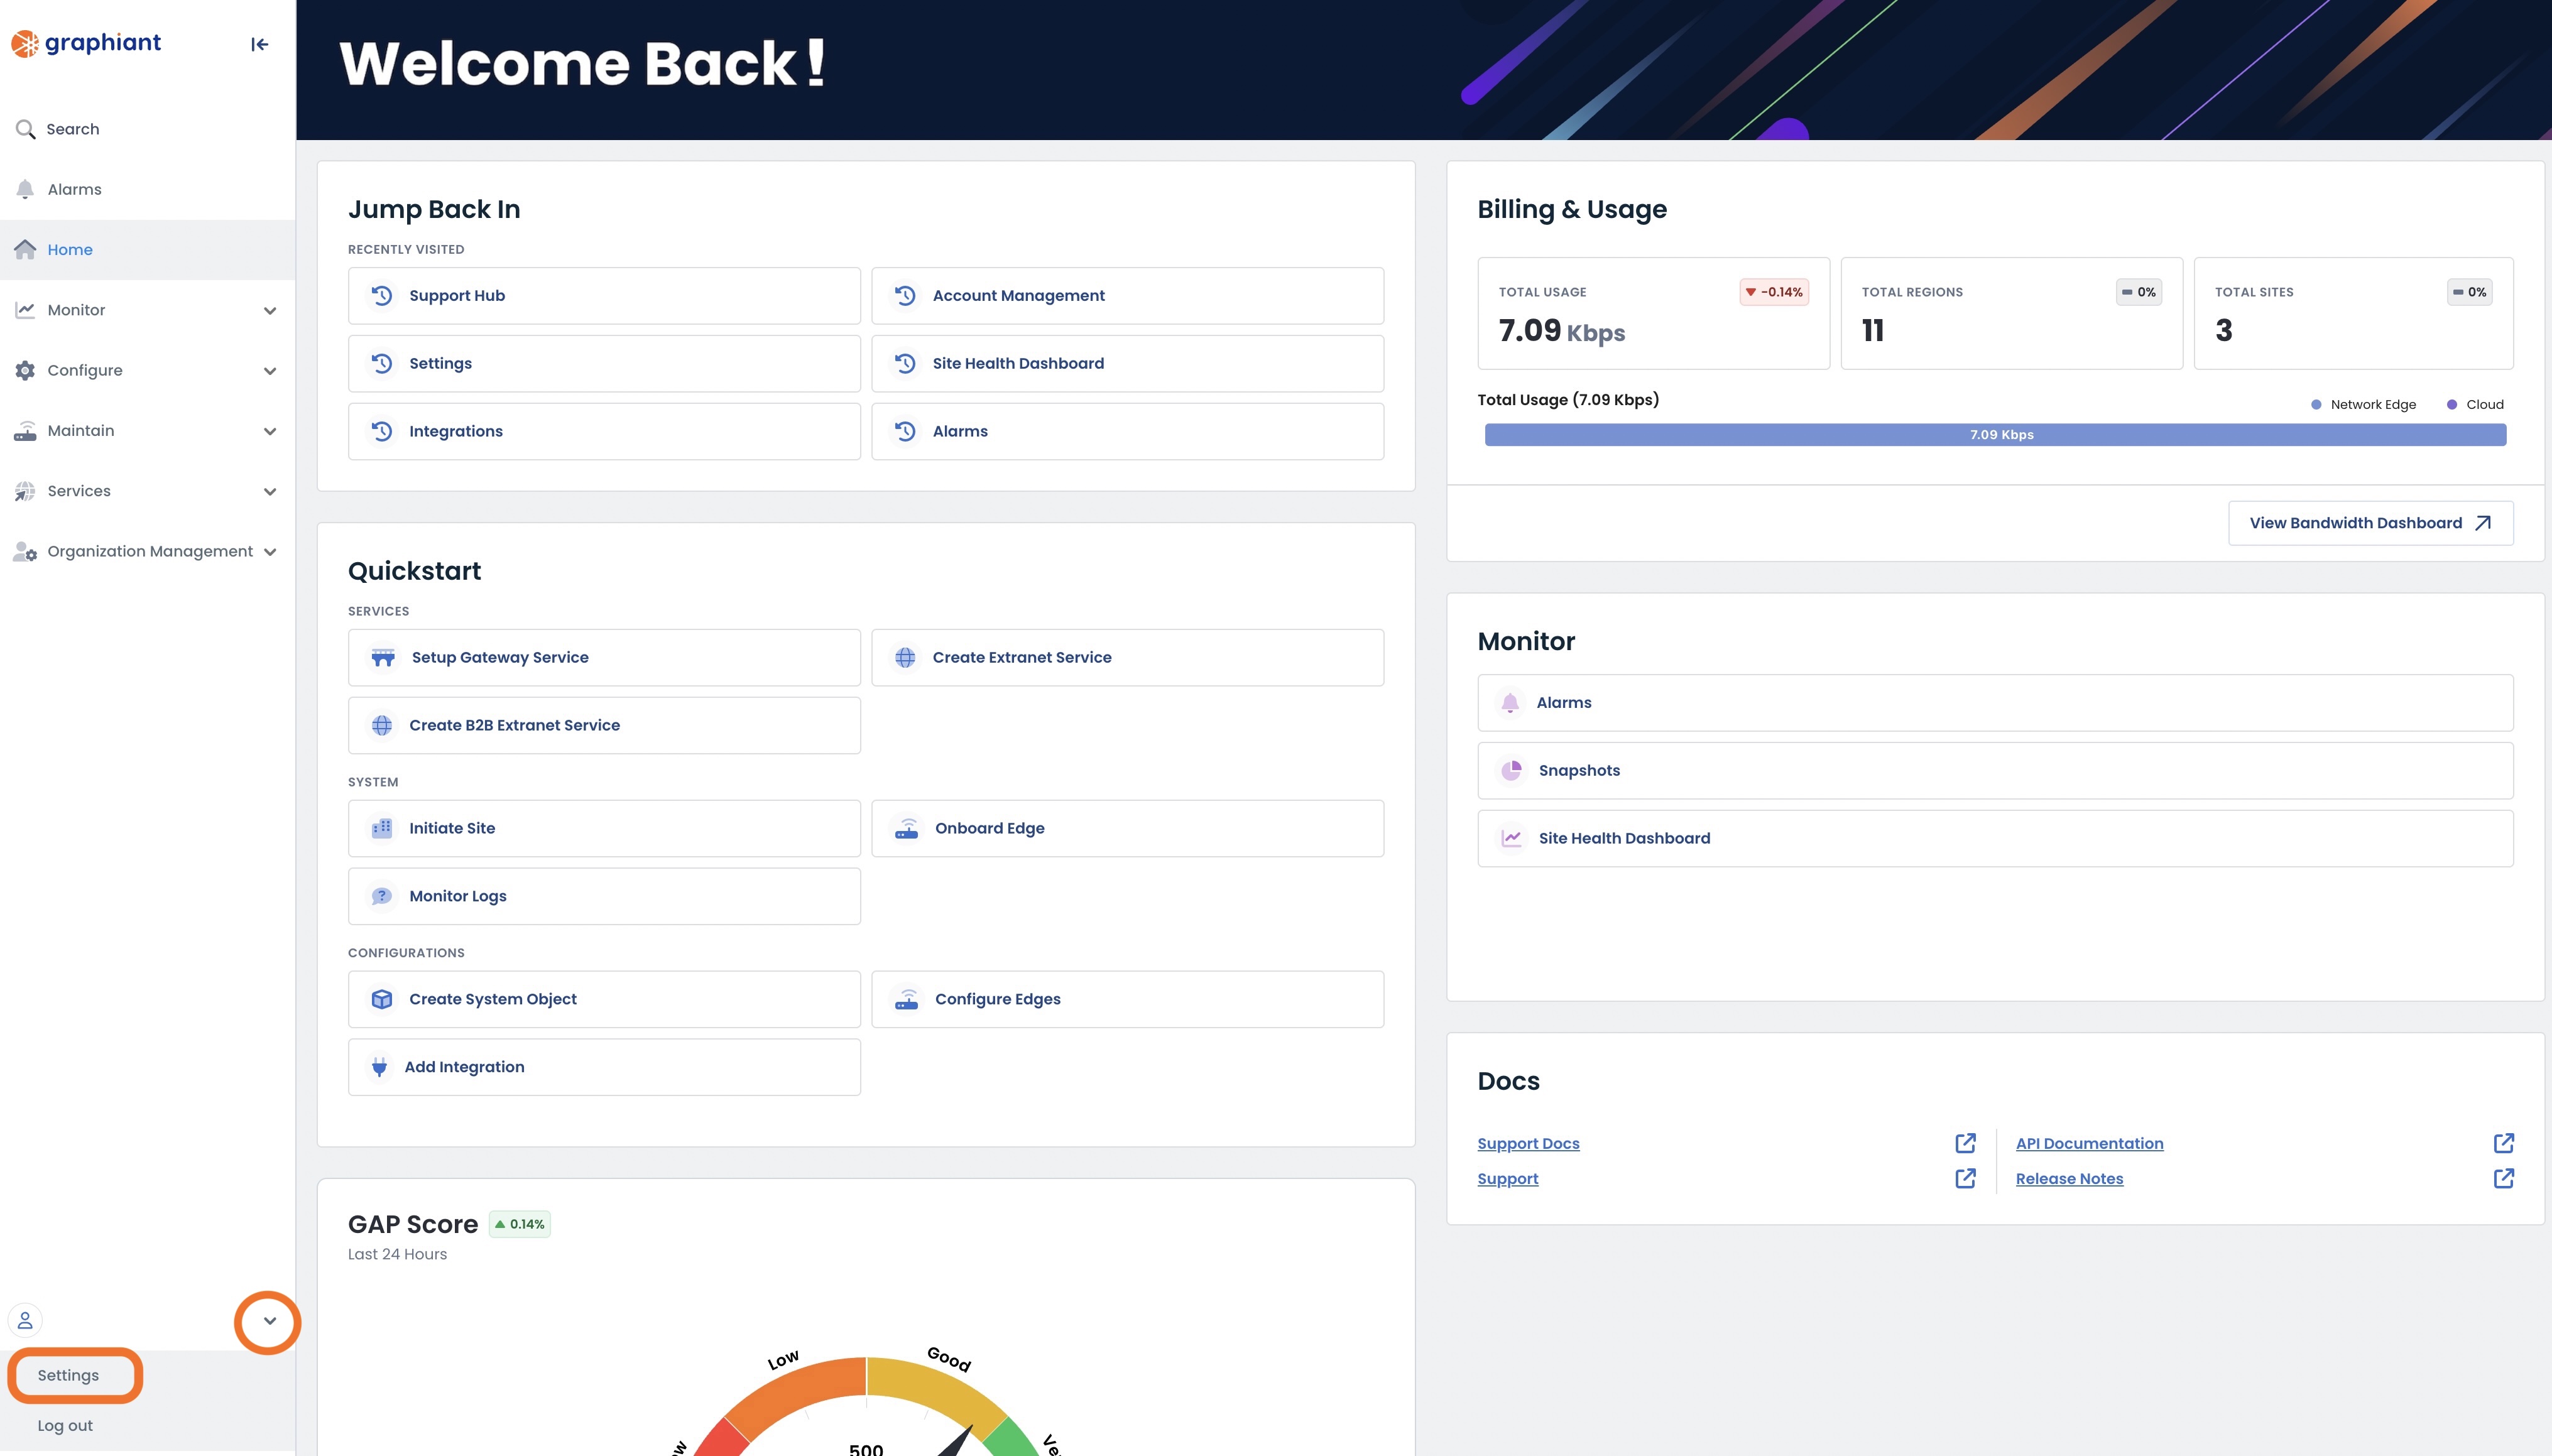
This will bring up the Settings area of the portal.
When changing any settings:
Ensure to click ‘Save Changes’ where available to put the updated setting(s) into effect.
(*Some toggle options take effect immediately.)
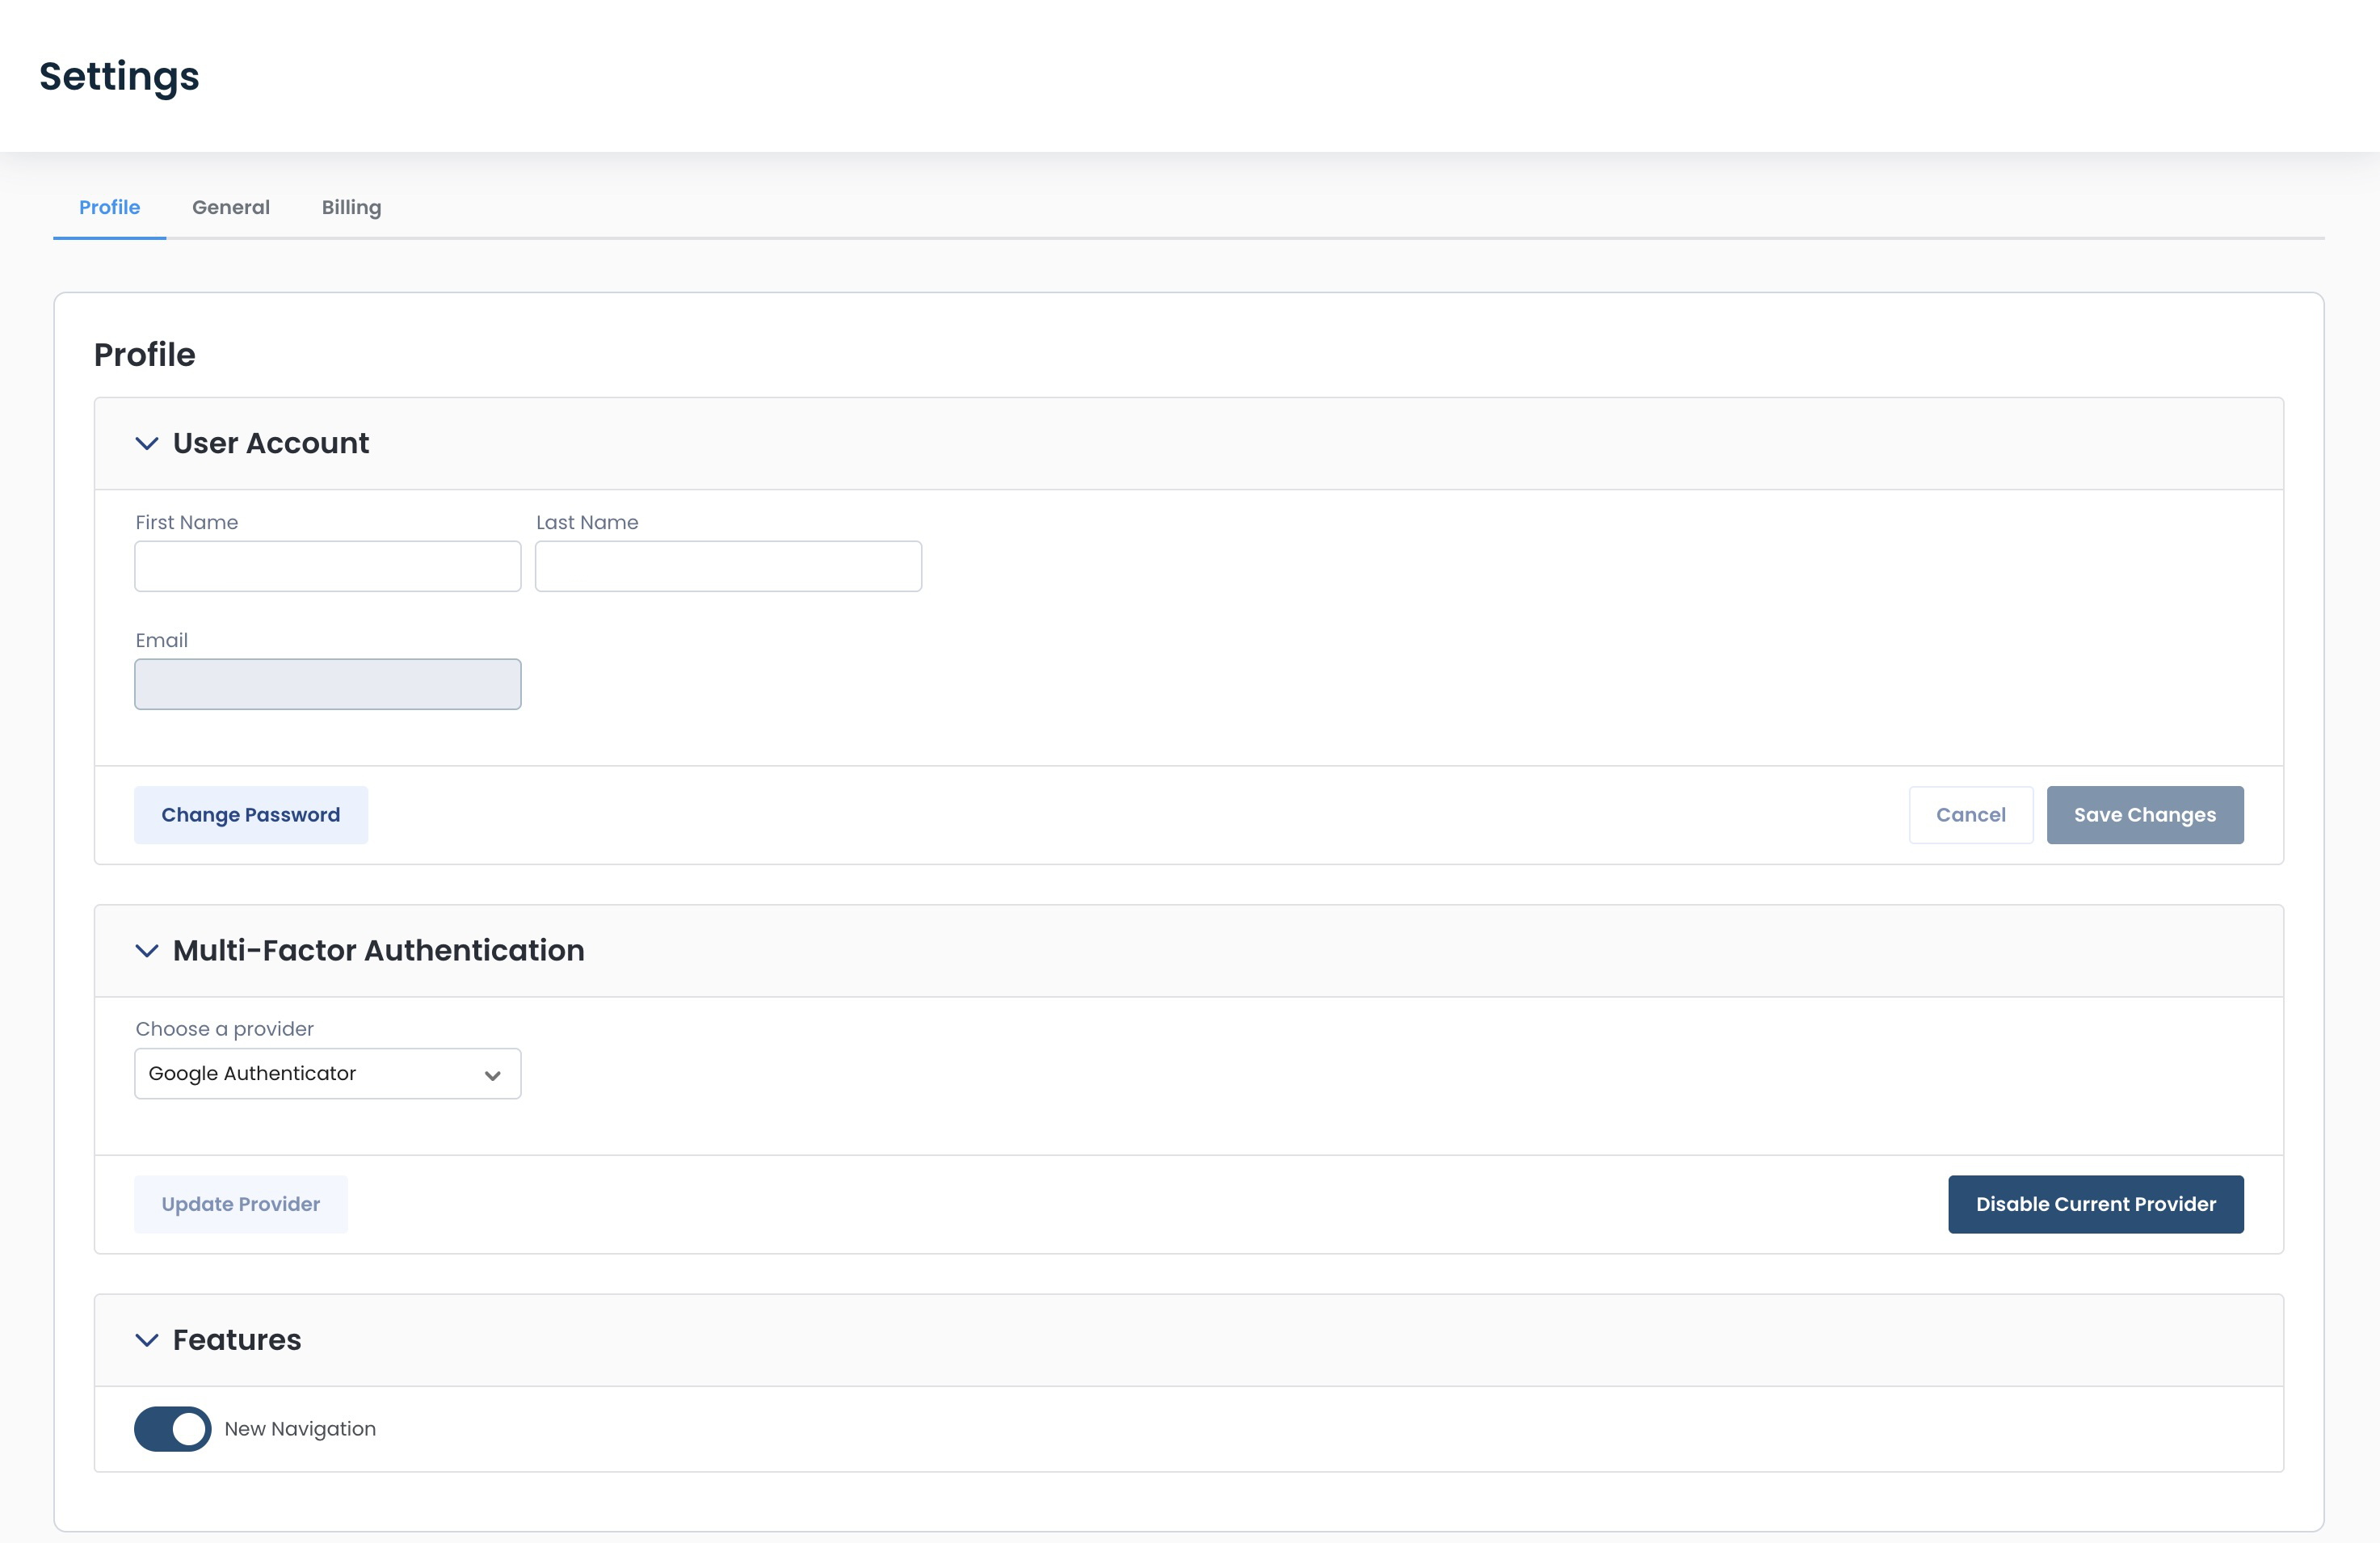
Profile Settings
The landing page of Settings is the “Profile” tab, which includes:
User Account
Multi-Factor Authentication
Feature Flags
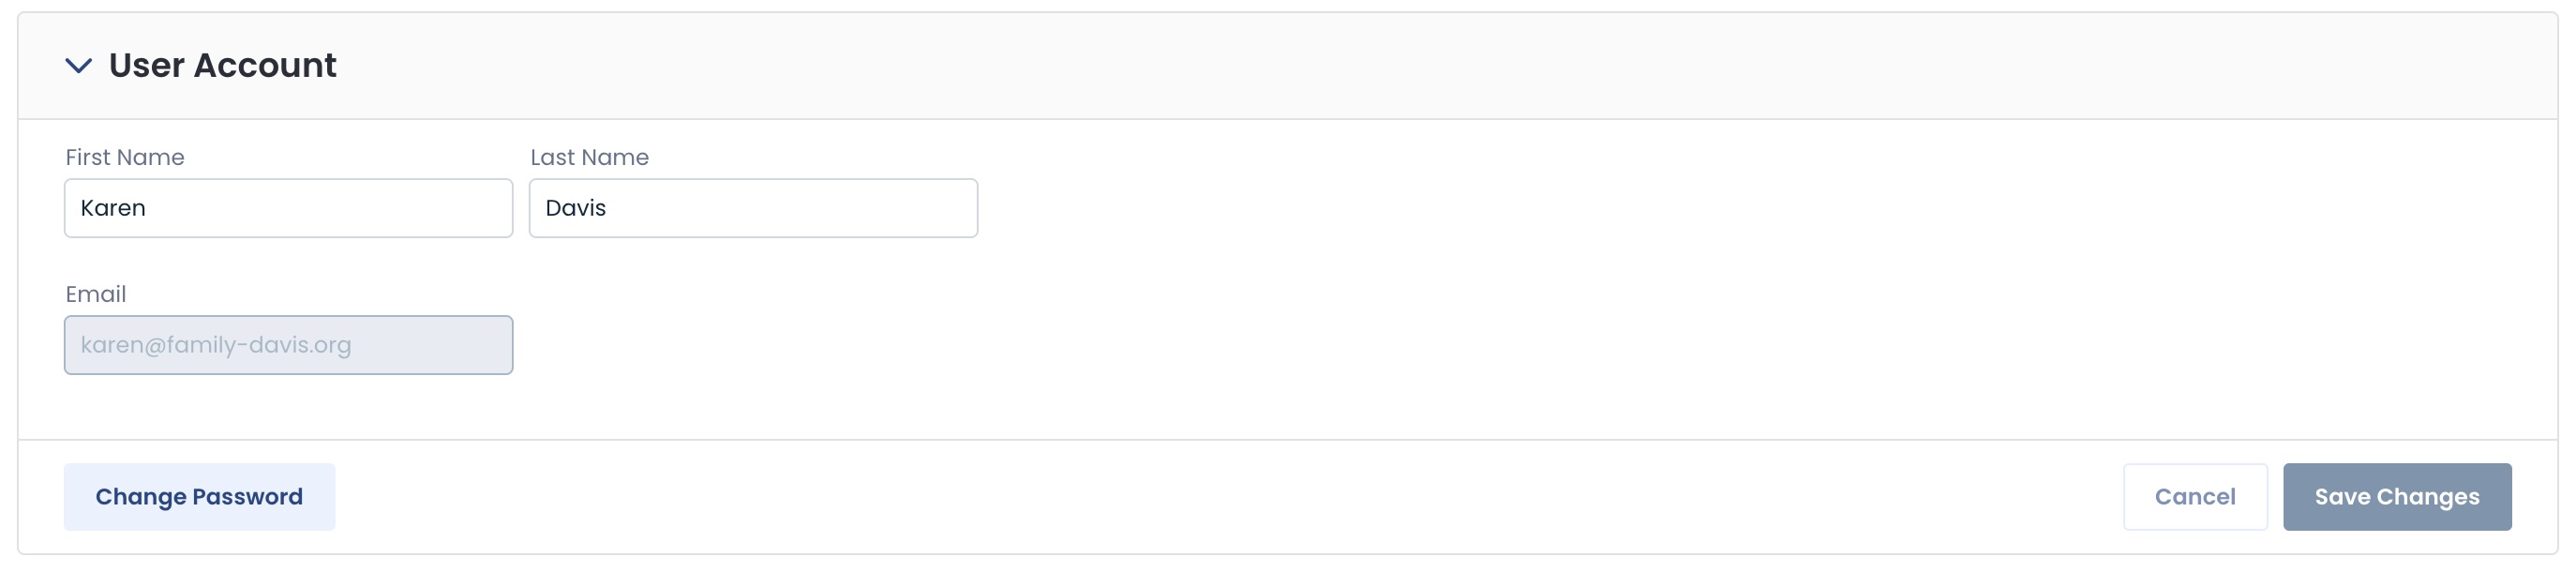
User Account
You will see your individual information here.
First and Last name
Email
From this area, you may also change your password.
Multi-Factor Authentication
Should MFA be activated for your account, options to select the provider of your choosing — and disable a provider — will be here.

Features
Any feature flags that can turn functionalities on/off are located here.
Currently, the only feature flag present is for the New Navigation within the Graphiant Portal.
For details on reverting back to the prior portal navigation, click here.

General Settings
The “General” tab includes:
Enterprise & Appearance
Release Settings: Details on the frequency and version of your upgrades
Security & Compliance: Gives the ability to select encryption and disable Graphiant Support's access
Alarms
.jpg)
Enterprise & Appearance
Here you will find company information, and have the ability to customize your Graphiant portal.
.jpg)
Details
Displayed at the top are your enterprise’s:
Name
Graphiant ID
Administrator Email

Portal Banner Message
Any message that you would like to convey across your Graphiant Portal for all of your users to see is input here.

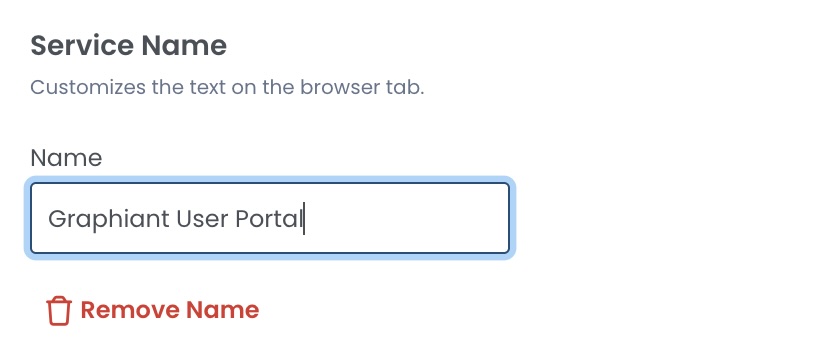
Service Name
This will be reflected in the text on the open browser tab.
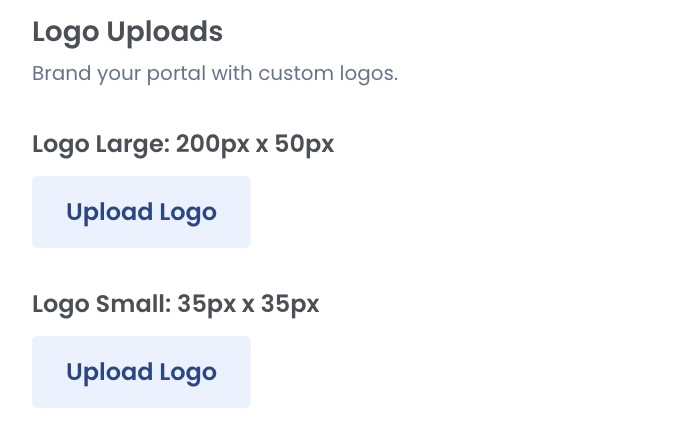
Logo Uploads
You can customize your company’s Graphiant Portal experience by uploading your logo.
Release Settings
Auto-Upgrade Management is located here.
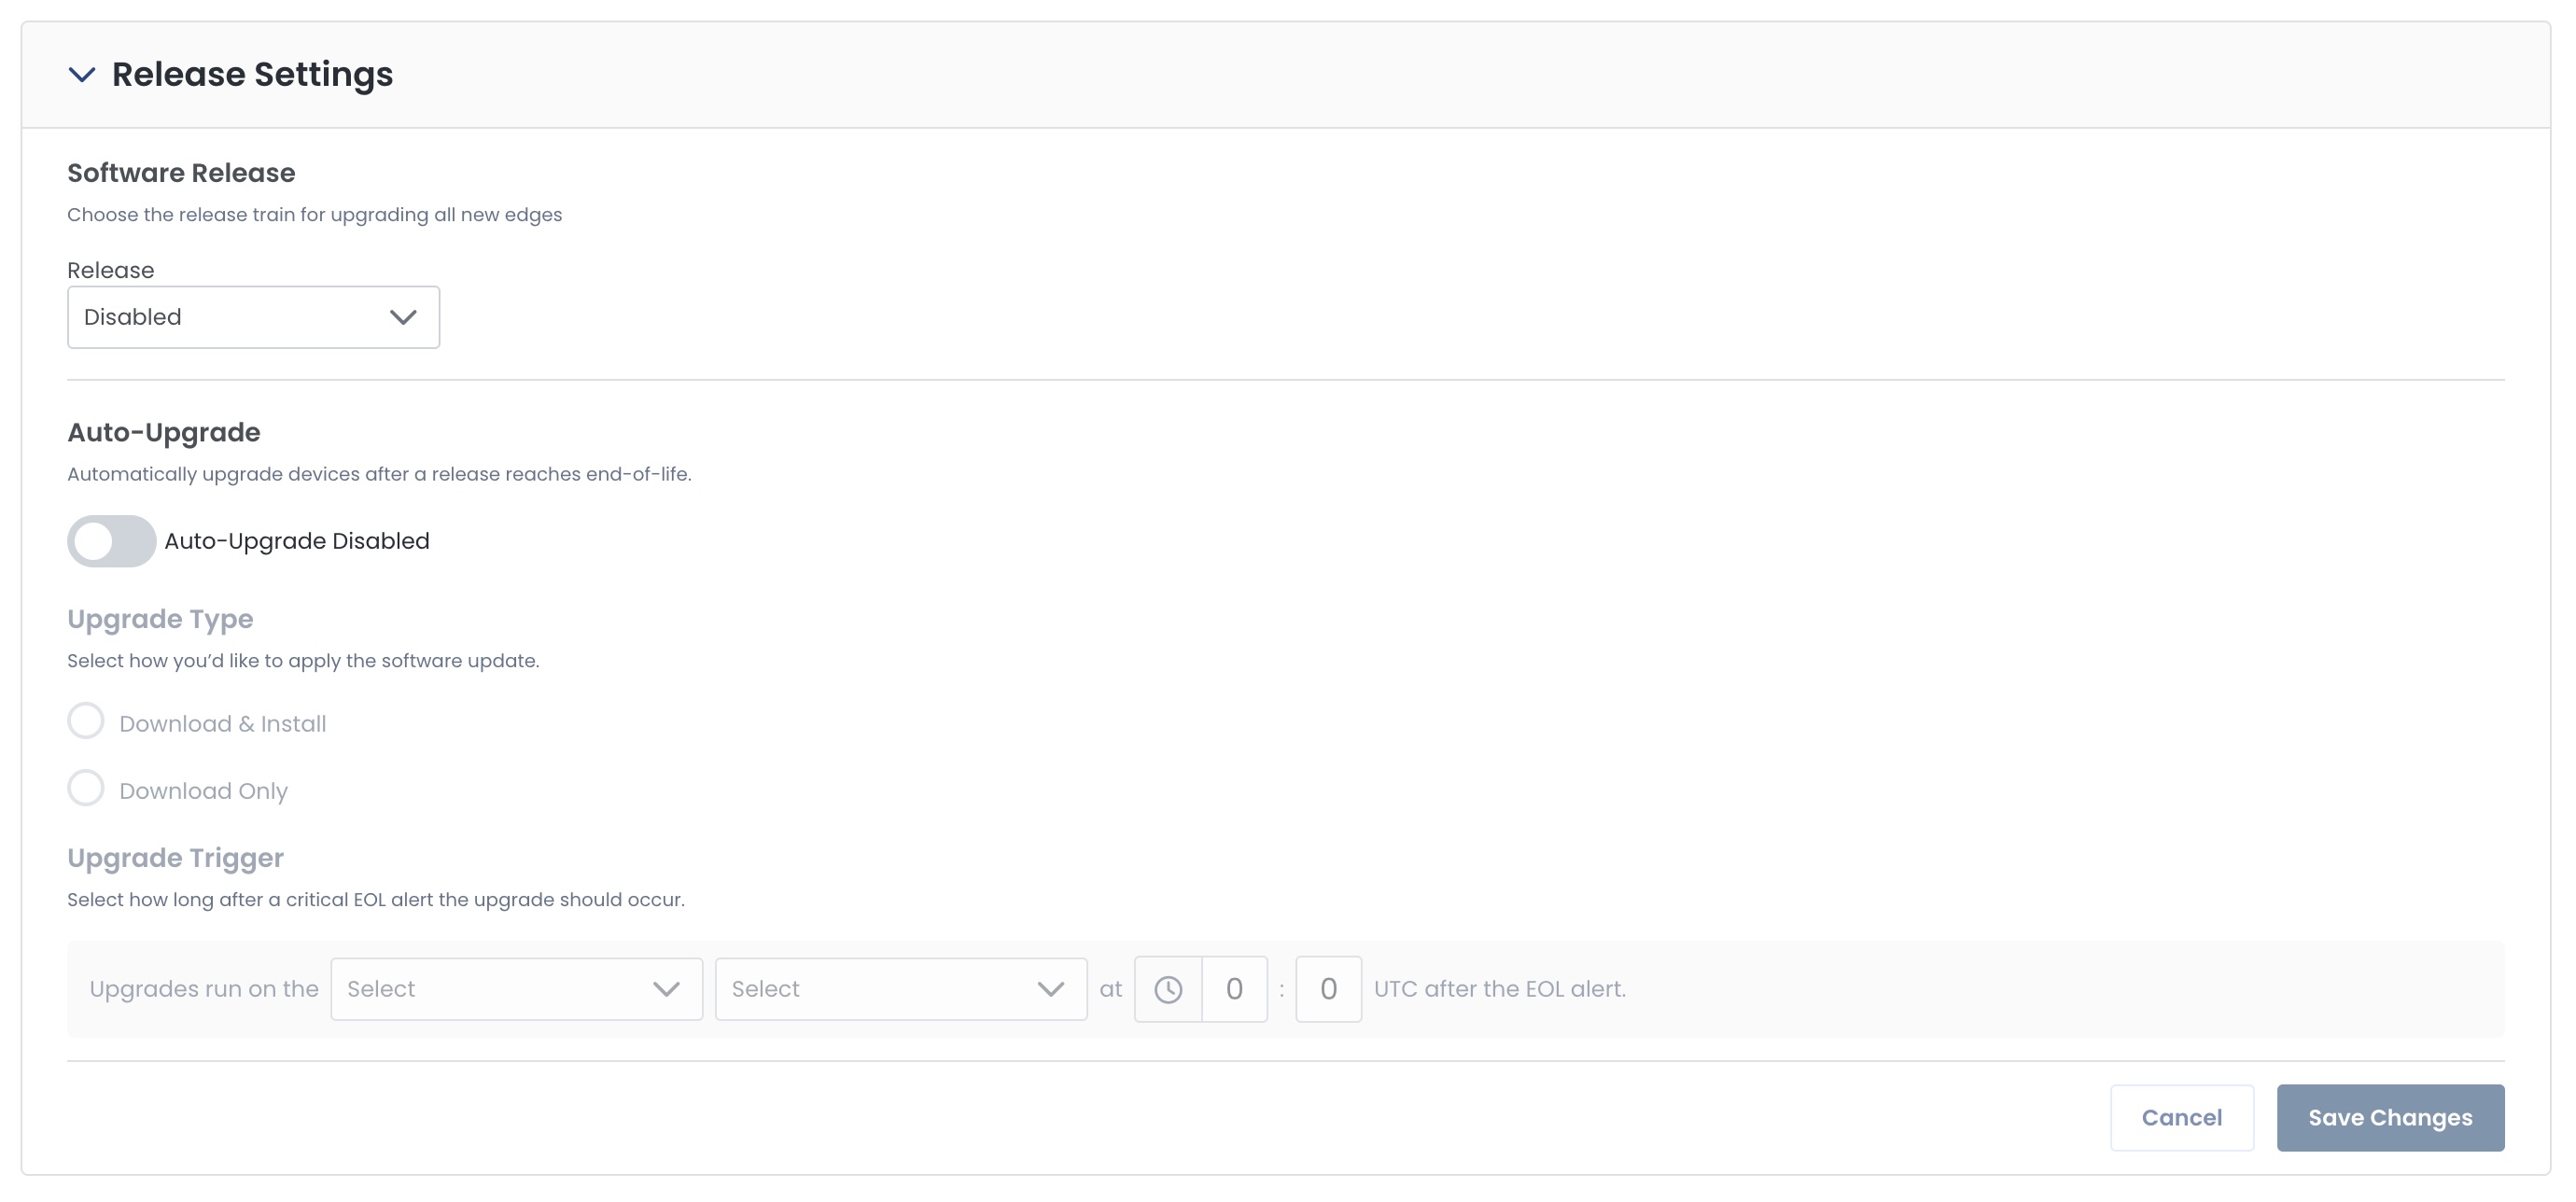
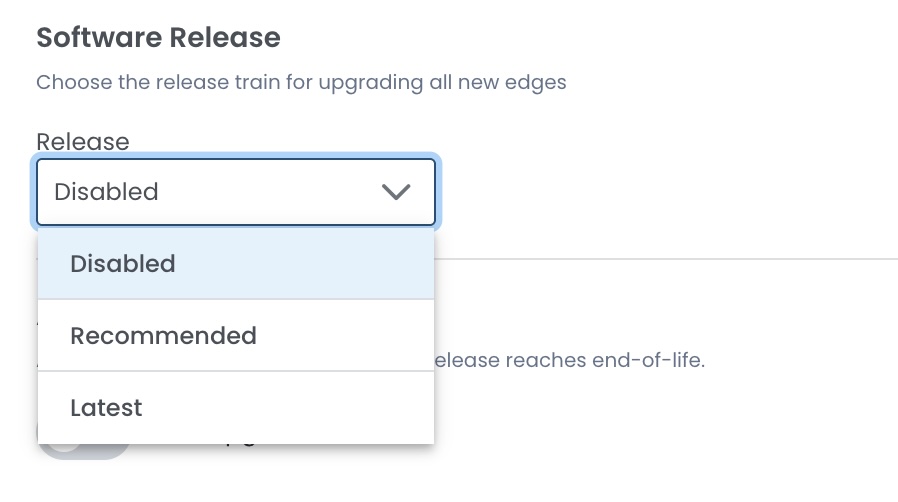
Software Release
Using the dropdown, select the software release train of your choice to be put onto all of your new Graphiant Edges.
For more information on Software Releases, click here.
Auto-Upgrade
Should you want to streamline software releases and have your devices automatically upgrade as each release reaches End-of-Life, you can activate that process here.
Click the toggle to enable Auto-Upgrade.
Select the Upgrade Type:
Download & Install
Download Only
Upgrade Trigger: Complete the information reflecting how soon after the EOL alert comes through that you would like the upgrade to occur.
.jpg)
Security & Compliance
This is the area that houses security measures and access management, and is only able to edited by the administrators of your enterprise.
If you are a managed service provider (MSP), you will not be able to edit this area of your tenant’s enterprise.
Encryption
You can choose between:
Standard Encryption: End-to-end data encryption based on currently standardized and widely deployed algorithms; this is enabled by default
PQC (Post Quantum Cryptography): End-to-end data encryption based on algorithms designed to resist quantum-enabled attacks
No Encryption: Should you have a need to utilize your own encryption only, you can choose to disable Graphiant’s encryption.
Warning:
Disabling Encryption will mean that your environment will not be encrypted by Graphiant to and from the Graphiant Core.
Use caution if choosing ‘No Encryption’.
Graphiant Remote Support
By default, Graphiant Support is able to access your environment for any troubleshooting needs and is toggled on.
Graphiant Support's access into the environment is limited to a read-only view when toggled off.
Note:
If Graphiant Remote Support is disabled and Graphiant Support is called to troubleshoot / make changes, ‘Graphiant Remote Support’ will have to be enabled.
Remote Support can again be disabled once the Support Team has concluded.
Session Timeout
Select the amount of time of inactivity required before users are automatically logged out.
Should you have multiple tabs open that are accessing the Graphiant Portal:
The timeout counter will be from the earliest accessed tab, and will log out all open tabs in use if the inactivity time requirement is reached.
.jpg)
Alarms
When multiple alarms are triggered for the same issue, the number of notifications to sift through can be cumbersome.
Graphiant offers an aggregation of instances of the same alarm, to help you see the issue quickly and not be inundated with notifications.
This feature is on by default.
Should you prefer to receive individual notifications for troubleshooting or records purposes, toggle off.

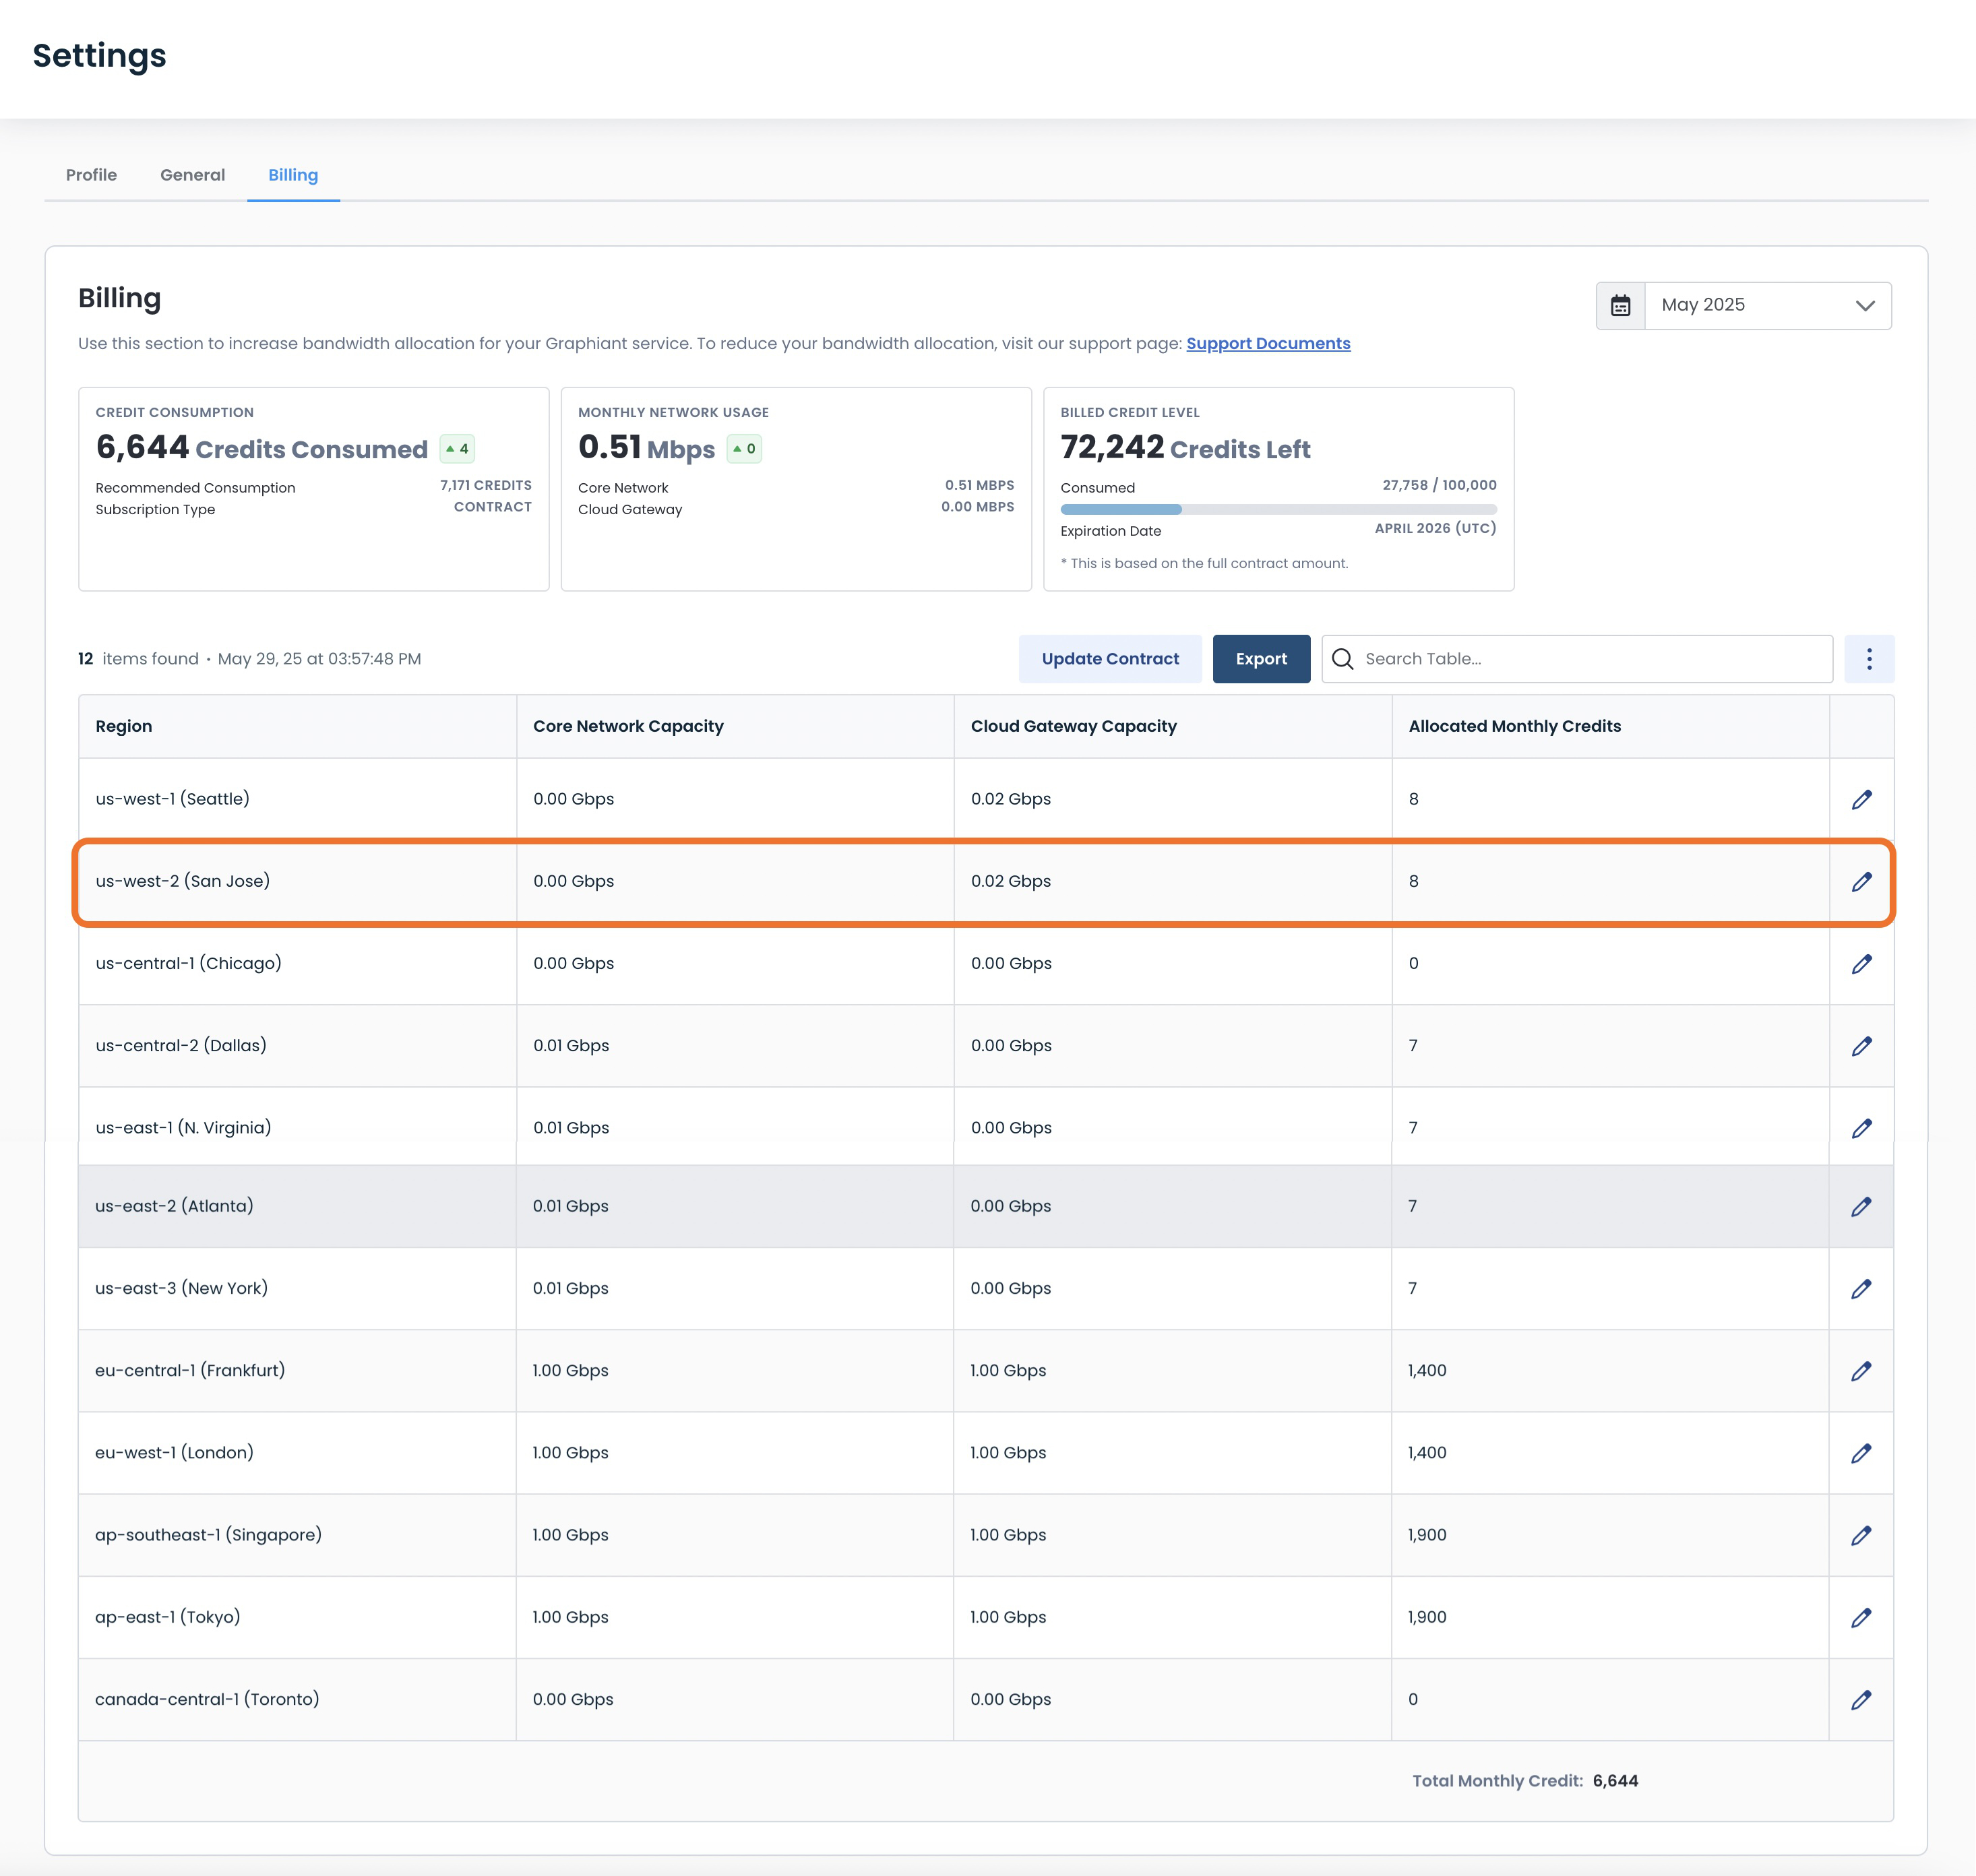
Billing
Here you can see your credit allocations and usage, make adjustments to those allocations, and download your billing information.
For detailed information on the billing process, credit consumption models, and bandwidth allocation tiers, click here.
Note:
Information will be for the month selected in the top right; in this case May of 2025.
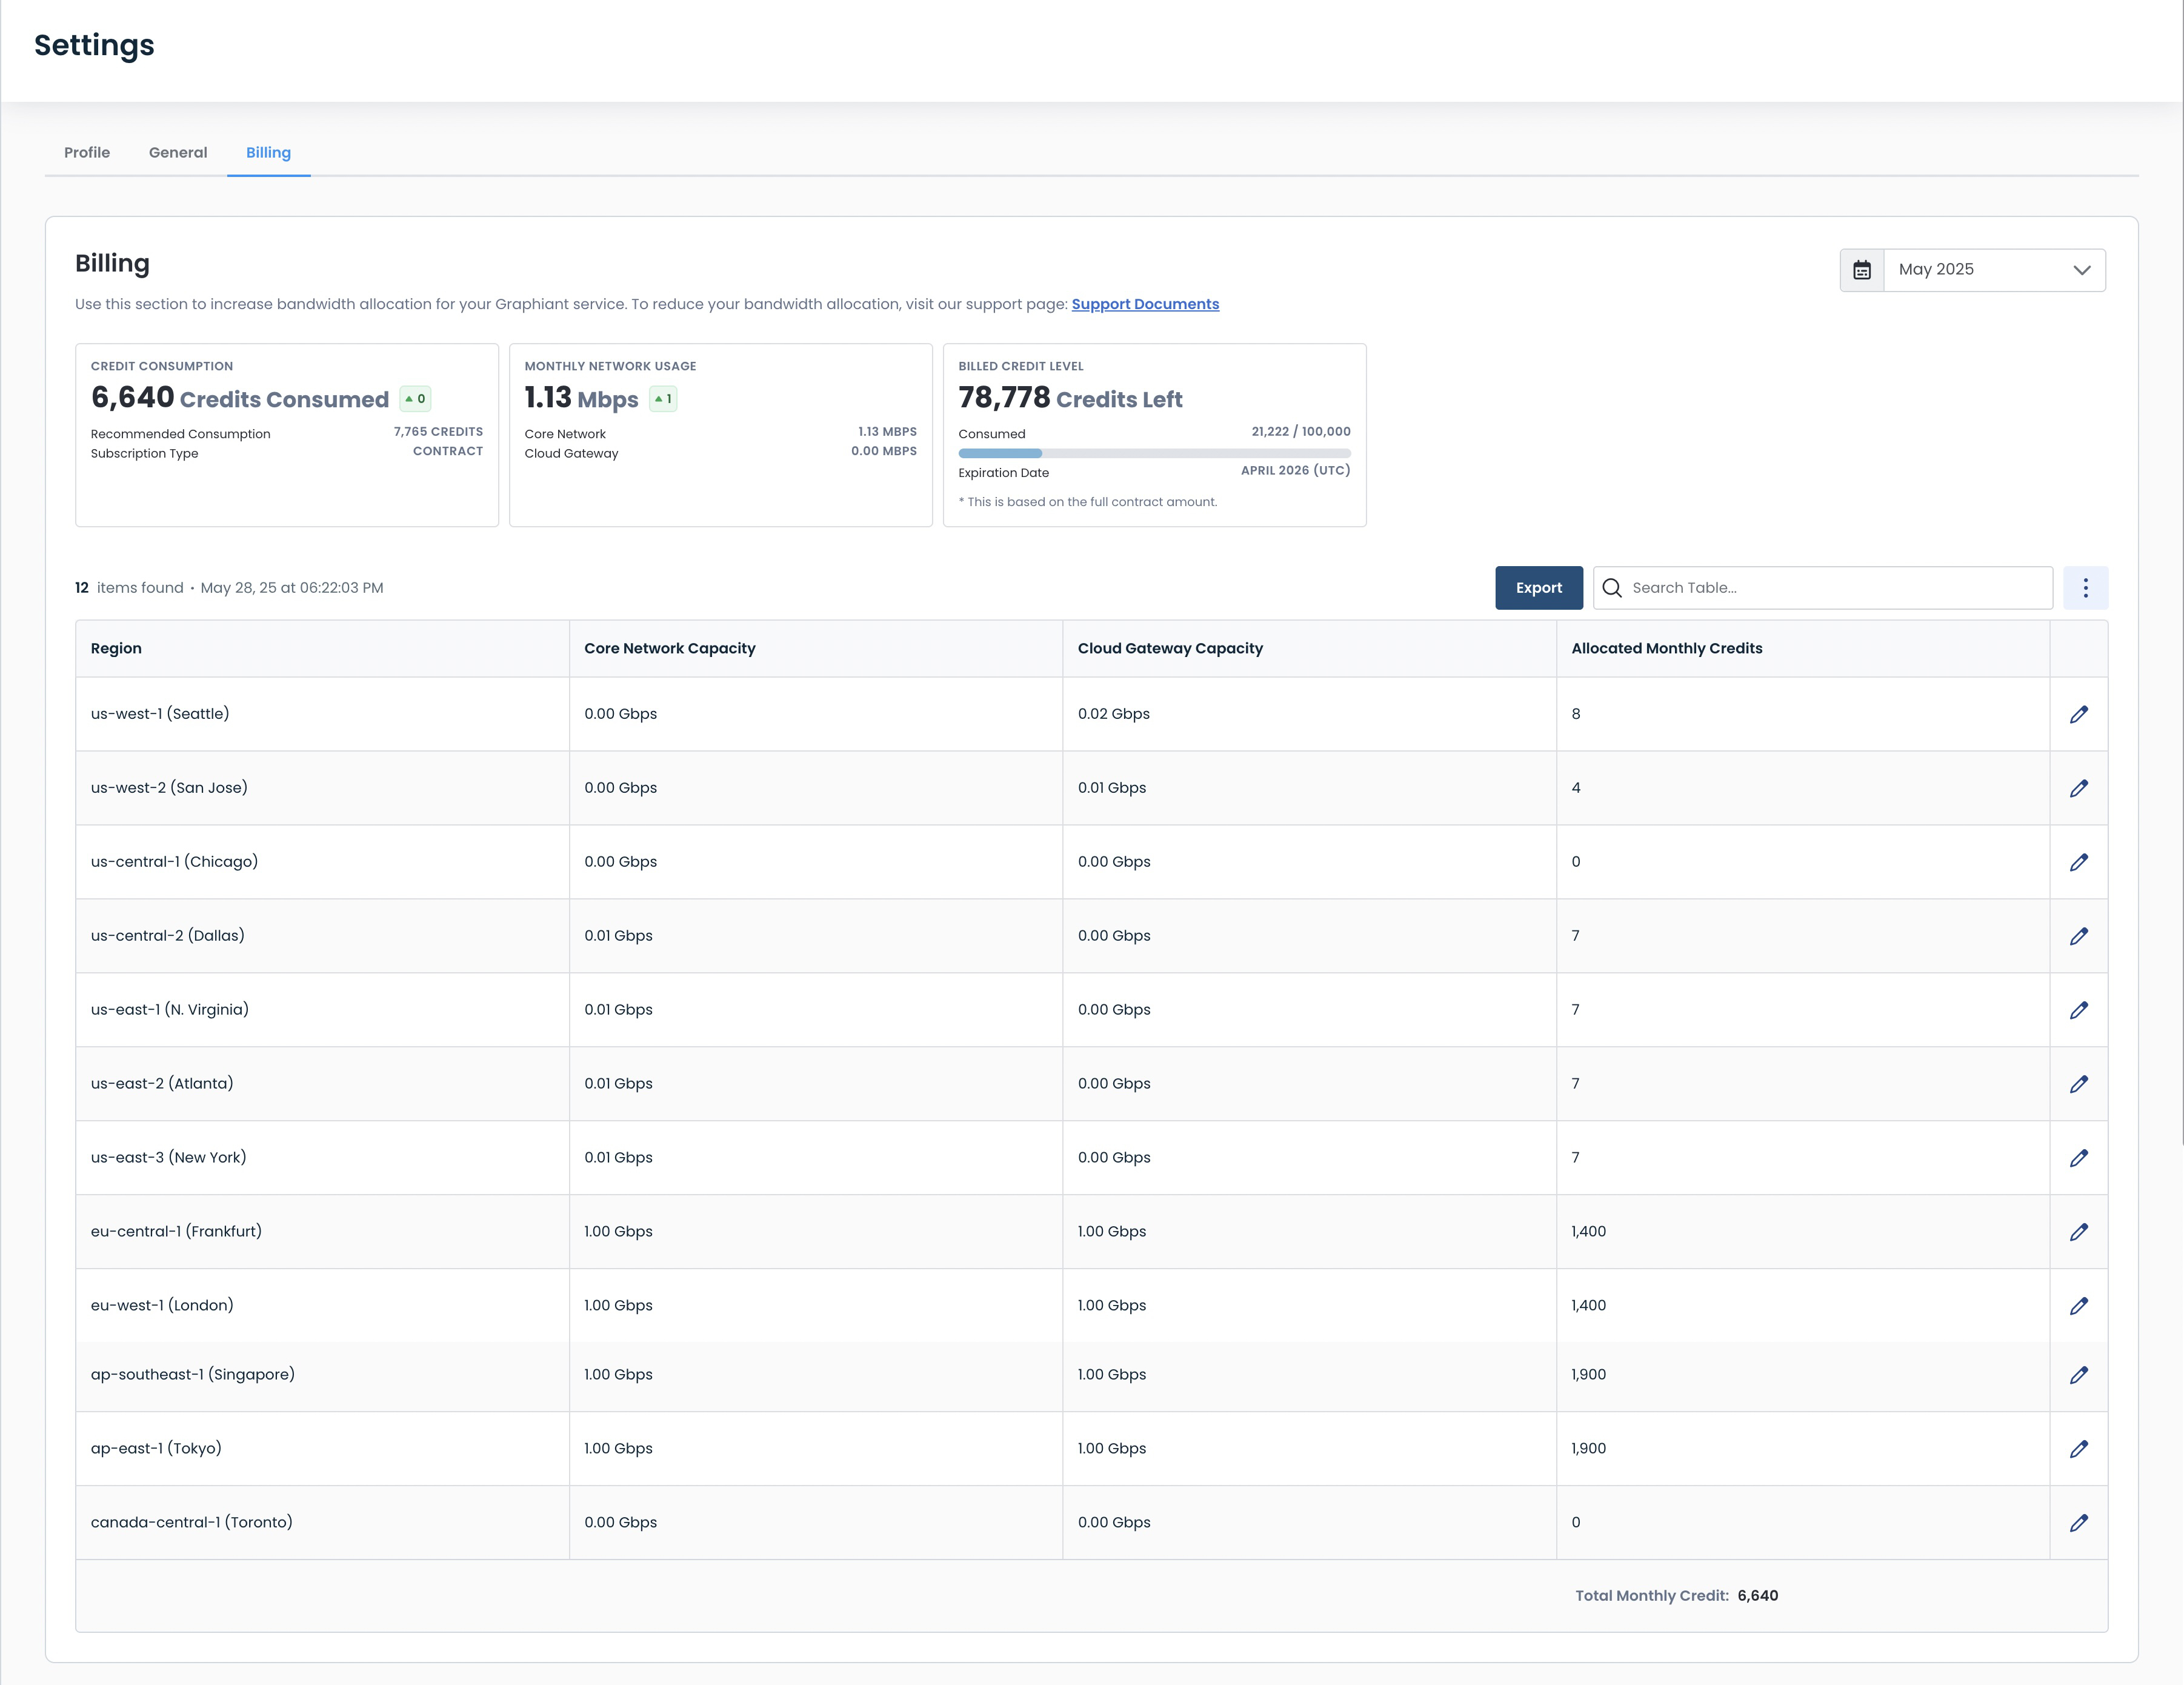
This dashboard provides the following information:
Widgets:
Credit Consumption:
Credits Consumed: Number of credits used
Recommended Consumption: Advised consumption per month going forward, based on your remaining credits over the remaining time on your contract
Subscription Type:
Contract: Purchased via direct sales with Graphiant
Monthly: Purchased via AWS Marketplace
Monthly Network Usage: Bandwidth usage recorded during the month, broken down between:
Core Network: Graphiant Entity (Edge/Gateway) to Graphiant Core
Cloud Gateway: Graphiant Gateway to Cloud Service
Billed Credit Level: Amount of credits remaining for that month
Consumed: Progress bar indicating how many credits have been used out of your allocated amount
Expiration Date: End of your plan (last day of the month at 12:00 am UTC), whether it be:
Contract: The Expiration Date will show the month your contract will end.
Monthly: The Expiration Date will show the end date of the current month.
Credit Table:
Region: Where the bandwidth is being consumed upon entering the Graphiant Data Highway/Backbone
Core Network Capacity: Maximum usage for your plan between the Edge and the Graphiant Core
Cloud Gateway Capacity: Maximum usage for your plan between the Cloud Gateway and the Cloud Service
Allocated Monthly Credits: Number of reserved credits per region for your plan for the entirety of the month
Total Monthly Credits: Total number of reserved credits for your plan for the entirety of the month
Editing Bandwith Allocation
To increase your bandwidth for any amount you wish to allocate for a region, click the ‘Edit’ symbol to the right of the region to be updated.
.jpg)
A modal will appear where you can increase your allocations for both Core Network and Cloud Gateway individually.
Note:
You can only increase your allocation here.
To decrease your allocation, open a ticket or contact Graphiant support. The change(s) will take place at the next billing cycle.
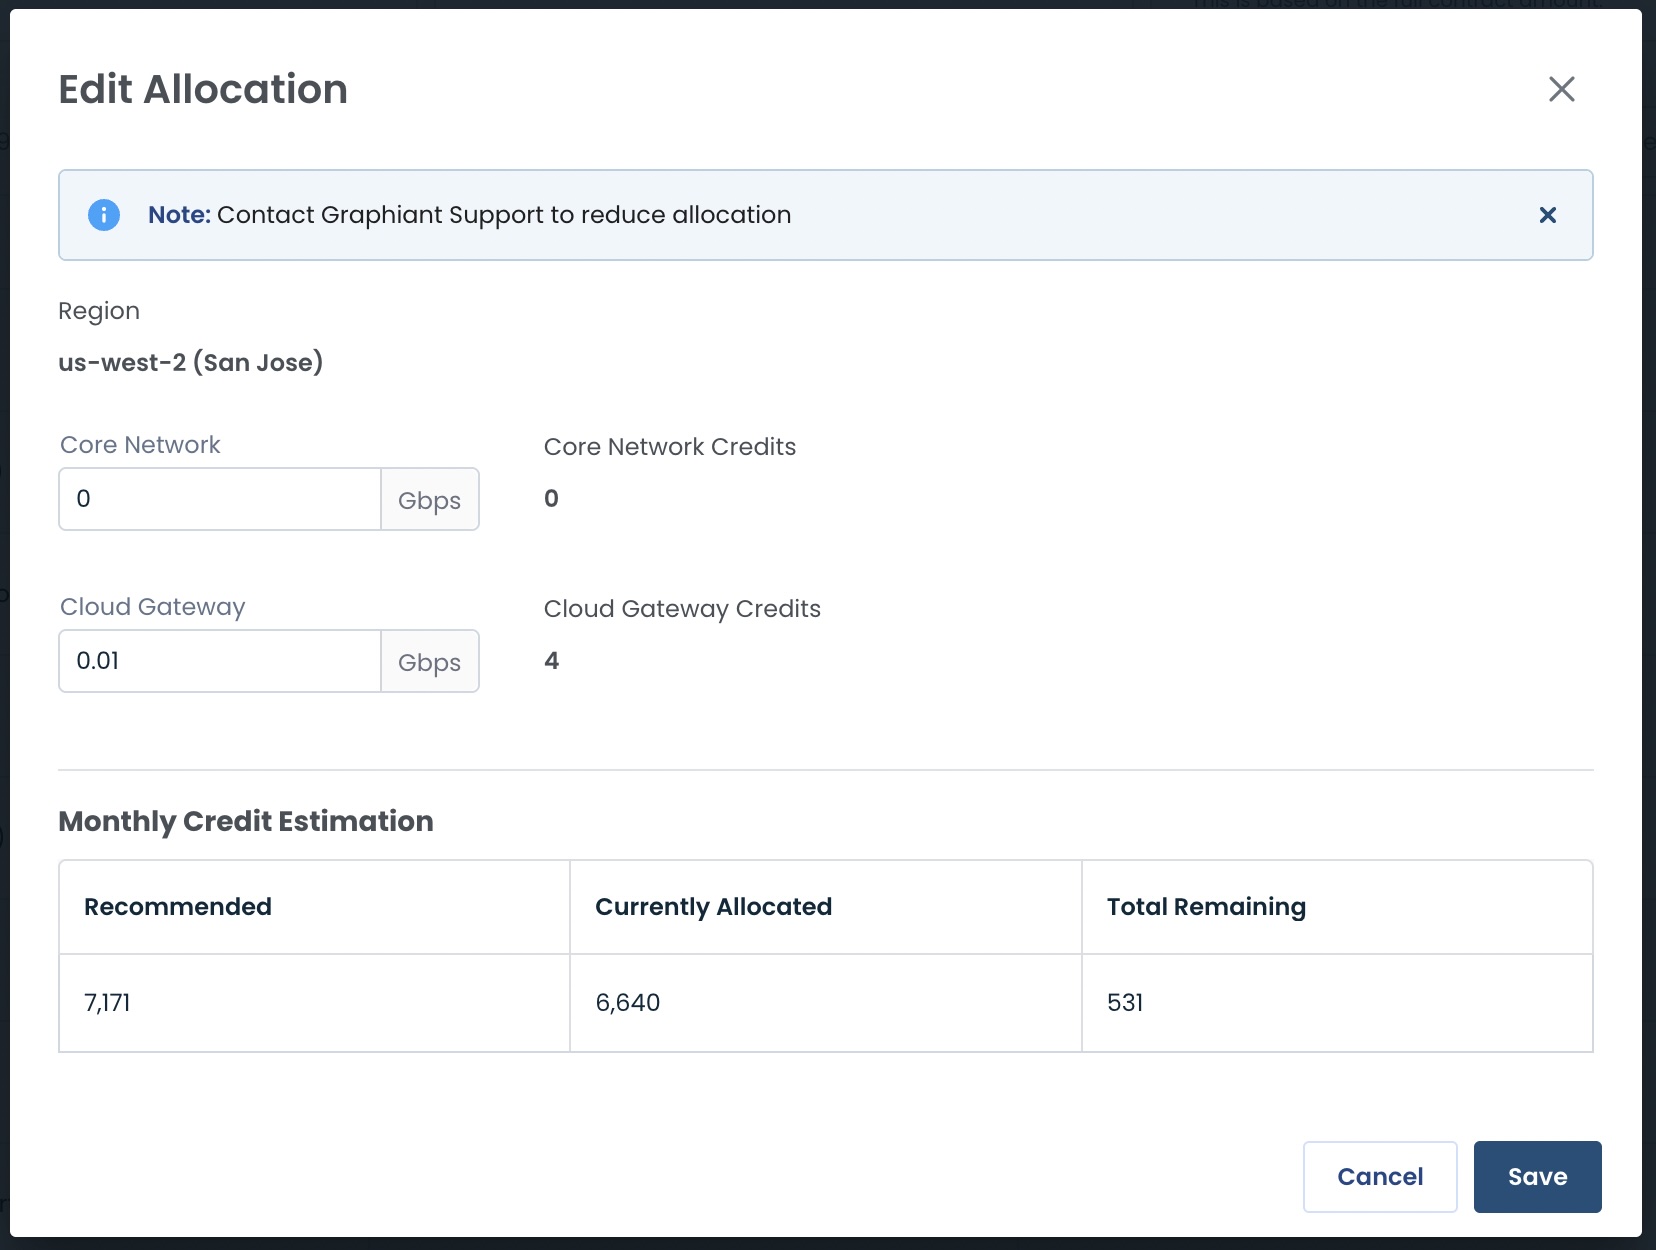
Increase the desired bandwidth allocation for either Core Network, Cloud Gateway, or both.
Note:
The credit totals for both capacities for that region are shown to the right of their respective fields, and update as you fill out the bandwidth so that you can see what the effect will be before you save your changes.
Click ‘Save’.
.jpg)
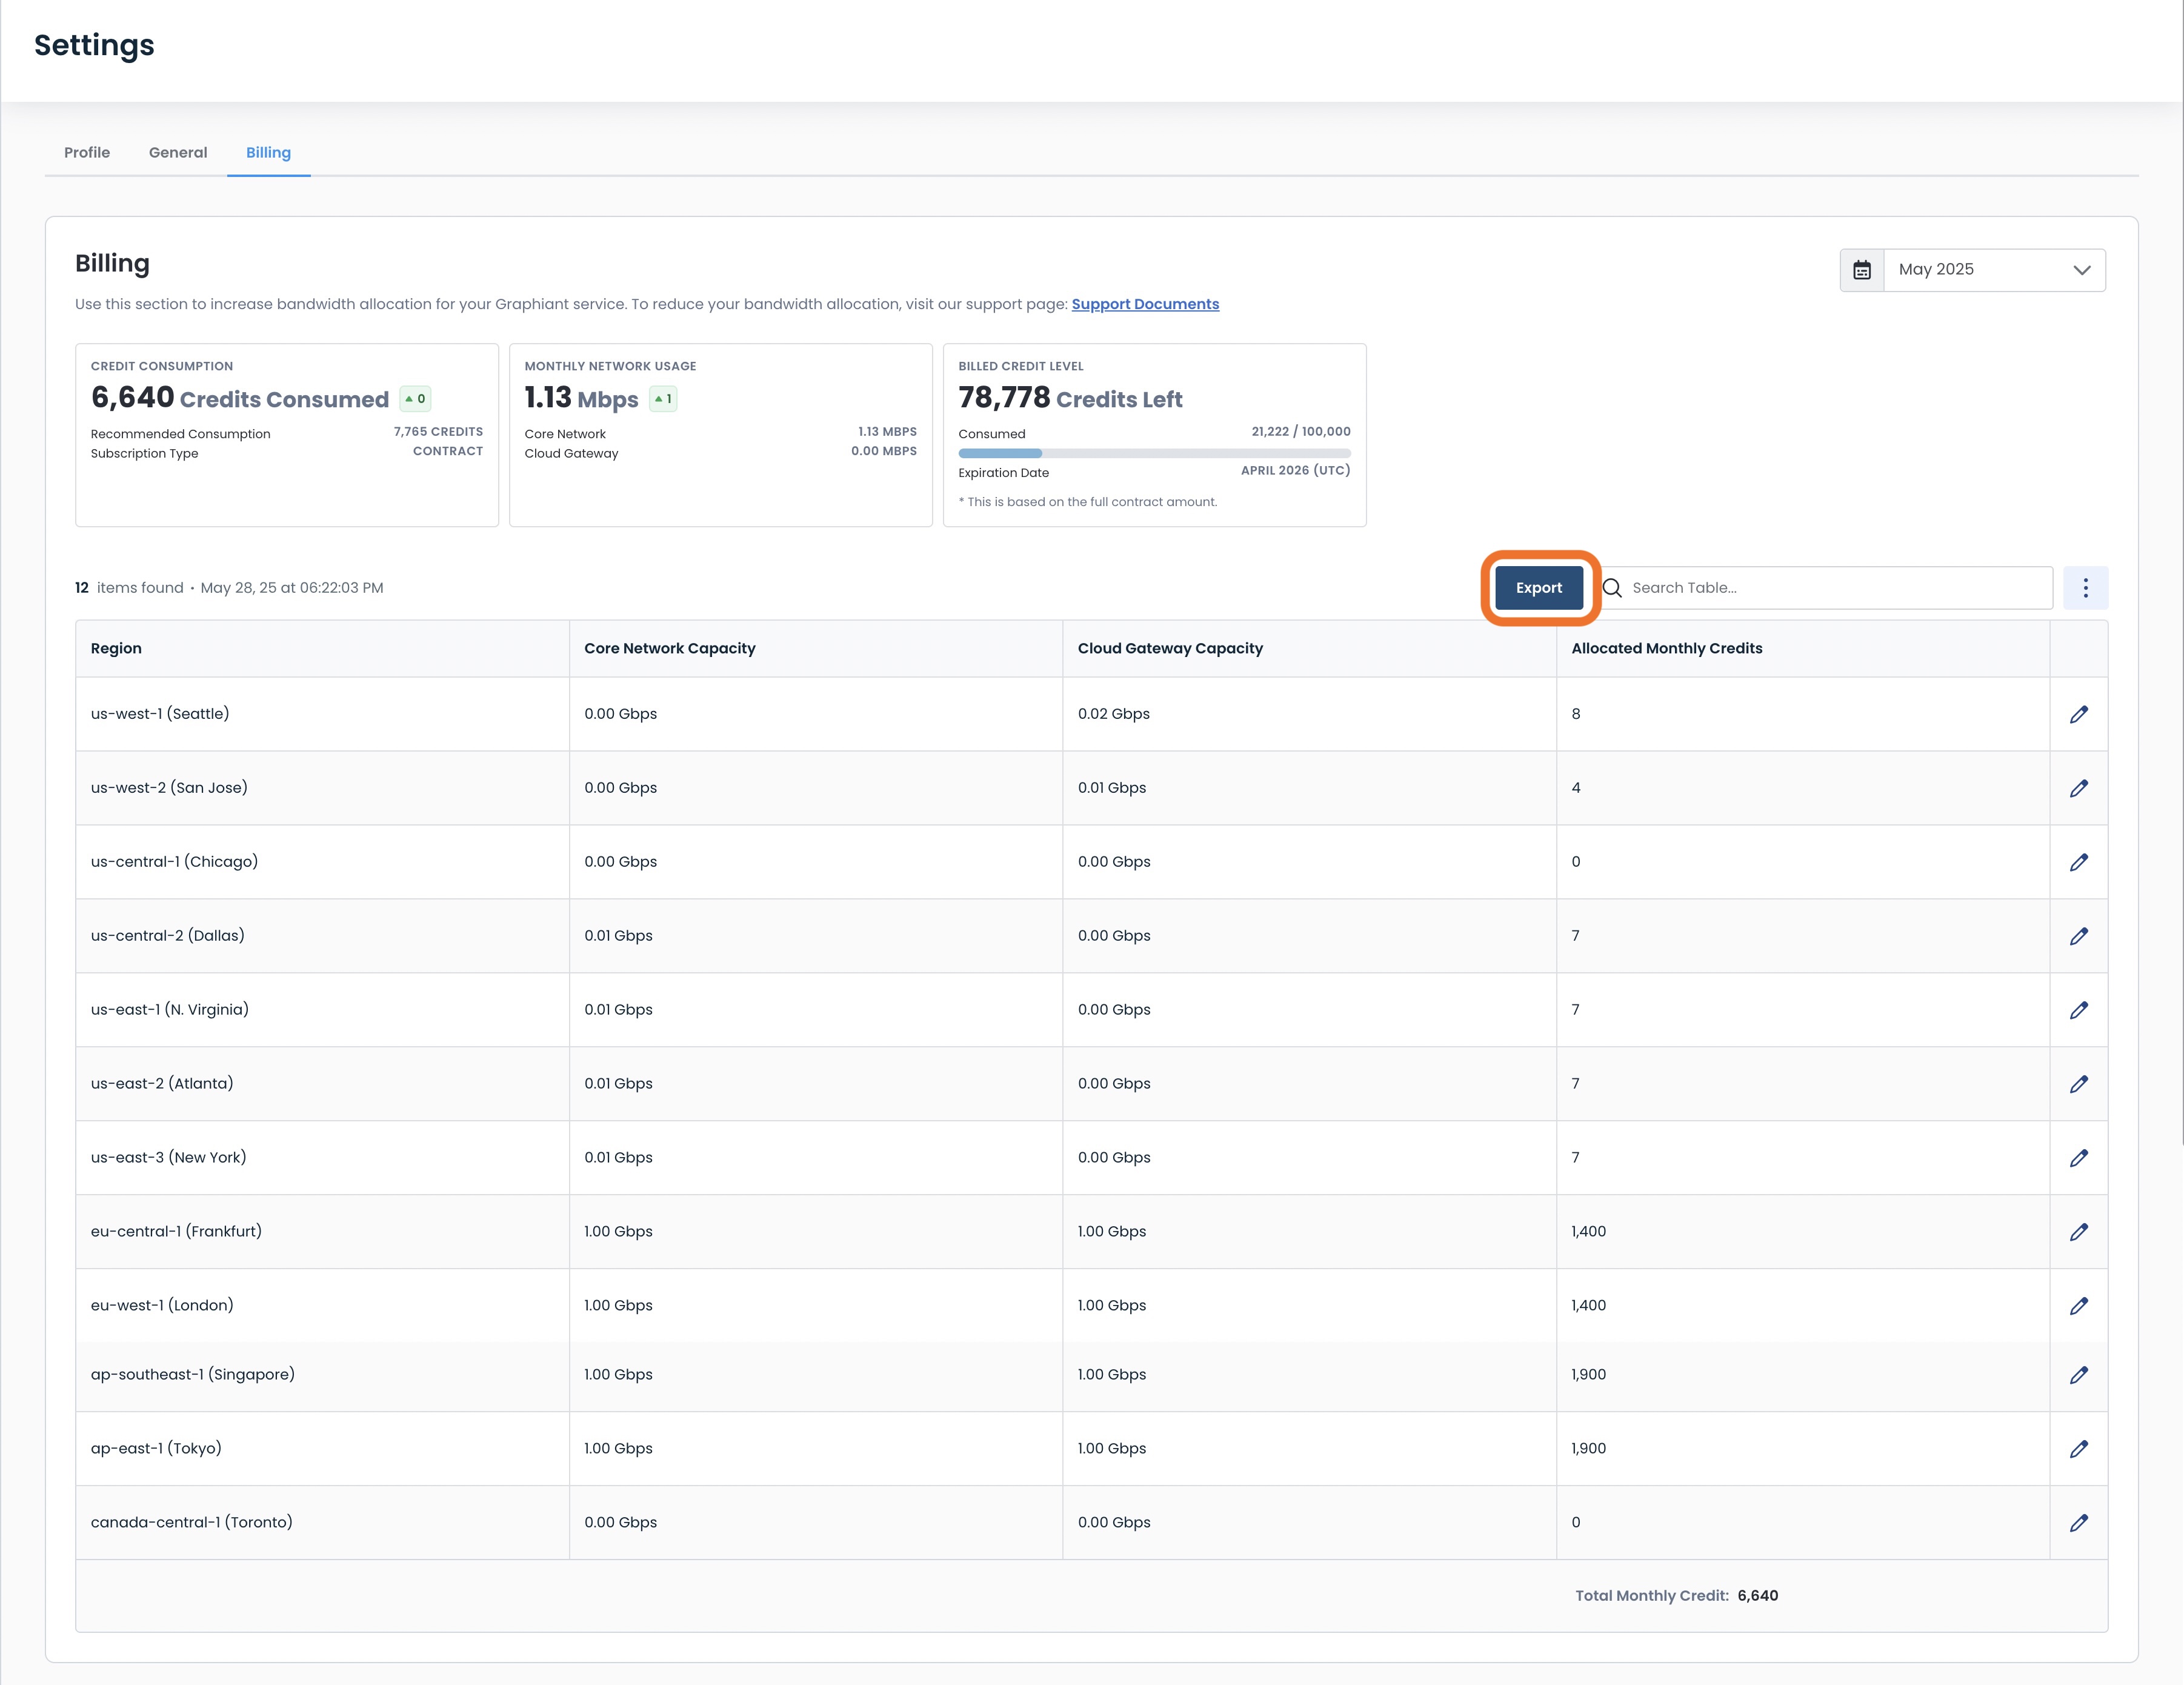
Your new bandwidth allocation totals will be reflected in the table, and incorporated into all credit and bandwidth values.
Note:
While increasing your bandwidth allocation amount, should you hit the next tier, Graphiant will automatically adjust your credit charges to match the lower price in that new tier. For more information about tier levels, click here.
Downloading Your Bandwidth / Credit Usage Information
You can download a report of this page by clicking the ‘Export’ button above the table.
A modal will appear confirming the month of the CSV file that you can export.
Click ‘Download’.
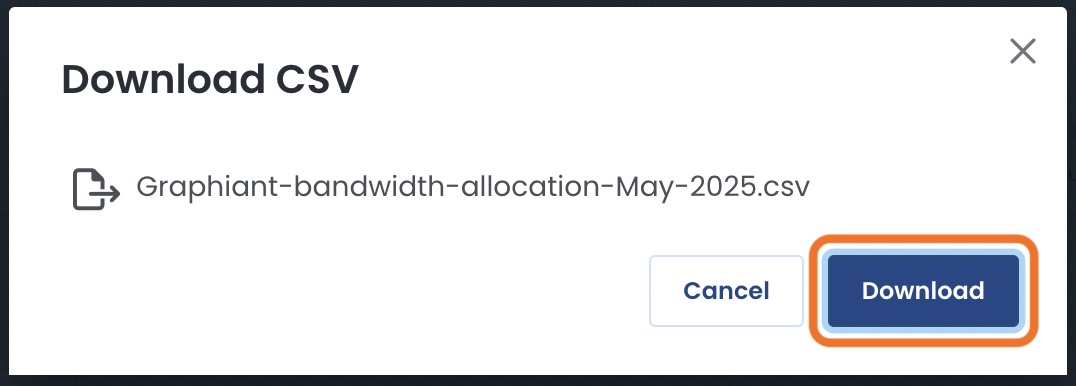
The report will now be downloaded to your device.