What is DHCP Relay?
DHCP is a network management protocol responsible for assigning and leasing new, dynamic IP addresses as well as propagating the subnet mask, default gateway, and DNS server to network devices as they connect on a LAN.
When utilizing DHCP on a network, there are two options: one is to establish a given Edge device as a DHCP server (see Configuring DHCP), the other is to connect your devices to a DHCP server already established elsewhere on your WAN. This is referred to as a DHCP Relay.
DHCP Relay in the Graphiant Portal
The following will walk you through the steps in order to connect your Edge device with, and establish, a DHCP Relay through the Graphiant Portal.
Step 1: Locating DHCP Relay in the Graphiant Portal
From the Home screen, navigate to the Edge Configuration screen by one of the following:
Locate the "Configurations" section within the “Quickstart” area of the screen; select 'Configure Edges'.
or
Click 'Configure' in the sidebar; select 'Devices'.
.png)
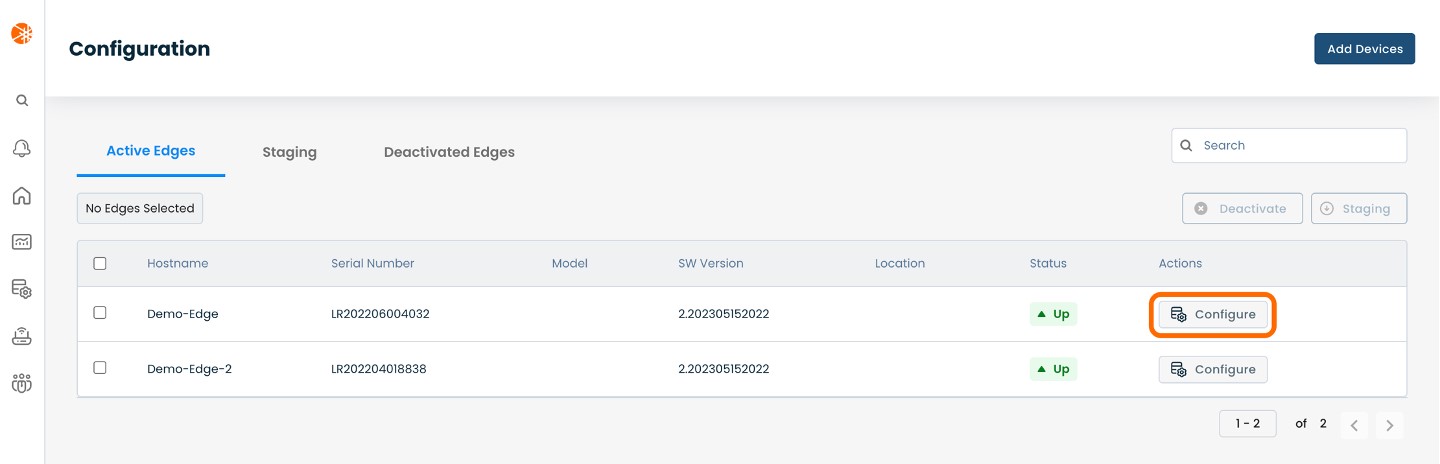
This will take you to the ‘Configuration’ page of the Graphiant Portal where you will be able to view all active, staged, and deactivated Edges. From here you will be able to select among the active Edges which Edge(s) you would like to be configured with DHCP Relay.
On the righthand side, select and click ‘Configure’ in tandem with the Edge you wish to manage.
This will take you onto a Configuration page with a focus on the Edge you have just chosen.
Here you will see a list of headings along the lefthand side of the page, such as ‘Configure Network’, ‘Configure Services’, ‘Configure Policies’, etc.
From here, select and click ‘Configure Network’.
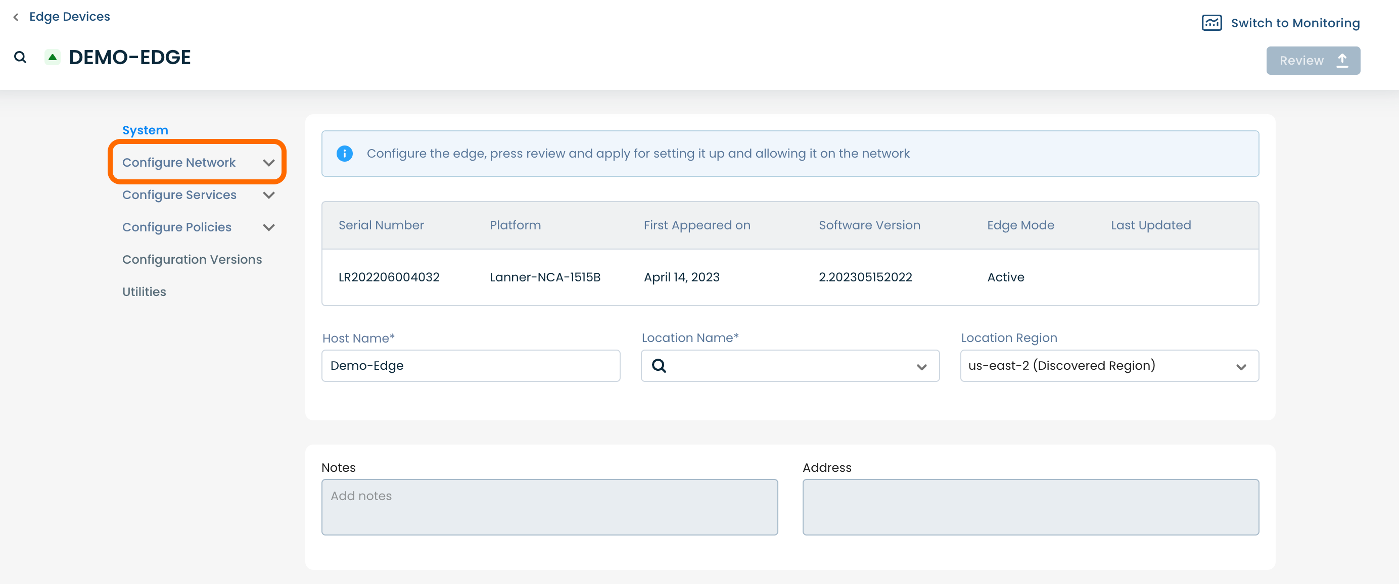
A dropdown menu will appear. From the dropdown menu, select and click ‘Interfaces’.

This will take you to an Interfaces page for the chosen Edge.
On the Interfaces page, you will see a list of available Interfaces to choose from.
Select and click the interface with which you would like to establish a DHCP Relay.
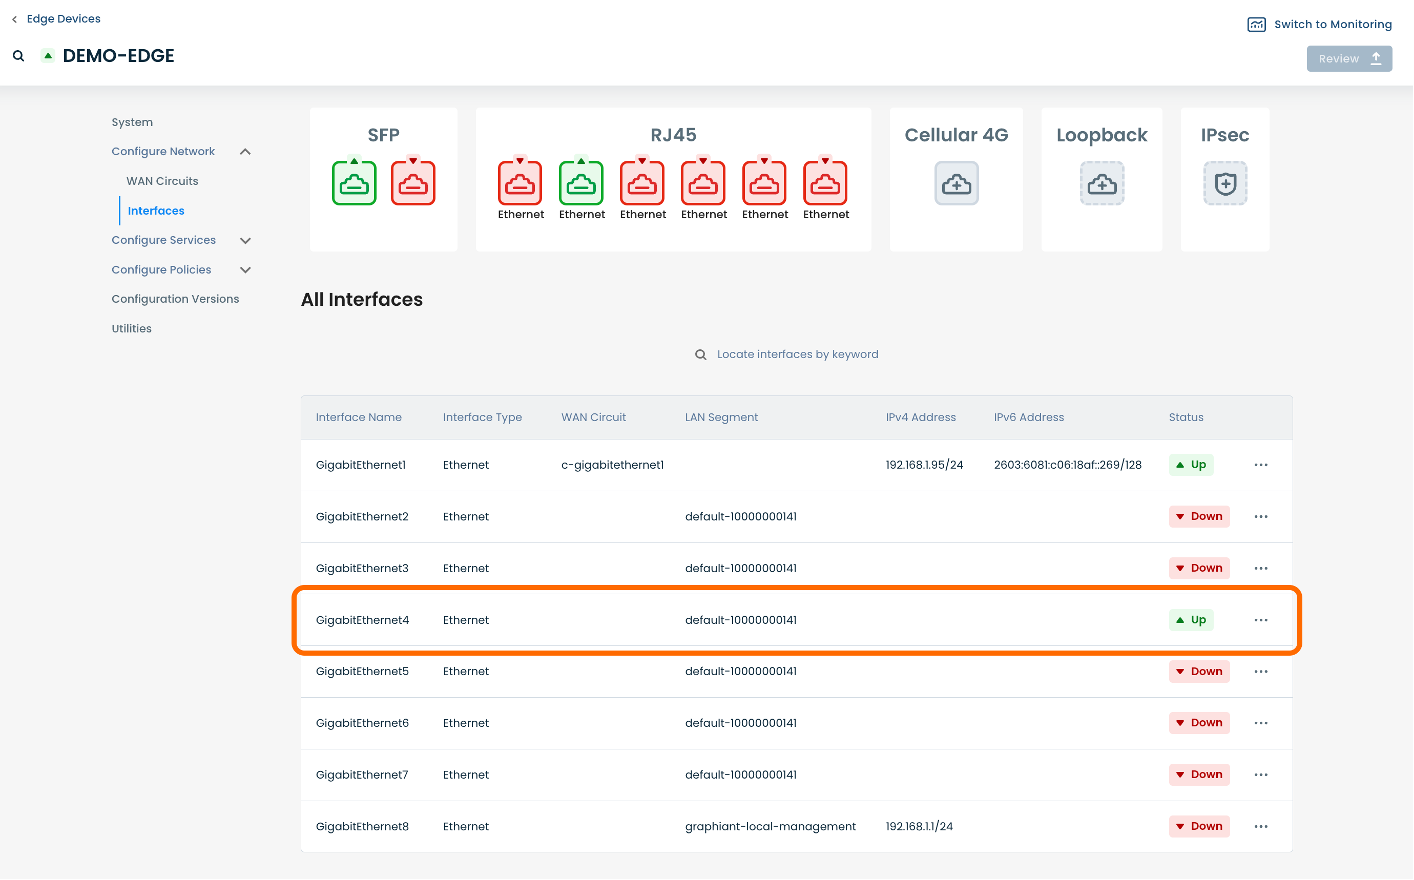
Select and click the ellipses in tandem with the selected interface; select and click ‘Edit interface’.
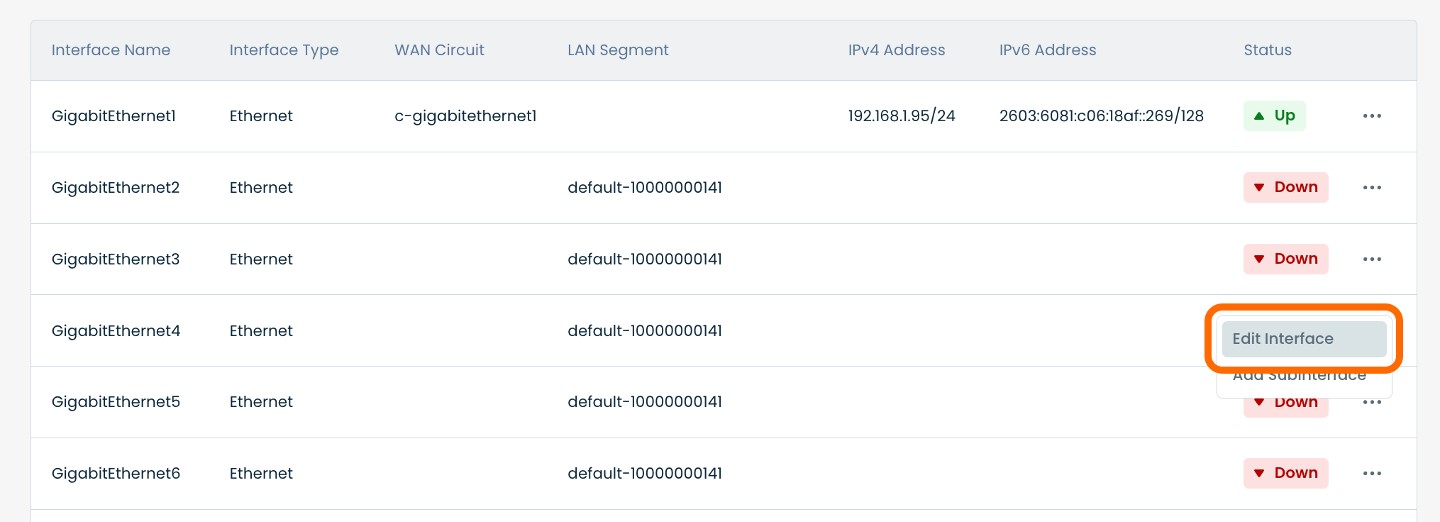
This will bring you to a page dedicated to the interface selected.
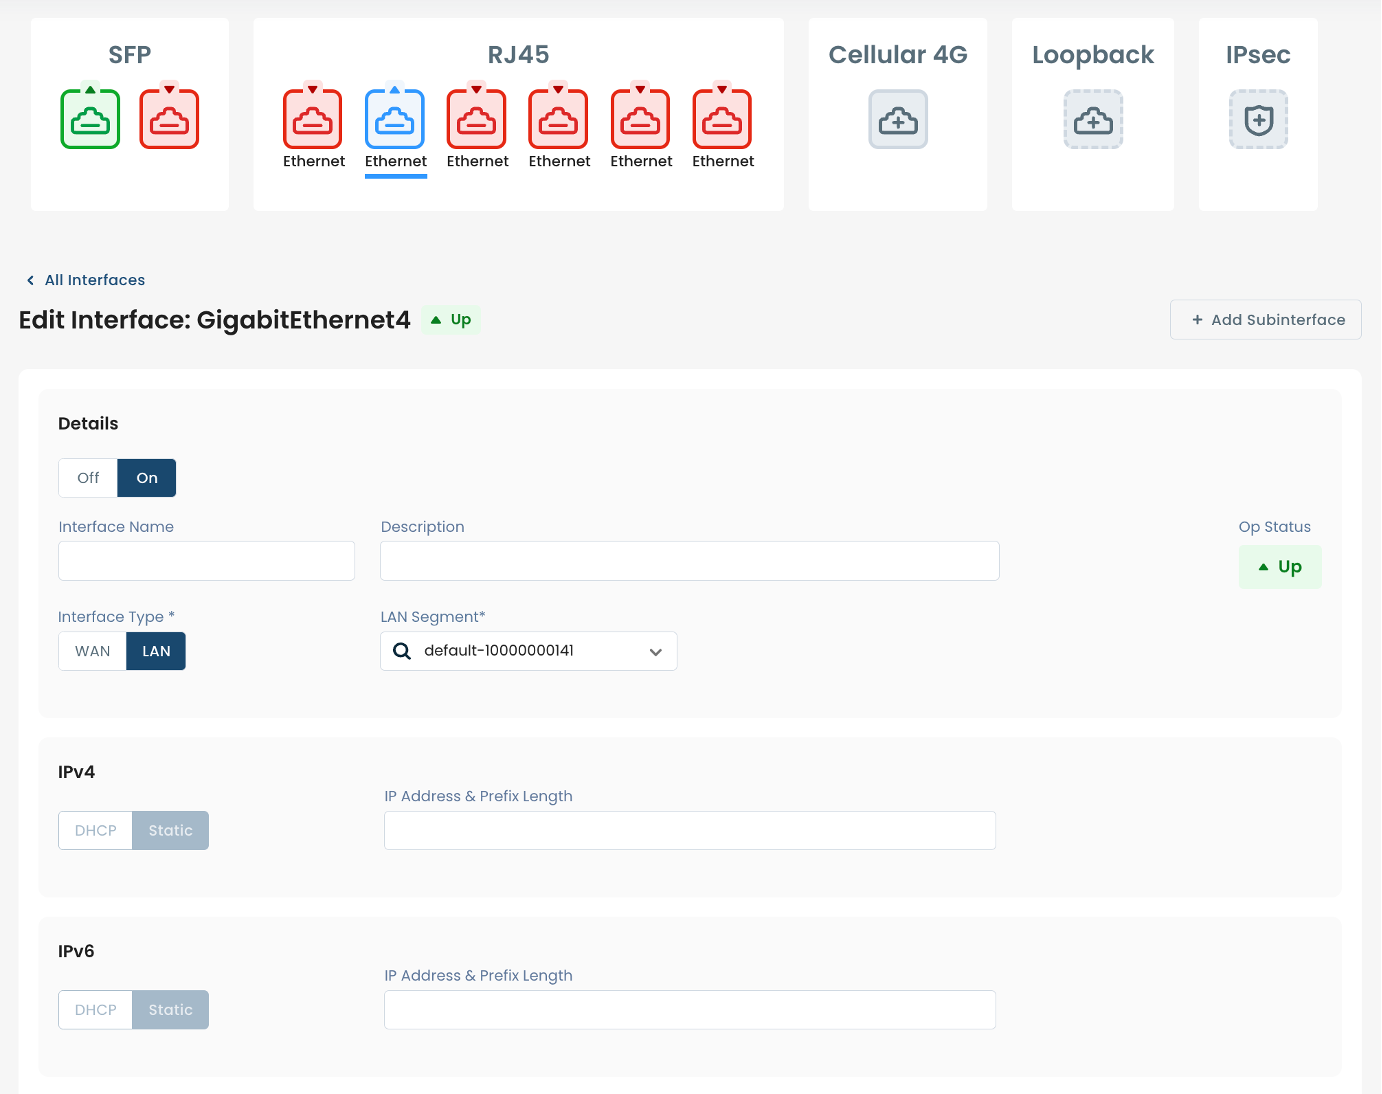
On this page you will be able to manage the selected interface, as well as add a subinterface.
Note:
For instructions on adding a subinterface, see Adding a Subinterface.
Step 2: Establishing DHCP Relay in the Graphiant Portal
Establishing DHCP Relayon a LAN Interface
Below are instructions for onboarding interfaces on a LAN. Here you will be able to establish a DHCP Relay, toggle Static and DHCP for IPv4 and IPv6 addresses, and establish VRRP.
Note:
Note: For instructions on establishing VRRP, see Configuring VRRP.
At the center of the page dedicated to the selected Interface, you will be able to toggle the interface type, with the choice of either ‘LAN’ or ‘WAN’.
Select and click ‘LAN’.
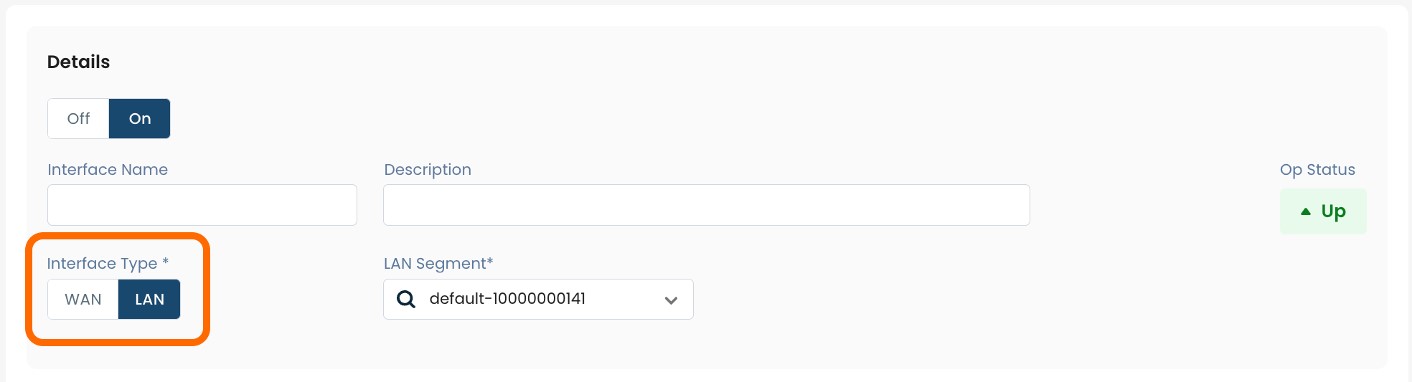
This will propagate several required fields, pictured below.
Descriptors for each of the fields required in order to establish DHCP Relay on the selected interface are:
(An * indicates a required field.)
Interface Name*: Choose a name to label the interface.
Description: Choose a description for the interface.
Interface Type*: Select LAN.
LAN Segment*: Choose a desired LAN segment from the dropdown menu.
Zone*: This field will populate automatically based on chosen LAN segment.
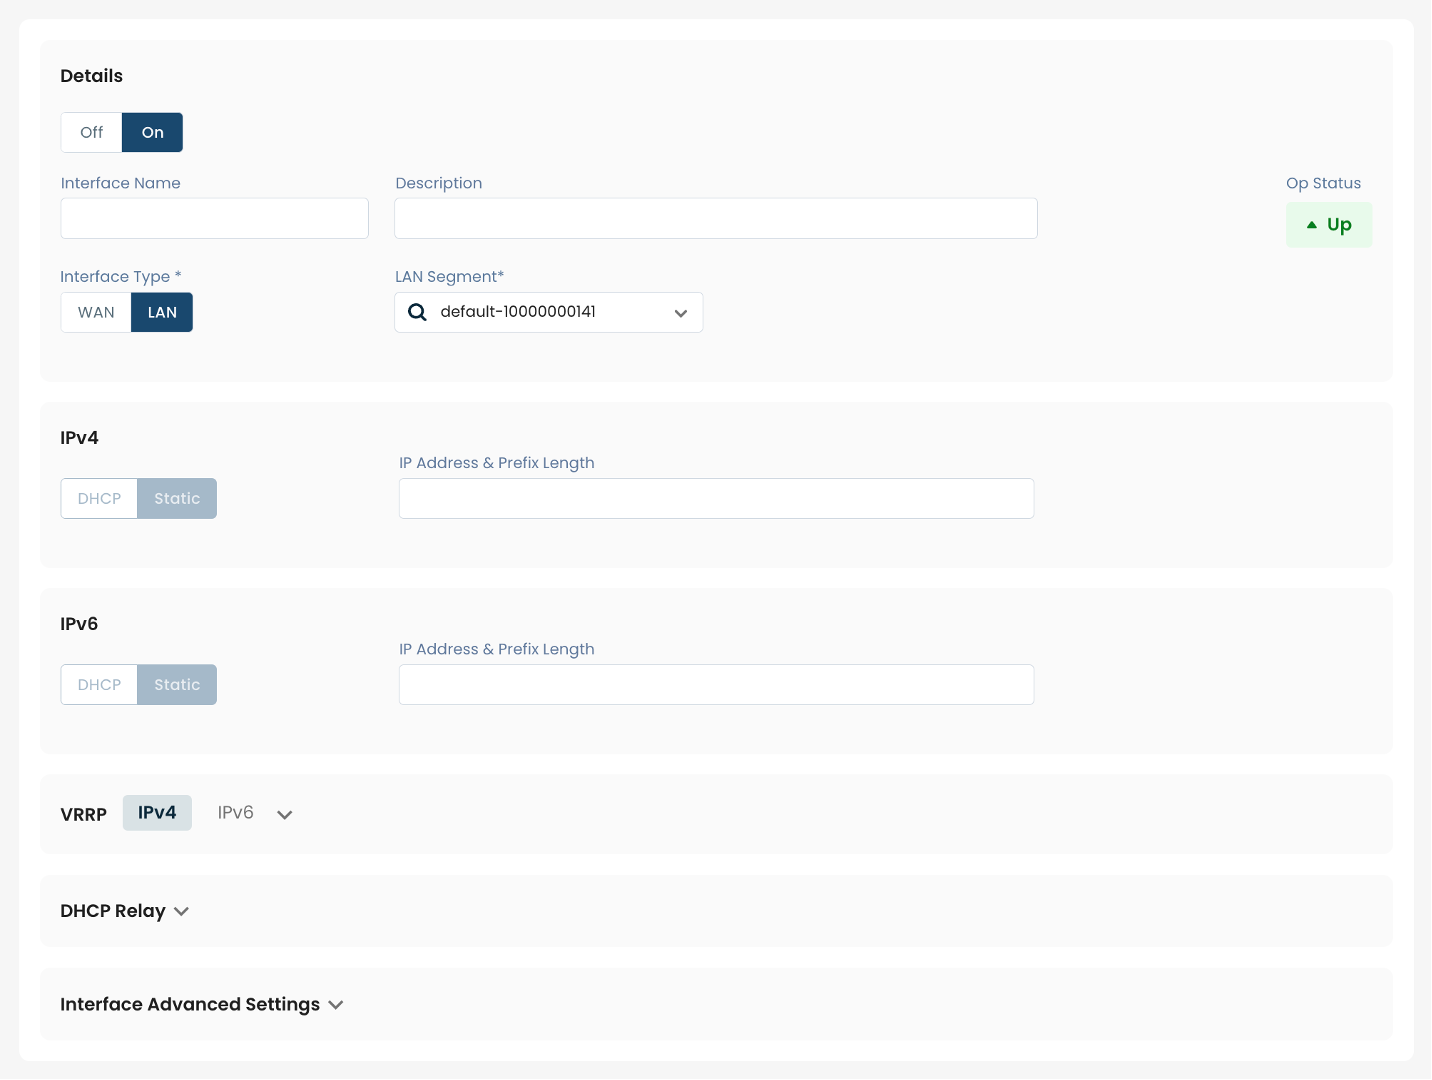
DHCP Relay:
IPv4 Addresses: This field will populate automatically .
IPv6 Addresses: This field will populate automatically.

Once the above fields are filled in, the selected Edge device will be ready to begin secure communications with the established DHCP server; however you will first need to review and approve all changes made.

On the top righthand corner, choose from the following options:
‘Discard’ to discard changes made
‘Save as Draft’ to save changes made to be implemented at a later time
‘Review’ to review and apply changes made for immediate deployment
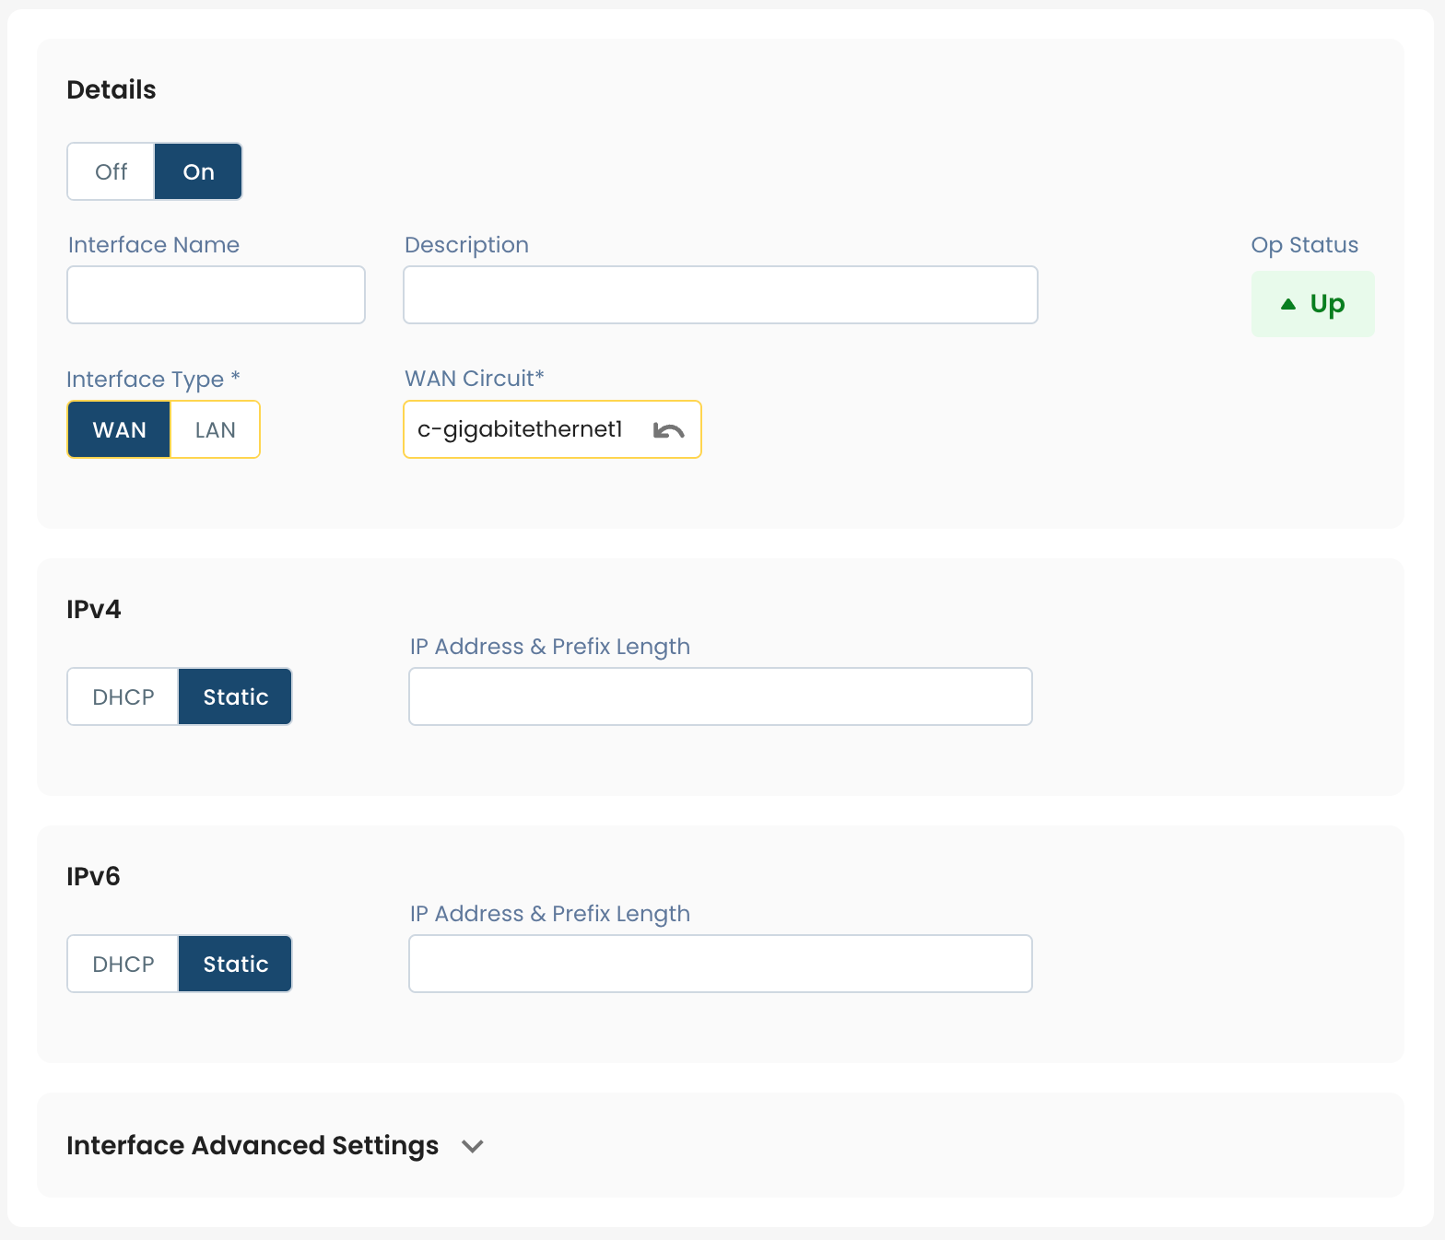
Establishing DHCP Relay on a WAN Interface
Below are instructions for onboarding interfaces on a WAN.
At the center of the page dedicated to the selected Interface, you will be able to toggle the interface type to either ‘LAN’ or ‘WAN’.
Select and click ‘WAN’.
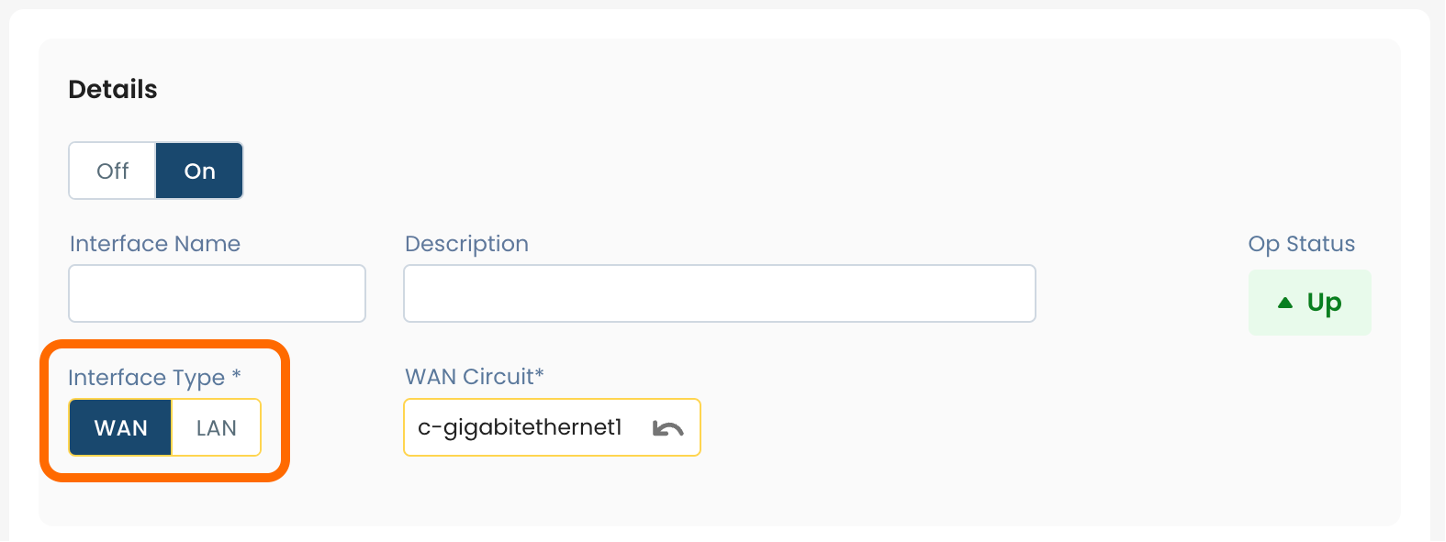
This will propagate several required fields, pictured below.
Descriptors for each of the fields required in order to begin communications with the allocated DHCP server on the selected interface are:
(An * indicates a required field.)
Interface Name*: Choose a name to label the interface.
Description: Choose a description for the interface.
Interface Type*: Select WAN.
WAN Circuit*: Choose the desired WAN circuit from the dropdown menu
IPv4
Choose Interface Type: Choose DHCP; The “IP Address & Prefix Length” field will populate automatically.
IPv6
Choose Interface Type: Choose DHCP; The “IP Address & Prefix Length” field will populate automatically.
Once the above fields are filled in, the selected Edge device will be ready to begin secure communications with the established DHCP server, however you will first need to review and approve all changes made.

On the top righthand corner, choose from the following options:
‘Discard’ to discard changes made
‘Save as Draft’ to save changes made to be implemented at a later time
‘Review’ to review and apply changes made for immediate deployment
Note:
For establishing an Edge device on your LAN as a DHCP server, see Configuring DHCP.