What is SNMP?
Simple Network Management Protocol (SNMP) is a standard protocol used to monitor and manage network devices. It enables secure access to your devices, supports authentication and encryption (when implemented), and provides the visibility needed to manage complex network environments.
SNMP facilitates information sharing among devices on your network by polling them for operational data such as status, throughput, configuration, temperature, memory usage, uptime, CPU utilization, errors, etc. It collects, organizes, and communicates this information to support network monitoring, troubleshooting, and fault isolation.
SNMP also provides mechanisms for protecting data in transit. Depending on your security option, you can enforce authentication requirements, restrict unauthorized access, and enable encryption to ensure the confidentiality and integrity of management data.
SNMP in the Graphiant Portal
Graphiant supports SNMPv2c and SNMPv3; from the Graphiant Portal, you will be able to configure the version that is right for you.
Locating SNMP in the Graphiant Portal
From the Home screen, navigate to the Edge Configuration screen by one of the following:
Locate the "Configurations" section within the top left of the screen; select 'Configure Edges'.
or
Click 'Configure' in the sidebar; select 'Devices'.
.jpg)
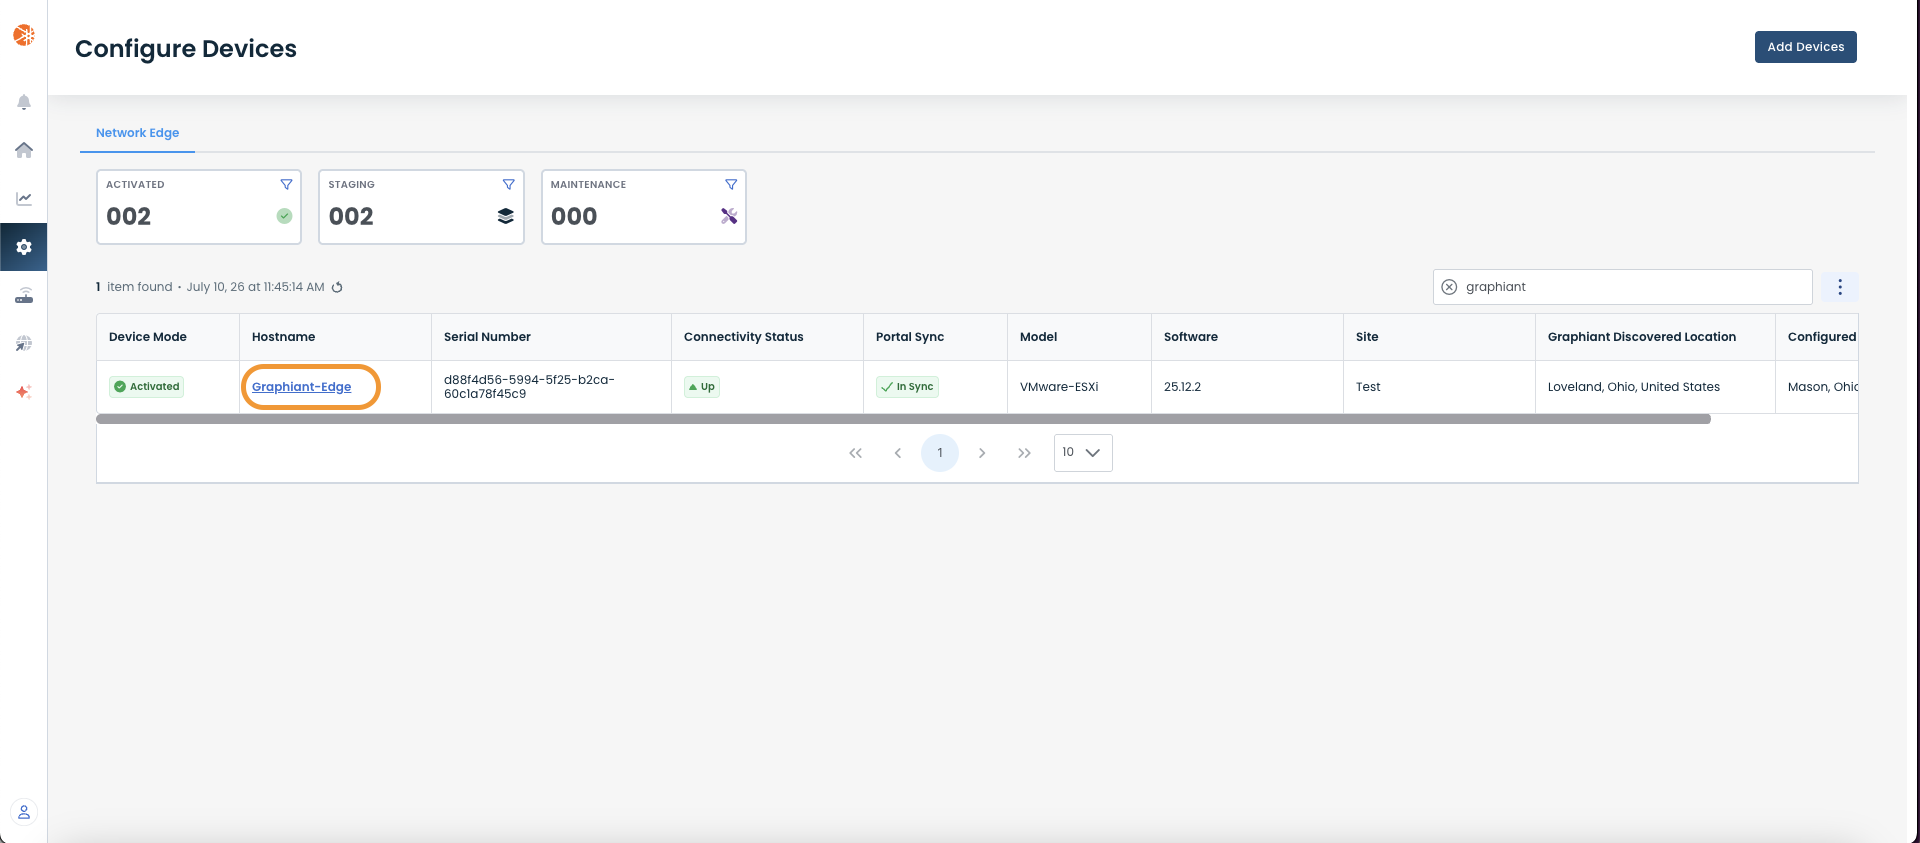
This will take you to the ‘Configuration’ page of the Graphiant Portal where you can view all active, staged, and deactivated Edges. From here you will be able to select among the active Edges which Edge(s) you would like to configure.
On the left-hand side, select and click the Edge you wish to manage under the column 'Hostname.'
This will take you onto a Configuration page with a focus on the Edge you have just chosen.
Here you will see a list of headers along the lefthand side of the page, such as ‘Configure Network’, ‘Configure Services’, ‘Configure Policies’, etc.
Select and click ‘Configure Services’, and from the dropdown menu select and click ‘Edge Services’.
.png)
This will bring you to the 'DNS' page in the Edge Services section. On this page click on the ‘SNMP’ tab.
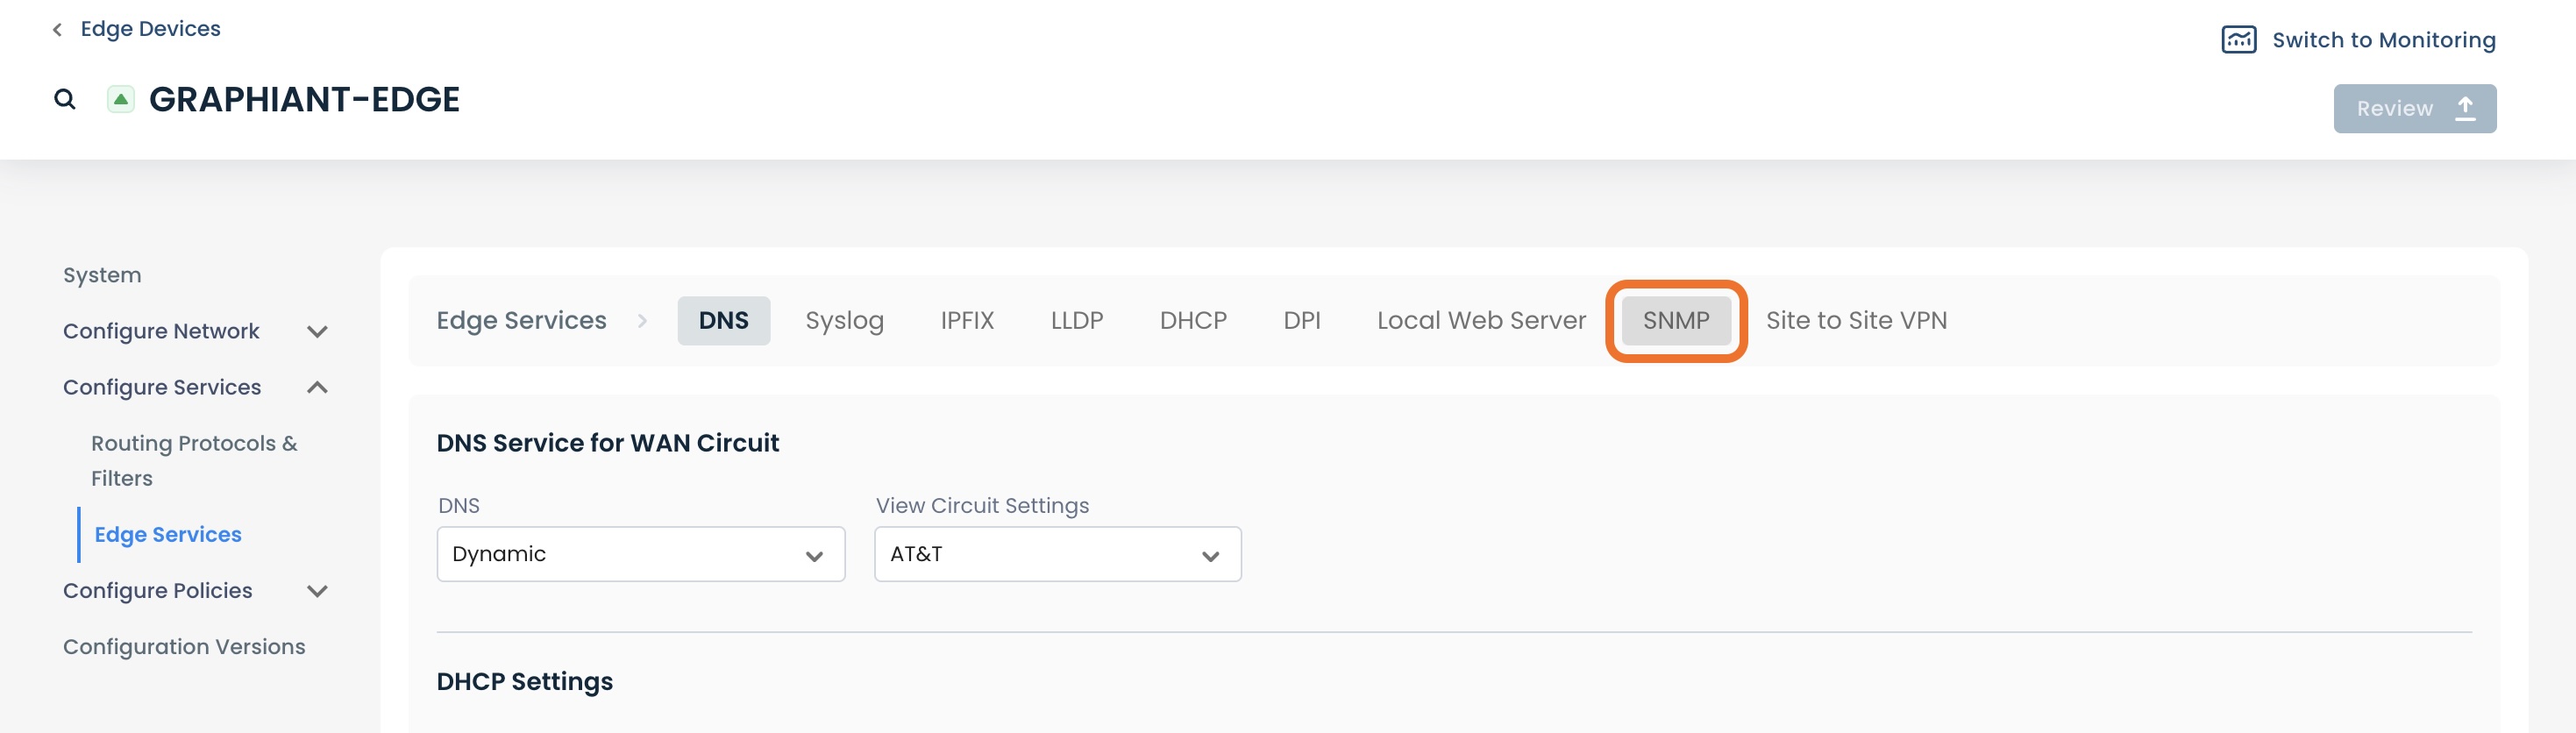
This will open up the landing page for SNMP configuration.
Step 2: Configuring SNMP in the Graphiant Portal
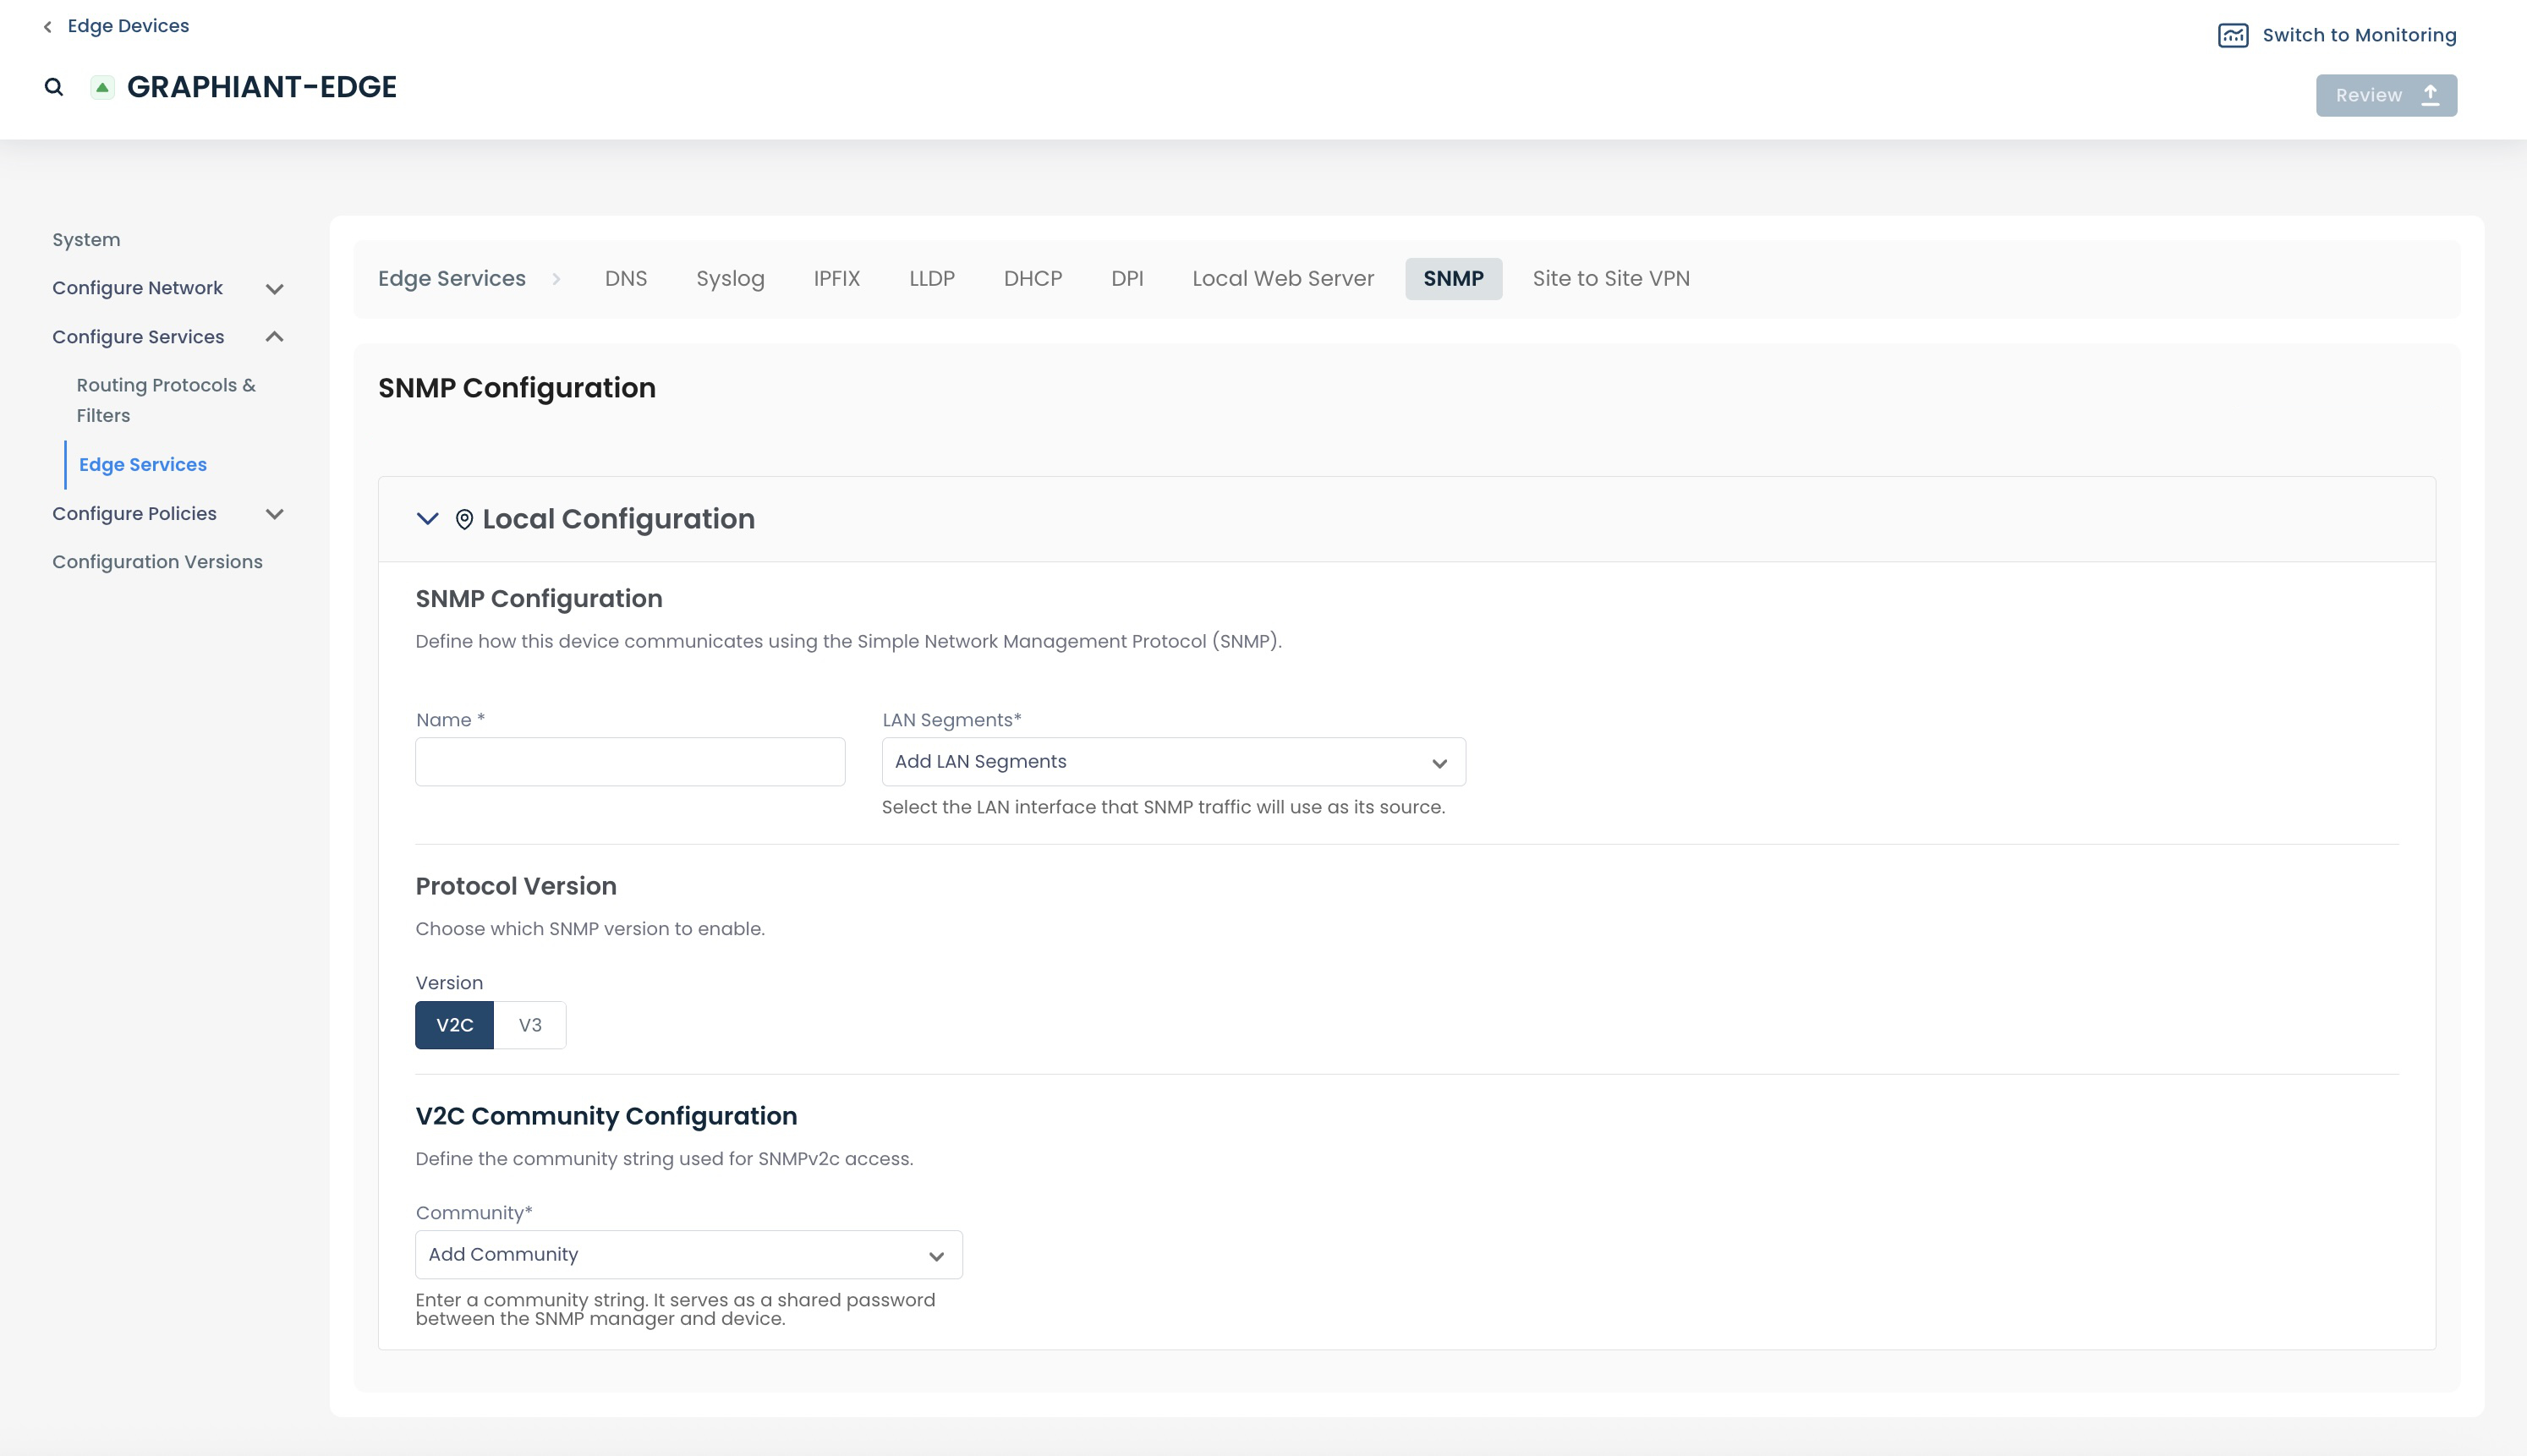
The SNMP configuration page is ready to take your information.
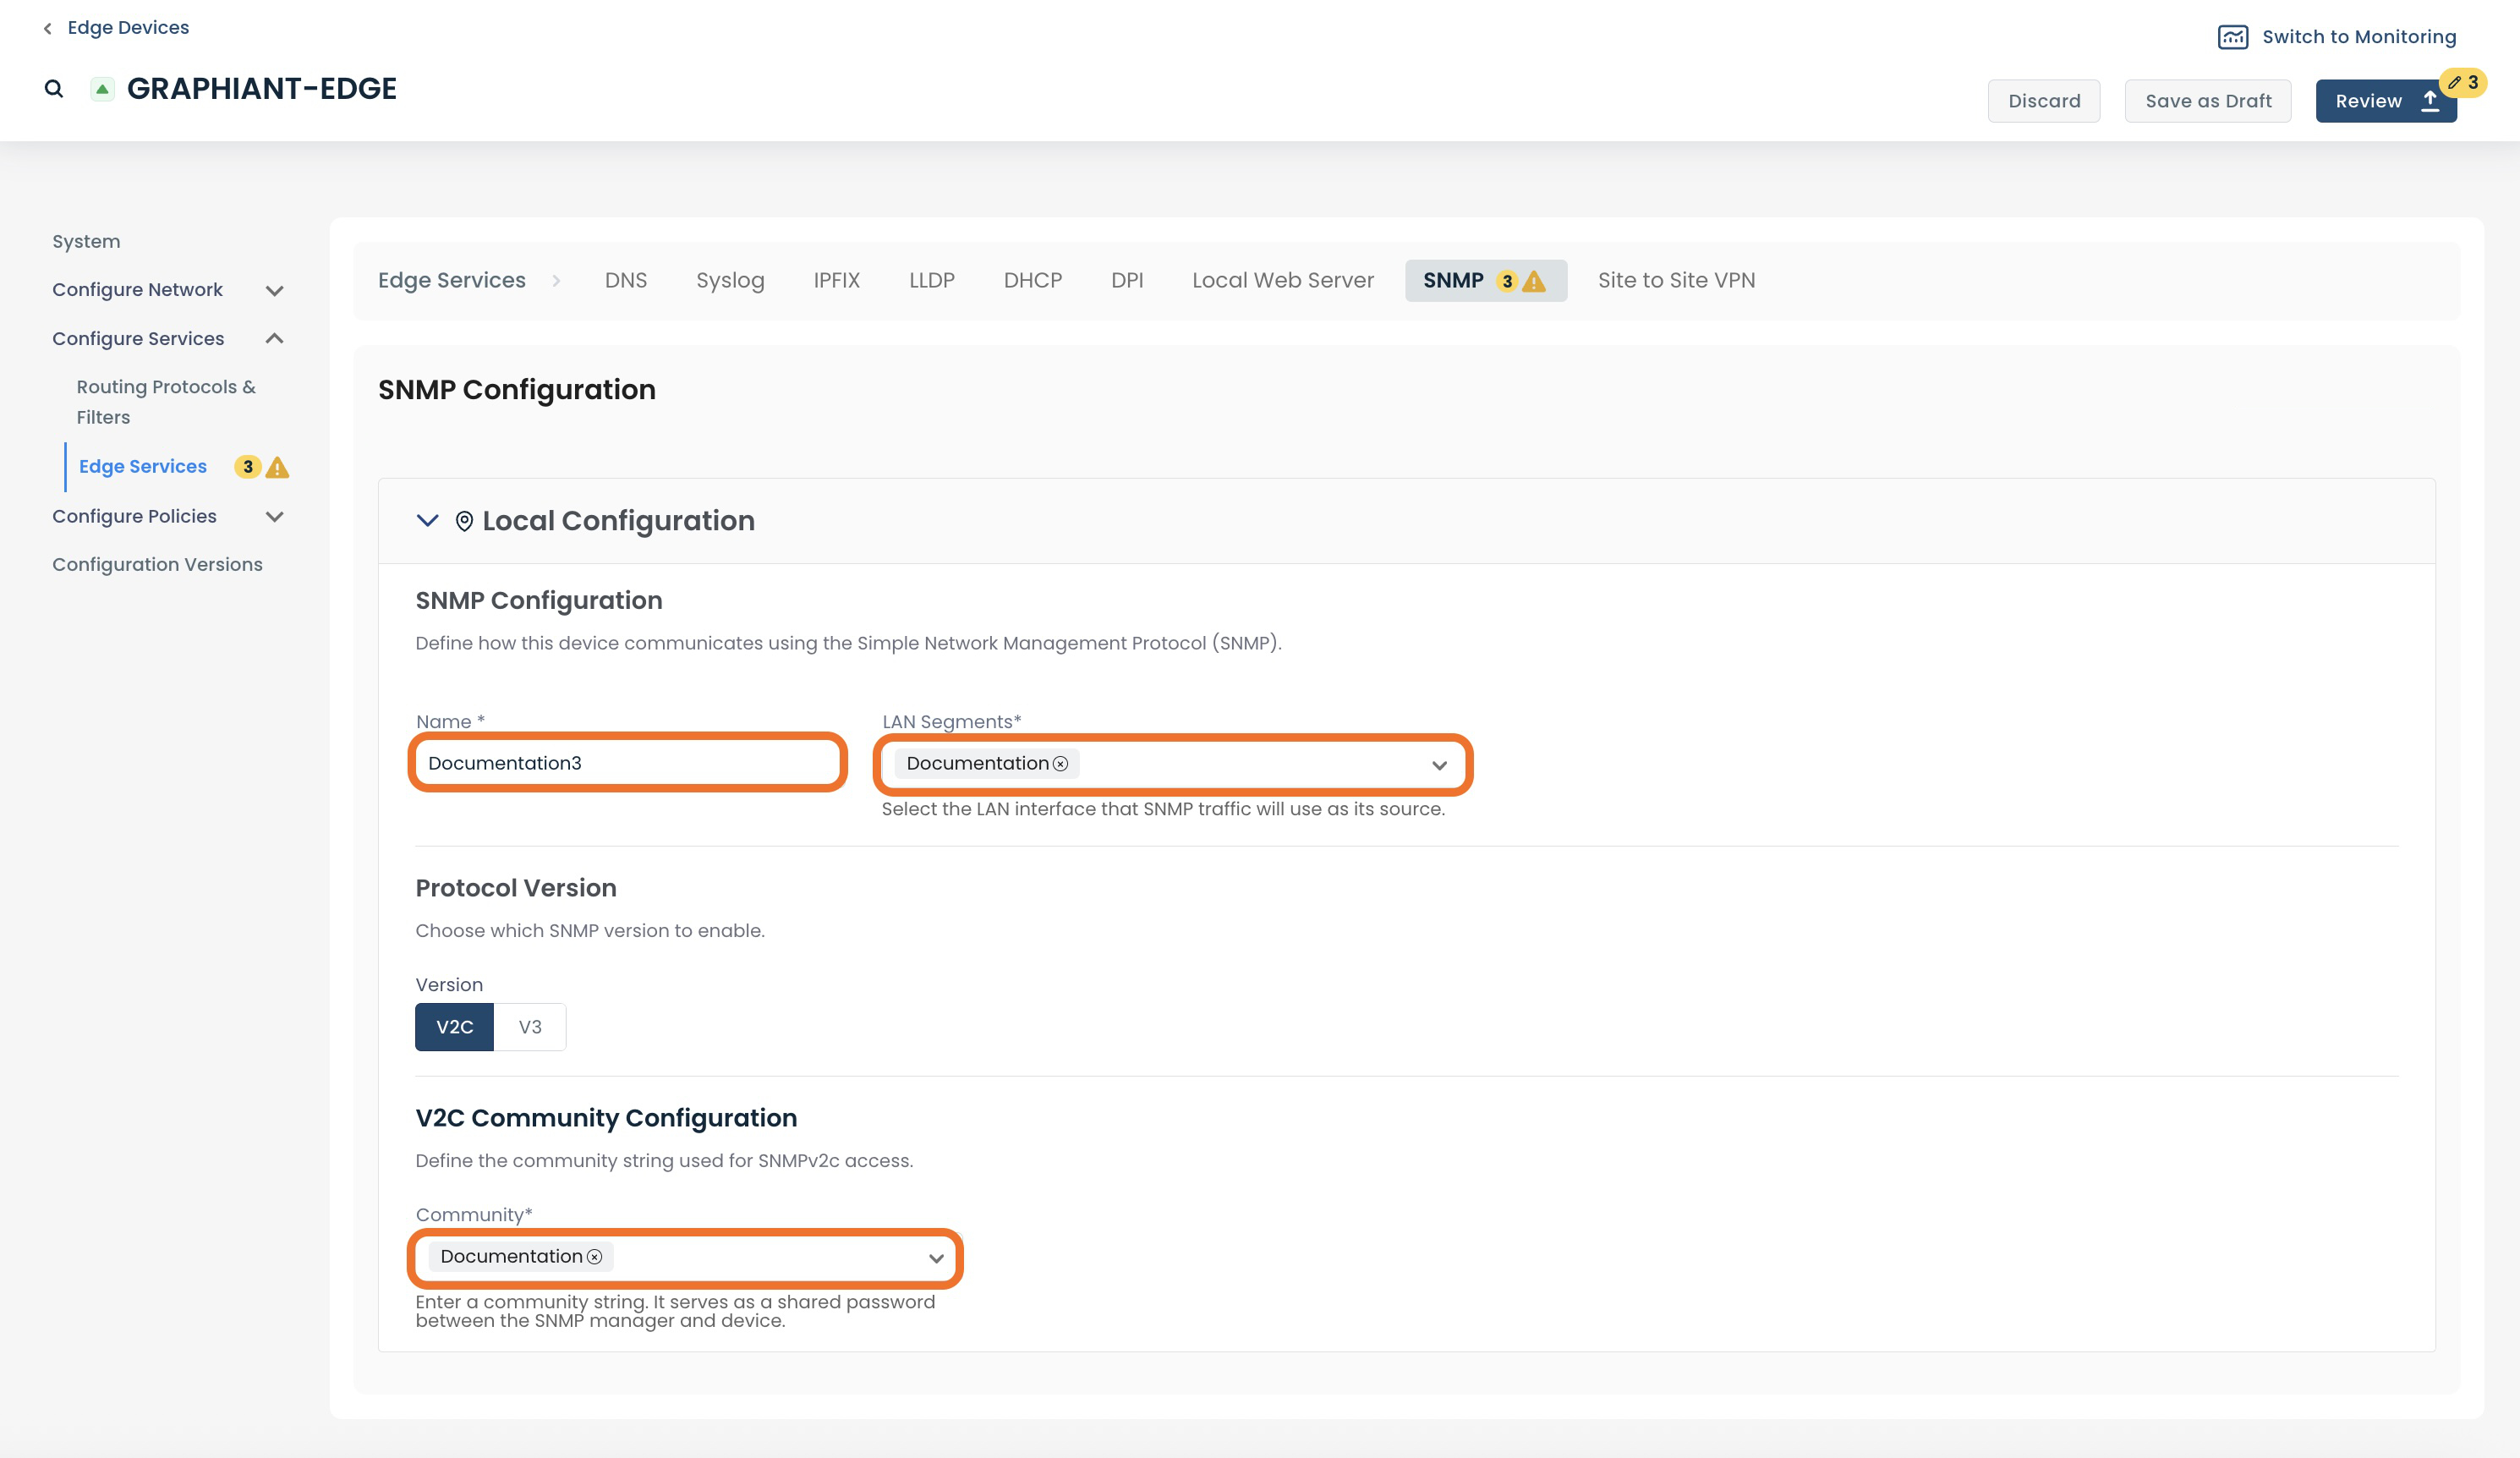
Configuring SNMPv2c
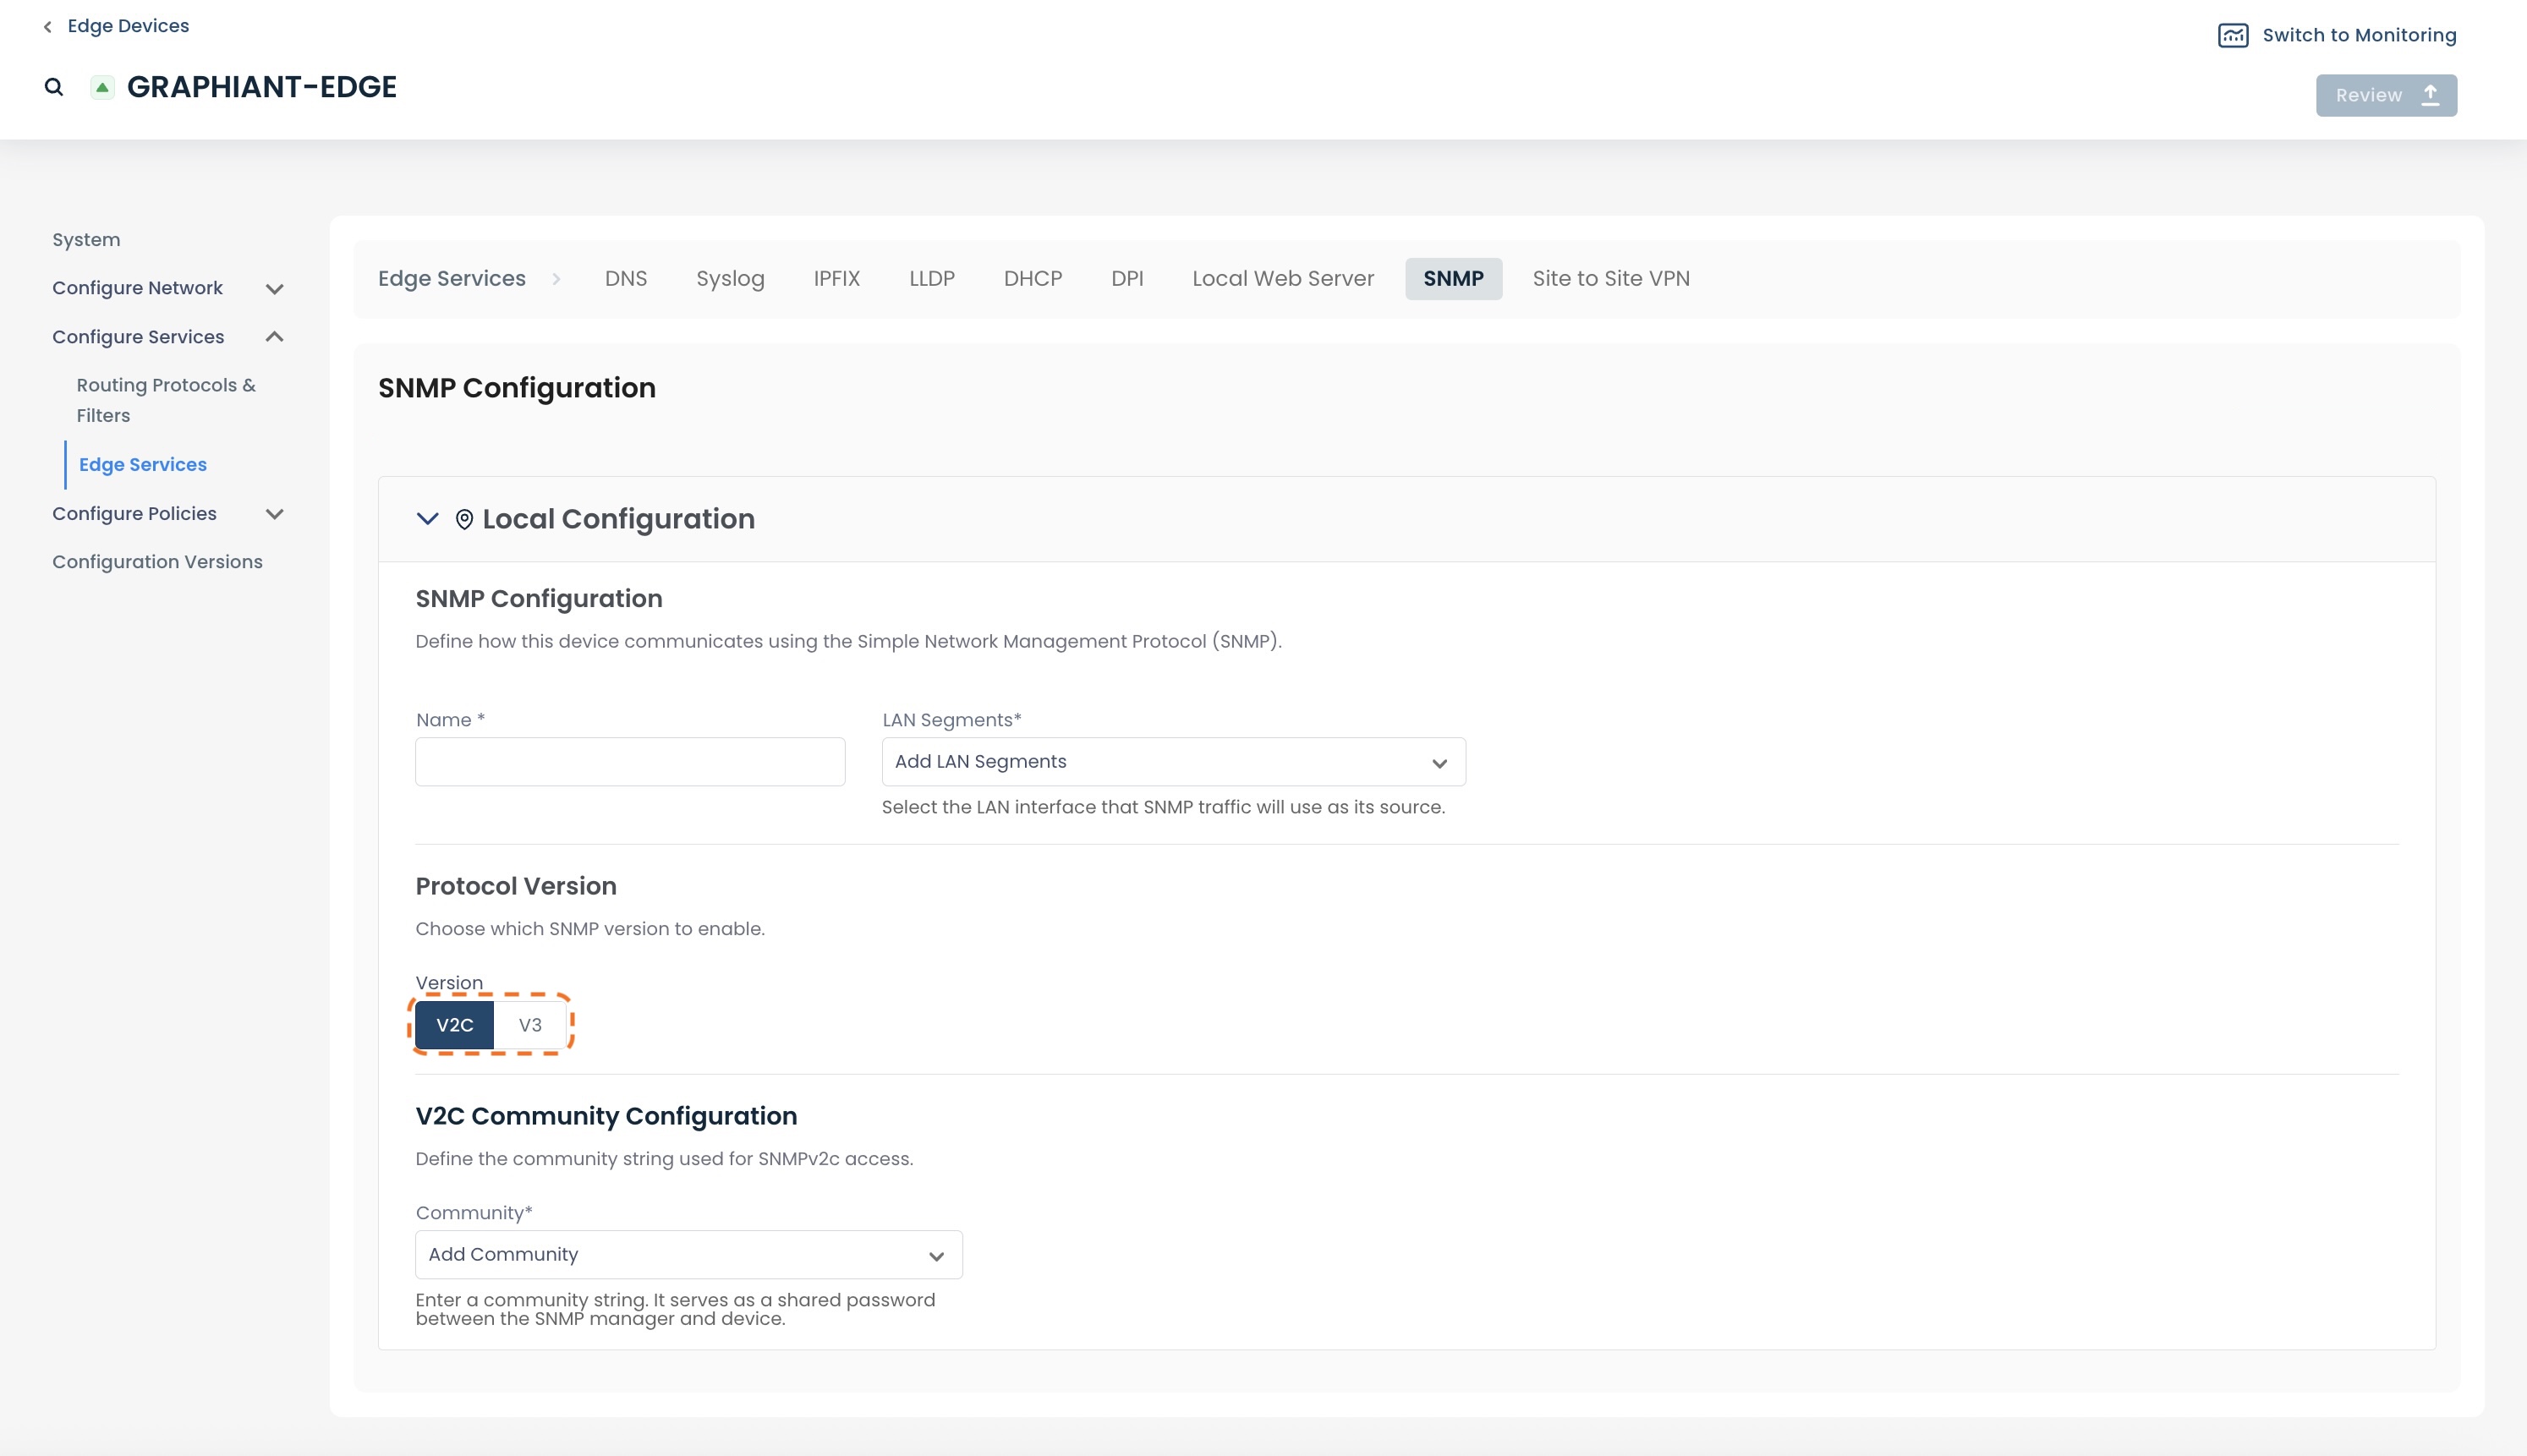
By default, SNMP v2c is selected as Protocol Version.
Fill out the following fields:
Name: Choose a name for the SNMP Server.
LAN Segment: From the drop-down, select the LAN Segment on which the network devices will reach the SNMP server.
Community: The shared string that will allow access to the SNMP device; select from the drop-down, or enter a new community name.
If creating a new Community, press <Enter> to save.
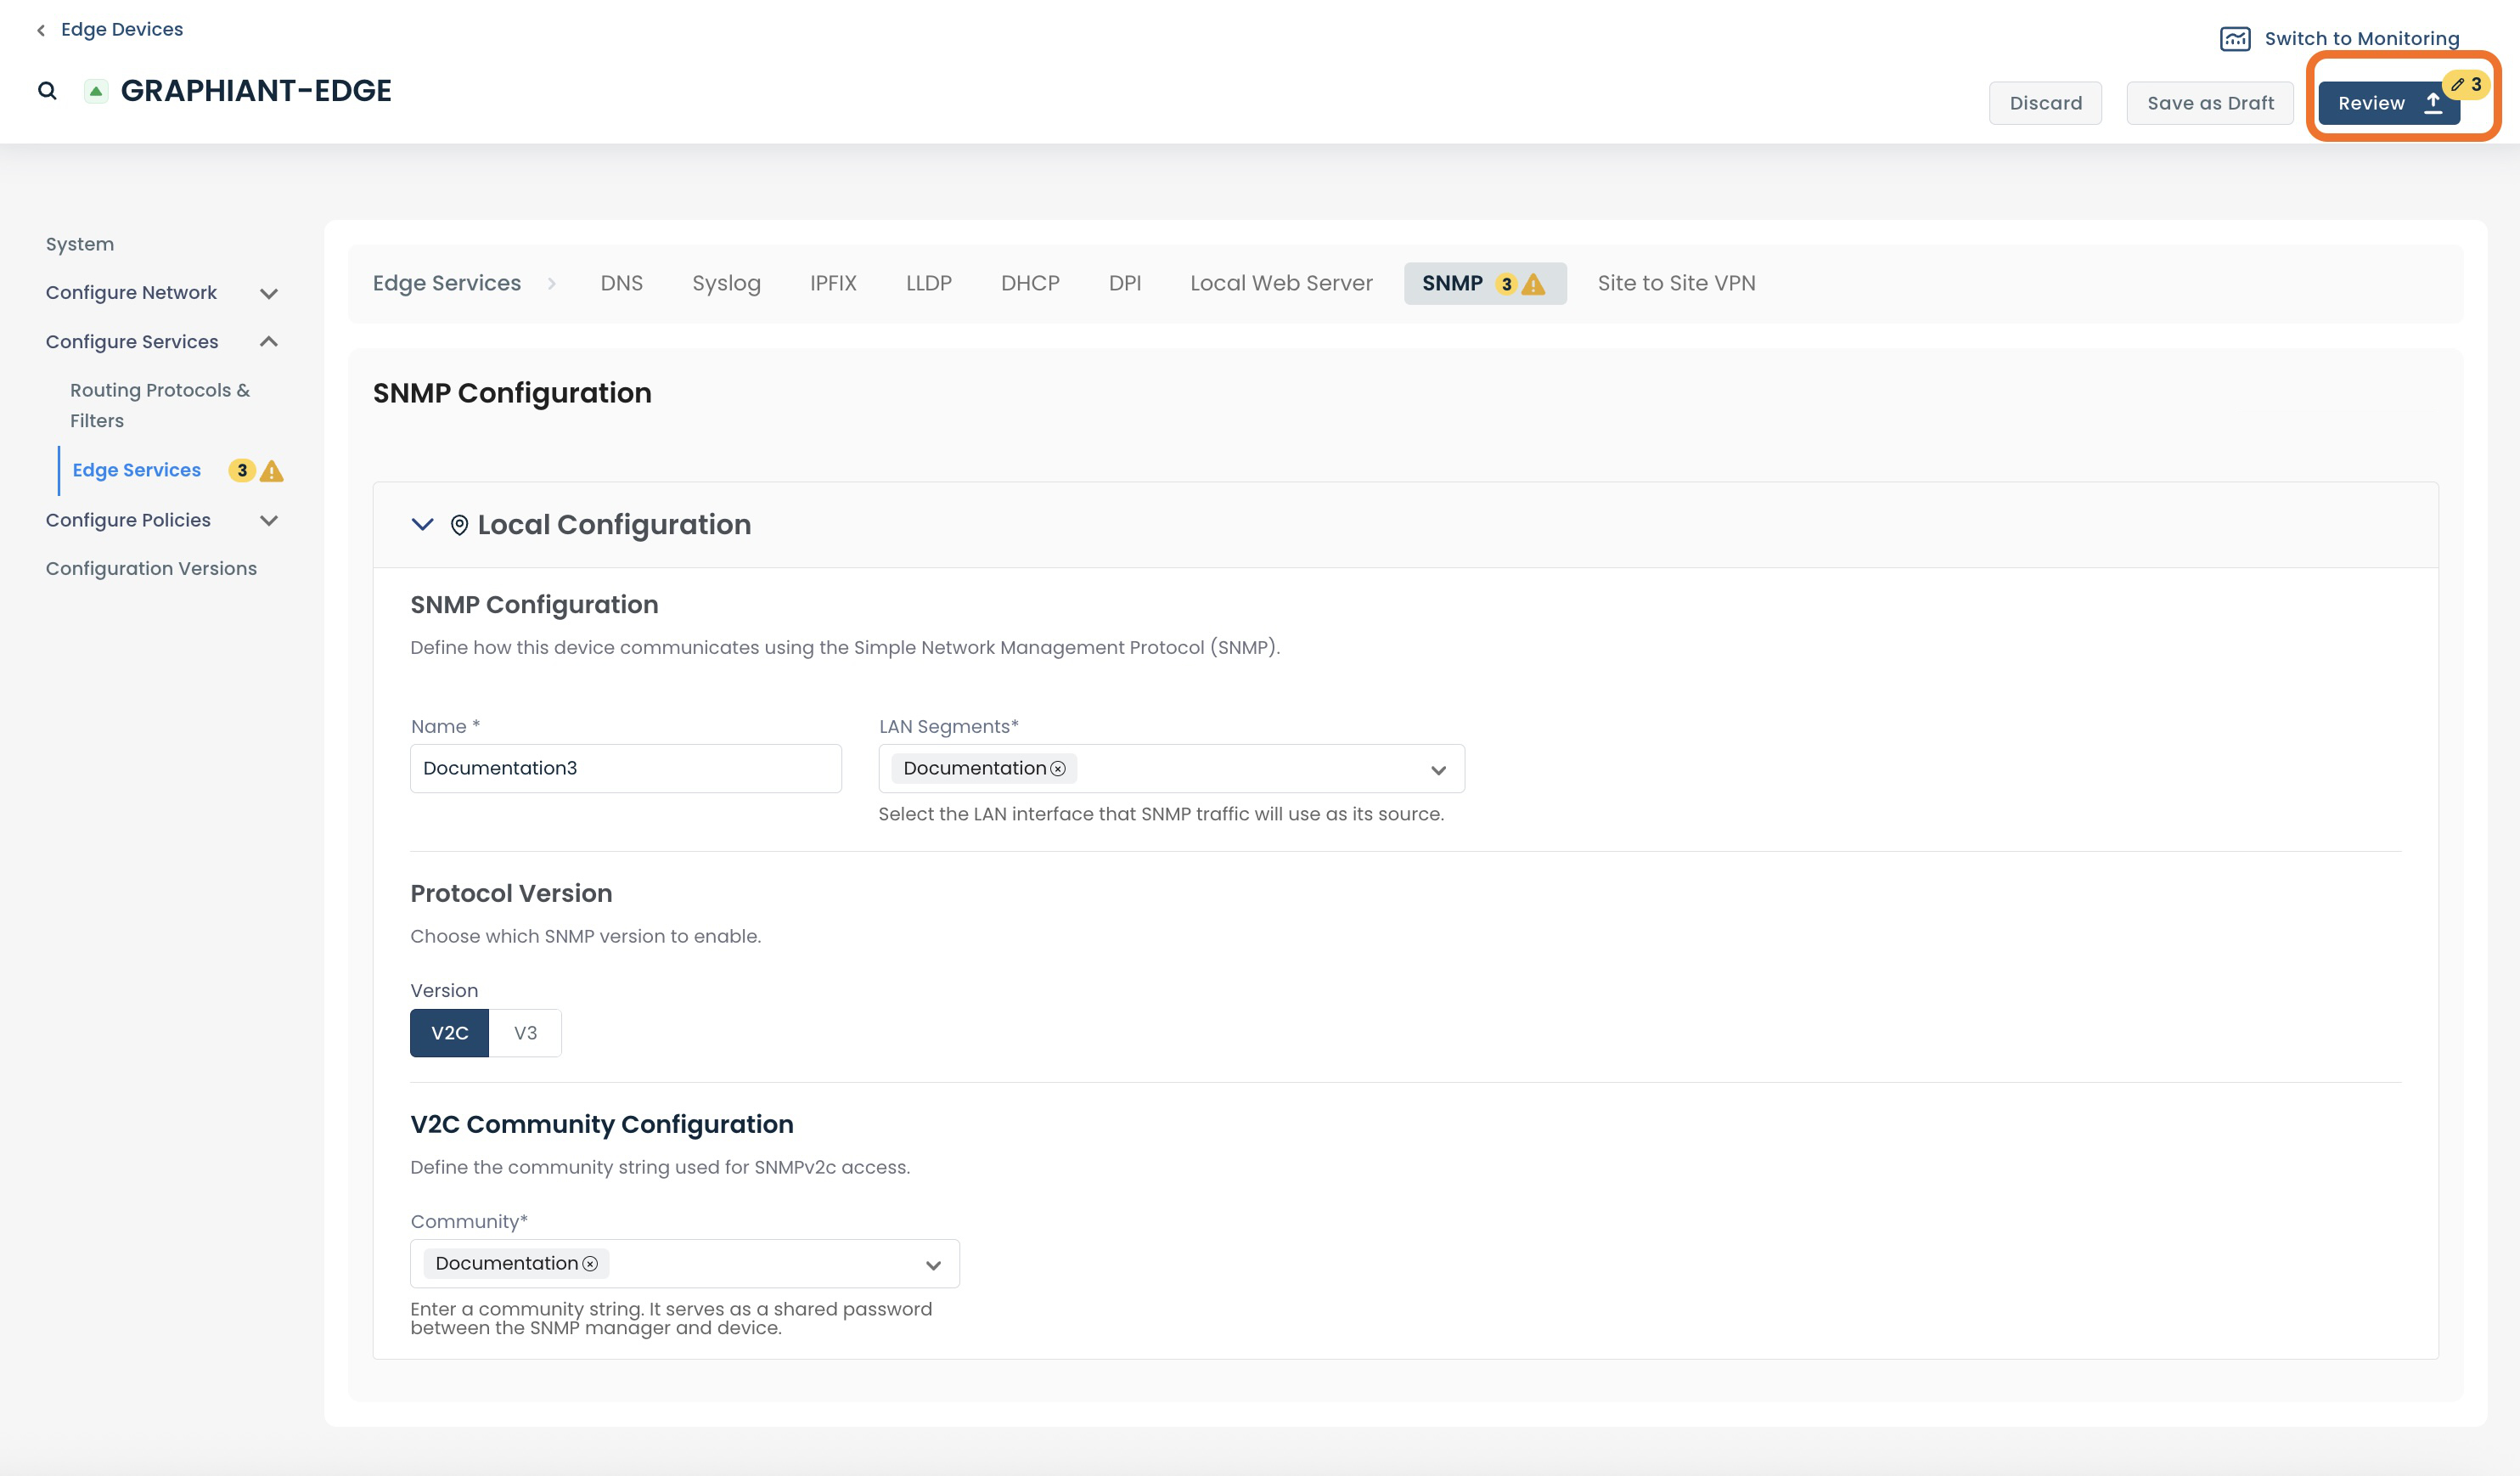
Once the required information is complete, click ‘Review’.
Review your configuration and label the change if desired.
Click ‘Apply’.
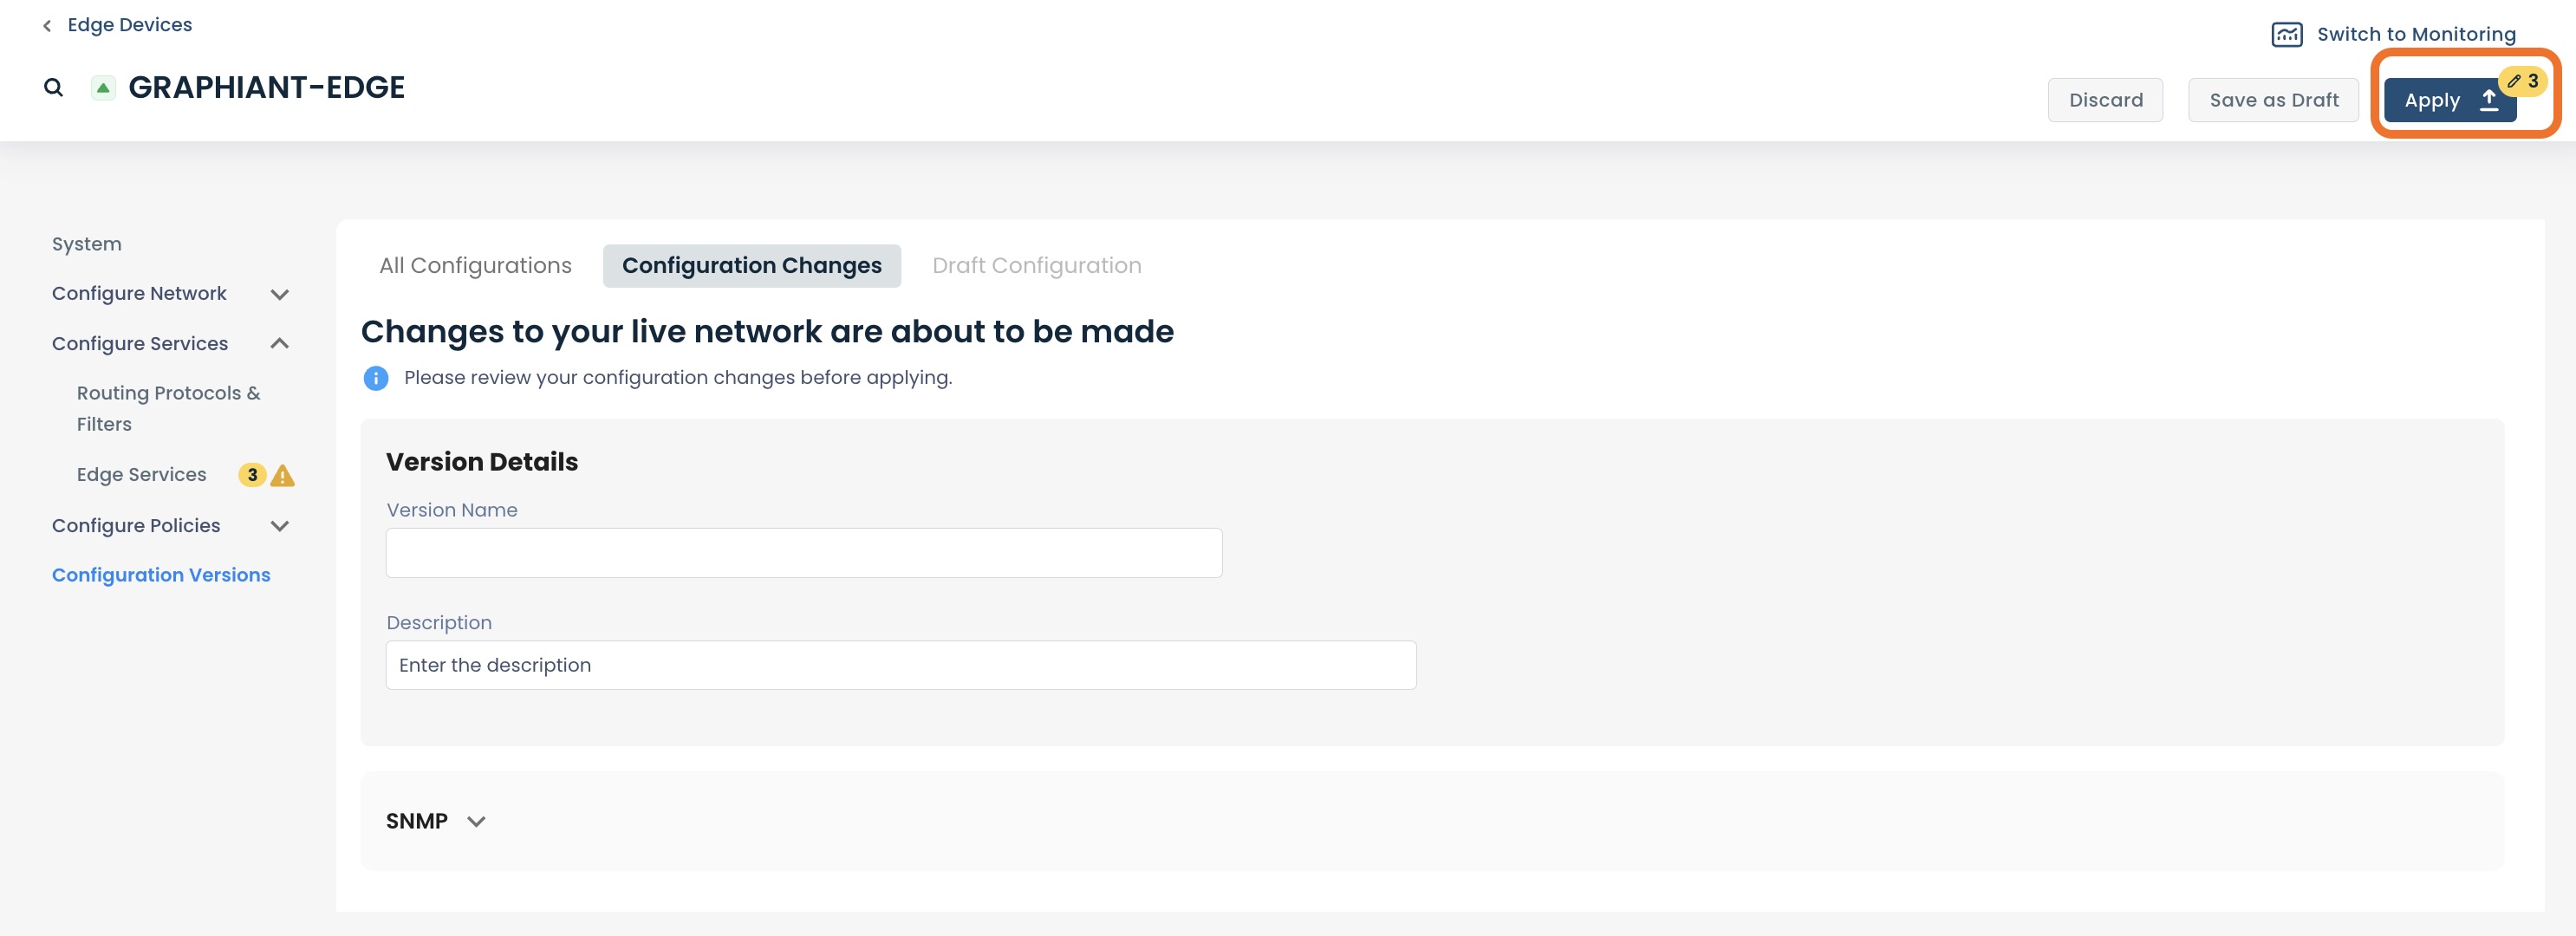
The new SNMP Server will be created.
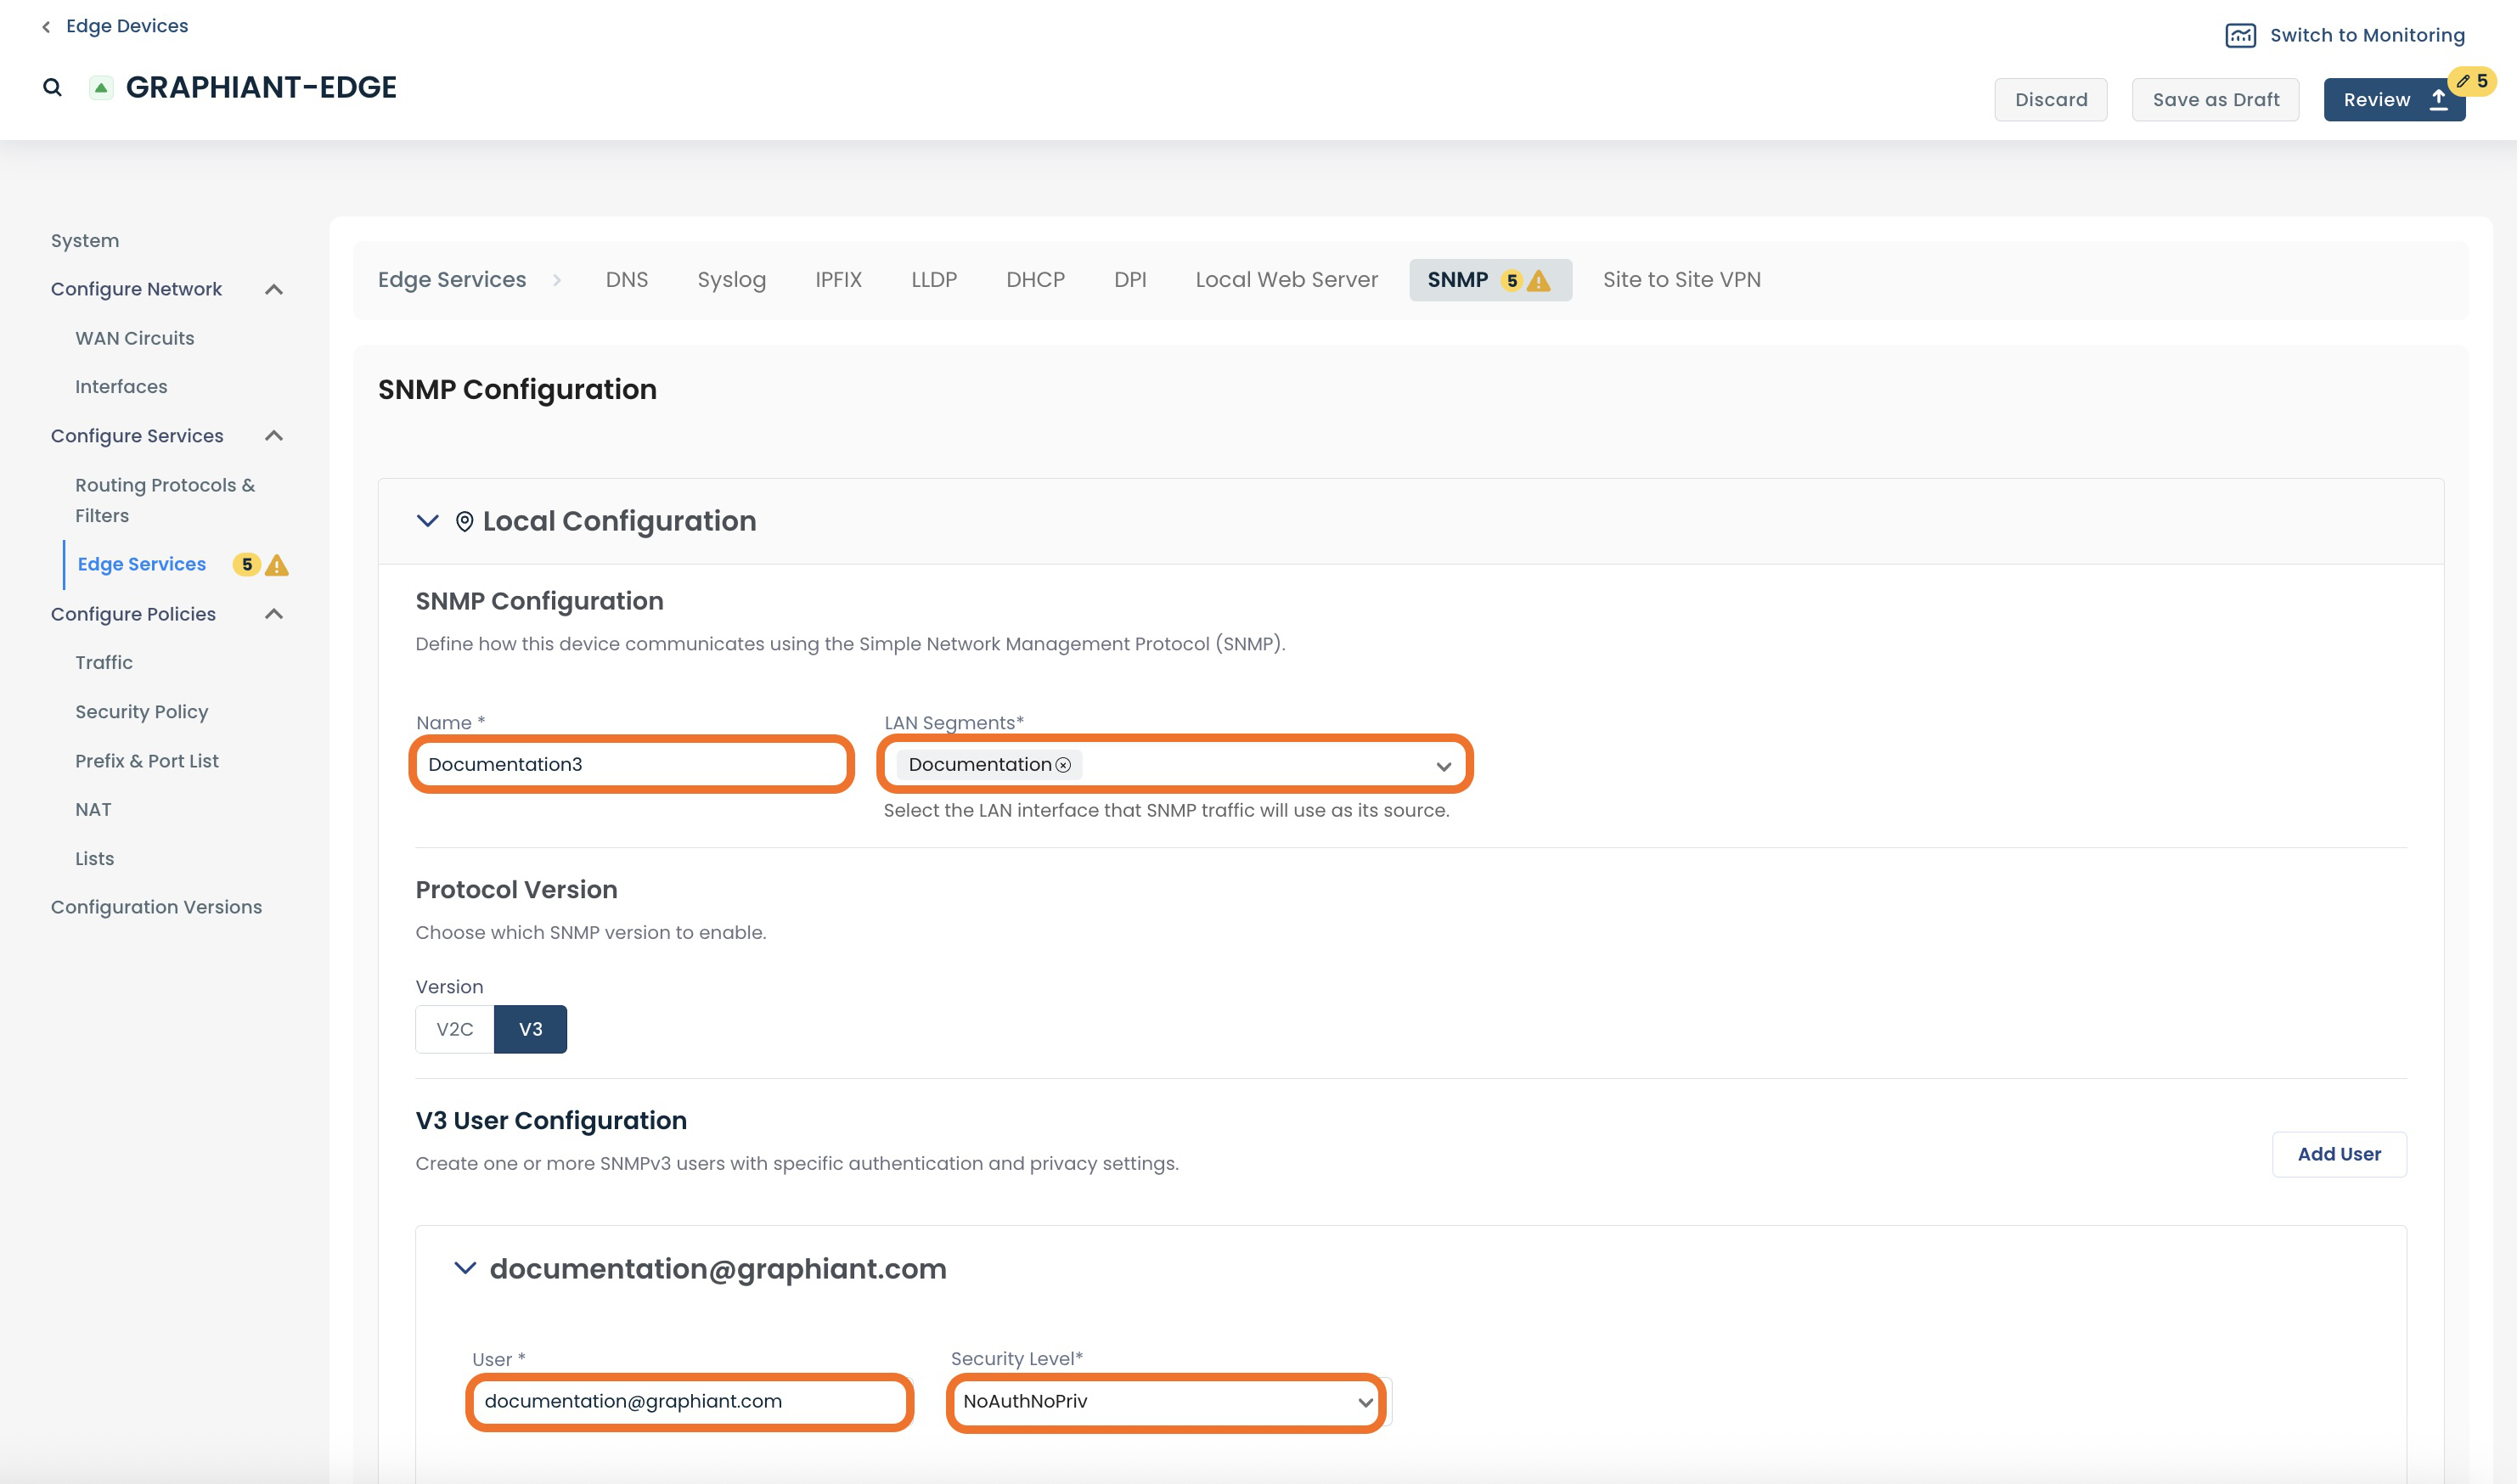
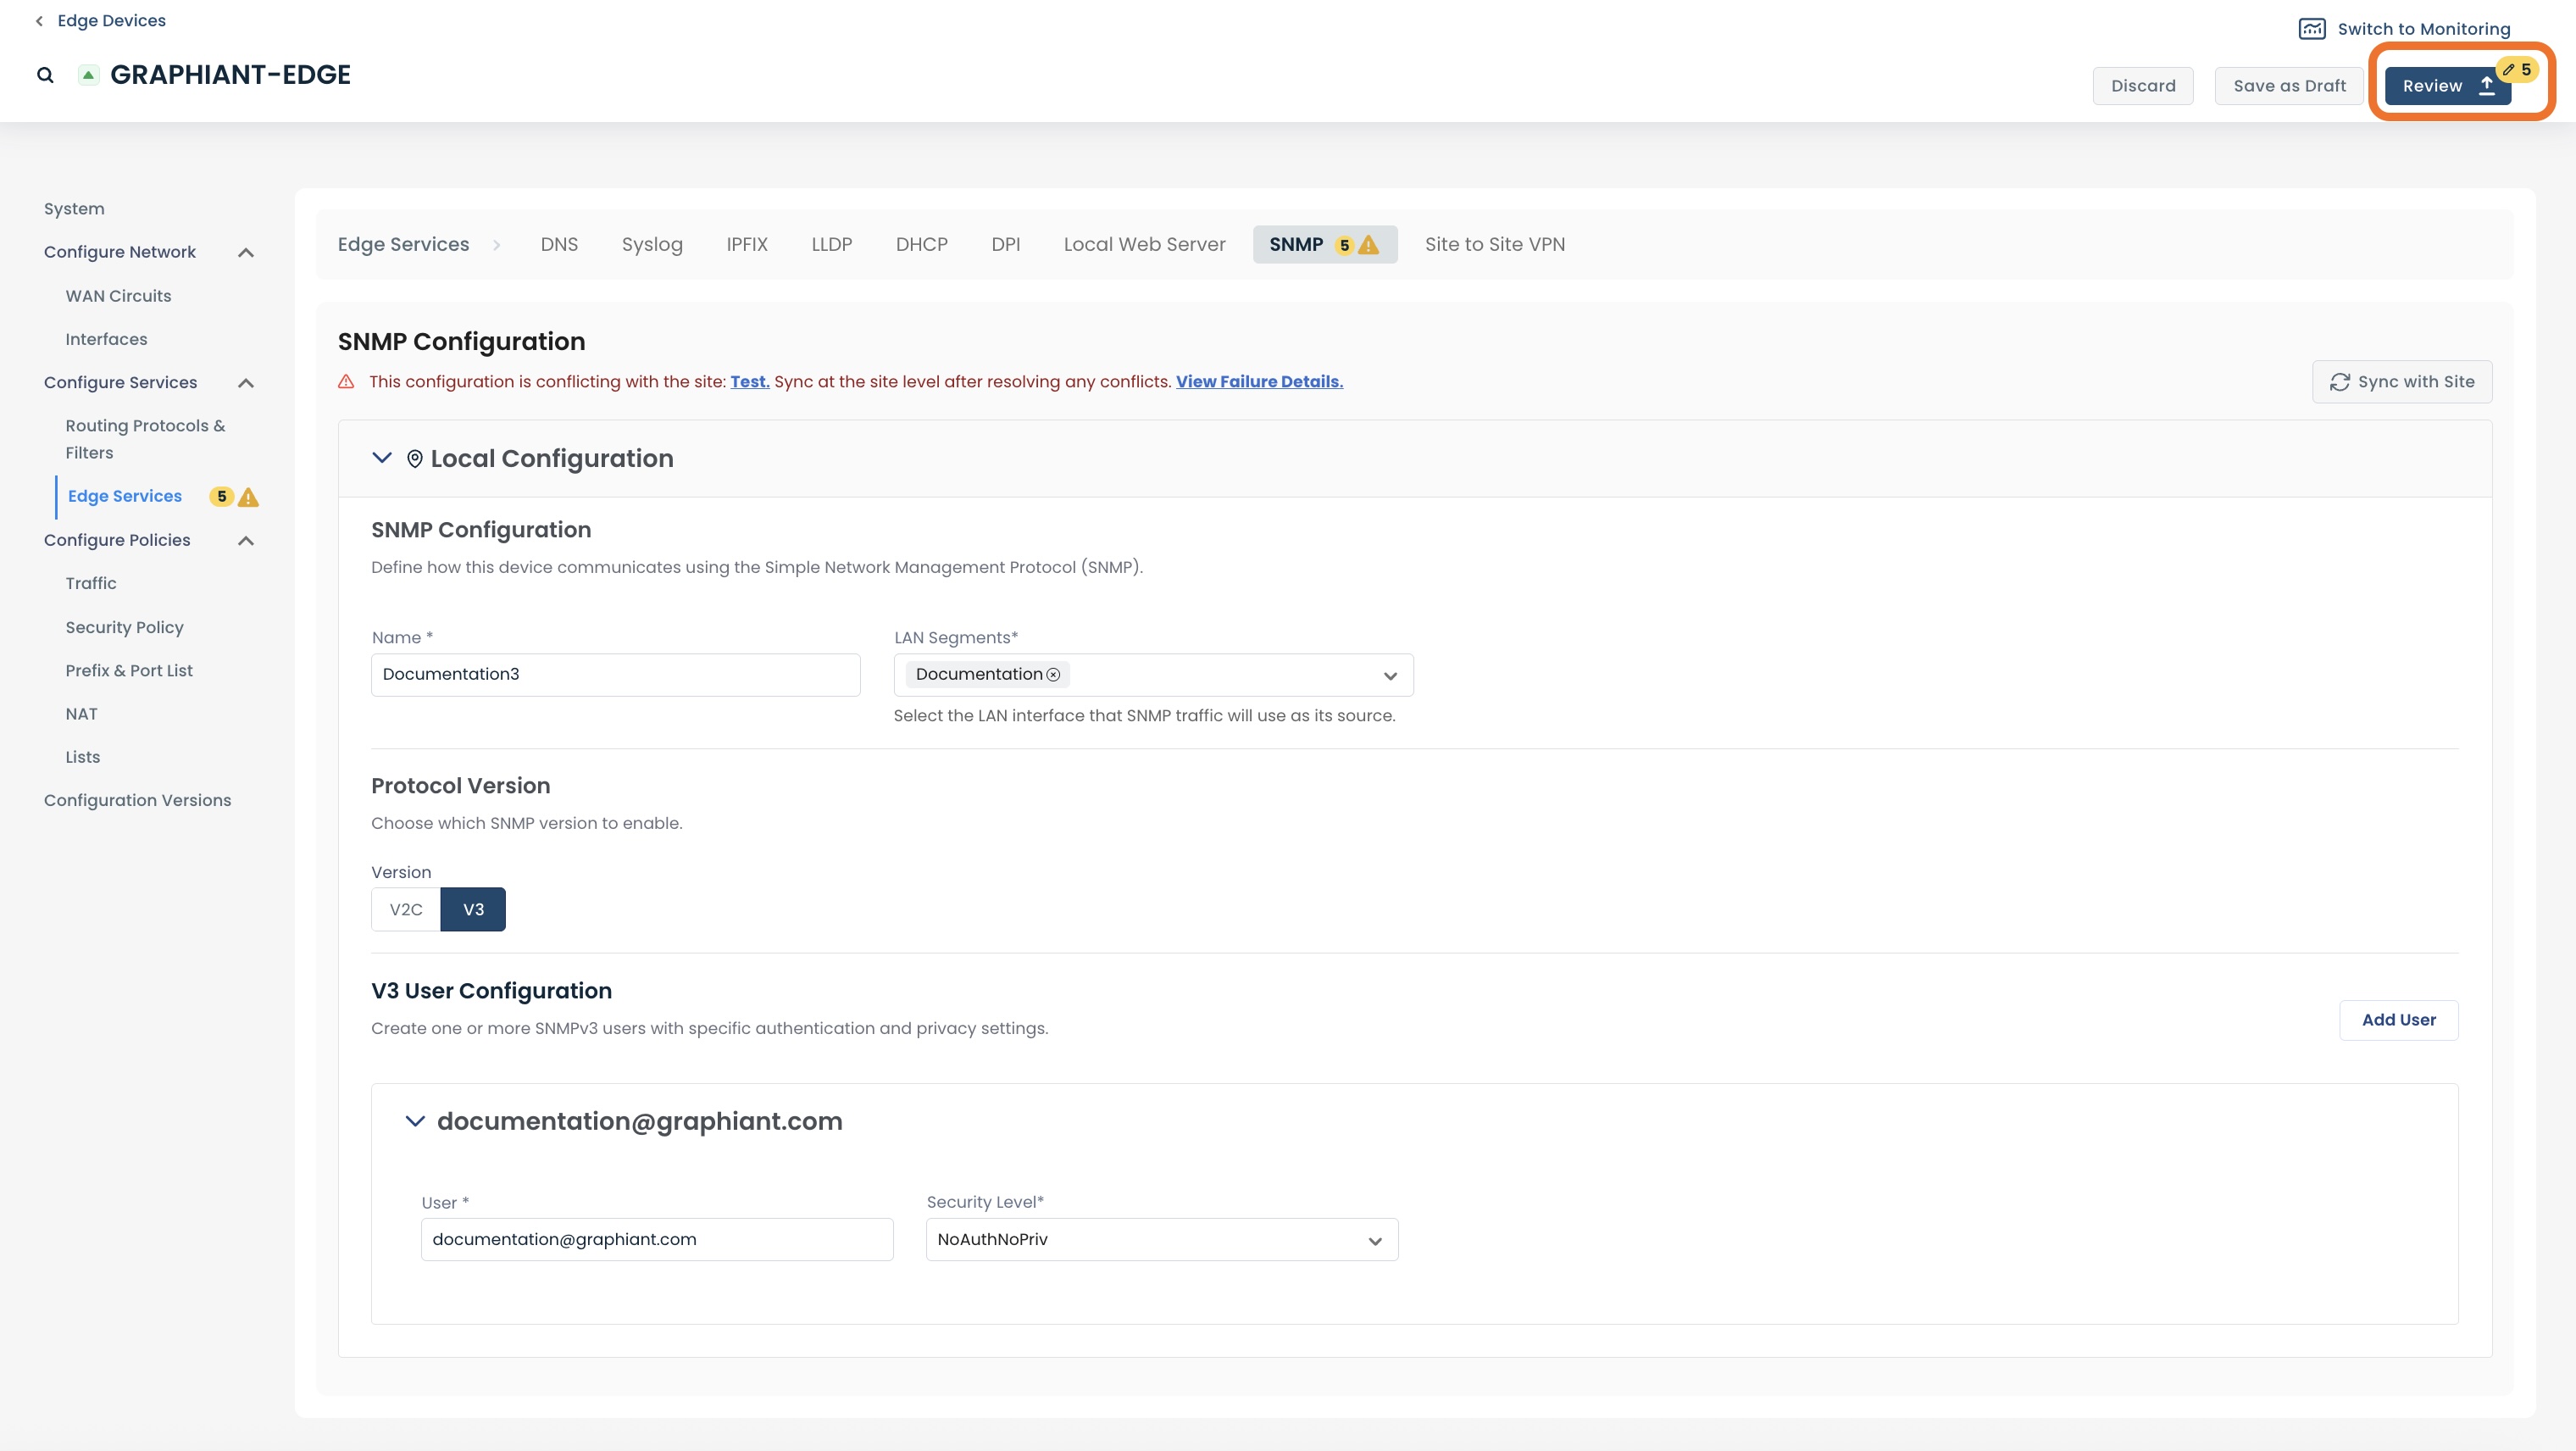
Configuring SNMPv3
Under ‘Protocol Version’, click ‘V3’.
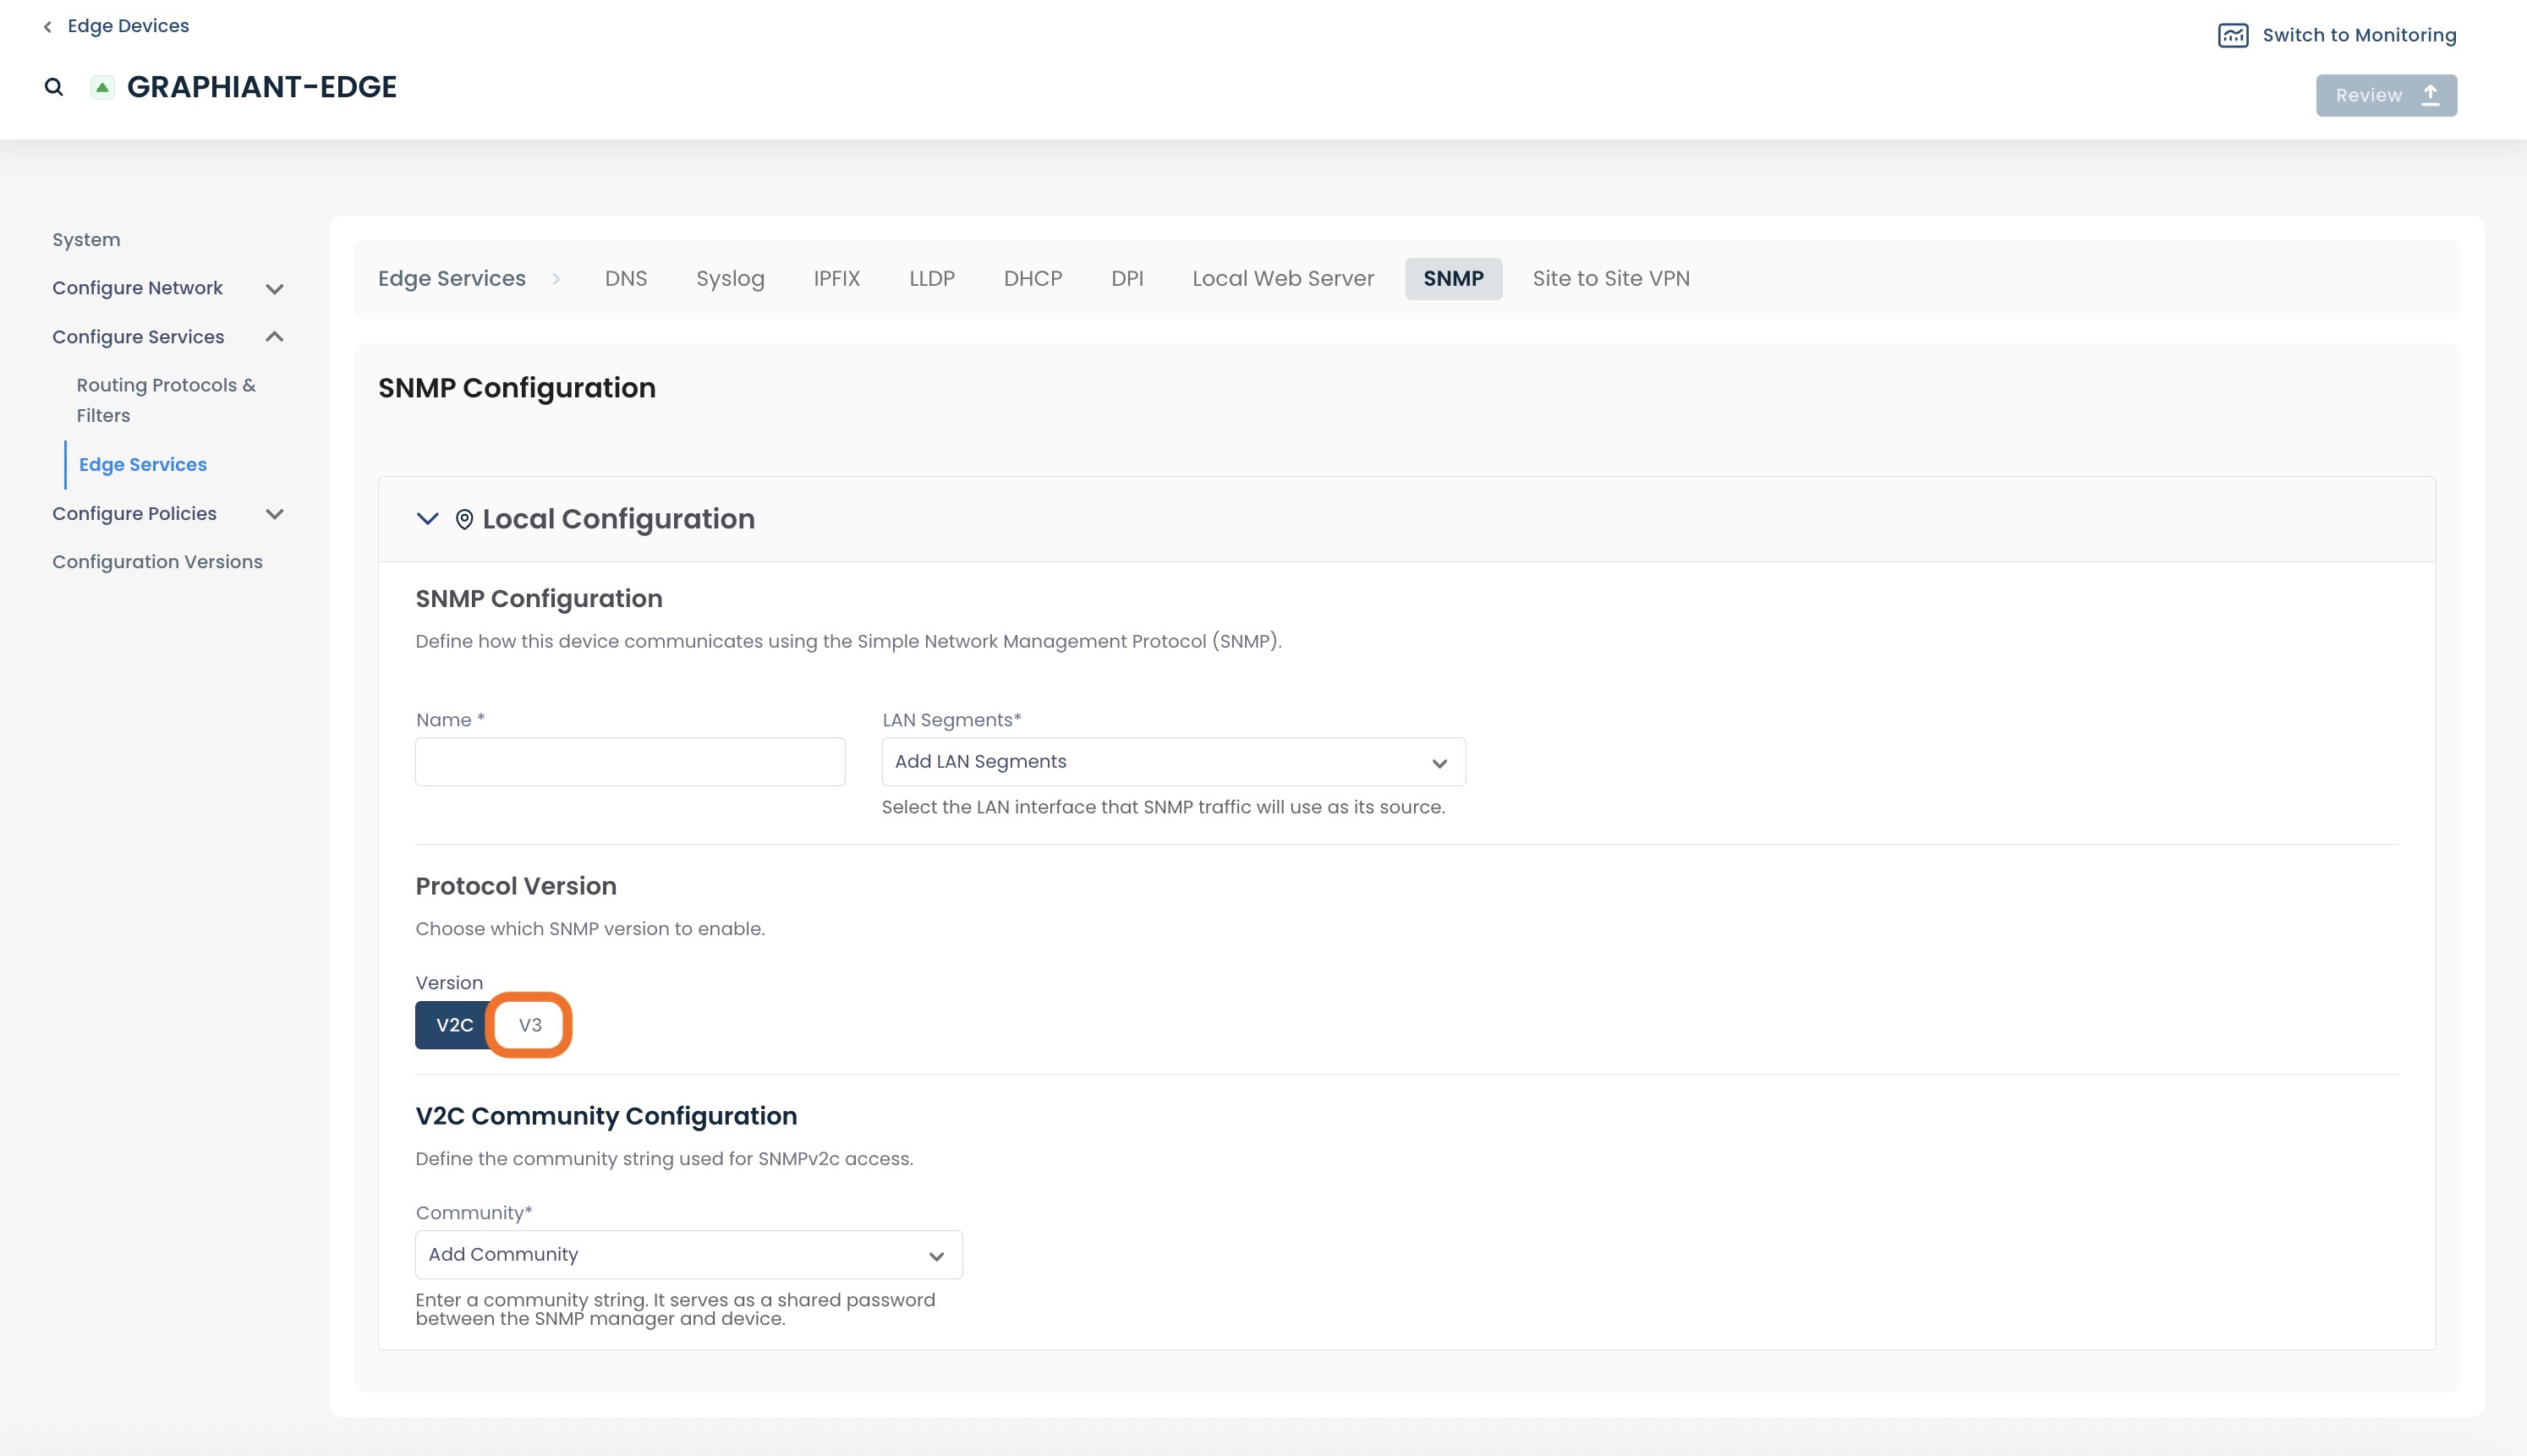
Fill out the following fields:
Name: Choose a name for the SNMP Server.
LAN Segment: From the drop-down, select the LAN Segment on which the network devices will reach the SNMP server.
User: Enter the username of the person you are allowing access to the SHMP server.
For information on adding additional users, click here.
Security Level: Select the authentication method for the identity of users and the privacy encryption of data.
See the options for Security Level here.
Security Levels
SNMPv3 supports the following three levels of security involving authenticating the identity of users and the privacy encryption of data:
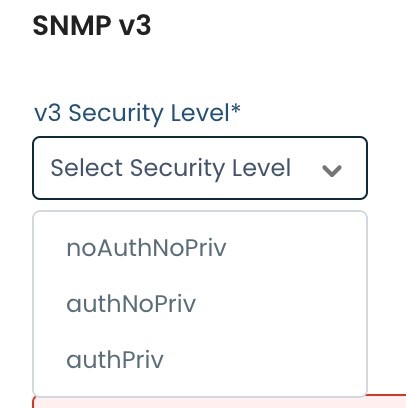
#1: "NoAuthNoPriv"
NoAuthNoPriv supports no authentication and no privacy; there are no passwords.
Required field:
Username: Enter the username of the person you are allowing access to the SHMP server.
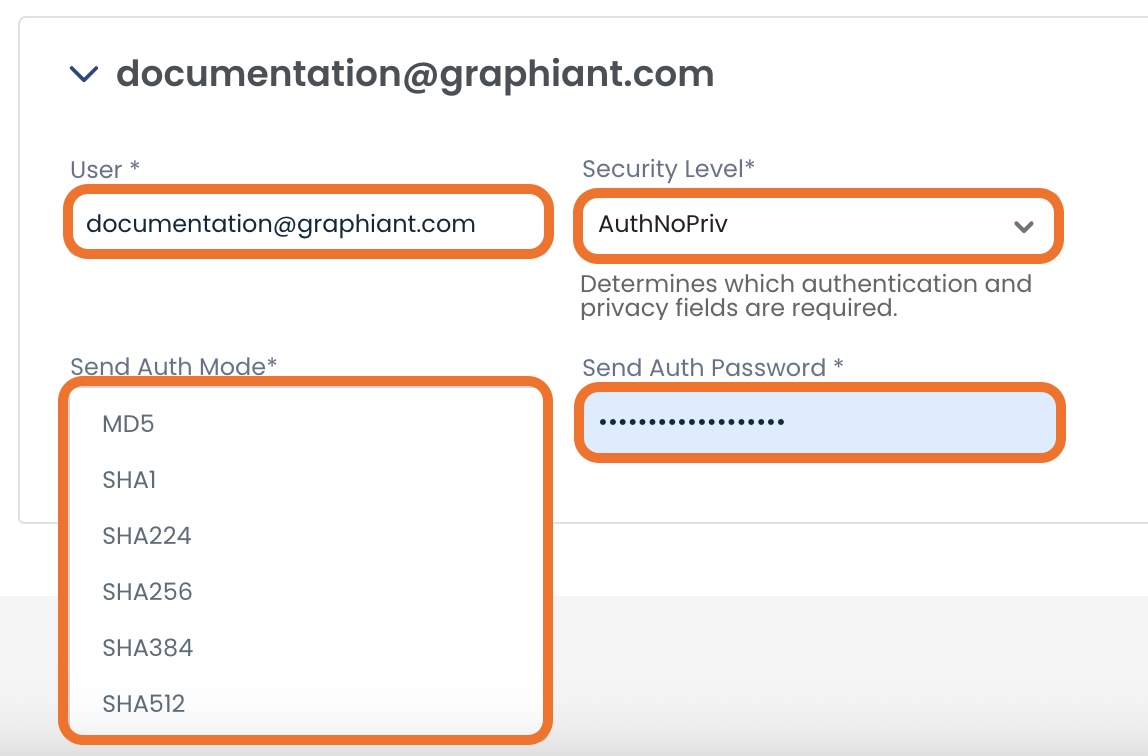
#2: "AuthNopriv"
AuthNoPriv supports authentication but no privacy.
Required fields:
Username: Enter the username of the person you are allowing access to the SHMP server.
Auth mode: Select the desired encryption algorithm from the drop-down.
Password: Enter the authentication encryption password previously configured on the SNMP server.
#3: "AuthPriv"
AuthPriv supports authentication and privacy.
Required fields:
Username: Enter the username of the person you are allowing access to the SHMP server.
Auth mode: Select the desired encryption algorithm from the drop-down.
Password: Enter the authentication encryption password previously configured on the SNMP server.
Privacy mode: Select the desired integrity protection algorithm; Graphiant supports AES-128 and DES.
Privacy password: Enter the privacy password previously configured in the SNMP server.

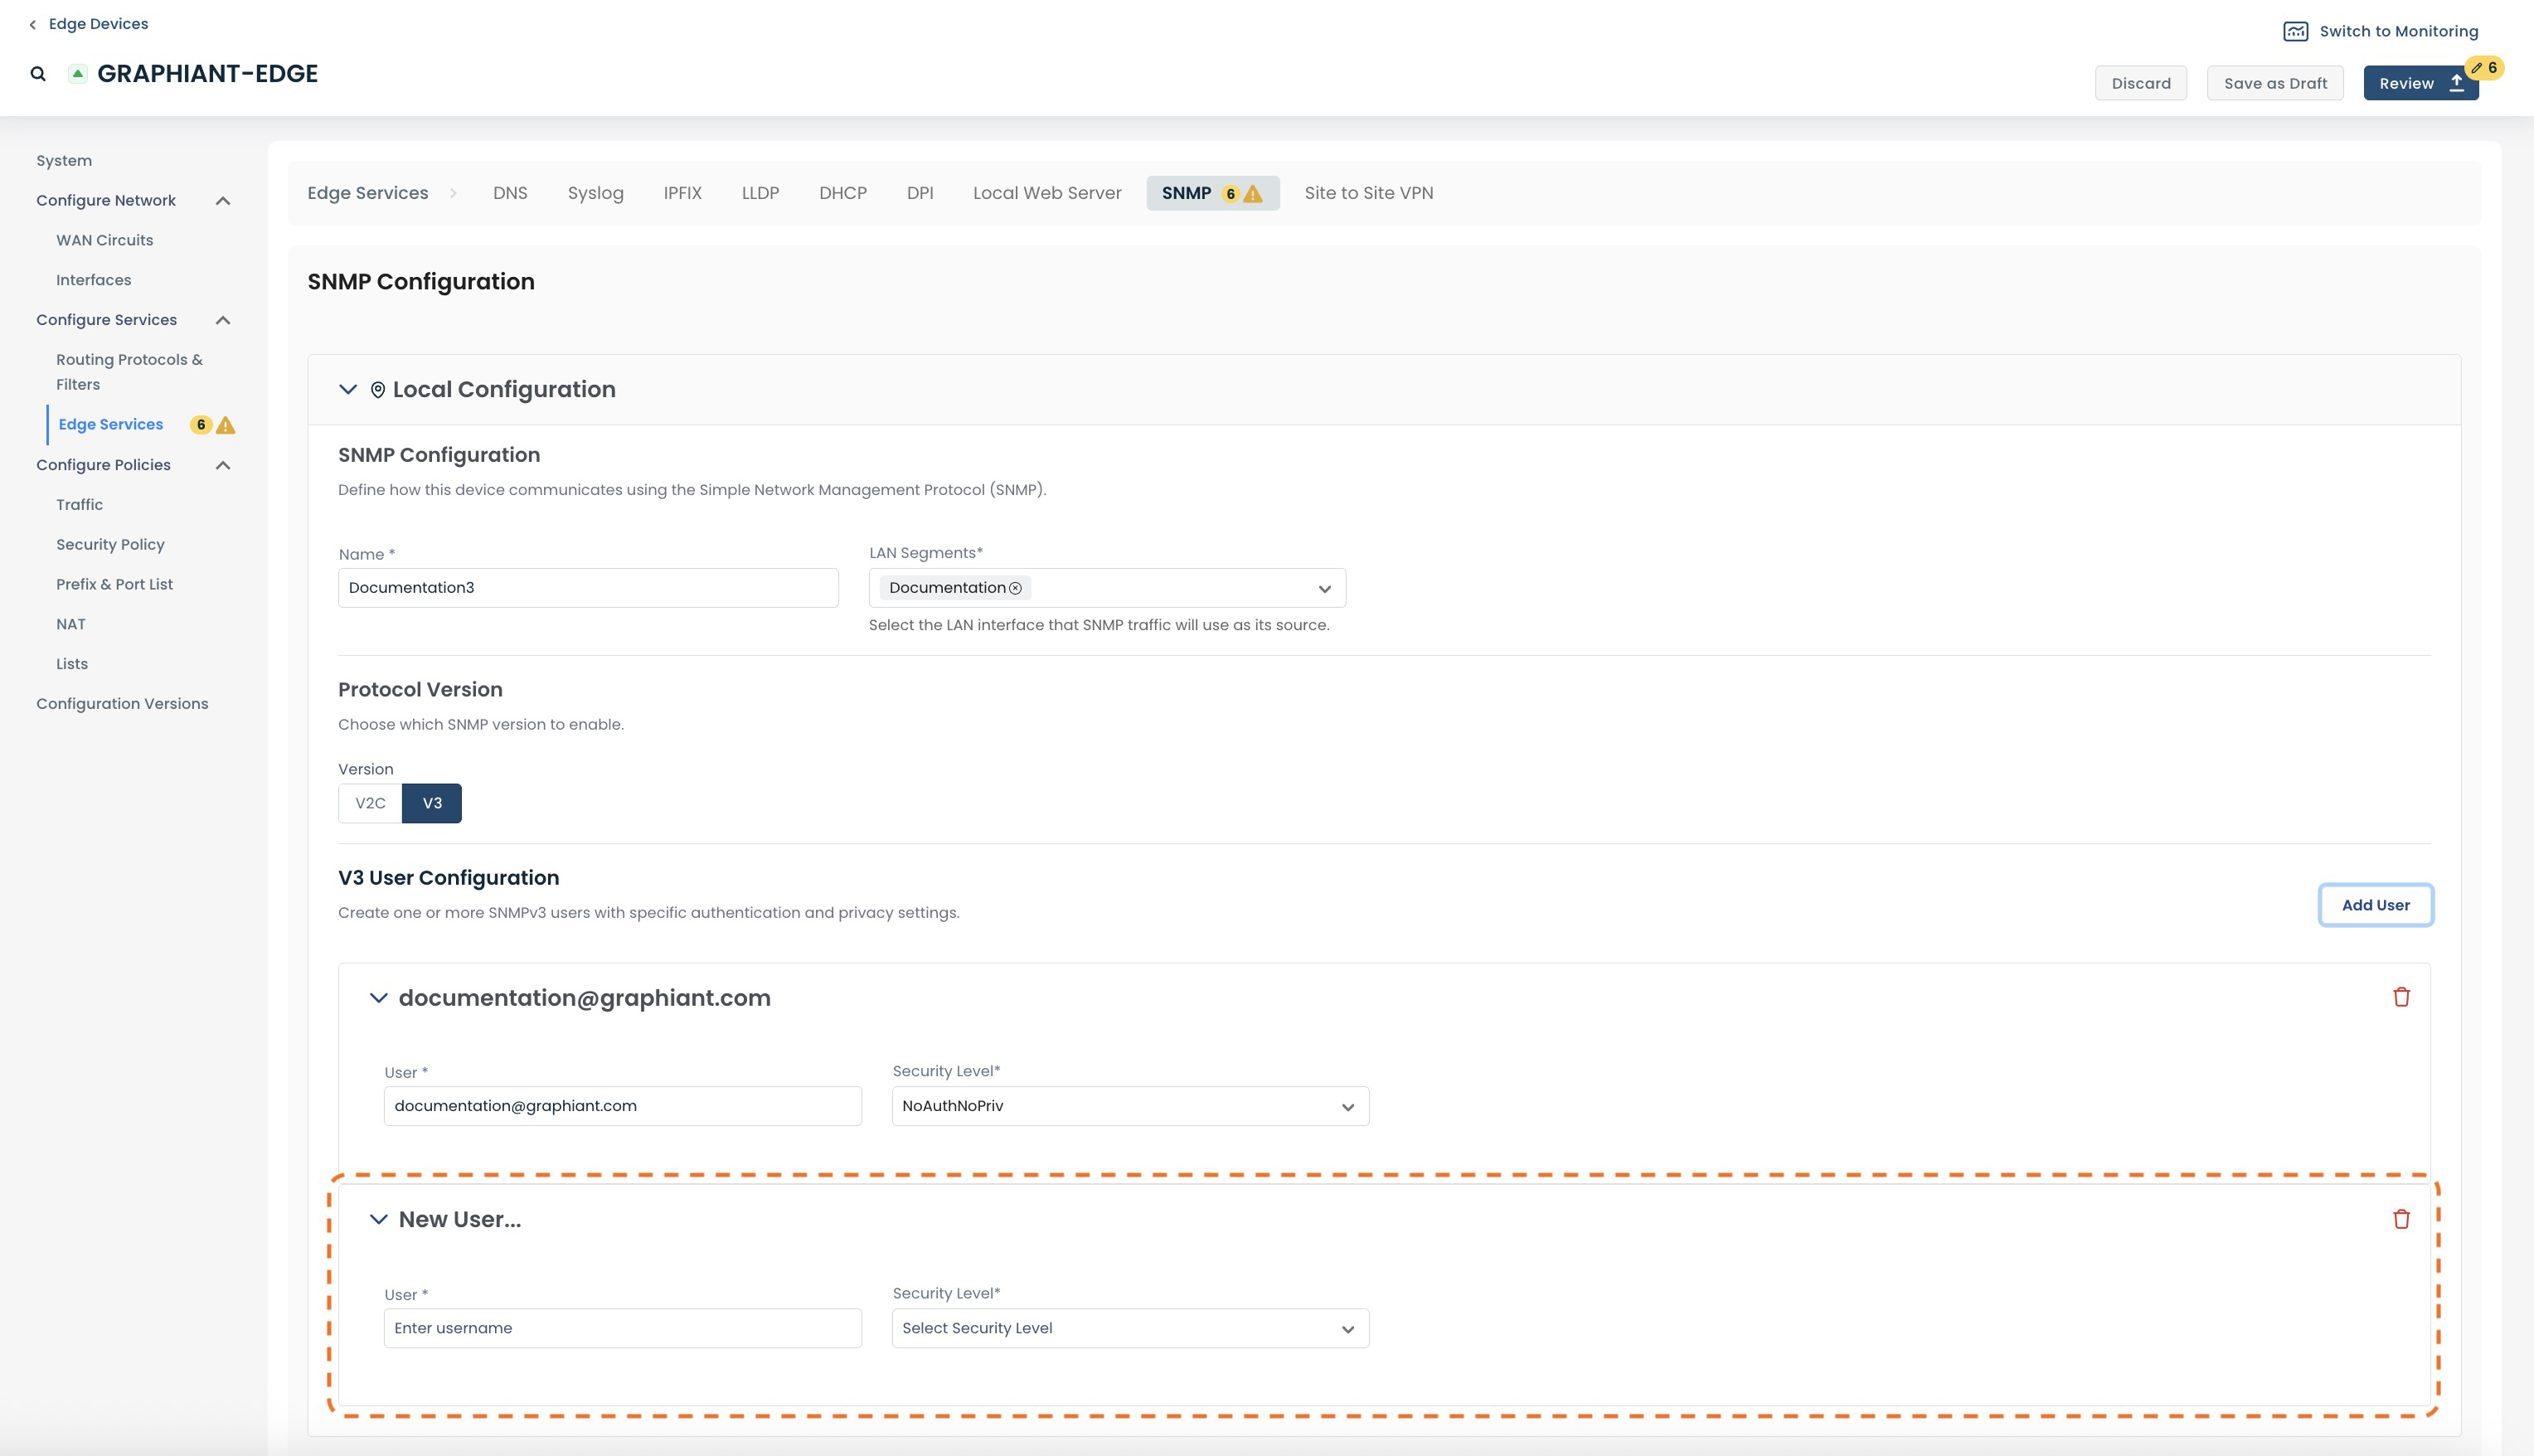
Adding Additional Users
Graphiant allows you to create multiple users who may access your SNMPv3 server.
Should you desire to add additional users, click ‘Add User’ to the right of “V3 User Configuration”.

The additional new user configuration will open below the previously entered user(s).
Once the desired data is entered, click 'Review'.
Review your configuration and label the change if desired.
Click ‘Apply’.
The new SNMP Server will be created.
Graphiant SNMP MIBs
For documentation on Graphiant vendor-specific Management Information Bases (MIBs), click here.