What is Syslog?
Log information is very important when troubleshooting problems. As a network grows in size, so does the countless stream of daily log files stored on each your network devices, making it impossible to manually track. With Syslog, this changed.
A Syslog server allows a network’s devices to send their log file information to one centralized location where a network admin can manage, search, and archive all of the network’s log information.
Syslog in the Graphiant Portal
From within the Graphiant Portal, you will be able to configure and deploy Syslog between various network Edges under your control.
Step 1: Locating Syslog in the Graphiant Portal
From the Home screen, navigate to the Edge Configuration screen by one of the following:
Locate the "Configurations" section within the “Quickstart” area of the screen; select 'Configure Edges'.
or
Click 'Configure' in the sidebar; select 'Devices'.
.png)
This will take you to the ‘Configuration’ page of the Graphiant Portal where you will be able to view all Active, Staged, and Deactivated Edges. From here you will be able to select among the Active Edges which Edge(s) you would like to be configured with Syslog.
On the left-hand side, select and click the Edge you wish to manage under the column 'Hostname.'
.png)
This will take you onto a Configuration page with a focus on the Edge you have just chosen.
Here you will see a list of headings along the lefthand side of the page, such as ‘Configure Network’, ‘Configure Services’, ‘Configure Policies’, etc.
From here, select and click ‘Configure Services’ and a dropdown menu will appear.
From the dropdown menu, select and click ‘Edge Services’.
.png)
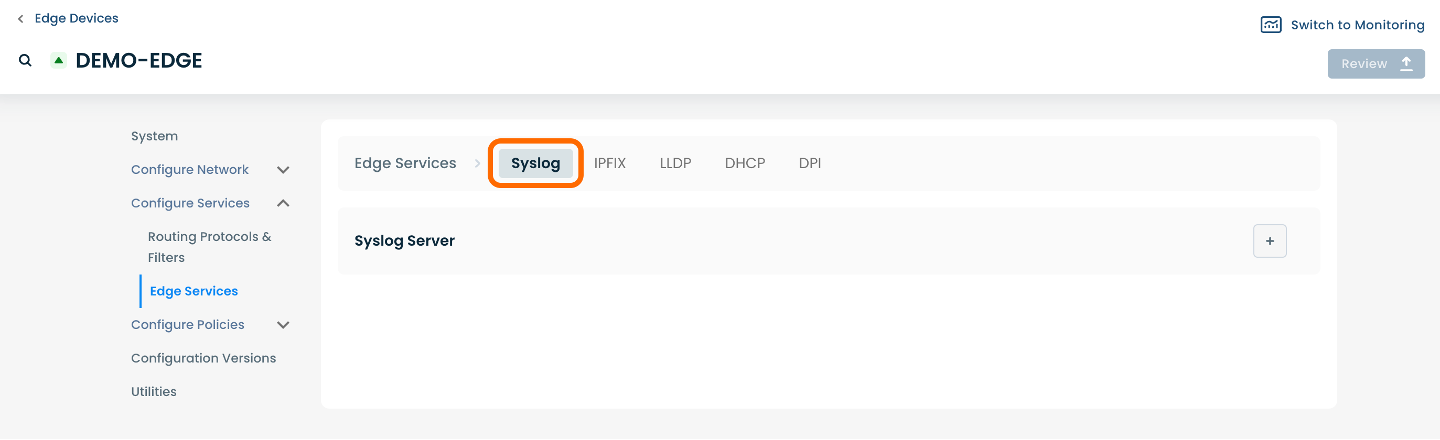
This will take you onto an Edge Services page dedicated to the chosen Edge.
On the Edge Services page, you will see a list of available headings along the top of the page such as ‘Static’, ‘BGP’, ‘Syslog’, etc.
Select and click ‘Syslog’.
Step 2: Setting Up Syslog in the Graphiant Portal
From within “Configure Services” on the Edge Services page, select ‘Syslog’ amongst the available headings along the top of the page.
After selecting ‘Syslog’, you will be able to add a Syslog Server to the selected Edge.
Select and click the (+) plus icon on the righthand side of the page.

The page will propagate various fields of required information for configuring a Syslog Server.
Note that the new Syslog Server will appear at the bottom of the list, below the existing servers.
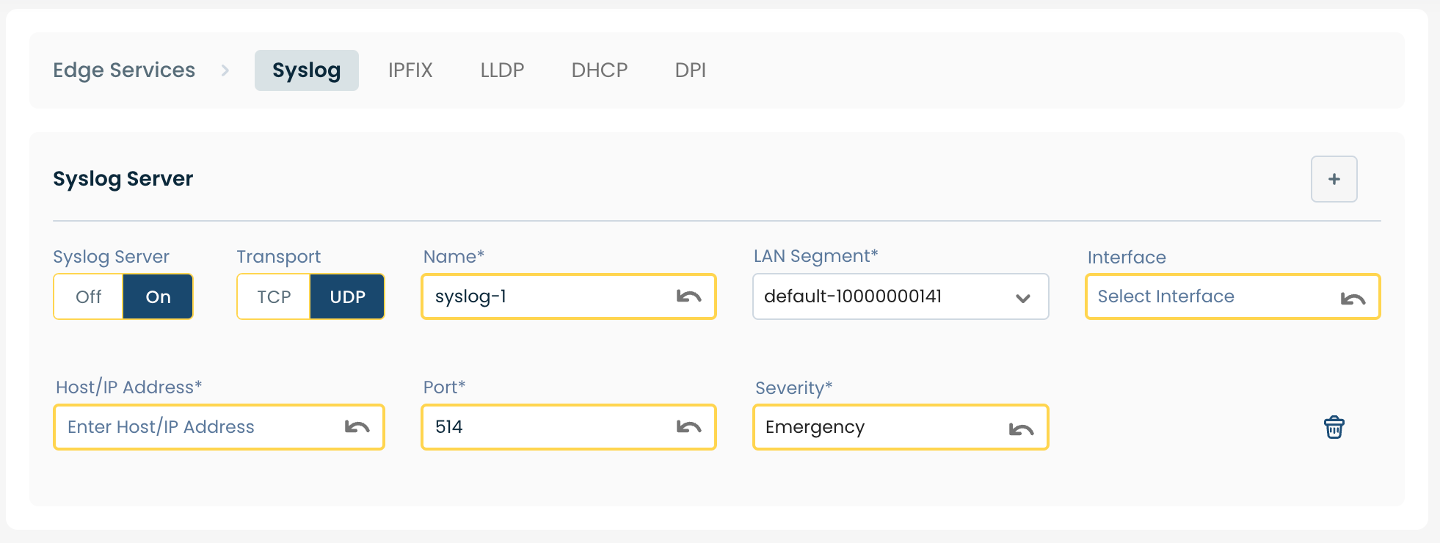
Below are descriptors for each of the fields required in order to configure Syslog:
(An * indicated a required field.)
Syslog Server*: To enable Syslog, choose ‘On’.
Transport*: Choose either ‘TCP’ or ‘UDP’.
Name: Choose a name for the server.
LAN Segment*: Choose the desired LAN Segment from the dropdown menu.
Interface*: Choose the desired Interface from the dropdown menu.
Host/IP Address*: Enter the Host/IP Address.
Port*: This field is automatically set to 514.
Severity*: Choose the desired level of severity from the dropdown menu.
Step 3: Review & Apply
Once all required fields are filled in, the selected Edge will be ready to begin utilizing Syslog, however you will first need to review and apply all changes made.

On the top righthand corner, choose from the following options:
‘Discard’ to discard changes made
‘Save as Draft’ to save changes made to be implemented at a later time
‘Review’ to review and apply changes made for immediate deployment