What is OSPF?
Open Shortest Path First (OSPF) is a link-state routing protocol used to construct a topology map of a given network to compute the shortest-path tree for each route a given IP packet might take within a network.
With link-state routing protocols such as OSPF, each router possesses information about the complete network topology and independently calculates the next best hop for every possible destination in the network, forming a network-wide routing table.
OSPFv2 in the Graphiant Portal
From within the Graphiant Portal, you can configure and deploy OSPFv2 between various network Edges under your control.
Step 1: Locating OSPFv2 in the Graphiant Portal
From the Home screen of the Graphiant Portal, navigate to the Edge Configuration screen via either one of the following:
Locate the "Quickstart" section at the top left of the screen; select 'Configure Edges'.
or
Click 'Configure' in the sidebar; select 'Devices'.
.jpg)
This will take you to the ‘Configuration’ page of the Graphiant Portal where you will be able to view all Active, Staged, and Deactivated Edges. From here you will be able to select among the Active Edges which Edge(s) you would like to be configured with OSPFv2.
On the right hand side, select and click ‘Configure’ in tandem with the Edge you wish to manage.
.png)
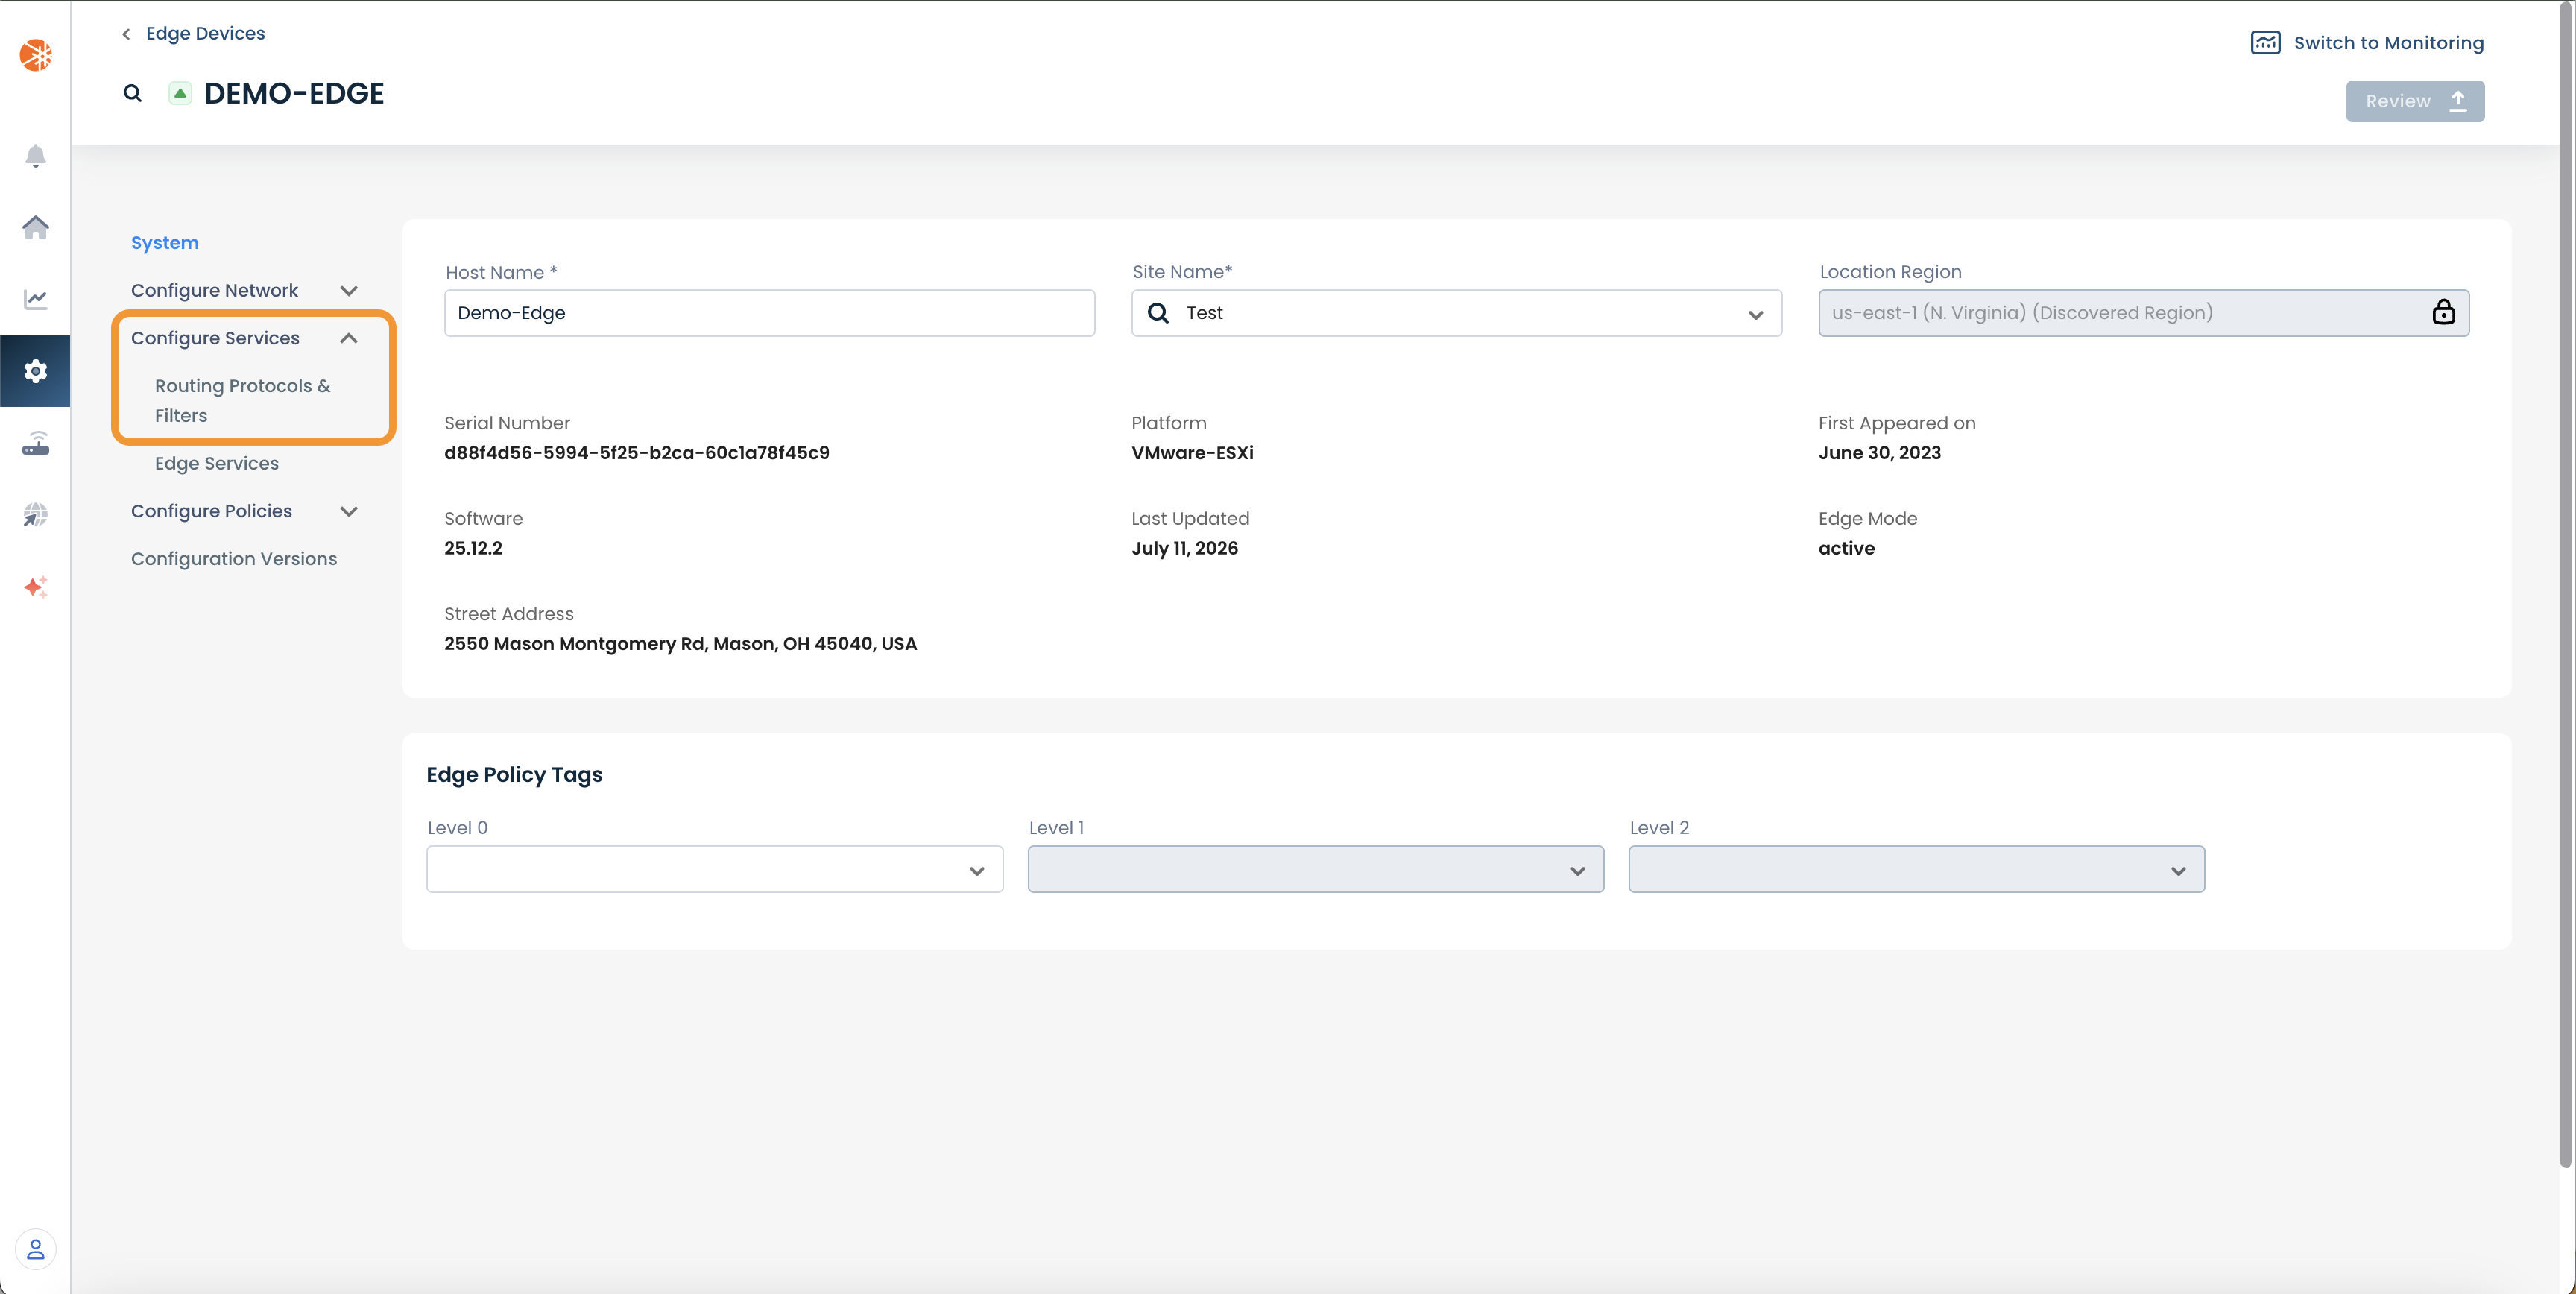
This will take you to a Configuration page of the Edge you have just chosen.
Here you will see a list of headings along the left hand side of the page, such as ‘Configure Network’, ‘Configure Services’, ‘Configure Policies’, etc.
From here, select and click ‘Configure Services’.
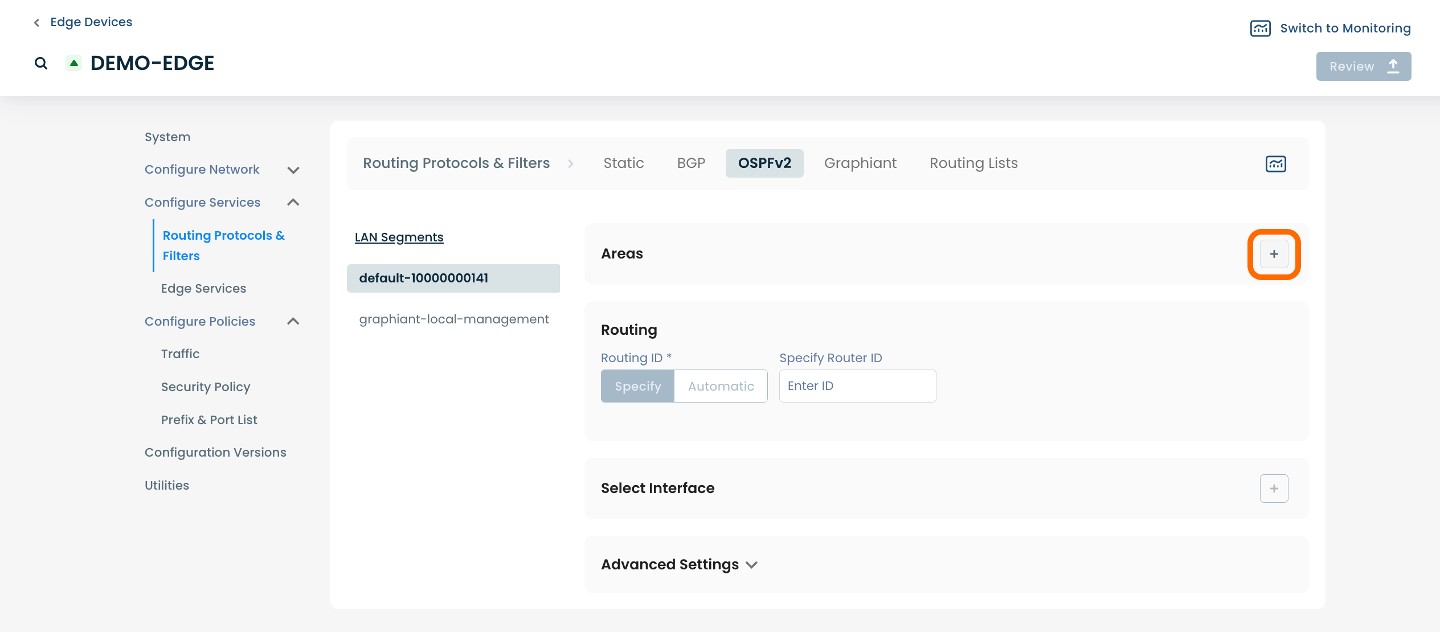
A drop down menu will appear. Select and click ‘Routing Protocols & Filters’.
This will take you to a Routing Protocols & Filters page dedicated to the chosen edge.
On this page, you will see a list of available headings along the top, such as ‘Static’, ‘BGP’, ‘OSPFv2’, etc.
Select and click ‘OSPFv2’.

Step 2: Setting Up OSPFv2 in the Graphiant Portal
From within ‘Configure Services’ on the ‘Routing Protocols & Filters’ page, select ‘OSPFv2’ amongst the available headings at the top of the page.
After selecting ‘OSPFv2’, the page will propagate various fields of required information for configuring Areas, Routing and Select Interface.
First, you create an Area, or Area(s), for your network.
To create an Area for your network, select and click the (+) plus icon in ‘Areas’ section.
Here you can configure any desired Areas for OSPFv2 on your network topography.
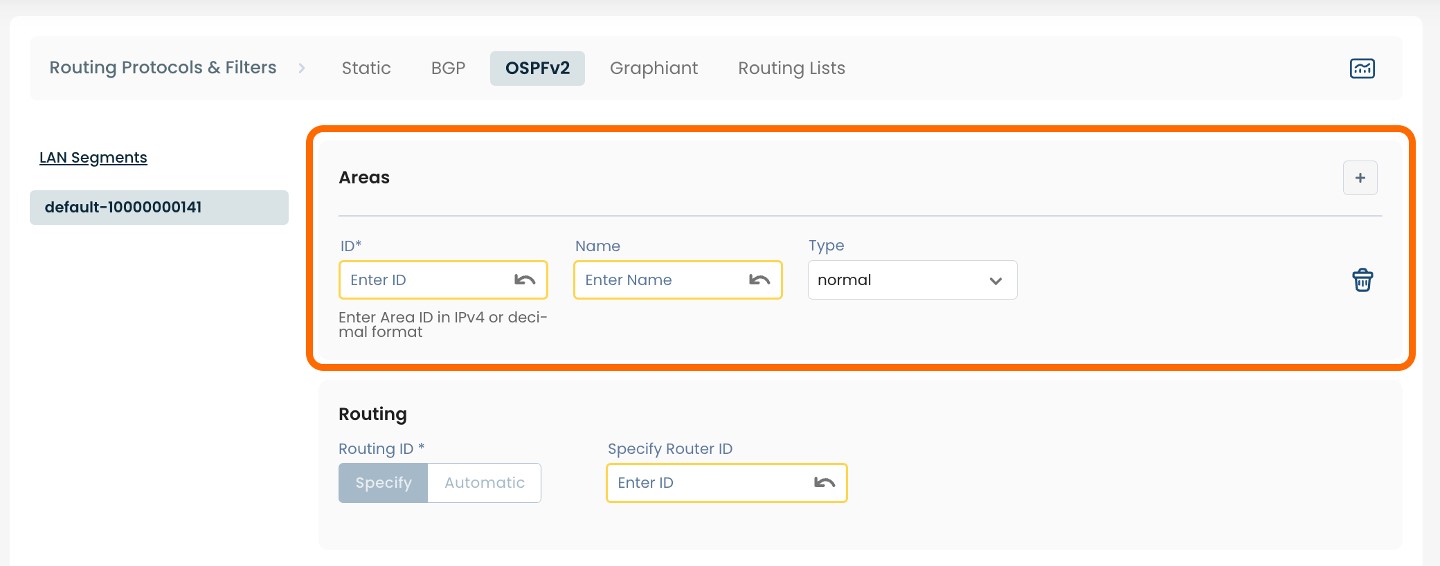
Below are descriptors for each of the fields required in order to configure an Area for use with OSPFv2.
(An * indicates a required field.)
ID*: Enter Area ID in IPv4 decimal format
Name*: Choose a name to label the Area
Type: Select ‘normal’ from the dropdown menu
Next, you will need to enter the desired Routing information.
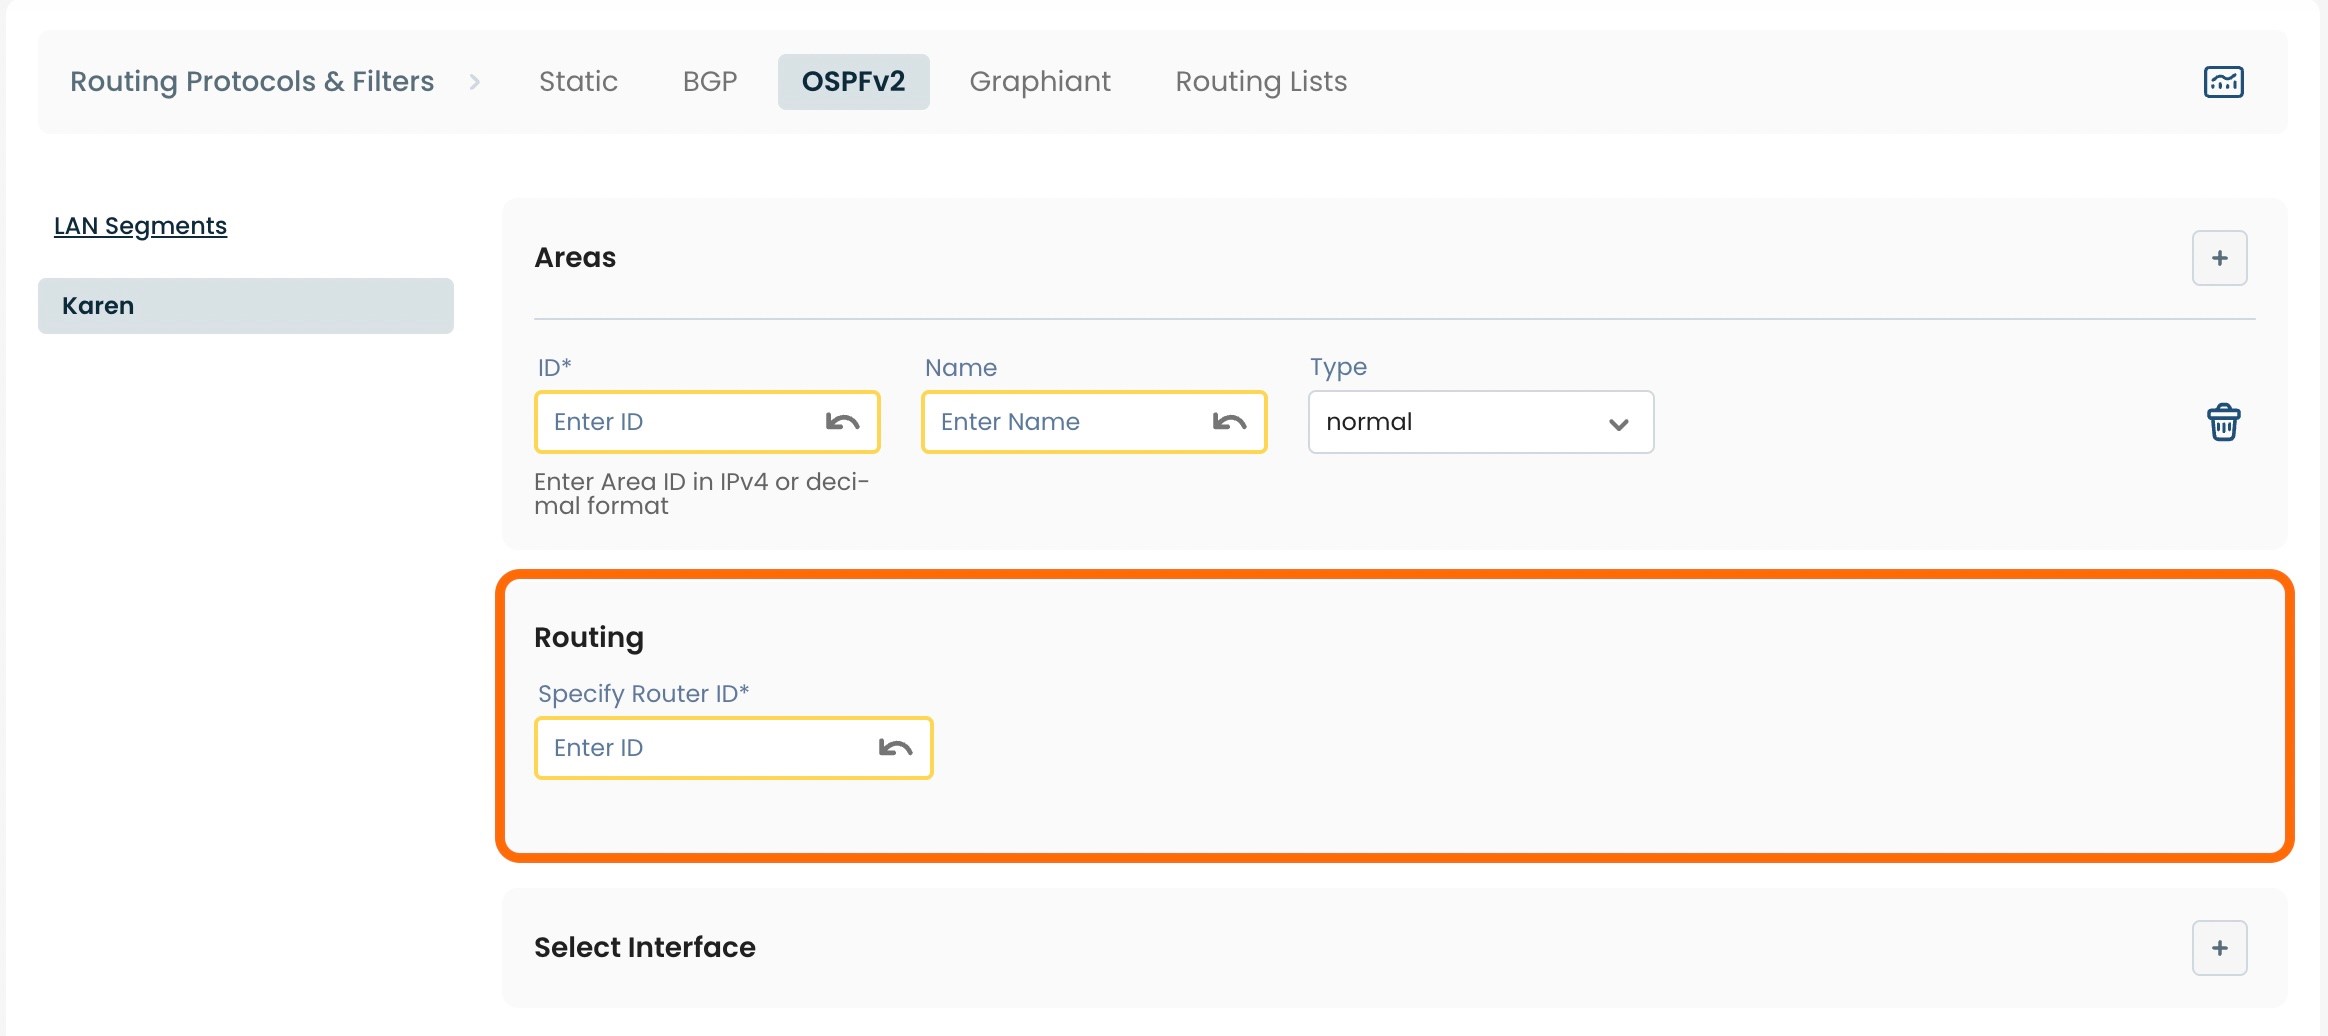
Below are descriptors for each of the fields required in order to configure Routing for use with OSPFv2.
(An * indicates a required field.)
Specify Router ID*: Enter the desired router ID in IPv4 decimal format.
Next, you will need to add/select the Interface(s) for use with OSPFv2.
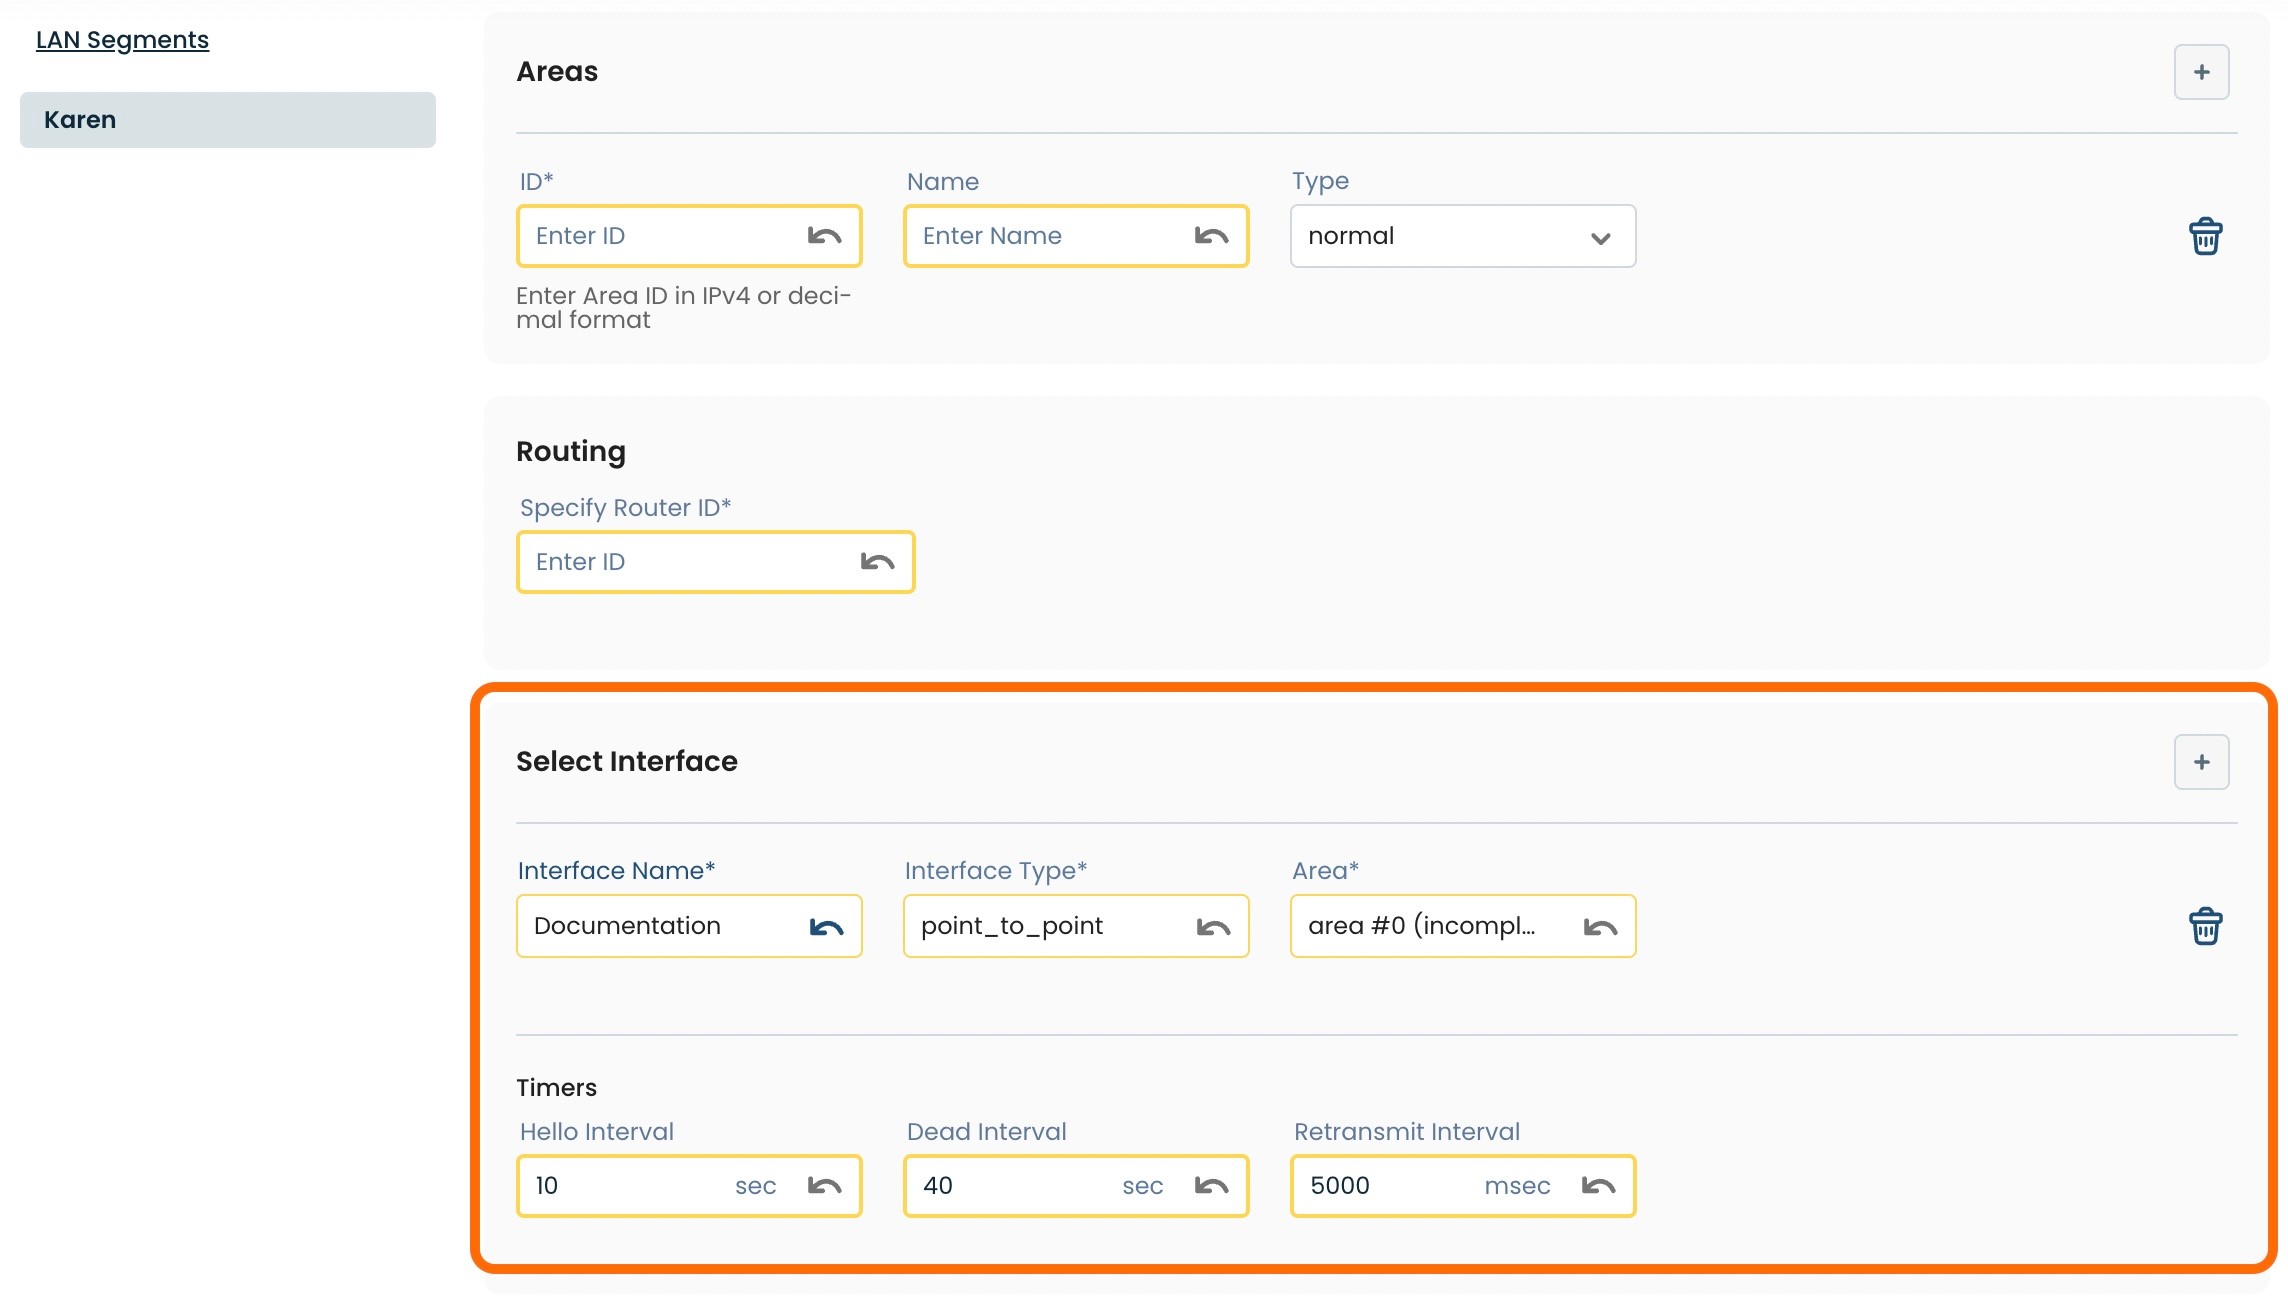
Below are descriptors for each of the fields required to select the desired Interface(s) for use with OSPFv2.
(An * indicates a required field.)
Interface Name*: Choose the desired Interface from the dropdown menu.
Interface Type*: Choose either ‘point-to-point’ or ‘broadcast’ from the dropdown menu.
Area*: Choose the desired Area from the dropdown menu.
Timers to ensure that a neighbor is still up may be configured using the following three fields:
Hello Interval: How often the hello packet is sent
Dead Interval: Length of time with no receipt of hello packets before the neighbor is assumed nonoperational
Retransmit Interval: Length of time after an LSA is sent for the Edge to wait to receive an acknowledgement packet, before retransmitting it
In addition to the above fields, you can make additional changes such as Redistribution under the header ‘Advanced Settings’.
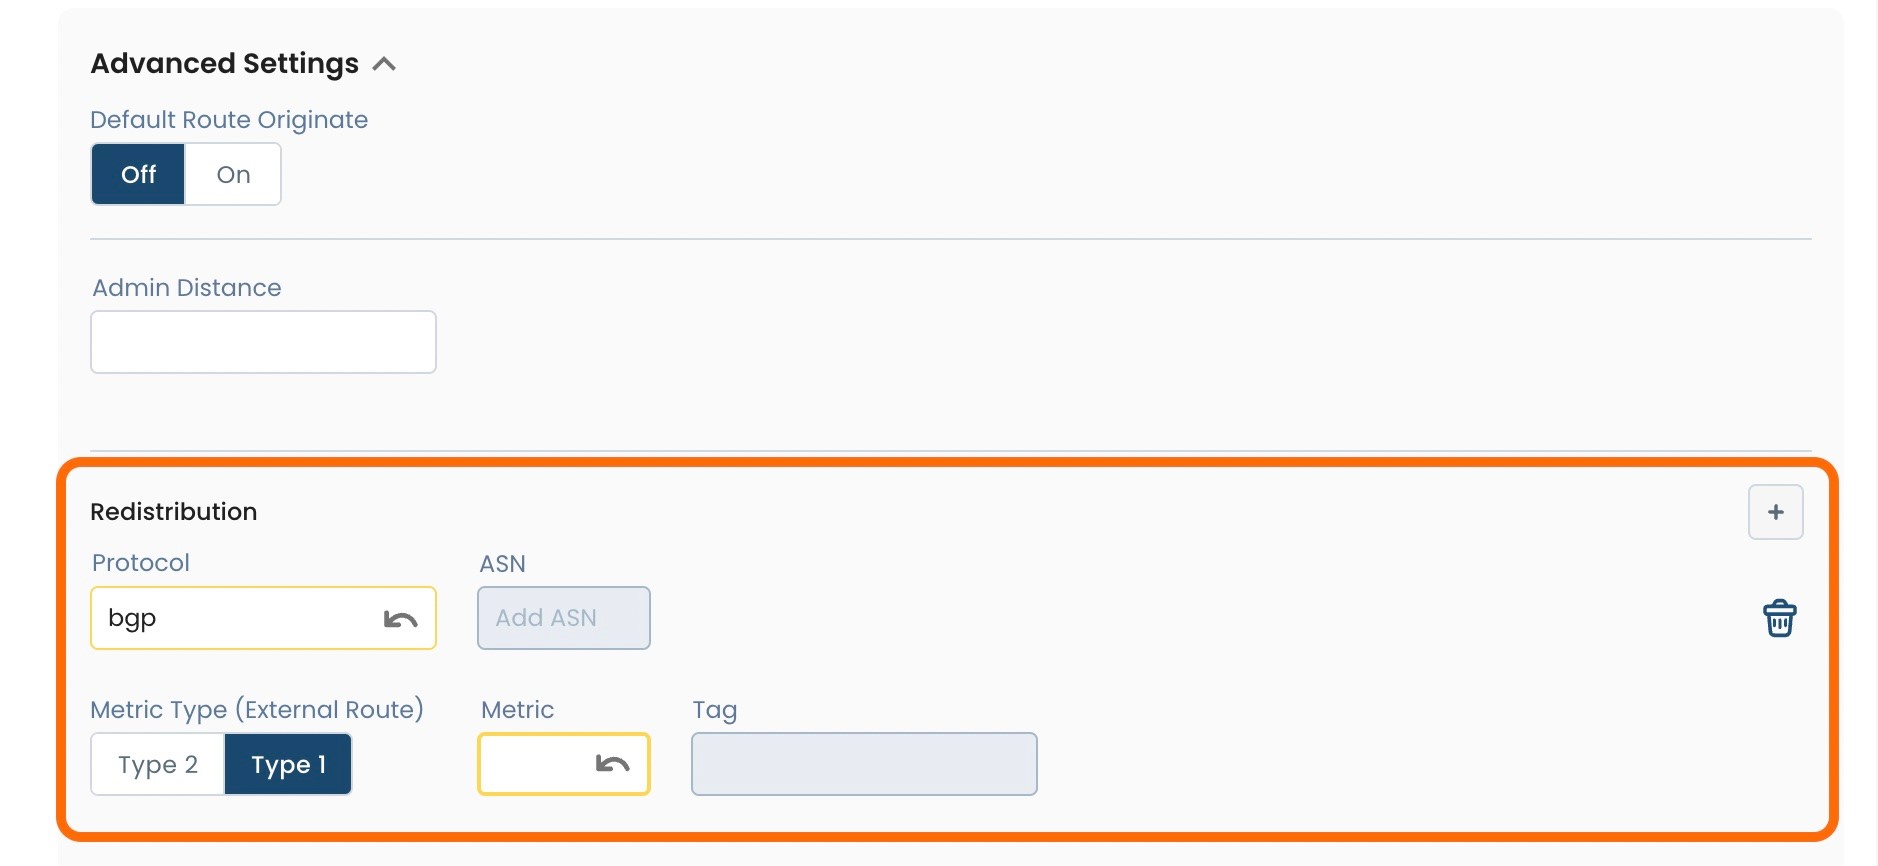
Below are descriptors for each of the fields required in order to configure Redistribution for use with OSPFv2.
(An * indicates a required field.)
Protocol*: Choose the desired protocol from the dropdown menu
ASN: Field currently not supported
Metric Type (External Route)*: Choose either ‘Type 2’ or ‘Type 1’
Metric*: Enter the desired priority, from 0-65535
Tag: Field currently not supported
Step 3: Review & Apply
Once all required fields are filled in, the selected Edge will be ready to begin utilizing OSPFv2, however you will first need to review and apply all changes made.

On the top right hand corner, choose from the following options:
‘Discard’ to discard changes made
‘Save as Draft’ to save changes made to be implemented at a later time
‘Review’ to review and apply changes made for immediate deployment
Note:
To allow OSPFv2 routes to be able to advertise to the Graphiant Core:
In the "Routing Protocols & Filters" area of the Graphiant Portal, select the 'Graphiant' tab at the top.
Under "Advanced Settings", toggle the OSPFv2 switch to 'On'.
Without OSPFv2 "On", the Edge will not advertise its OSPF routes to the Core.
.png)