Why are Graphiant Edges Attached to a Site?
Graphiant Edges are attached to a site, because configurations will be performed at the Site level.
Every Edge will be attached to a Site, from which it will pull down its configuration.
Each Edge can be attached to only one Site.
Note:
An Edge must be attached to a Site. An Edge can be moved to a different Site, but not removed from Sites completely.
Attaching a Graphiant Edge to a Site
From the Graphiant Portal Home screen, navigate to the Edge Configuration screen by one of the following:
Locate the "Configurations" section within the Quickstart area of the screen; select 'Configure Edges'.
or
Click 'Configure' in the sidebar; select 'Devices'.
.jpg)
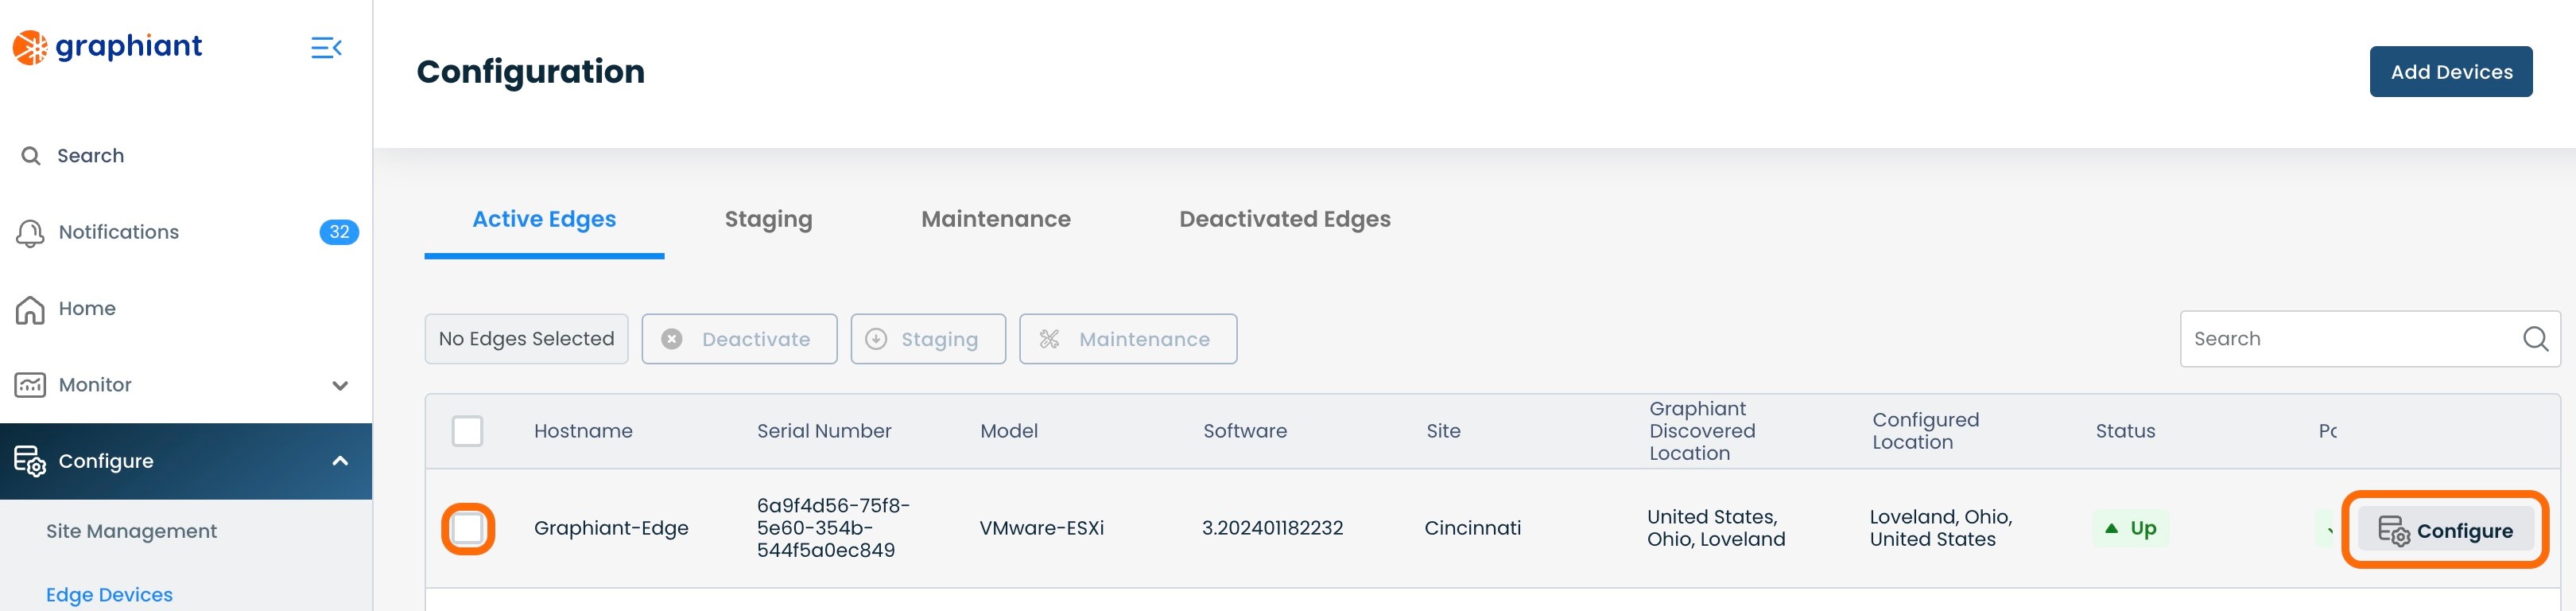
Select the Edge to be added to the Site by checking the box next to that Edge, and then clicking 'Configure'.

This will bring up the “System” screen for that Edge.
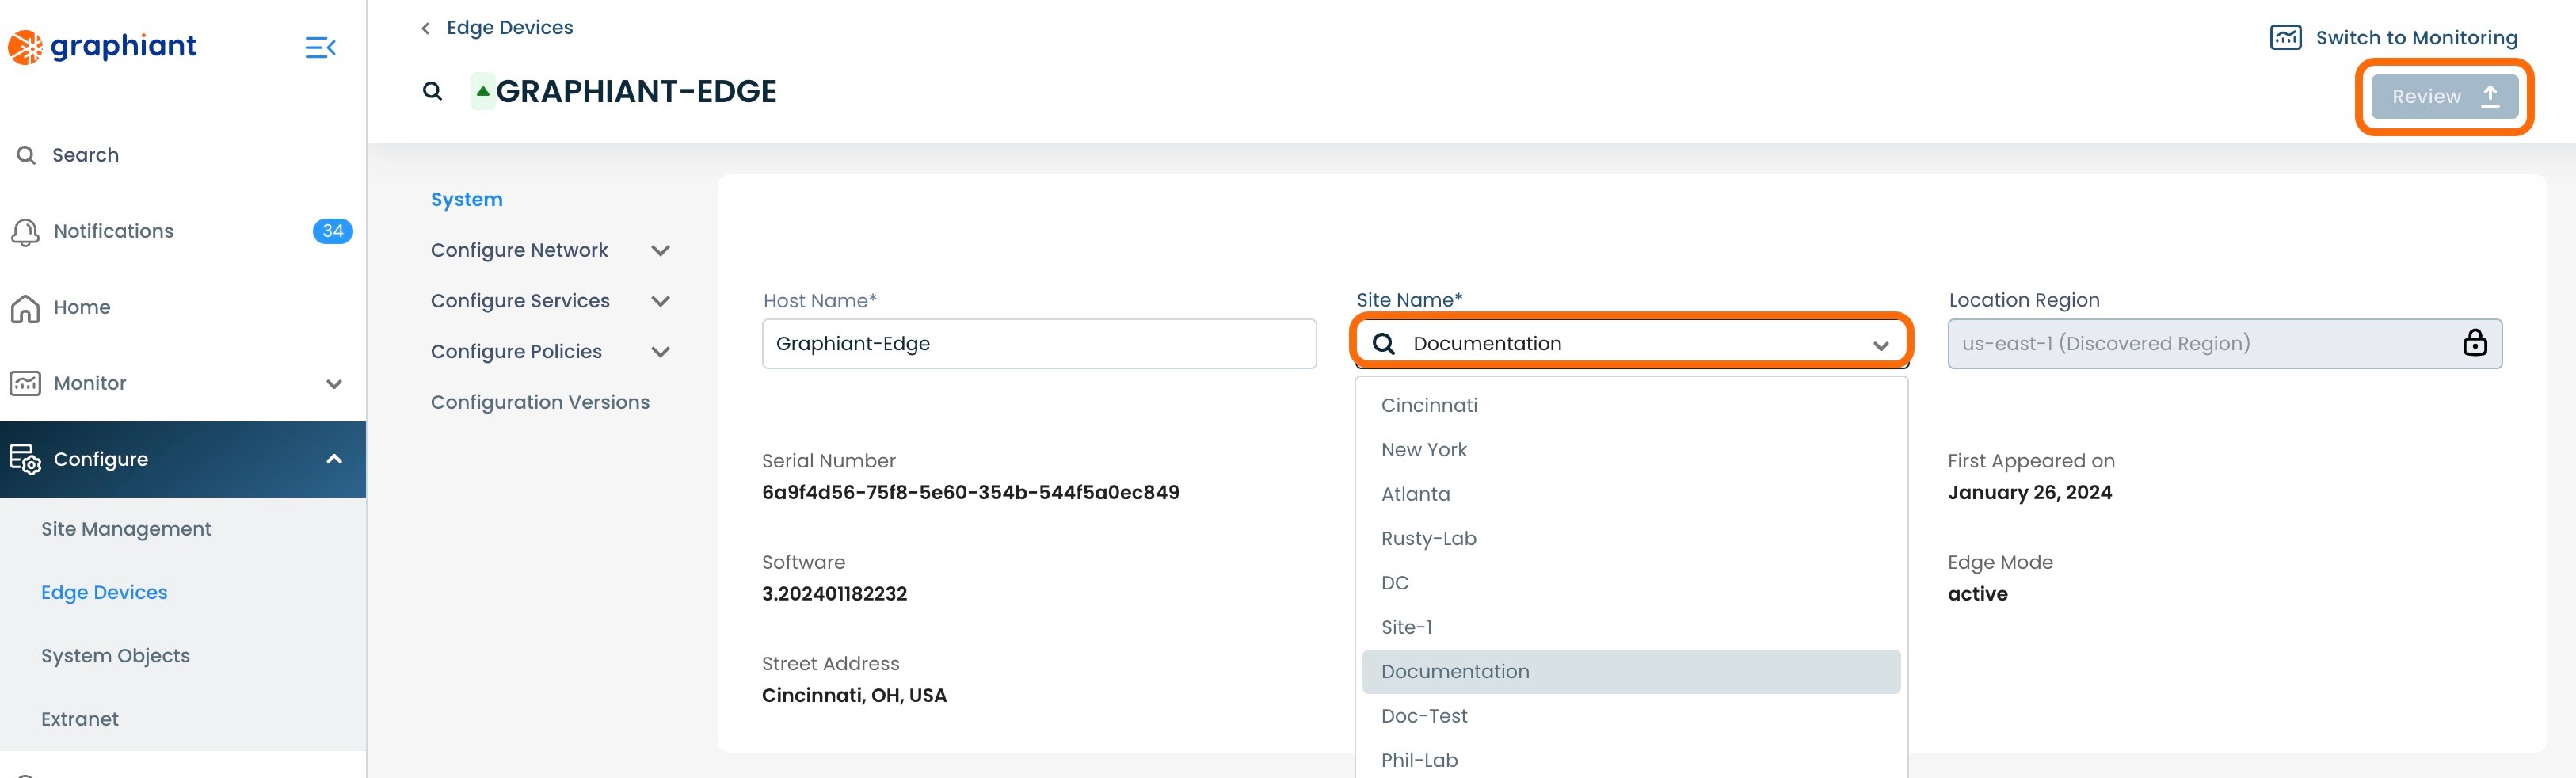
Site Name: Select the desired Site from the drop-down.
Note:
Configurations are performed at the Site level; ensure that the Site chosen for the Edge matches the configuration desired for that Edge.
Click 'Review', then 'Apply'.
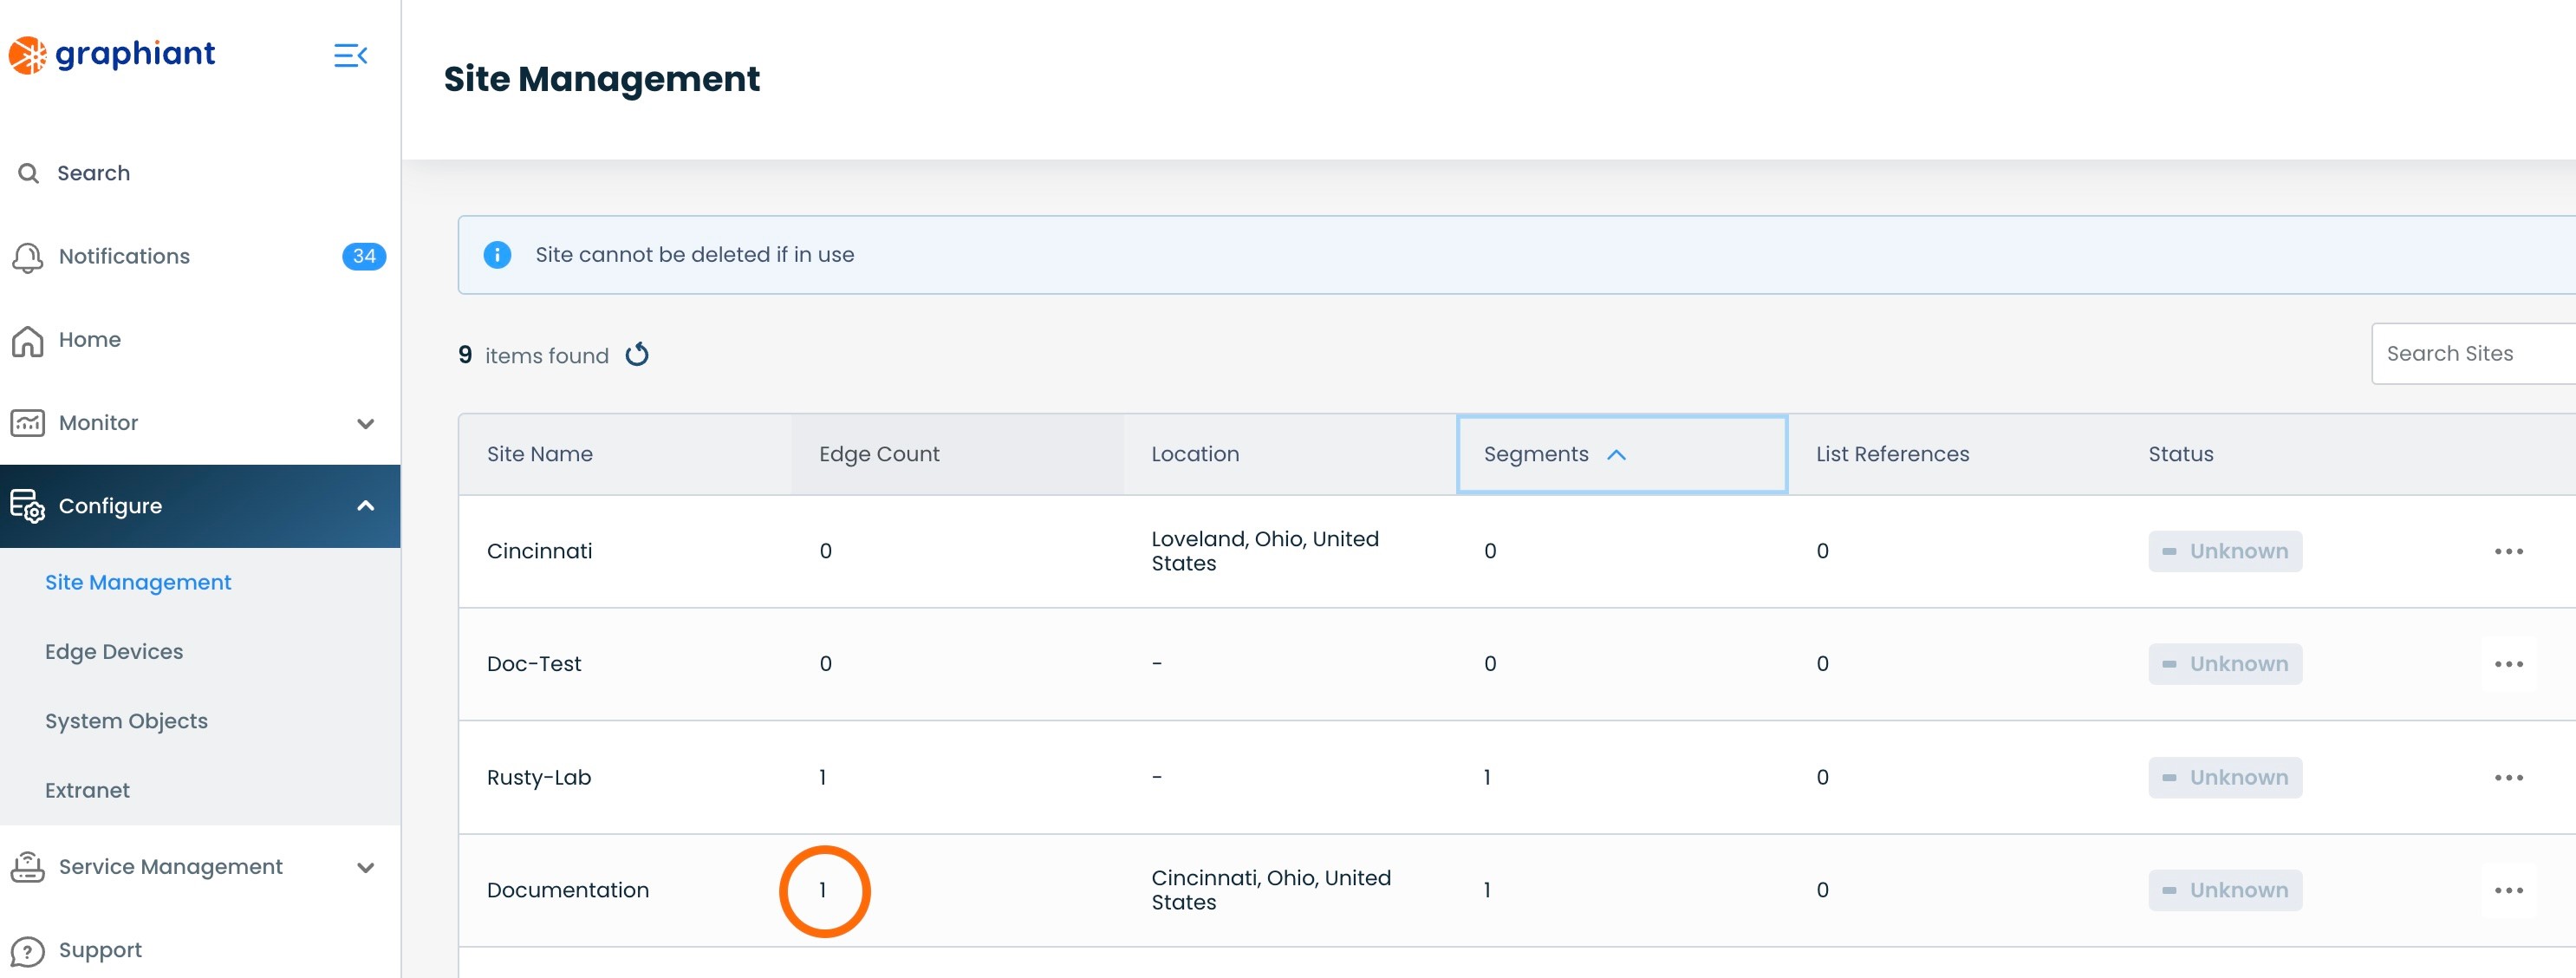
The Edge is now attached to the selected Site.
This will show up in the Summary Table in the Site Management tab in the left side menu.
Editing the Site to Which an Edge is Attached
From the Graphiant Portal Home screen, navigate to the Edge Configuration screen by one of the following:
Locate the "Configurations" section within the Quickstart area of the screen; select 'Configure Edges'.
or
Click 'Configure' in the sidebar; select 'Devices'.
.png)
Select the Edge whose Site will be edited by checking the box next to that Edge, and then clicking 'Configure'.
This will bring up the “System” screen for that Edge.
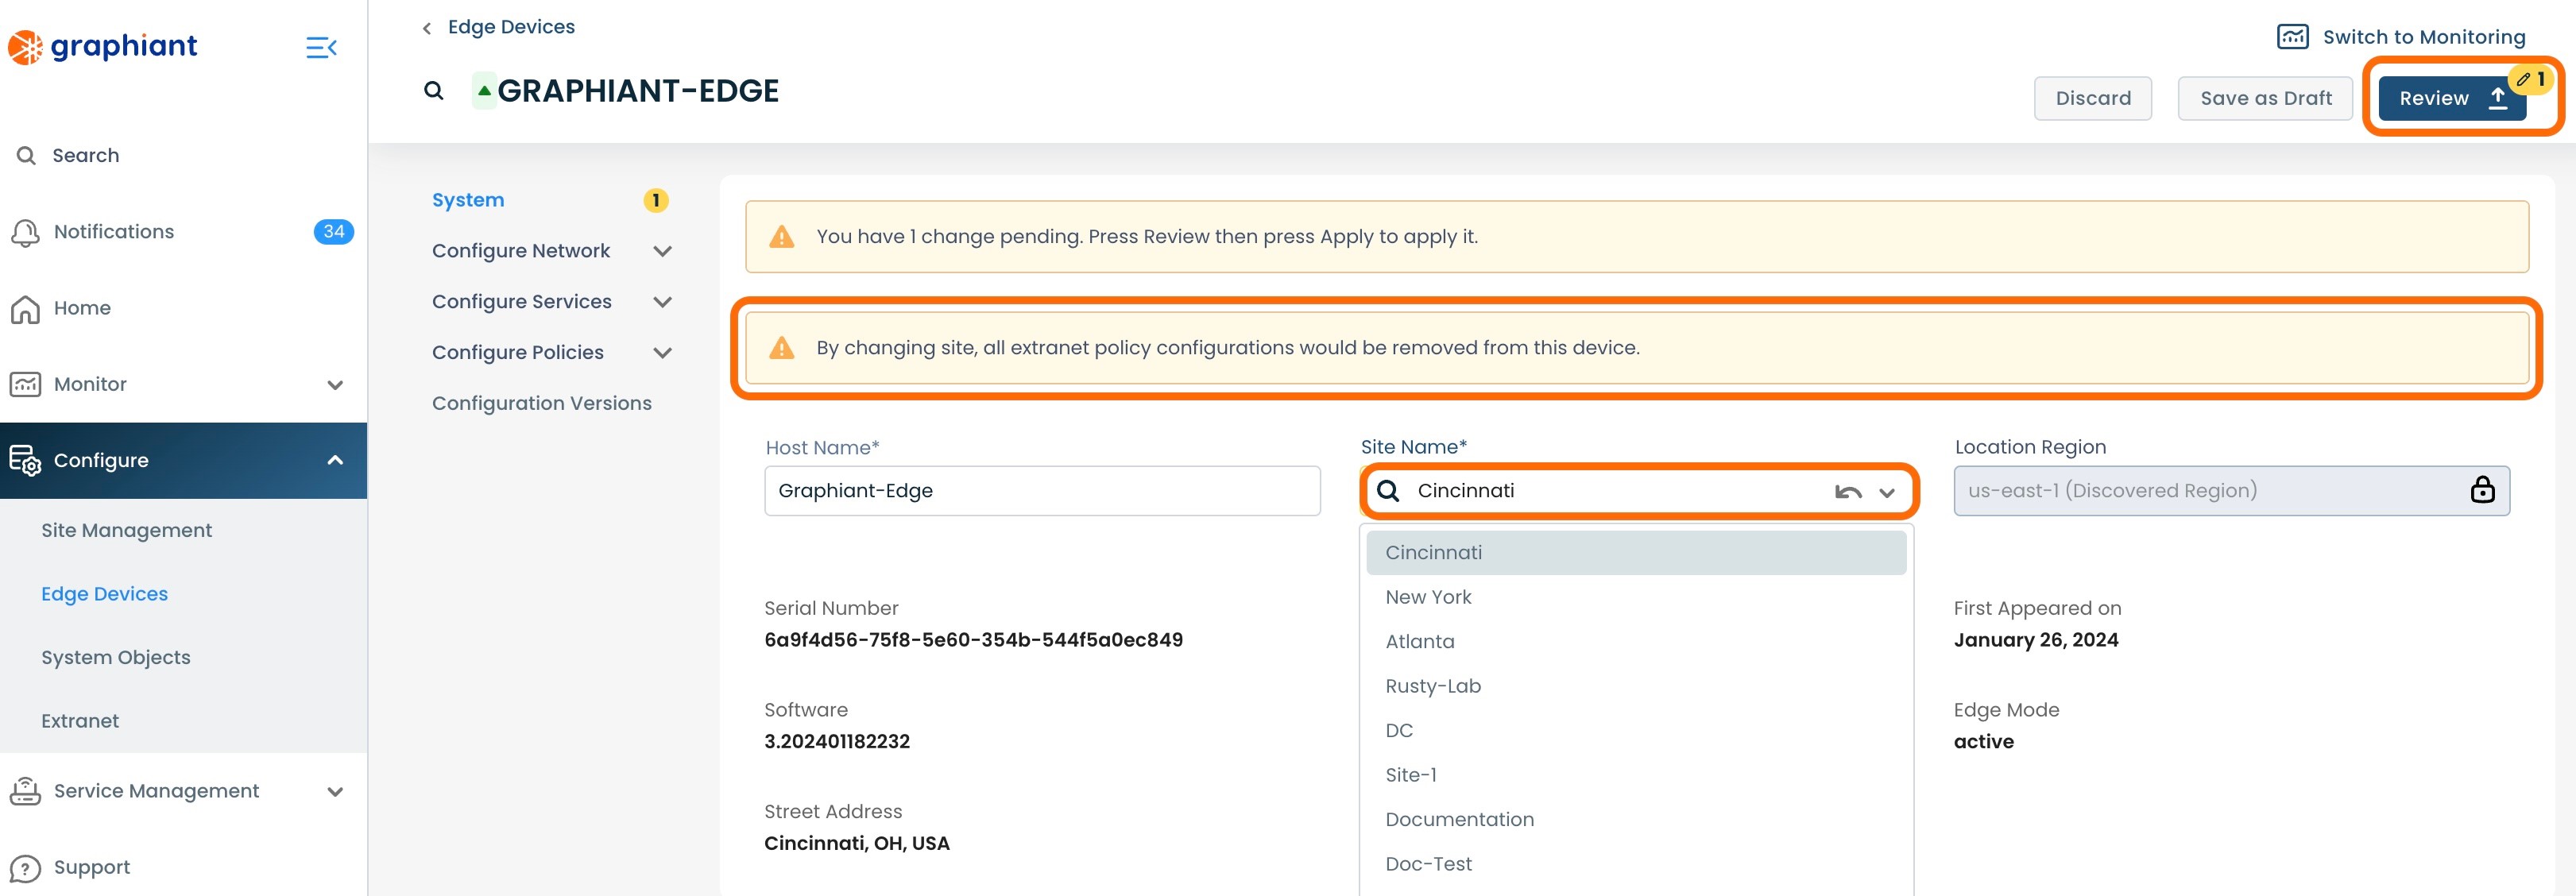
From the drop-down, select the desired Site.
Note:
All configurations from the former Site will be replaced with the configurations from the new Site, including Extranet.
Click 'Review' and 'Apply'.