What is SNMPv3?
SNMPv3 is the Simple Network Management Protocol that ensures secure access to devices by providing enhanced security features from SNMPv2. SNMPv3 supports strong authentication and encryption, and allows the secure management of complex network environments through its ability to provide protected and reliable data about network devices.
SNMPv3 facilitates the sharing of information among various devices on a network. Graphiant SNMPv3 monitors and manages network devices connected over an IP by polling the devices for various data, such as current state, throughput, configuration, temperature, memory usage, uptime, CPU utilization, errors, etc. SNMPv3 collects, organizes, and sends this data from the various devices for network monitoring, assisting with fault identification and isolation.
SNMPv3 makes data encryption possible. It allows admins to specify different authentication requirements on a granular basis, preventing unauthorized authentication. SNMPv3 can be used to require encryption for data transfers, ensuring a higher level of security.
Locating System Objects SNMPv3 in the Graphiant Portal
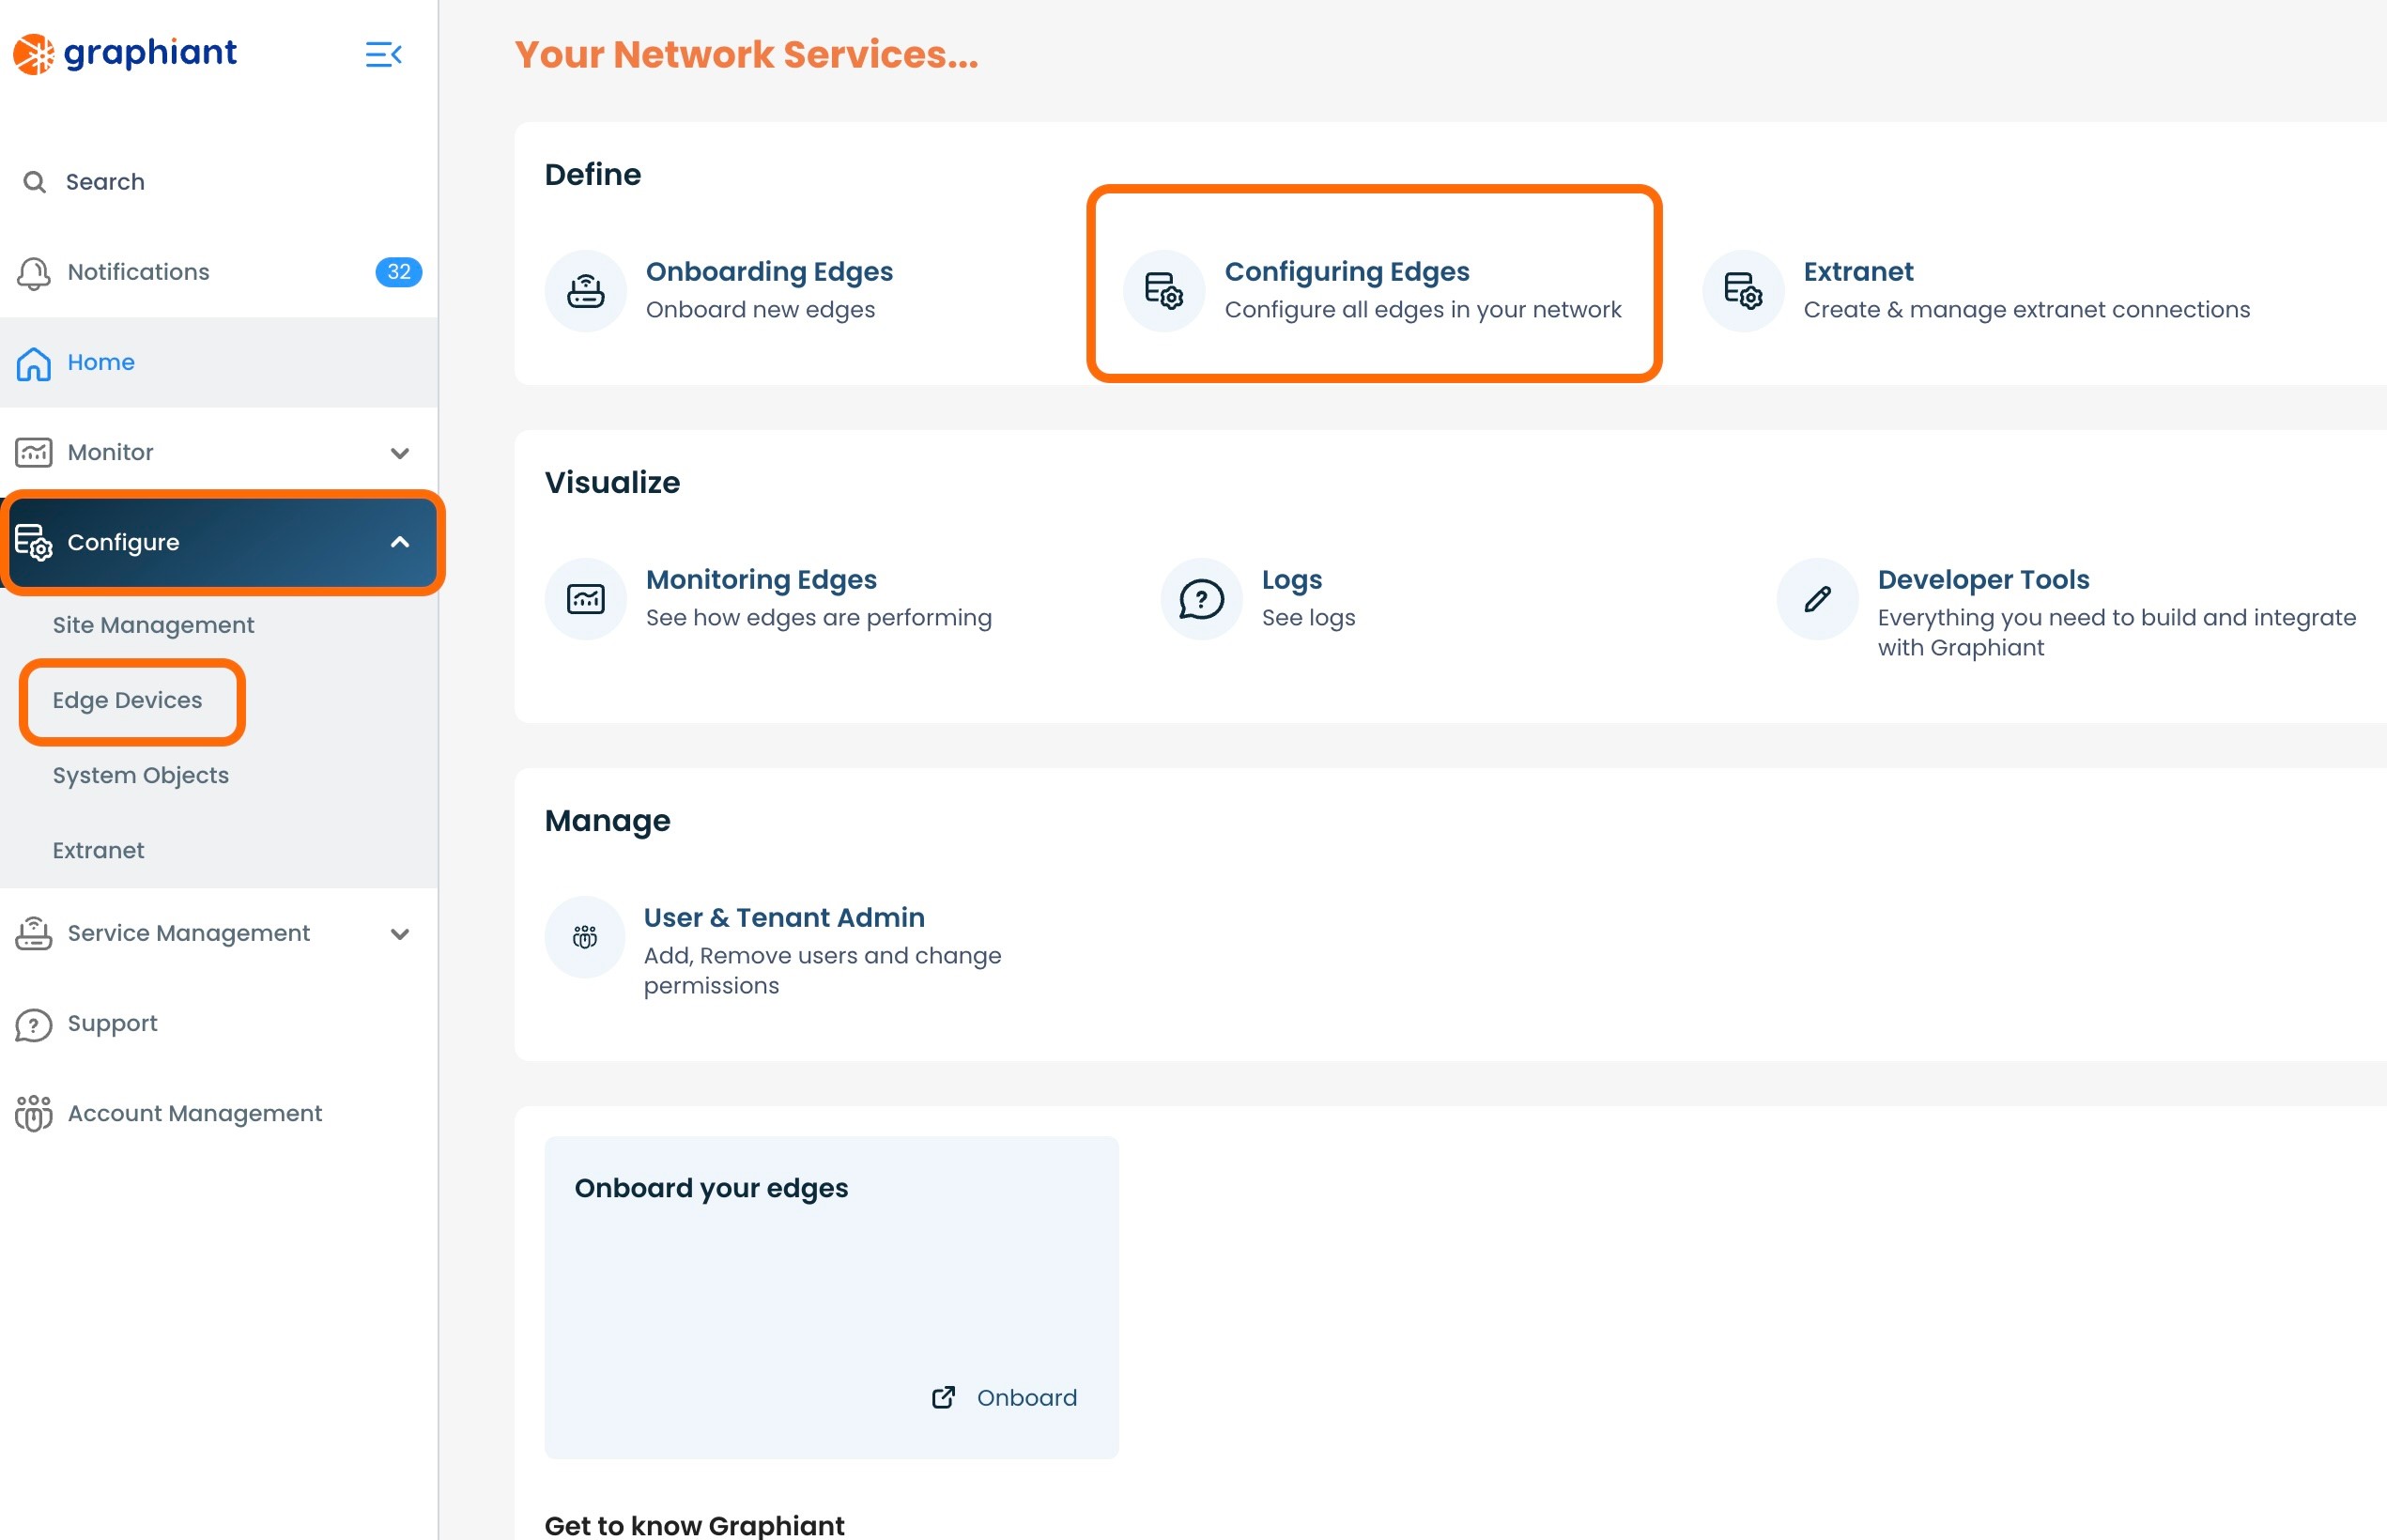
From the Home screen, navigate to the System Objects screen by one of the following:
Locate the "Configurations" section within the top left of the screen; select 'Create System Object'.
or
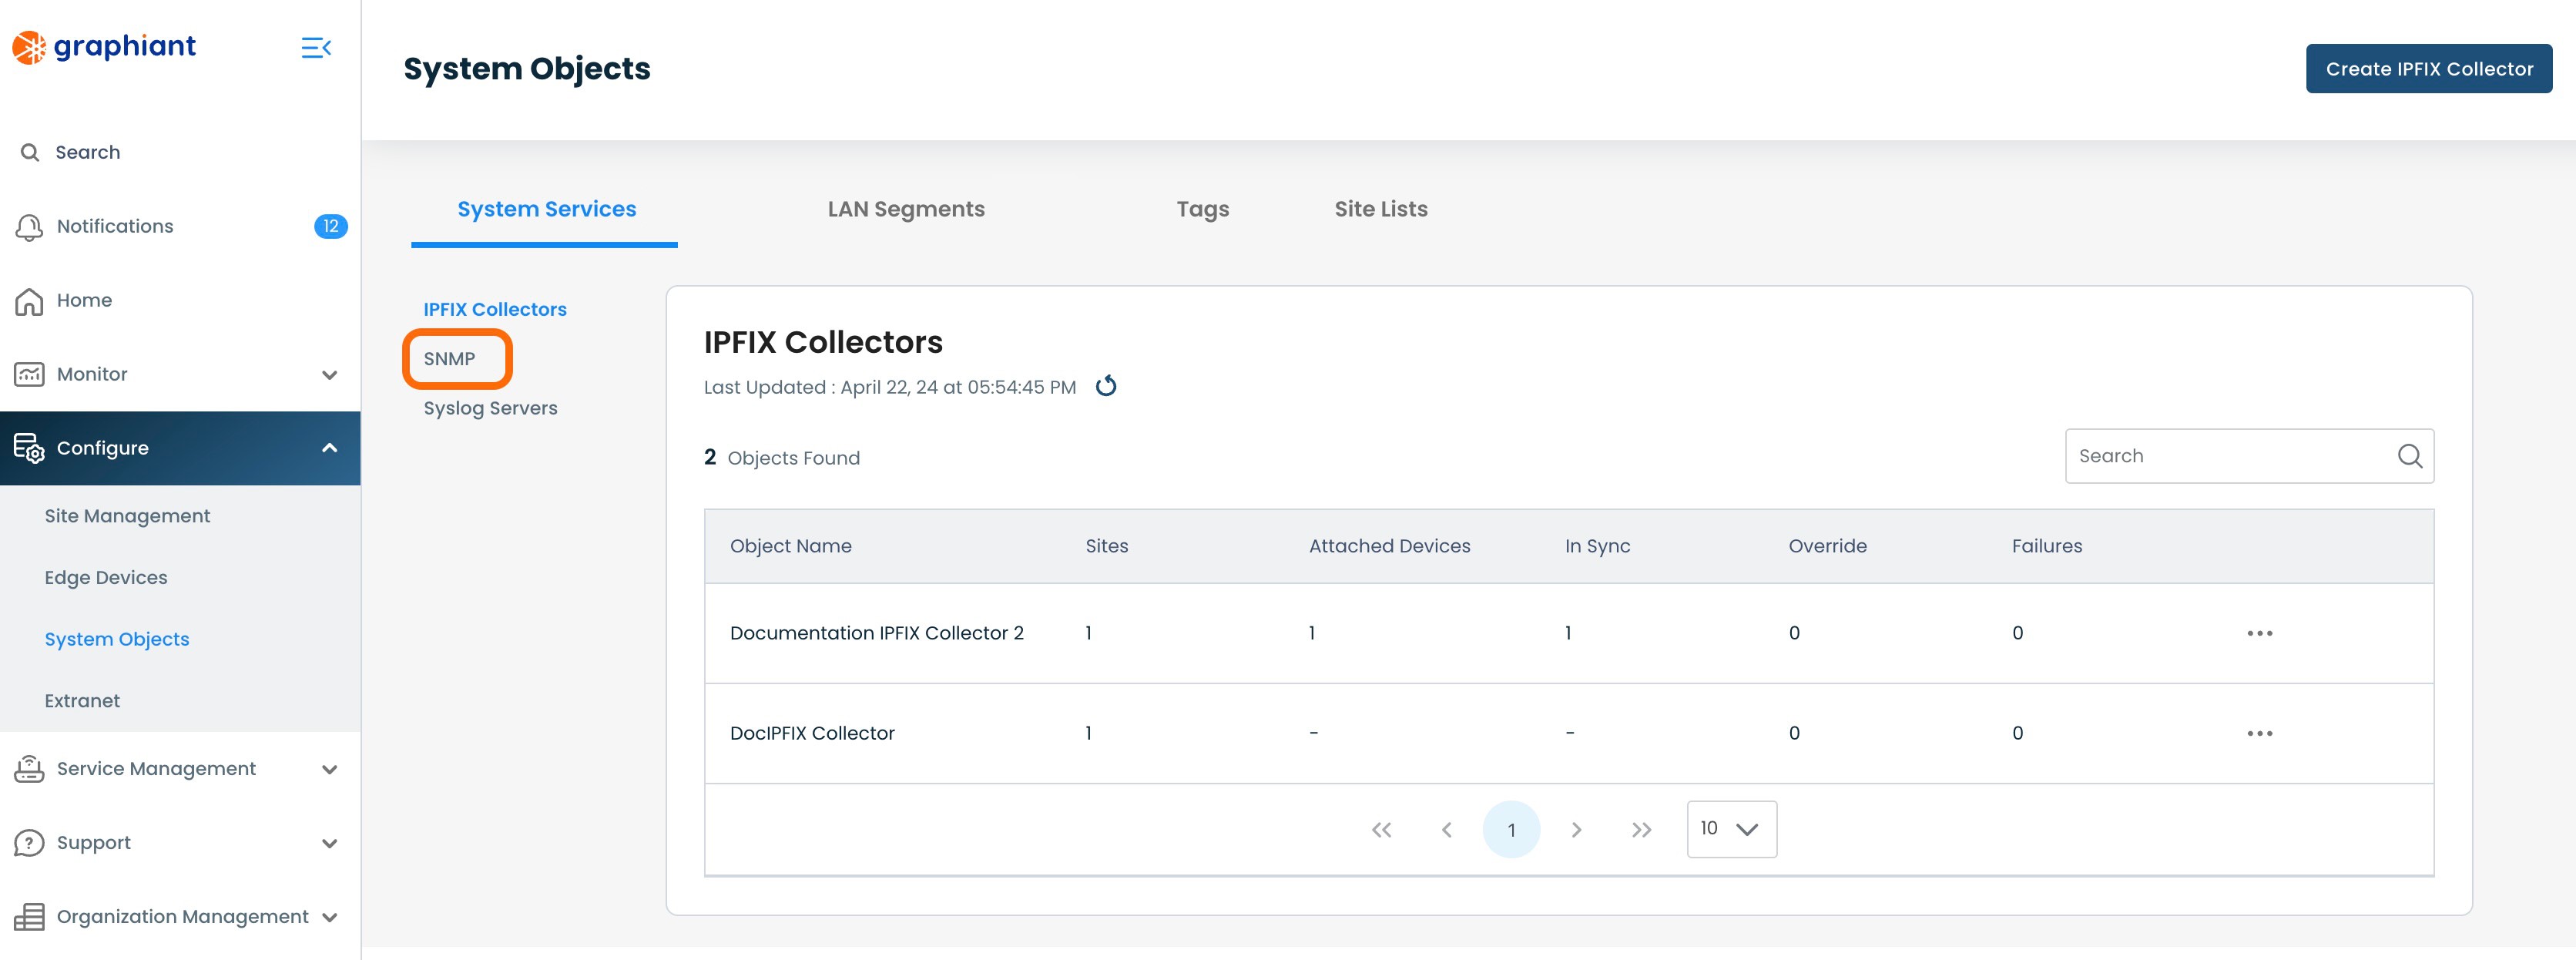
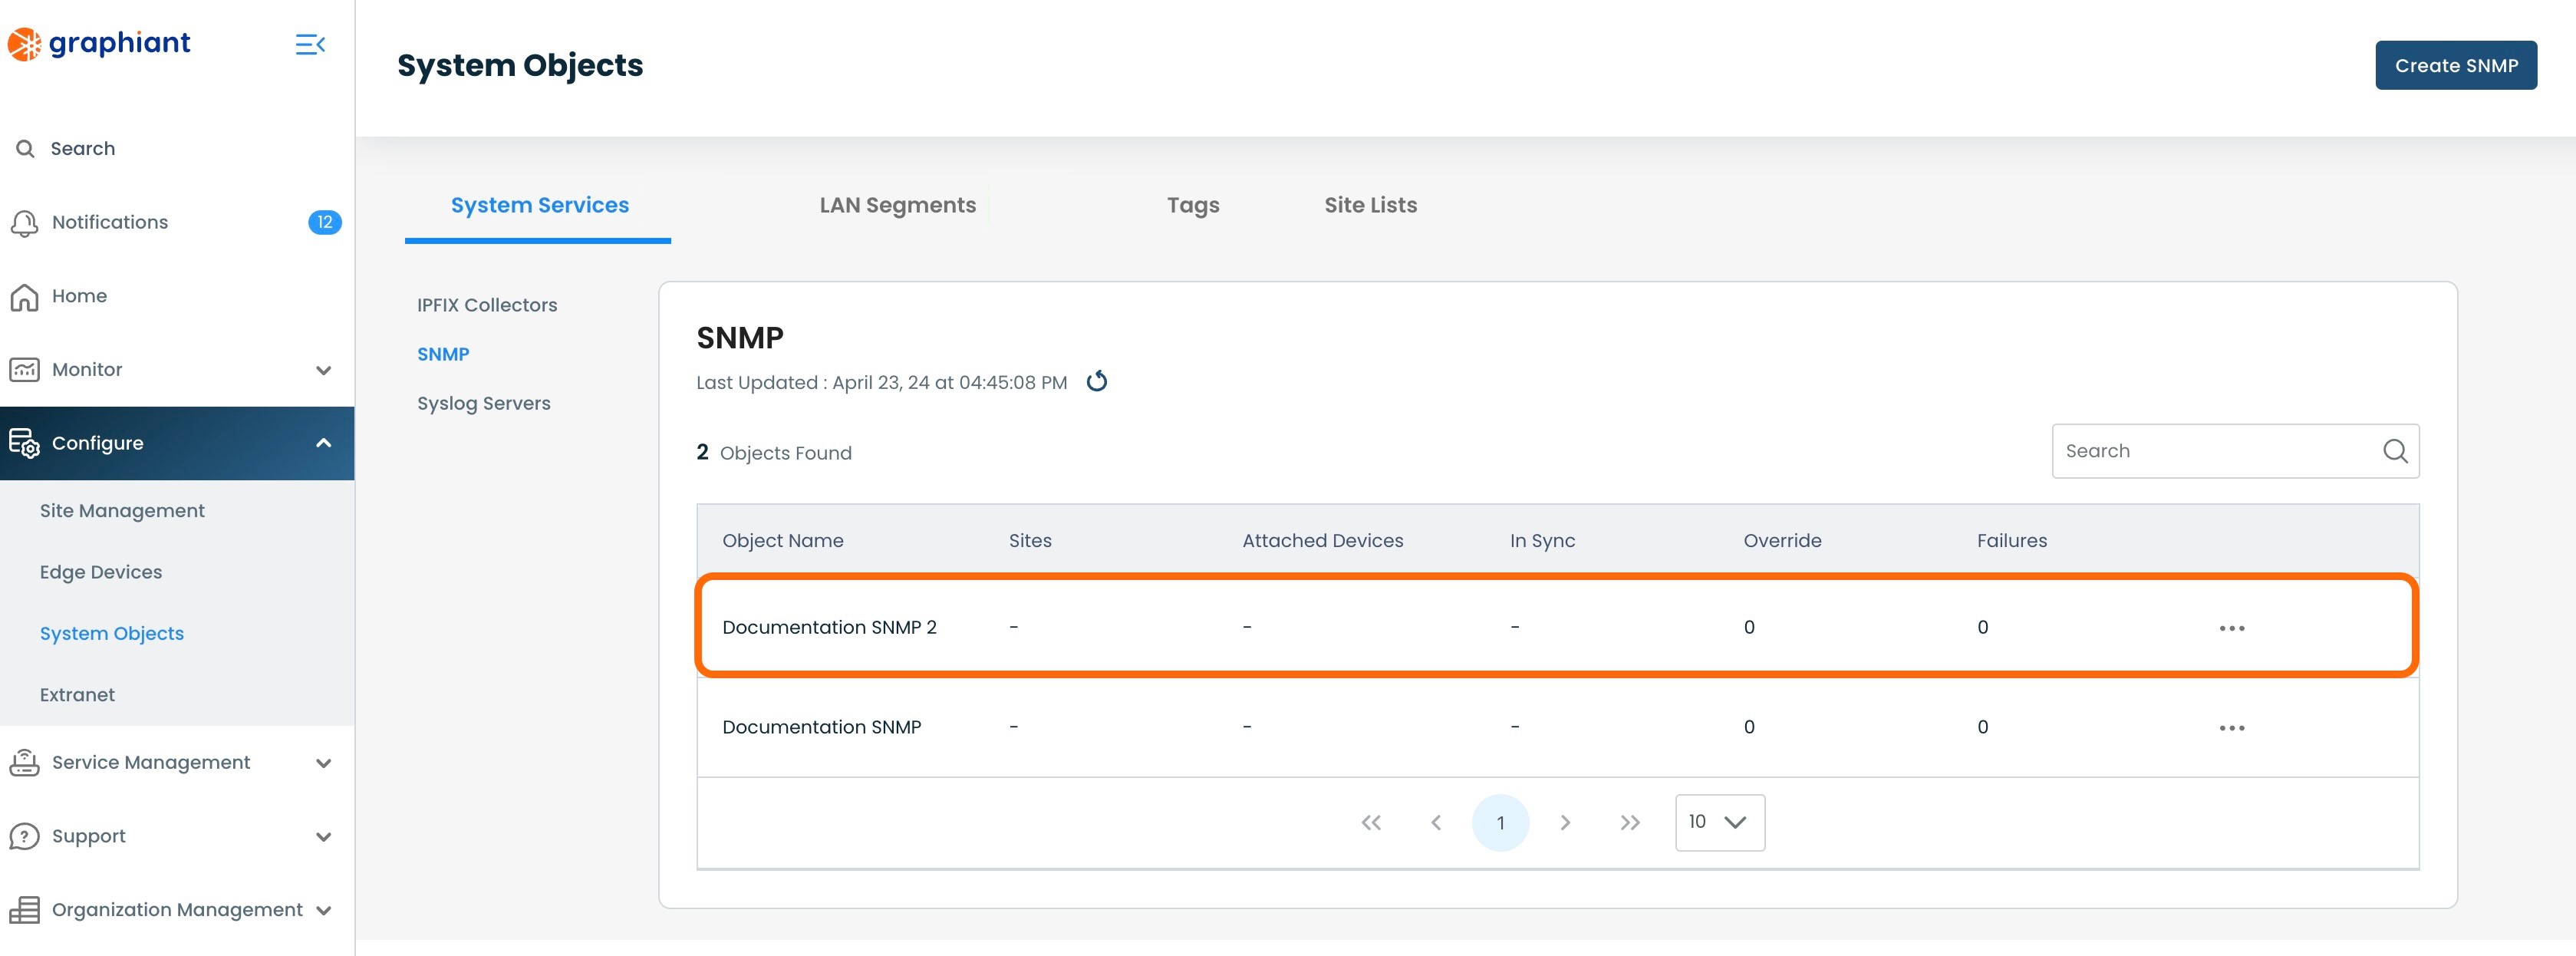
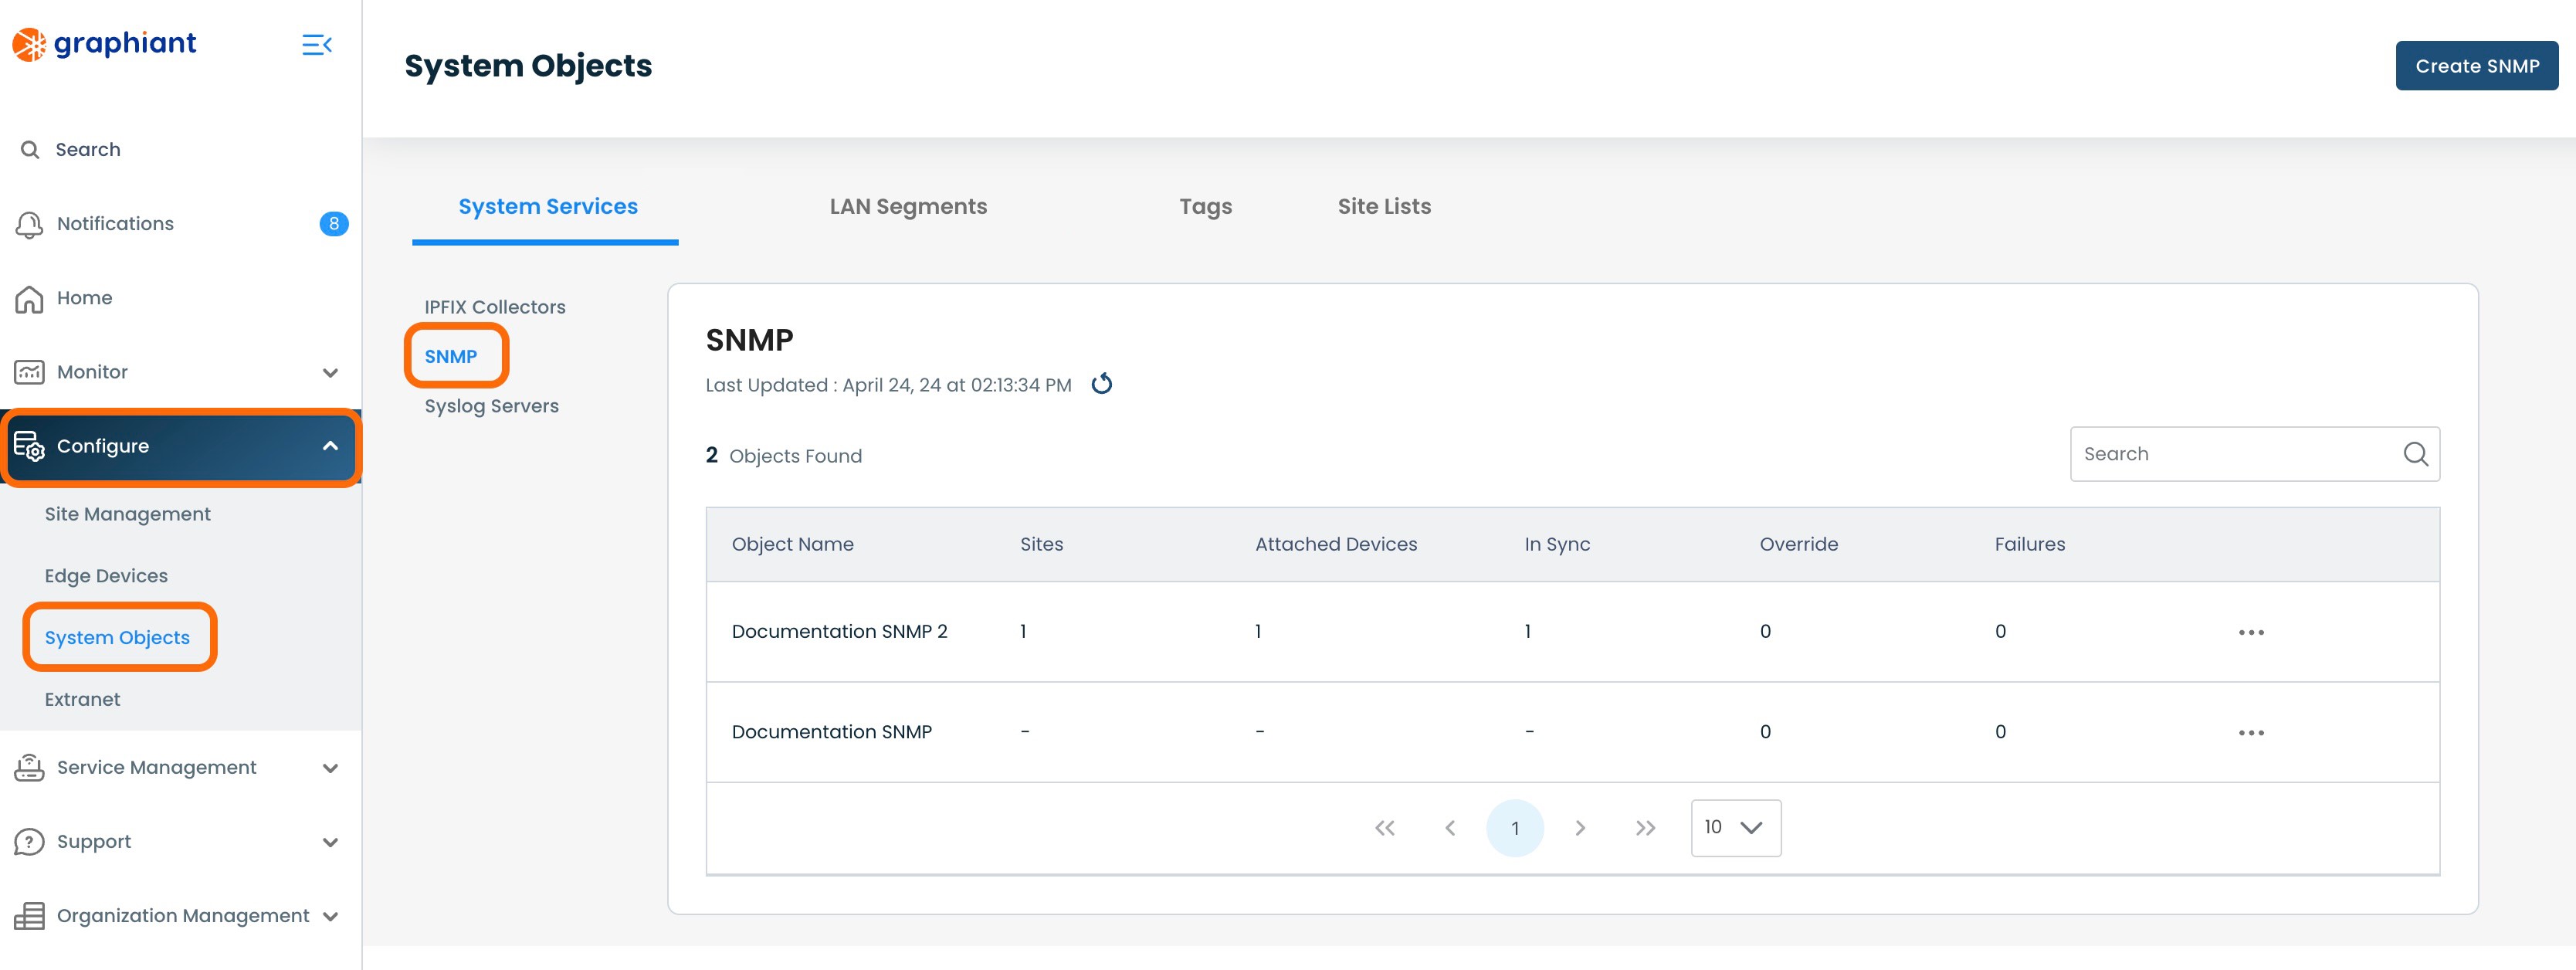
Click 'Configure' in the sidebar; select 'System Objects'.
.jpg)
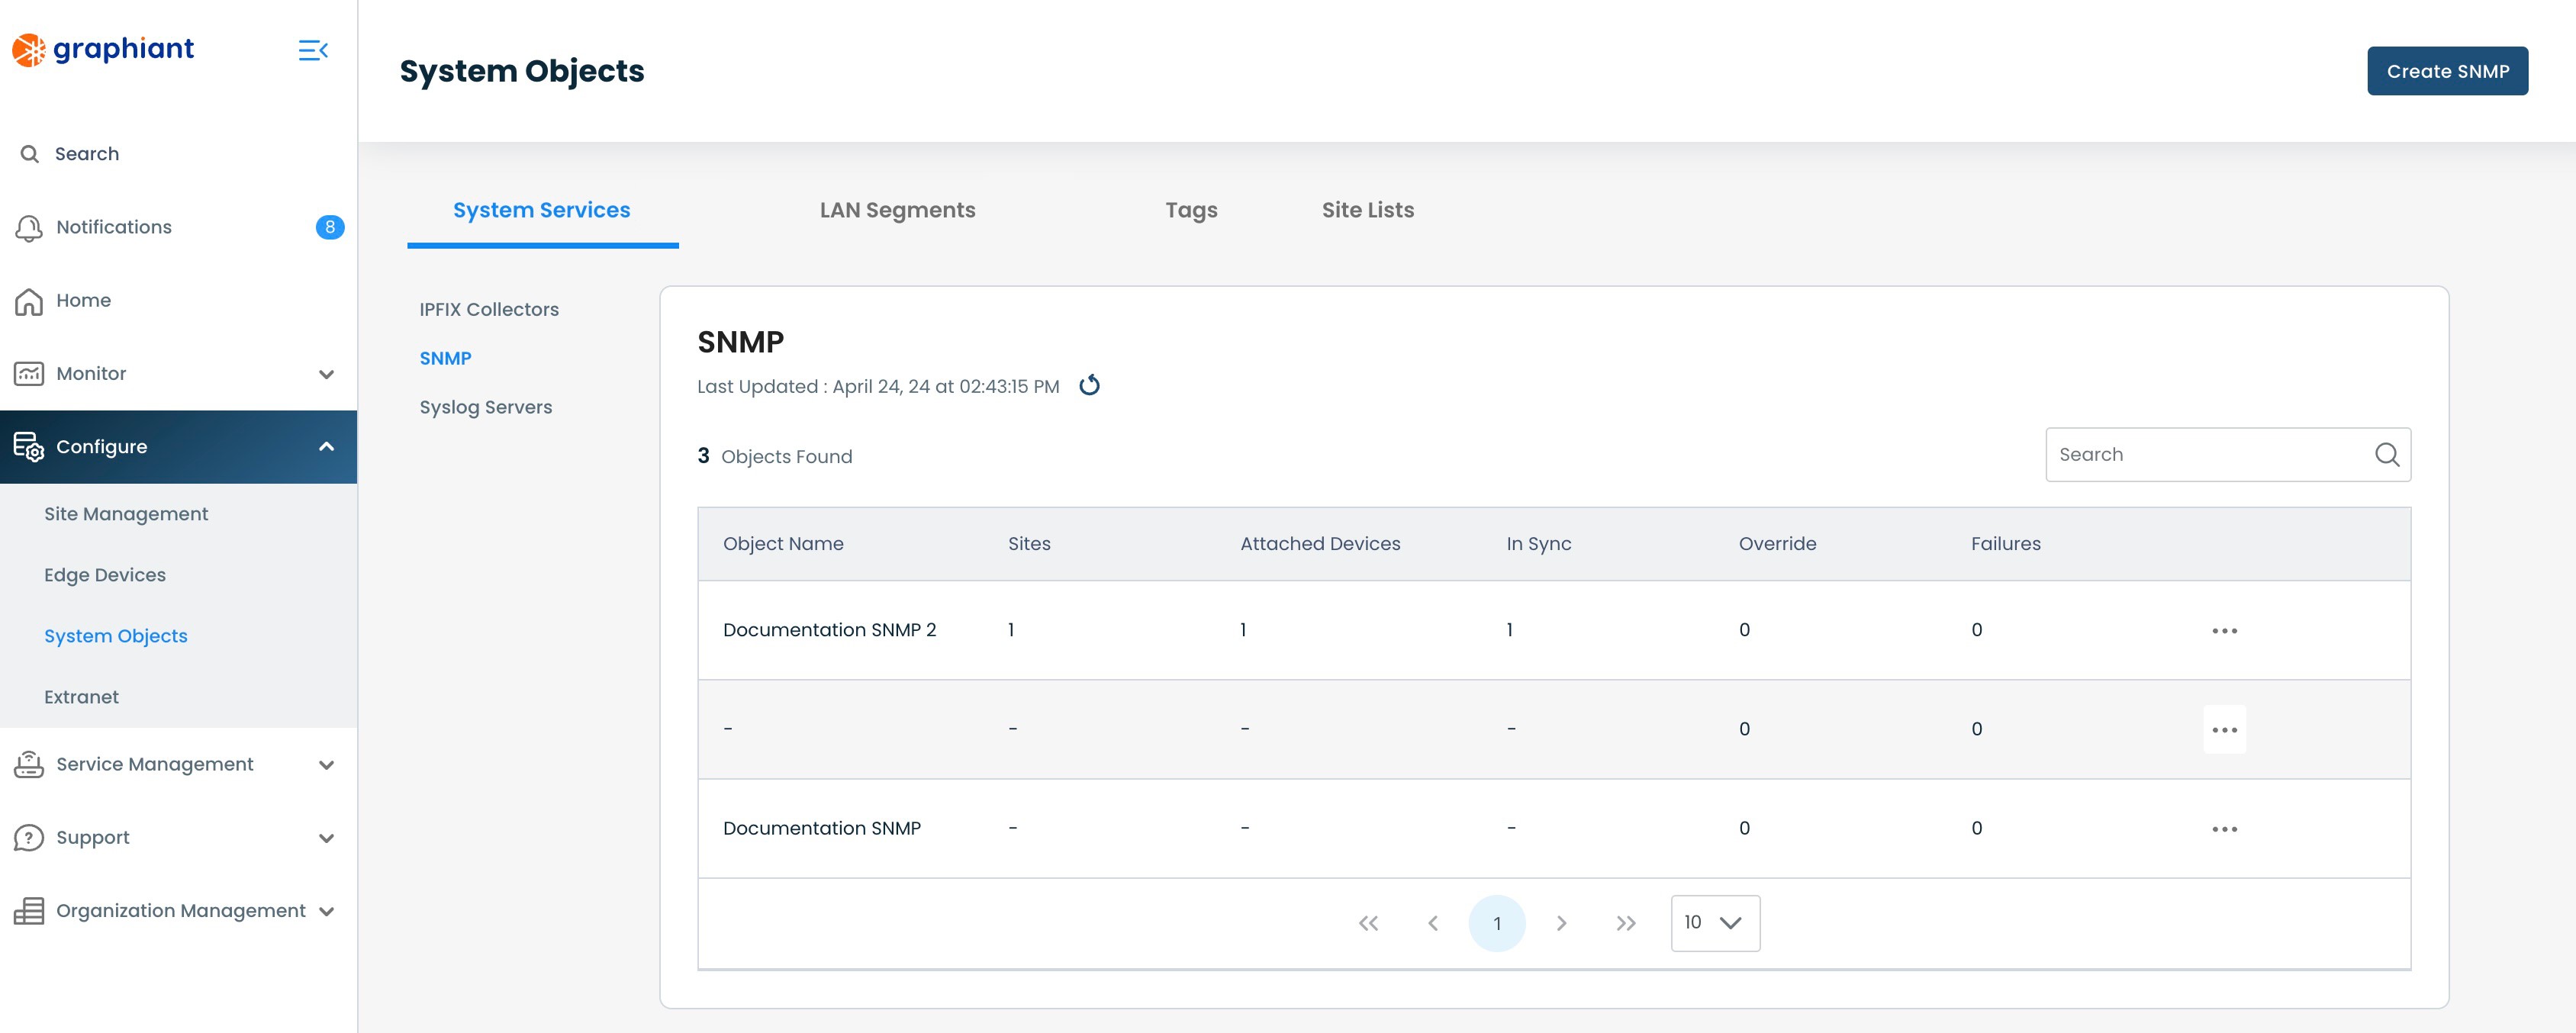
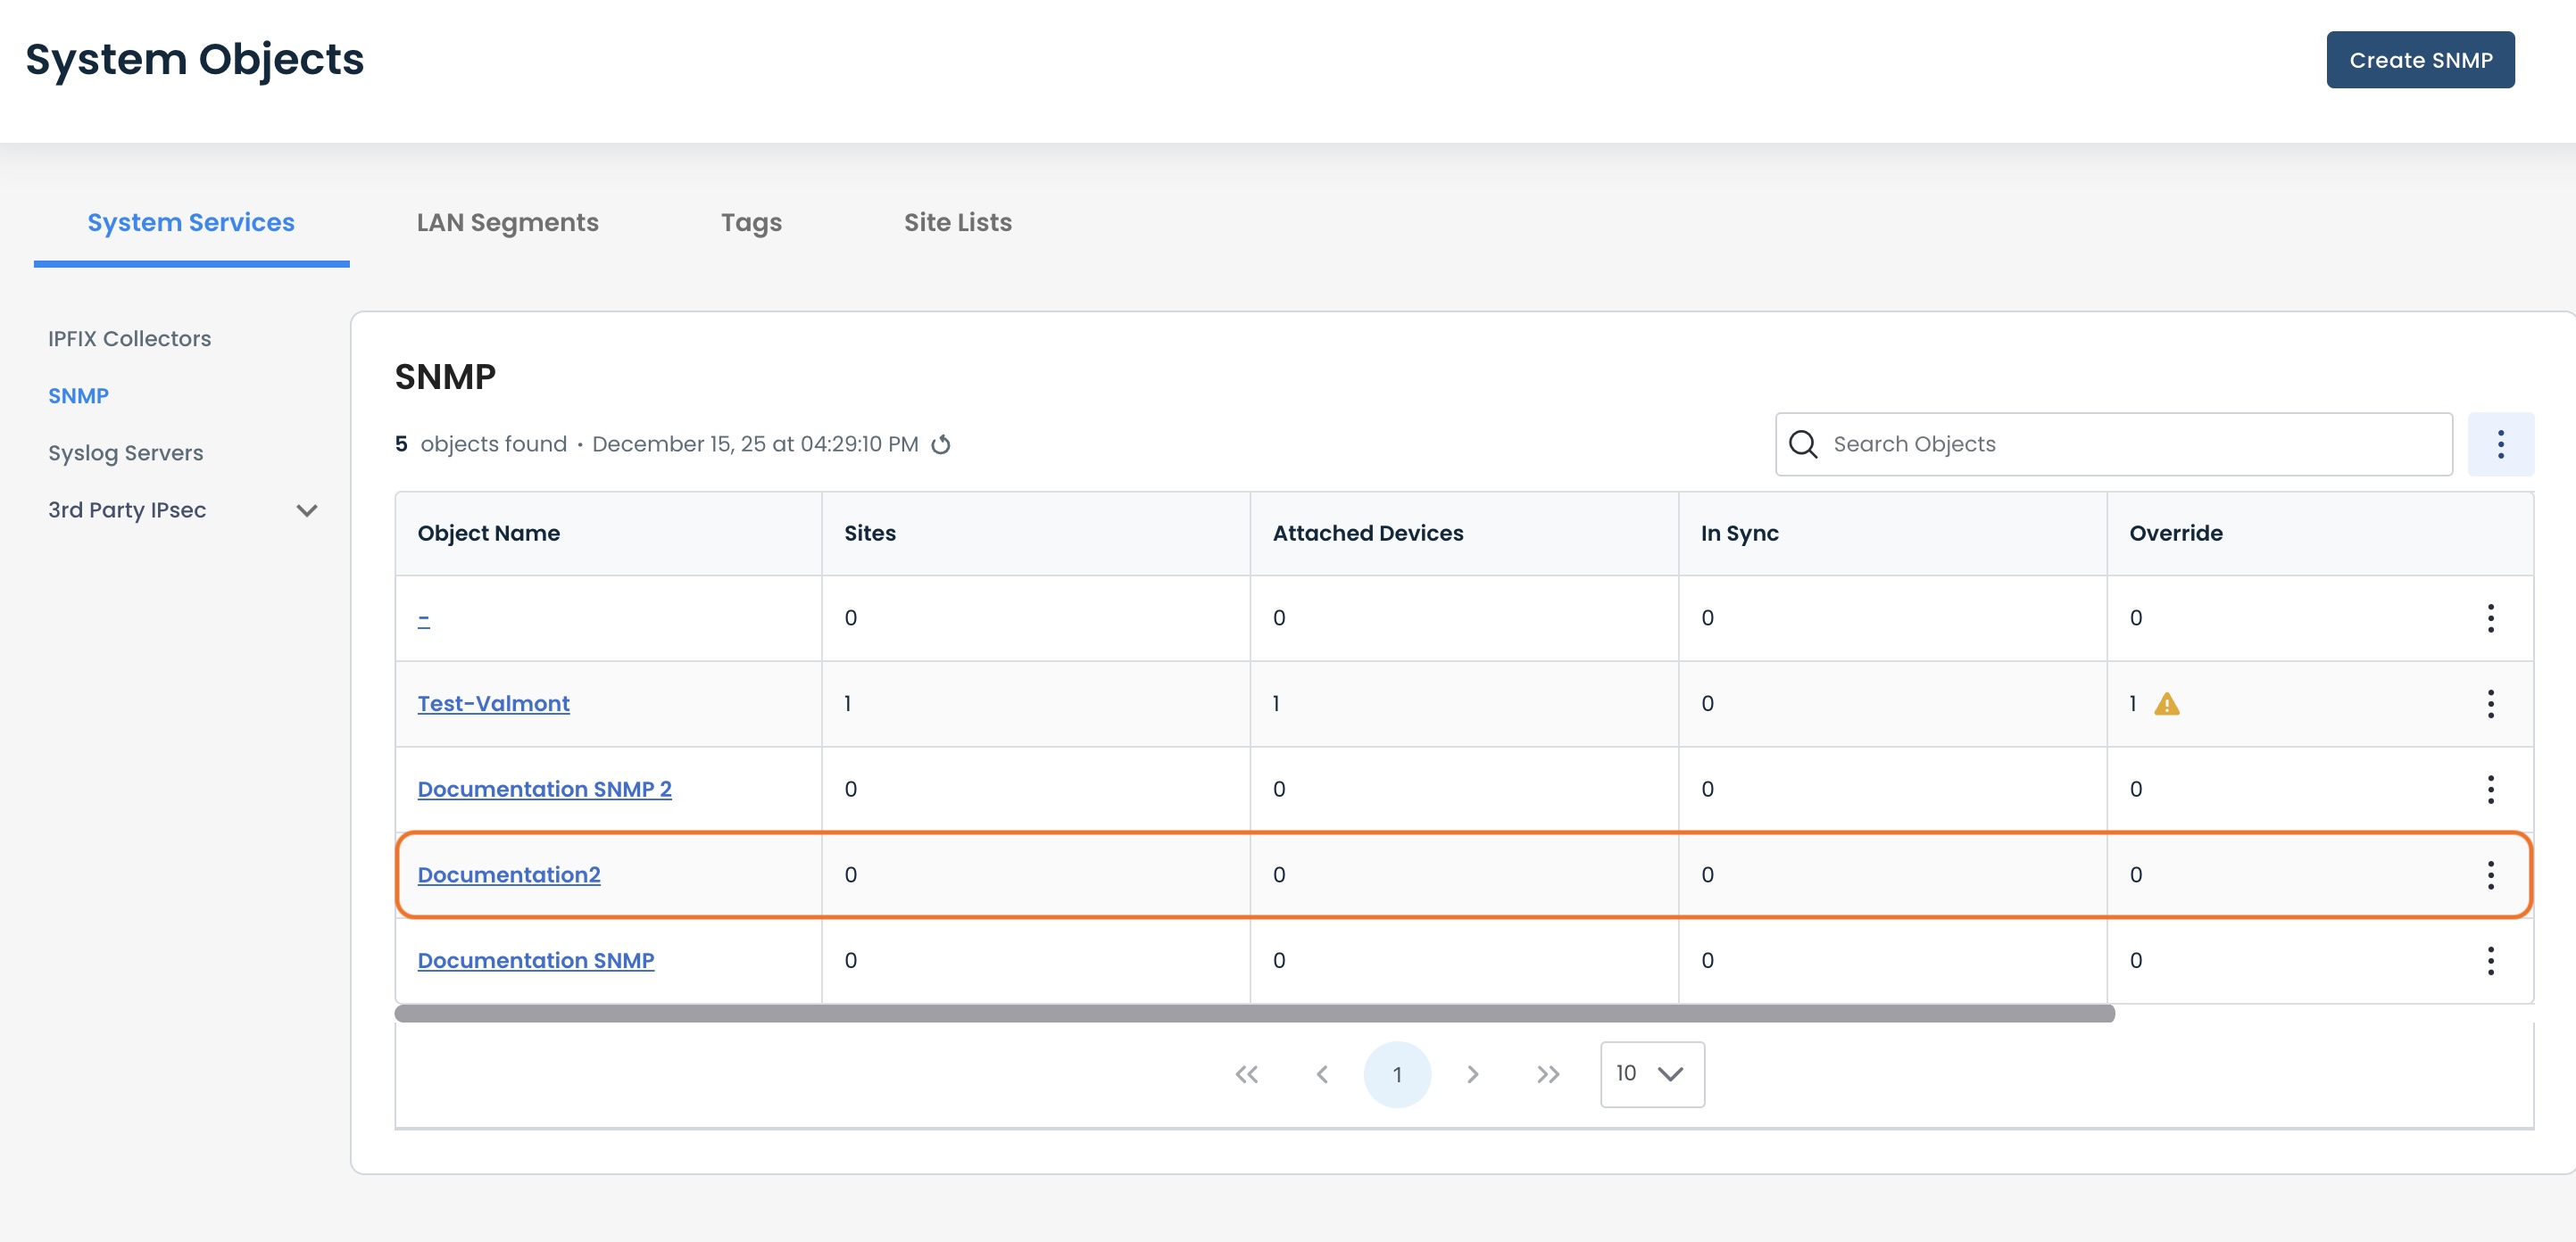
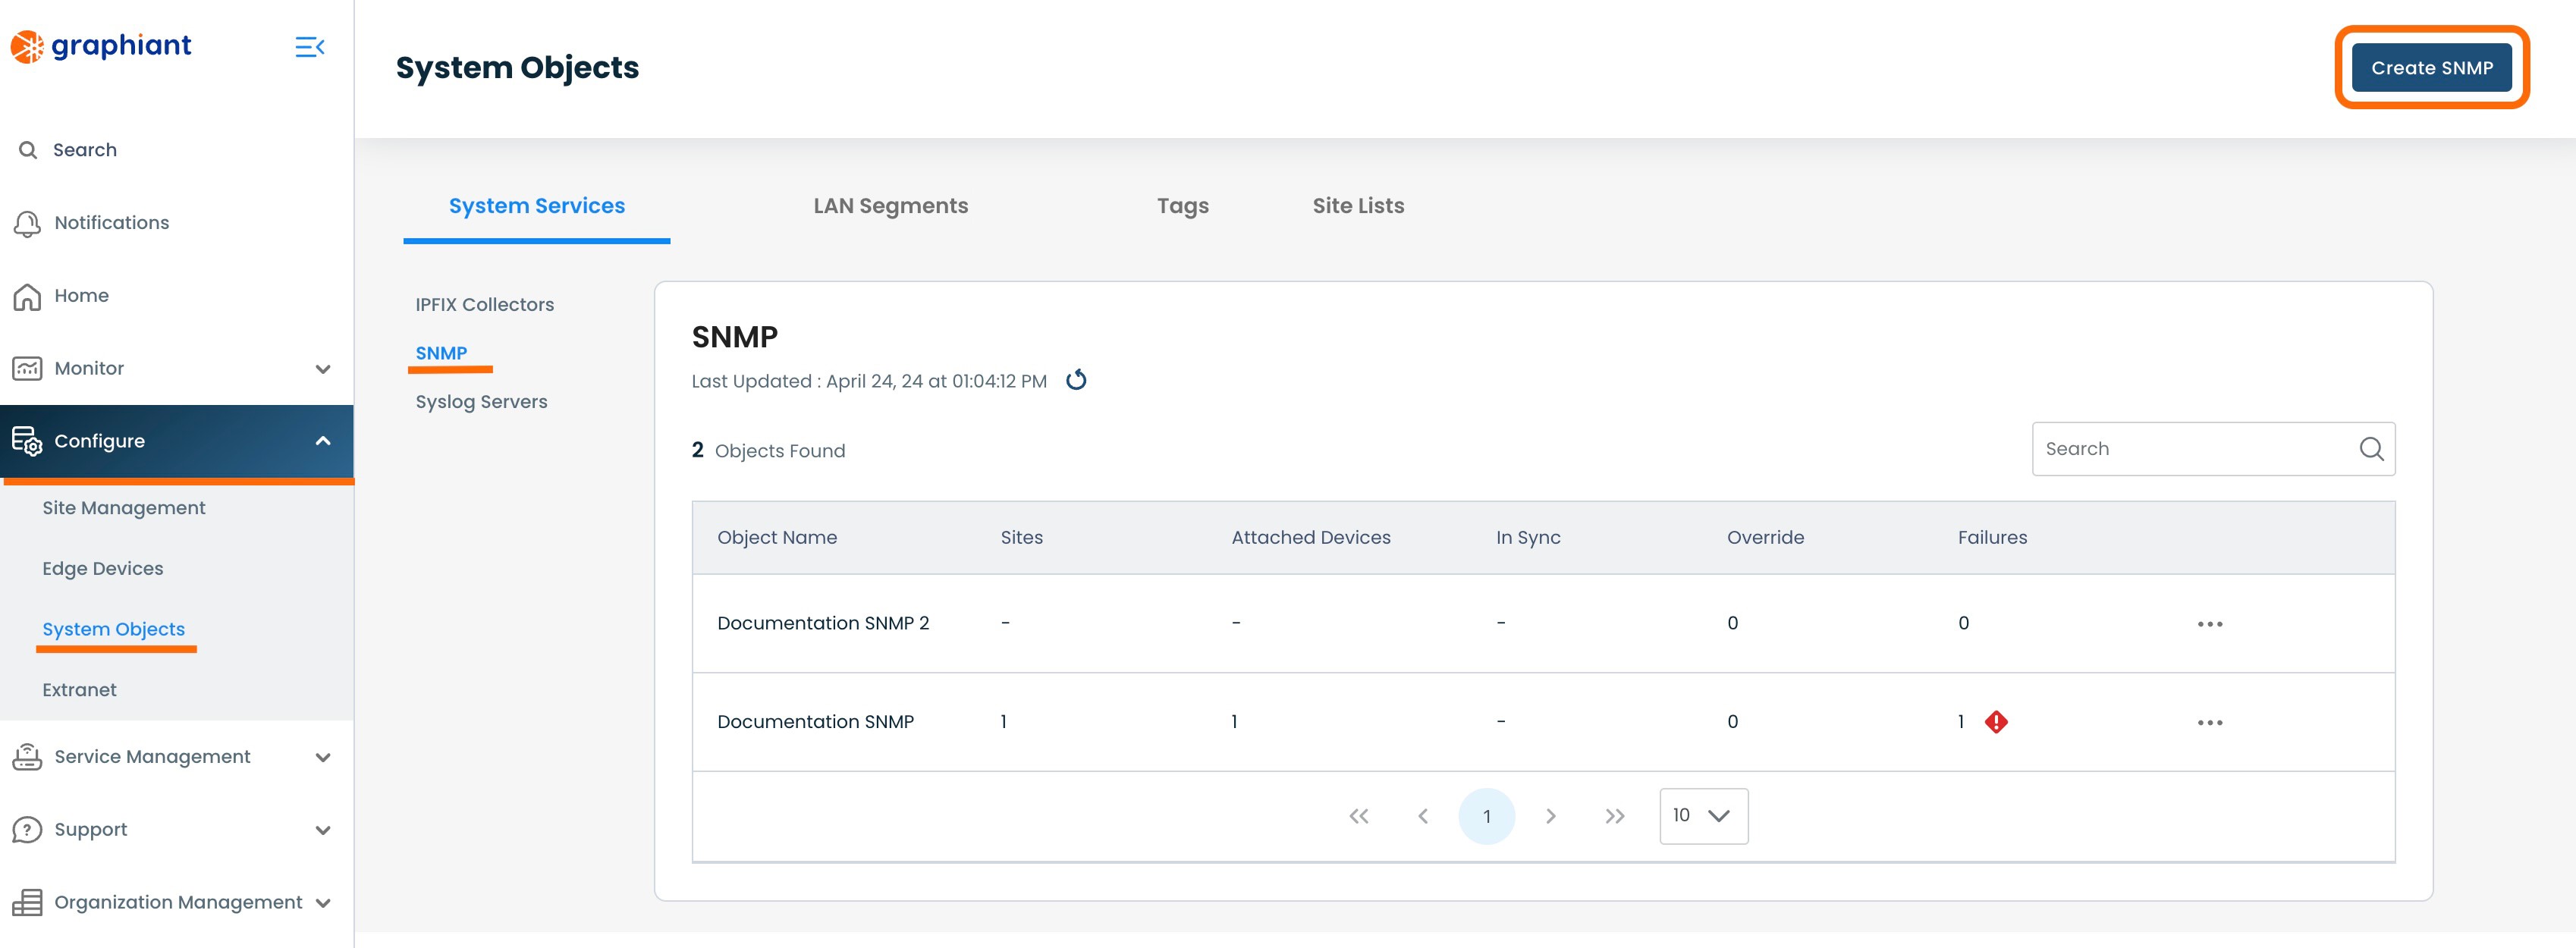
Under “System Services”, click 'SNMP'.
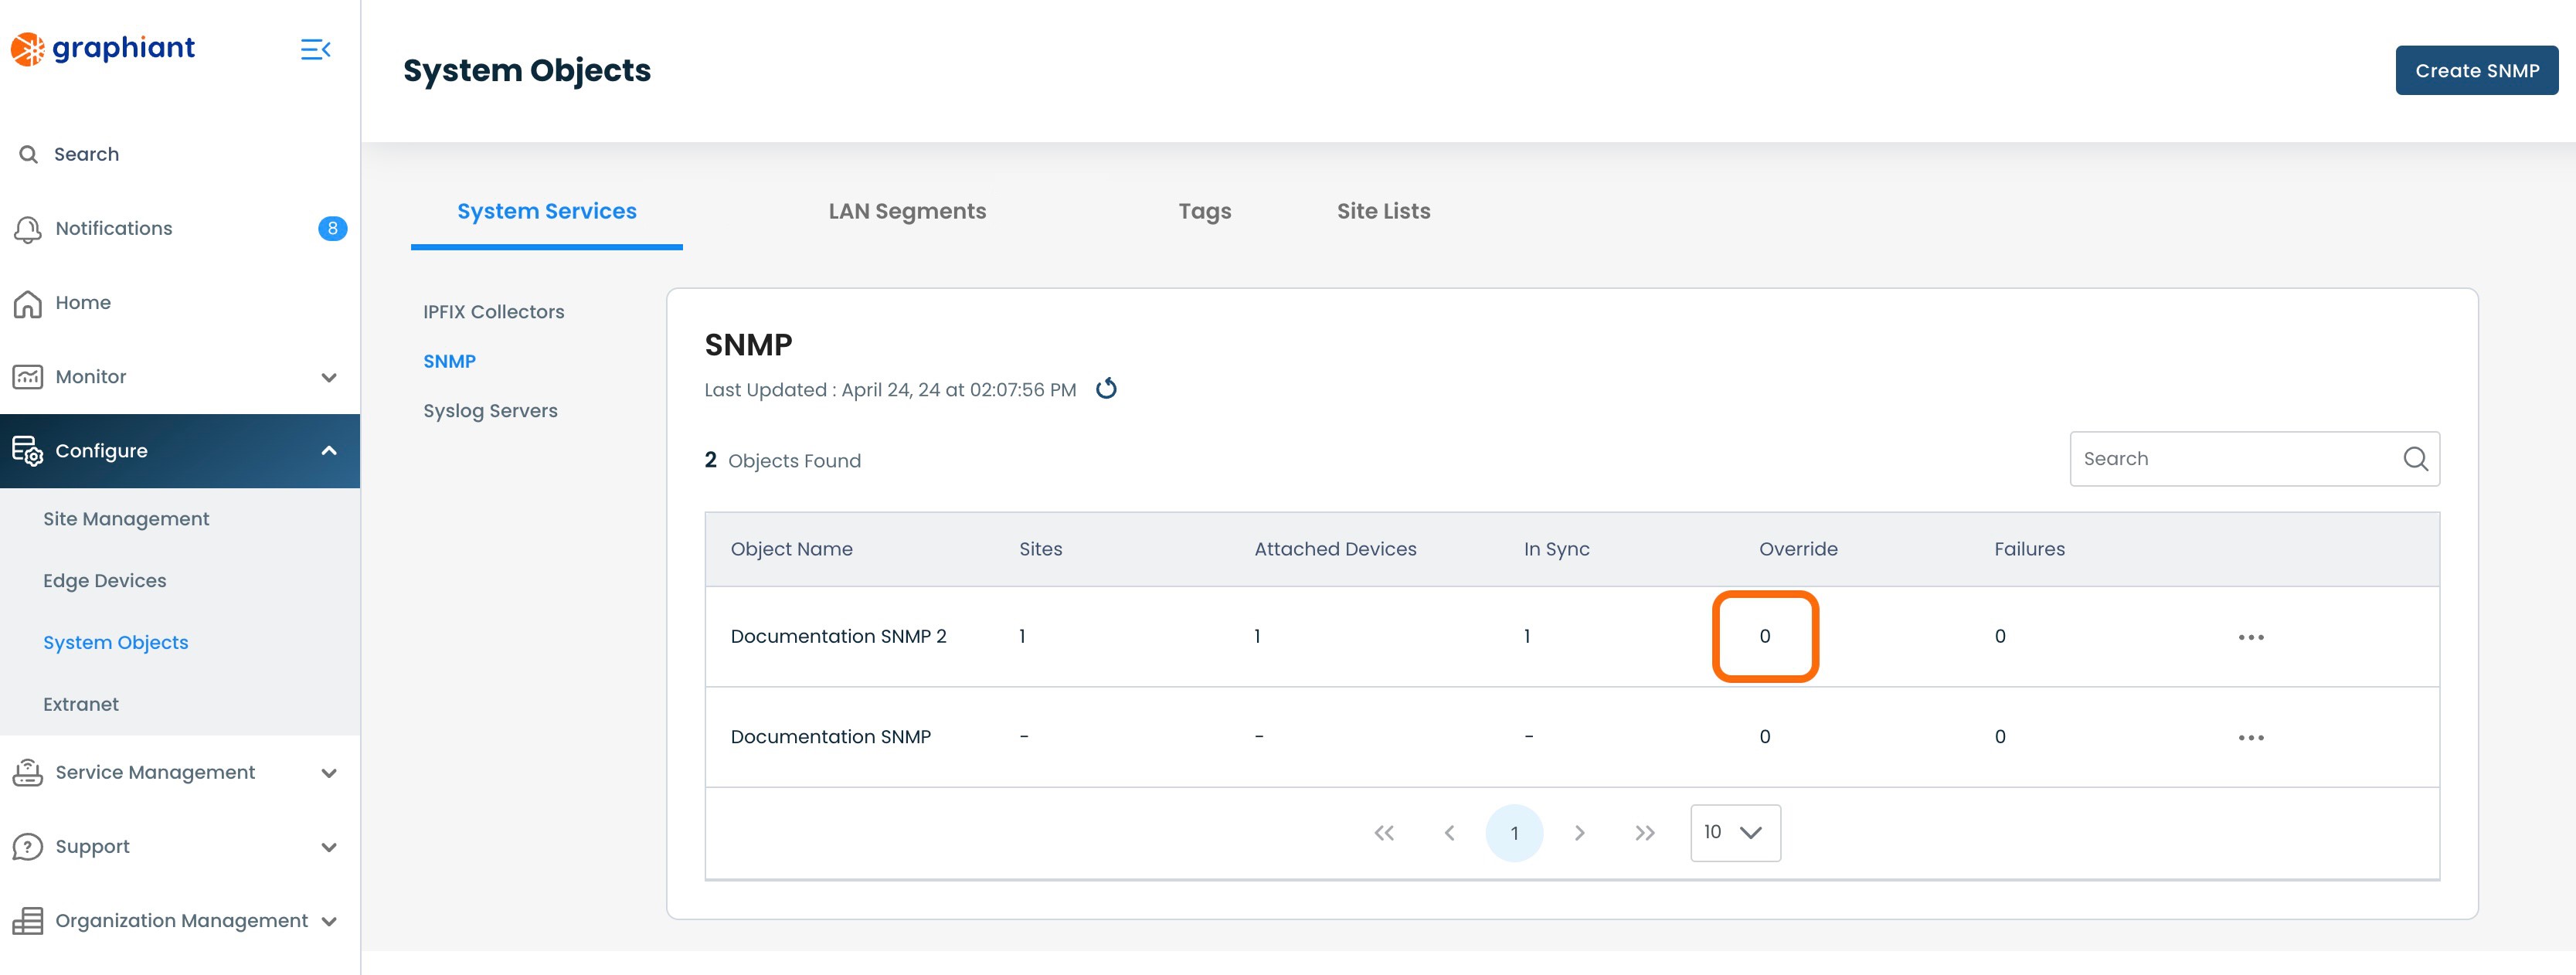
This will bring up the SNMP table, with the following fields:
Object Name: The assigned name of the SNMP Server
Sites: Number of Sites to which the SNMP Server is attached
Attached Devices: Number of Edges to which the SNMP Server is attached
In Sync: Number of Edges which are successfully pulling down their SNMP Server configuration from the Site.
Override: Number of Edges in Override Status (see here for details on Override status)
Failures: Number of Edges in Failure Status (see here for details on Failure status)
Creating an SNMP Server in System Objects
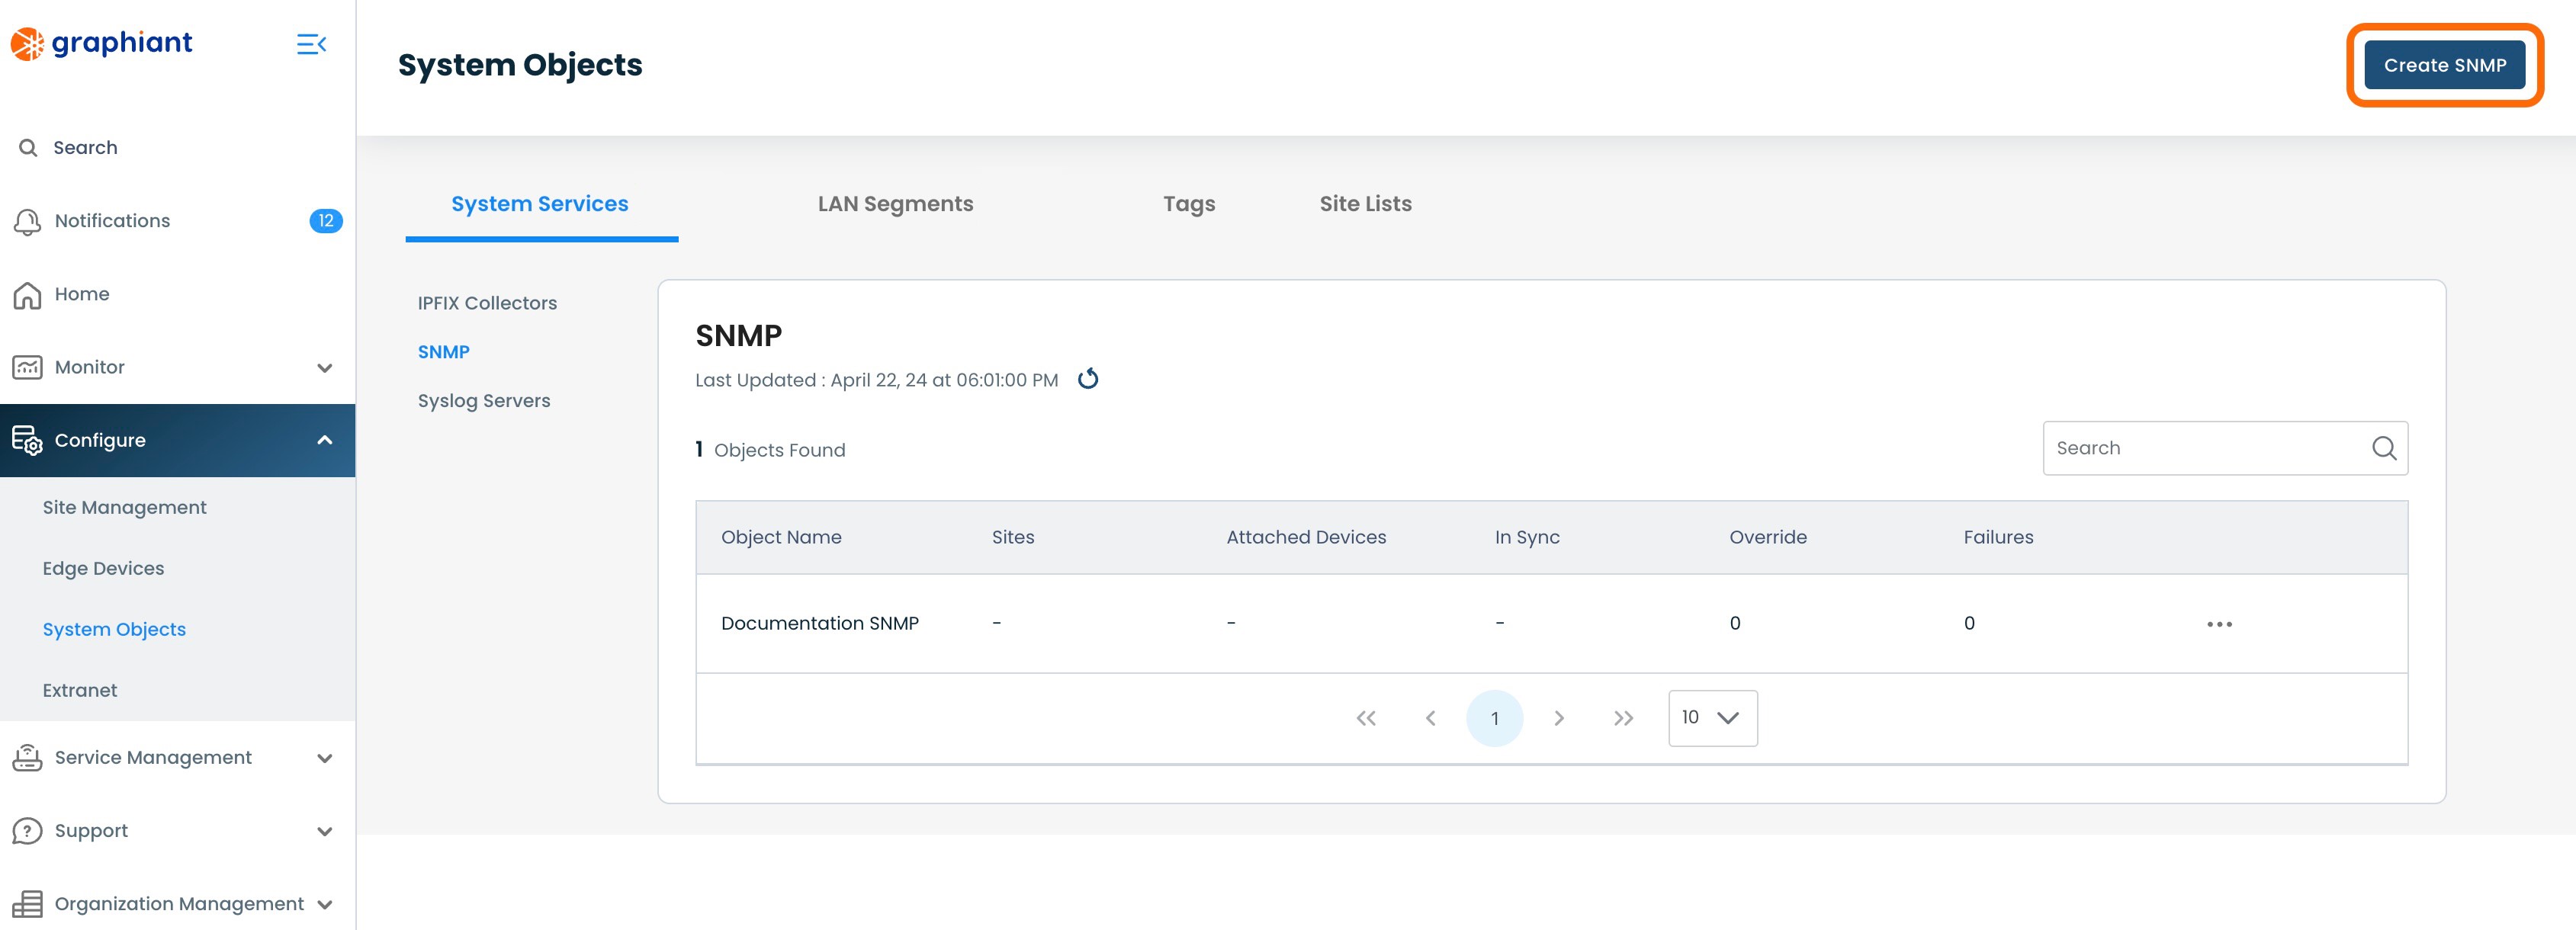
To create a System Objects SNMP server, navigate to the SNMP table from within System Objects.
Click 'Create SNMP' in the upper right corner.
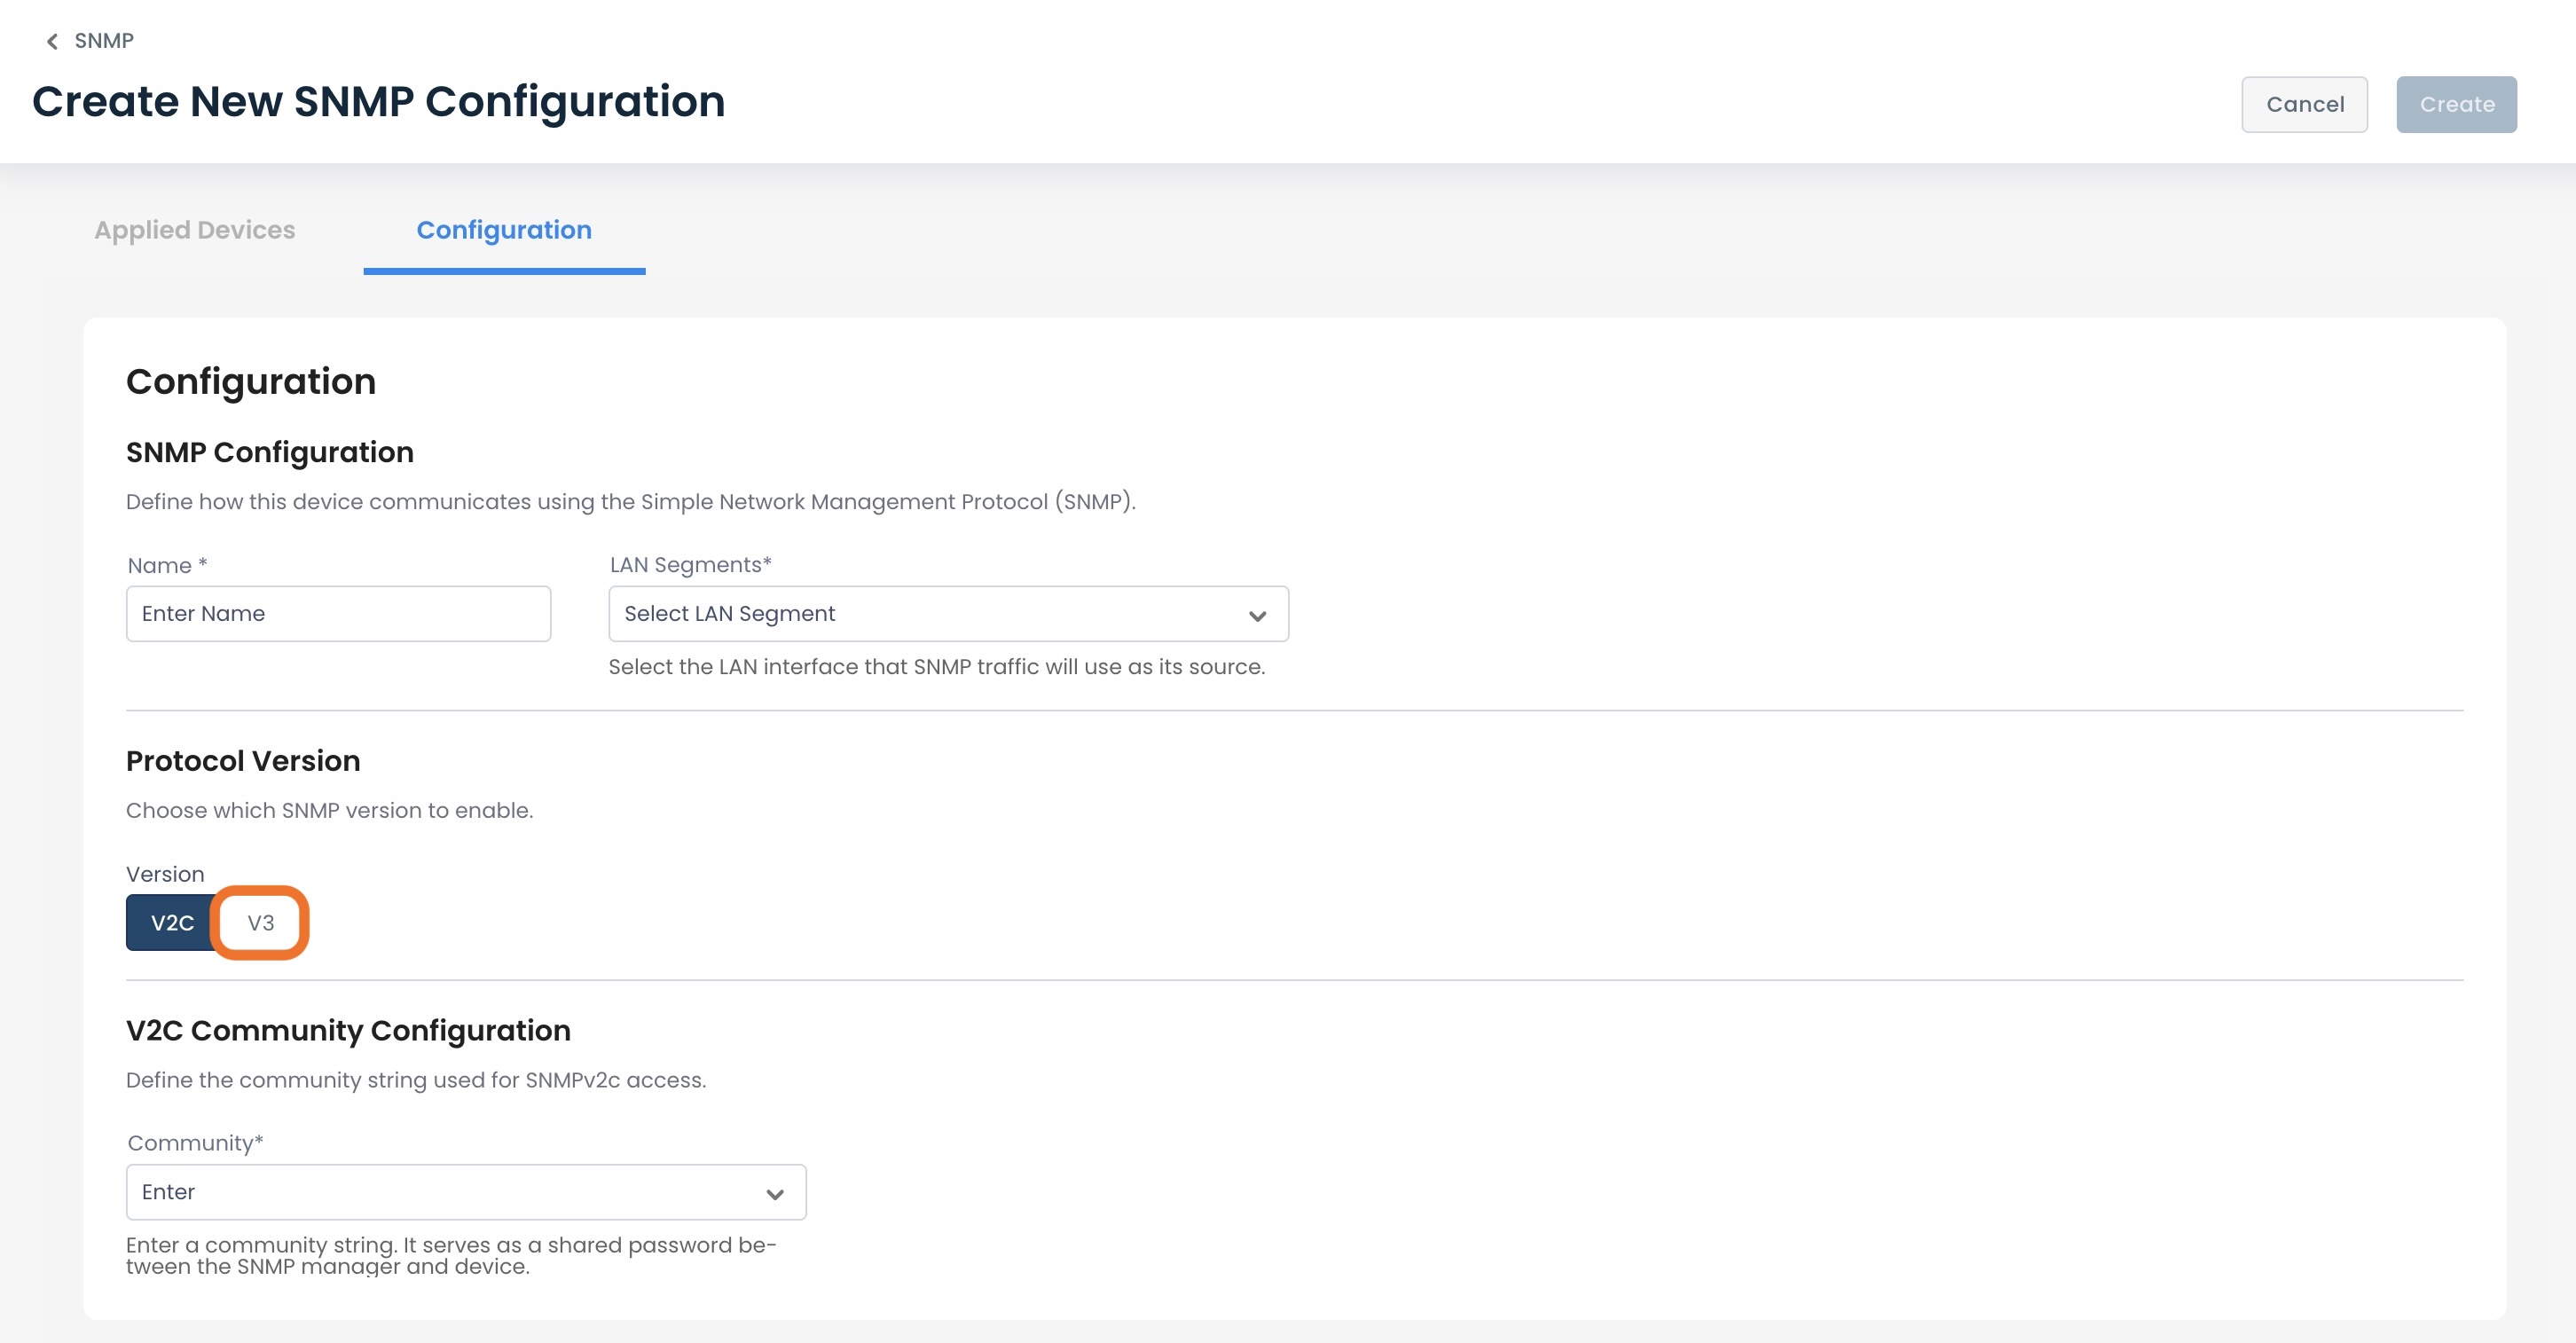
Graphiant supports both SNMPv2c and SNMPv3
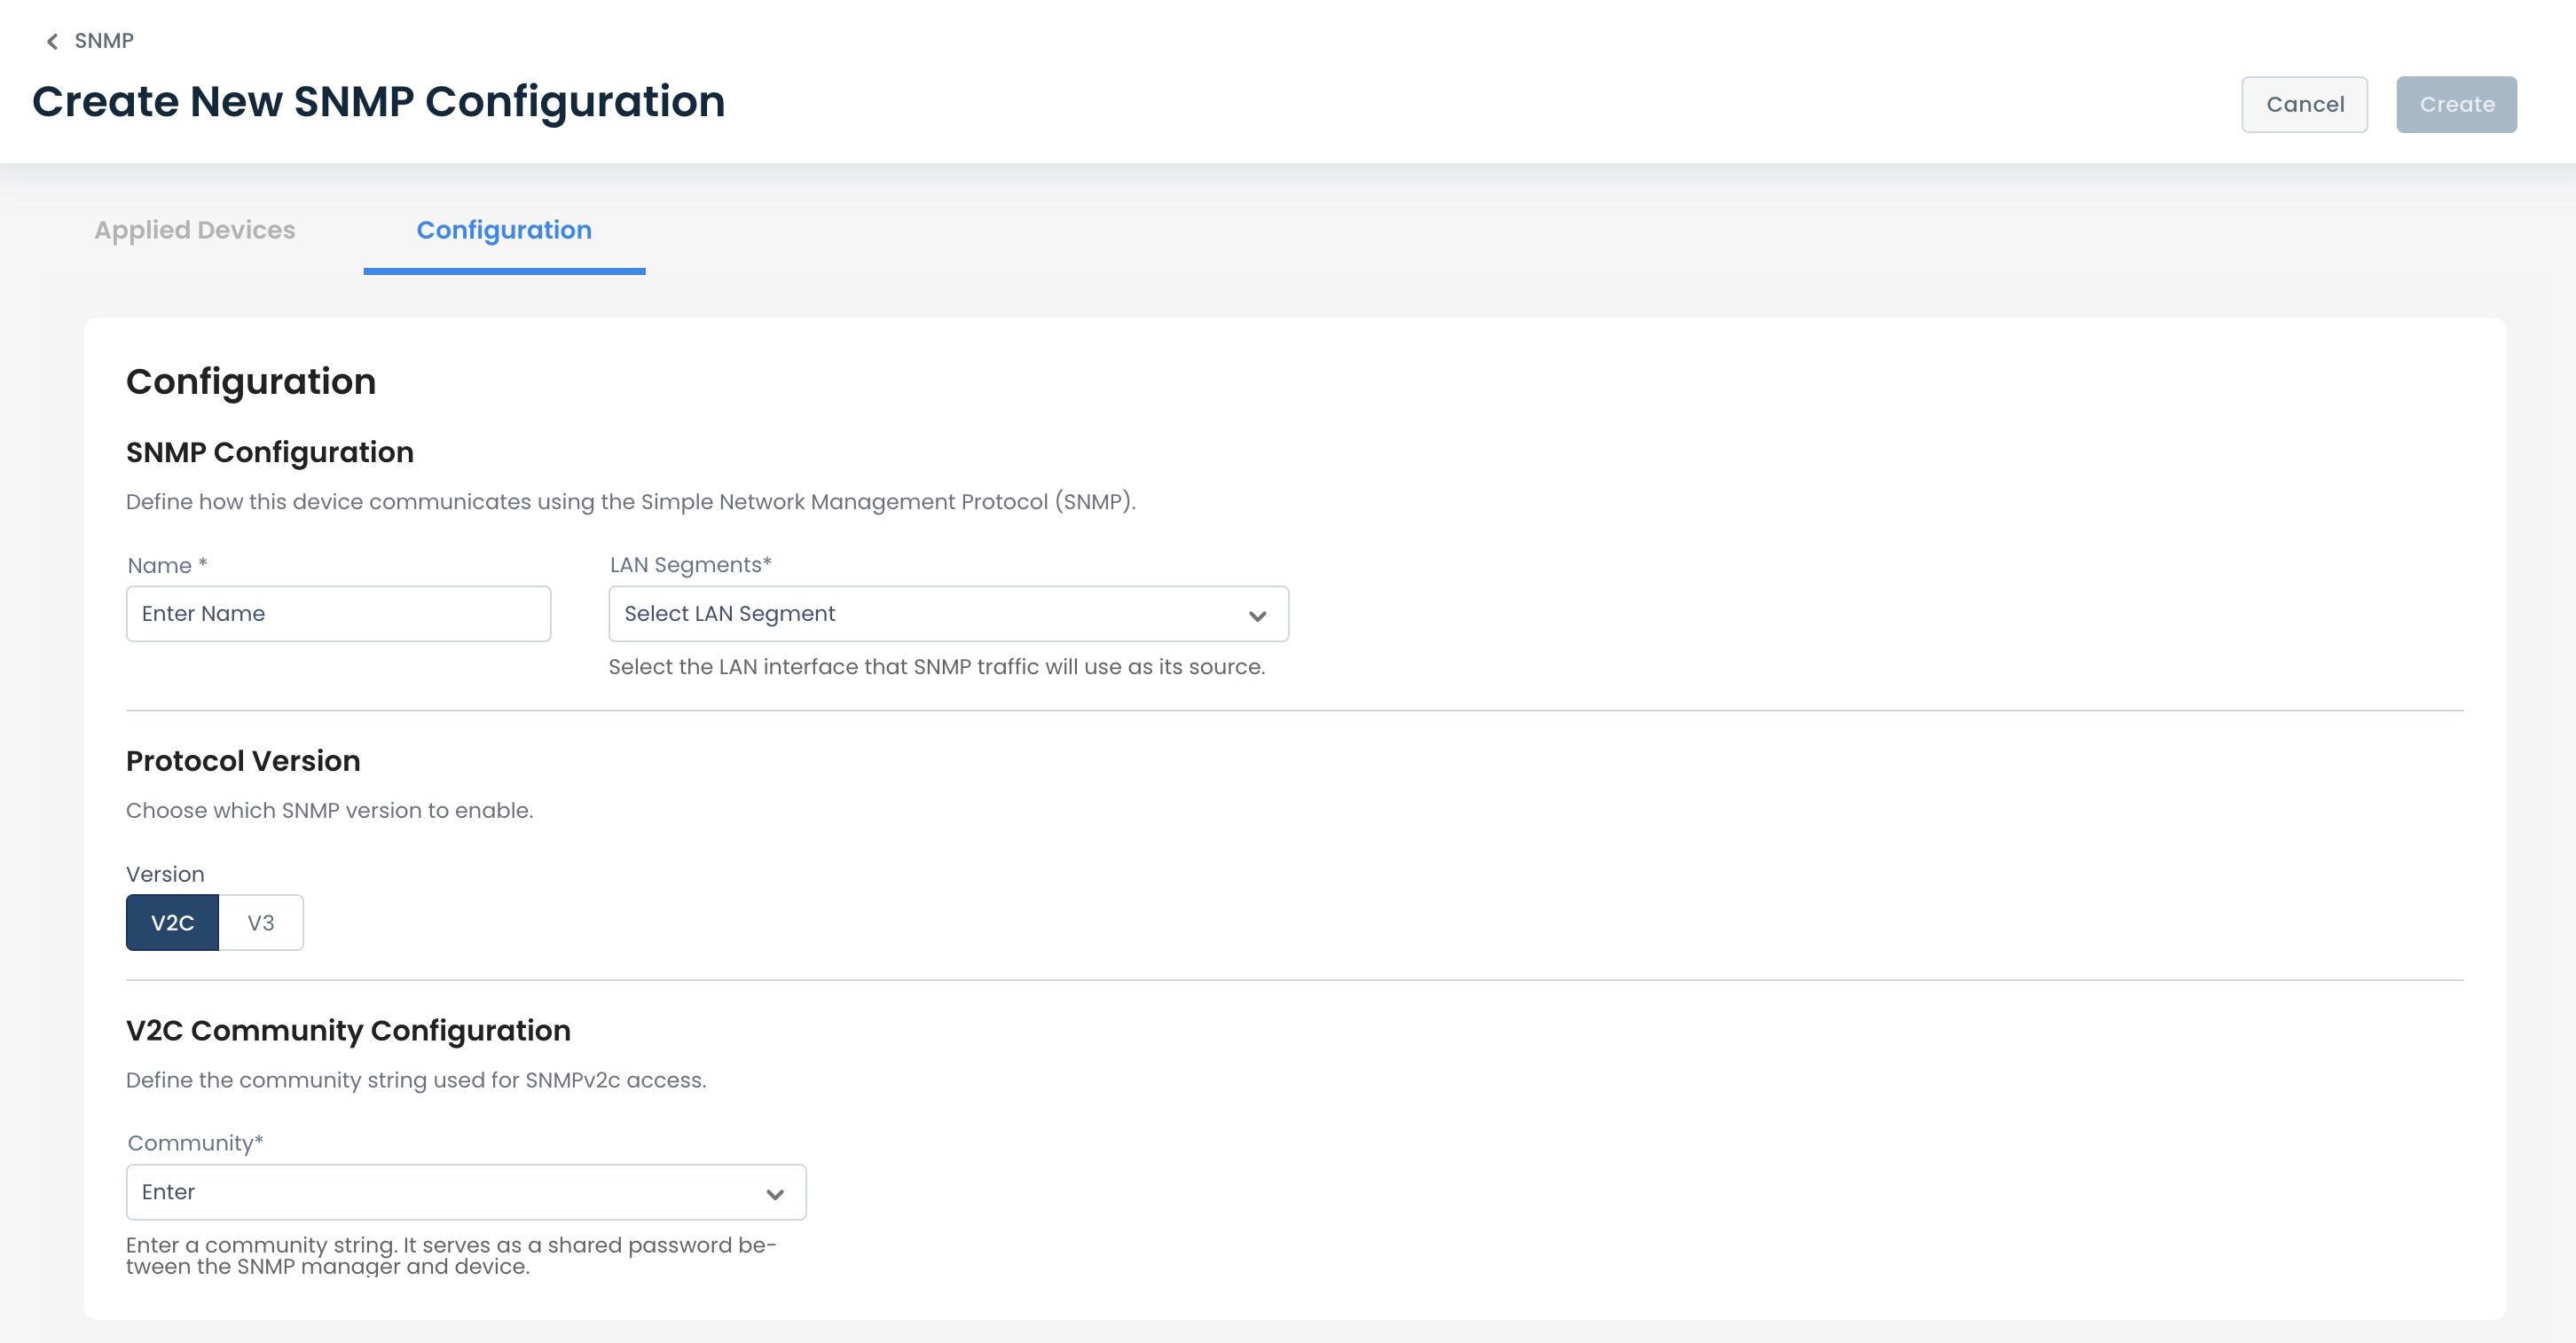
The following fields are required and independent of SNMP version:
Name: Label for the SNMP Server.
LAN Segment: On which the network devices will reach the SNMP server.
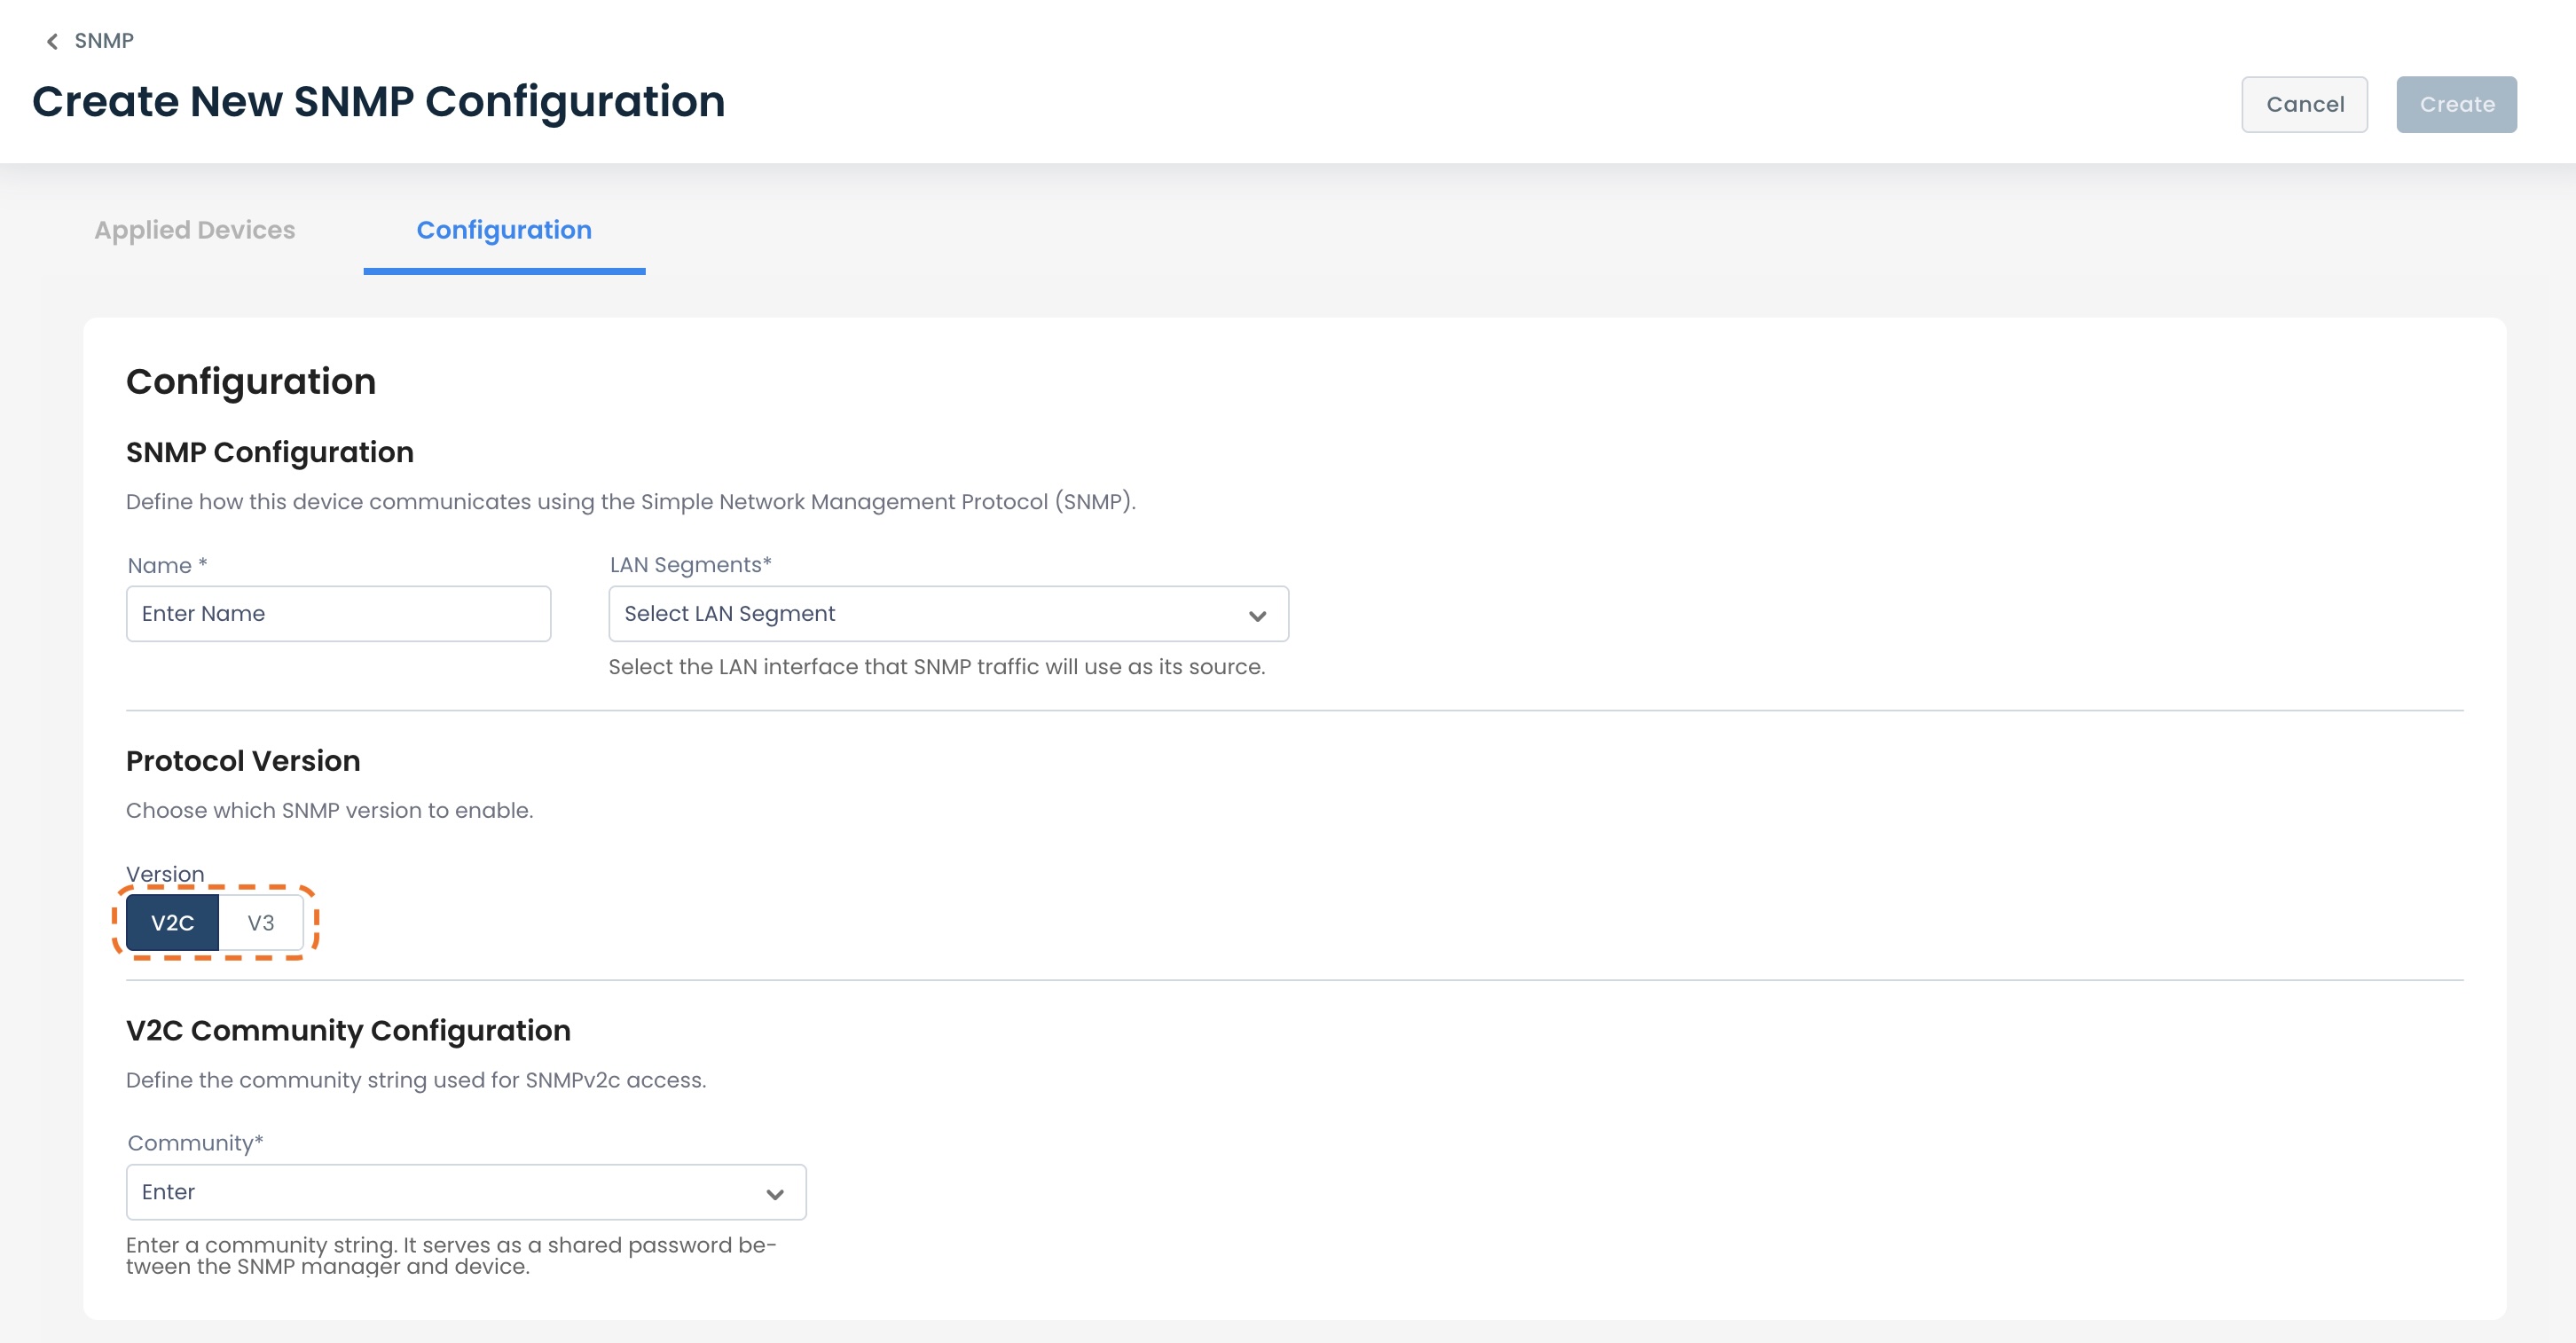
Protocol Version: Can choose from SNMPv2c or SNMPv3.
Configuring SNMPv2c
By default, SNMP v2c is selected as Protocol Version.
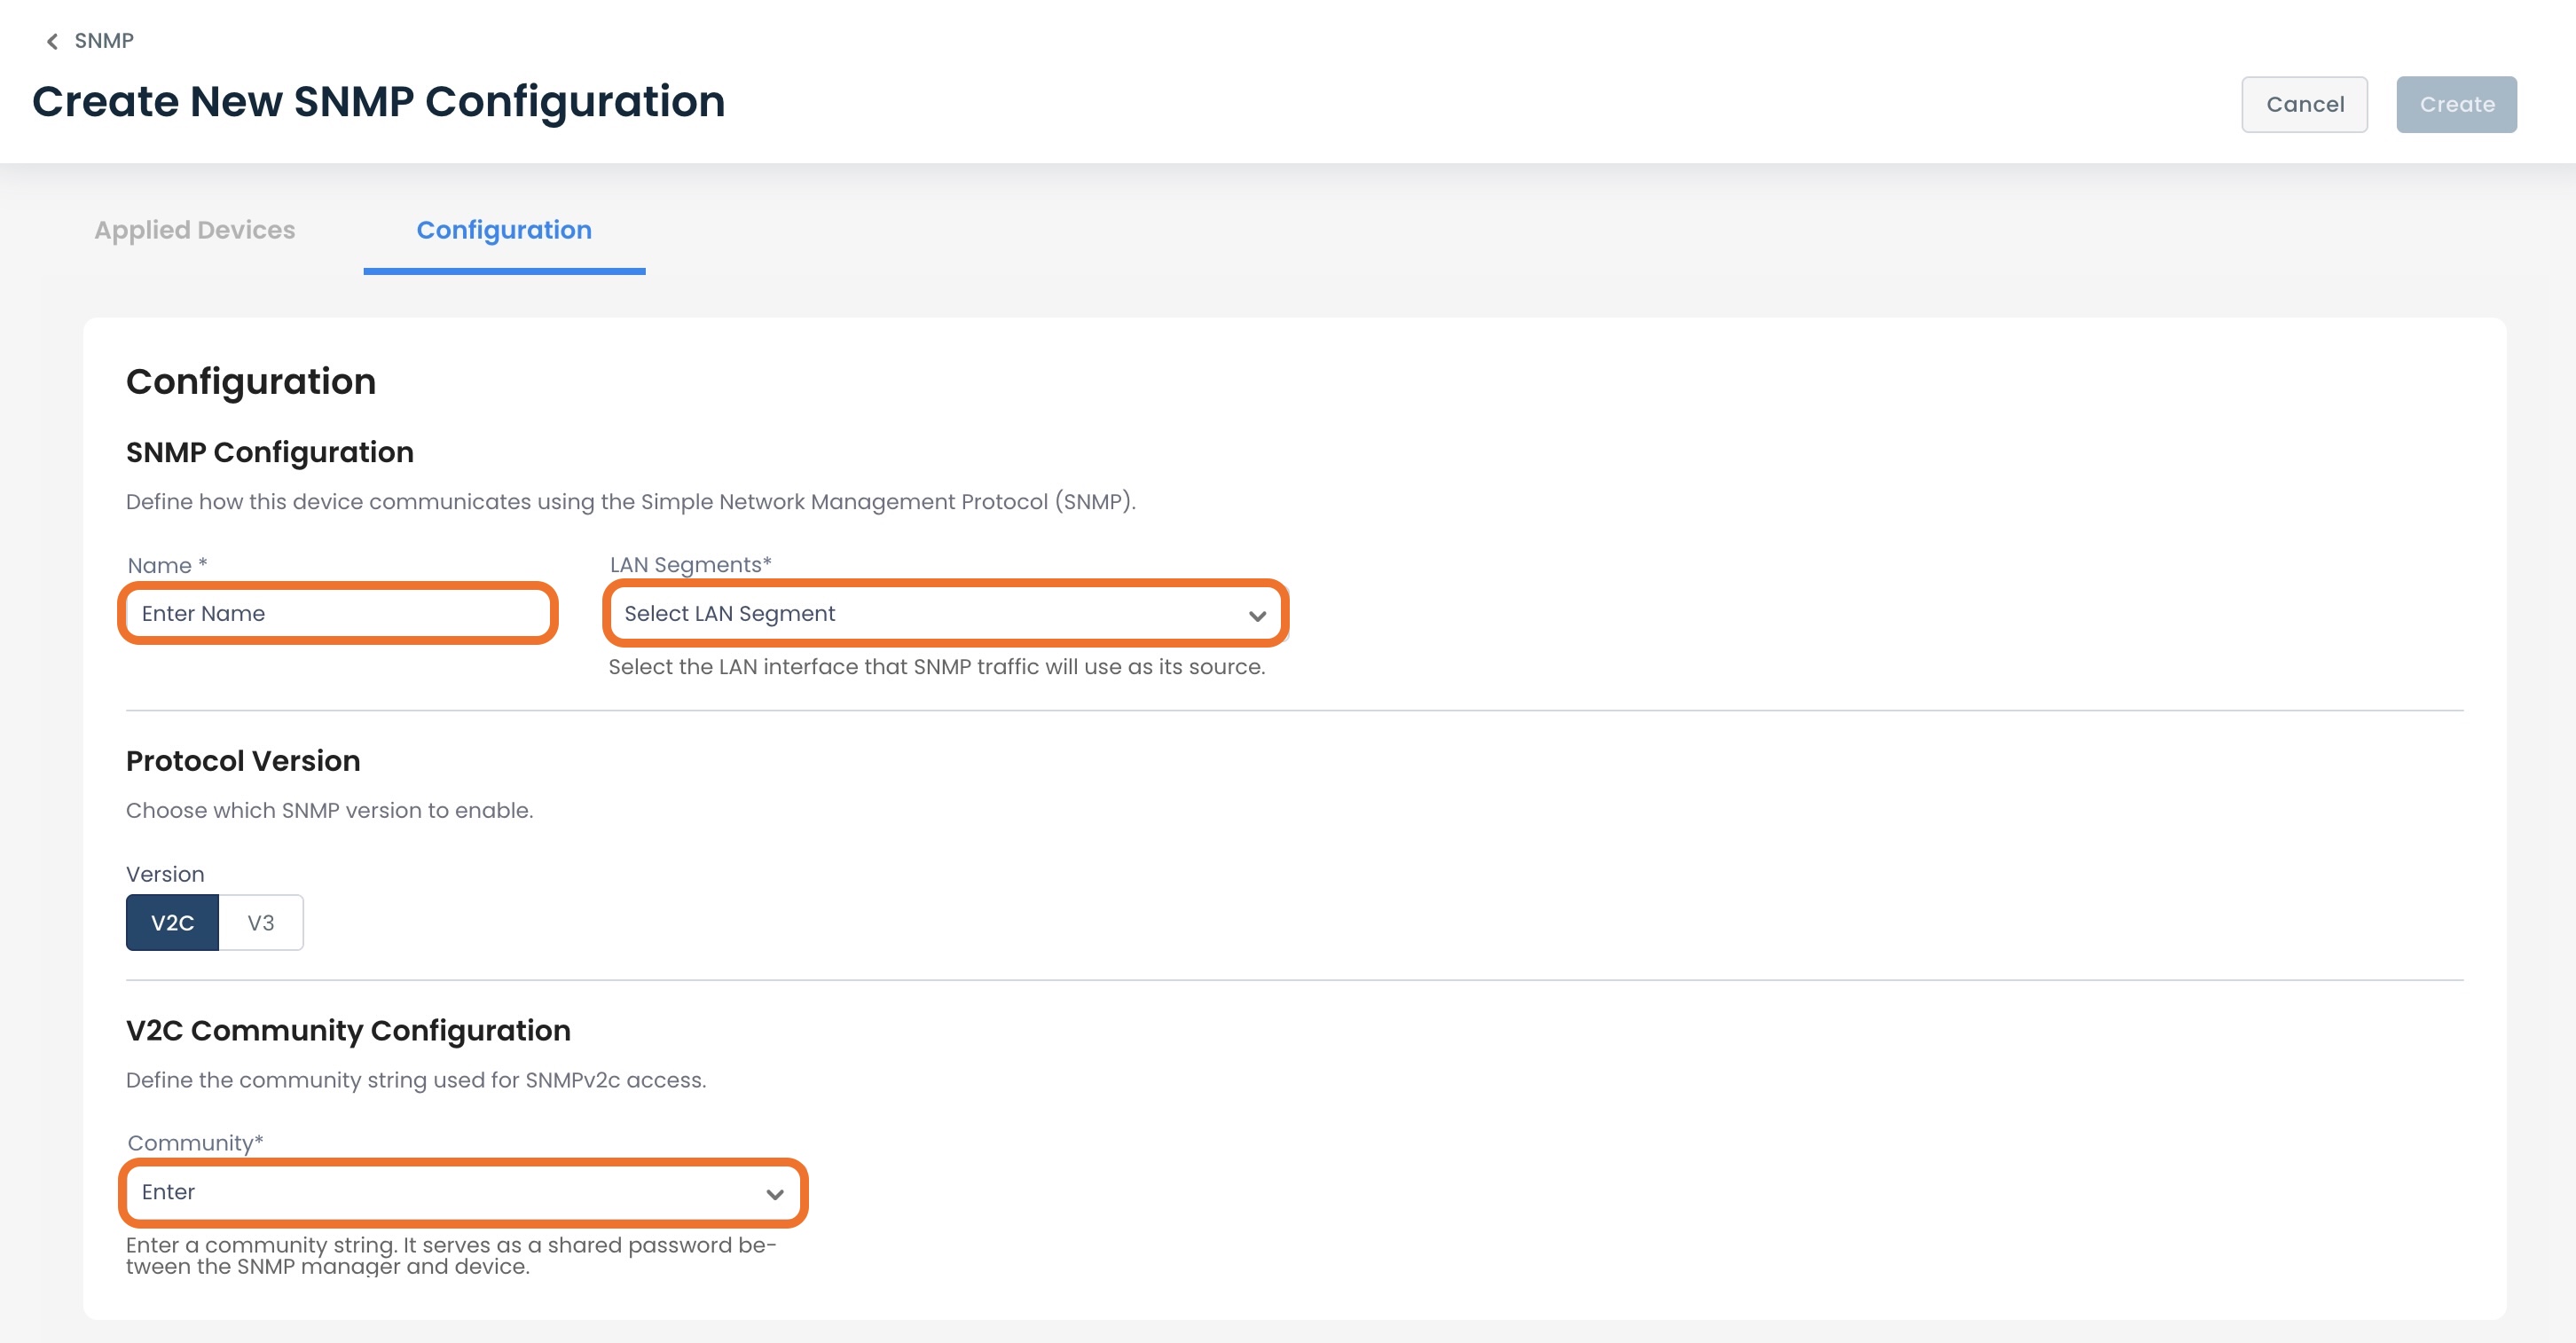
Fill out the following fields:
Name: Choose a name for the SNMP Server.
LAN Segment: From the drop-down, select the LAN Segment on which the network devices will reach the SNMP server.
Community: The shared string that will allow access to the SNMP device; select from the drop-down, or enter a new community name.
If creating a new Community, press <Enter> to save.
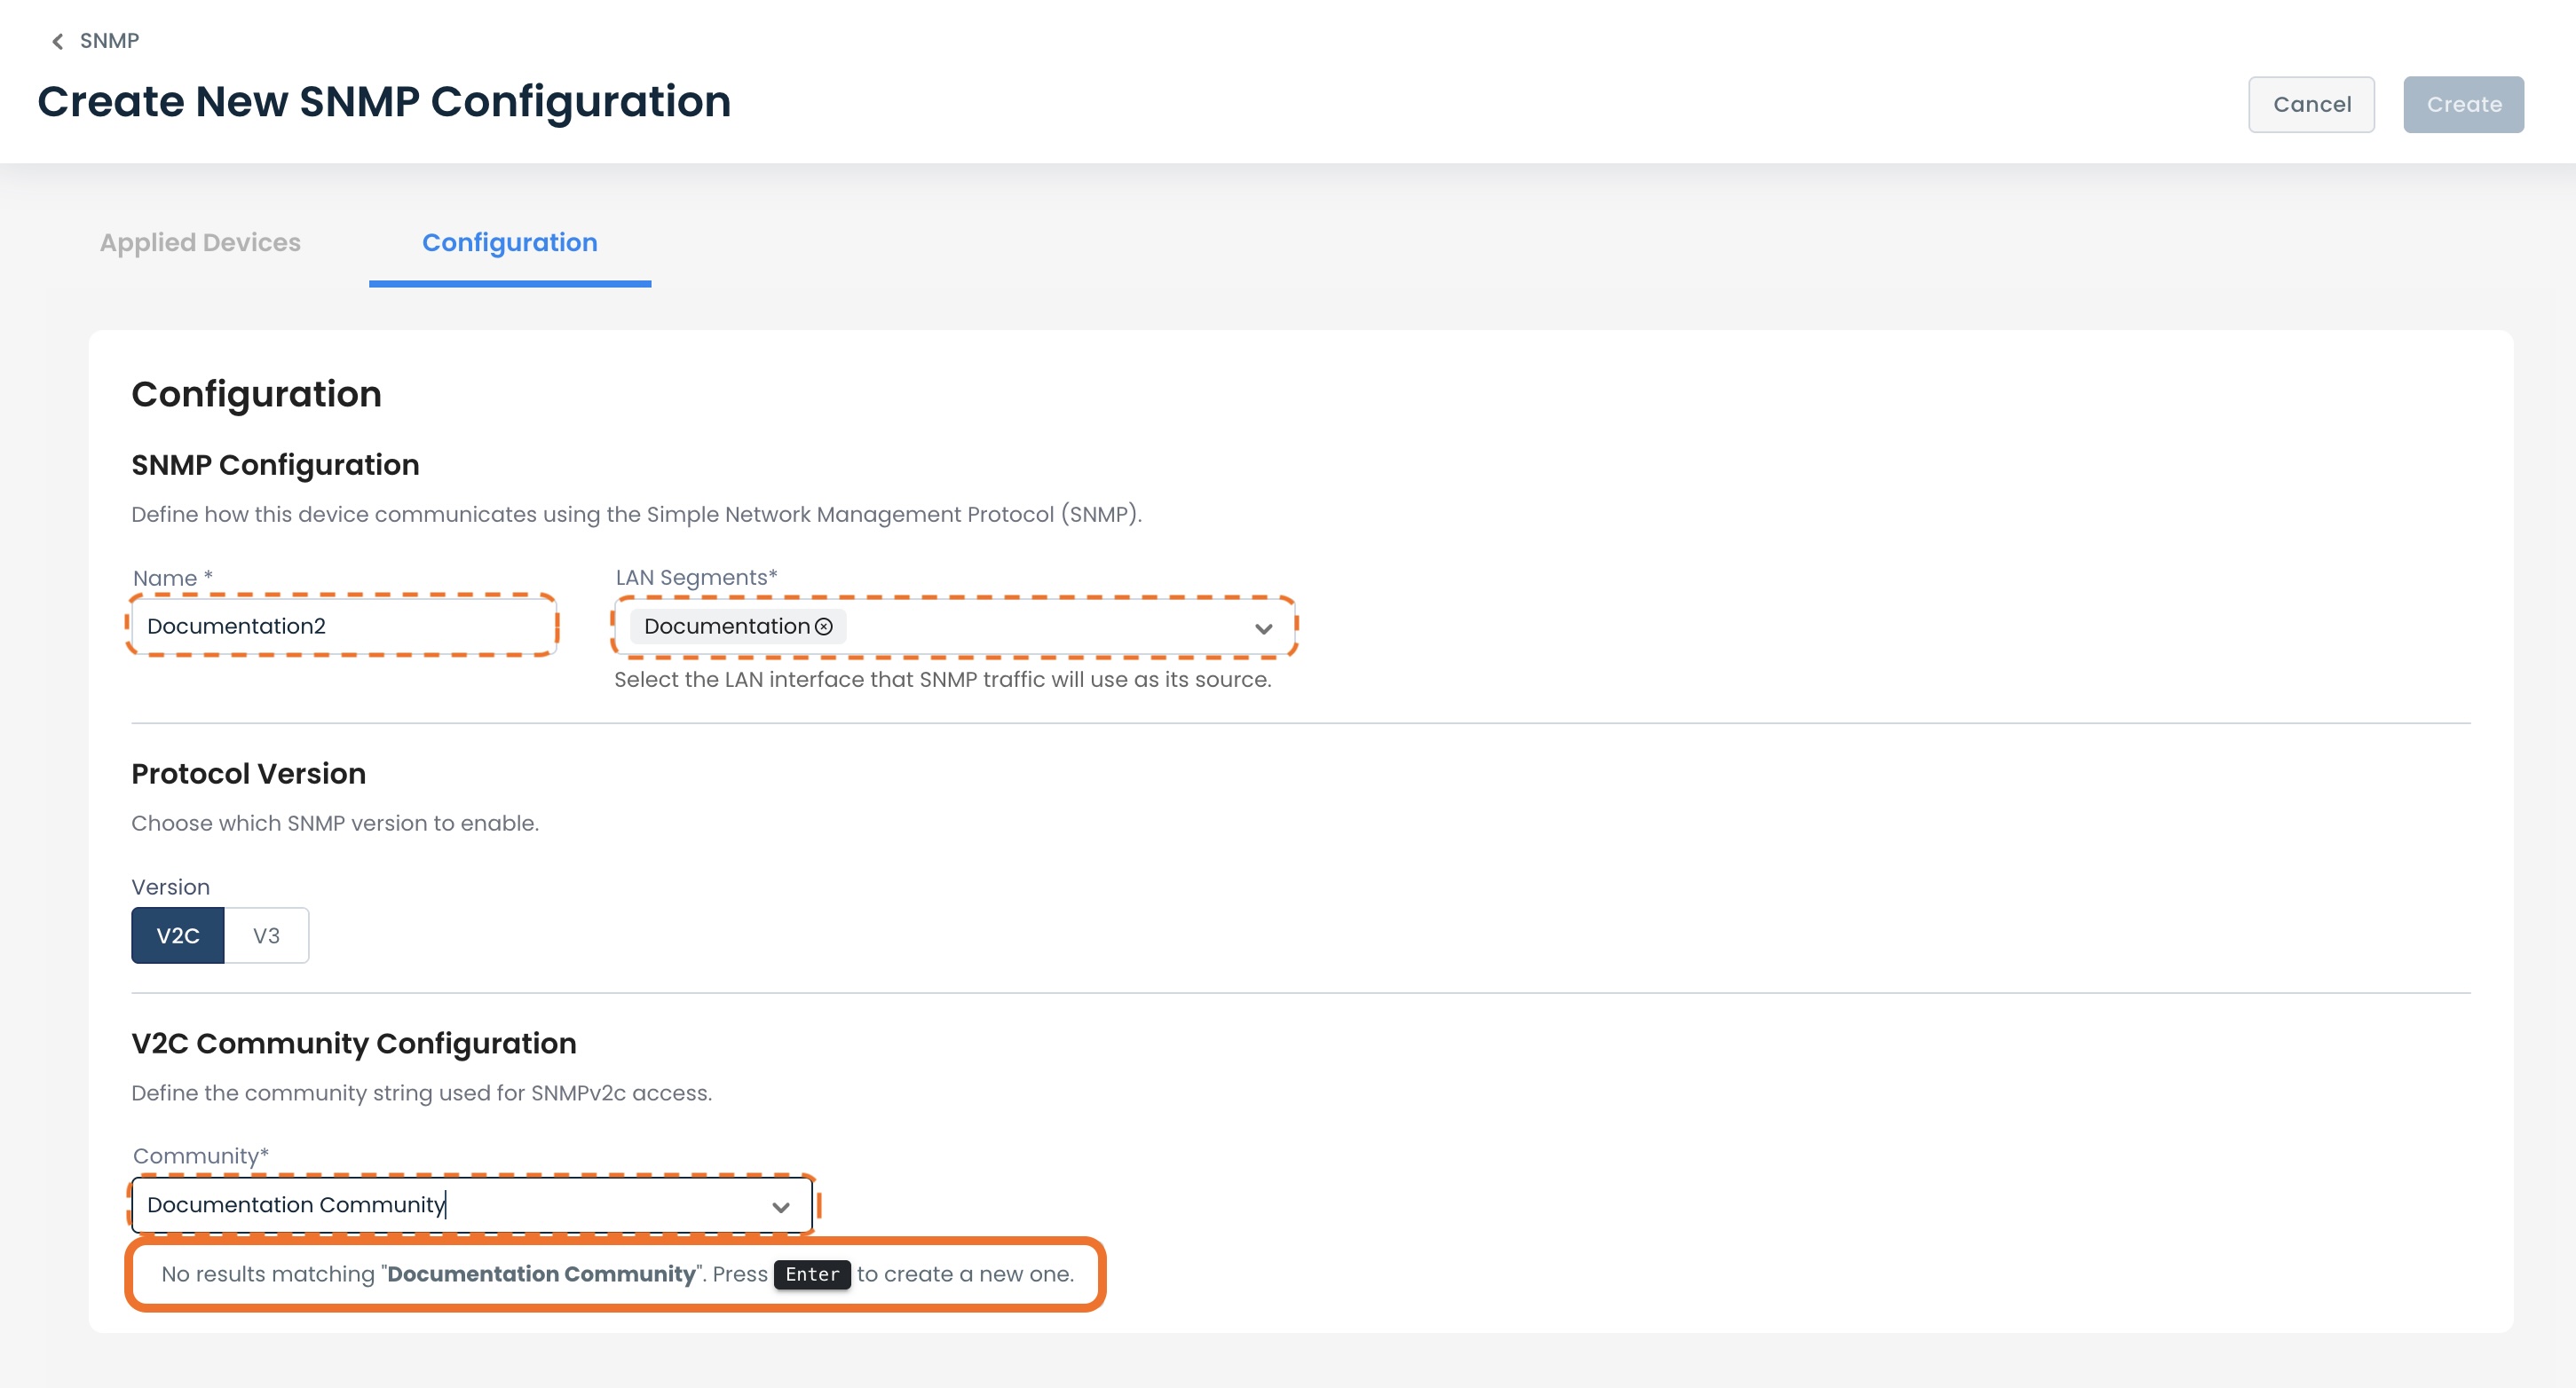
Once the required information is complete, click ‘Create’.

The new SNMP Server will appear in the table.
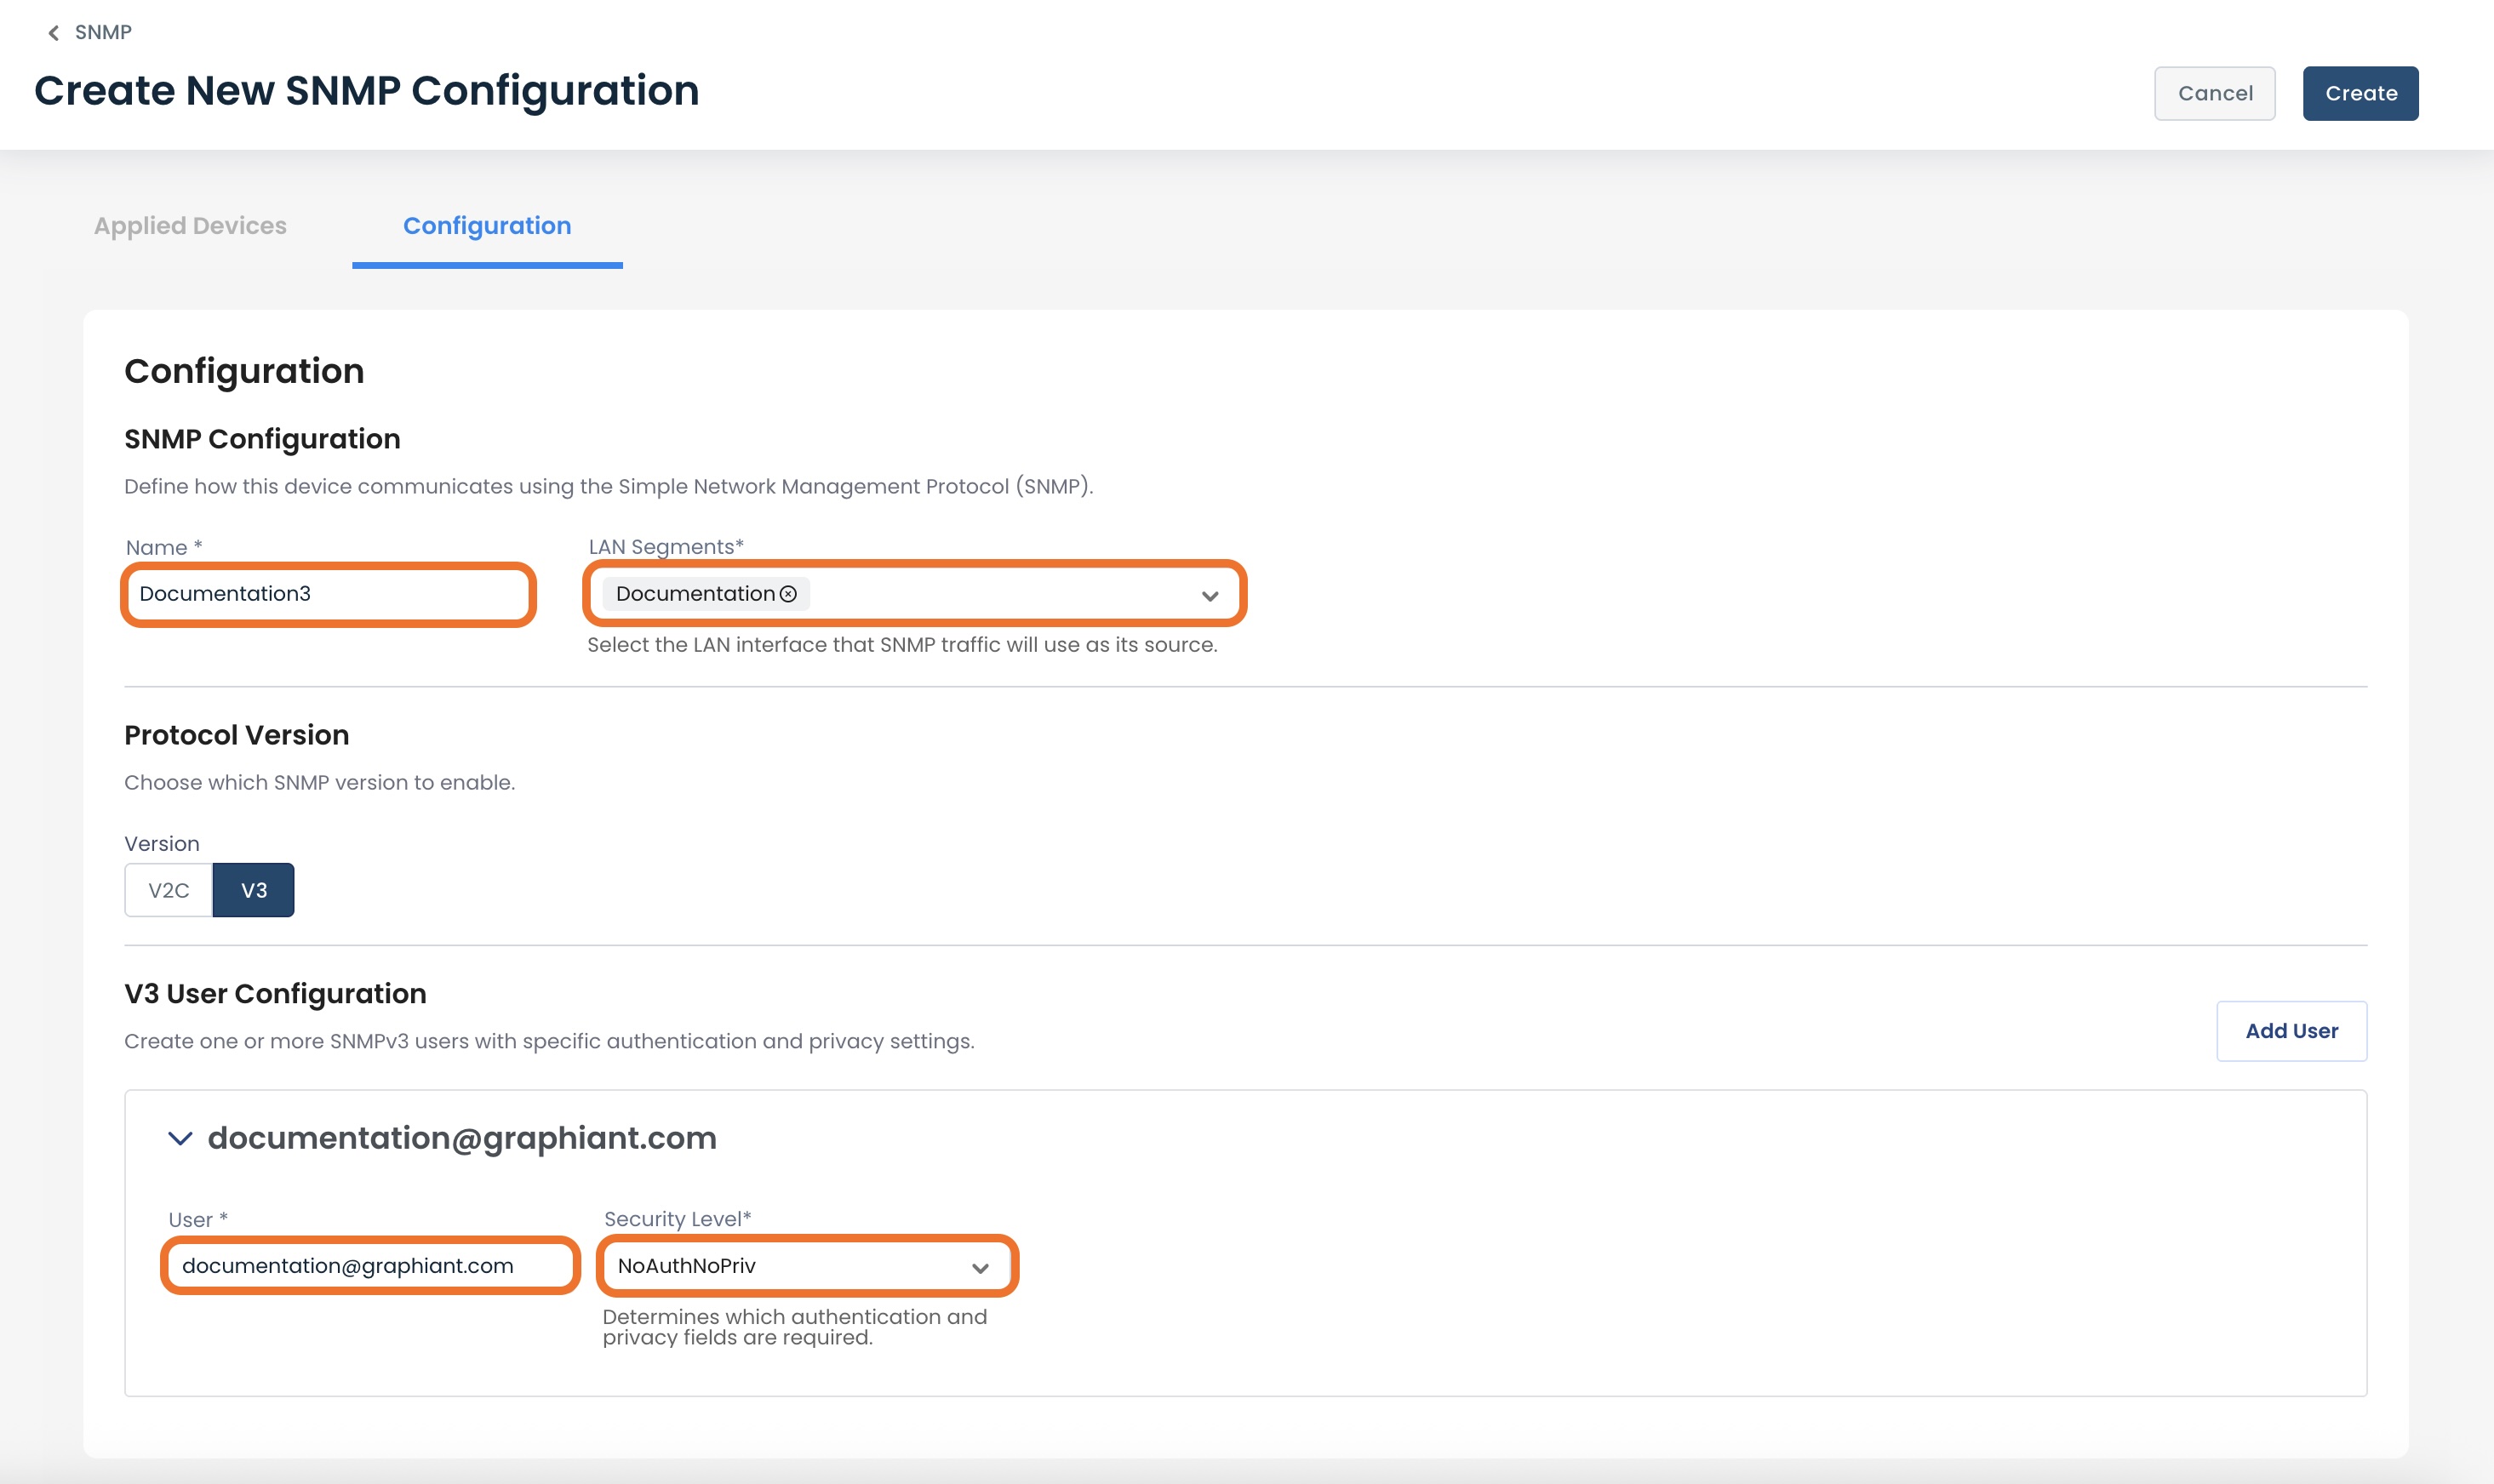
Configuring SNMPv3
Under ‘Protocol Version’, click ‘V3’.
Fill out the following fields:
Name: Choose a name for the SNMP Server.
LAN Segment: From the drop-down, select the LAN Segment on which the network devices will reach the SNMP server.
User: Enter the username of the person you are allowing access to the SHMP server.
For information on adding additional users, click here.
Security Level: Select the authentication method for the identity of users and the privacy encryption of data.
See the options for Security Level here.
Security Levels
SNMPv3 supports the following three levels of security involving authenticating the identity of users and the privacy encryption of data:
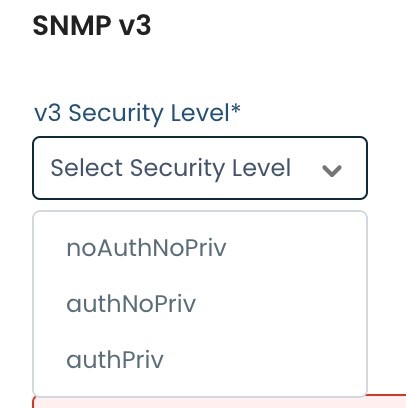
#1: "NoAuthNoPriv"
NoAuthNoPriv supports no authentication and no privacy; there are no passwords.
Required field:
Username: Enter the username of the person you are allowing access to the SHMP server.
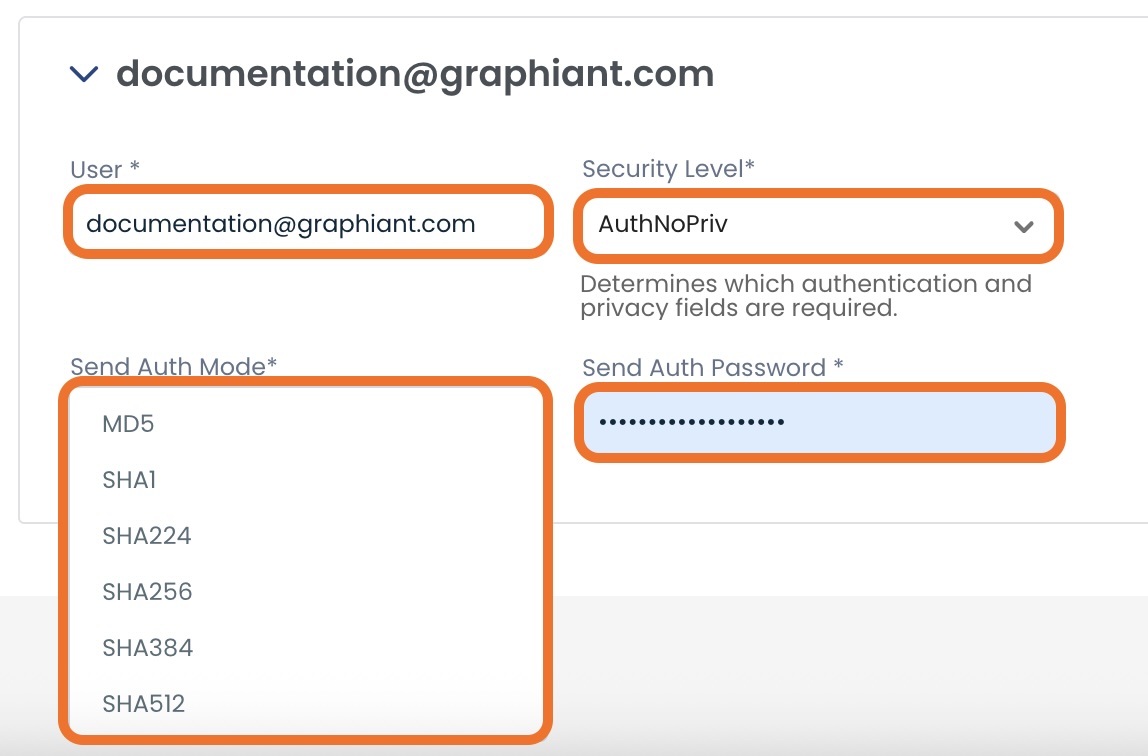
#2: "AuthNopriv"
AuthNoPriv supports authentication but no privacy.
Required fields:
Username: Enter the username of the person you are allowing access to the SHMP server.
Auth mode: Select the desired encryption algorithm from the drop-down.
Password: Enter the authentication encryption password previously configured on the SNMP server.
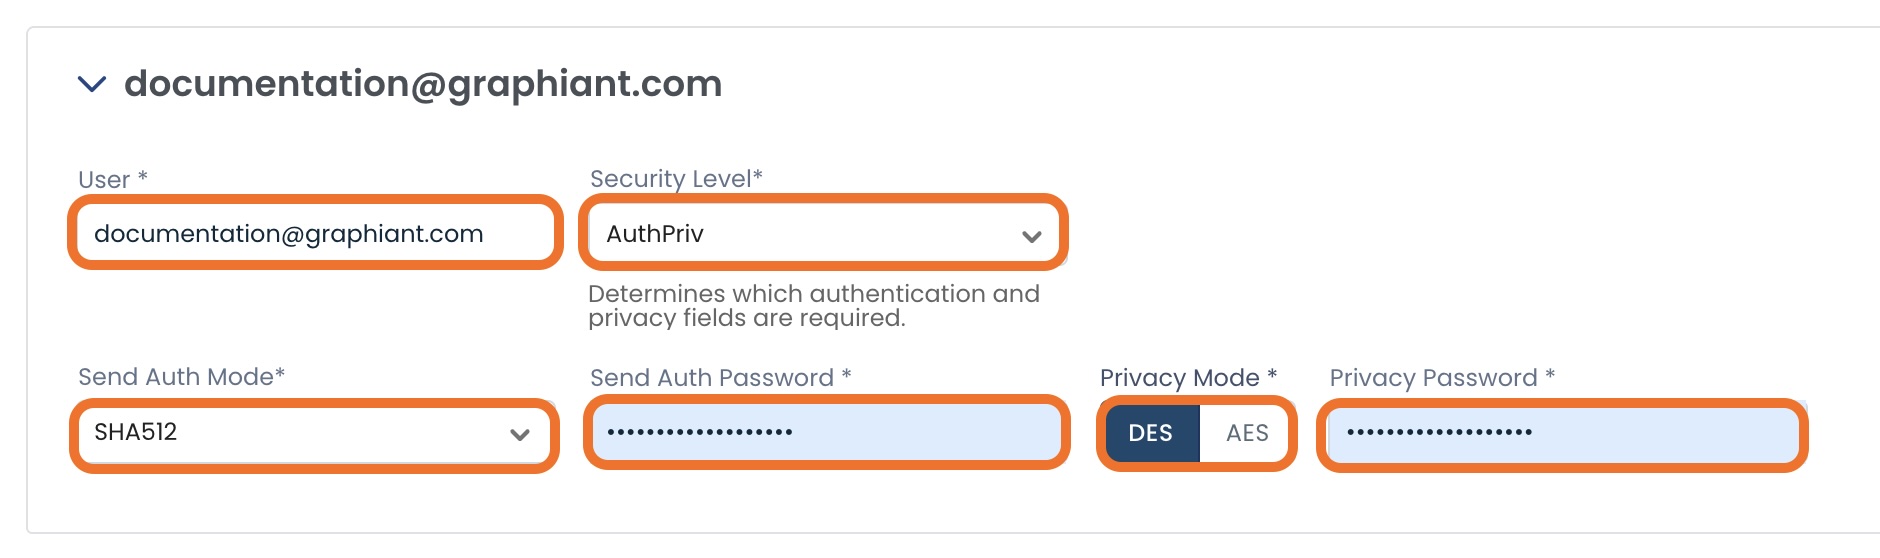
#3: "AuthPriv"
AuthPriv supports authentication and privacy.
Required fields:
Username: Enter the username of the person you are allowing access to the SHMP server.
Auth mode: Select the desired encryption algorithm from the drop-down.
Password: Enter the authentication encryption password previously configured on the SNMP server.
Privacy mode: Select the desired integrity protection algorithm; Graphiant supports AES-128 and DES.
Privacy password: Enter the privacy password previously configured in the SNMP server.
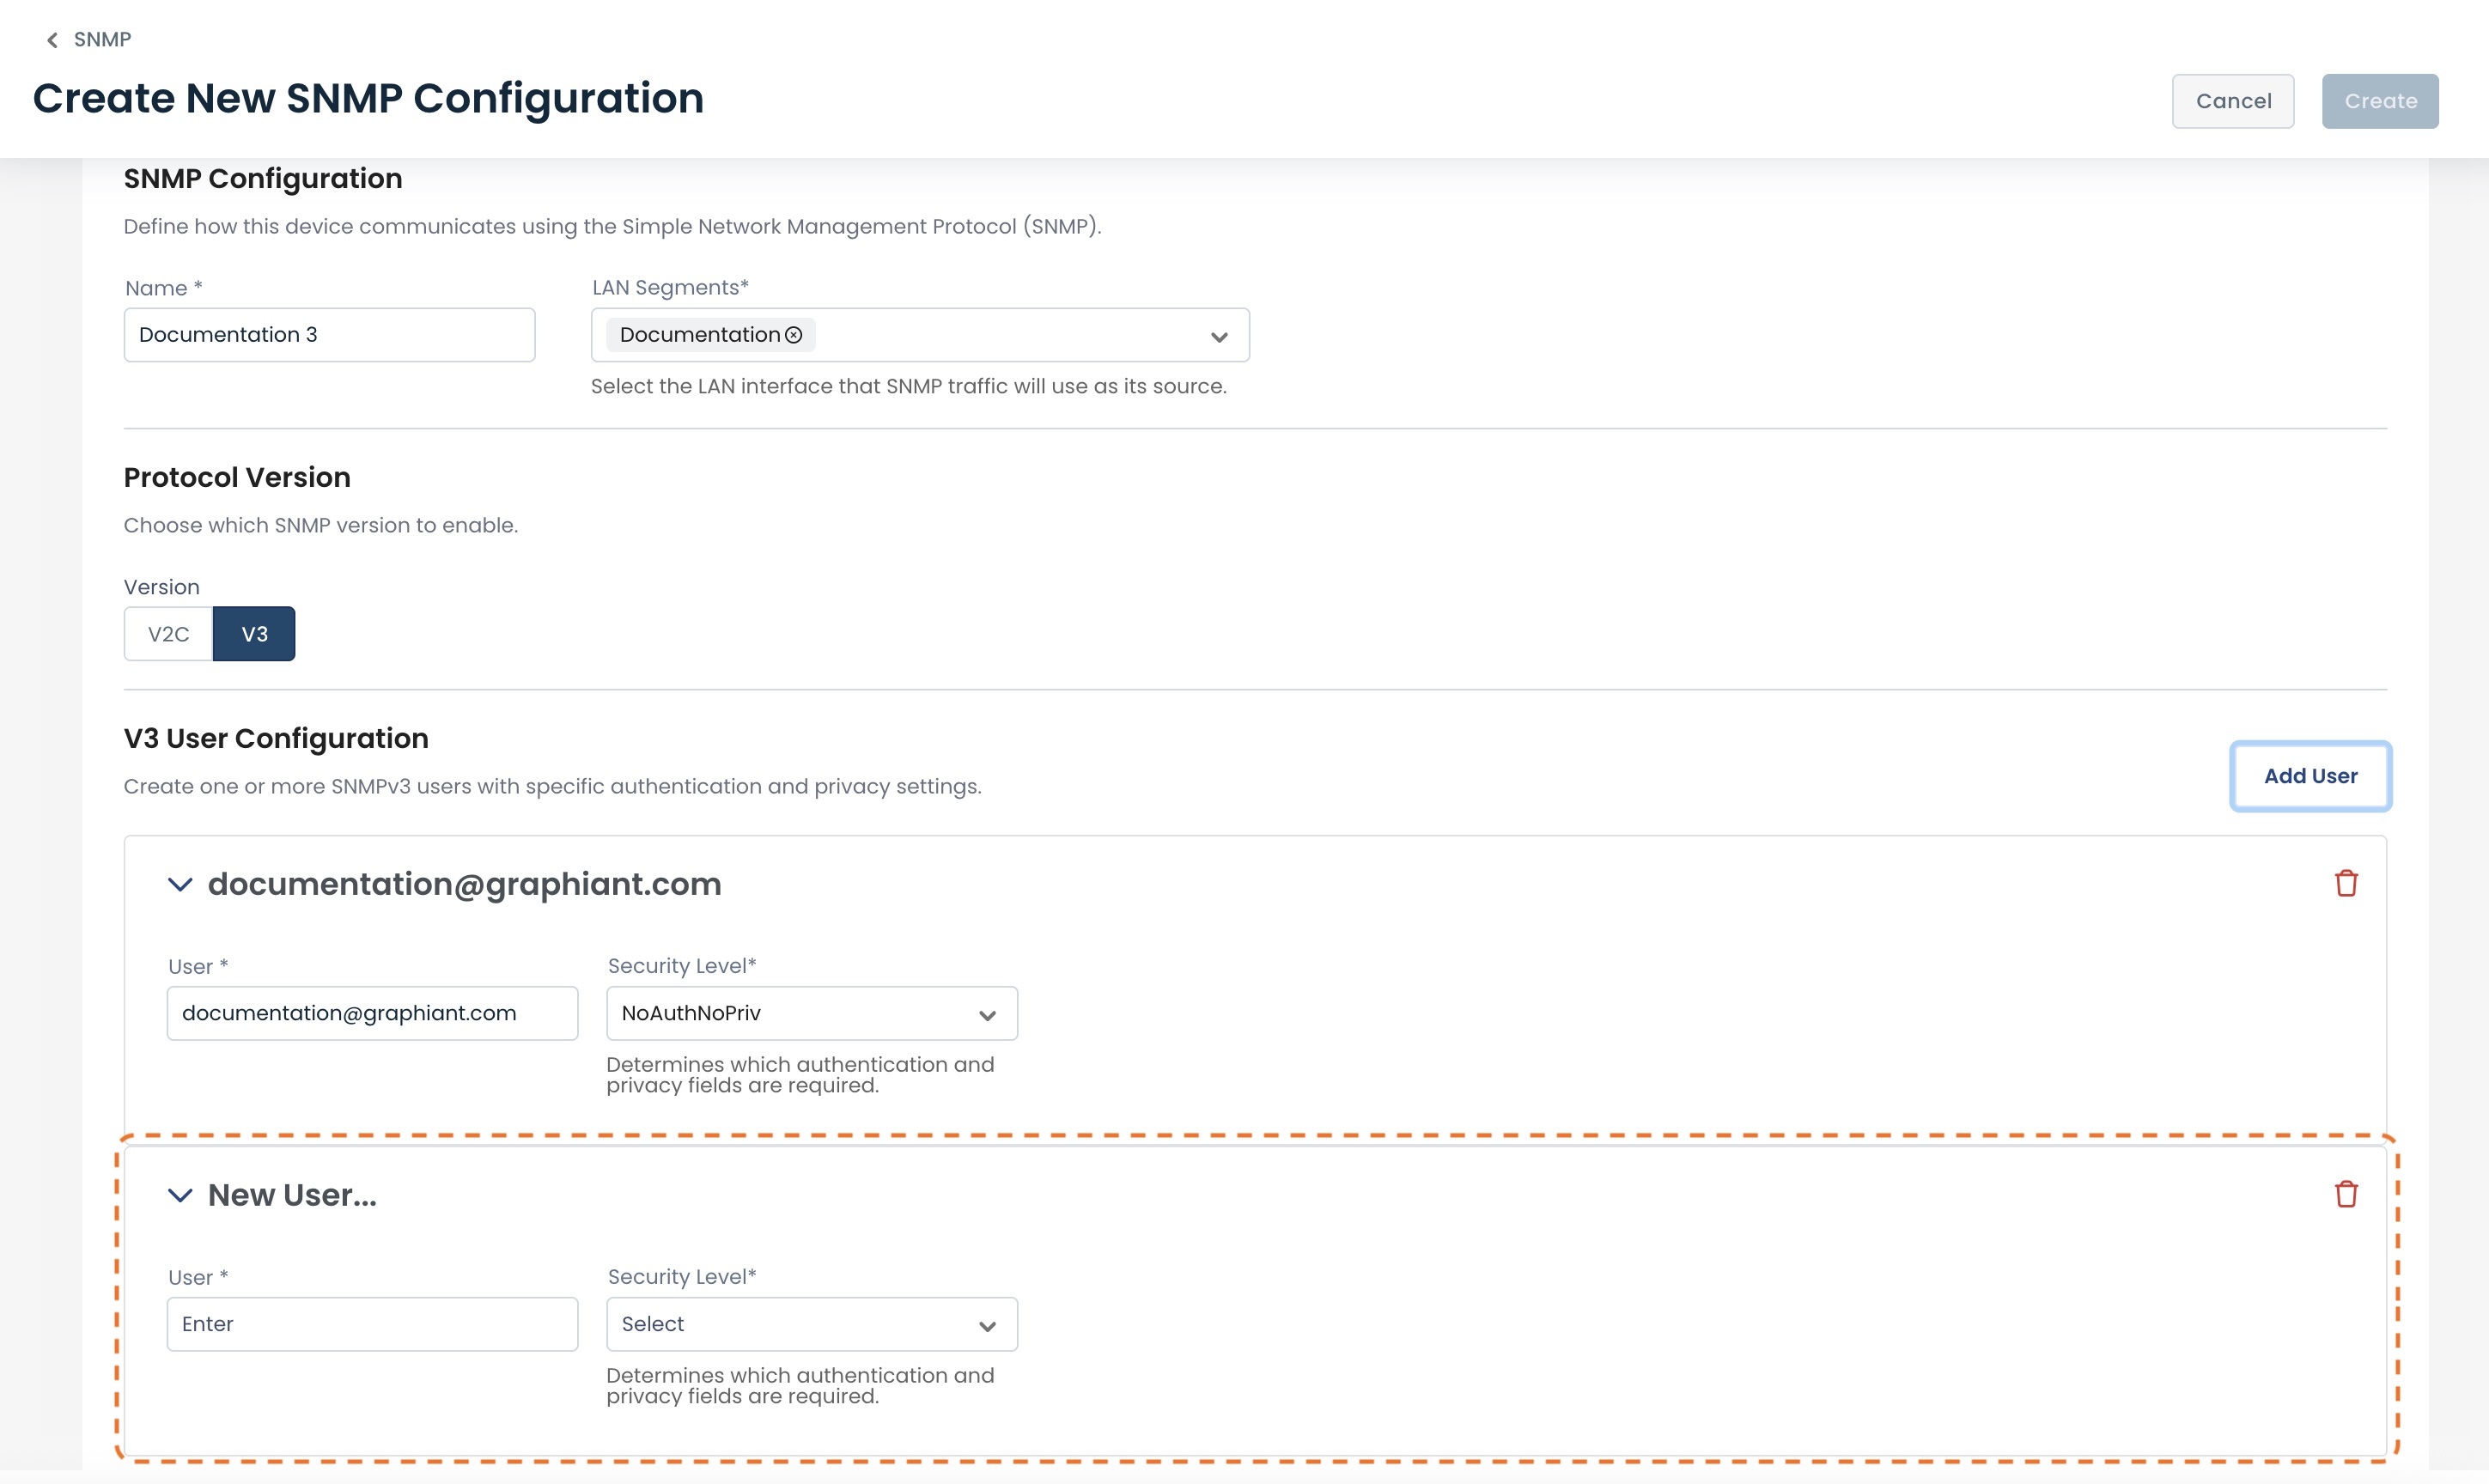
Adding Additional Users
Graphiant allows you to create multiple users who may access your SNMPv3 server.
Should you desire to add additional users, click ‘Add User’ to the right of “V3 User Configuration”.
.jpg)
The additional new user configuration will open below the previously entered user(s).
Once the desired data is entered, click 'Create'.
The new SNMP server will now appear in the SNMP table.
Attaching an SNMP Server to a Site
For a System Object SNMP Server to be utilized by any Edges, it must be attached to a Site.
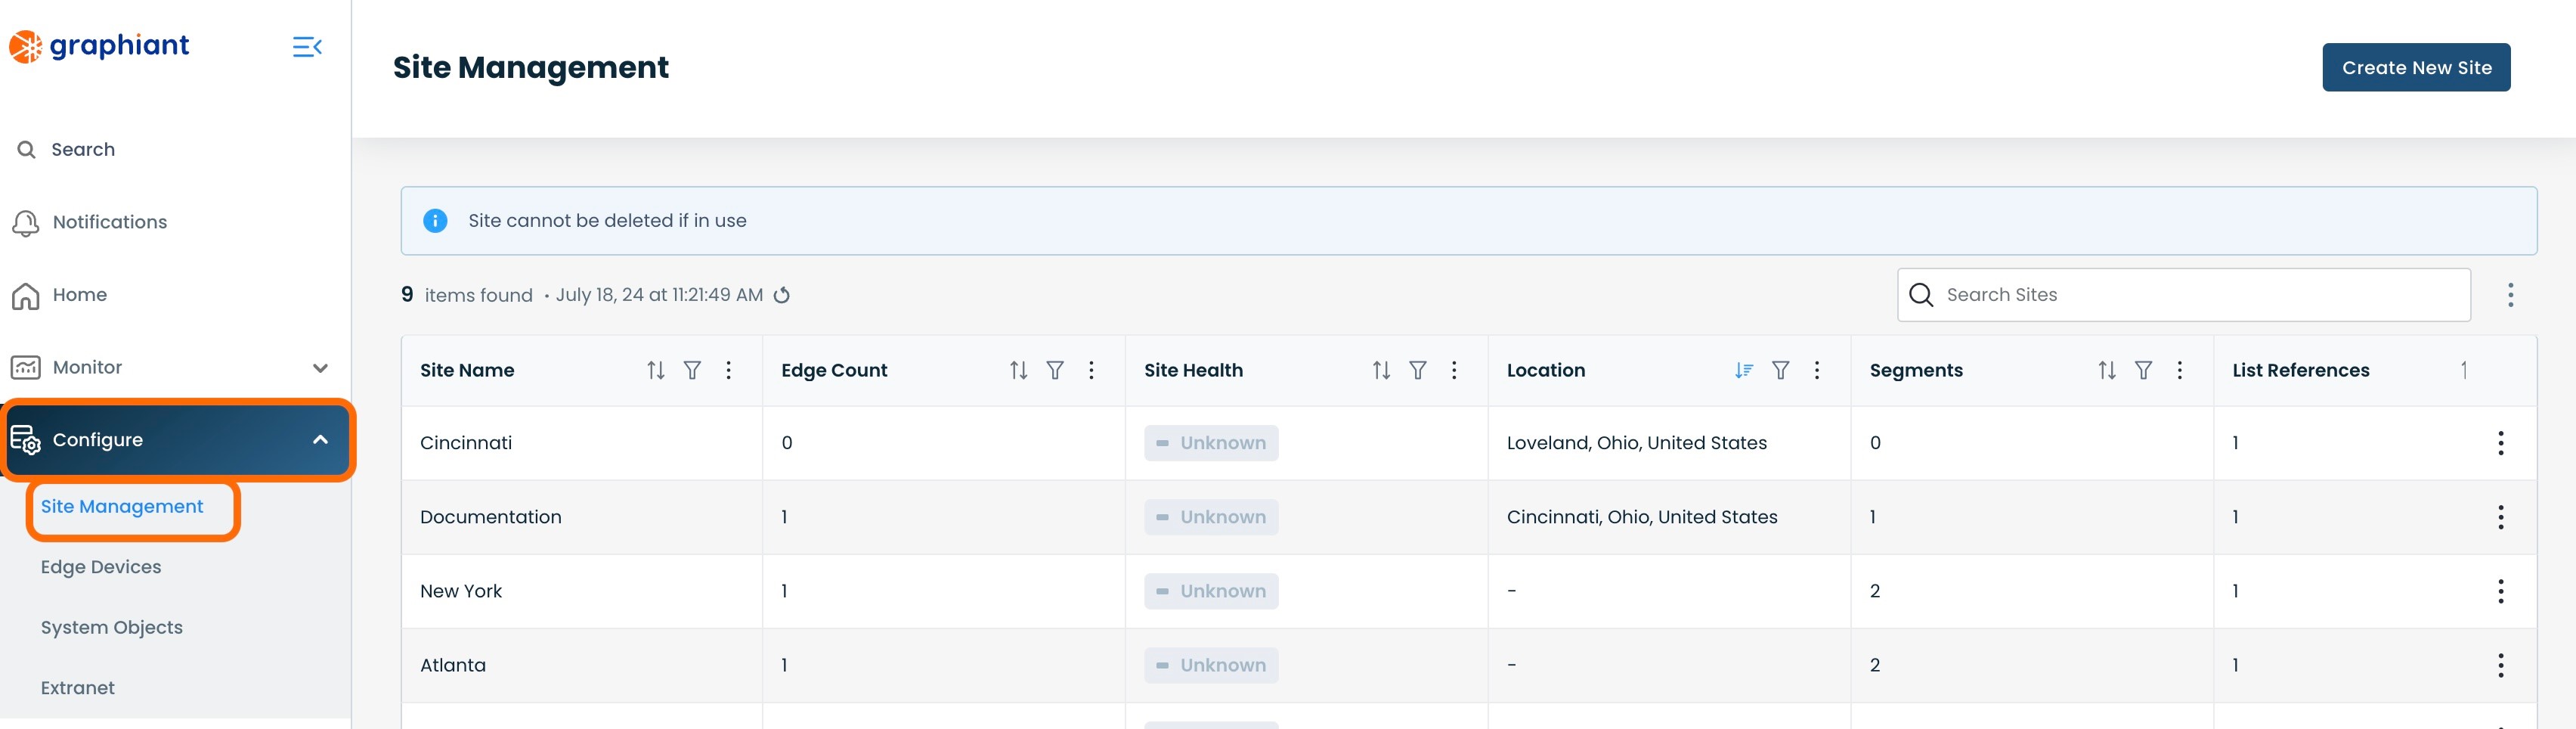
To attach an SNMP Server to a Site, click 'Configure' from the left side menu from anywhere in the Portal; select 'Site Management'.
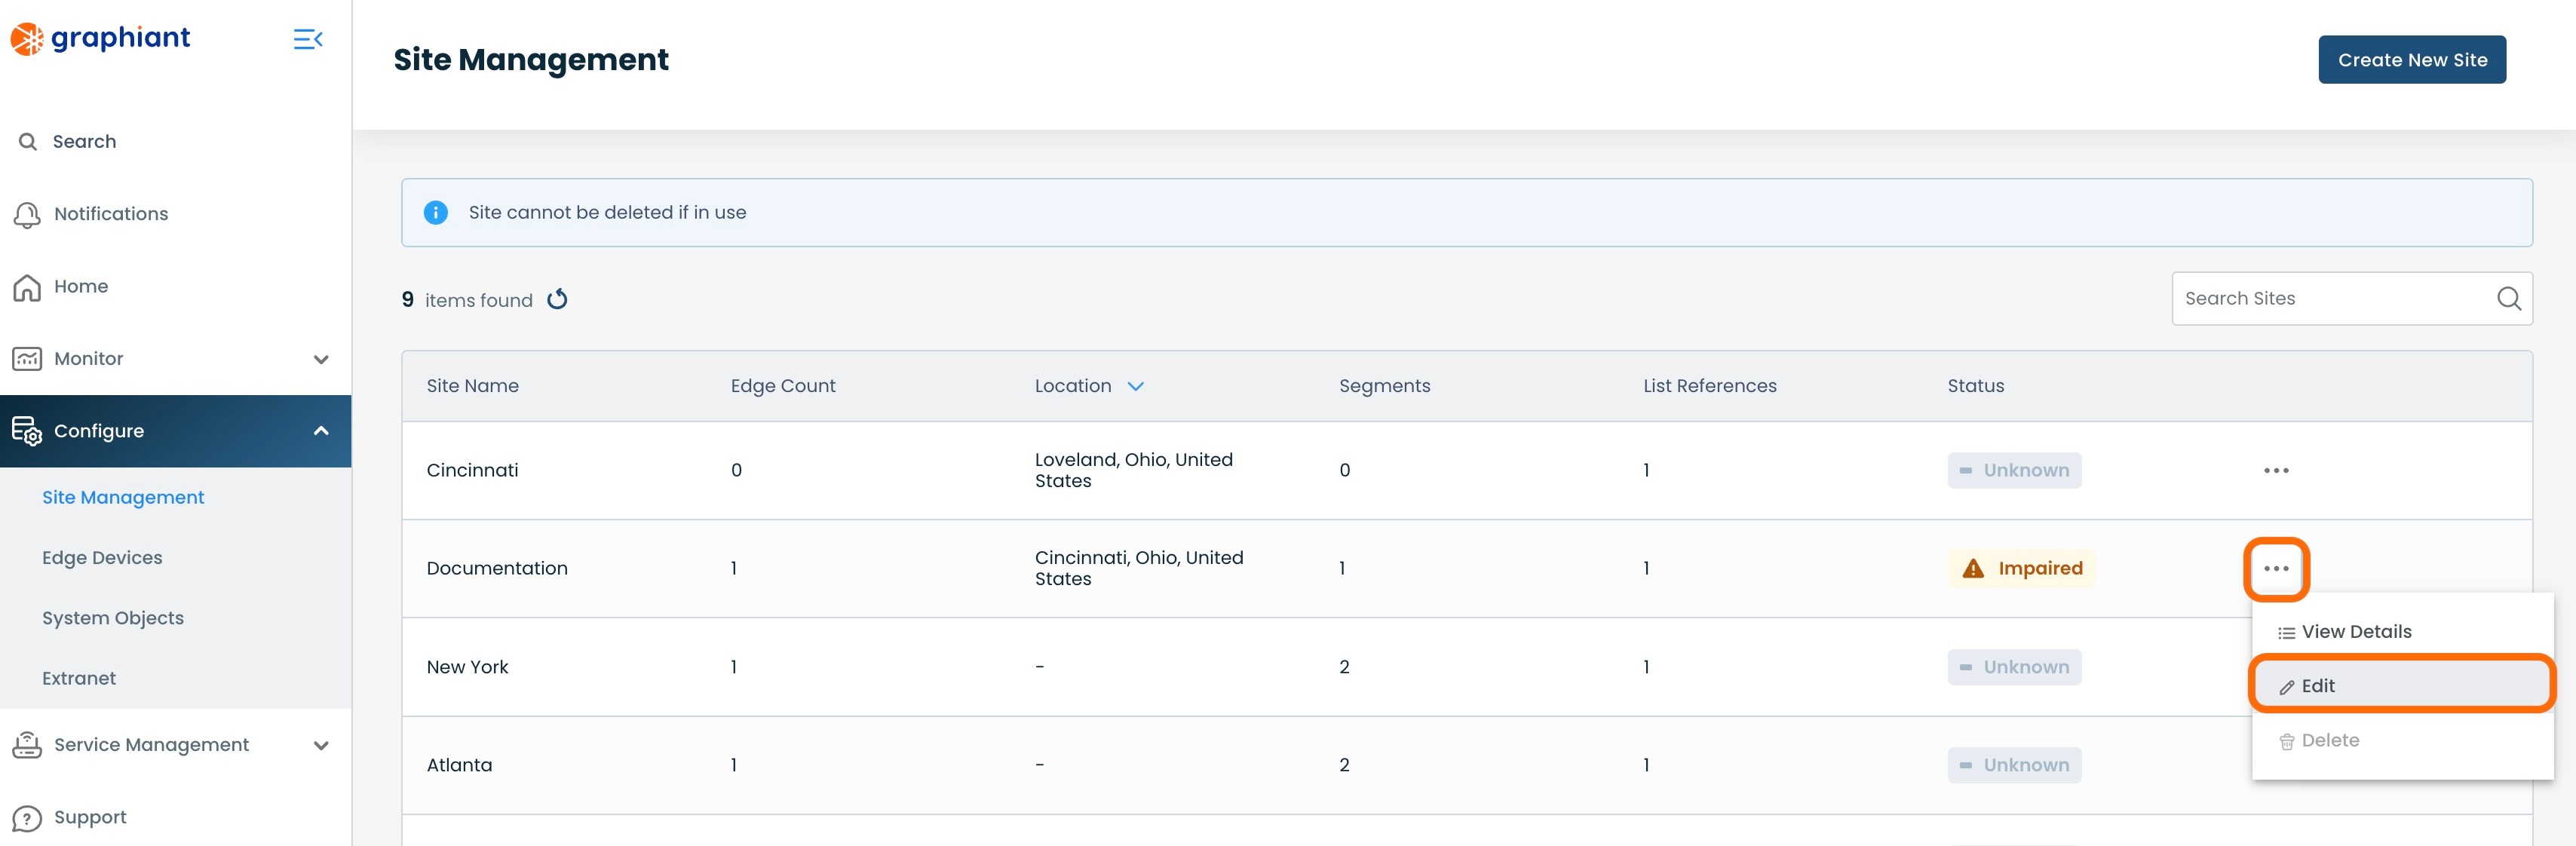
Click the 3 dots to the right of the Site to which the SNMP Server will be attached; select 'Edit'.
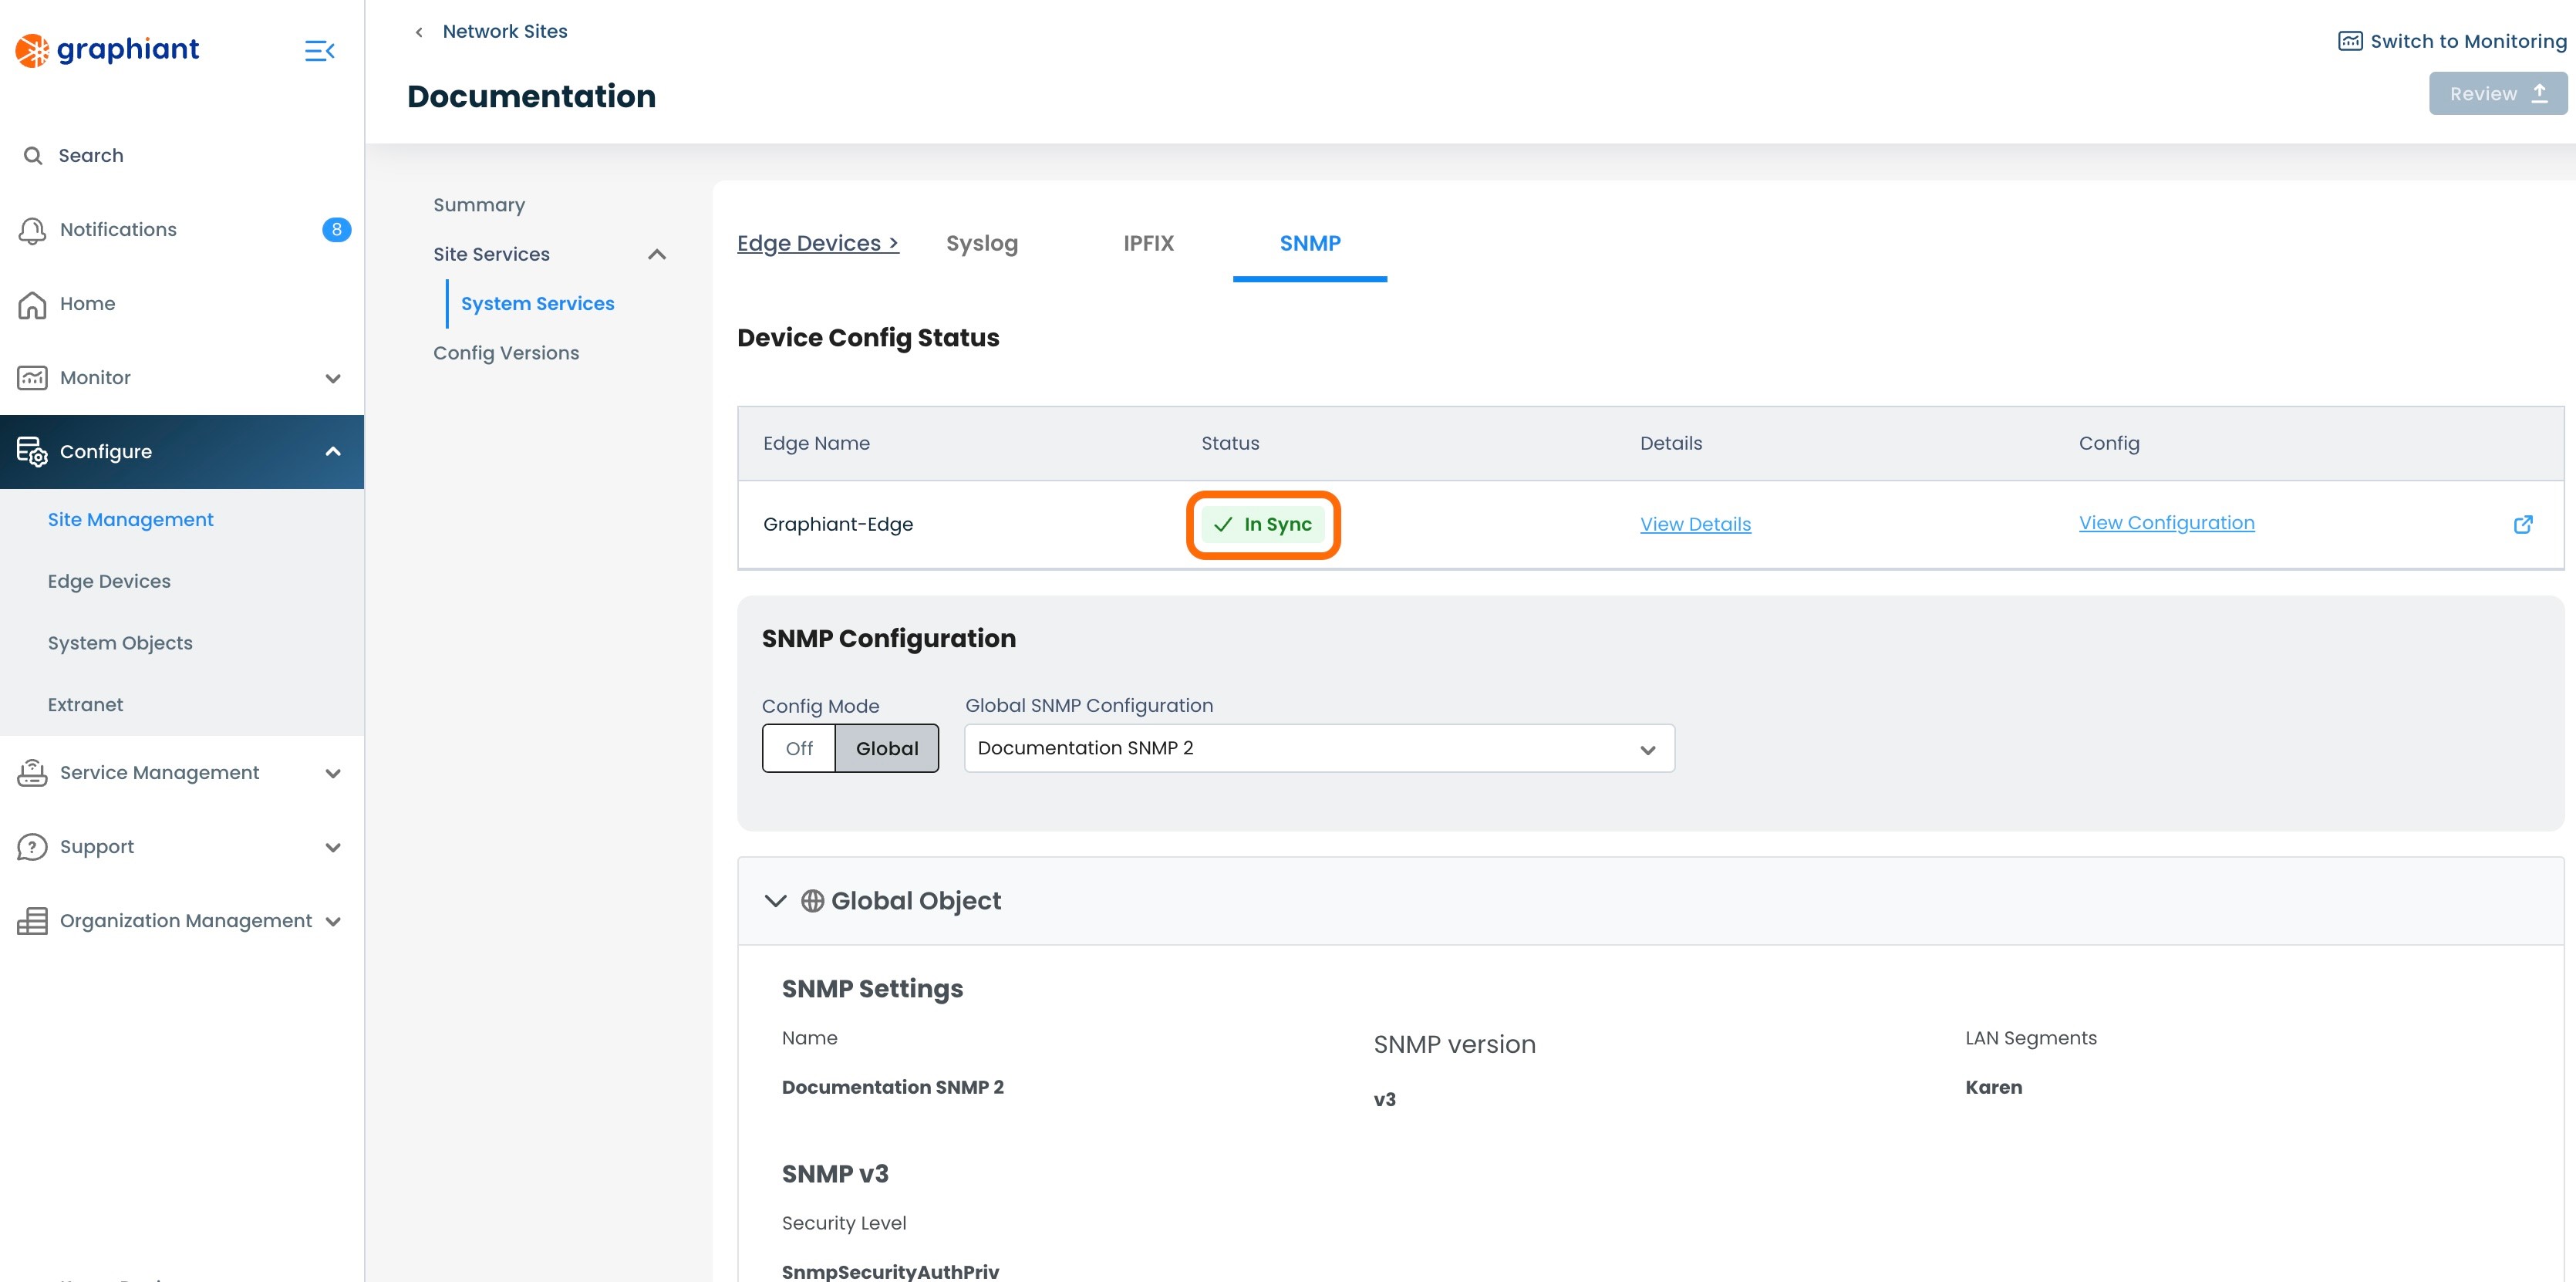
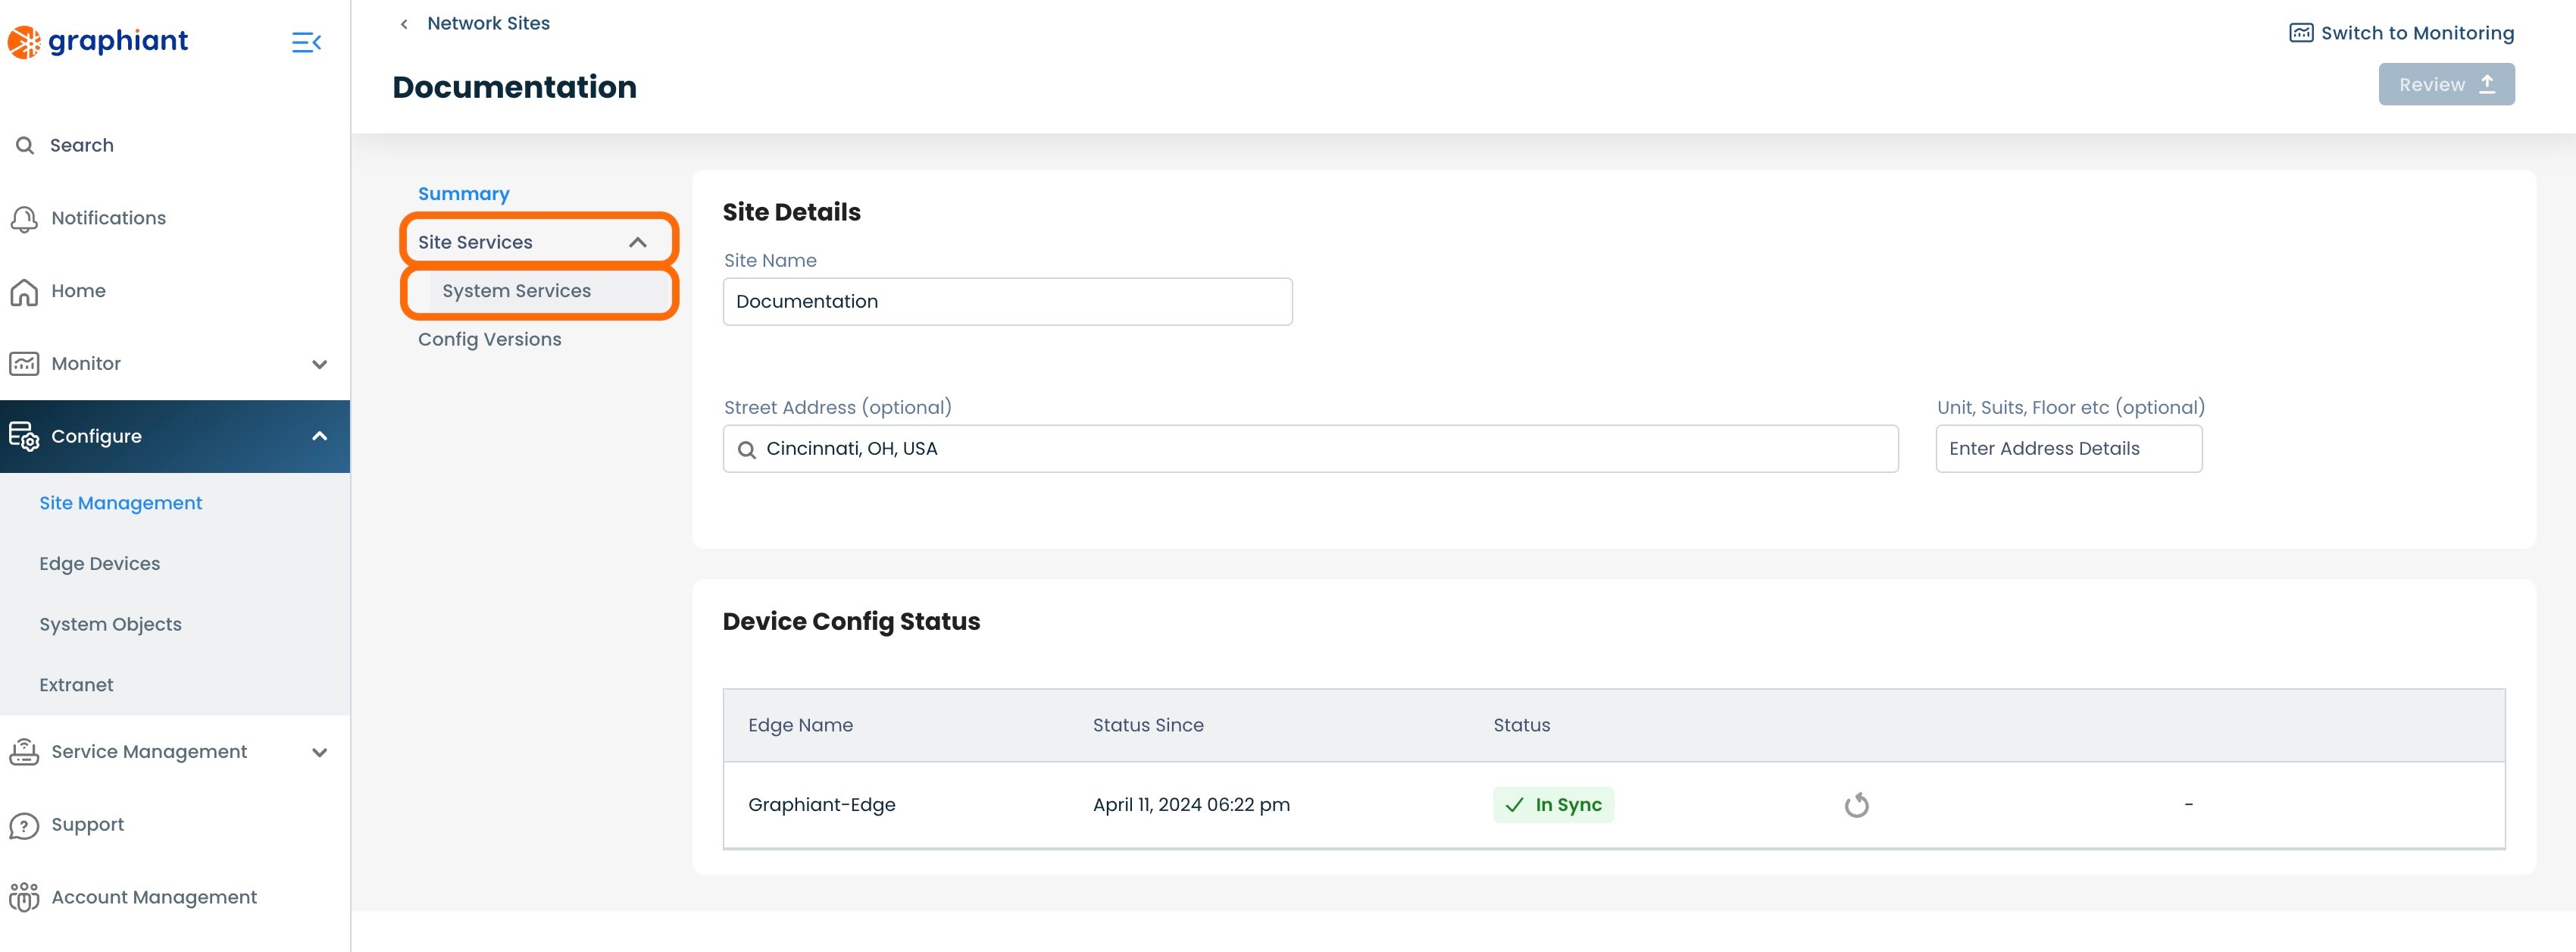
Click 'Site Services' under 'Summary'; select 'System Services'.

Select the 'SNMP' tab from across the top.
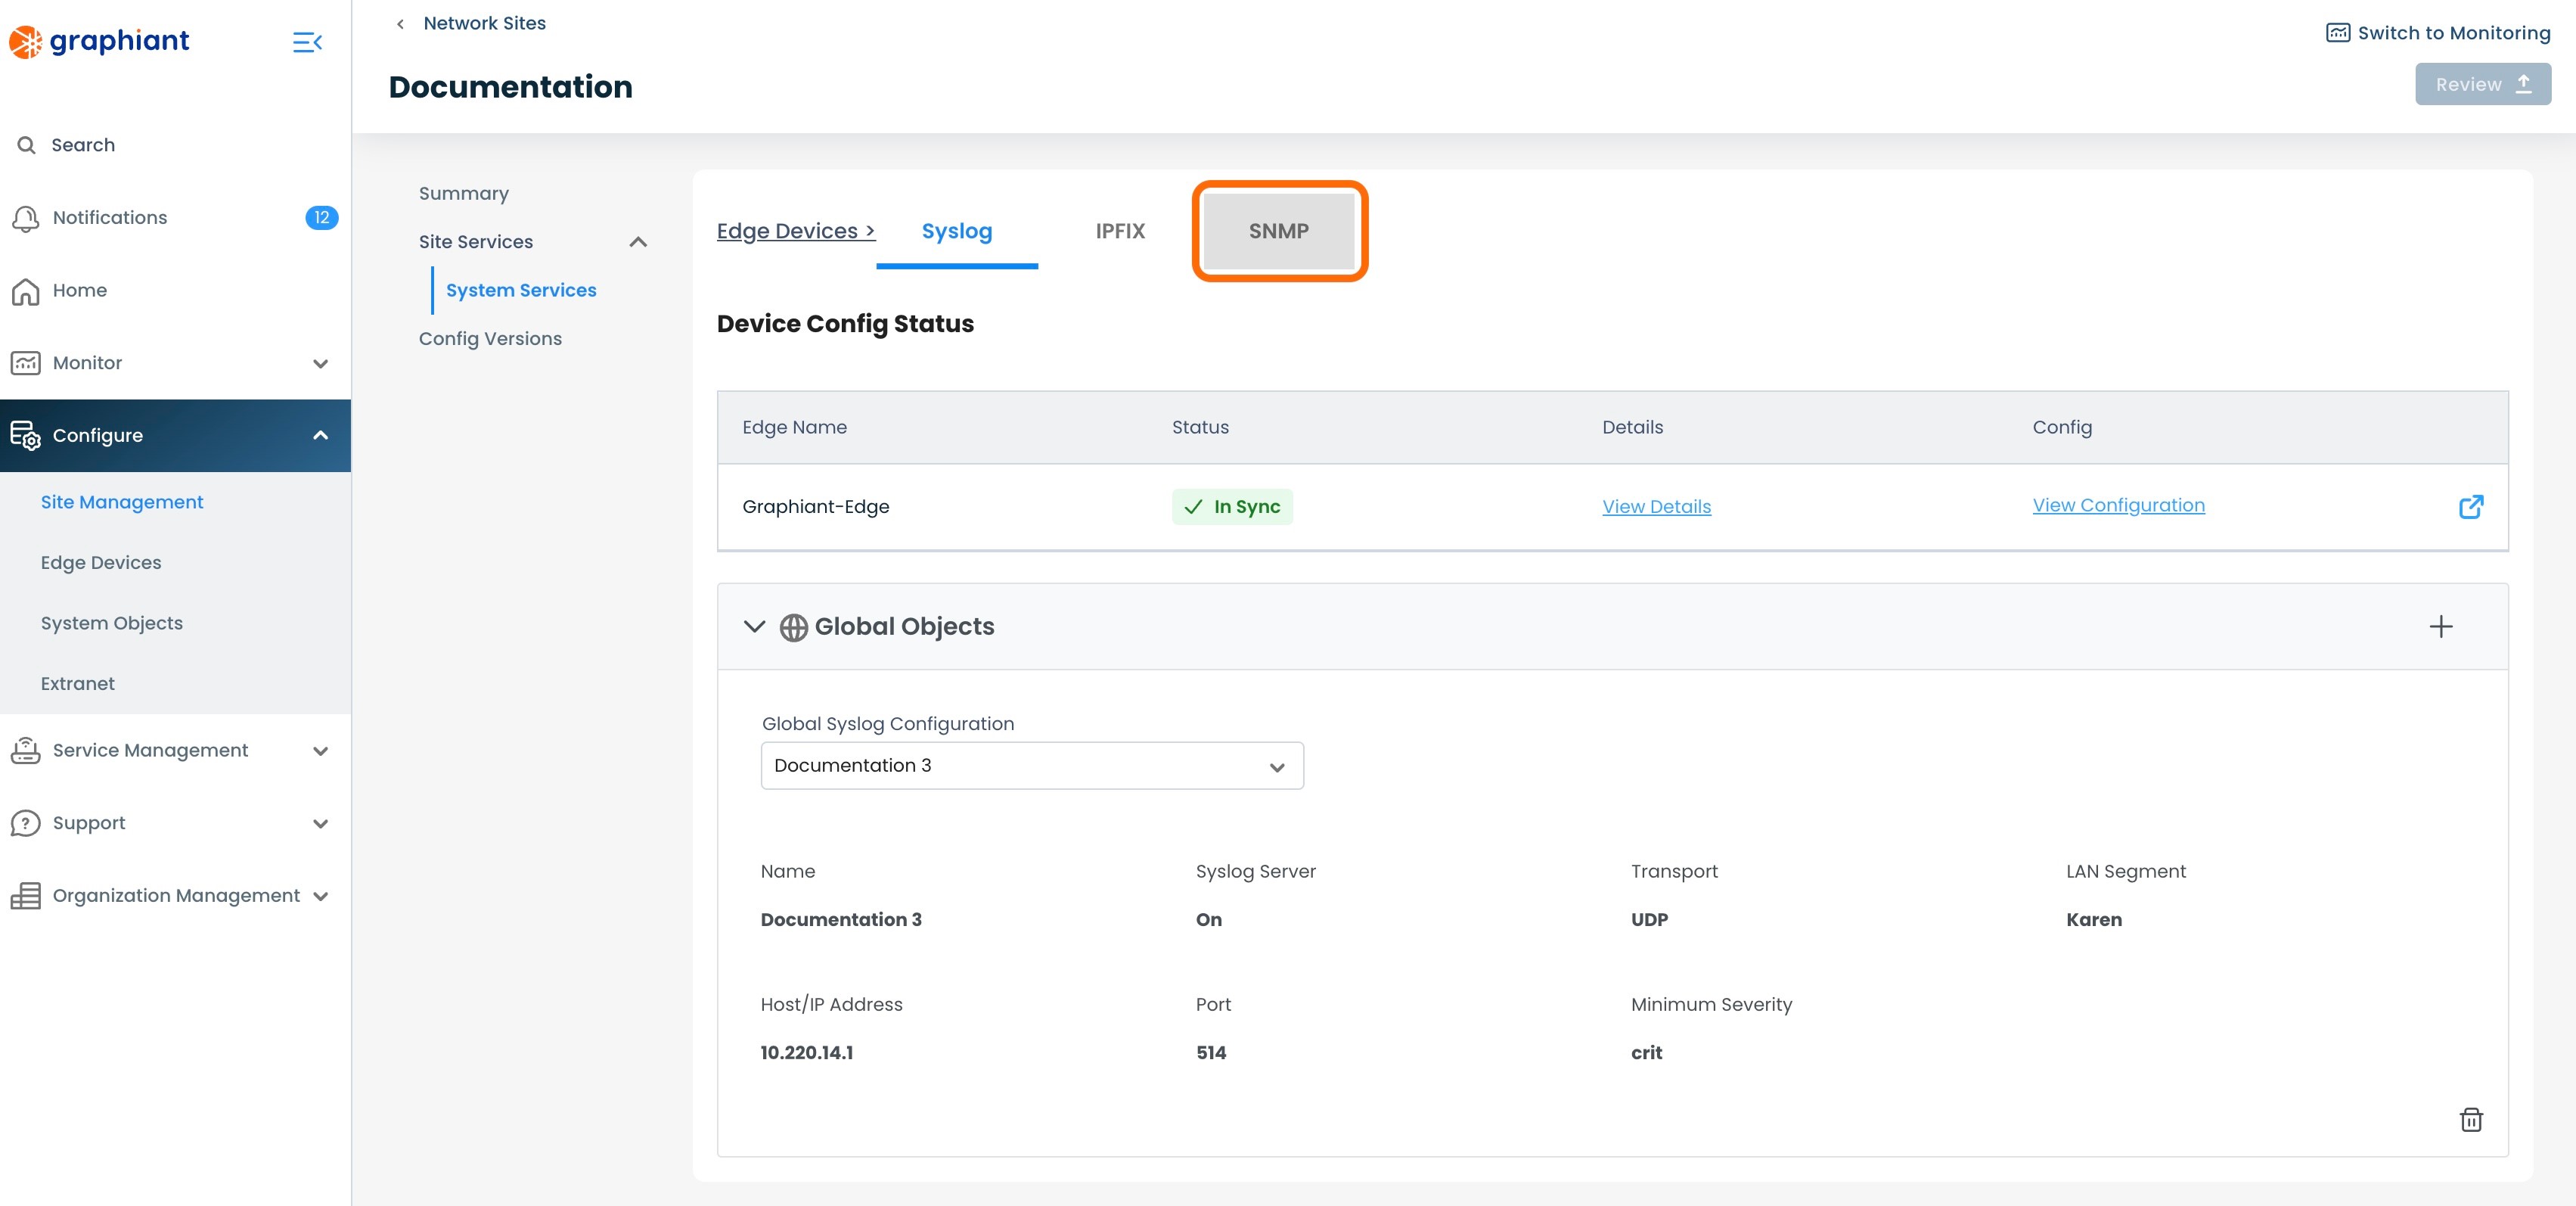
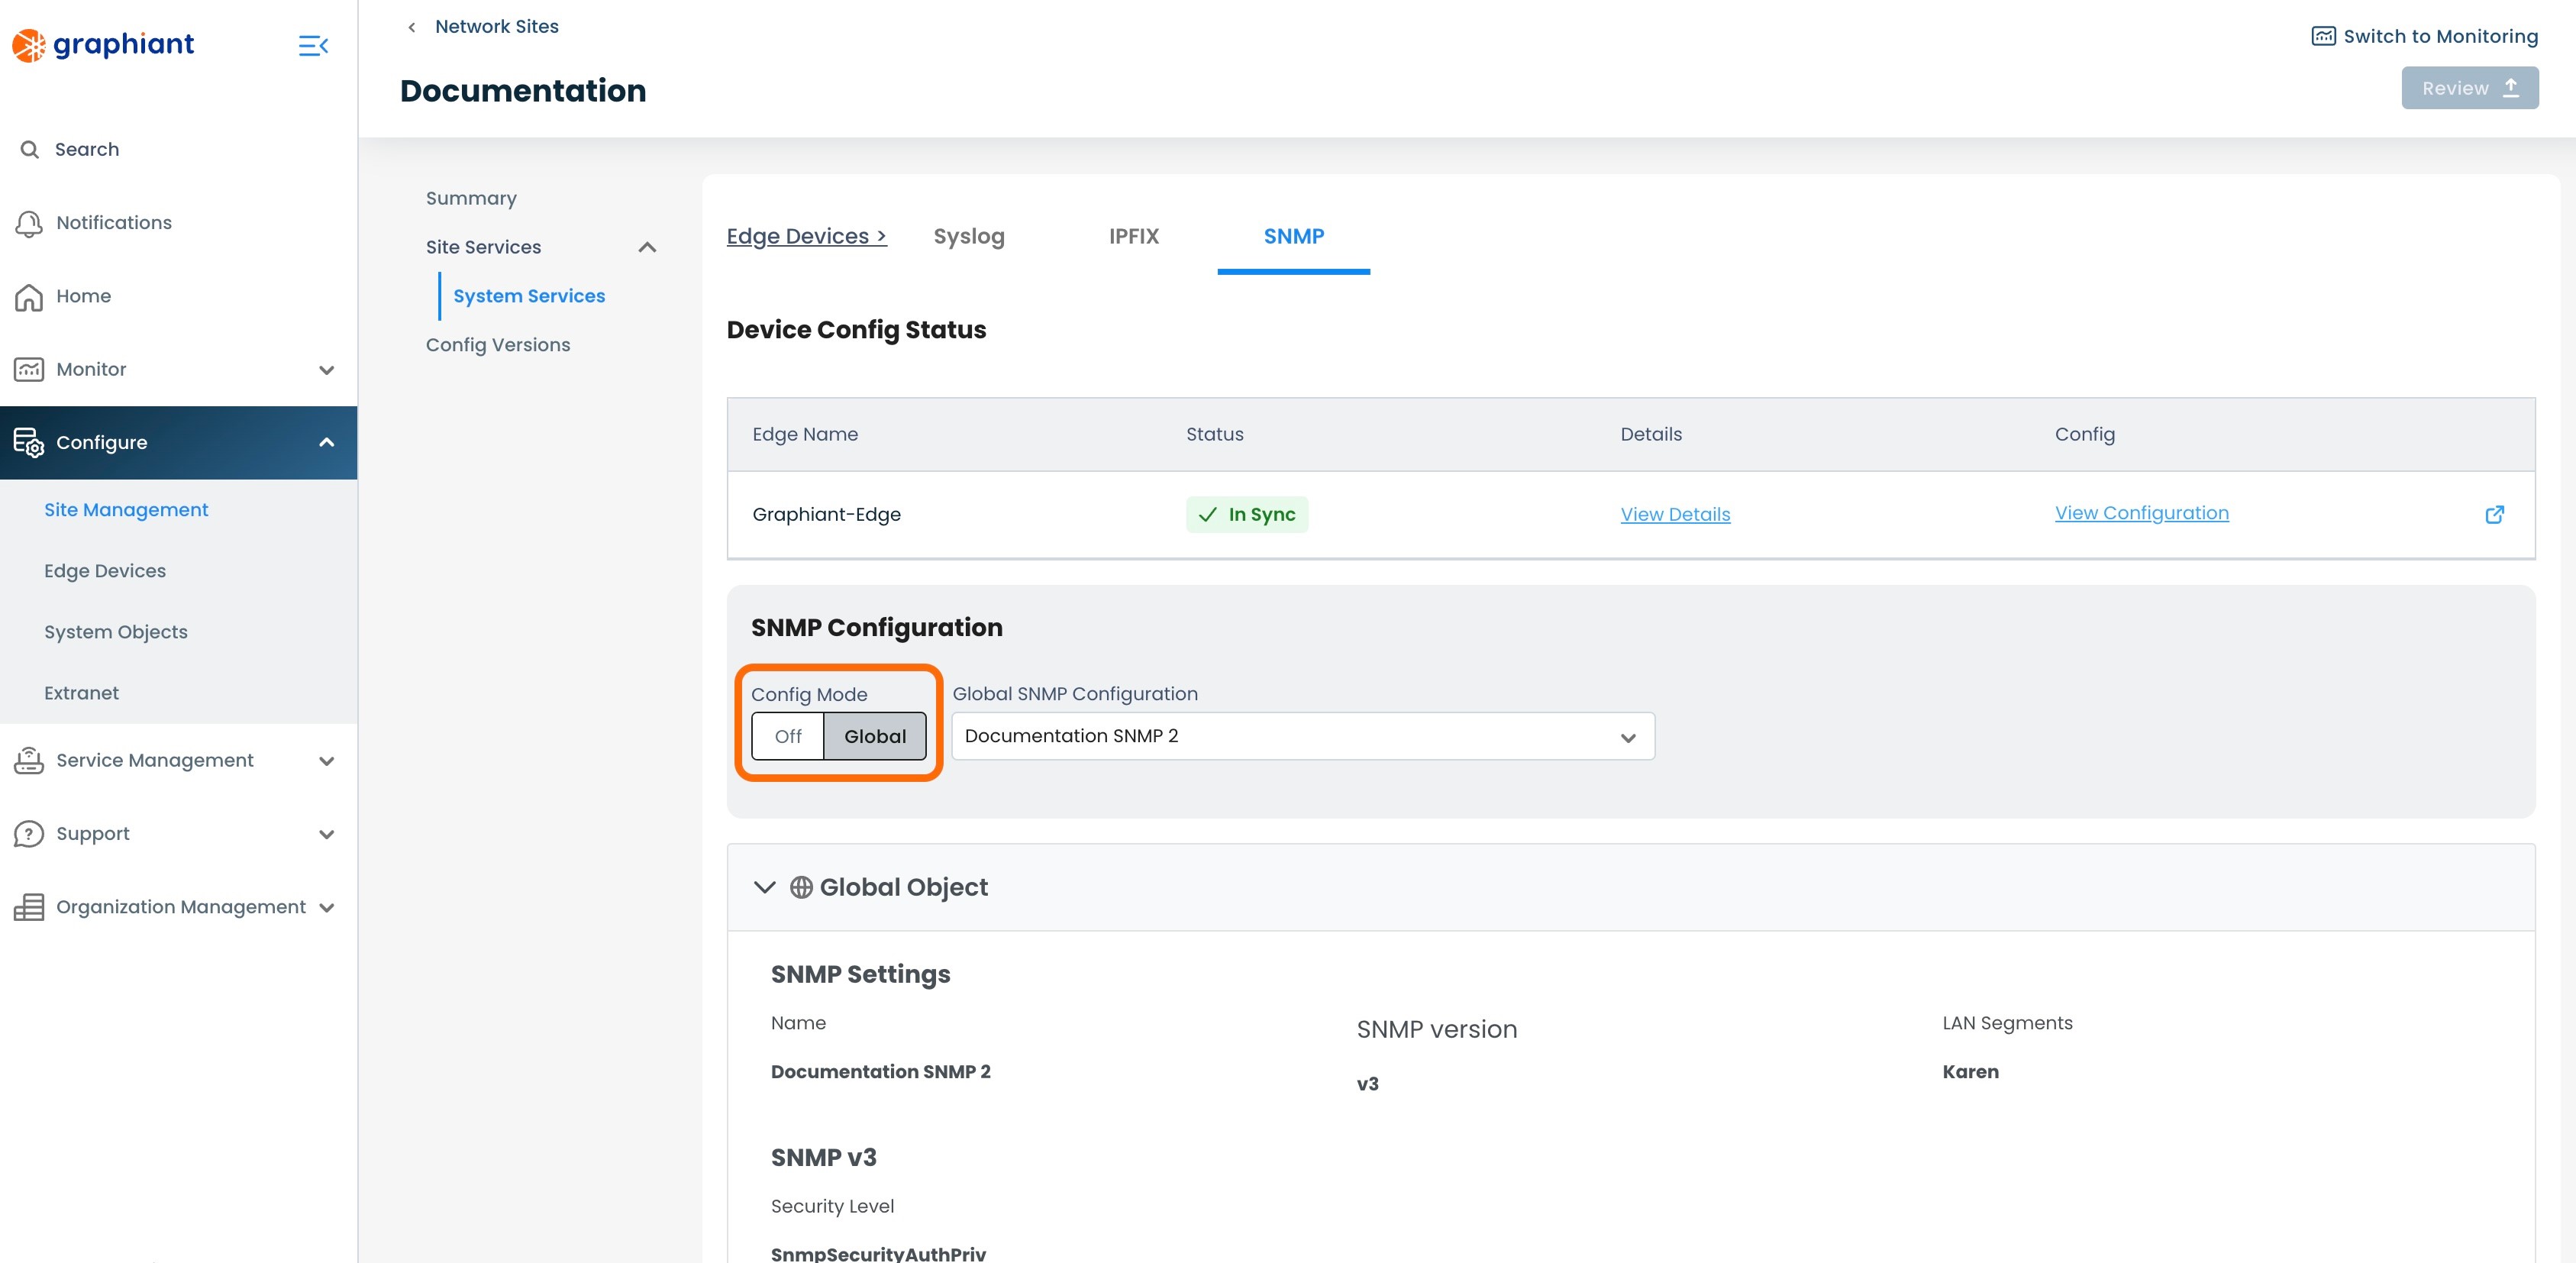
Click 'System' under "SNMP Configuration".
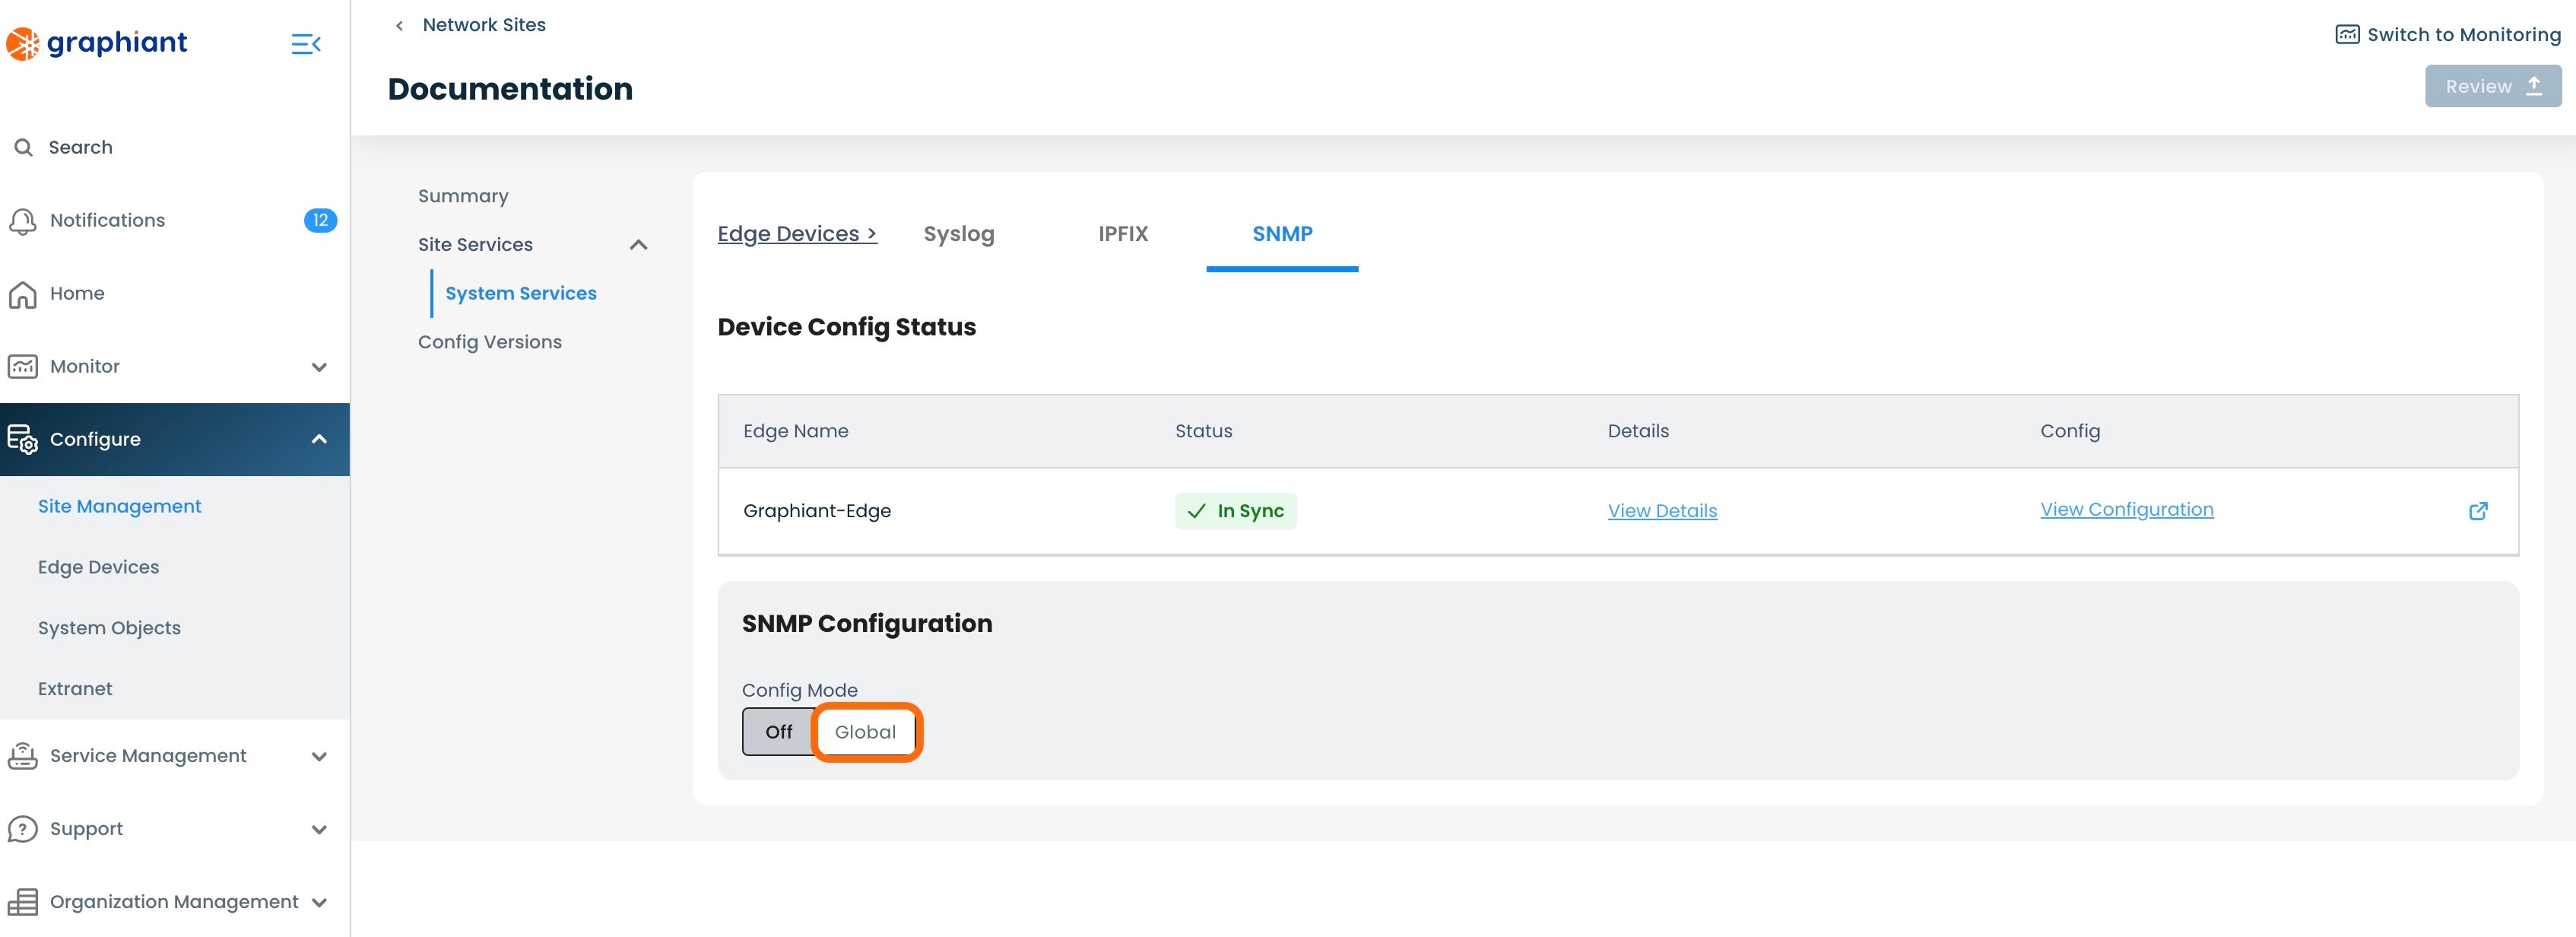
A "System SNMP Configuration" field will pop up; select the desired SNMP server to attach to the Site.
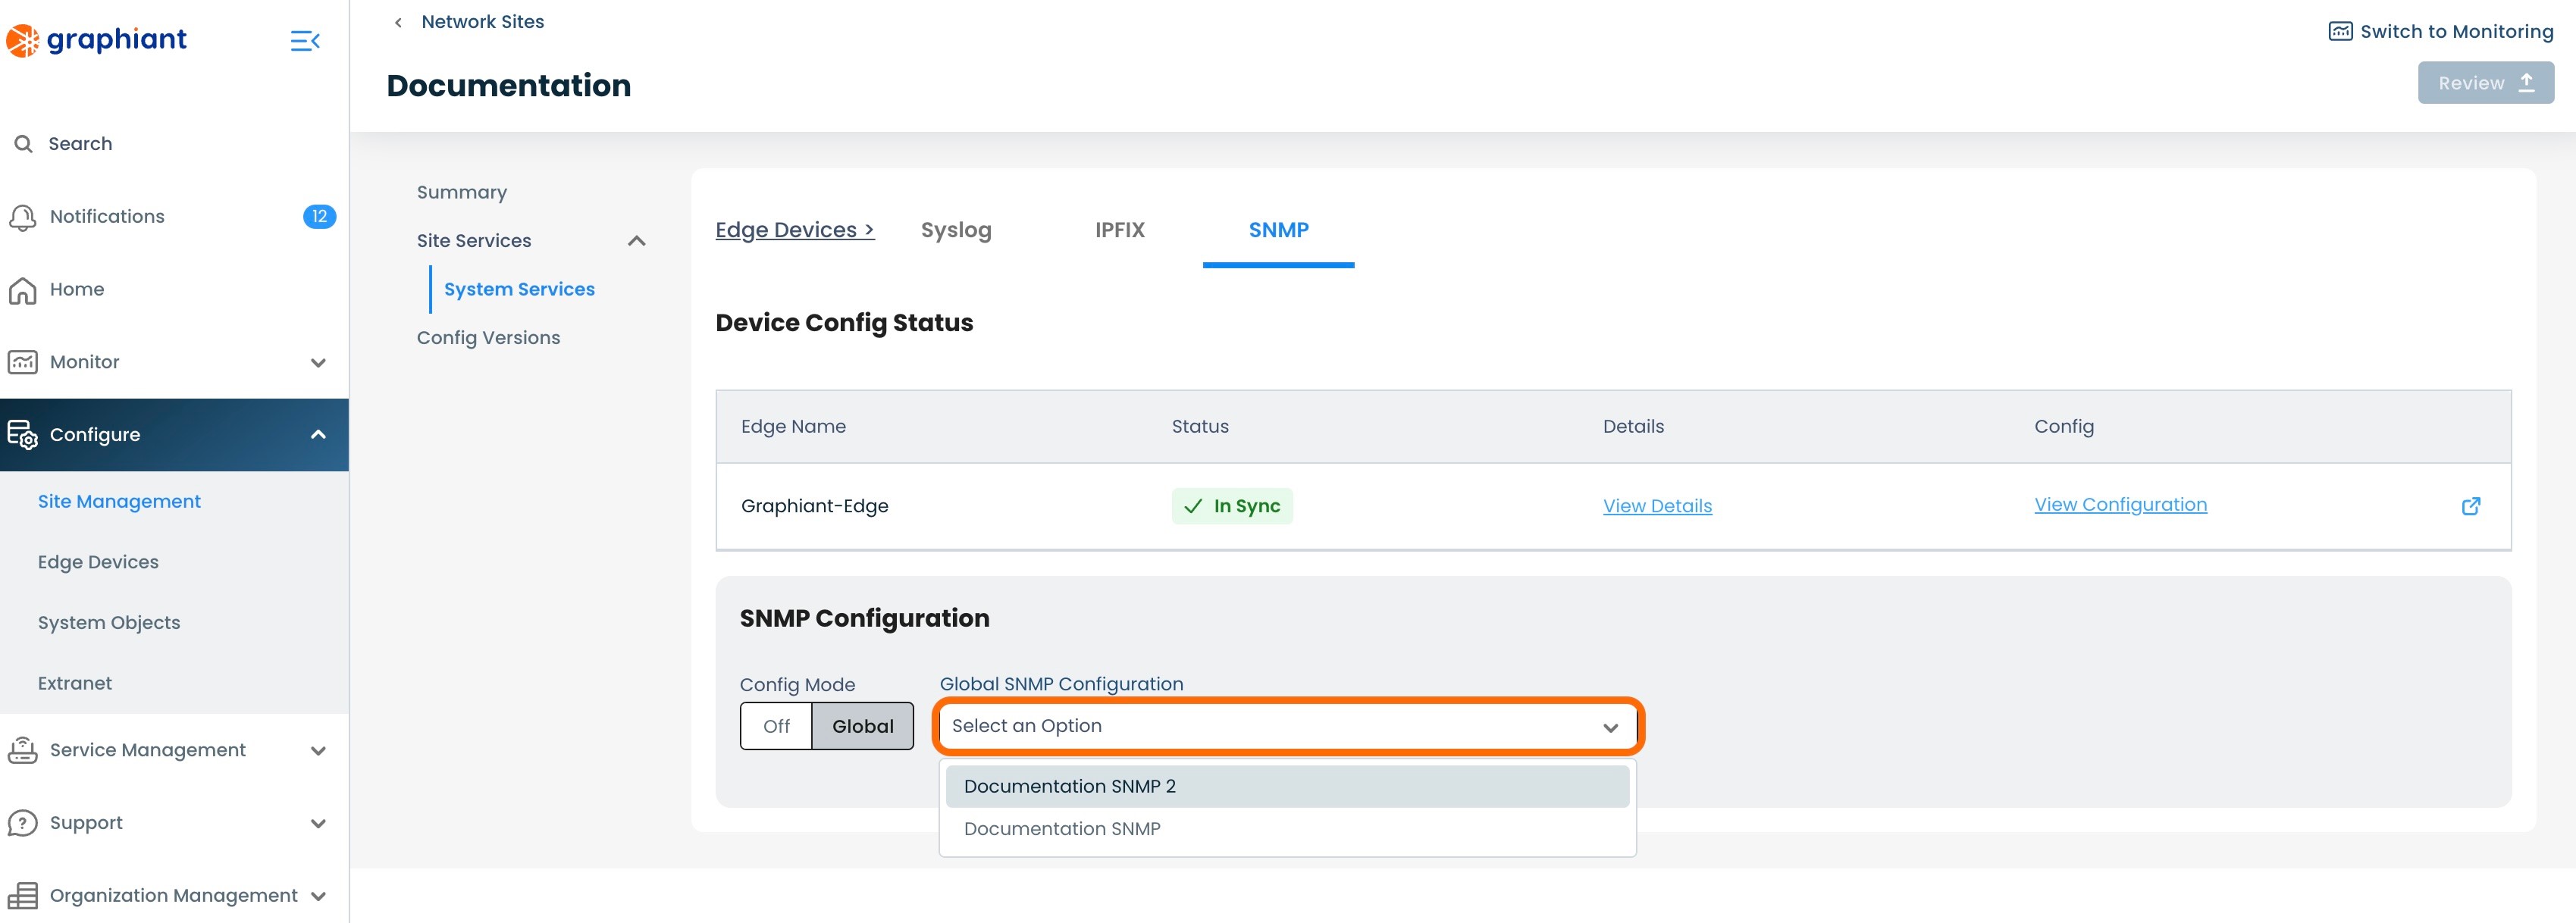
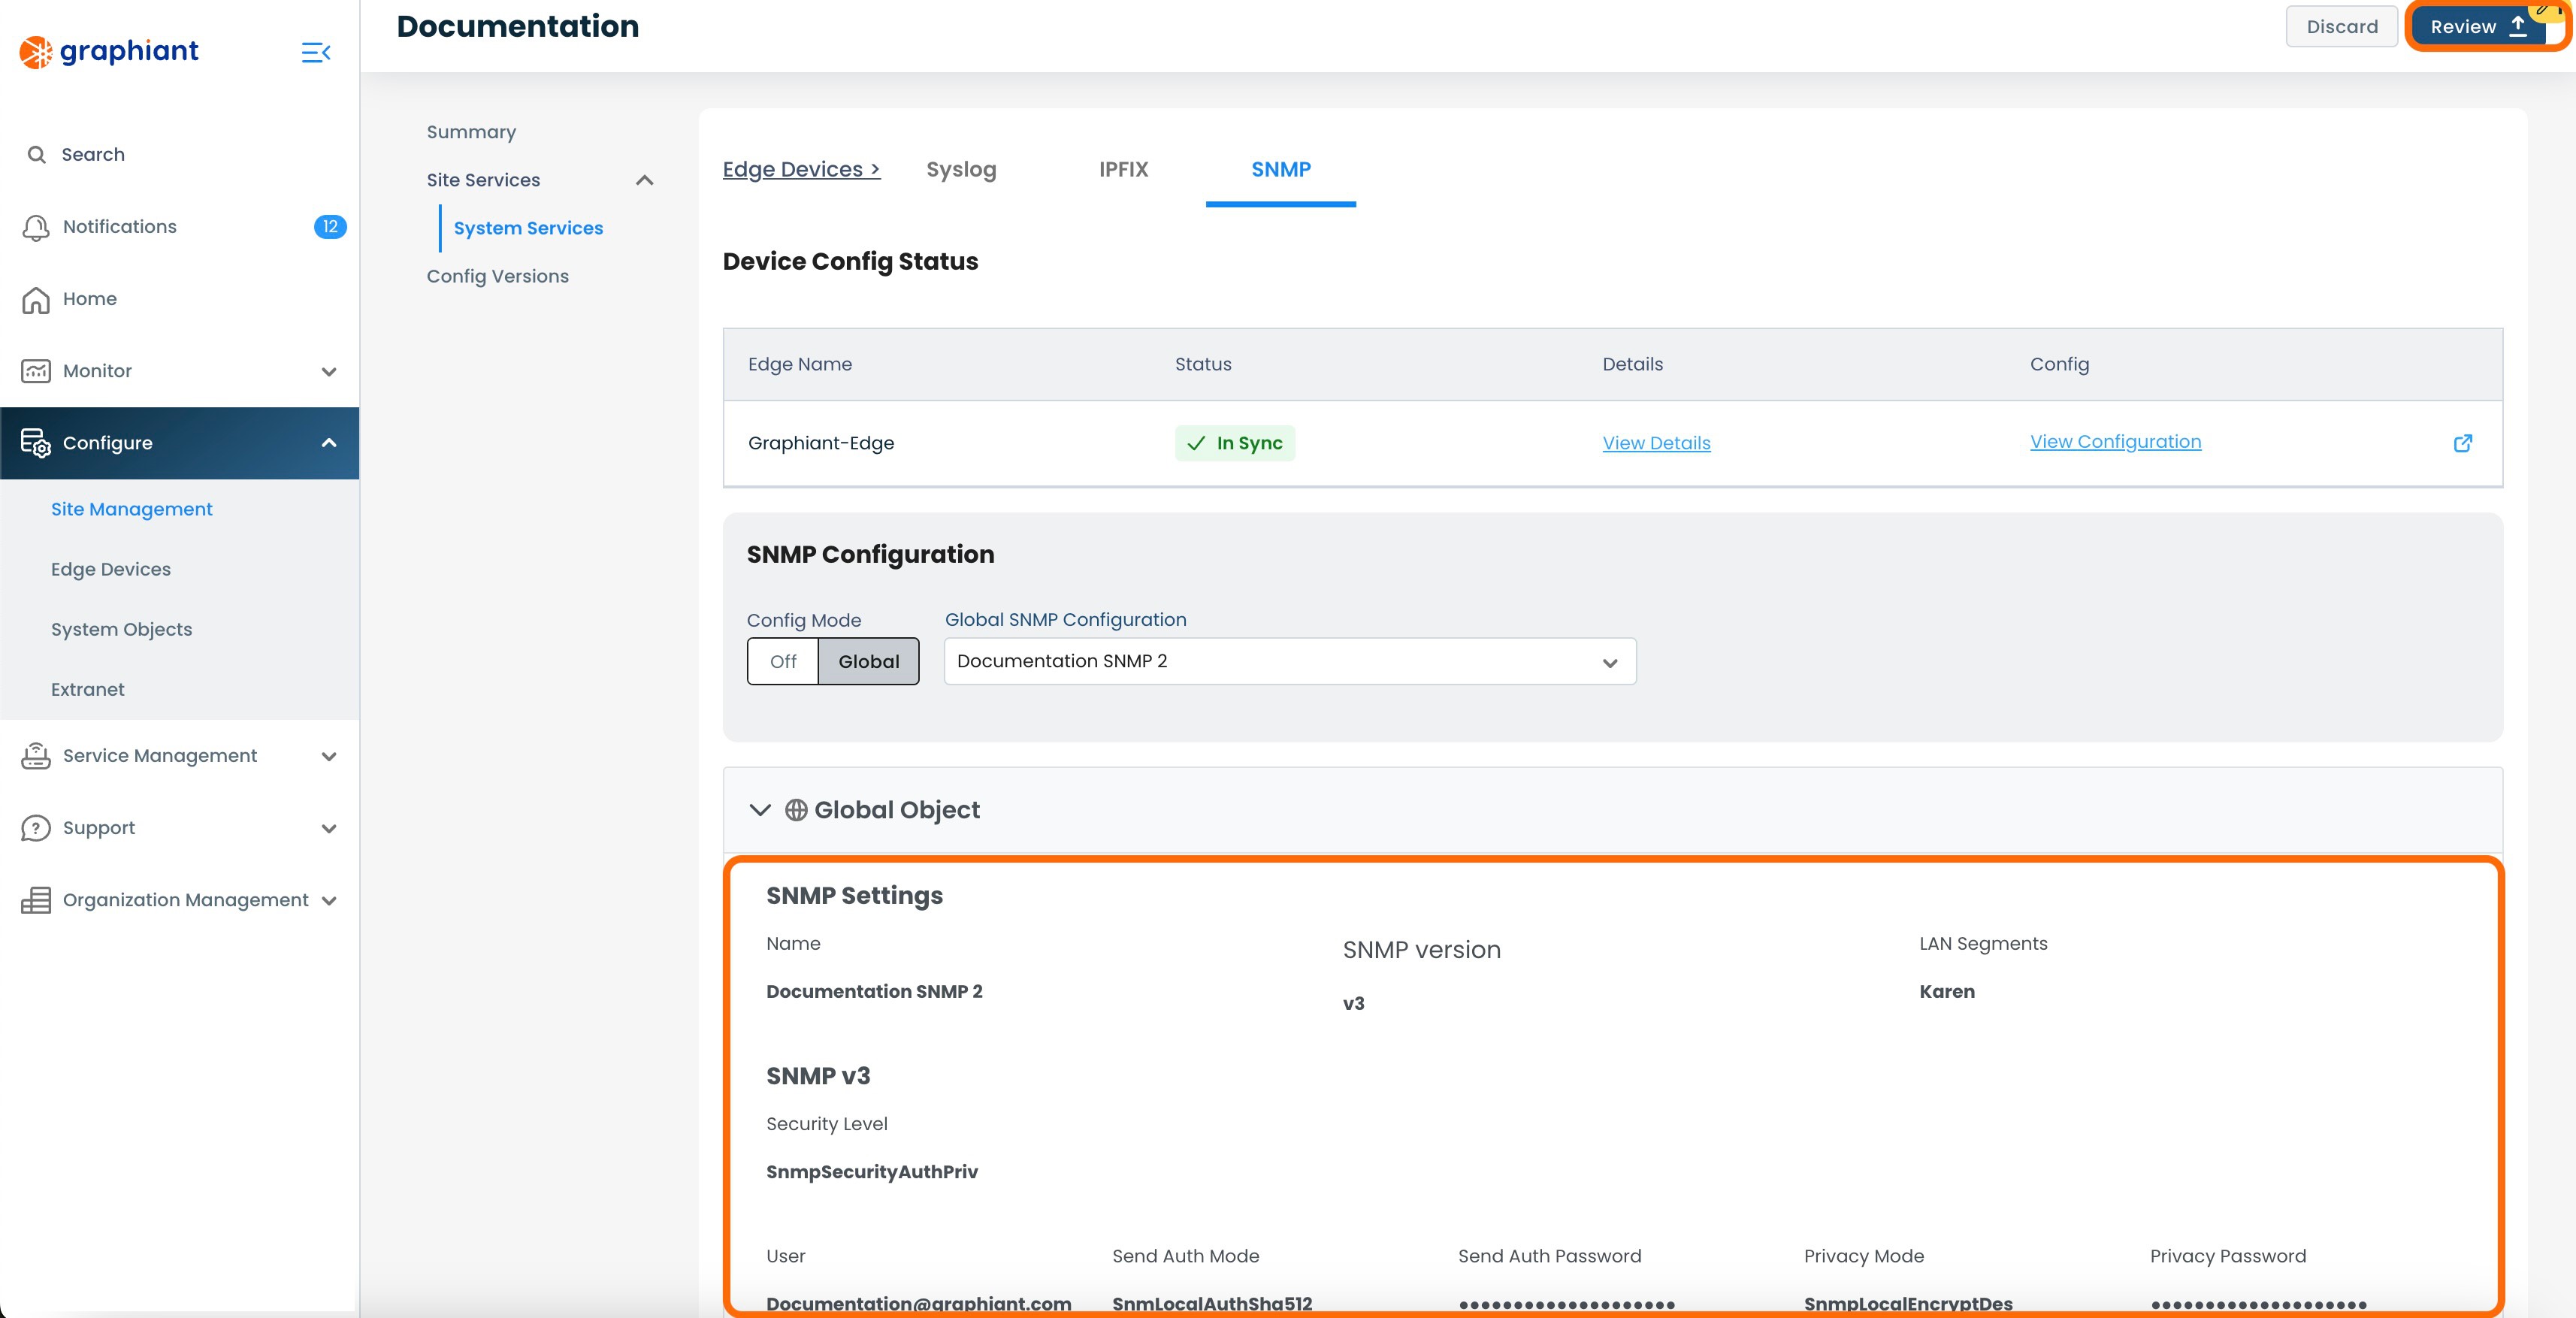
The configuration of the selected SNMP Server will be displayed.
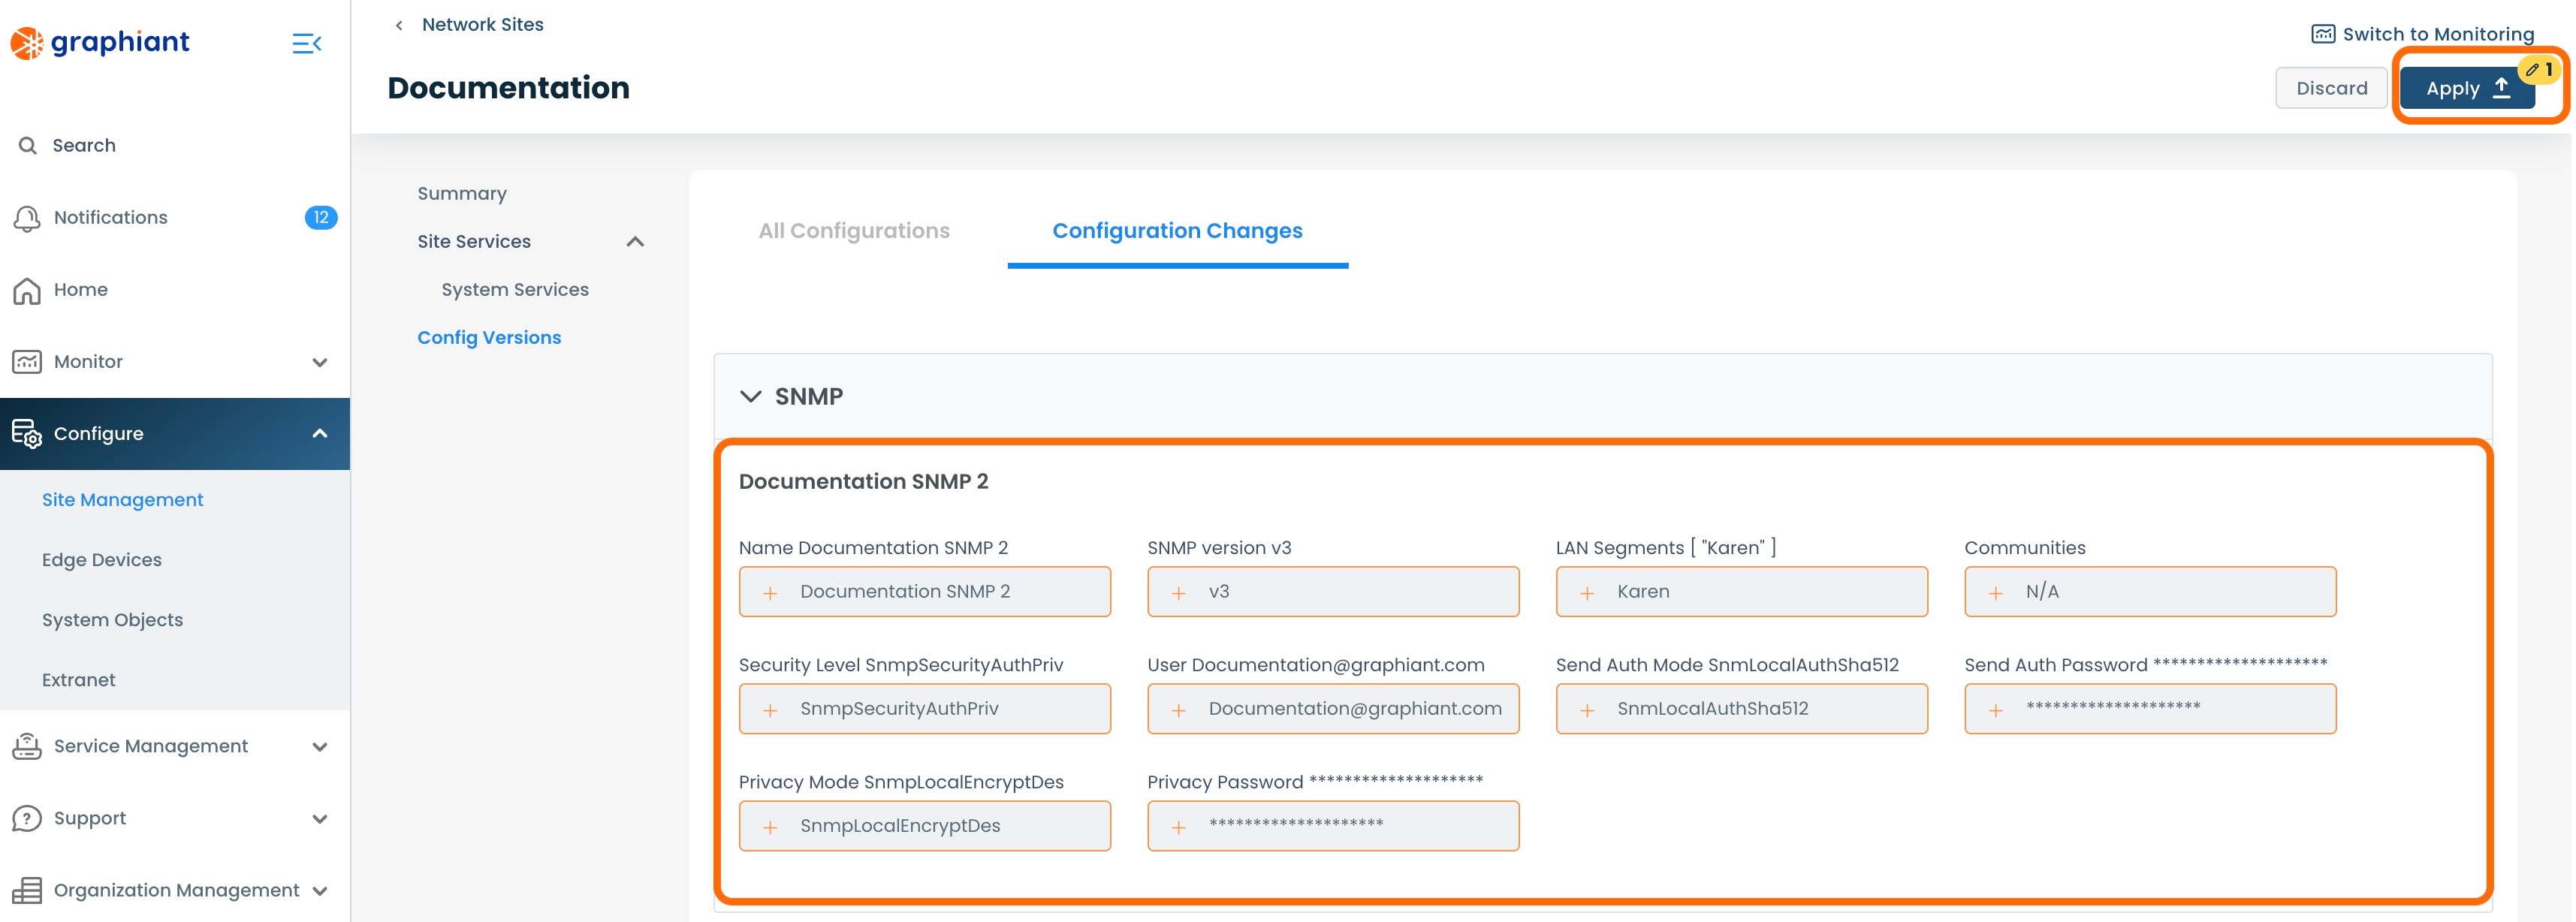
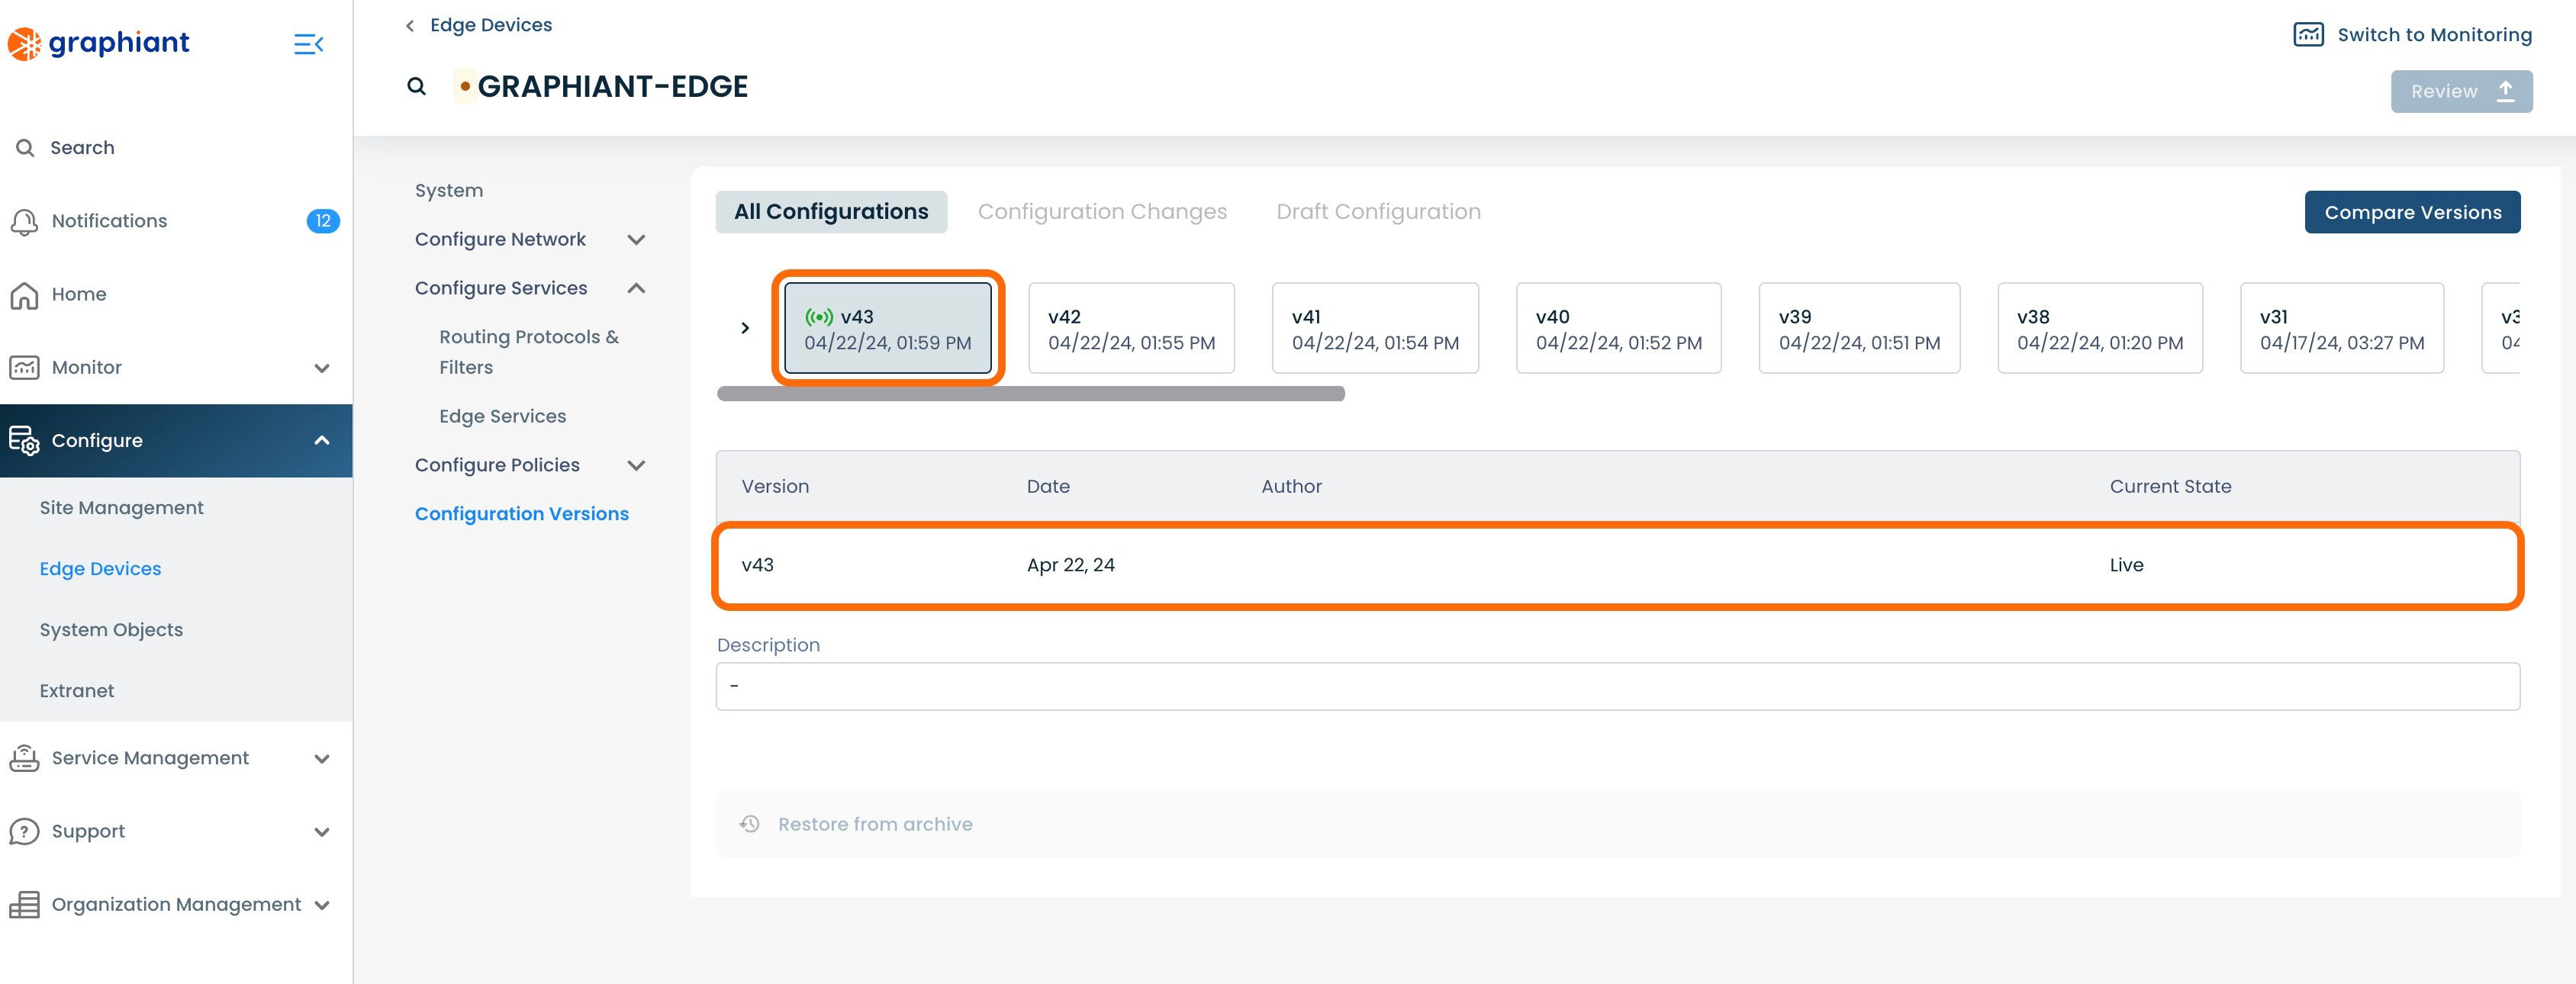
Click 'Review'.
This will bring up the "Configuration Versions" screen, listing the changes that will occur once the Configuration is applied.
Click 'Apply'.
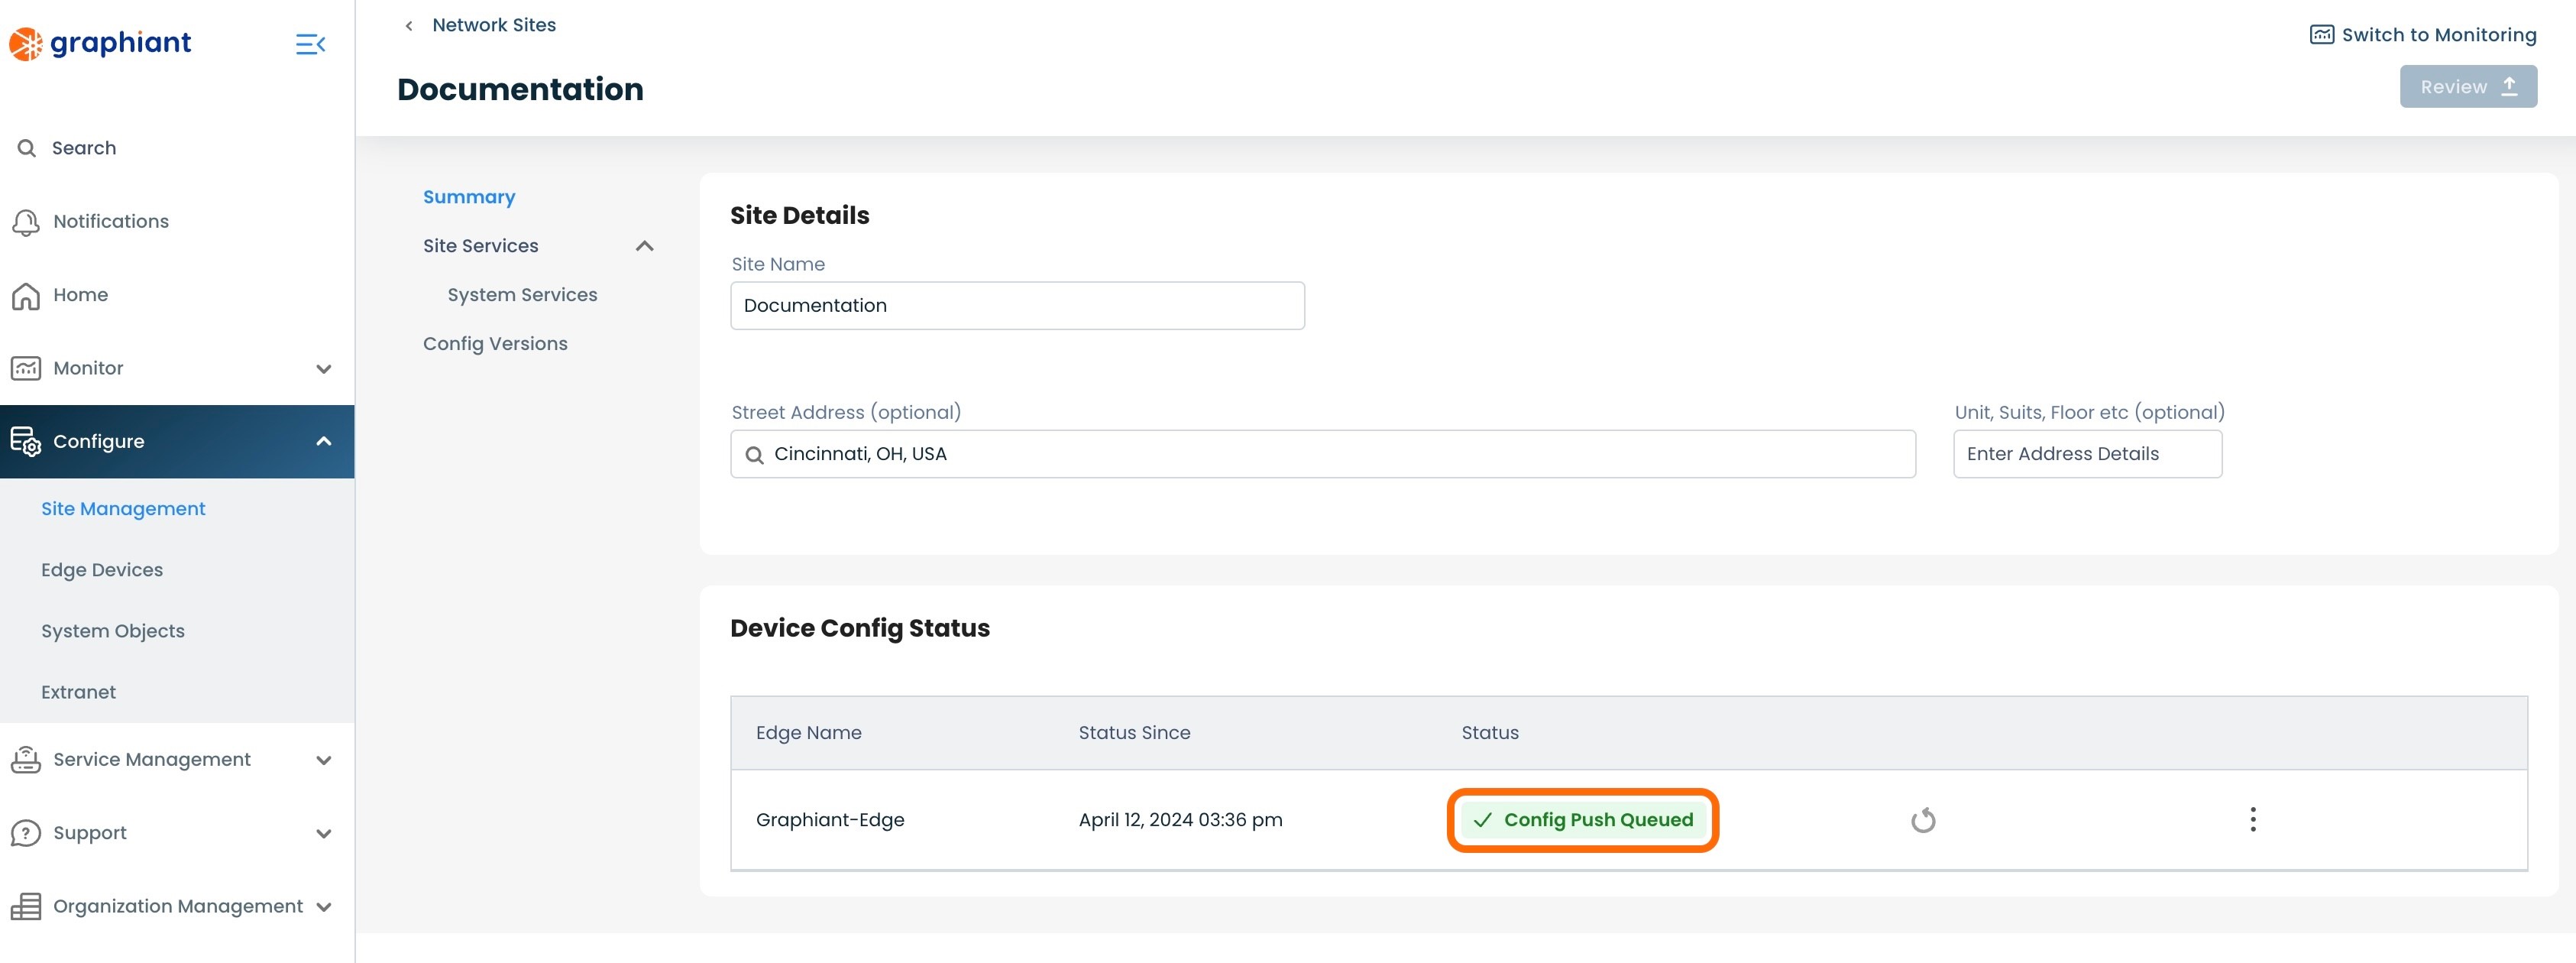
A 'Device Config Table' table will appear with the status of the Edge(s) on that Site being "Config Push Queued".
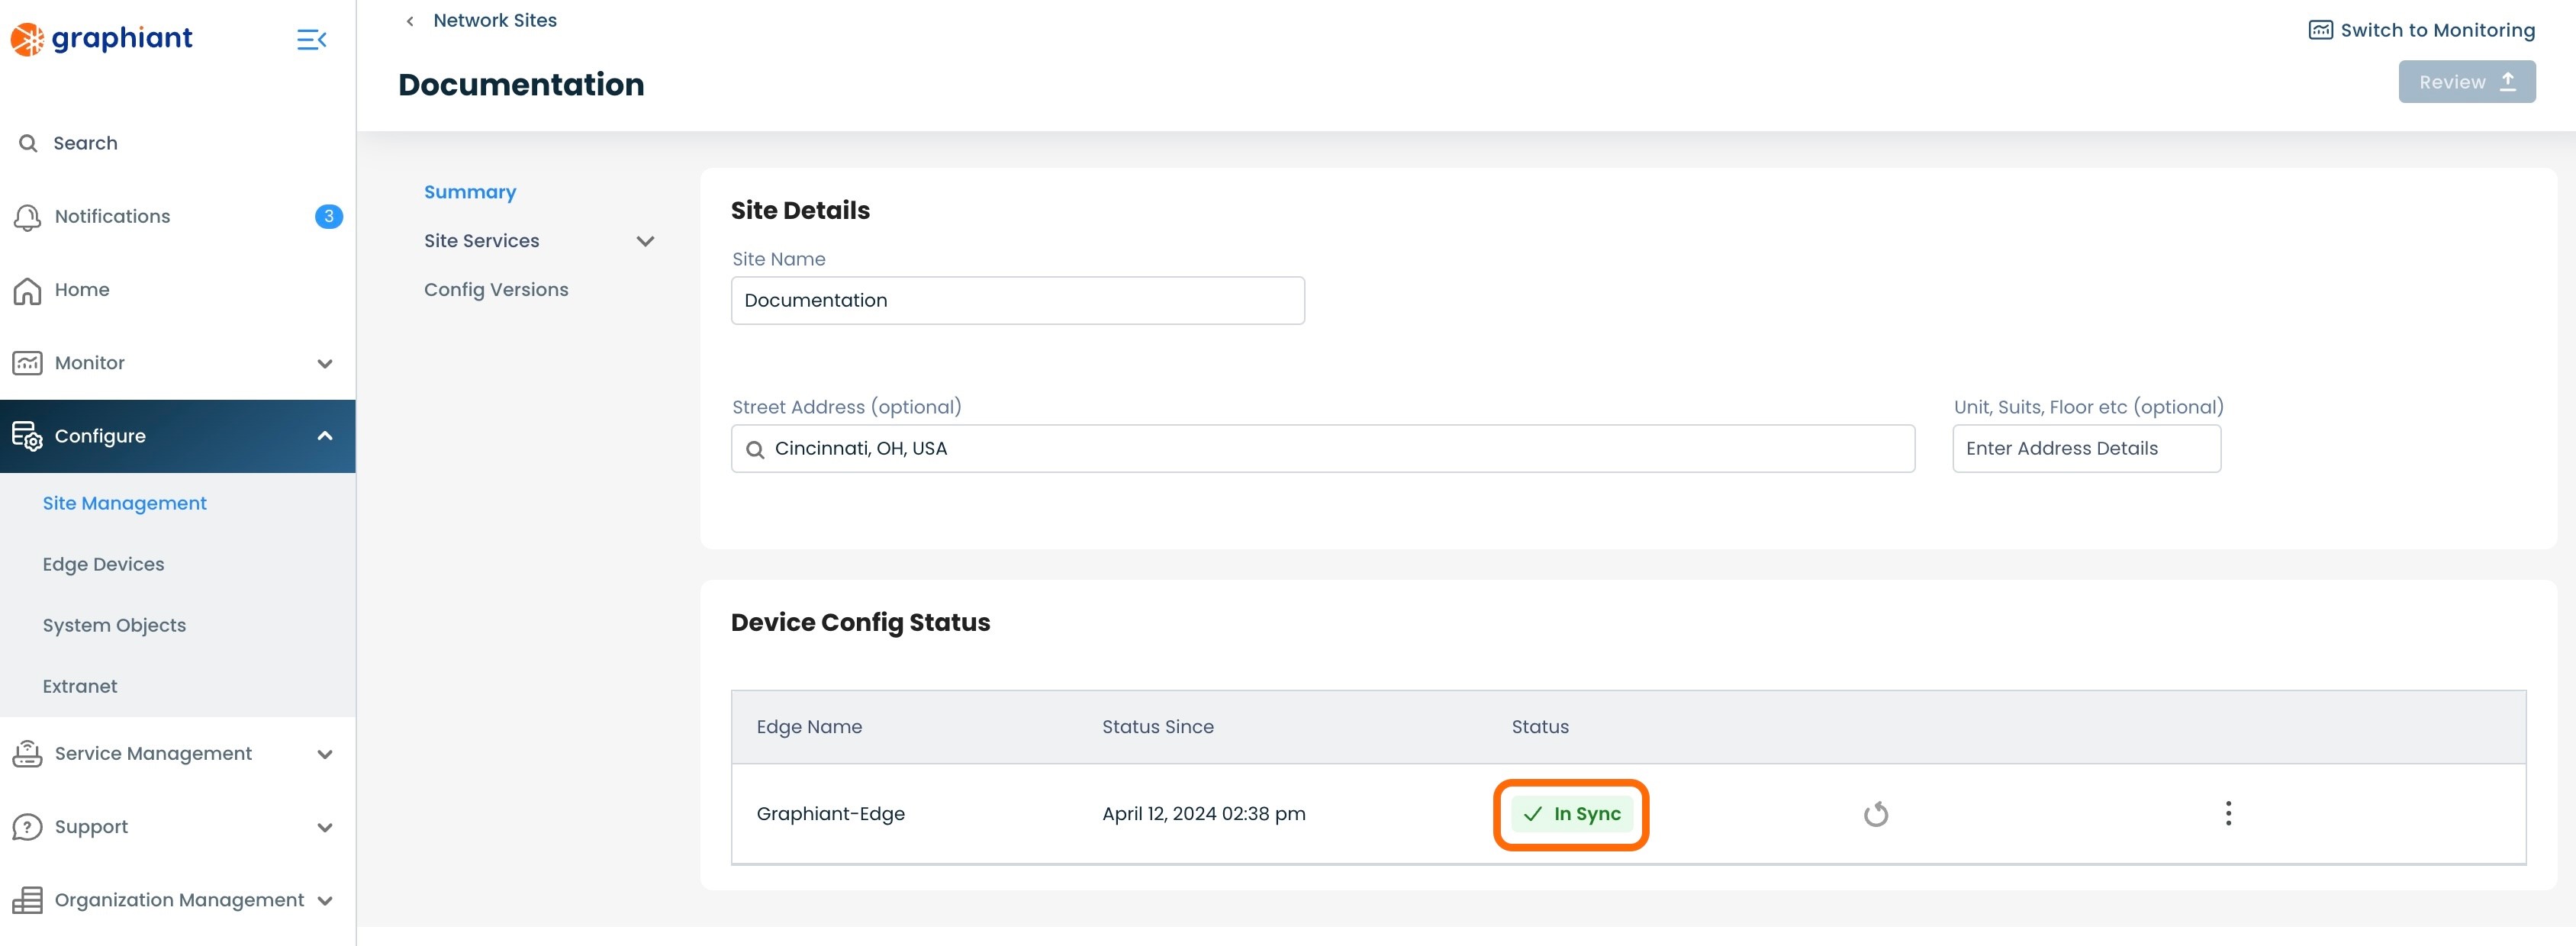
When the configuration from the Site to the Edge(s) is complete, the status of the Edge(s) will be "In Sync".
Note:
If any other System Service (Syslog, IPFIX) is in override for that Edge, the status will read as "Override". (Click here for Configuration Status information.)
From the 'Site Services'; 'System Services' menu under the Summary on the left then navigating to the 'SNMP' tab, the SNMP Server will appear in the Site and its configuration will be visible.

Configuration Status from the Site to the Graphiant Edge
The 'Status' field of each Edge in a Site can be reported in the following terms:
"In Sync": The Edge configuration is synced with the Site configuration; the Edge is doing exactly what the Site is telling it to do.
"Override": The Edge configuration is not synced with the Site configuration; this will be the status if you are overriding the Site to perform necessary changes directly on the Edge.
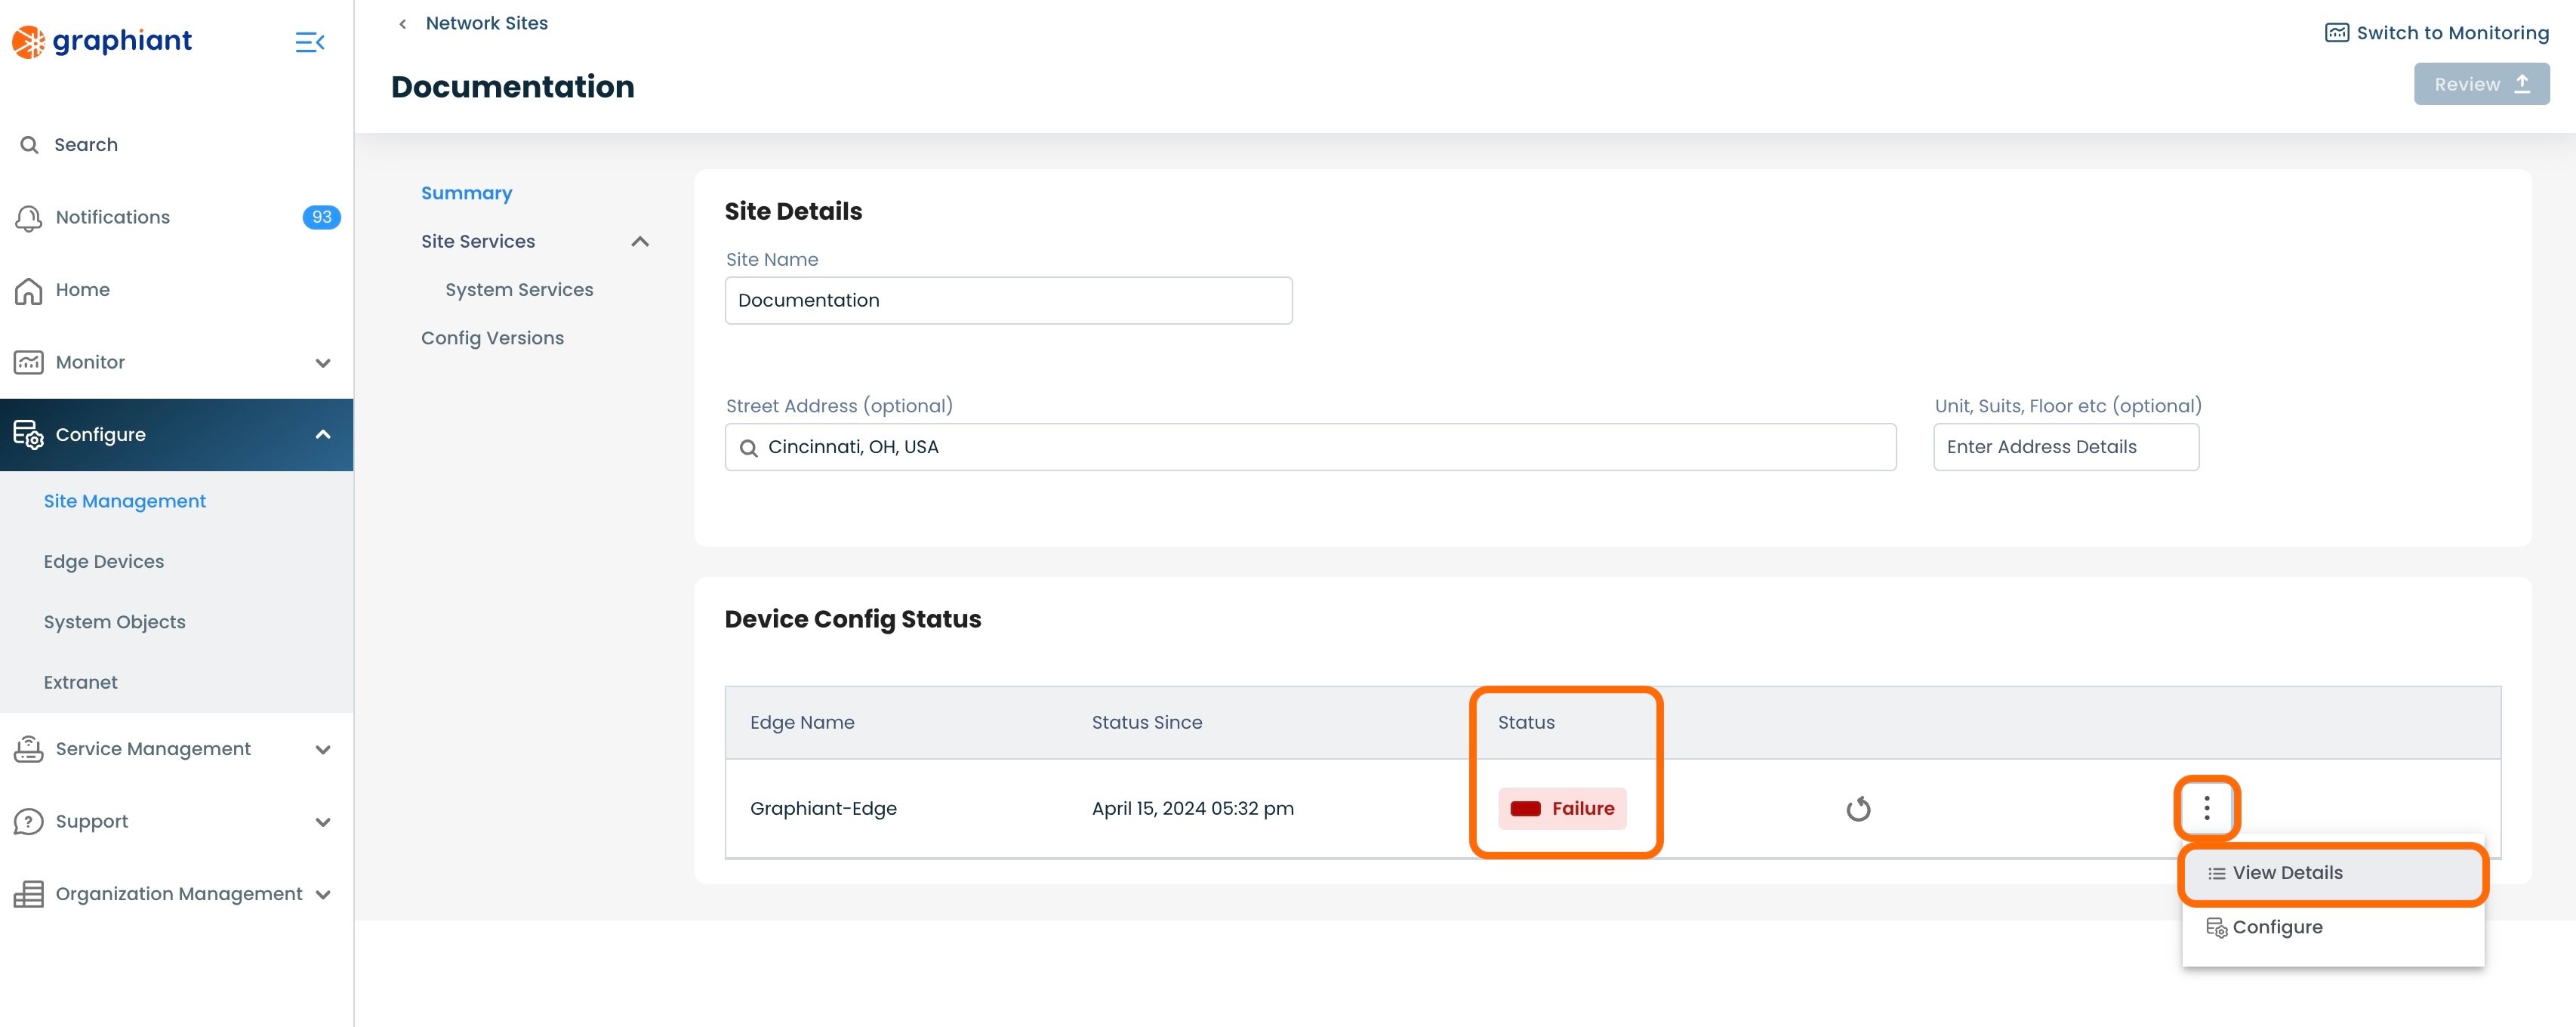
"Failure": The Site configuration failed when it attempted to push its configuration to the Edge.
If an SNMP attachment results in "Failure" Status
Locating the Failure Status Error Message
The failure status error message can be found in 3 locations within the Graphiant Portal, for ease of discovery wherever you are within the Portal.
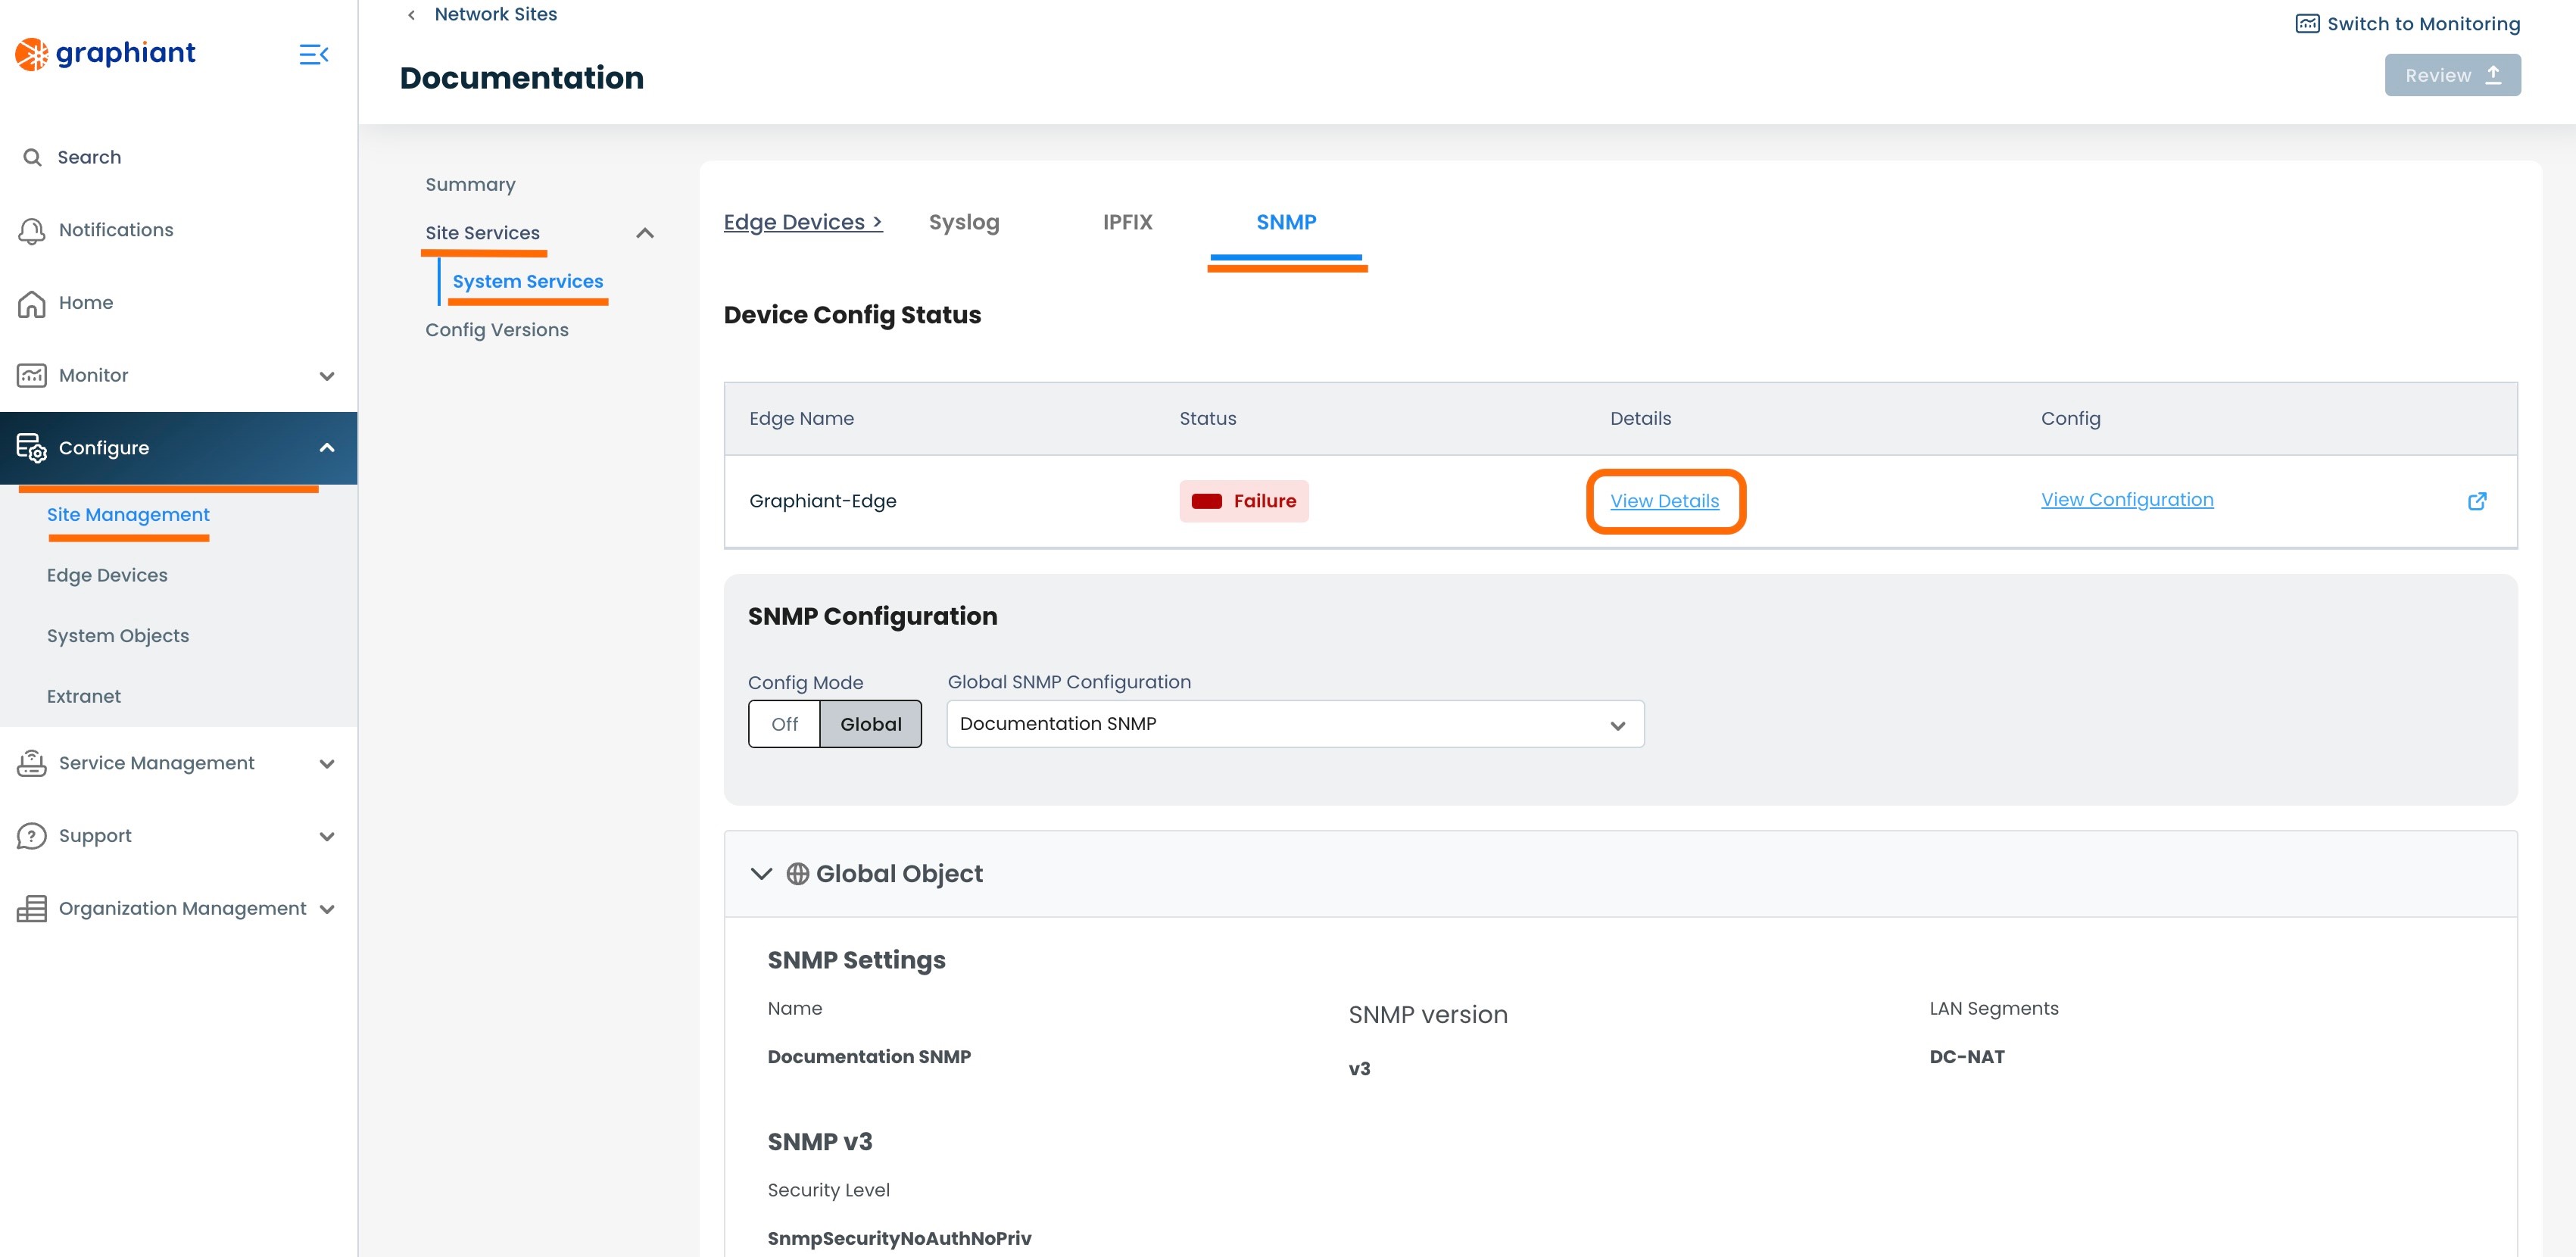
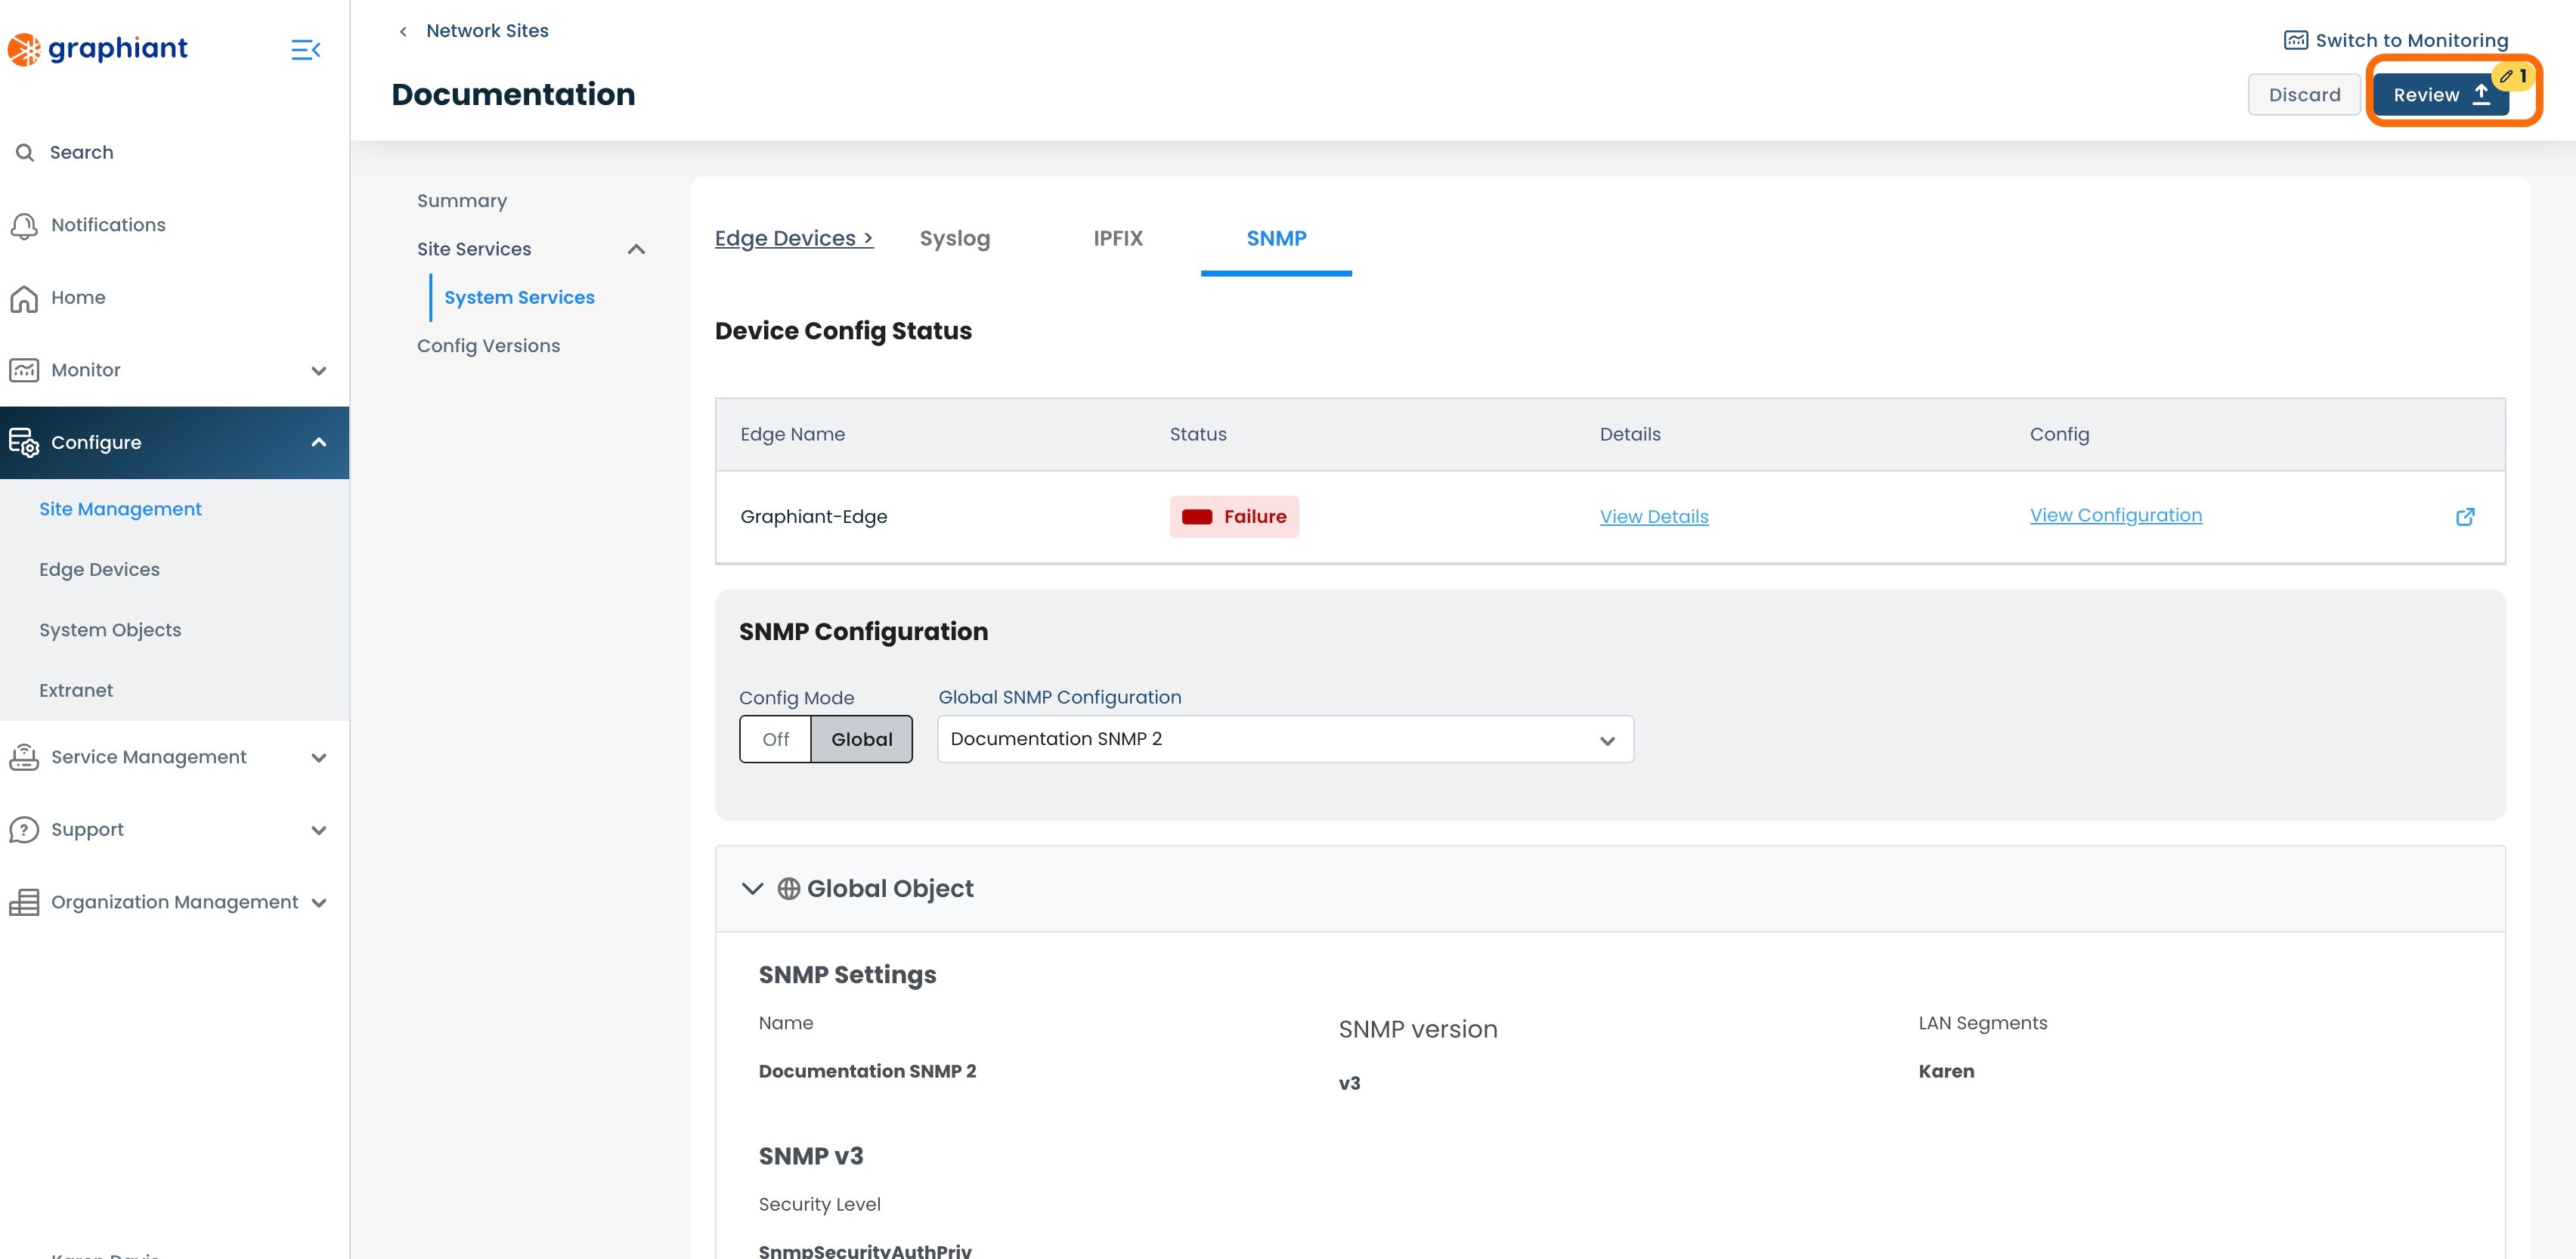
#1: Site Management Summary Screen
Should a Site attachment attempt result in a status of "Failure", the reason for the failure can be immediately seen under the “Device Config Status” by clicking the 3 dots to the right of the Edge, and selecting 'View Details'.
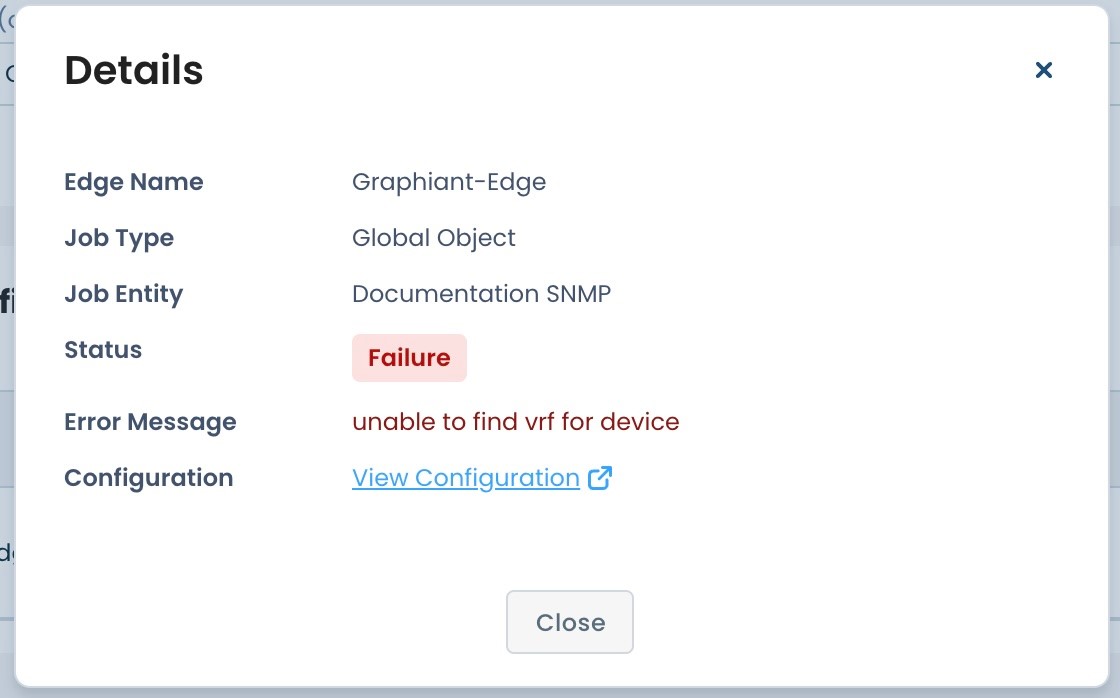
This will bring up a modal of details for the Edge.
The "Error Message" under the Failure Status will explain the reason for the failure.
'View Configuration' will bring up the Edge configuration, if desired.
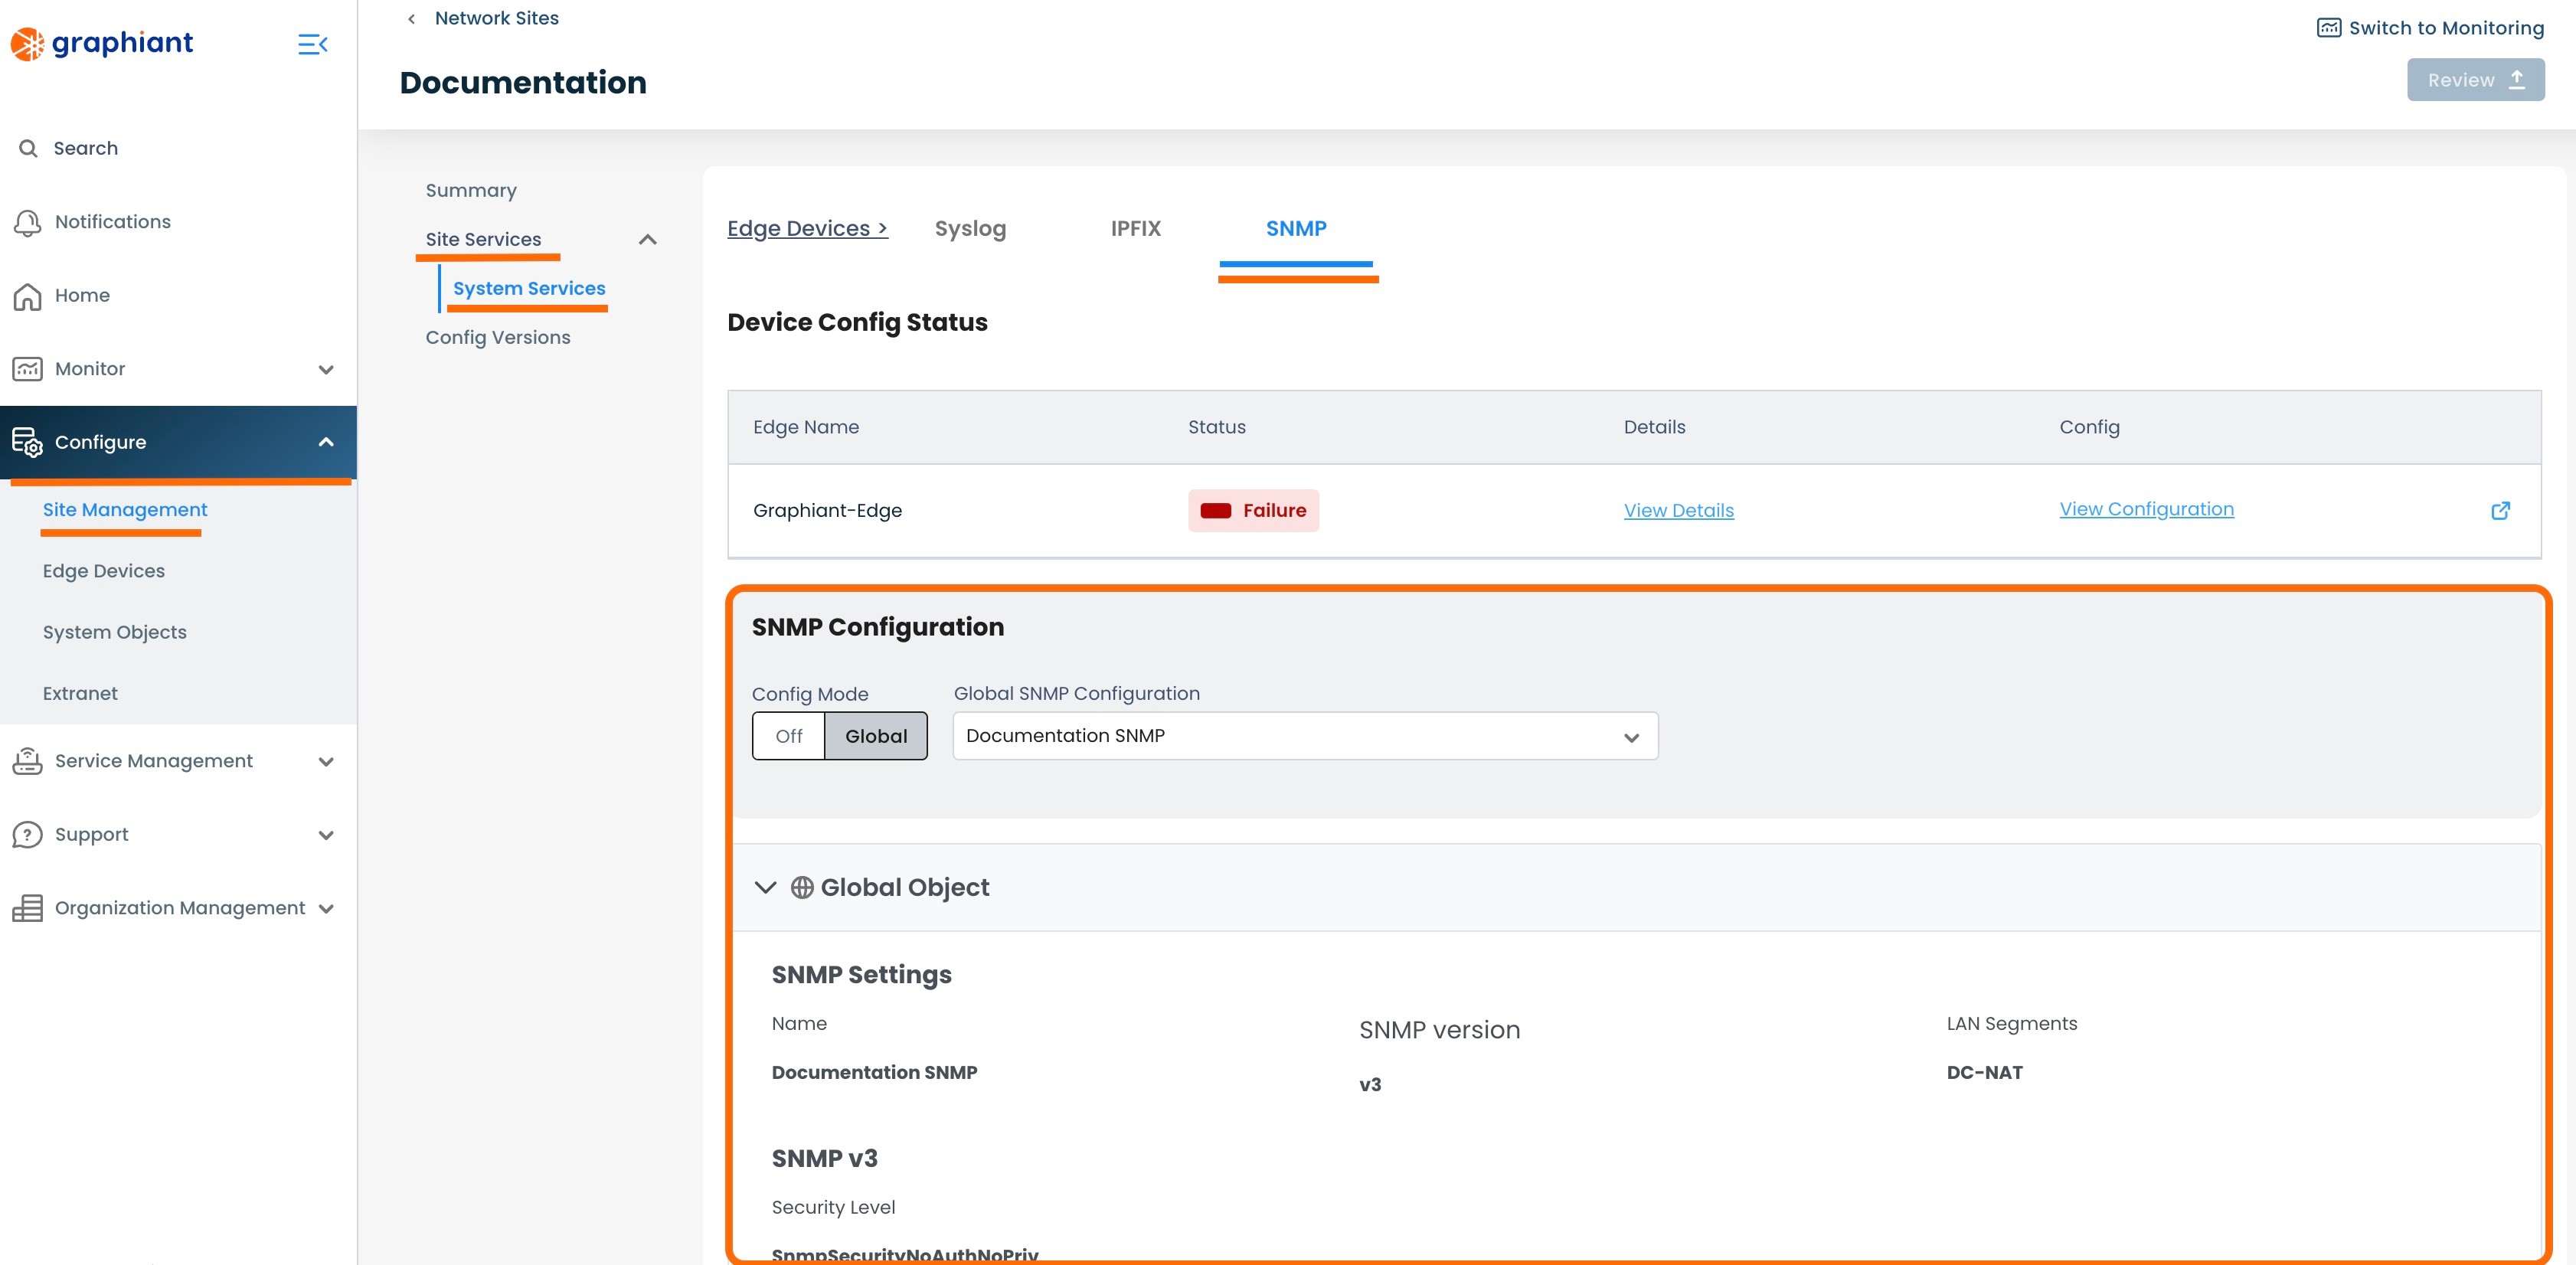
#2: Site Management SNMP Screen
Within the Site Management area of the Portal, click 'Site Services'; select 'System Services'; choose the 'SNMP' tab at the top.
Click 'View Details' to the right of the "Failure" status.
This will bring up a modal of details for the Edge.
The "Error Message" under the Failure Status will explain the reason for the failure.
'View Configuration' will bring up the Edge configuration, if desired.
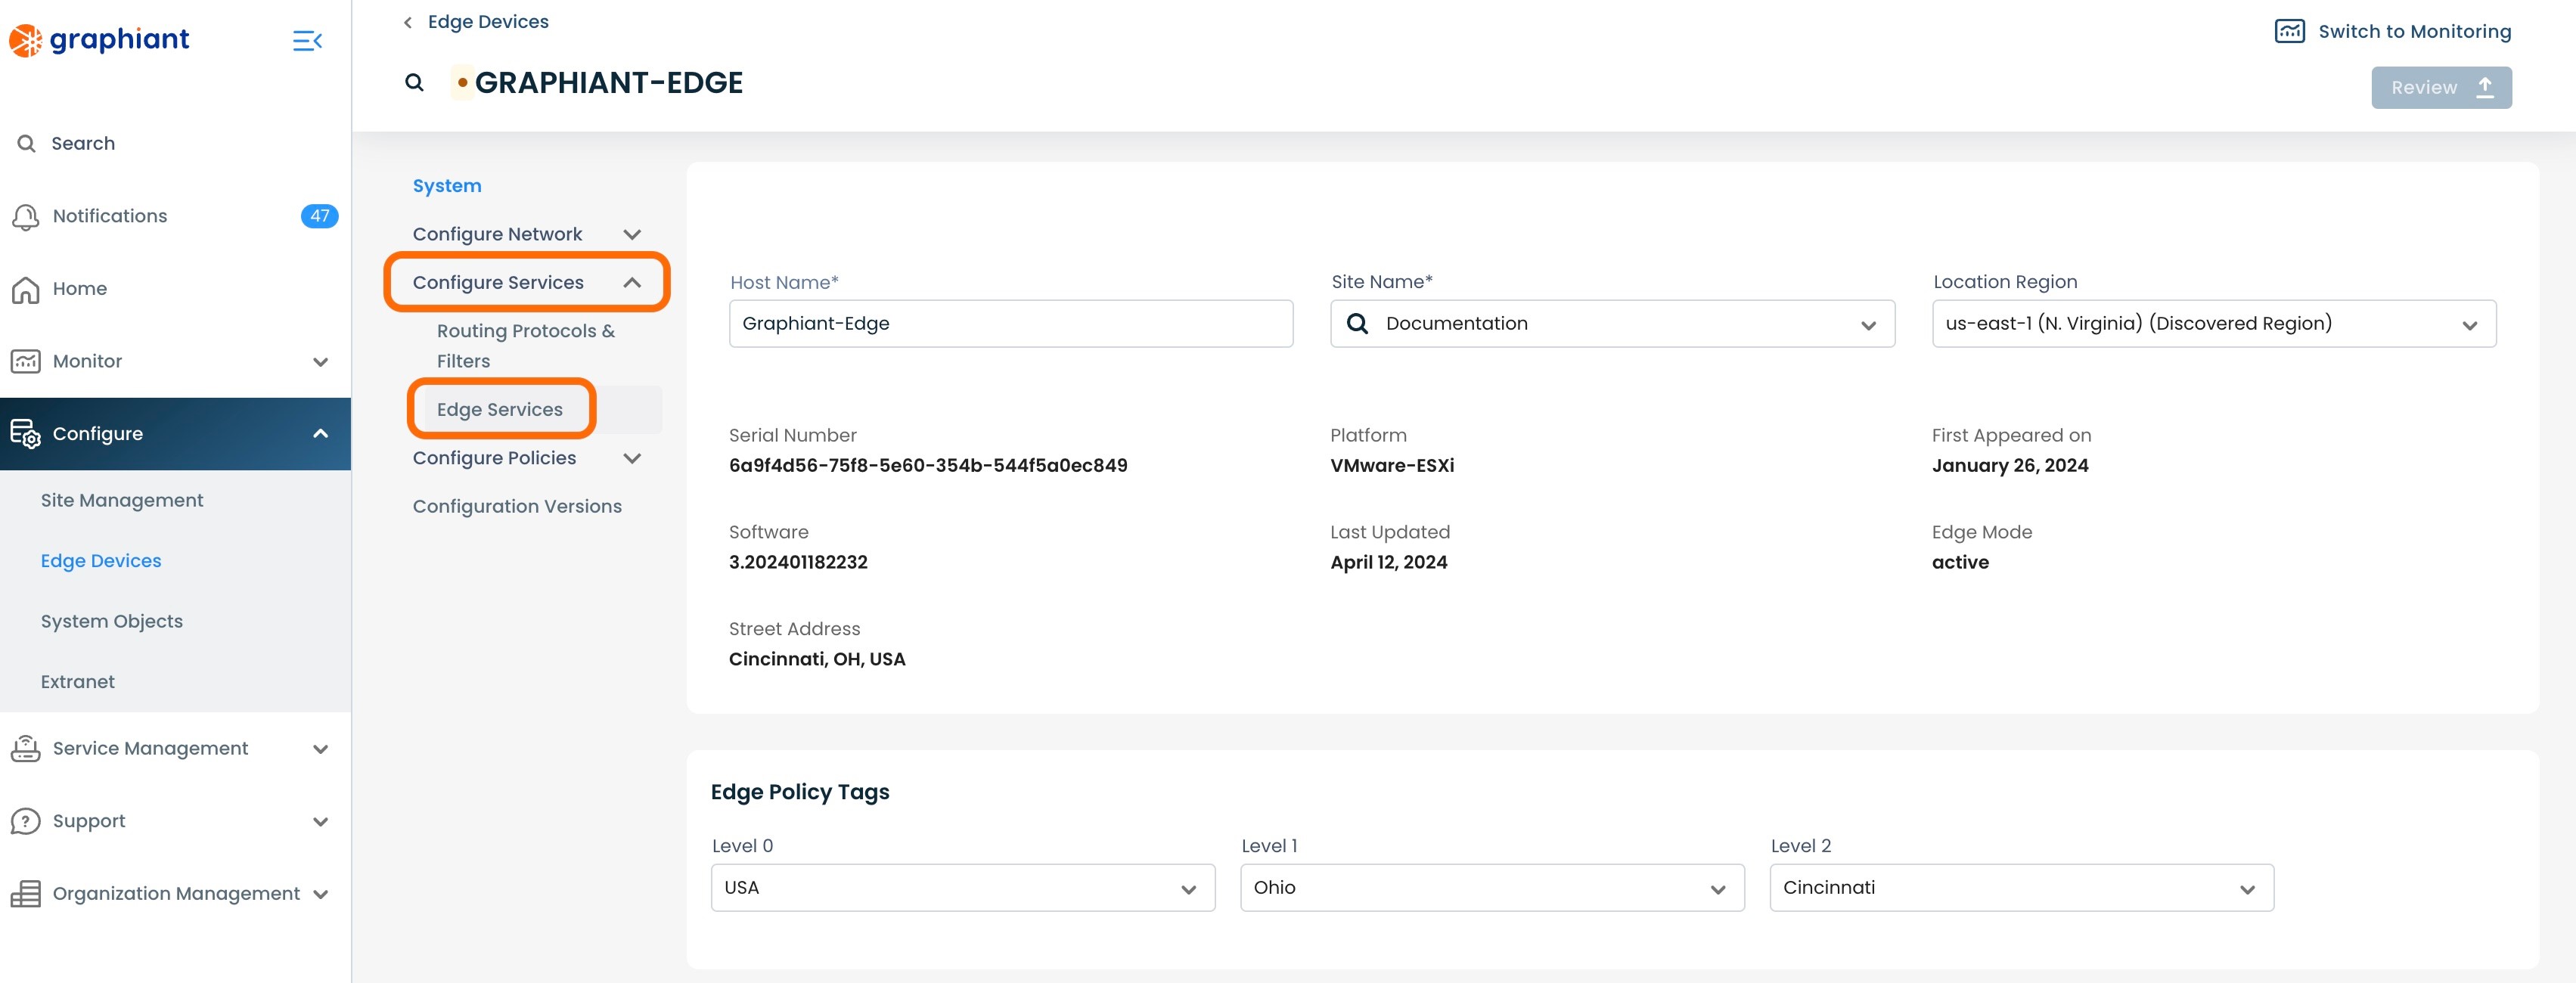
#3: Edge Configuration SNMP Screen
Within the Edge Configuration area of the Portal, click 'Configure Services; select 'Edge Services'; choose the 'SNMP' tab at the top.
Click 'View Failure Details' within the warning message.
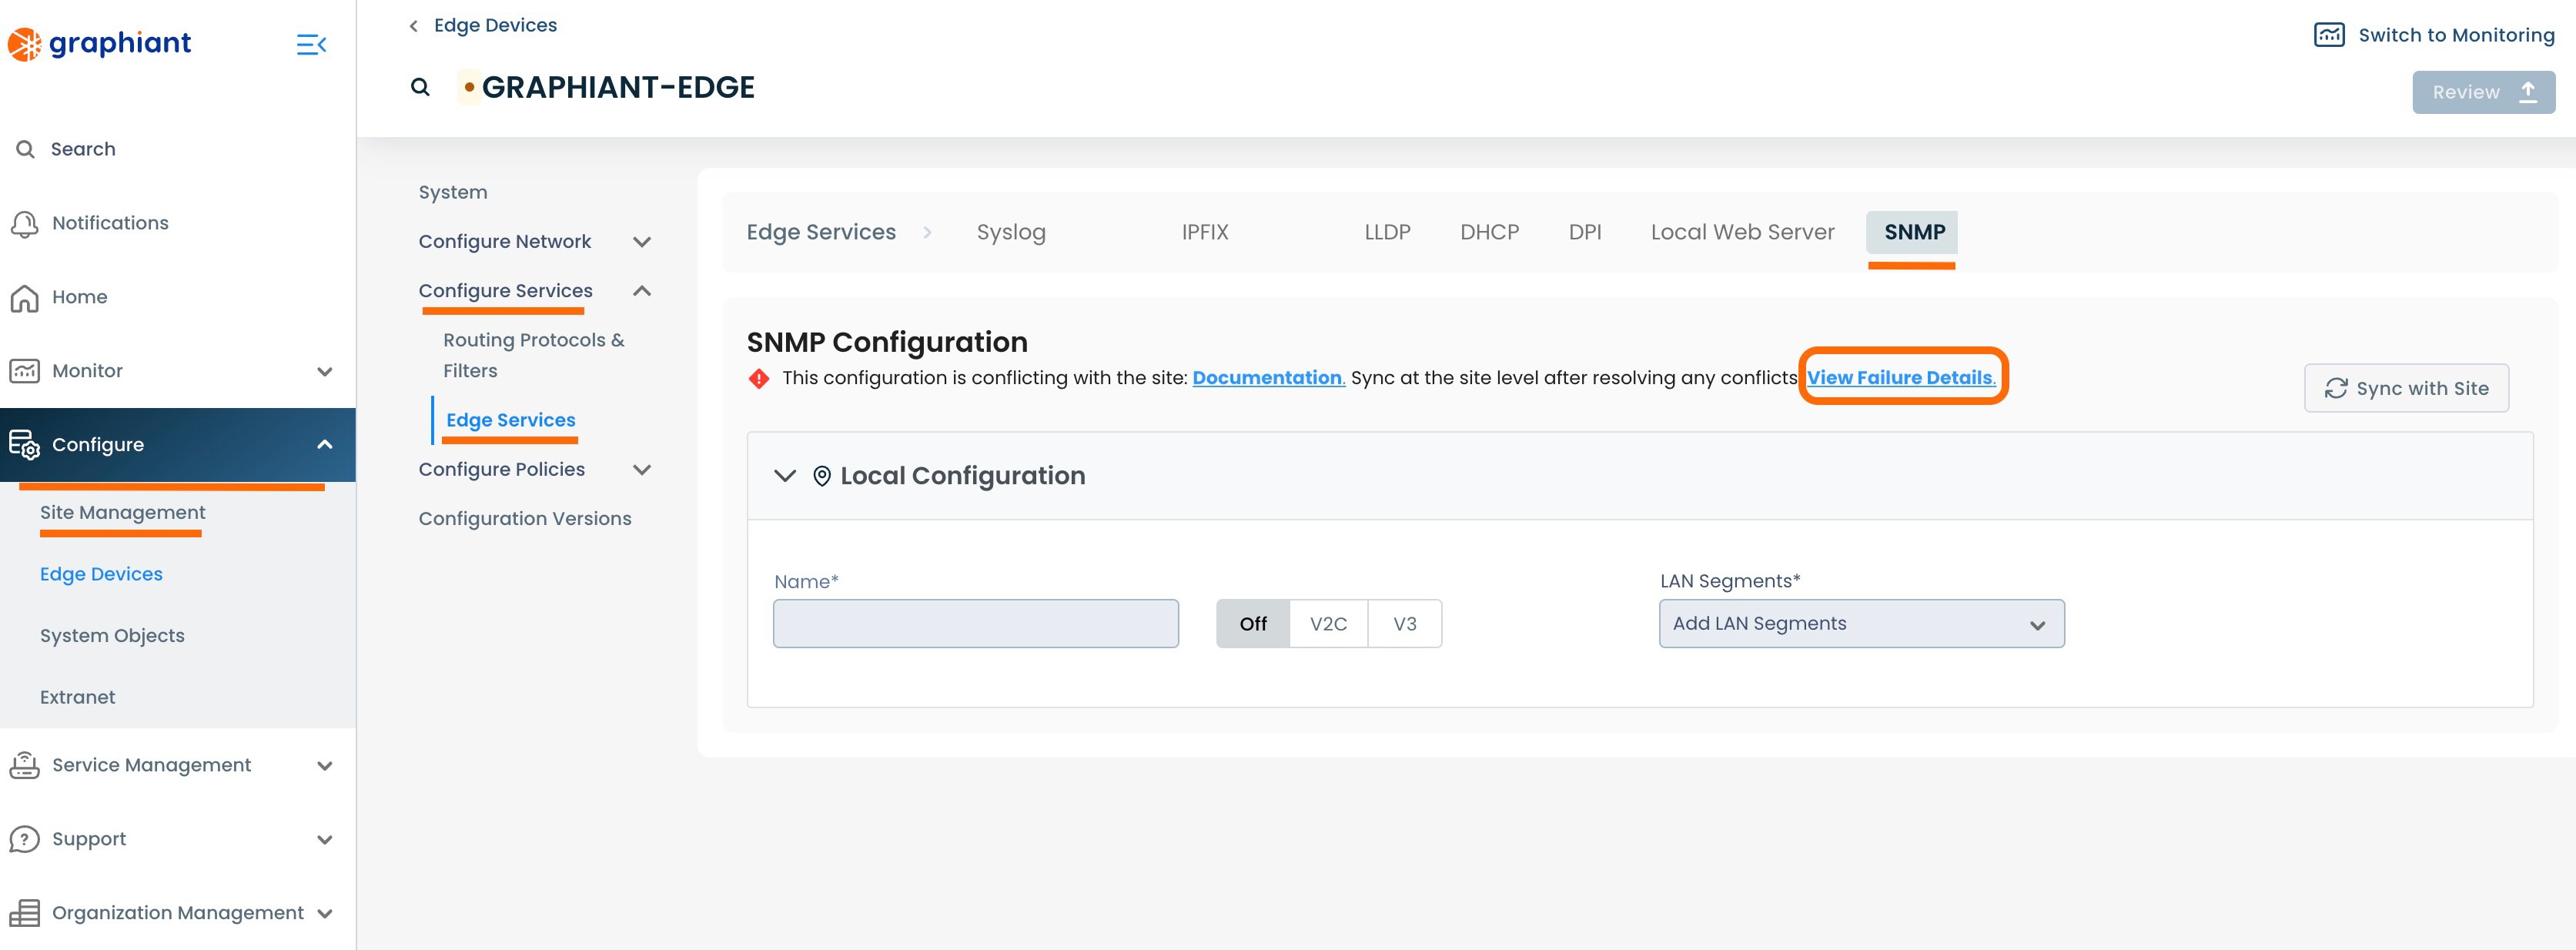
This will bring up a modal of details for the Edge.
The "Error Message" under the Failure Status will explain the reason for the failure.
'View Configuration' will bring up the Edge configuration, if desired.
Correcting the SNMP Attachment Failure
To correct the error that resulted in the SNMP attachment error, navigate to the Site Management Summary screen for SNMP.
Correcting an SNMP Attachment Failure via Selecting a New SNMP Server
In the System Objects SNMP screen, select a different SNMP configuration from the drop-down of previously created SNMP Servers.
Note:
Take care to select an SNMP configuration that will meet the requirements and eliminate the error message.
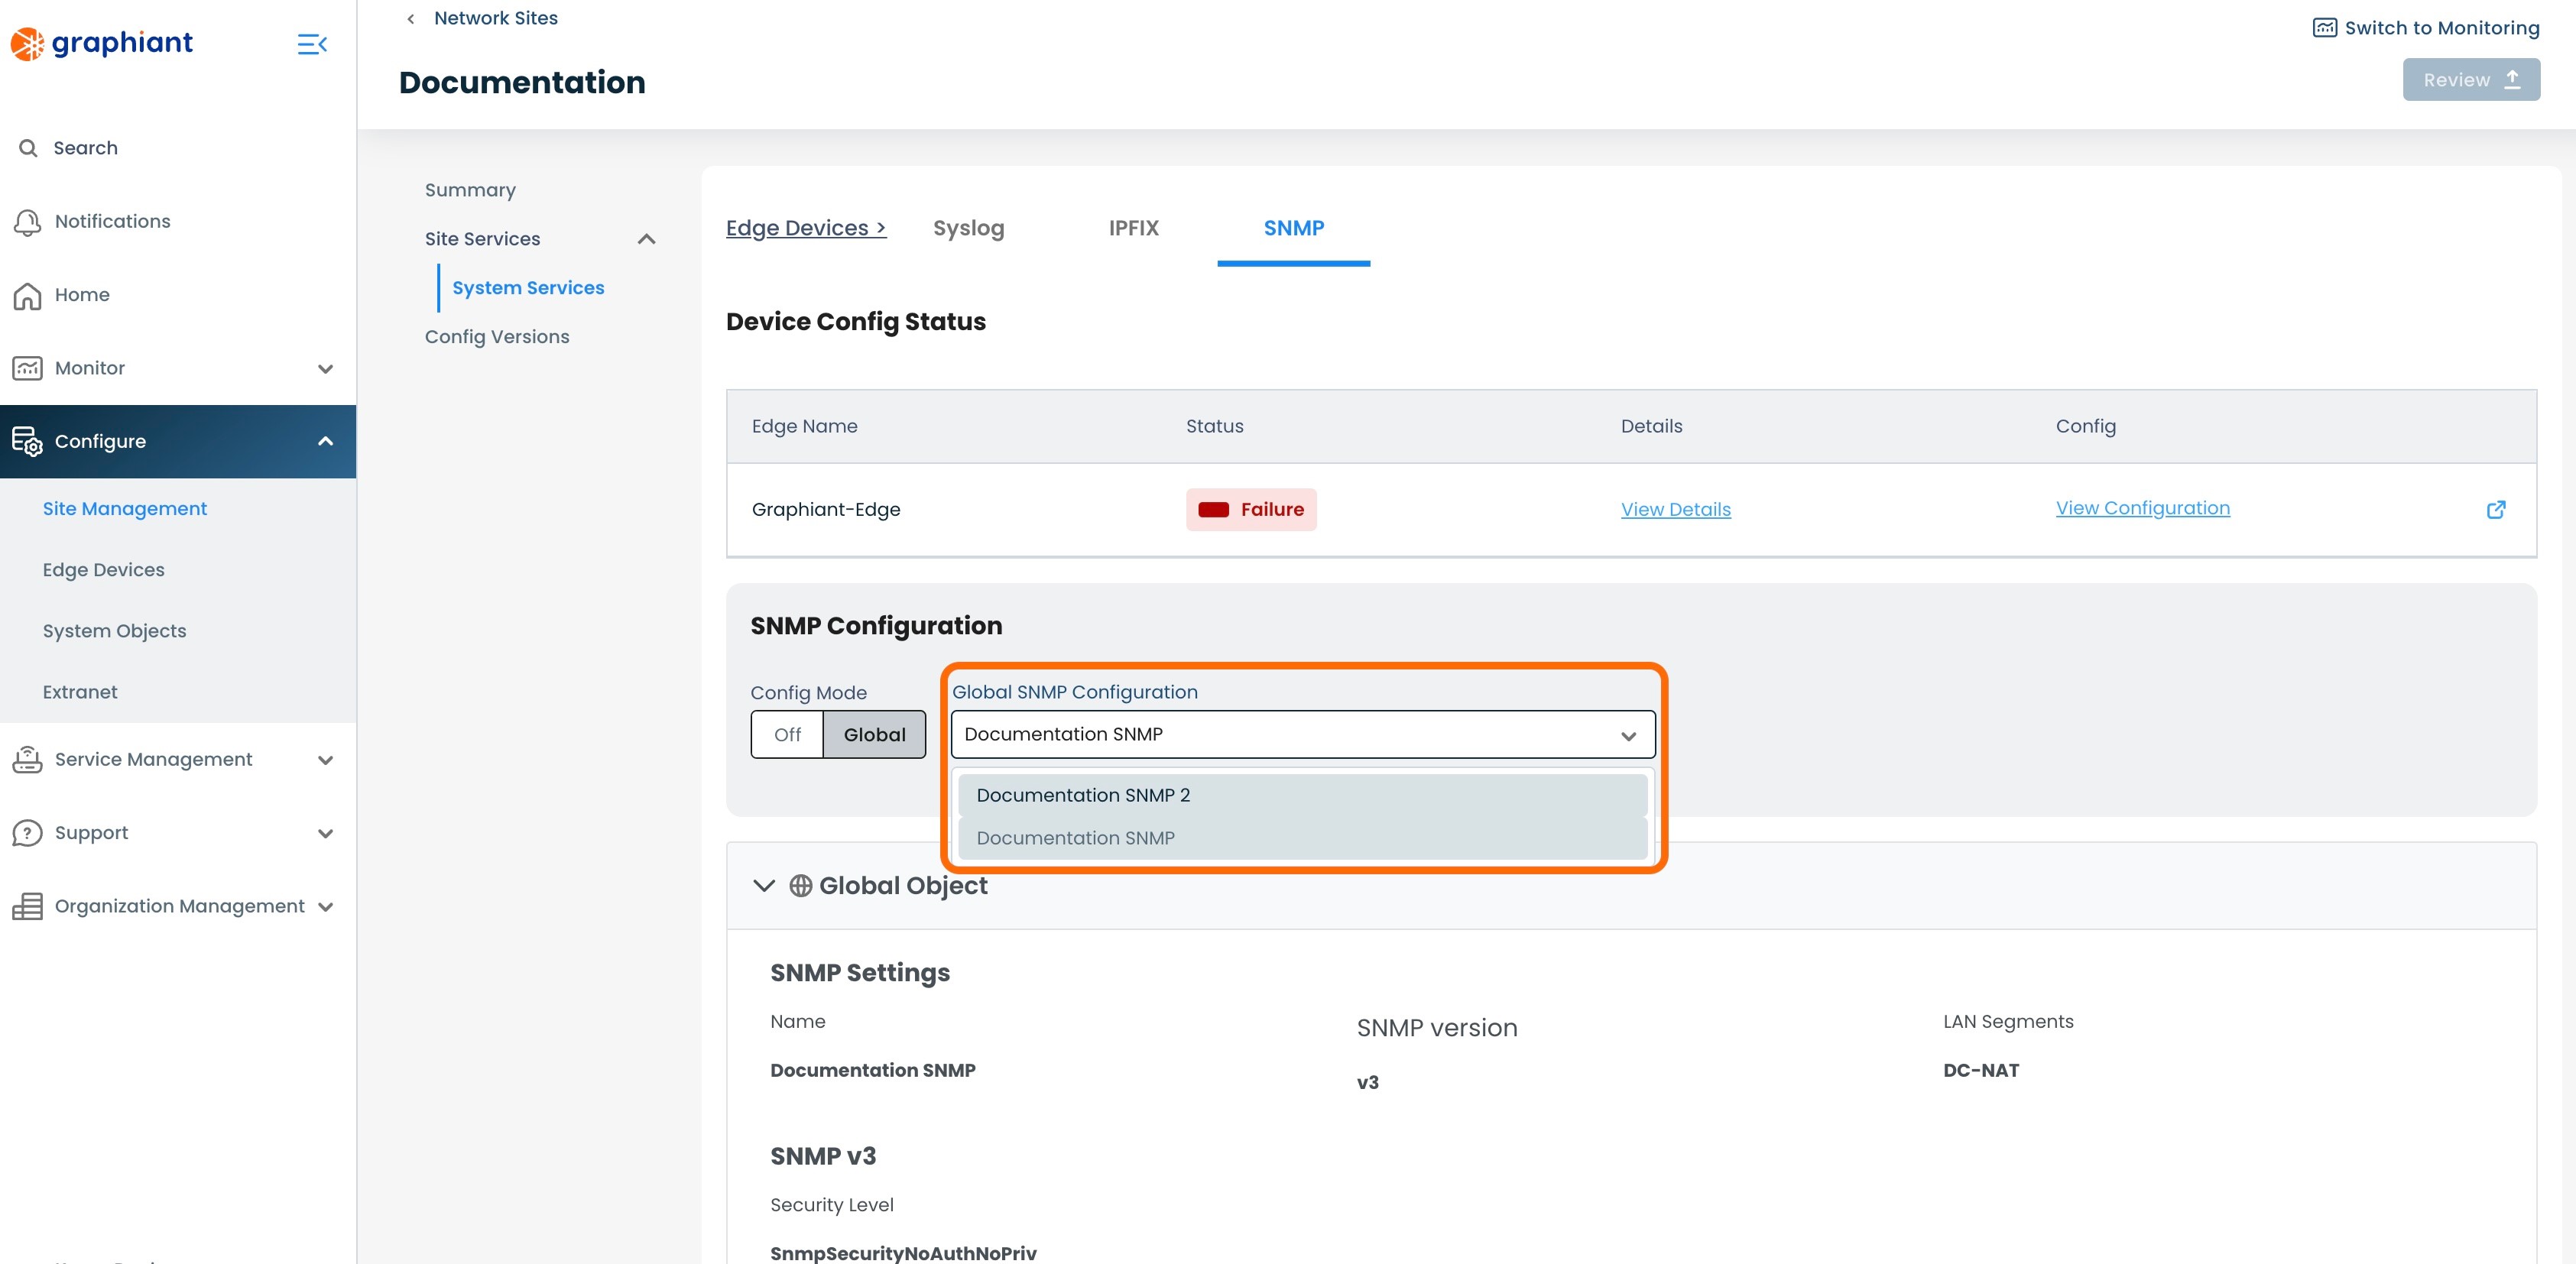
When the different SNMP Server is selected, click 'Review' and 'Apply.
Correcting an SNMP Attachment Failure via Creating a New SNMP Server
If no previously created SNMP Servers will have the desired configuration, a new SNMP Server can be created.
To create a new SNMP server, navigate to the SNMP table from within System Objects.
Click 'Create SNMP' in the upper right corner.
Create the new SNMP Server as previously described here.
Note:
Take care to create an SNMP Server that will meet the requirements and eliminate the error message.
Overriding the Site SNMP Configuration for an Edge
If there is a need to change the SNMP configuration directly on an Edge (i.e. for troubleshooting purposes), the subscription to the Site's configuration must be paused. This effectively breaks the connection between the Edge and the SNMP Server, as all System Objects flow through the Site configuration to the Edge.
In Override status, the Edge is out of "read-only" mode for System Objects, and all fields are then able to be edited. Any desired changes are now able to be made to the Edge locally.
Locating the Override Switch
To override the configuration, go to 'Configuring Edges' either by clicking the button in the top center, or by clicking 'Configure' in the left side menu, then selecting 'Edge Devices'.
Select the checkbox for the Edge to configure; click the 'Configure' button to the right of that Edge.

Click 'Configure Services' on the left; select 'Edge Services'.
Select the 'SNMP' tab from across the top.
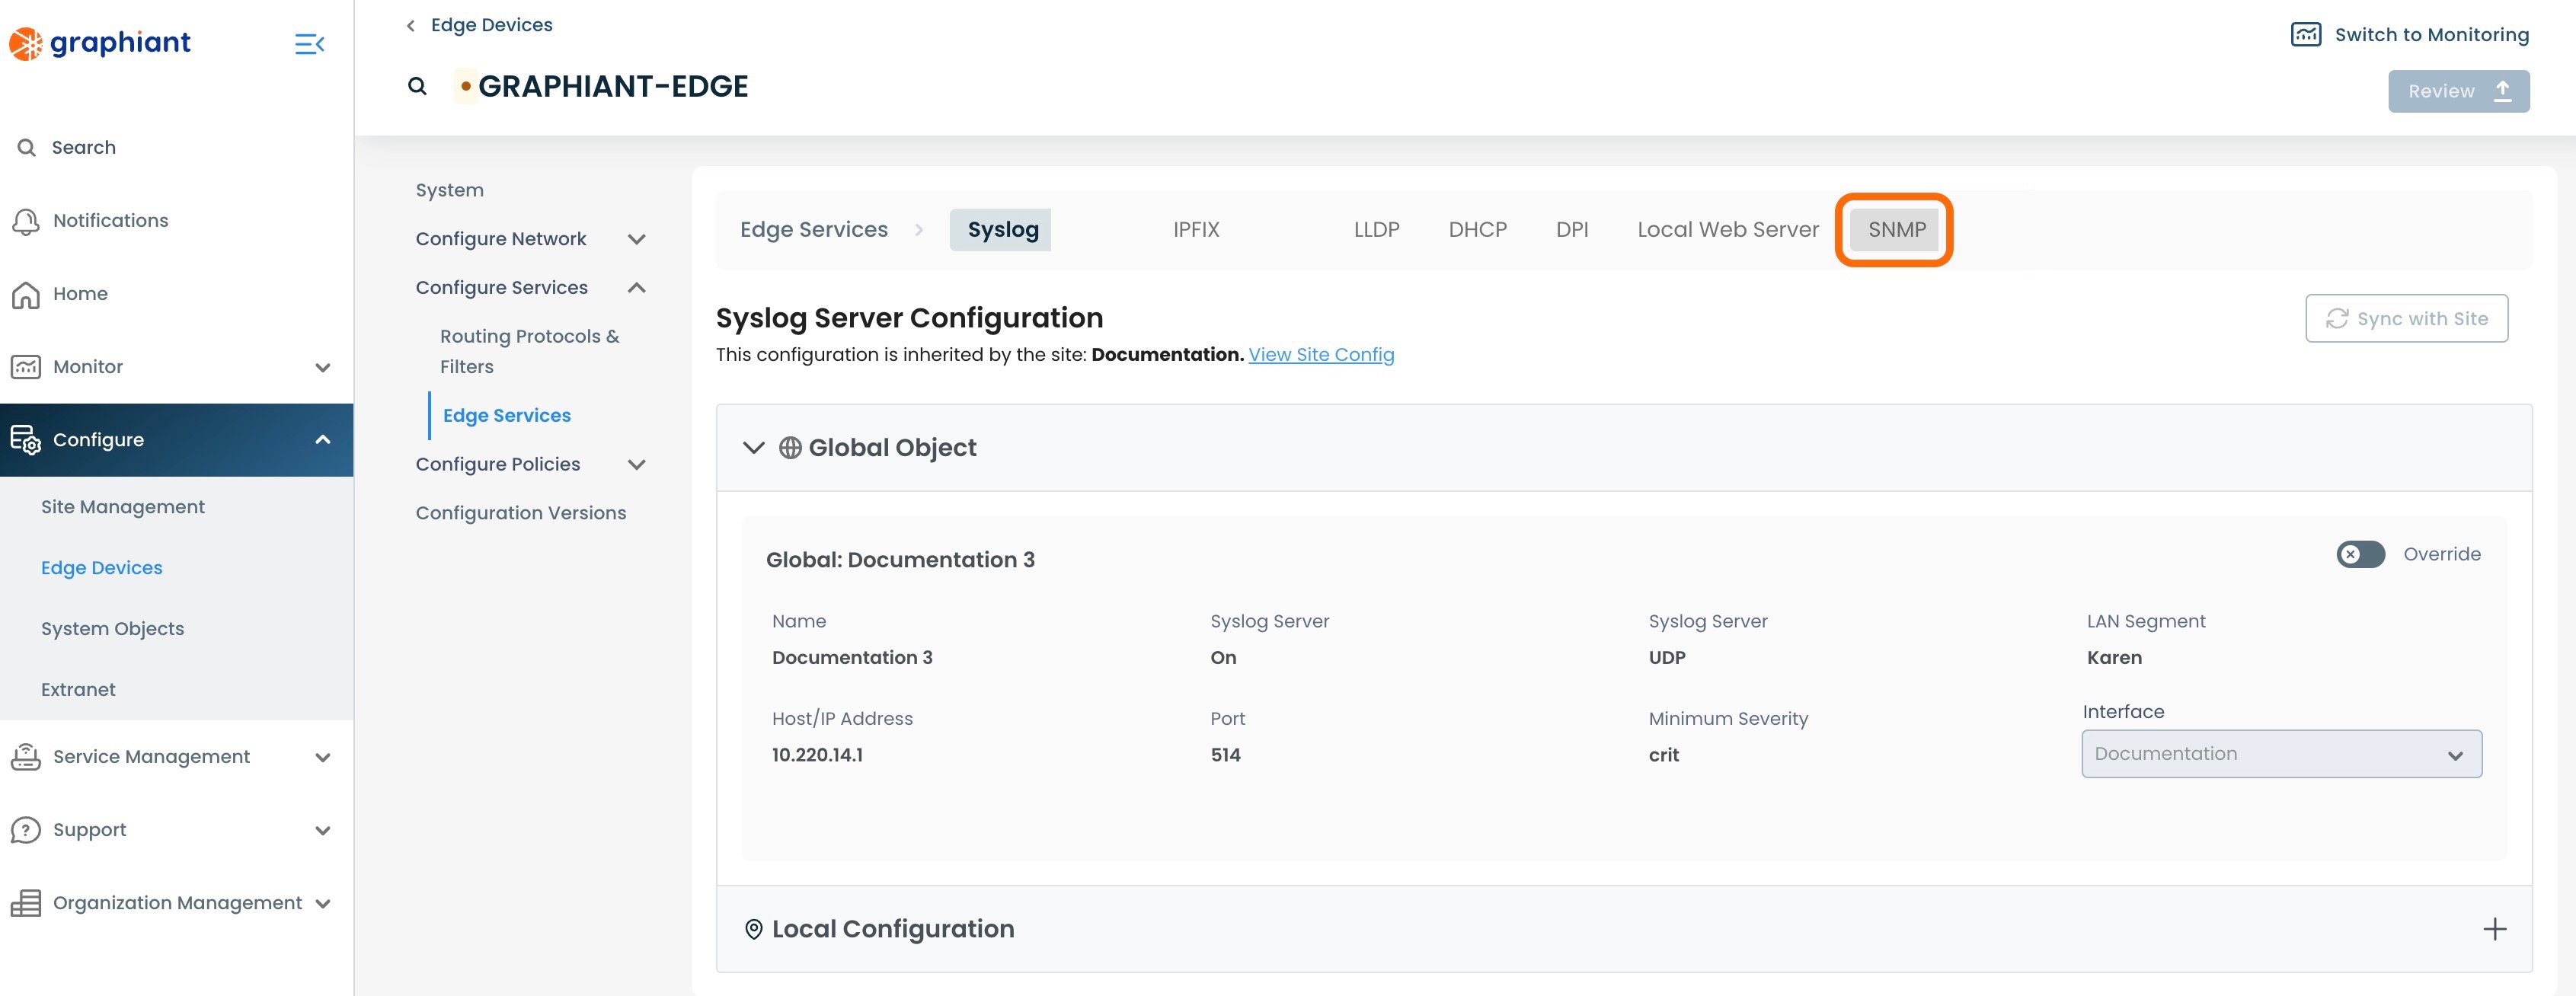
The SNMP Server will be shown here under "System Object".
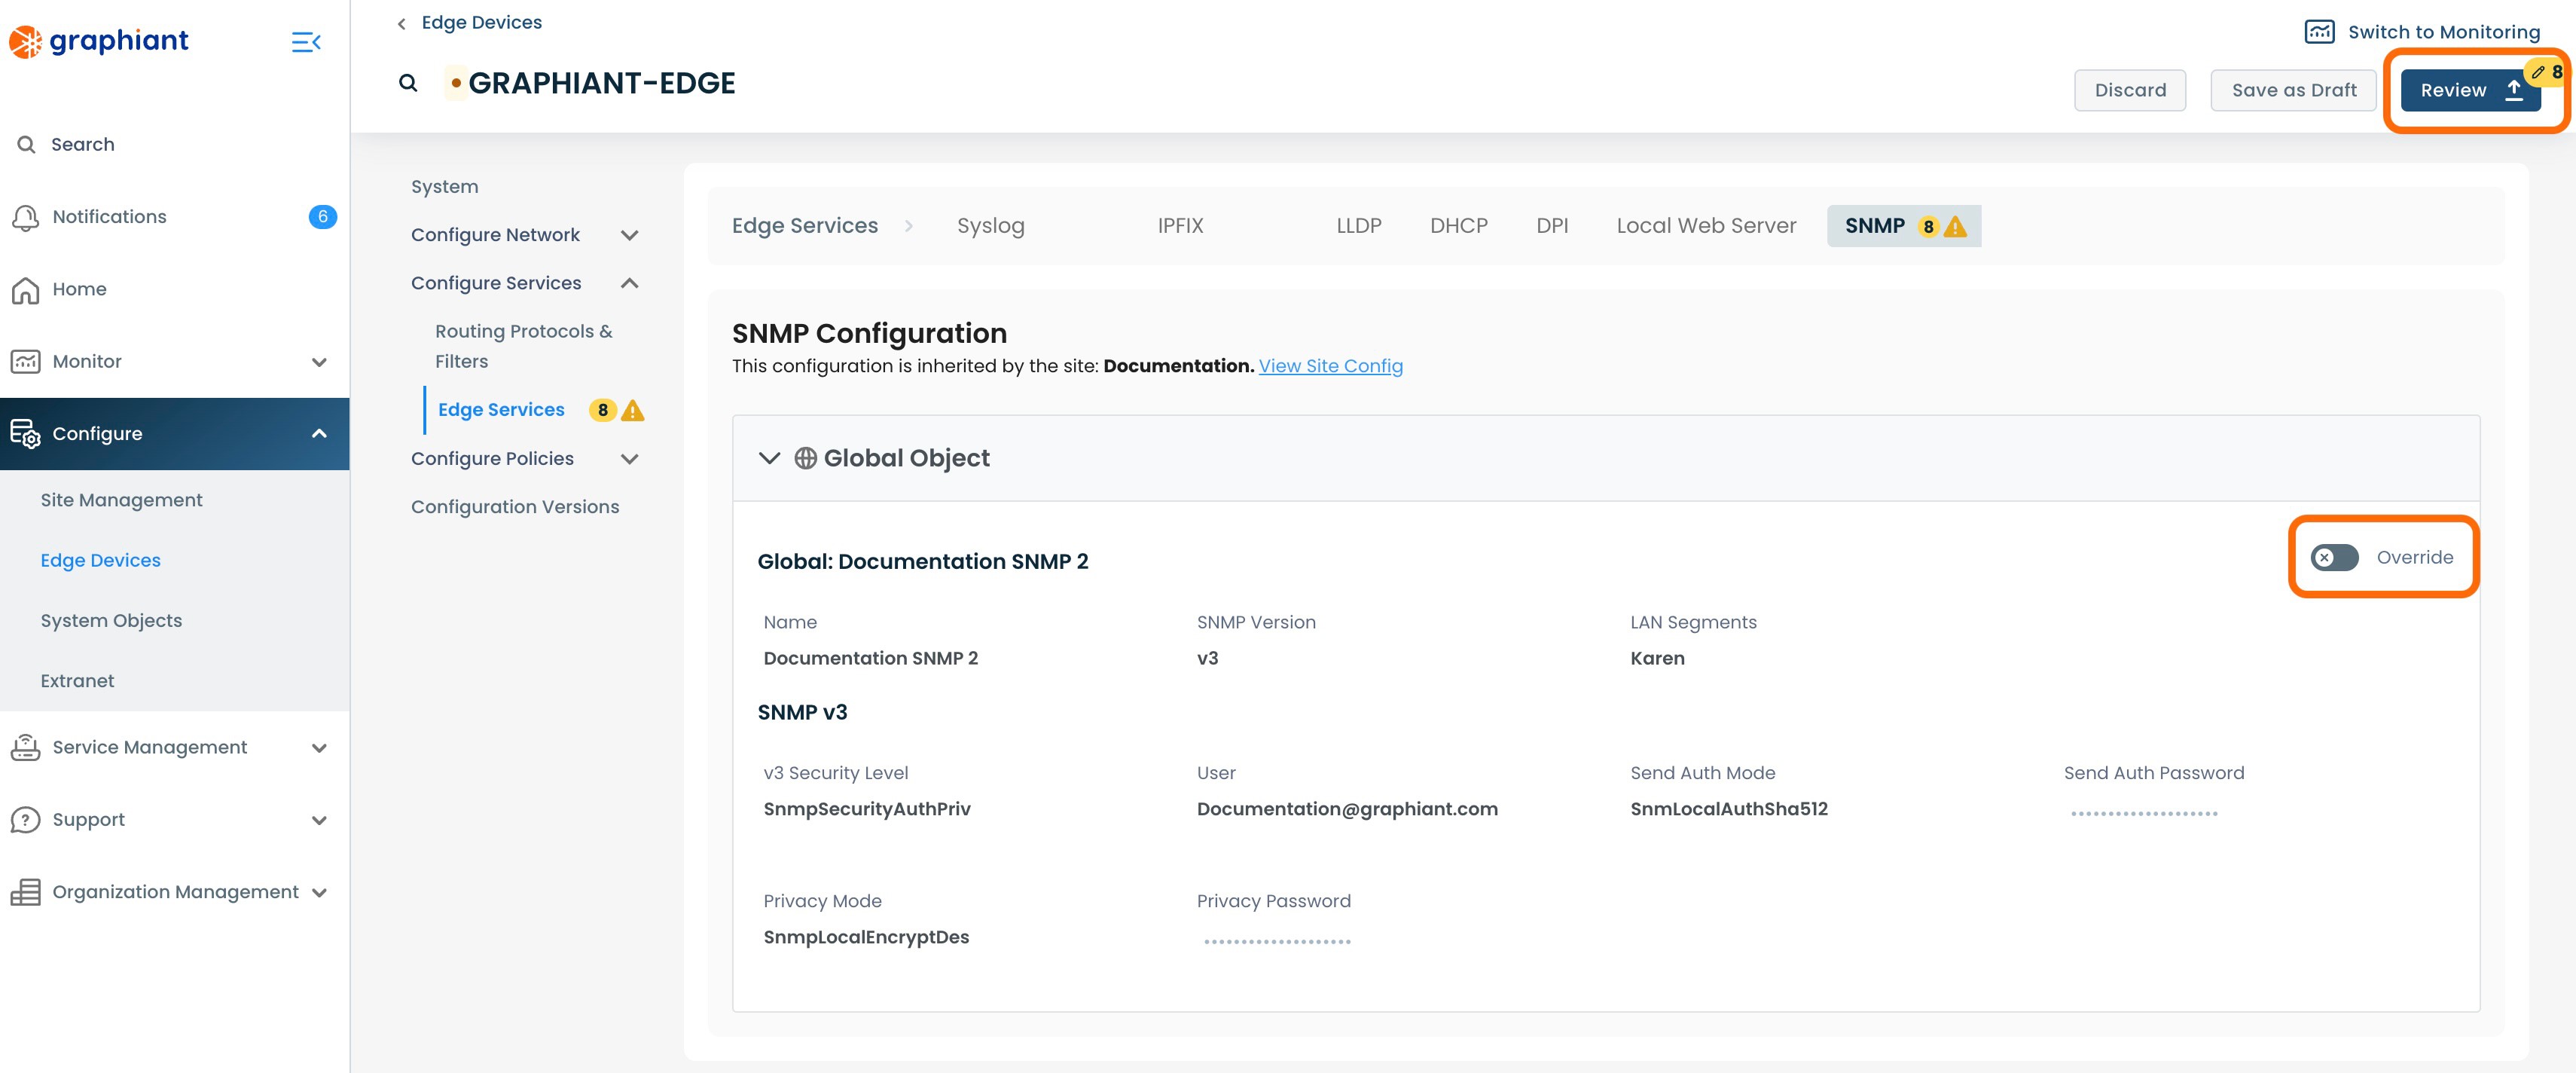
The Override Switch will be at the top right of the System Object section.

Overriding the Site SNMP Configuration for an Edge
To override the Edge SNMP Configuration, from the Edge Services screen, click the 'Override' switch located at the top right of the System Object.
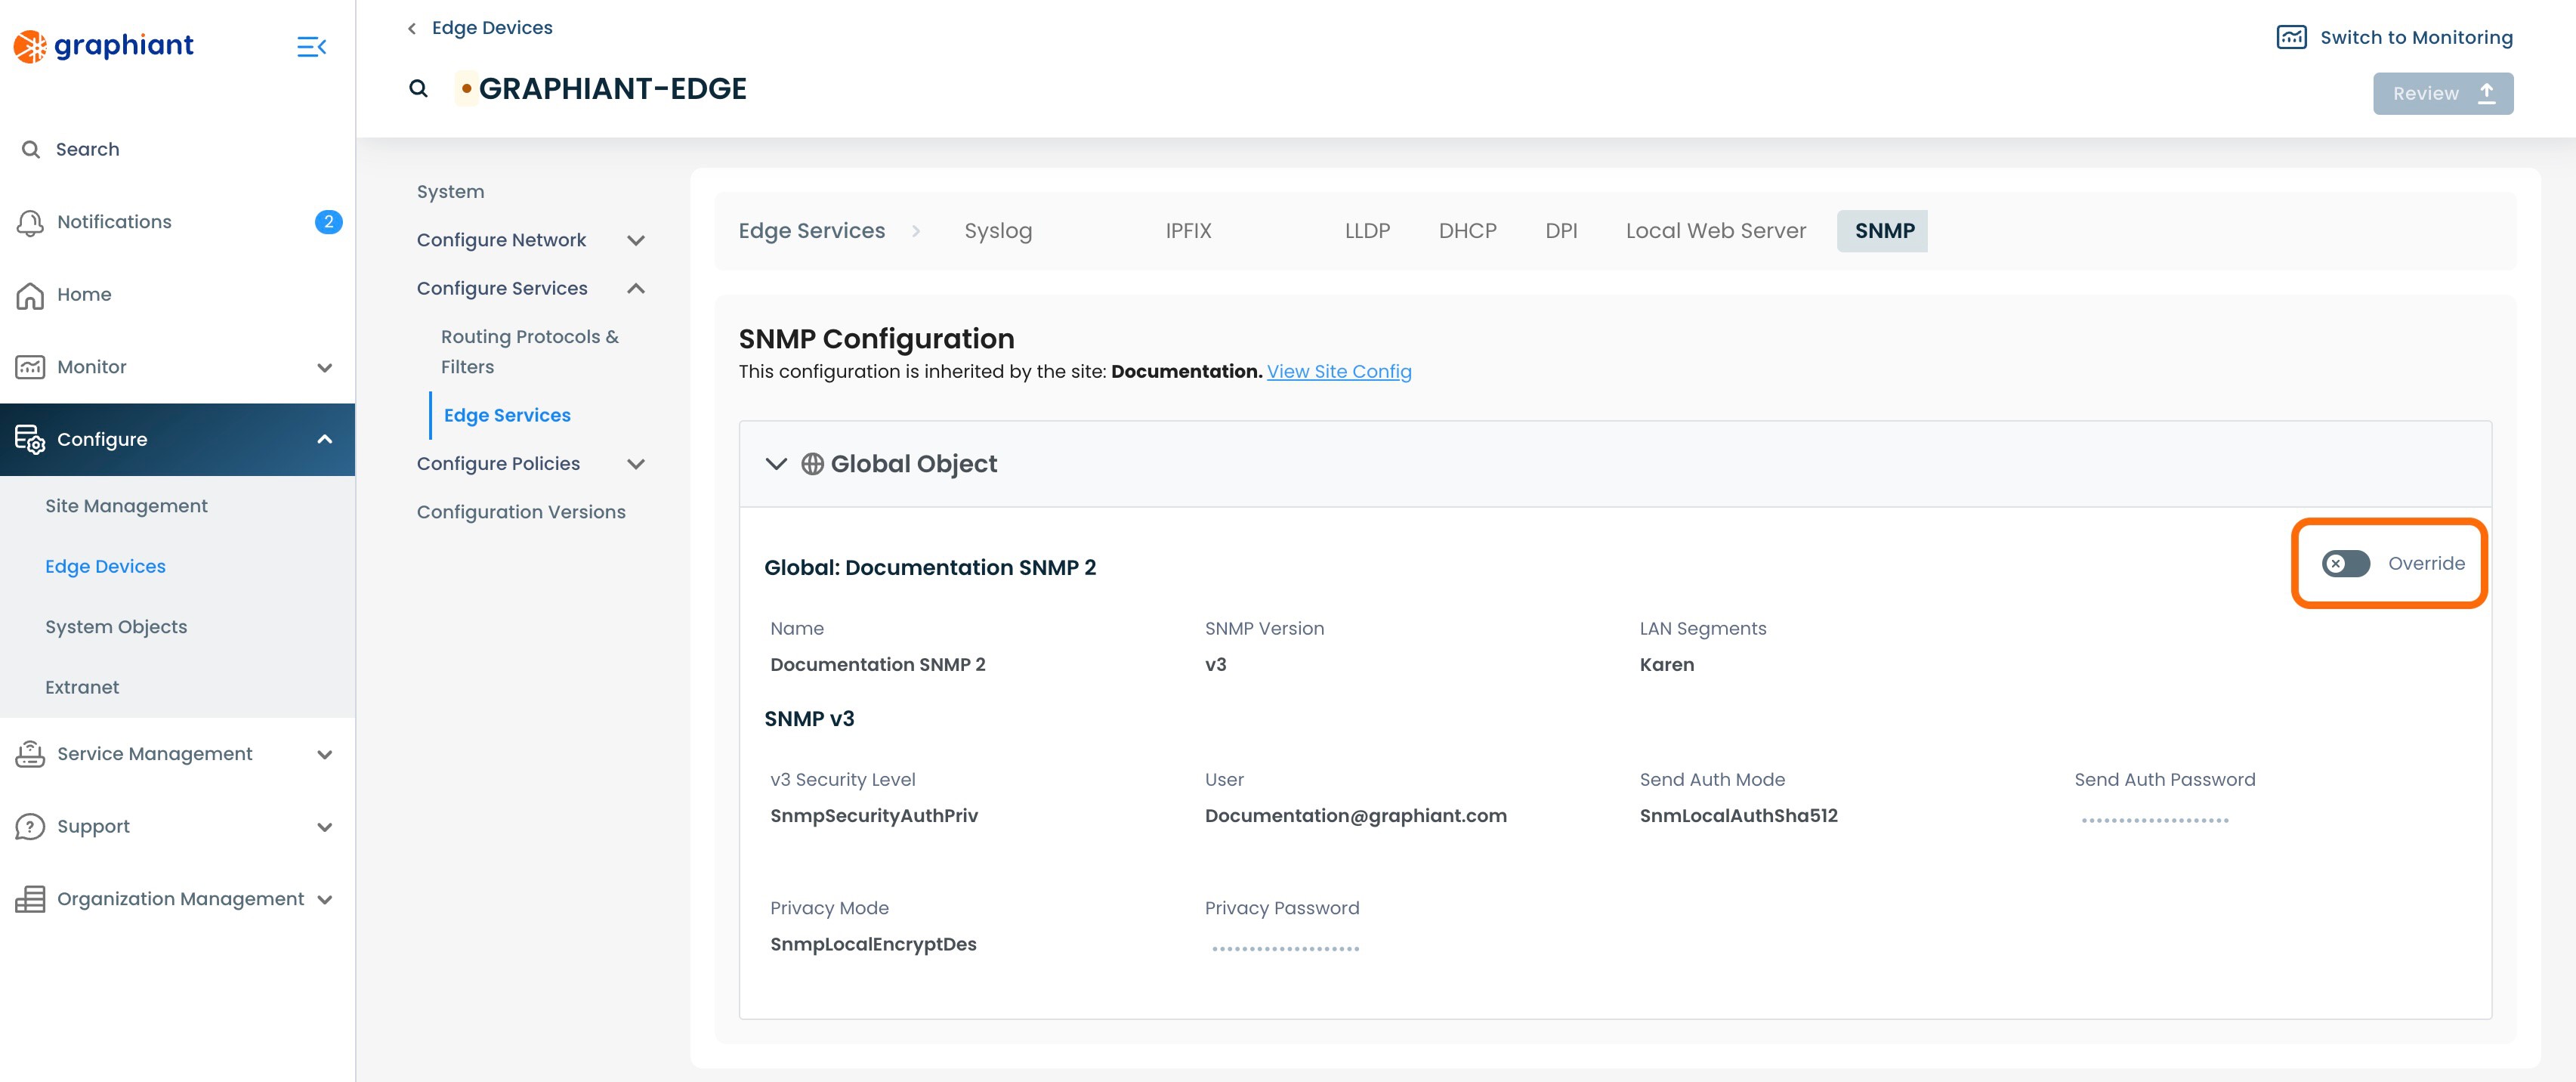
The 'Override' switch will show activated, and all of the fields will now be able to be edited.
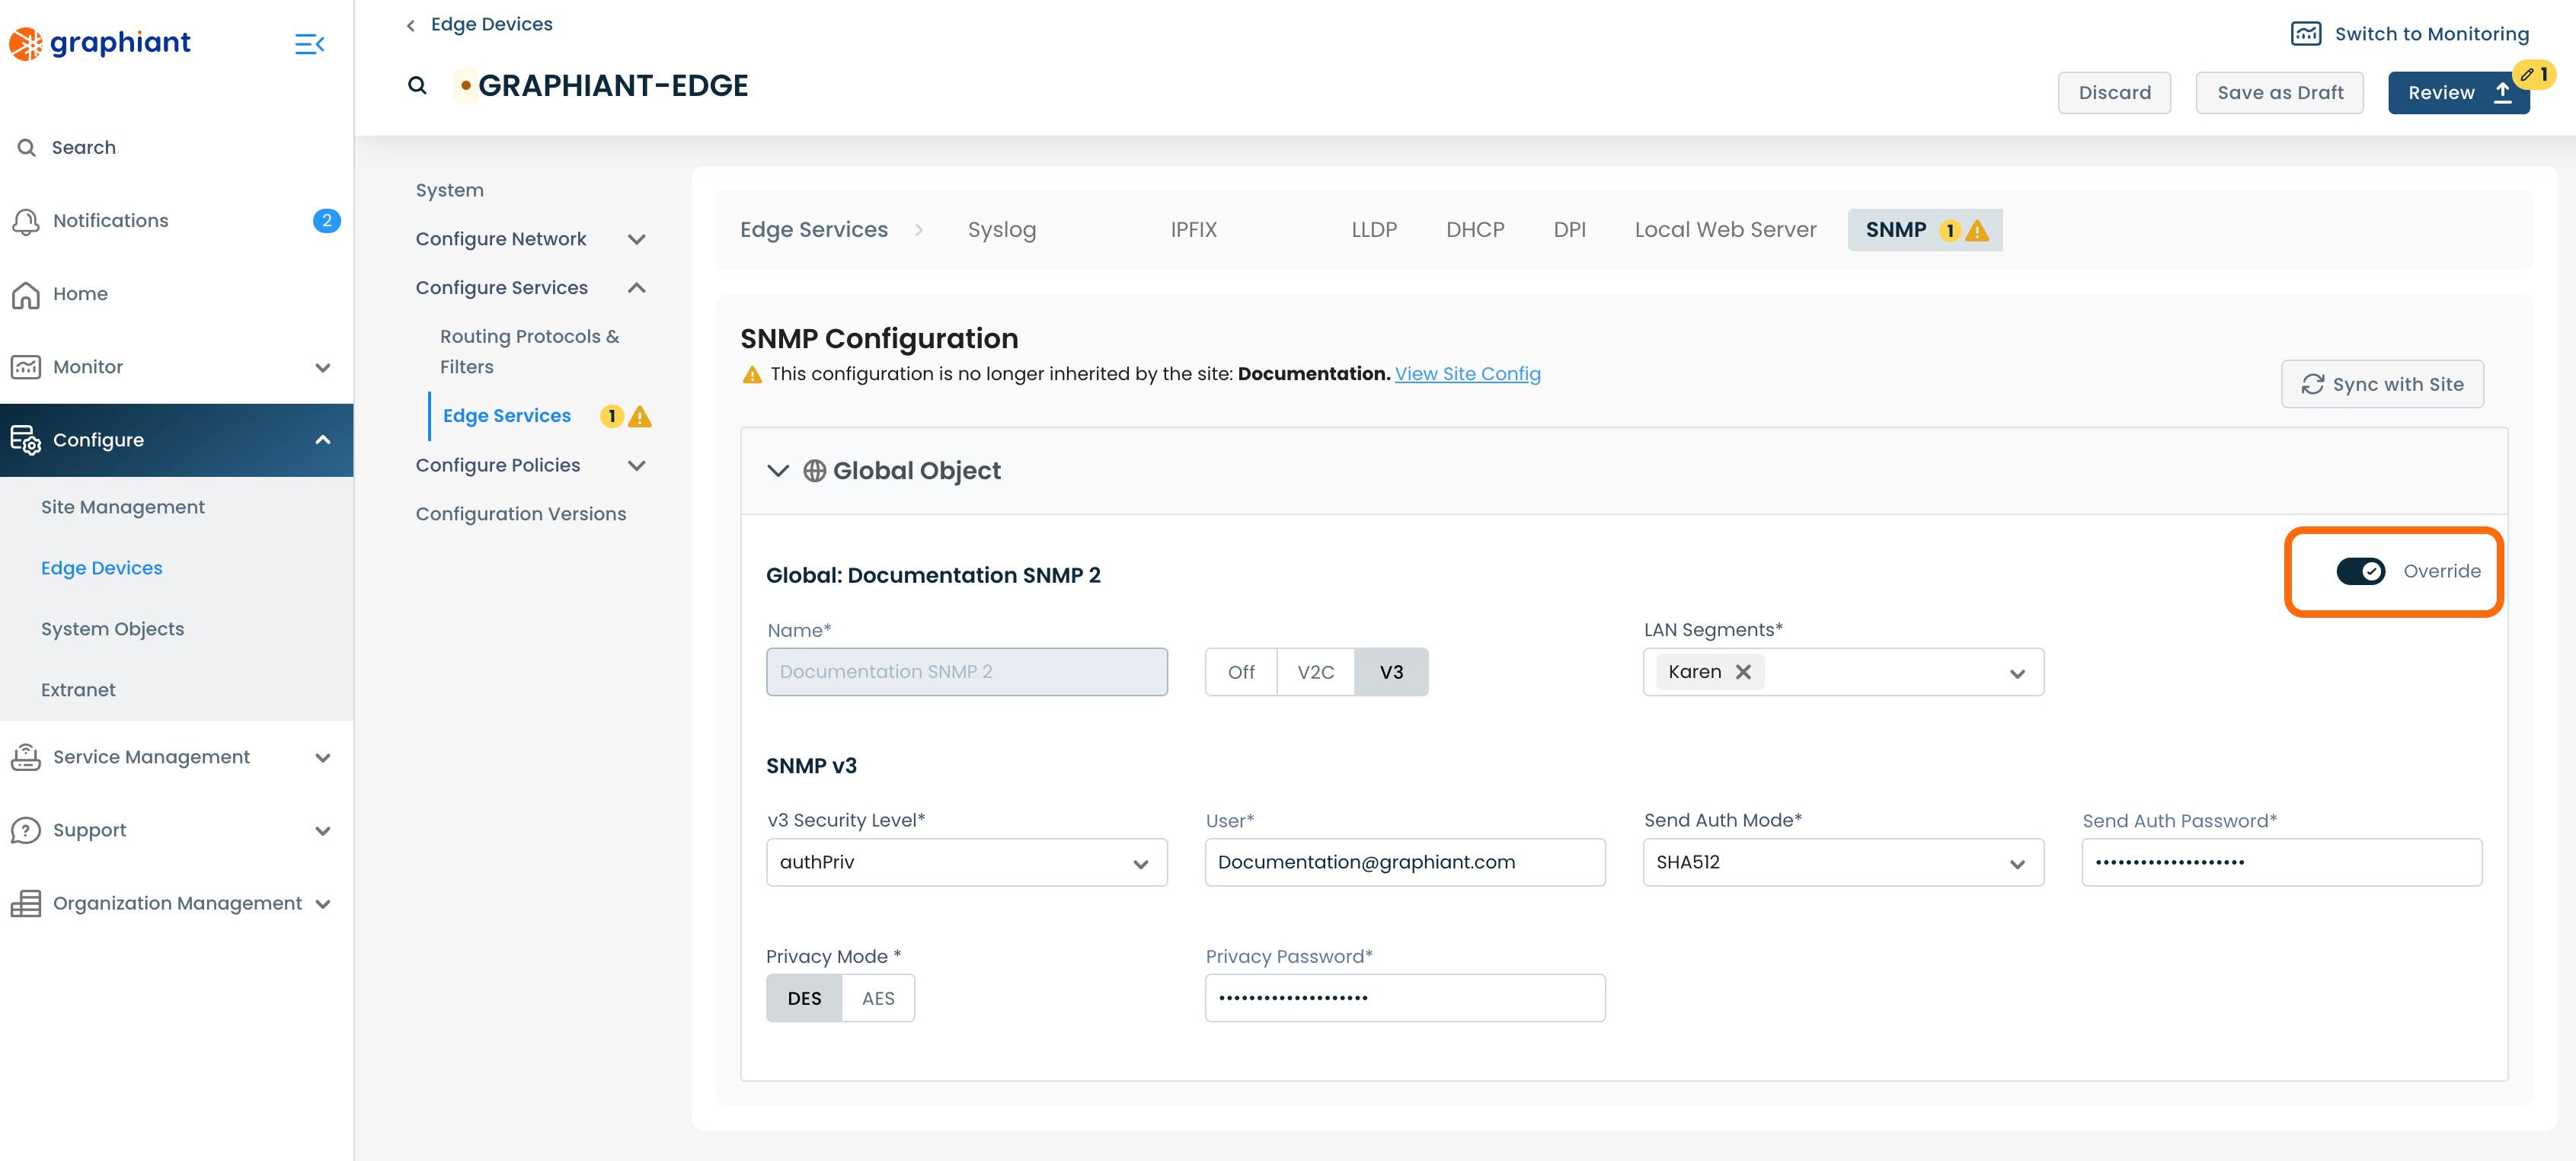
Make the desired configuration changes; click 'Review'.
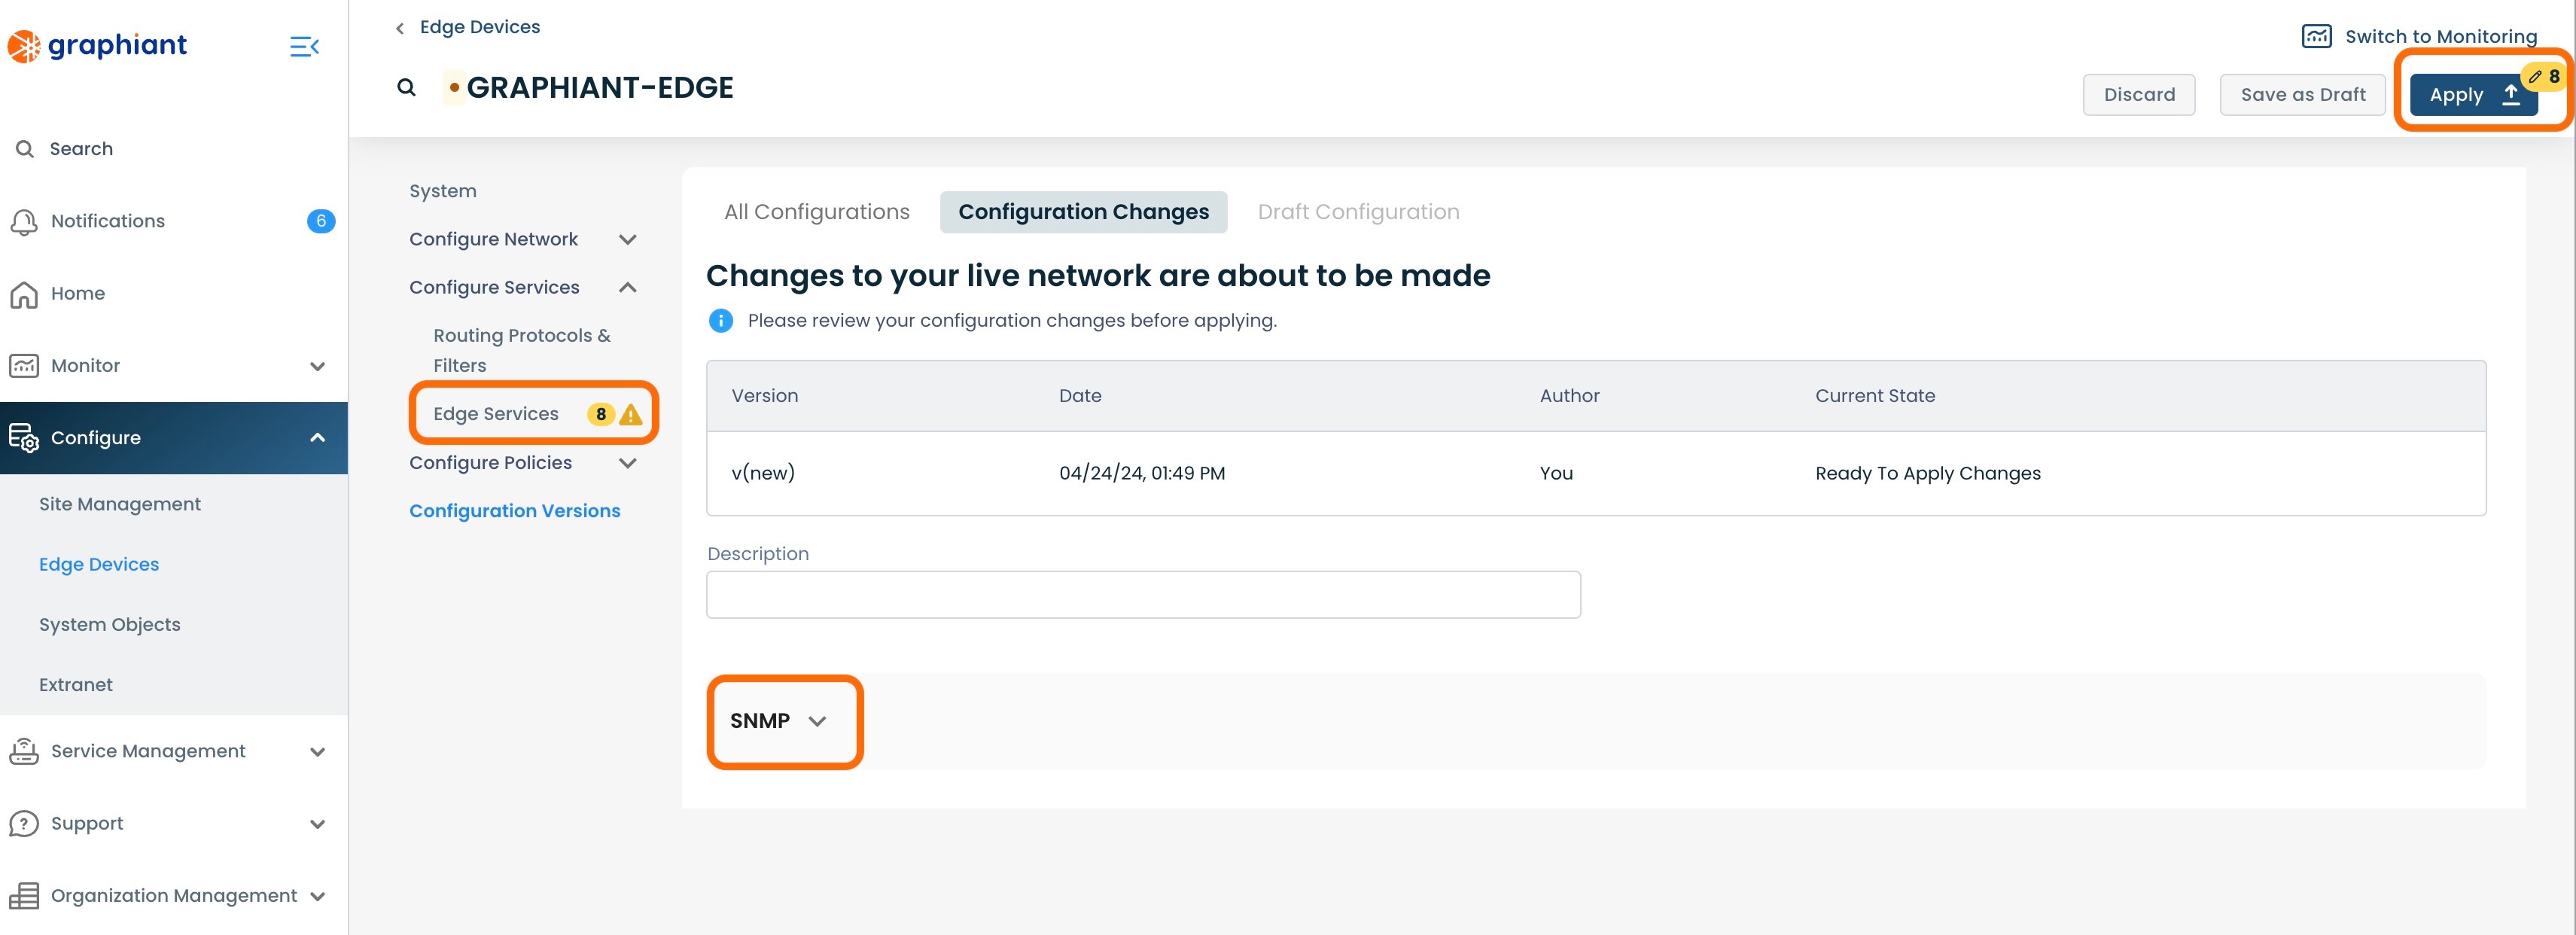
This will bring up the "Configuration Versions" screen for the Edge.
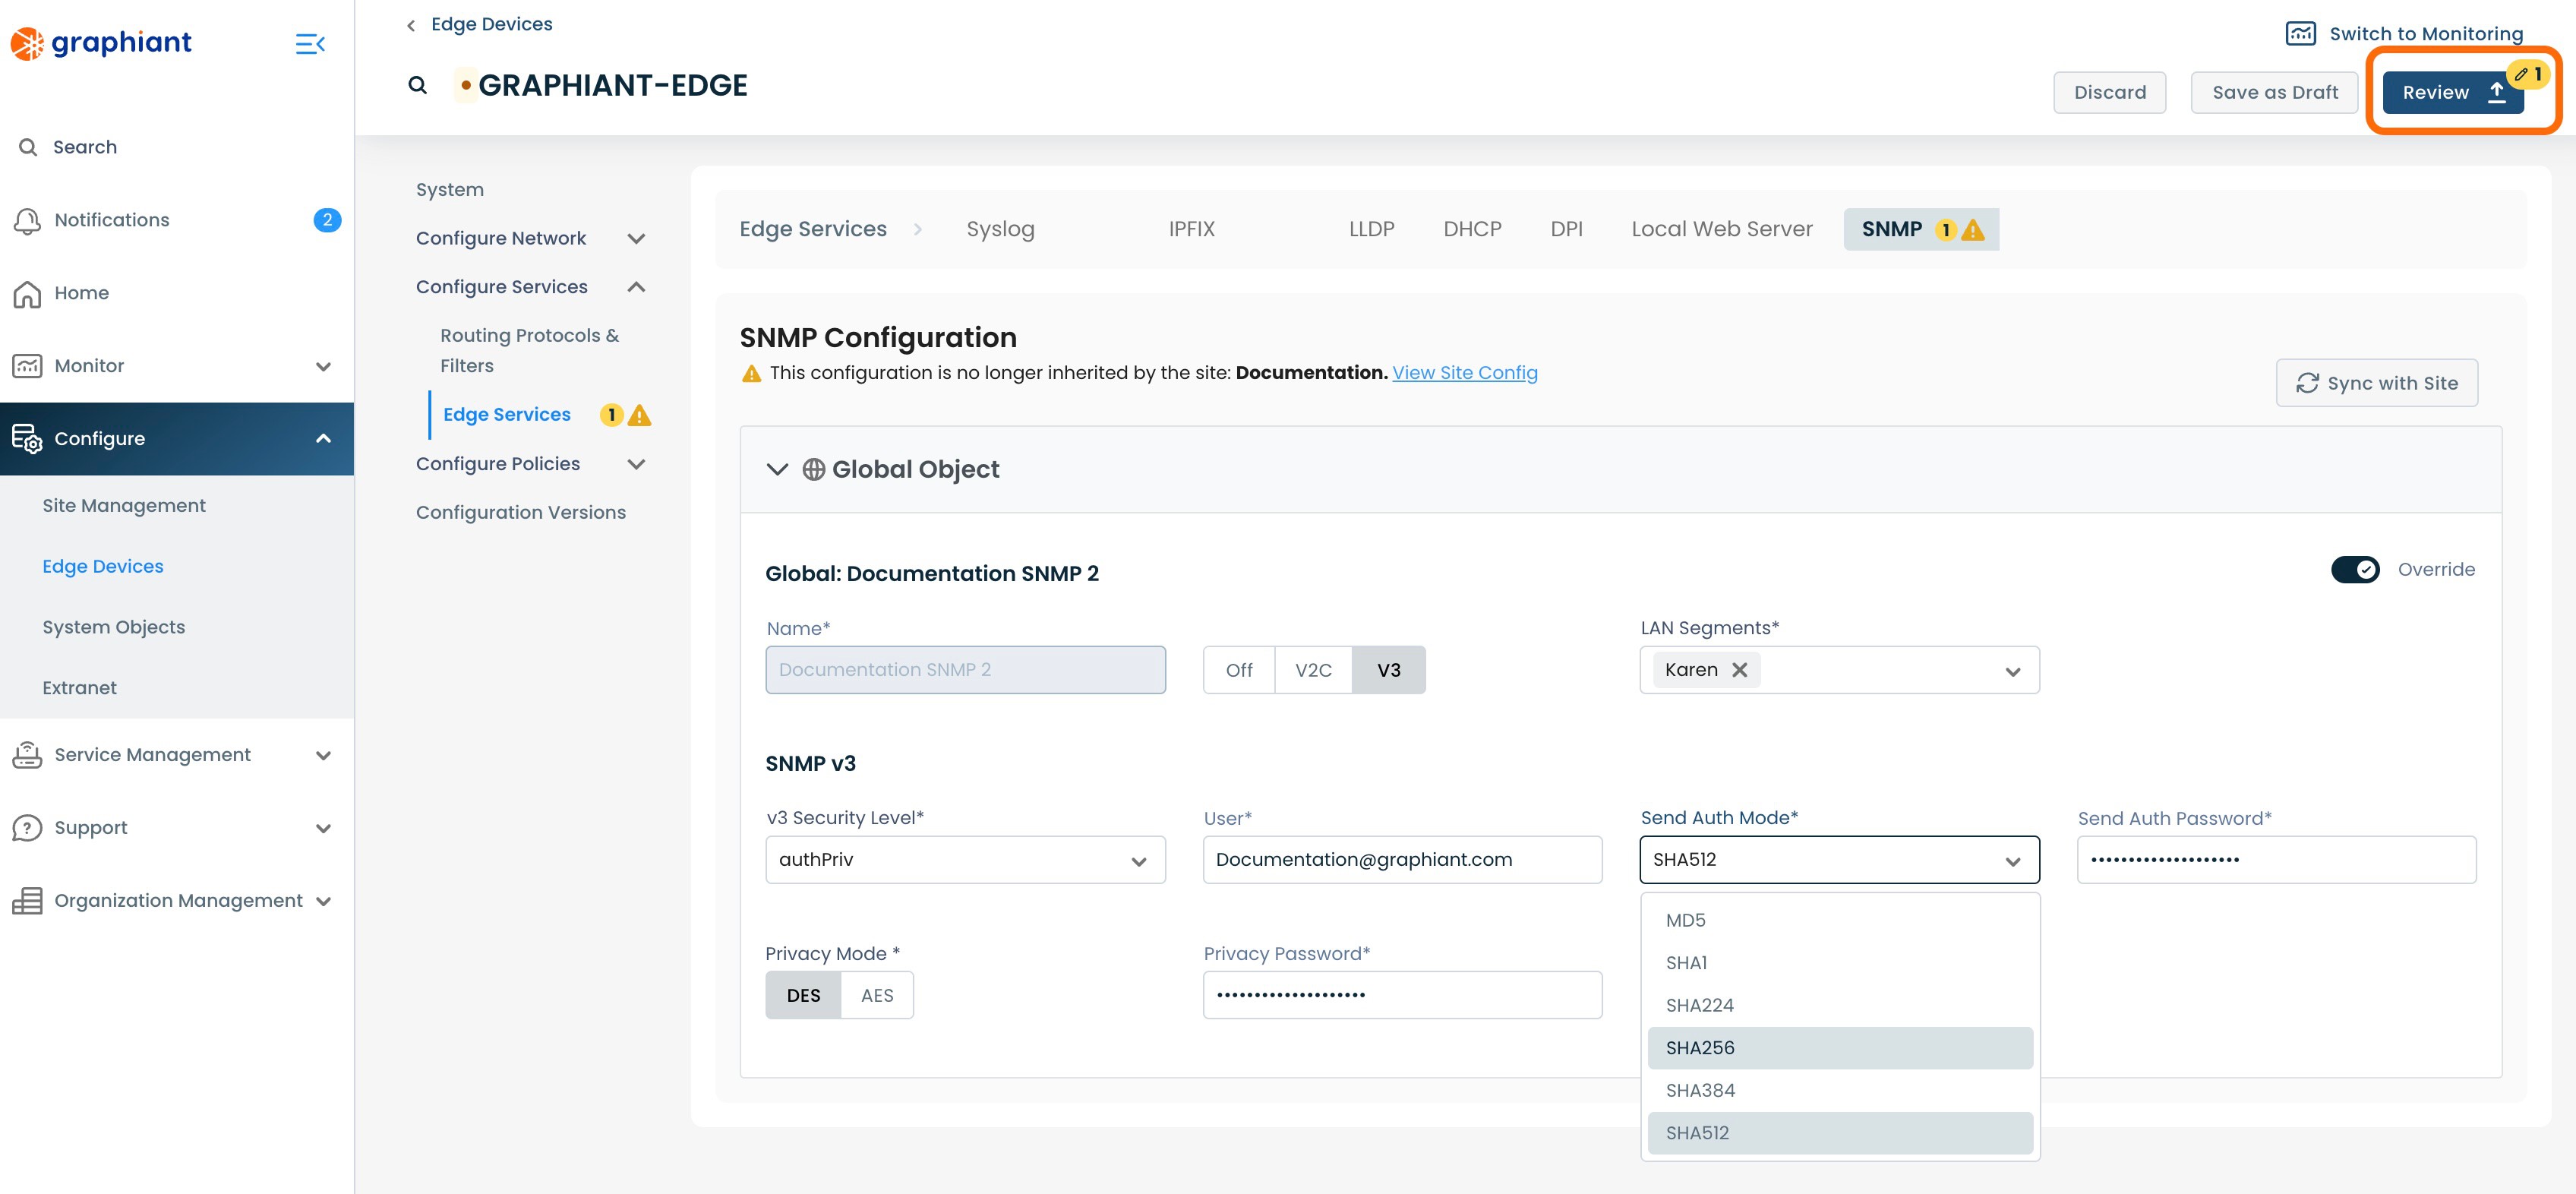
Next to 'Edge Services' on the left will be warnings. One will indicate that the SNMP Server has been selected for Override, and any others will reflect the number of changes made within the configuration.
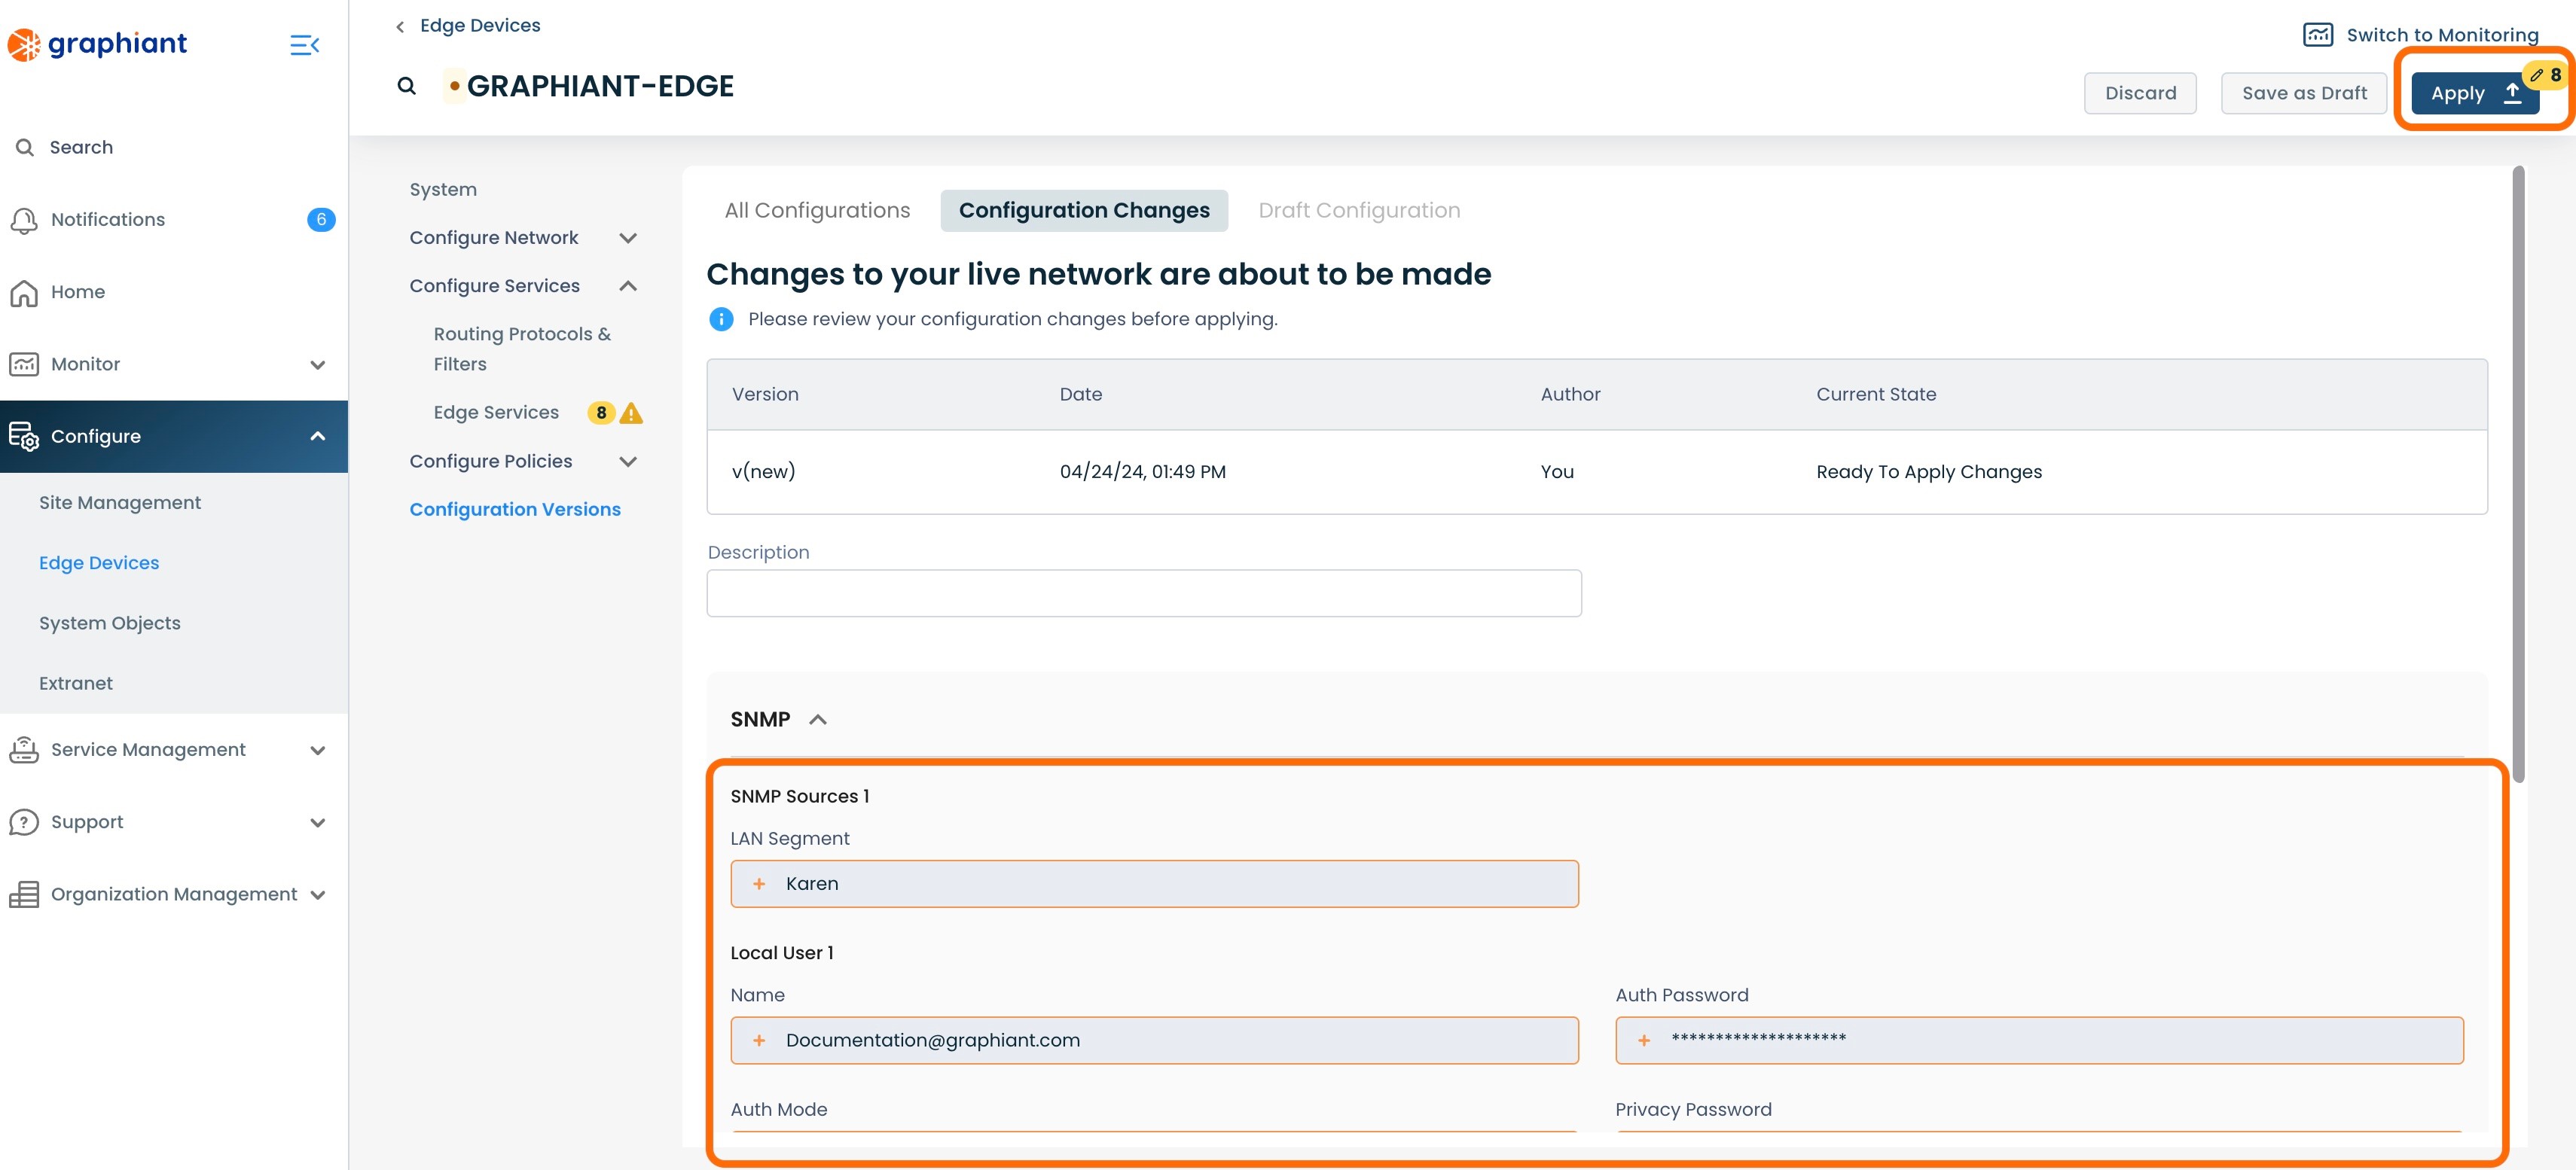
To see the exact changes that will be made in the configuration, click the 'SNMP' drop-down.
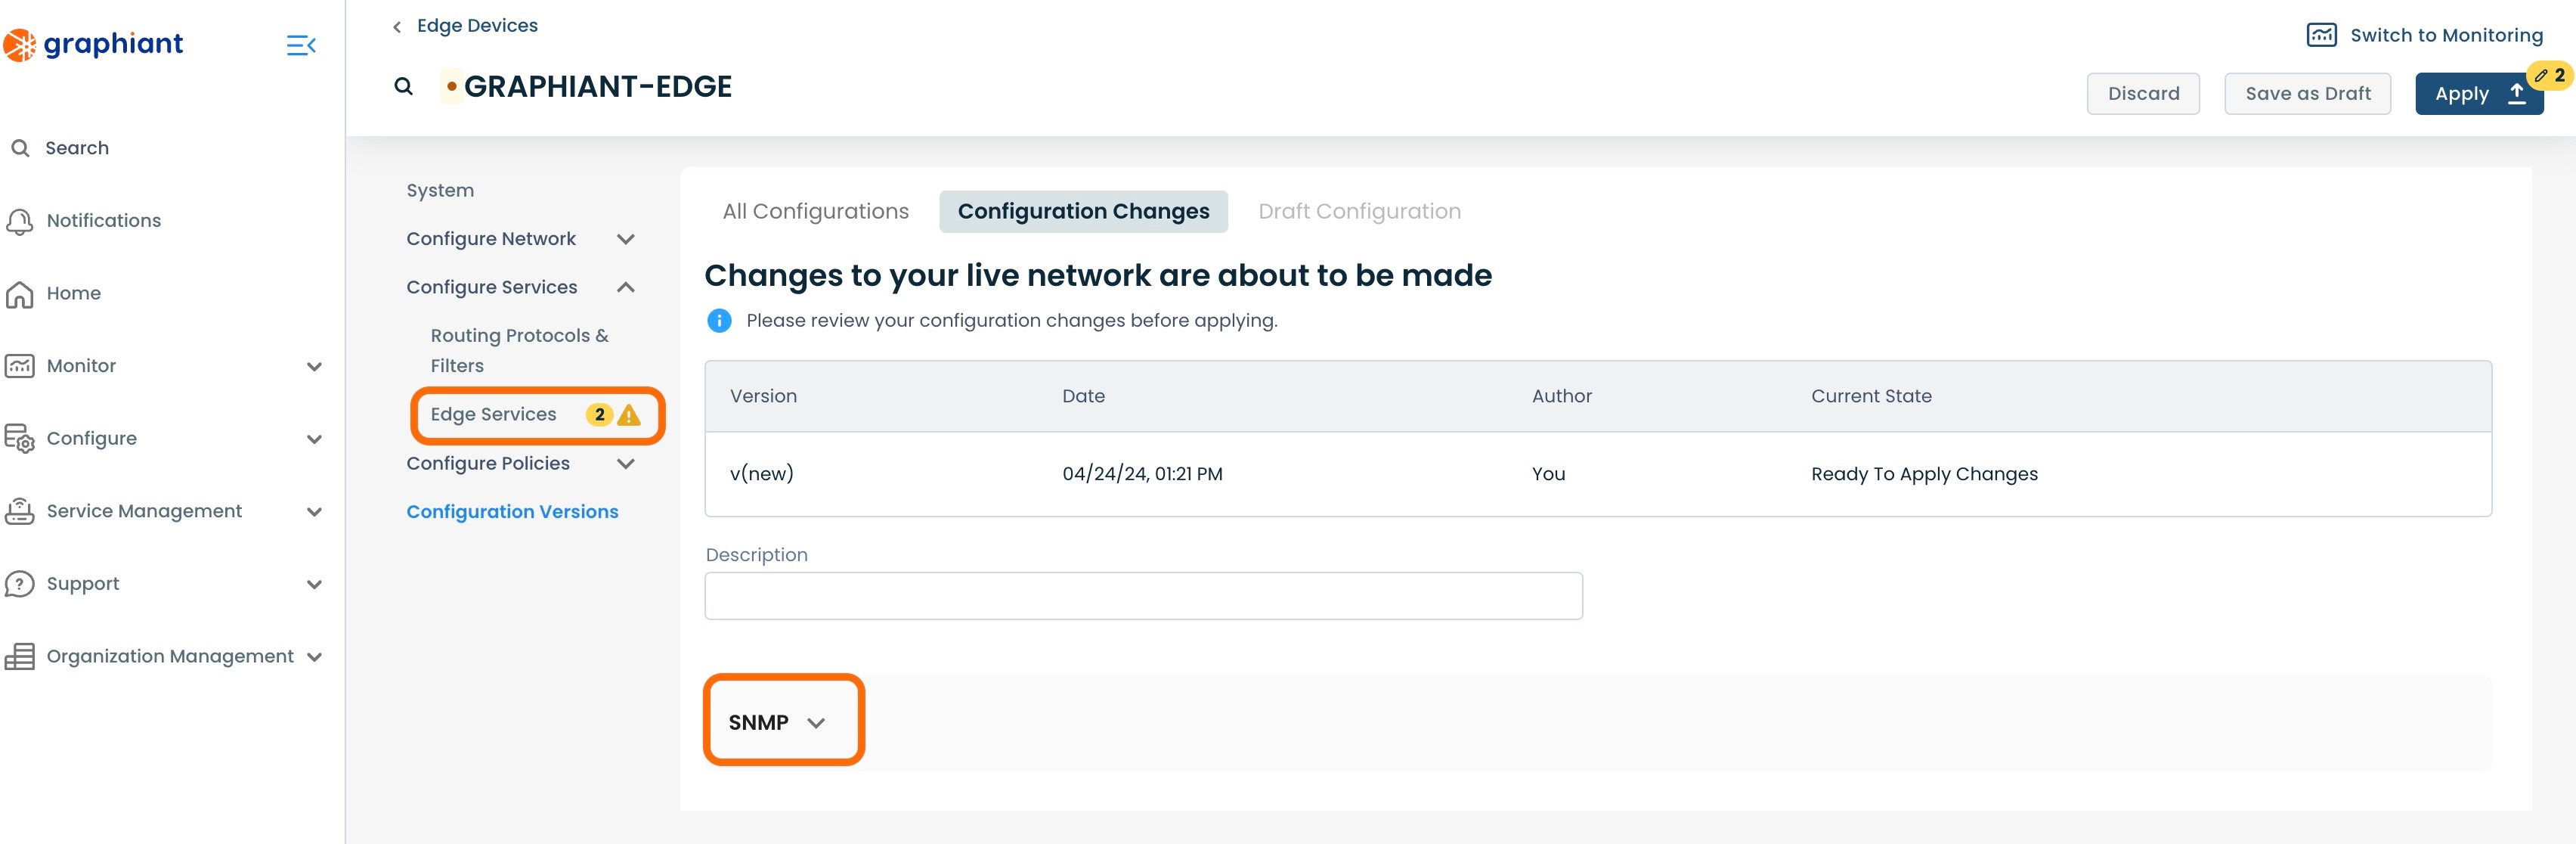
The configuration changes to be made once applied are shown here.
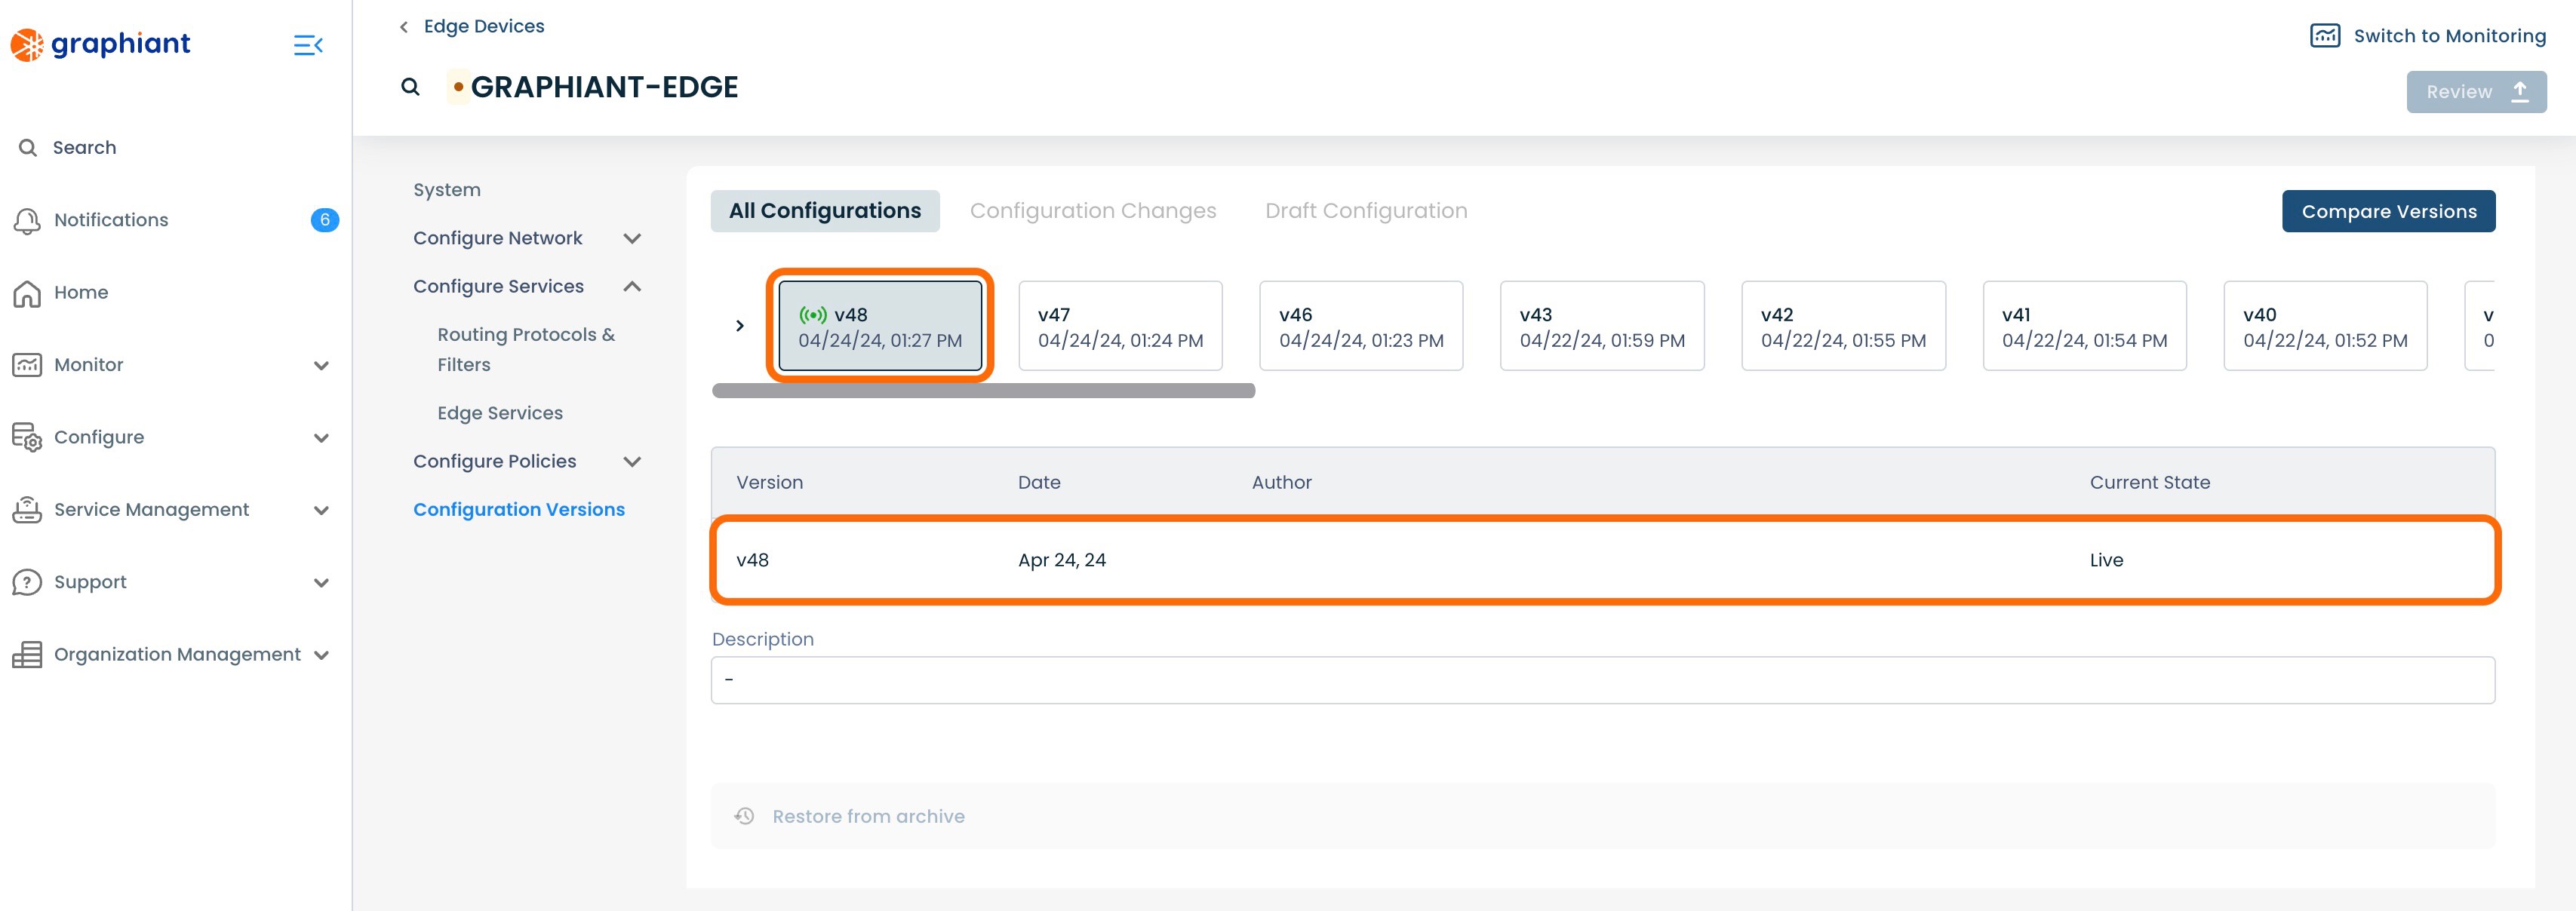
Click 'Apply'.
The new configuration will be highlighted in gray, and show listed below as live.
Override Details and Status
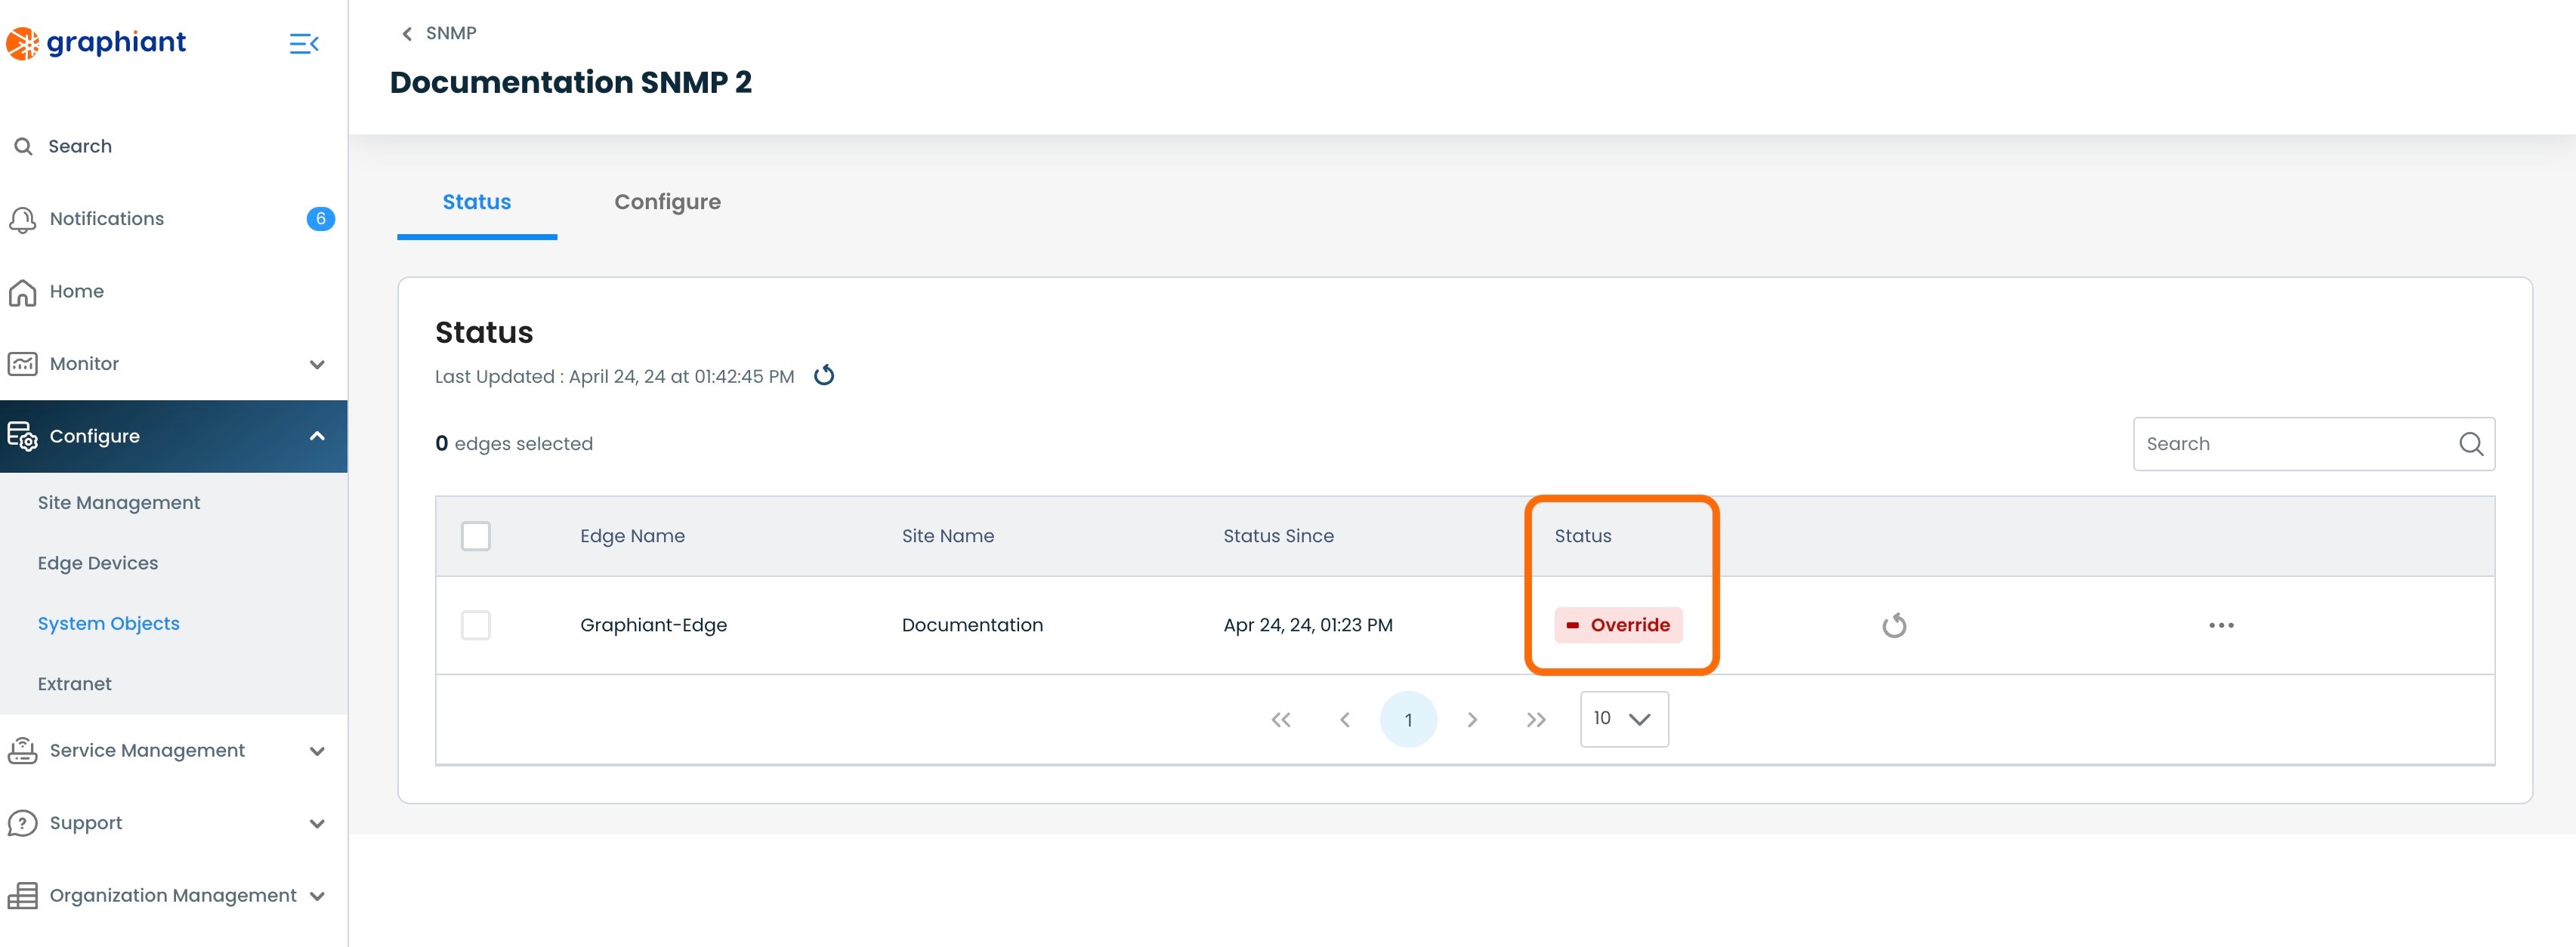
On returning to the SNMP Server table, it will now show an alert under the 'Override' column, with the quantity of Edges that are in Override status for SNMP.
The Site is no longer tracking if the Edge configuration is "In Sync" with the Site's configuration.
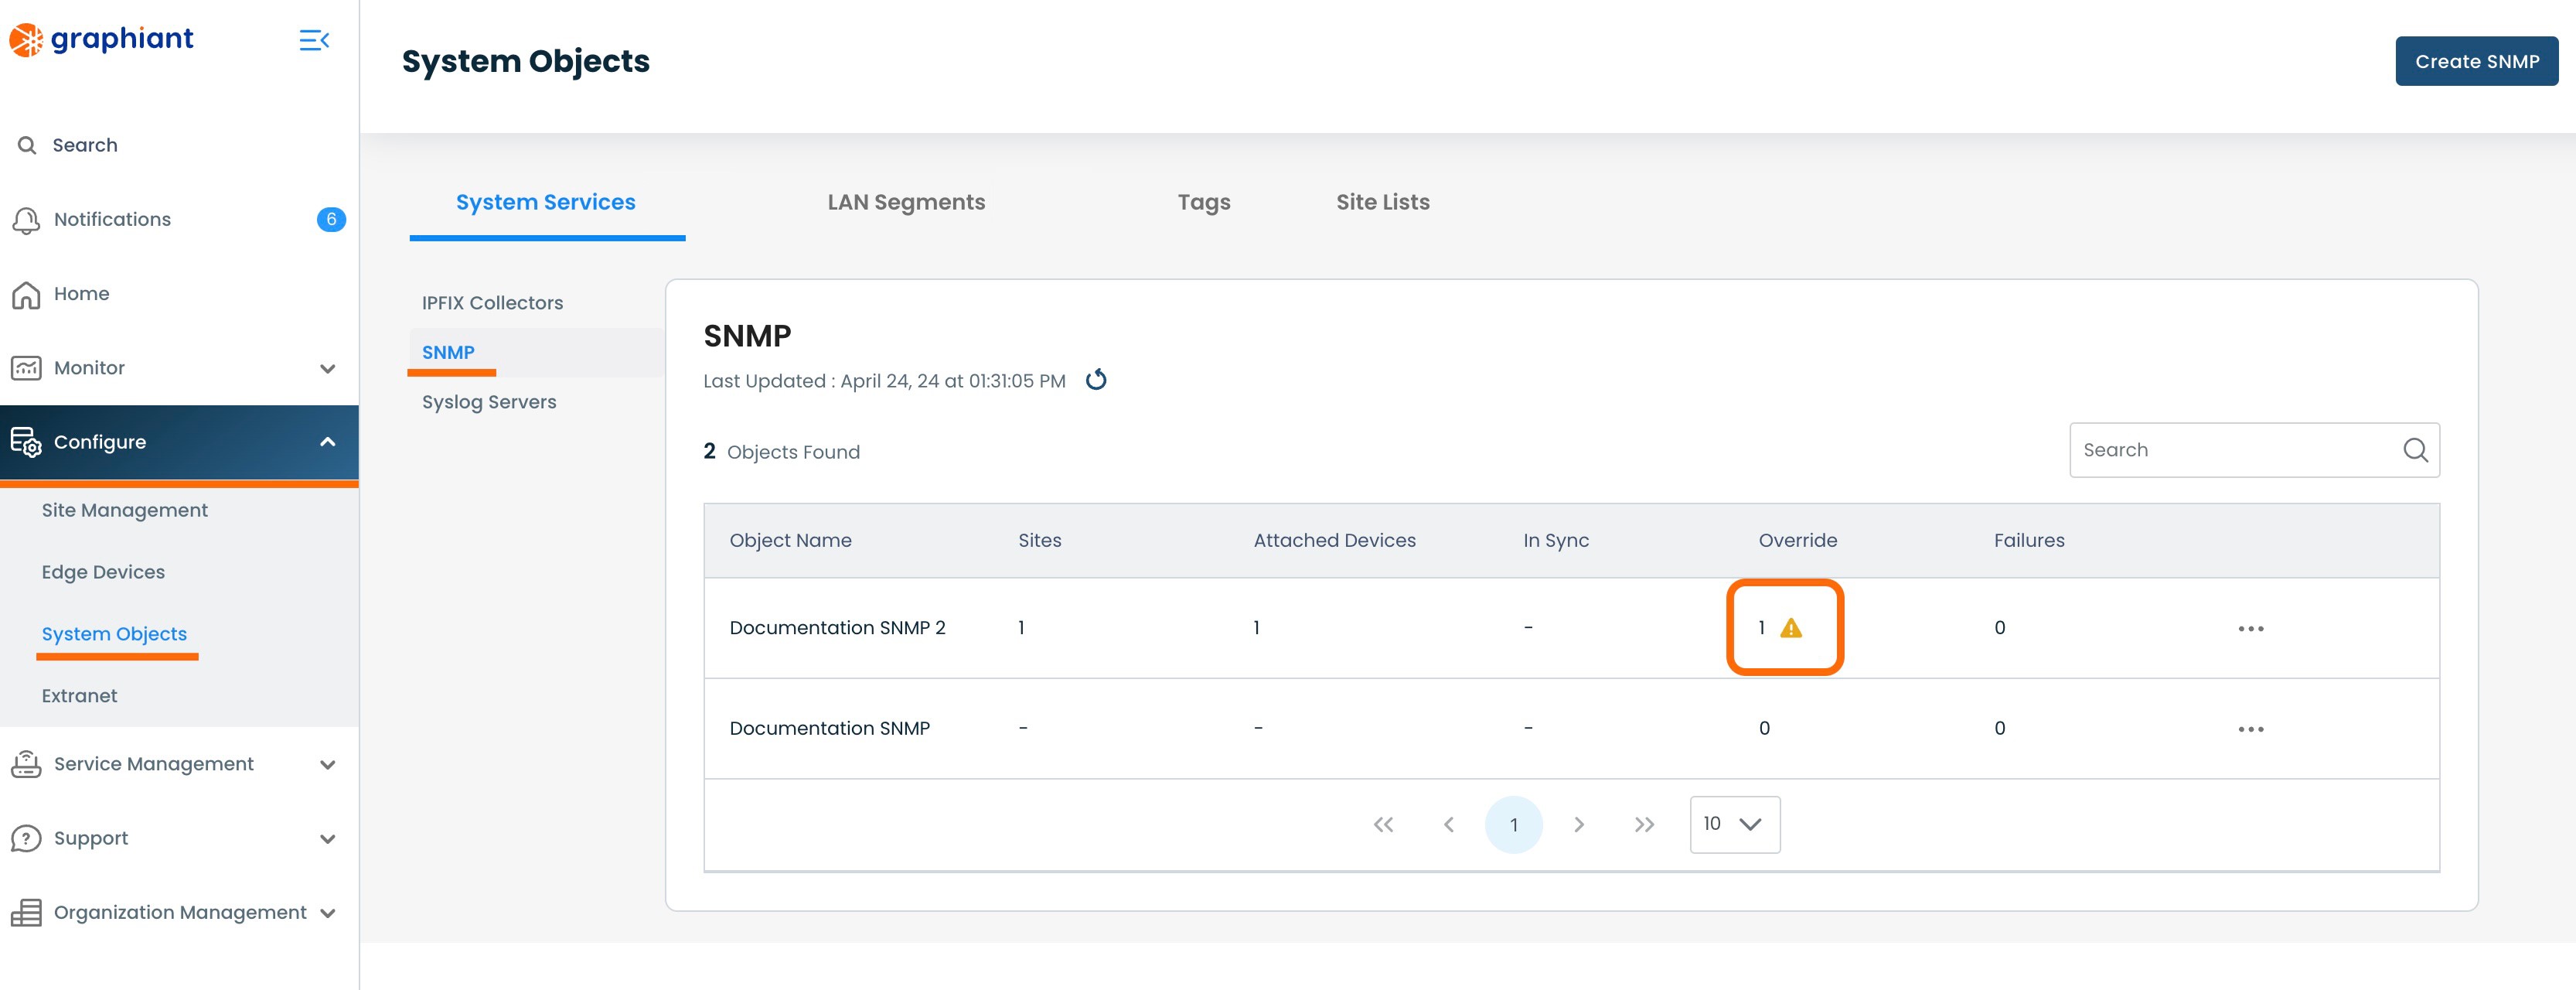
To see the Override details, click on the 3 dots to the right of the SNMP Server with the override; select 'View Details'.

This will bring up the Status screen for the Edges. The Edge that has been configured while in Override will read the Status of "Override".
Restoring an Edge from Override Configuration to Site Configuration
When the Edge is ready to go back under the Site configuration and out of Override Status, return to the SNMP Configure Screen for the Edge, where the Override switch is located. (For help finding this screen, click here).
Click the 'Override' switch; hit 'Review'.
Note:
When Override is deselected, all fields edited in the Override are cleared, and automatically put back to Site configuration selections.
This will bring up the "Configuration Versions" screen for the Edge.
Next to 'Edge Services' on the left will be warnings. One will indicate that the SNMP Server has been deselected for Override, and any others will reflect the number of changes that will be automatically reverted within the configuration when it again pulls down from the Site configuration.
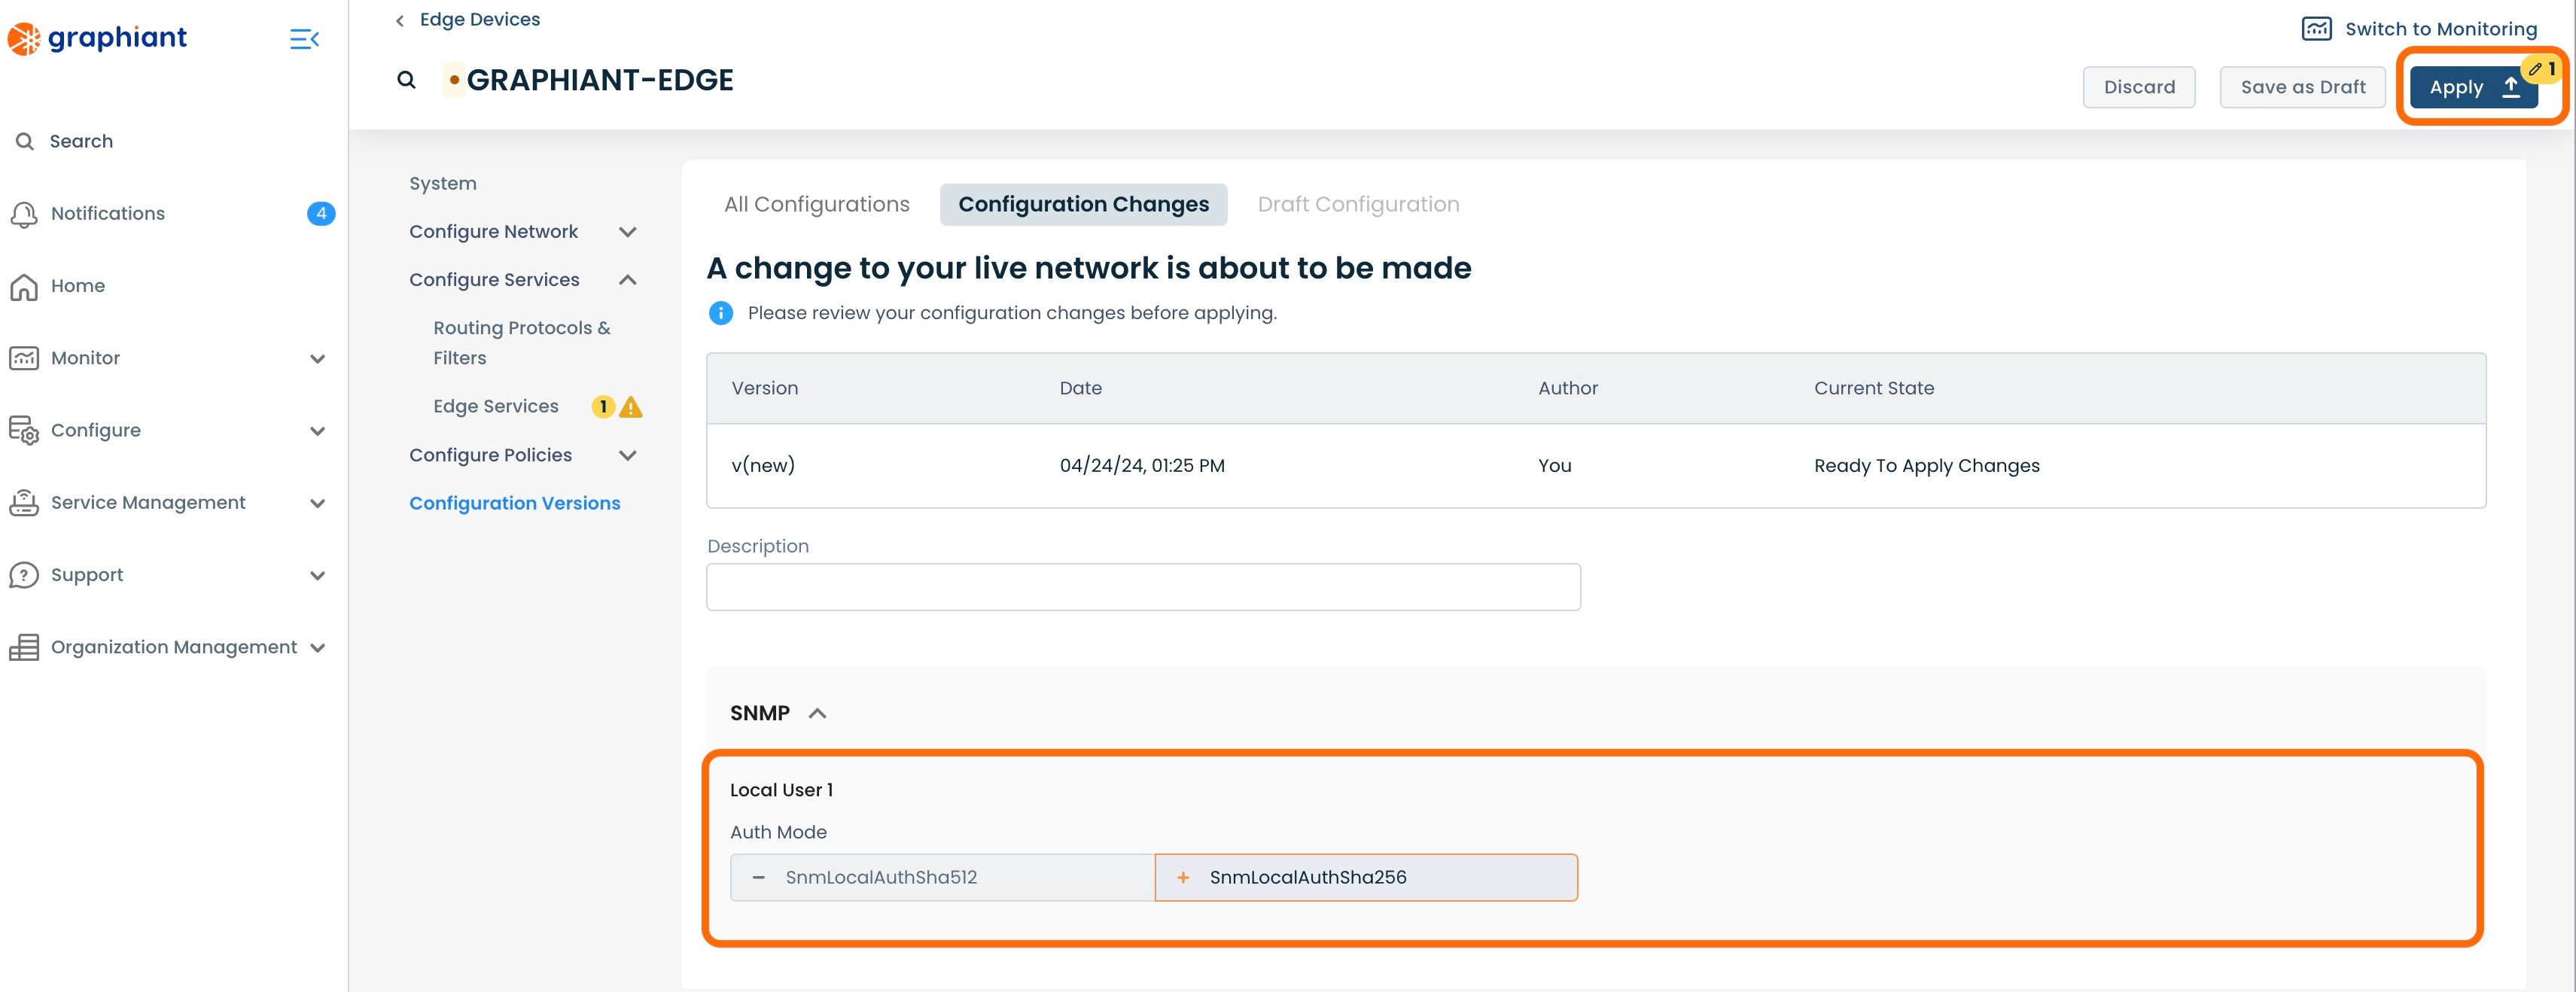
To see the exact changes that will be made in the configuration, click the 'SNMP' drop-down.
The configuration changes to be made once applied are shown here.
Click 'Apply'.
The new configuration will be highlighted in gray, and show listed below as live.
On returning to the SNMP Server table, it will now show that the Edge is no longer included in "Override".
Note:
Any other Edges in that SNMP Server that are in Override will still be included in this column.
The SNMP table will now show that Edge as "In Sync", as it is again getting it's configuration from the Site.
Cloning a System Objects SNMP Server
An SNMP Server can be cloned, for ease of creating a new SNMP Server that is mostly identical to a previously created SNMP Server, with just a few changes.
To clone an SNMP Server, navigate to the SNMP Server table.
Click the 3 dots to the right of the SNMP Server to be cloned; select 'Clone'.
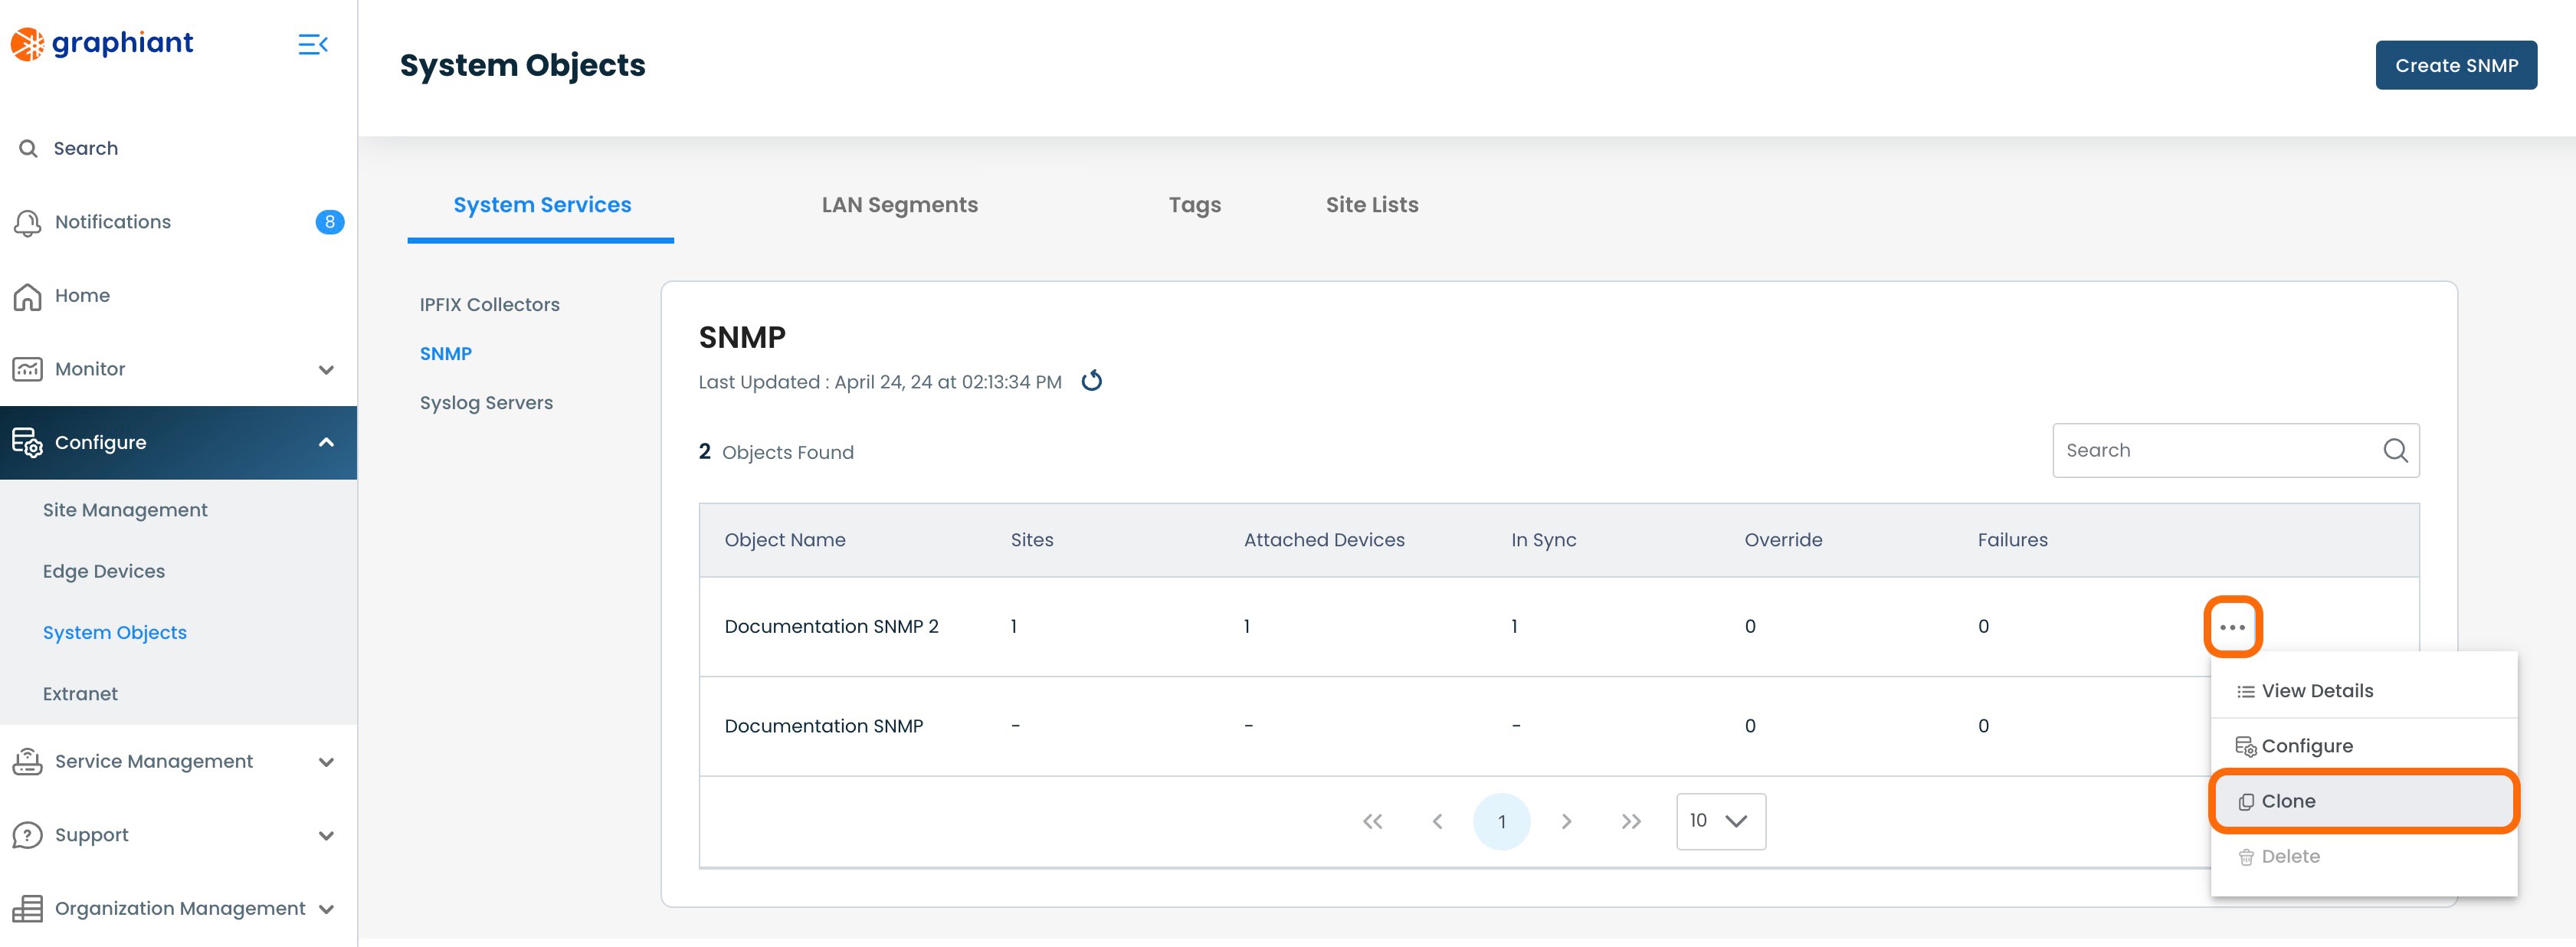
This will open a Configure screen for a copy of the SNMP Server that was cloned.
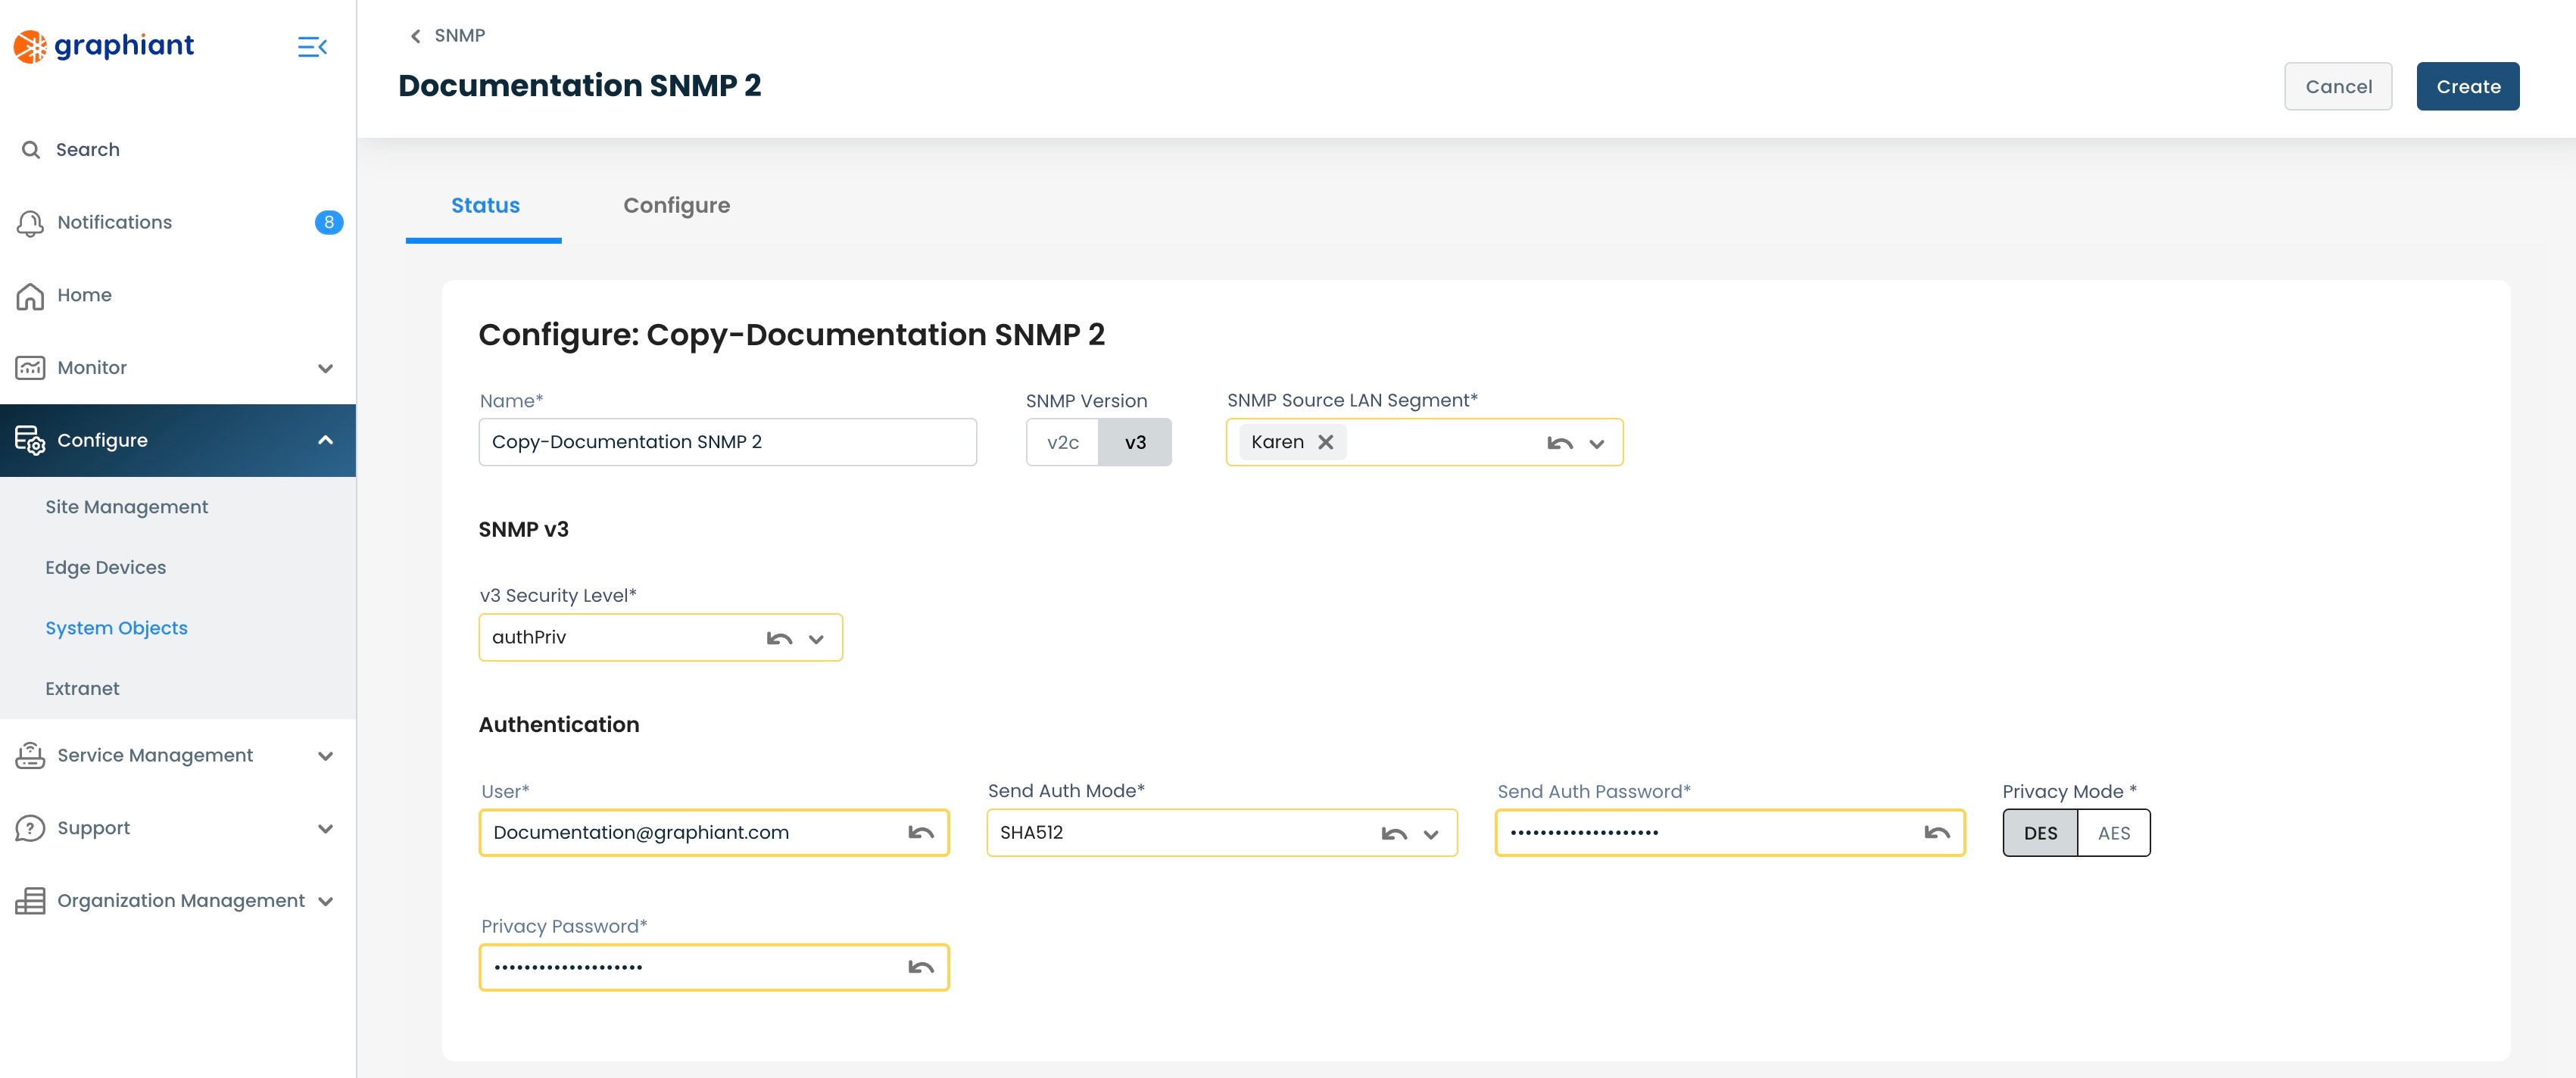
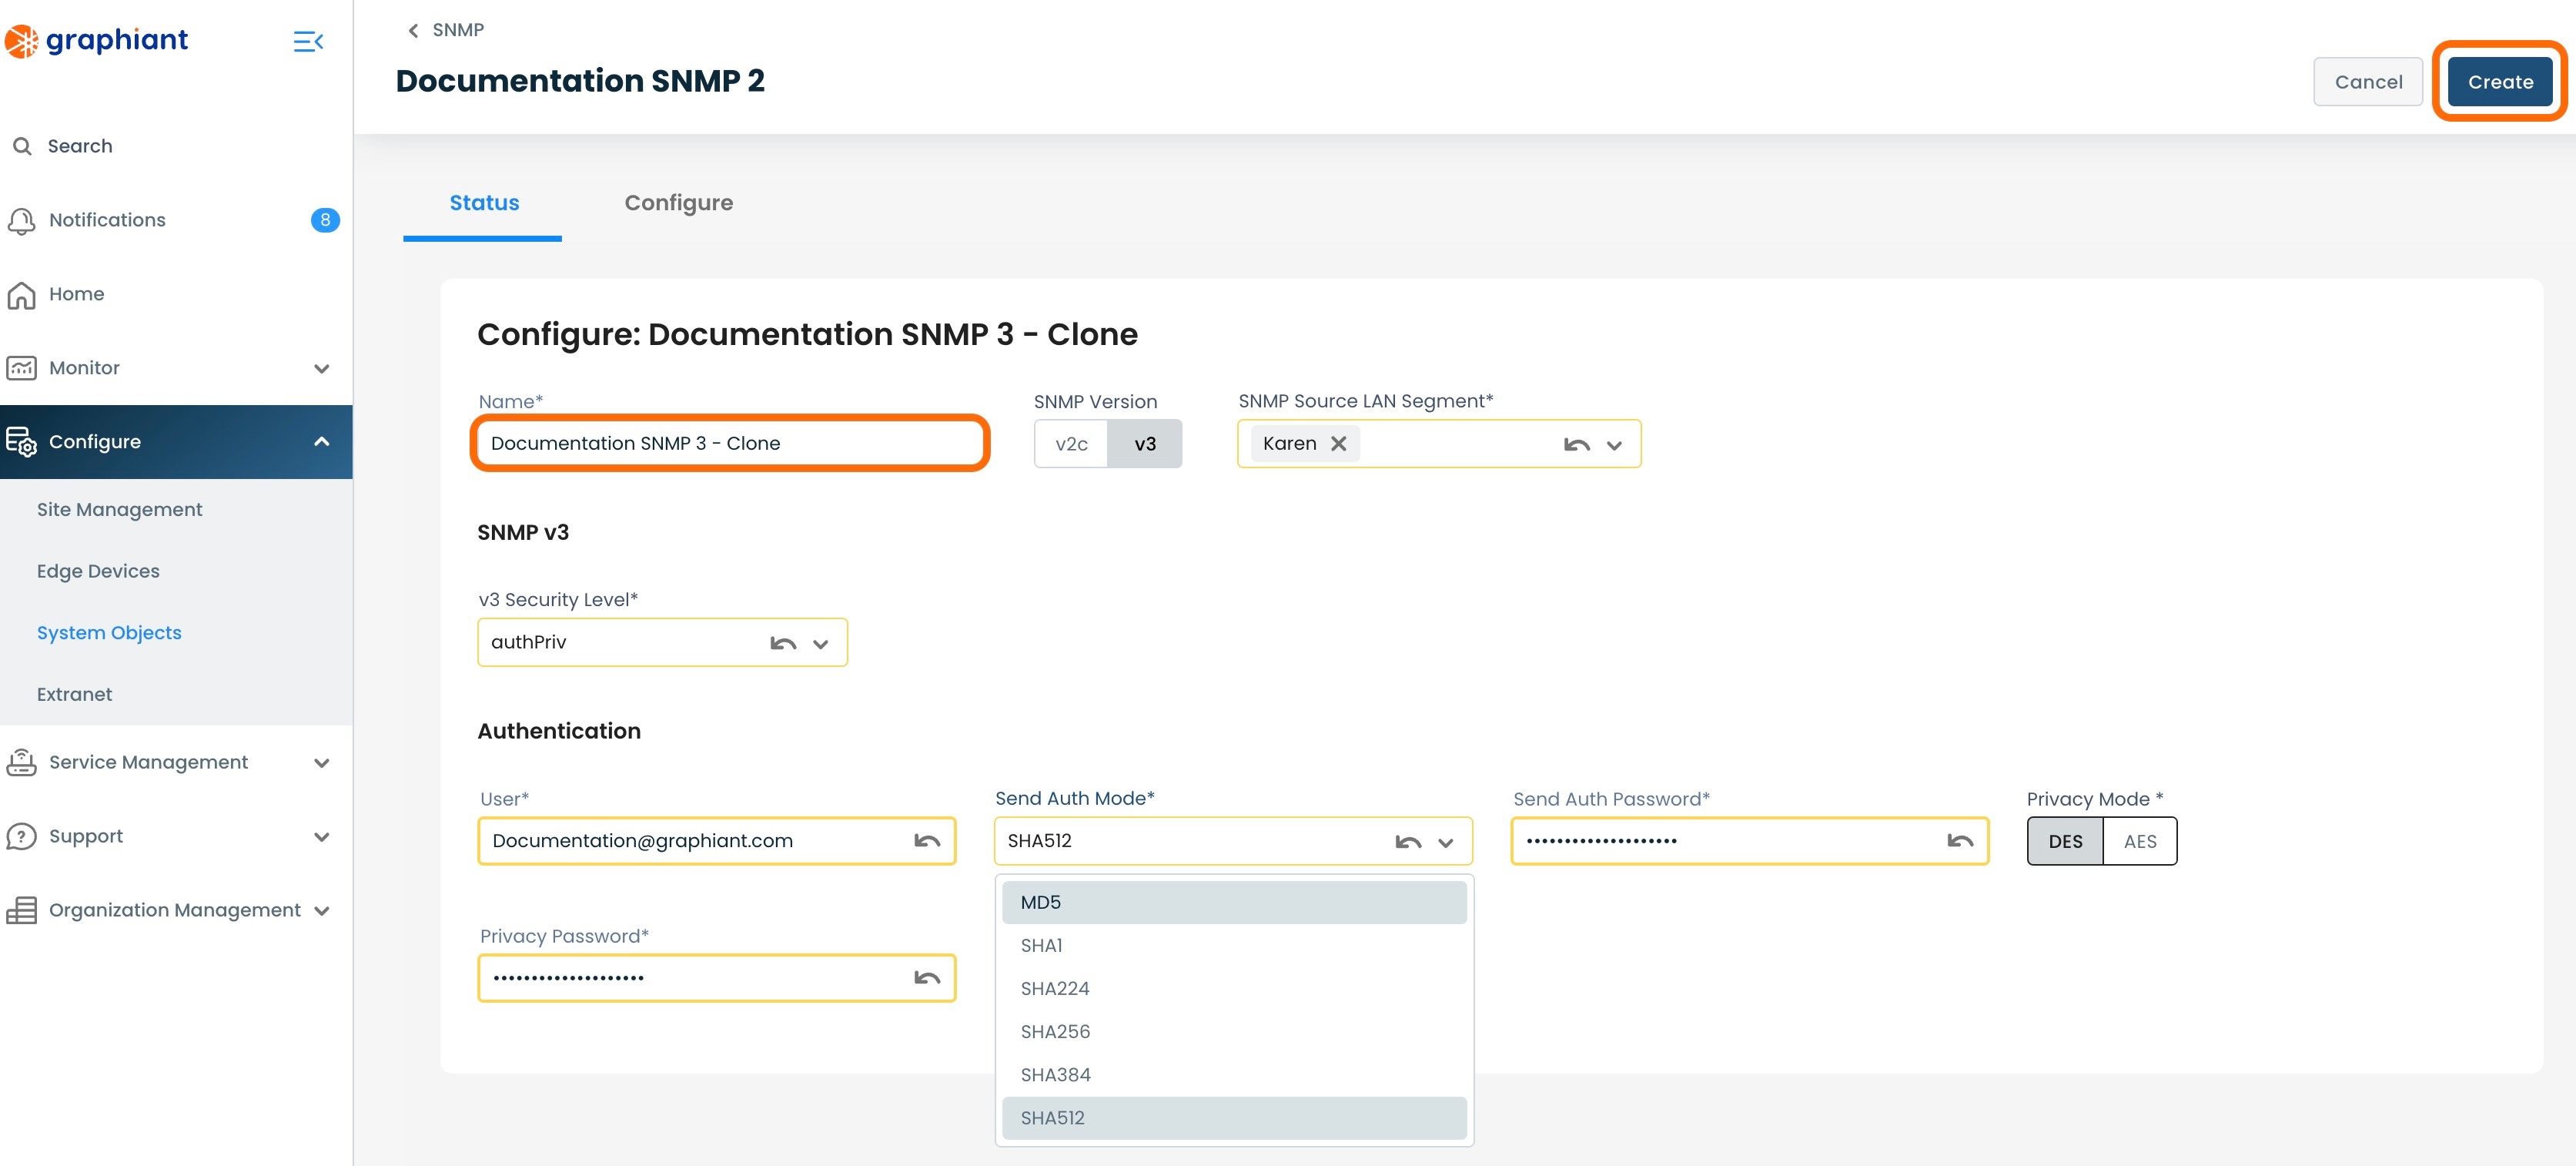
Name: Edit this field so as to have distinction from the original SNMP Server.
Edit any desired fields that will differ from the original.
Click 'Create'.
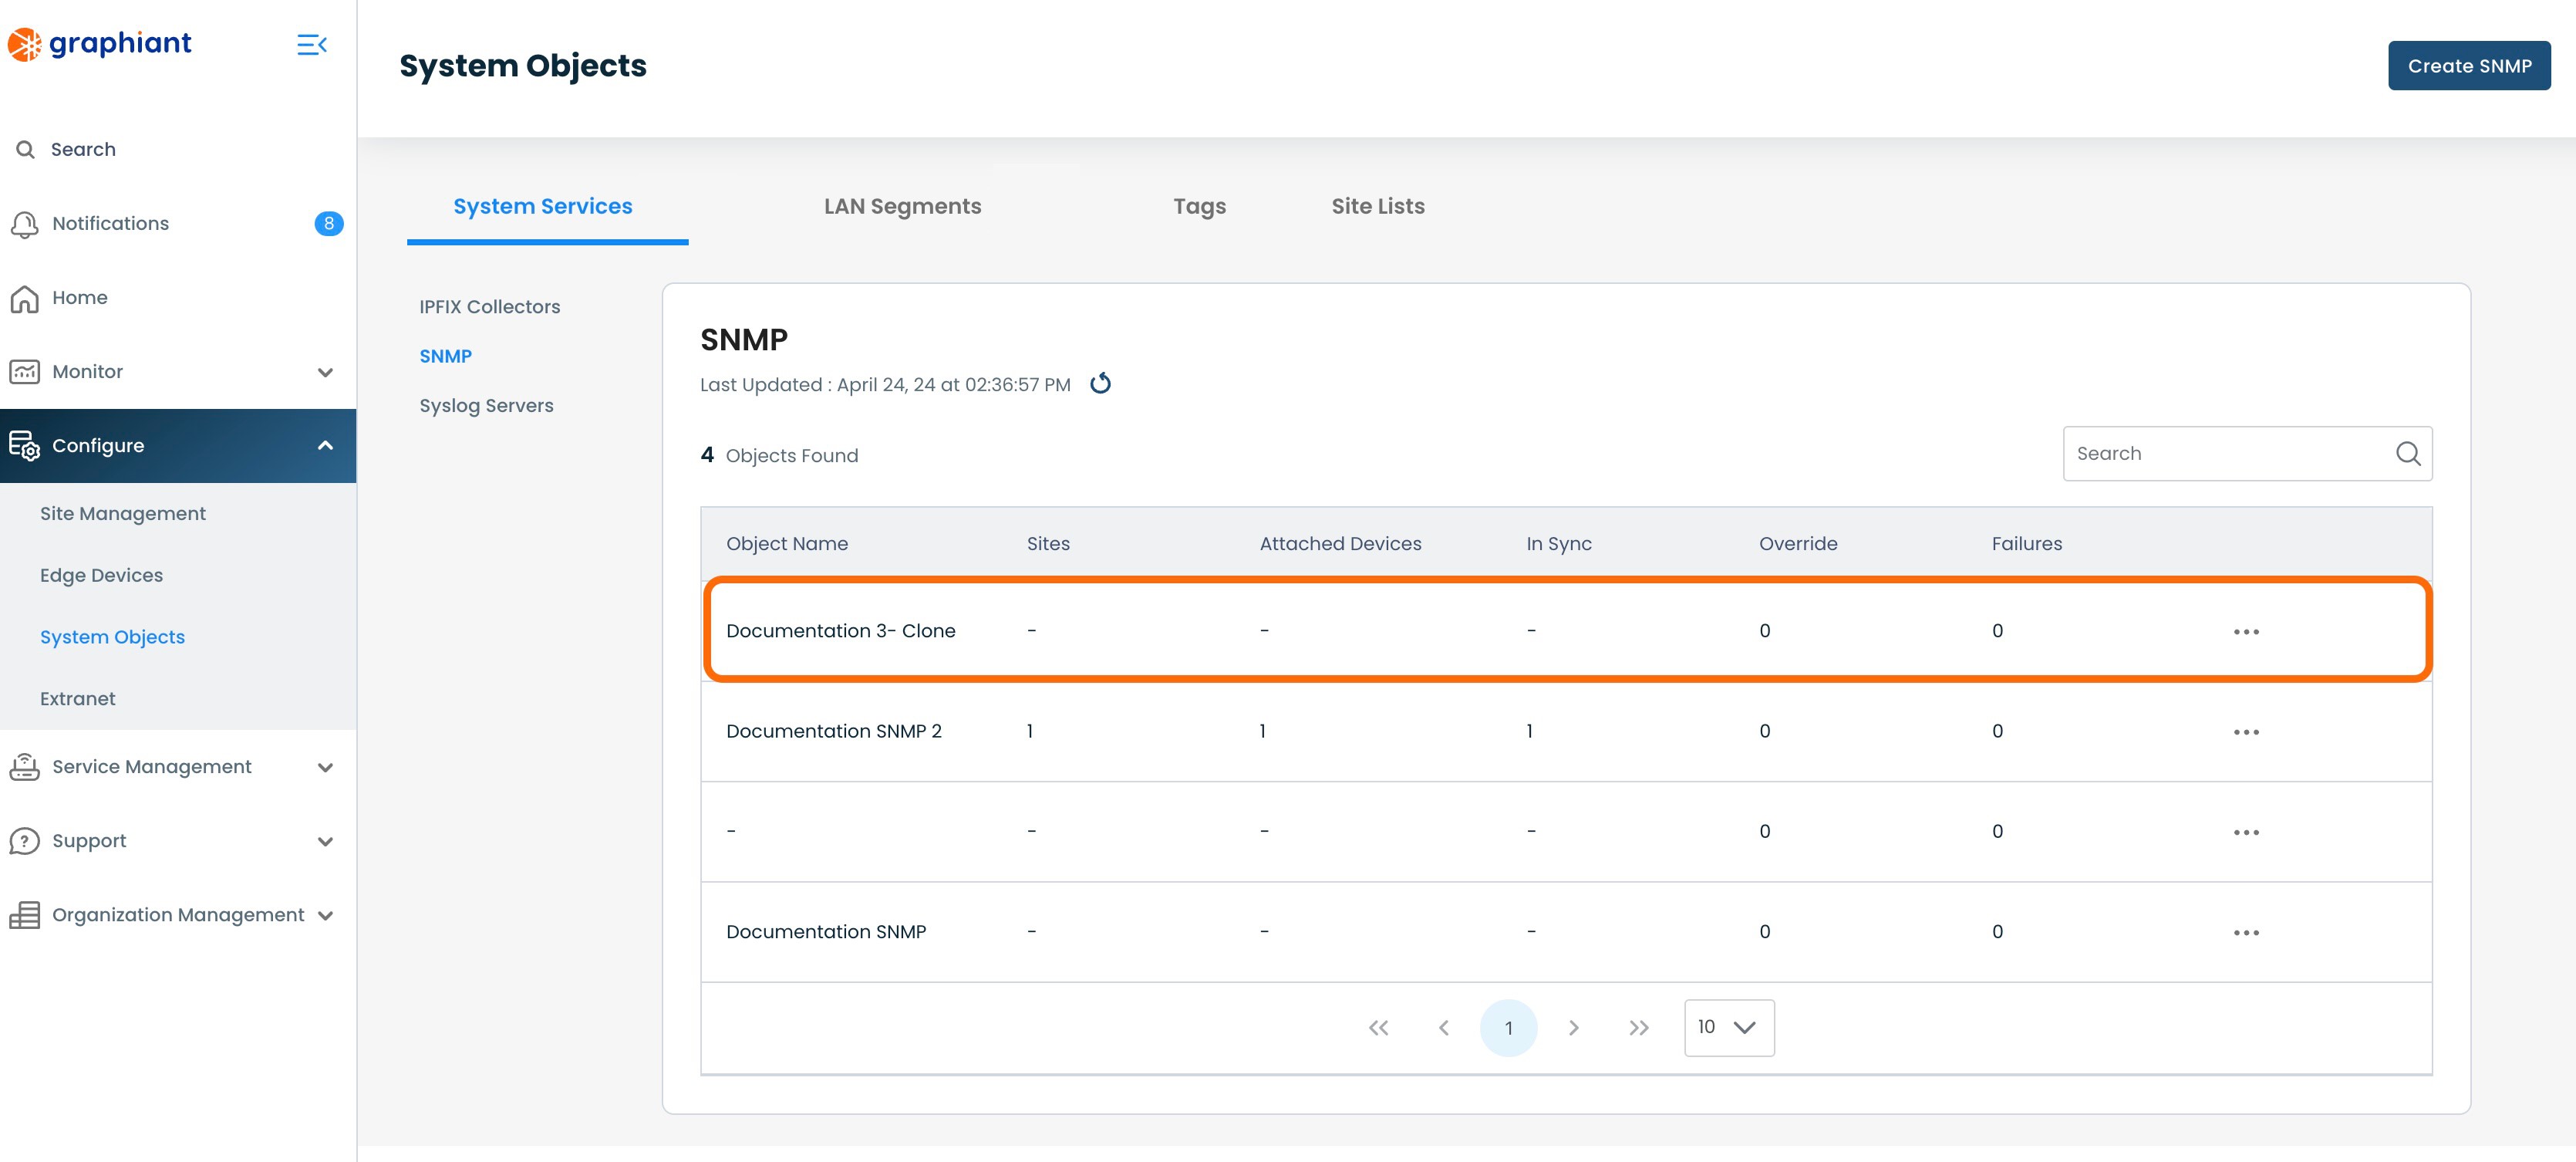
The cloned SNMP Server will now appear in the SNMP Server table.
Detaching a System Objects SNMP Server from a Site
To detach an SNMP Server from a Site so that the Edges attached to that Site will no longer receive that SNMP Server configuration, navigate to the Site Management Summary screen for SNMP.
Click 'Configure' from the left side menu from anywhere in the Portal; select 'Site Management'.

Click the 3 dots to the right of the Site from which the SNMP Server will be detached; select 'Edit'.

Click 'Site Services' under 'Summary'; select 'System Services'.
Select the 'SNMP' tab from across the top.

This page will show all of the SNMPv3 Servers for the Site.
Locate the SNMPv3 Server to be detached.

Locate the "Config Mode" switch immediately under the 'SNMP Configuration' heading.
Select 'Off' for Config Mode.
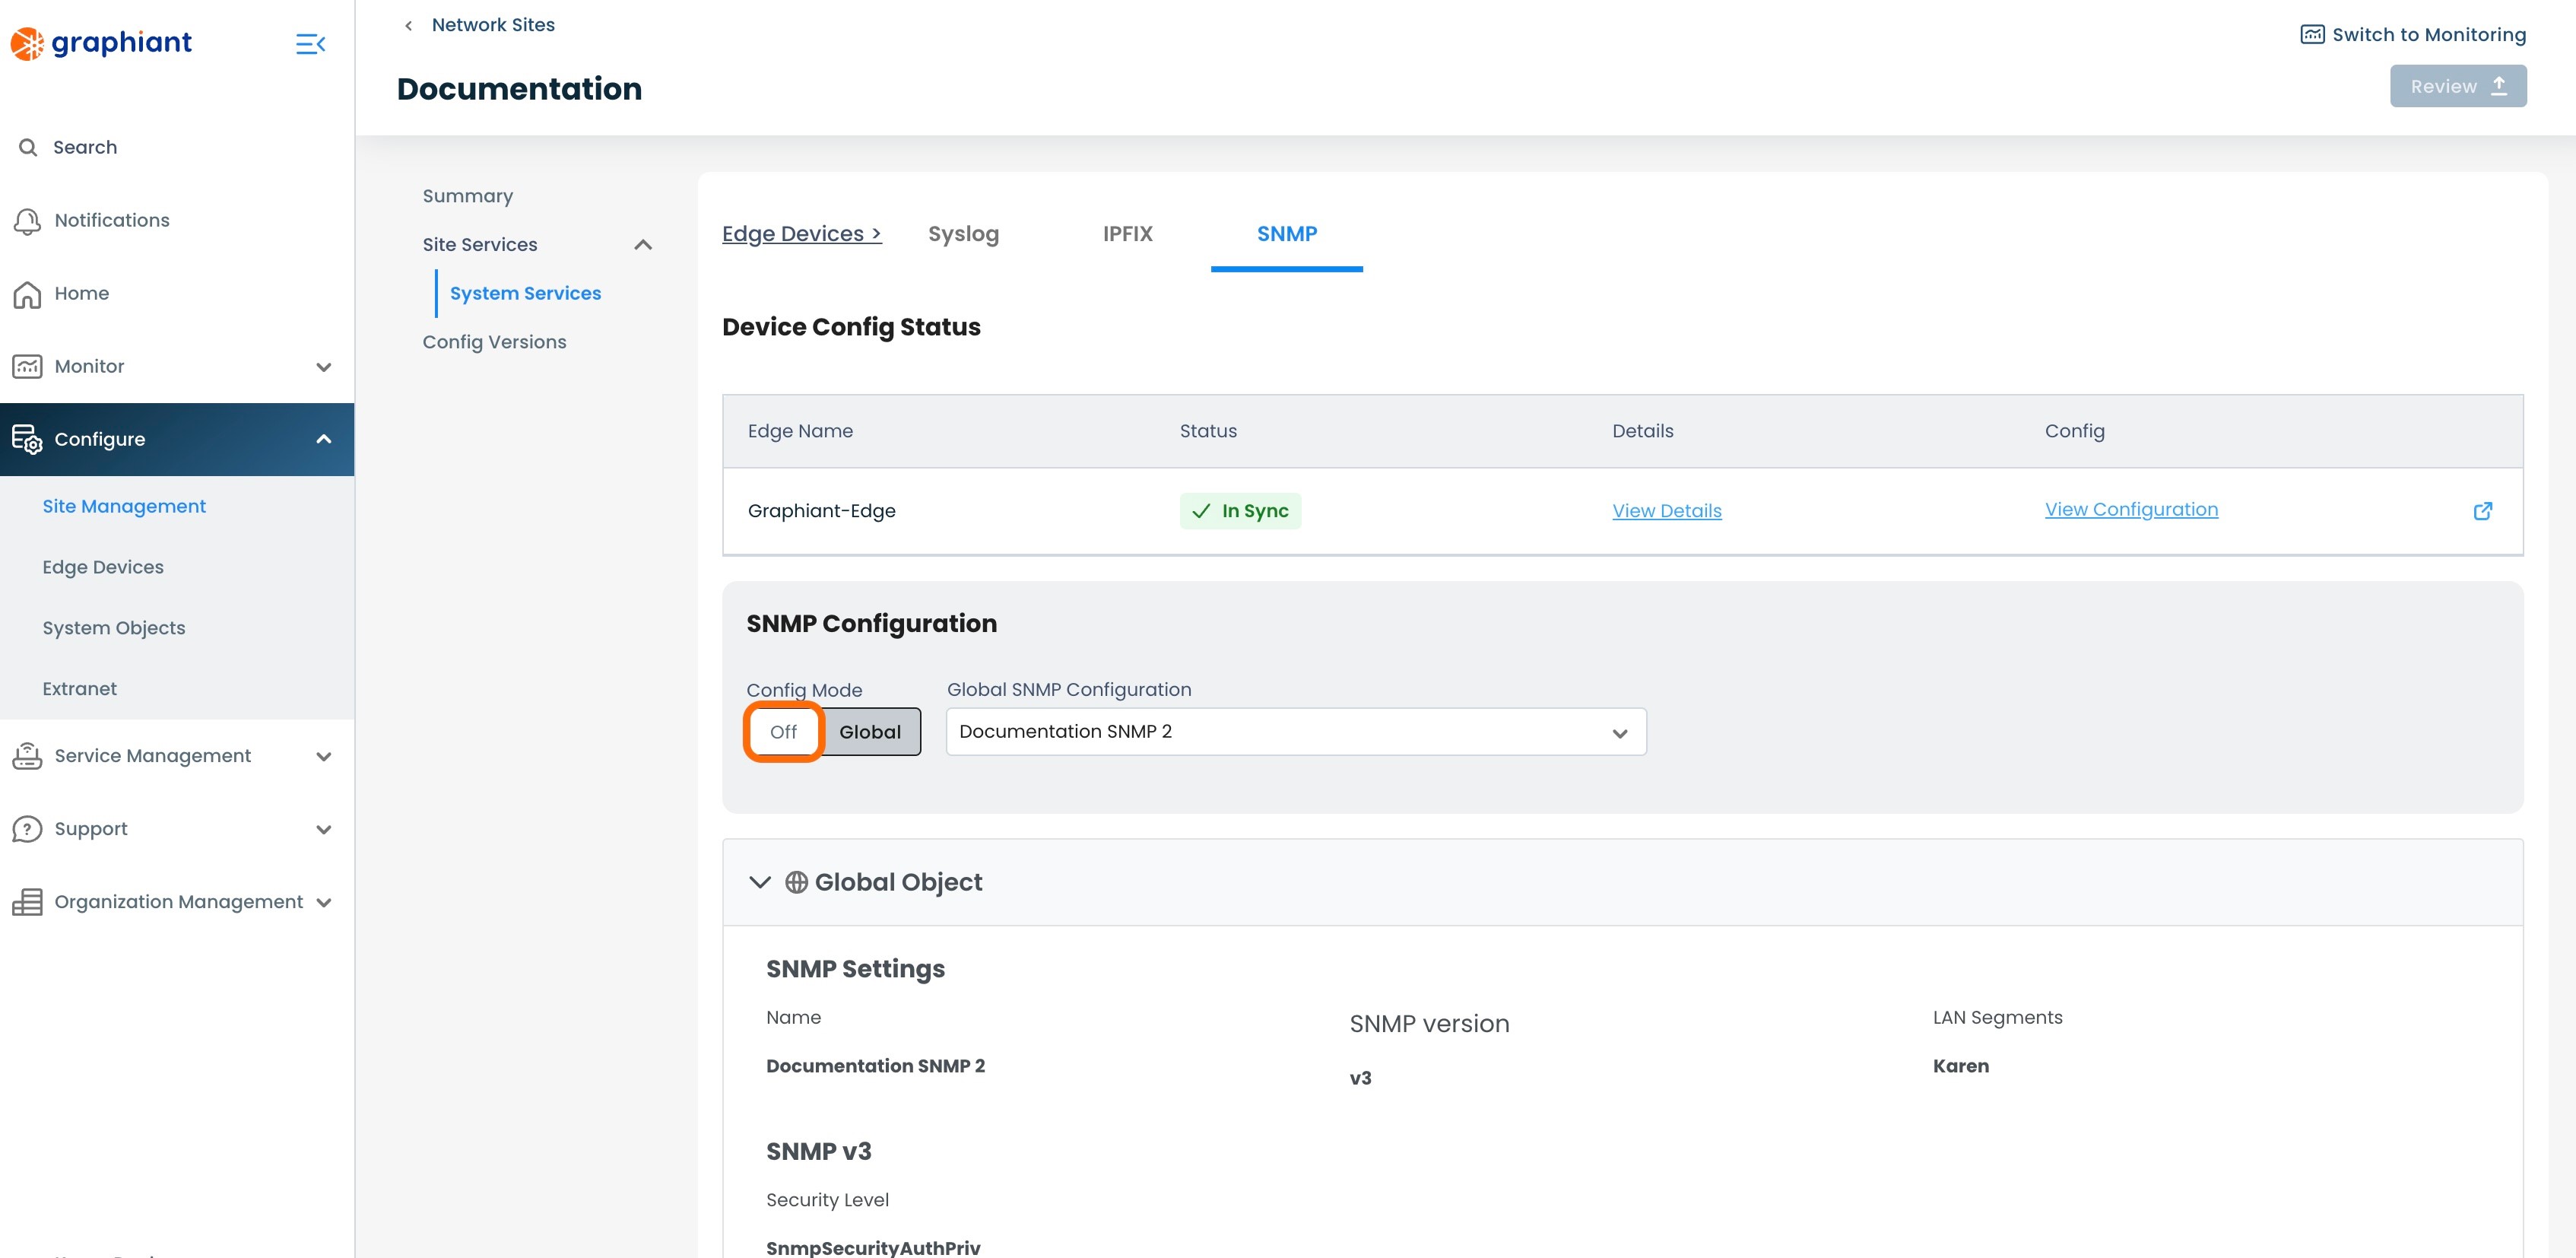
The SNMP Server will now longer be listed under the System Objects in SNMP.
'Review' & 'Apply'.
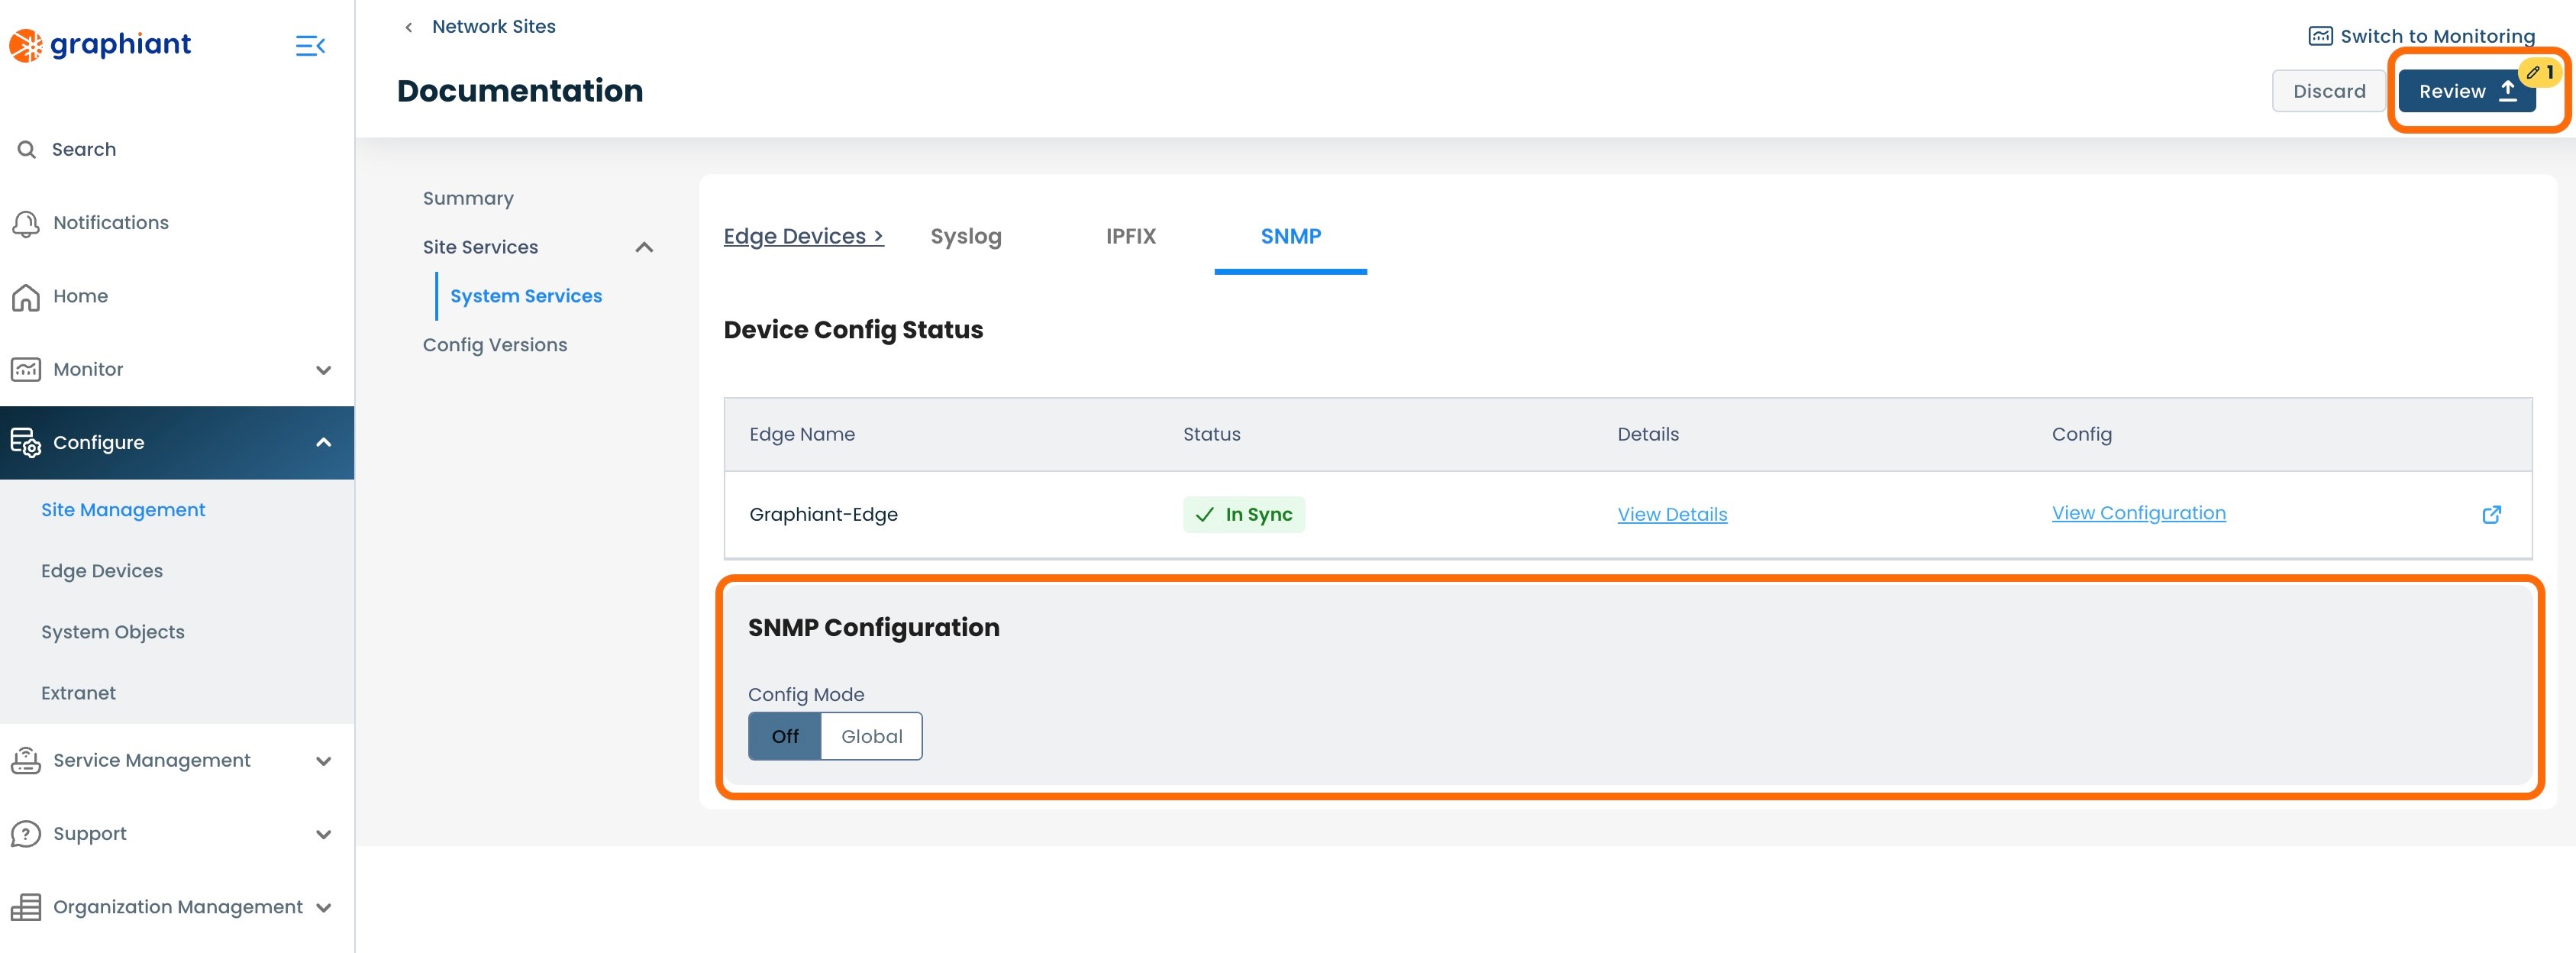
The SNMP Server will now be detached from the Site.
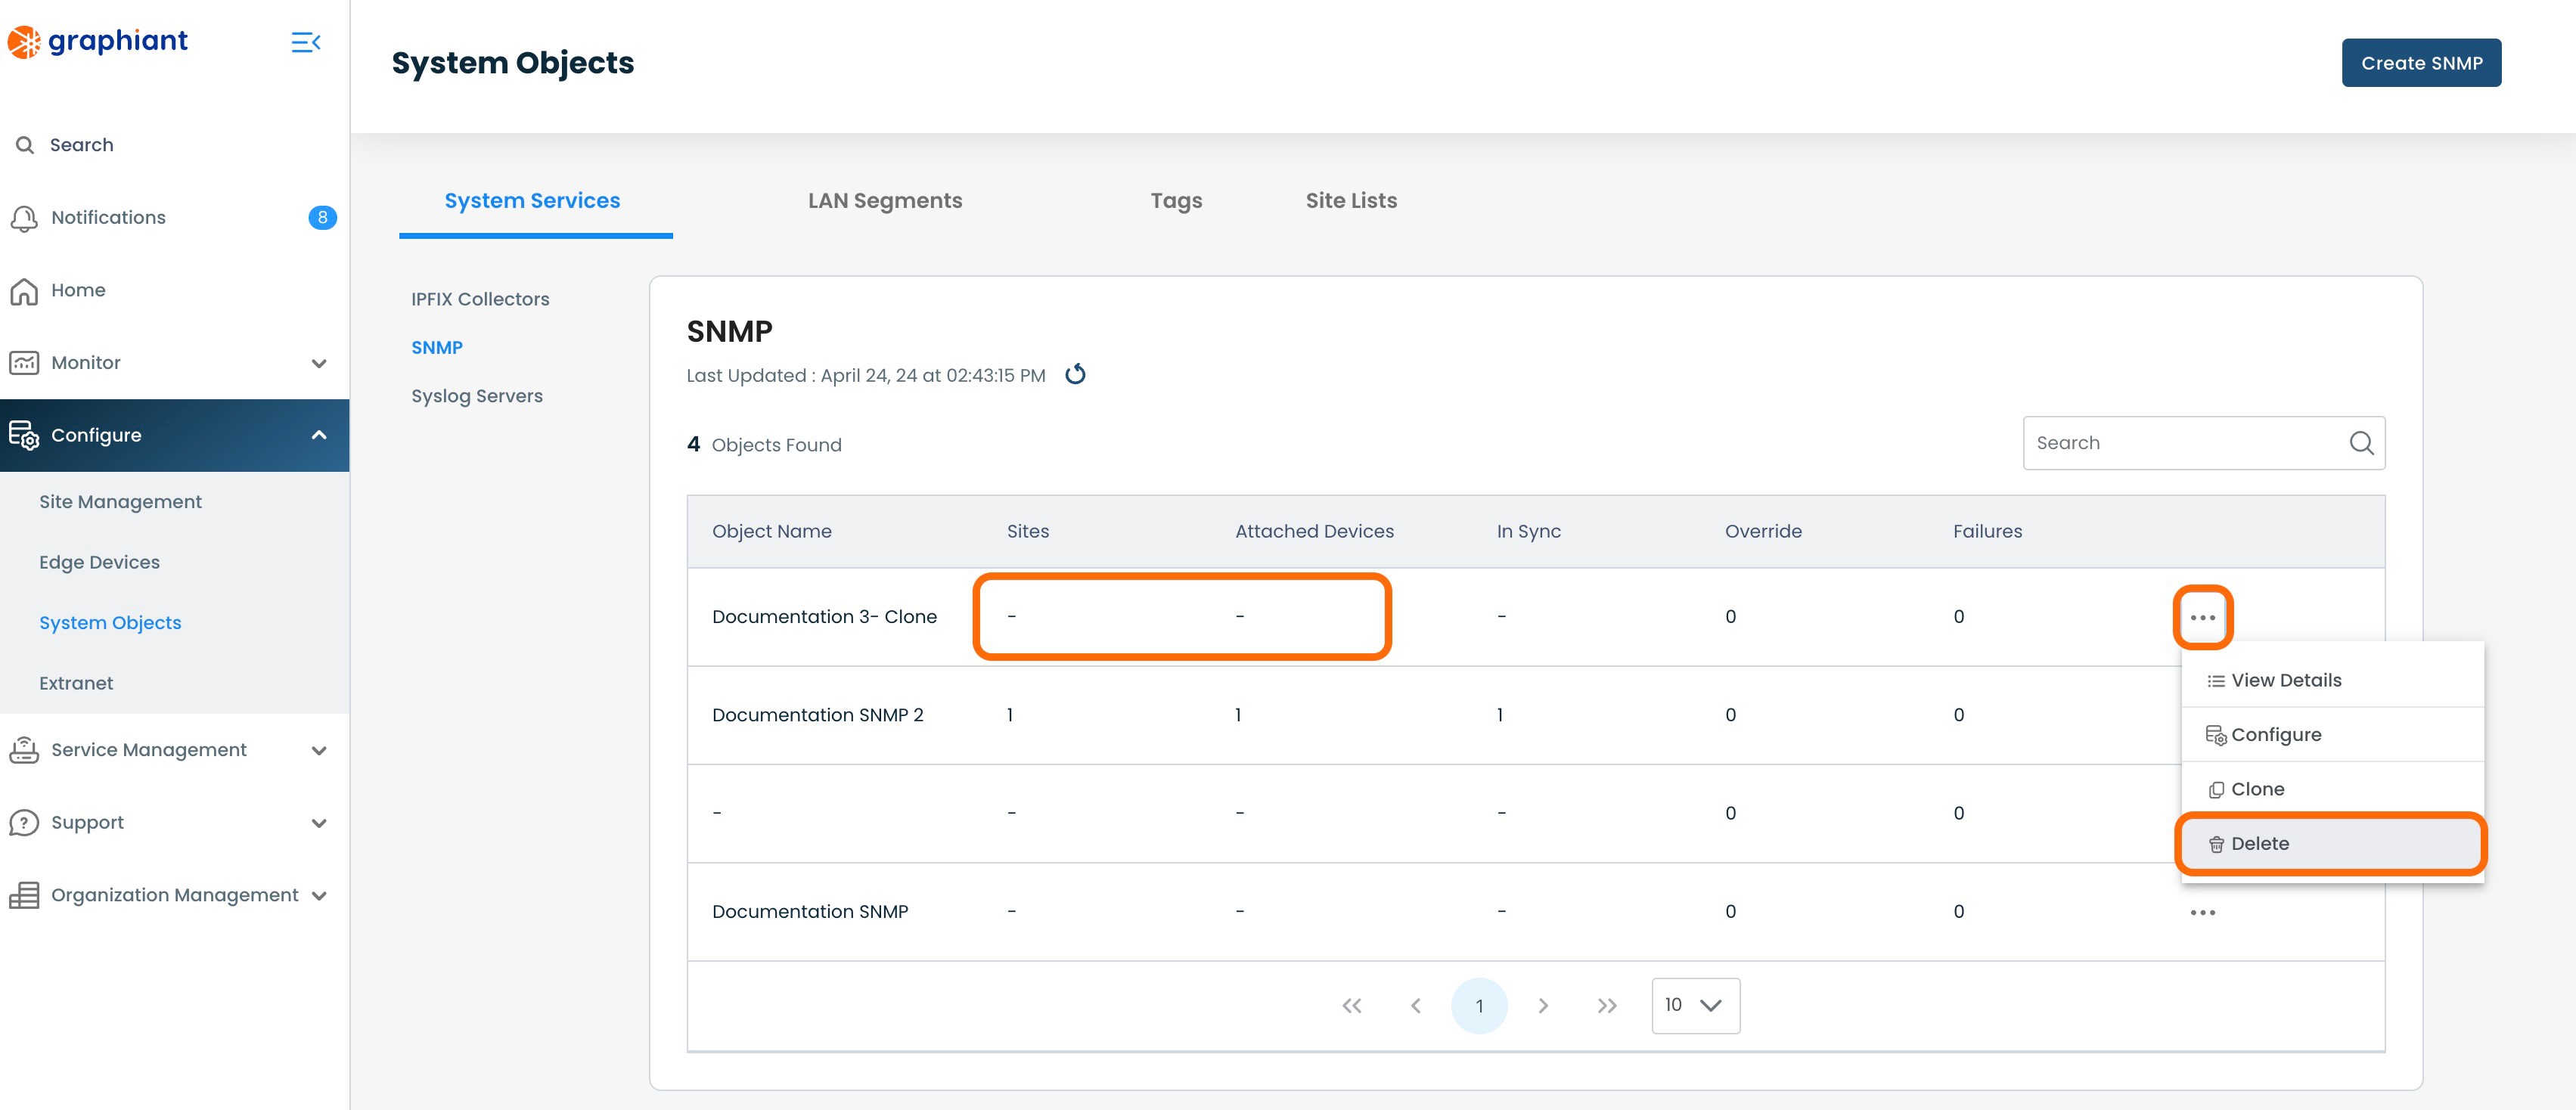
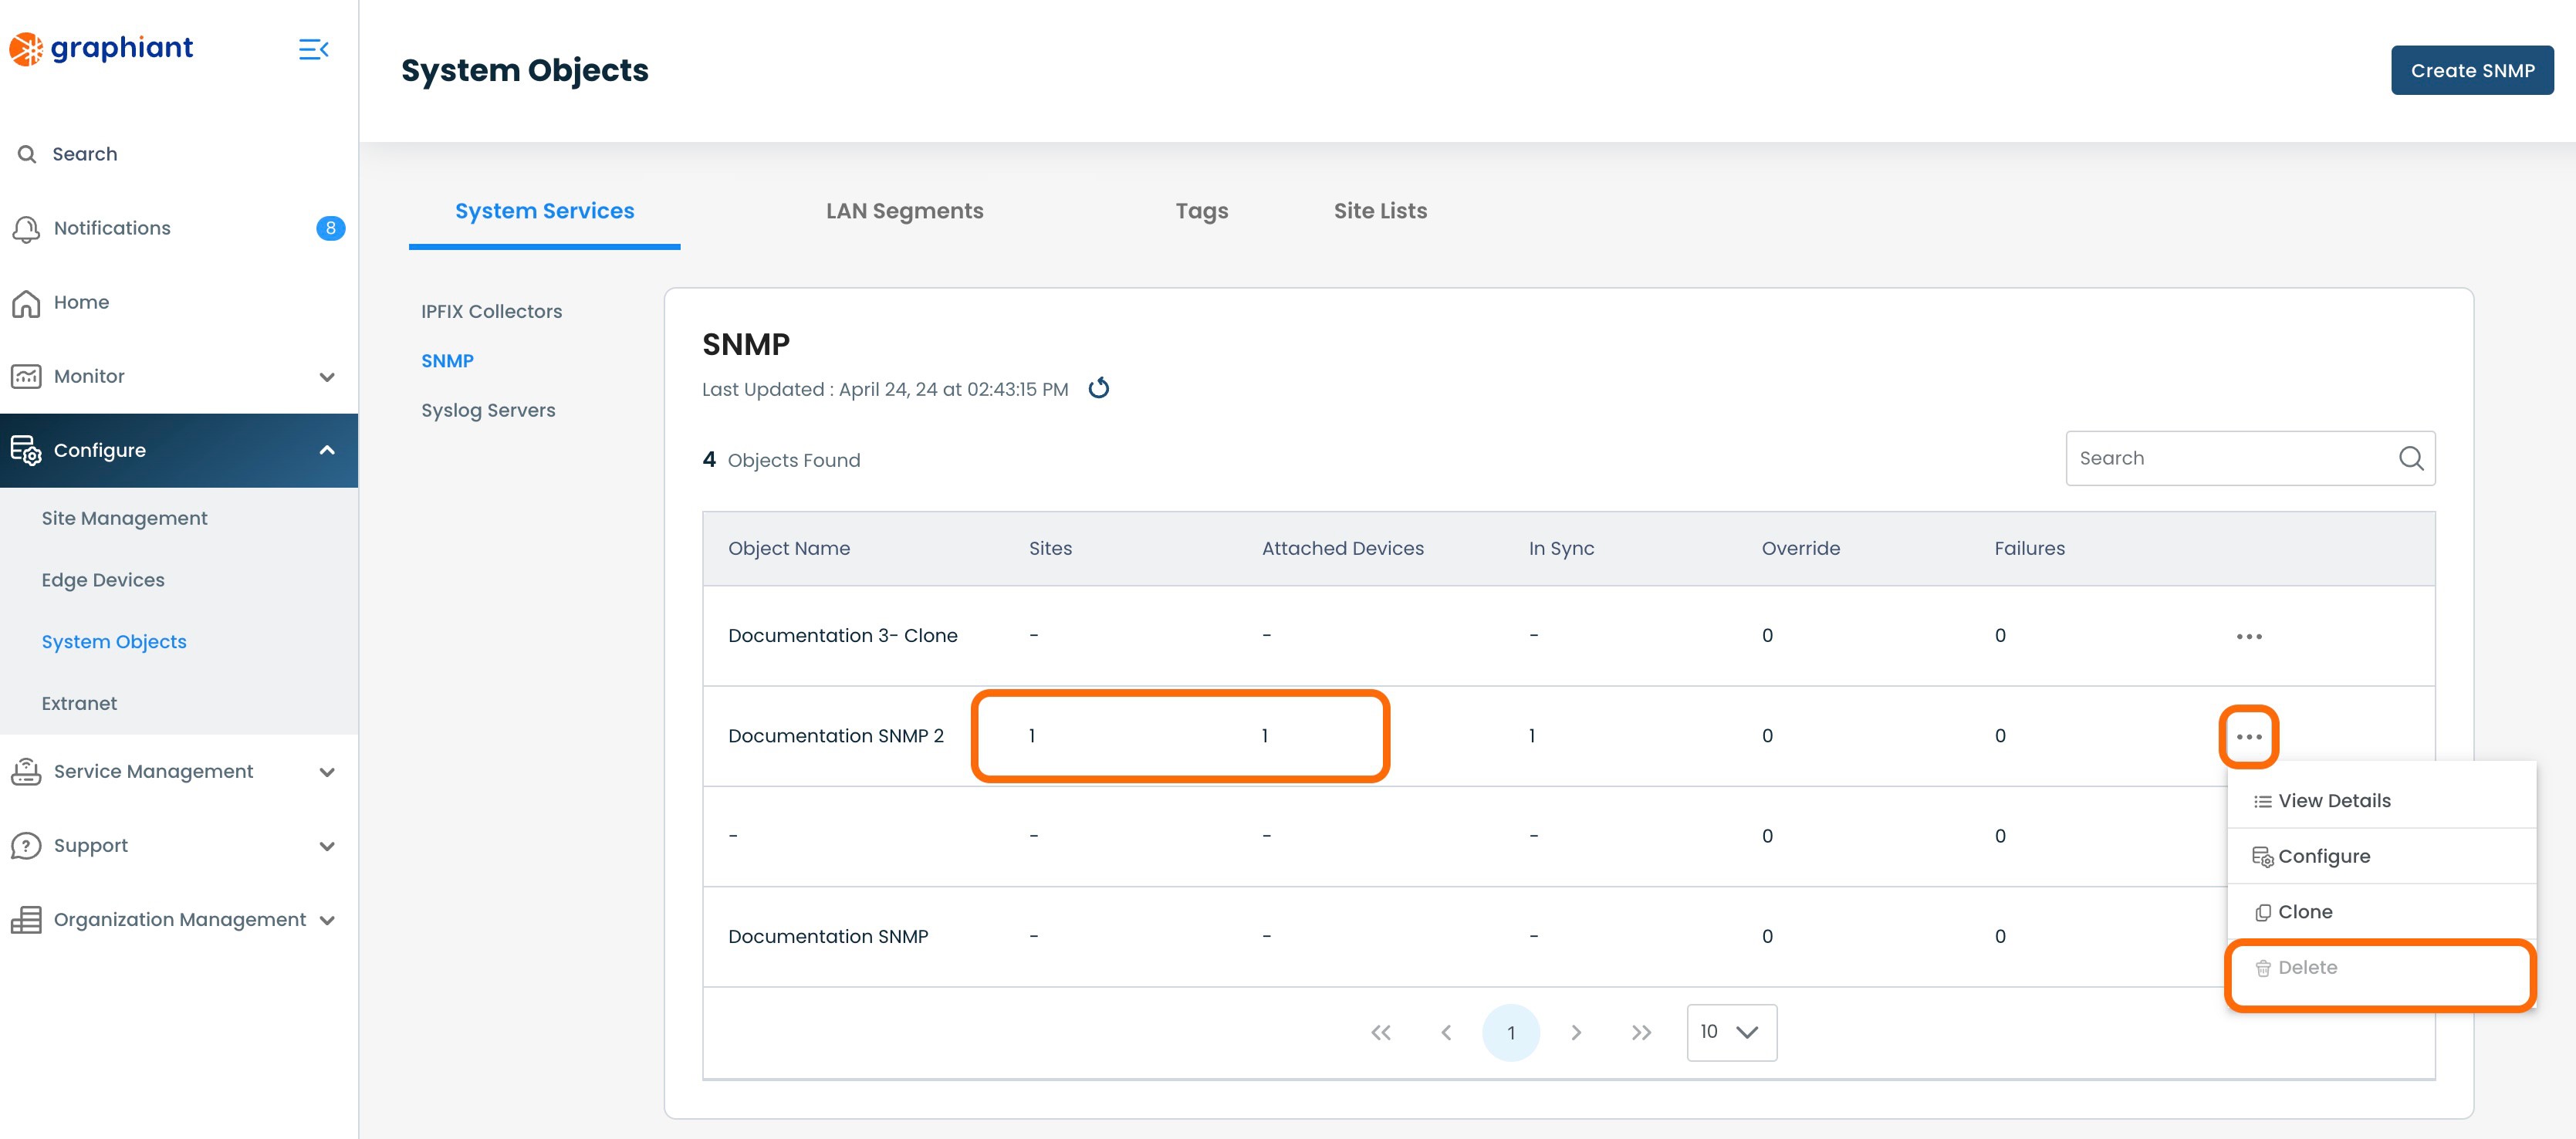
Deleting a System Objects SNMP Server
To delete an SNMP Server, navigate to the SNMPServer table.
Note:
An SNMP Server can only be deleted if it is has no mappings; it cannot be attached to any Sites, Edges, or have any other references to it within the network.

Click the 3 dots to the right of the SNMP Server to be deleted; select 'Delete'.
An SNMP Server with no Sites or Edges attached and not referenced anywhere in the network will have a successful 'Delete' action permitted.
If an SNMP Server still has Sites or Edges attached to it or is referenced elsewhere in the network, the 'Delete' selection will be grayed out and the Delete action will not be permitted.
A modal will appear with a confirmation to proceed with the SNMP Server deletion.
If the SNMP Server is confirmed to be deleted, click 'Confirm'.
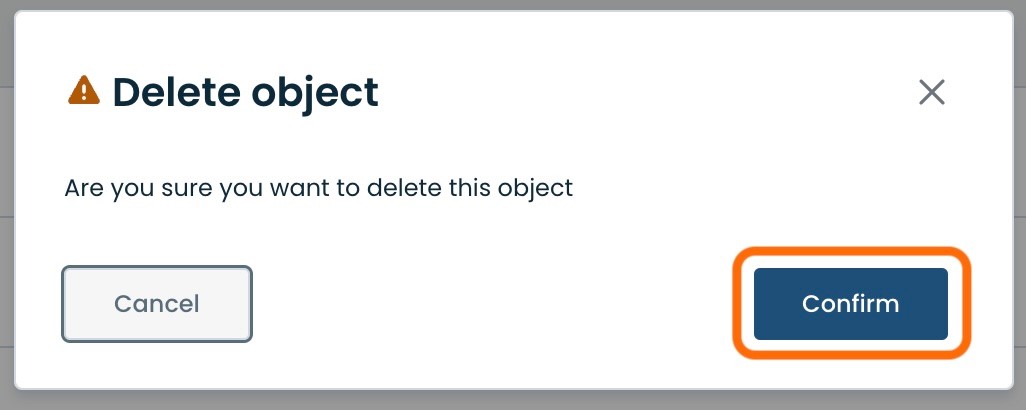
The SNMP Server will be removed and no longer present in the SNMP Server Table.