What are Tags?
A Tag is a label that can be applied to Graphiant Edges to organize them into groups for ease of configuration and policies.
As many Tags as desired can be created; only one Tag can be assigned to each Graphiant Edge.
Tags are alphanumerically named.
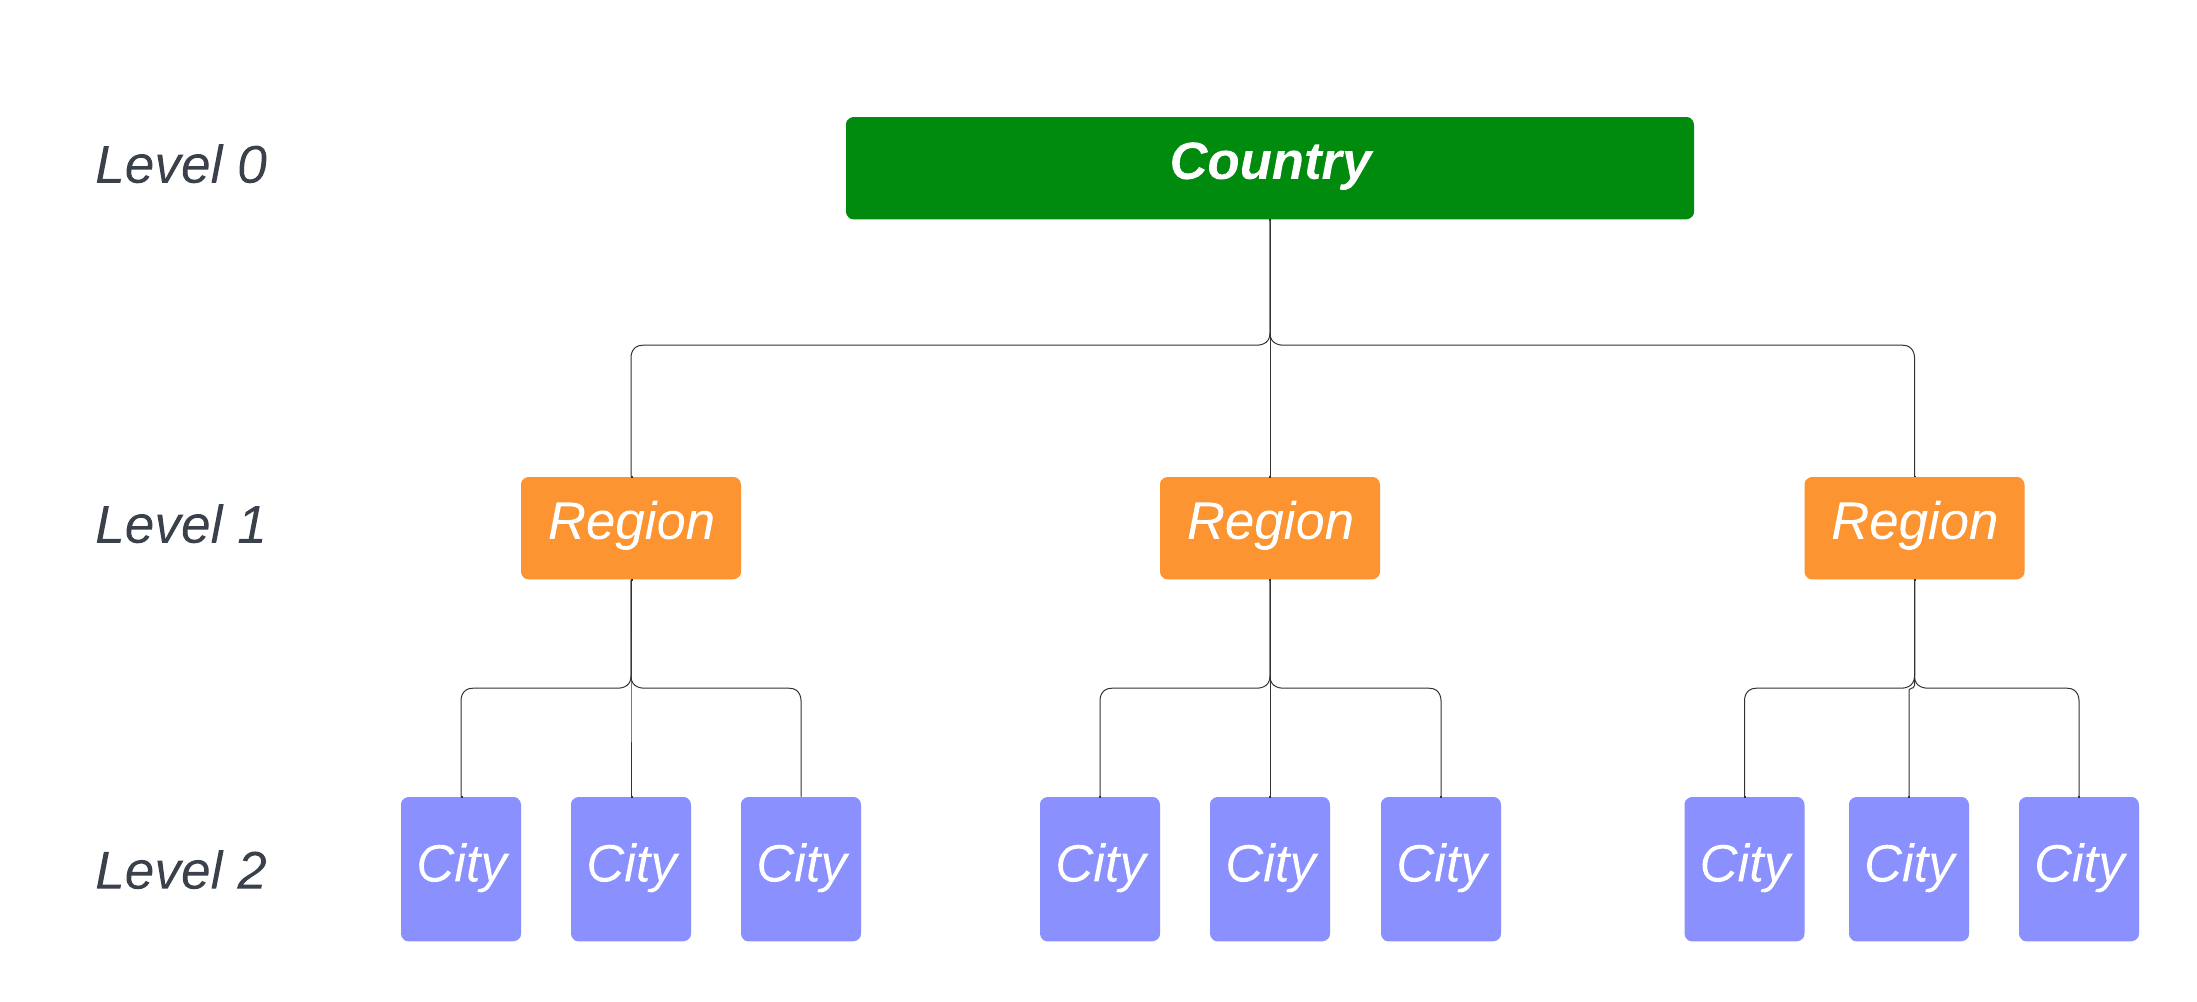
Within a Tag, up to three values can be assigned (Level 0, Level 1, Level 2). Level 0 is the broadest scope of the levels, encompassing a larger group due to a wider variable than either of the other two. Level 0 is followed by Level 1, which is a smaller group defined by a narrower variable. Level 2 is always the most specific variable of the three, and therefore the smallest group.
Tag Levels have a hierarchy, such that when searching on them, criteria can match on one, two, or three tag values, but matches are hierarchical -- to match on Level 1, Level 0 must first be matched; similarly to match on Level 2, Levels 0 and 1 must first be matched.
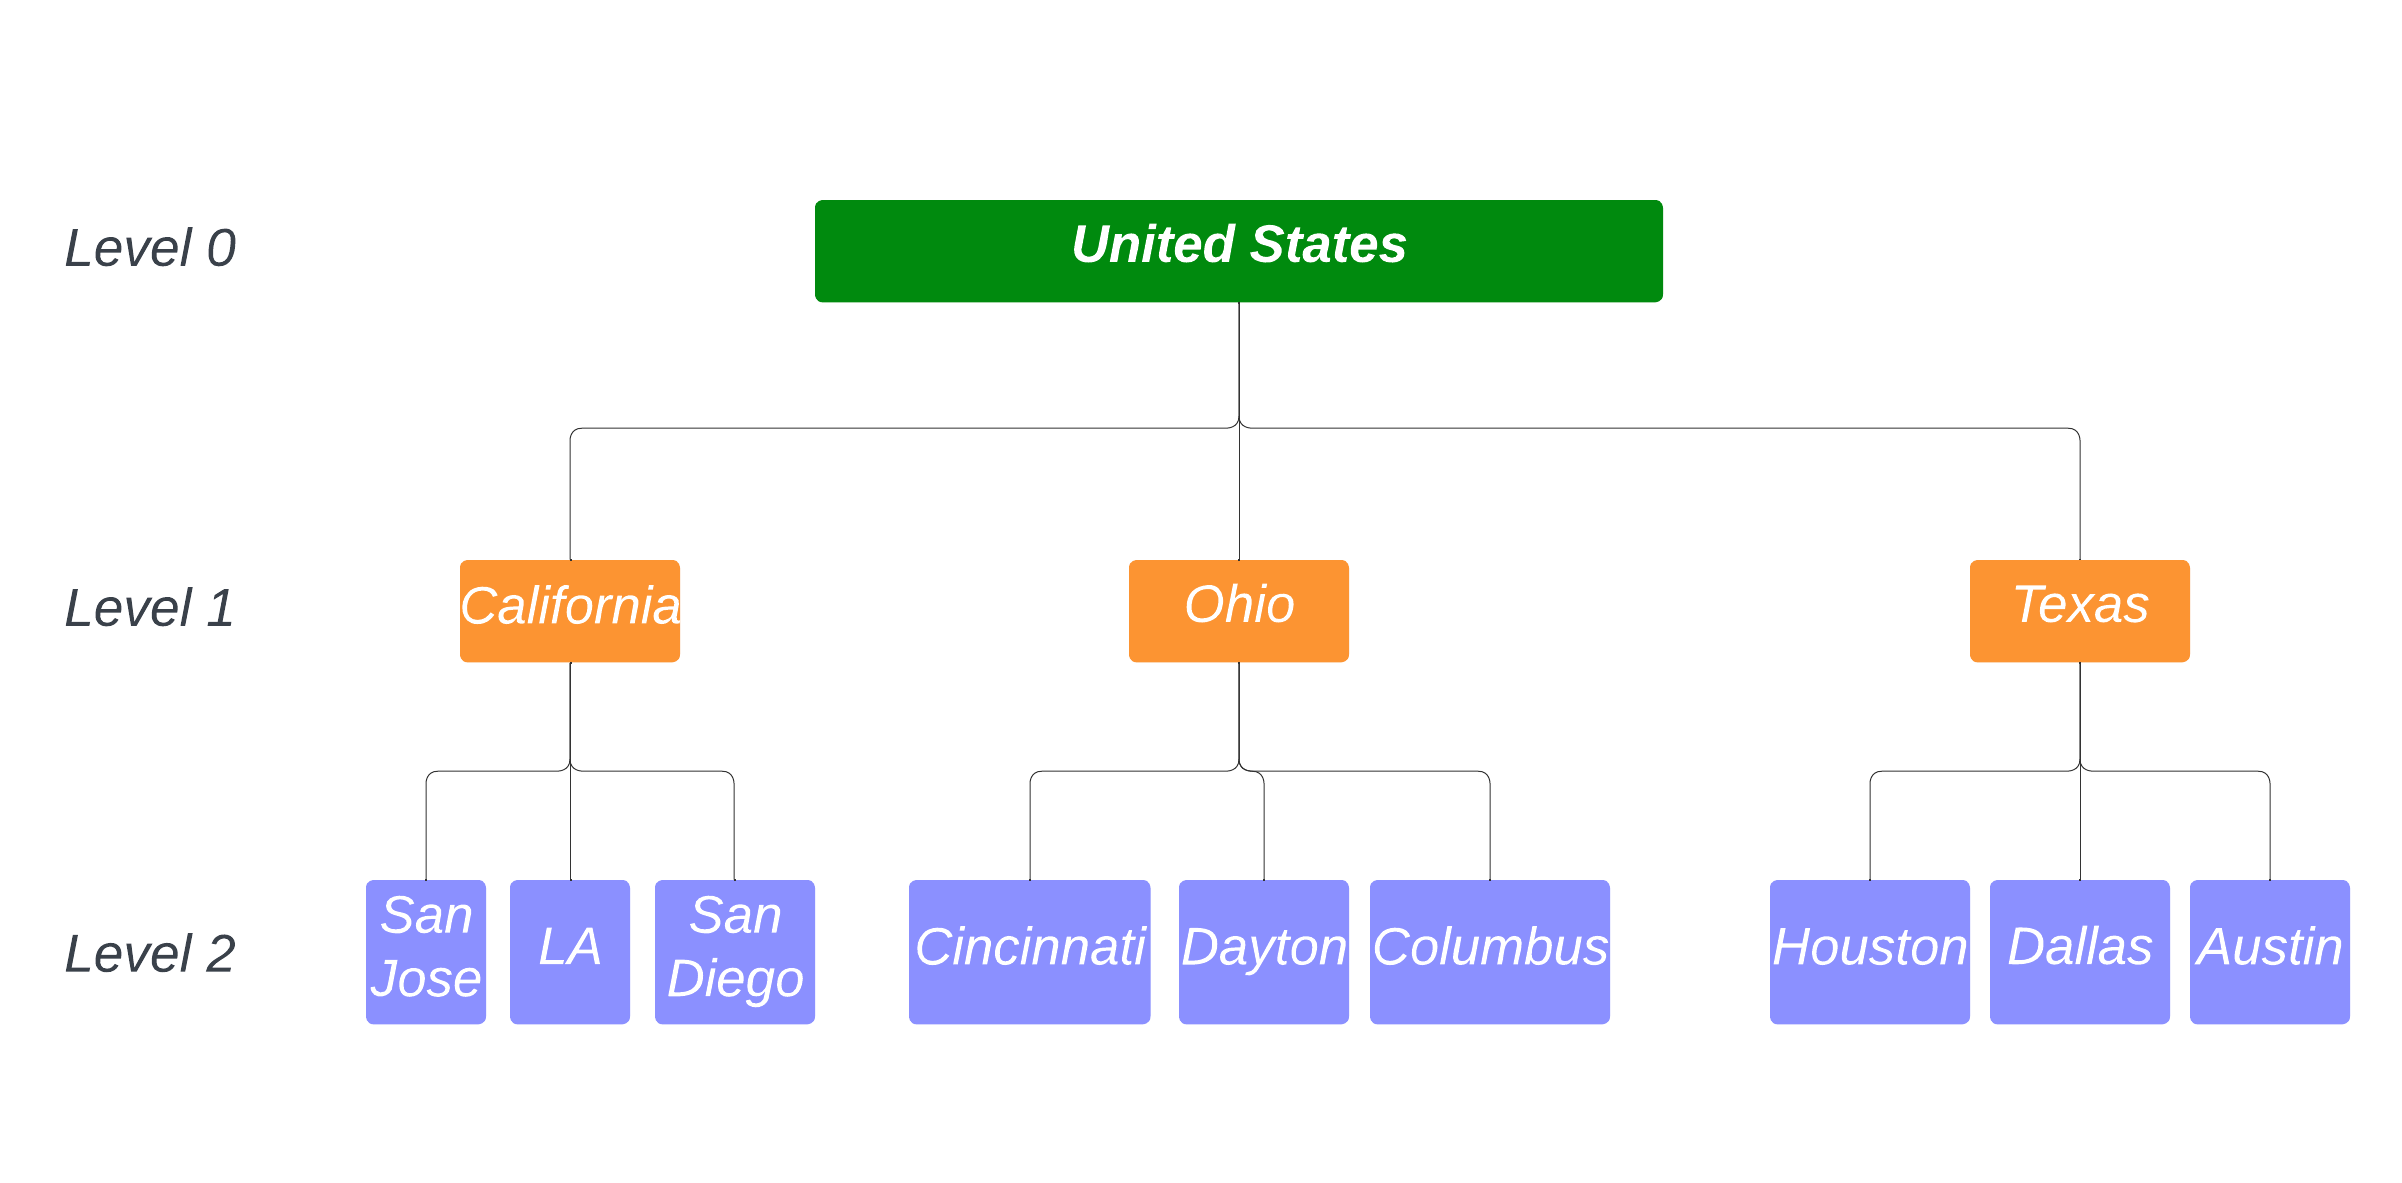
For example, geographical tag scenarios could have the following structure:
Following this example, the tag flow could look like the following:
Creating Tags
Step 1: Locating Tags in the Graphiant Portal
From the Home screen, navigate to the System Objects screen by one of the following:
Locate the "Configurations" section within the top left of the screen; select 'Create System Object'.
or
Click 'Configure' in the sidebar; select 'System Objects'.
.png)
From across the top, select the 'Tags' tab; click 'Add Tag' at the upper right.
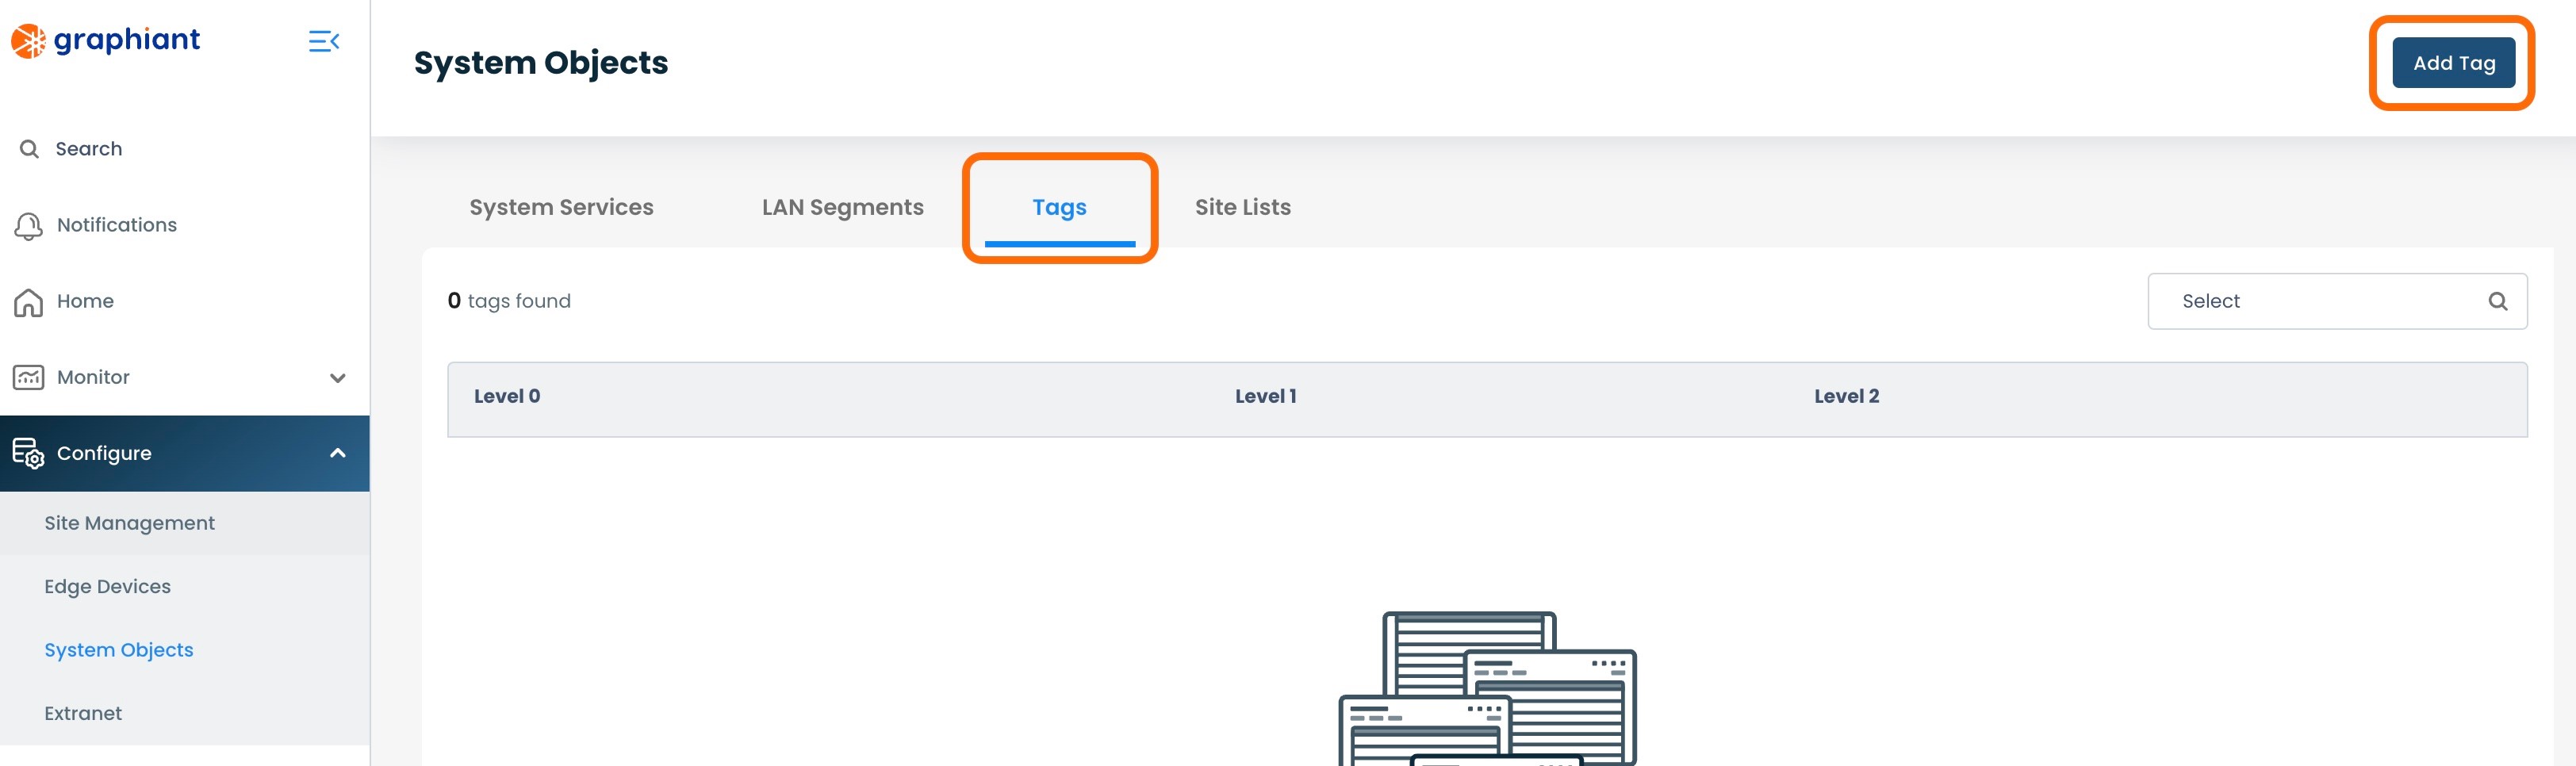
A modal will appear where Tags can be entered.

Step 2: Creating Tags
Tag designation begins with Level 0.
Level 0 encompasses the broadest scope, followed by Level 1, and ending with Level 2 being the most narrow of the group.
Choose an existing Tag by selecting from the drop-down.
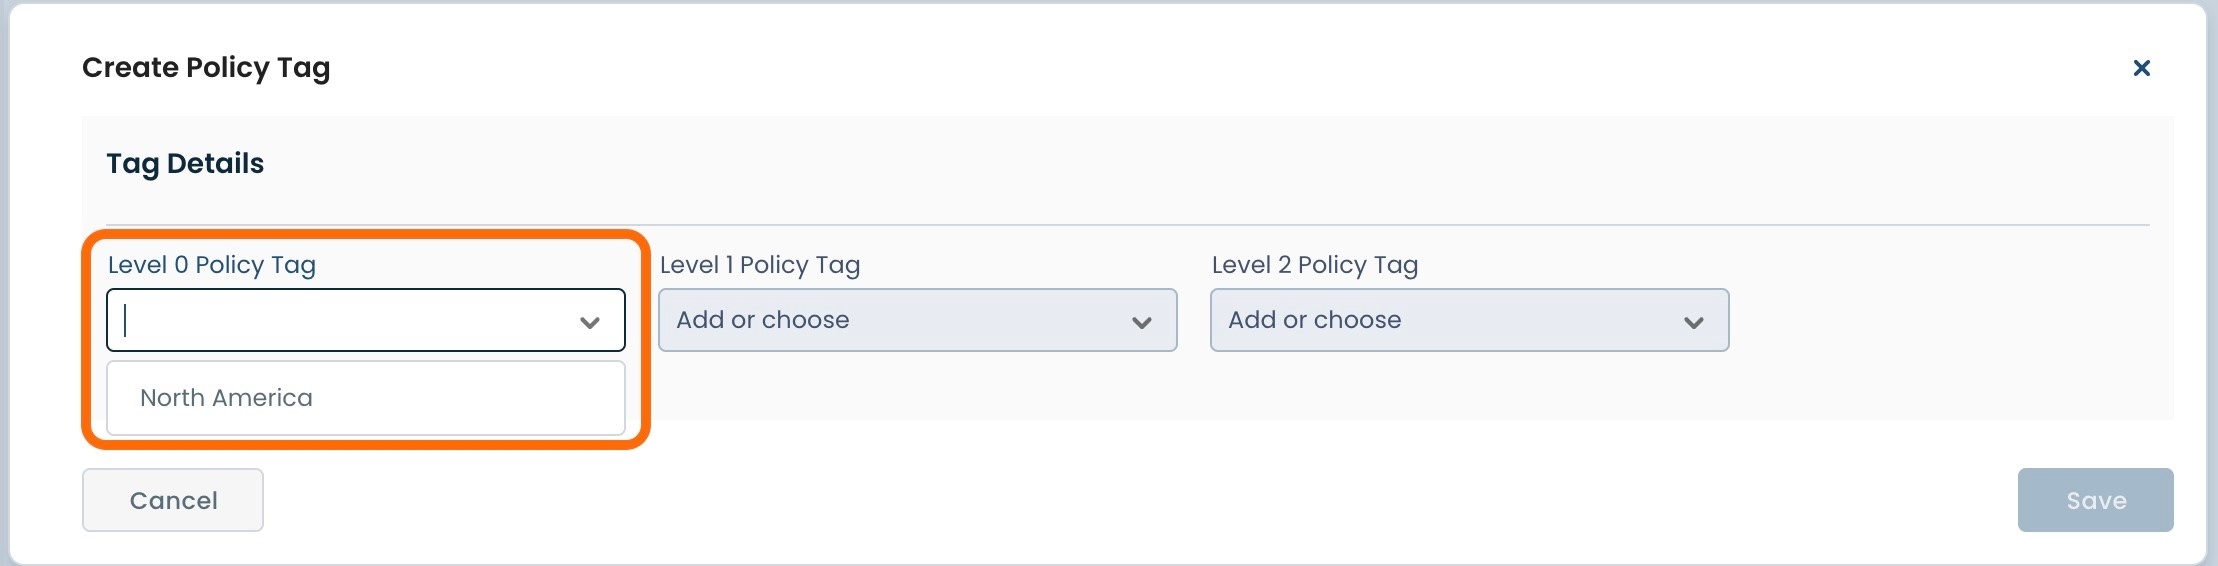
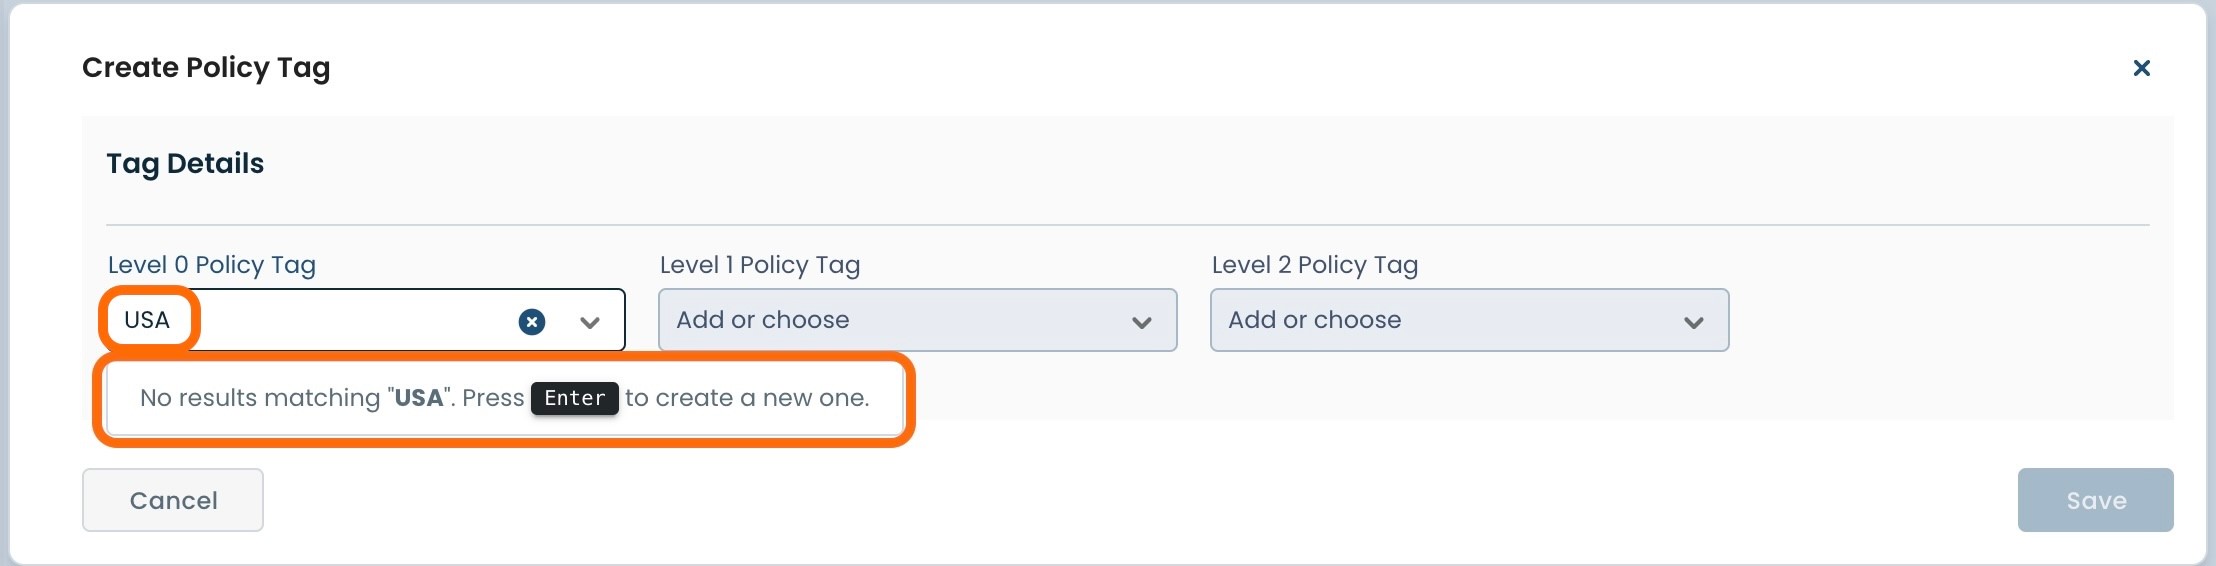
A new Tag can be added by typing in the desired Tag and hit 'Enter'.
Note:
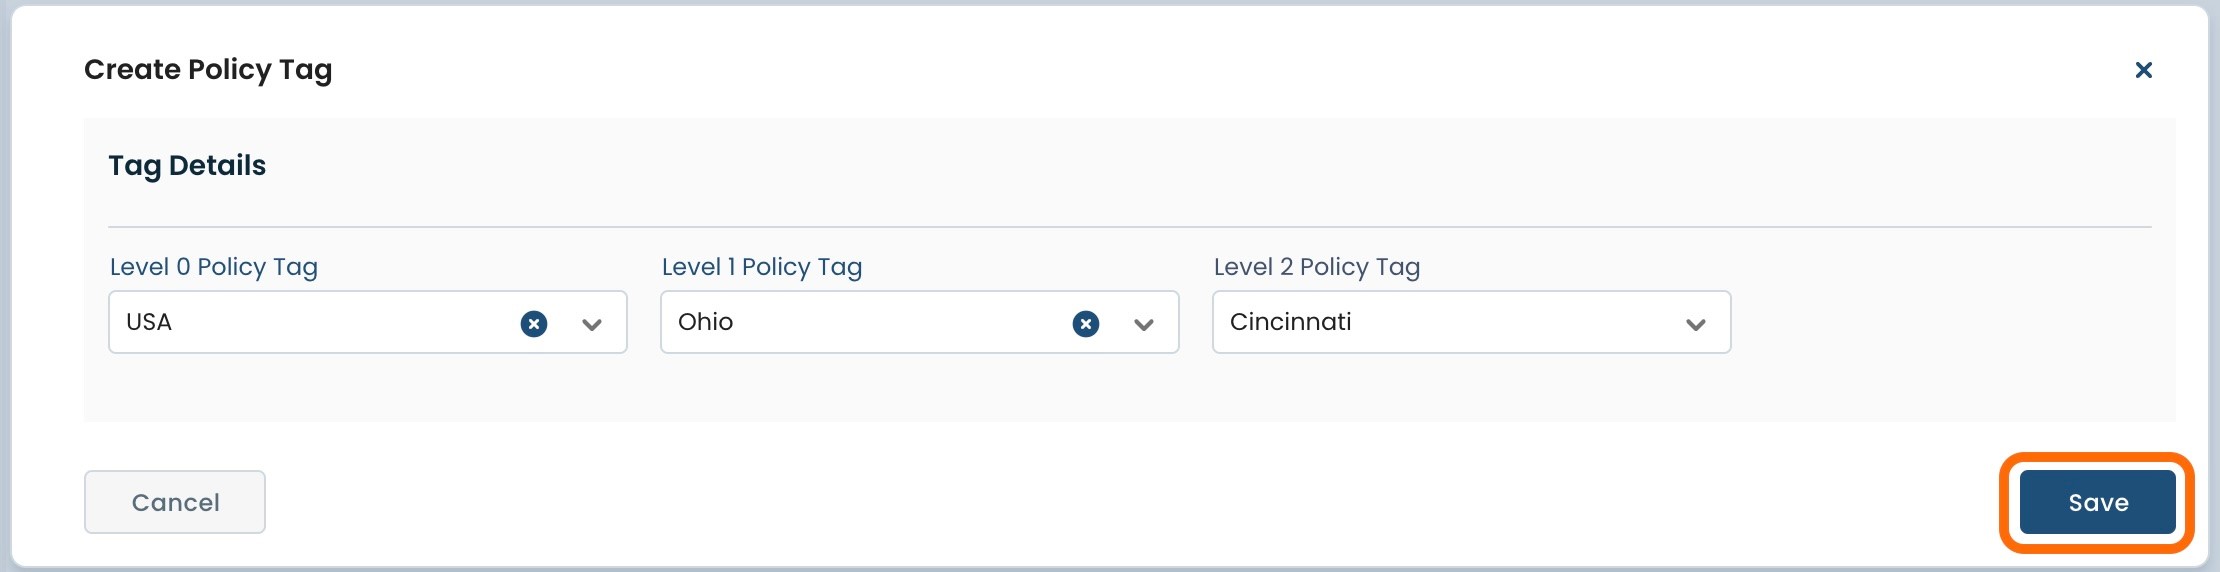
Three Tag values can be assigned but are not necessary. There can be one, two, or three values in total per Tag.
Repeat the process for any remaining desired Tag values for Levels 1 and/or 2.
When all desired Tag levels are completed, click 'Save'.
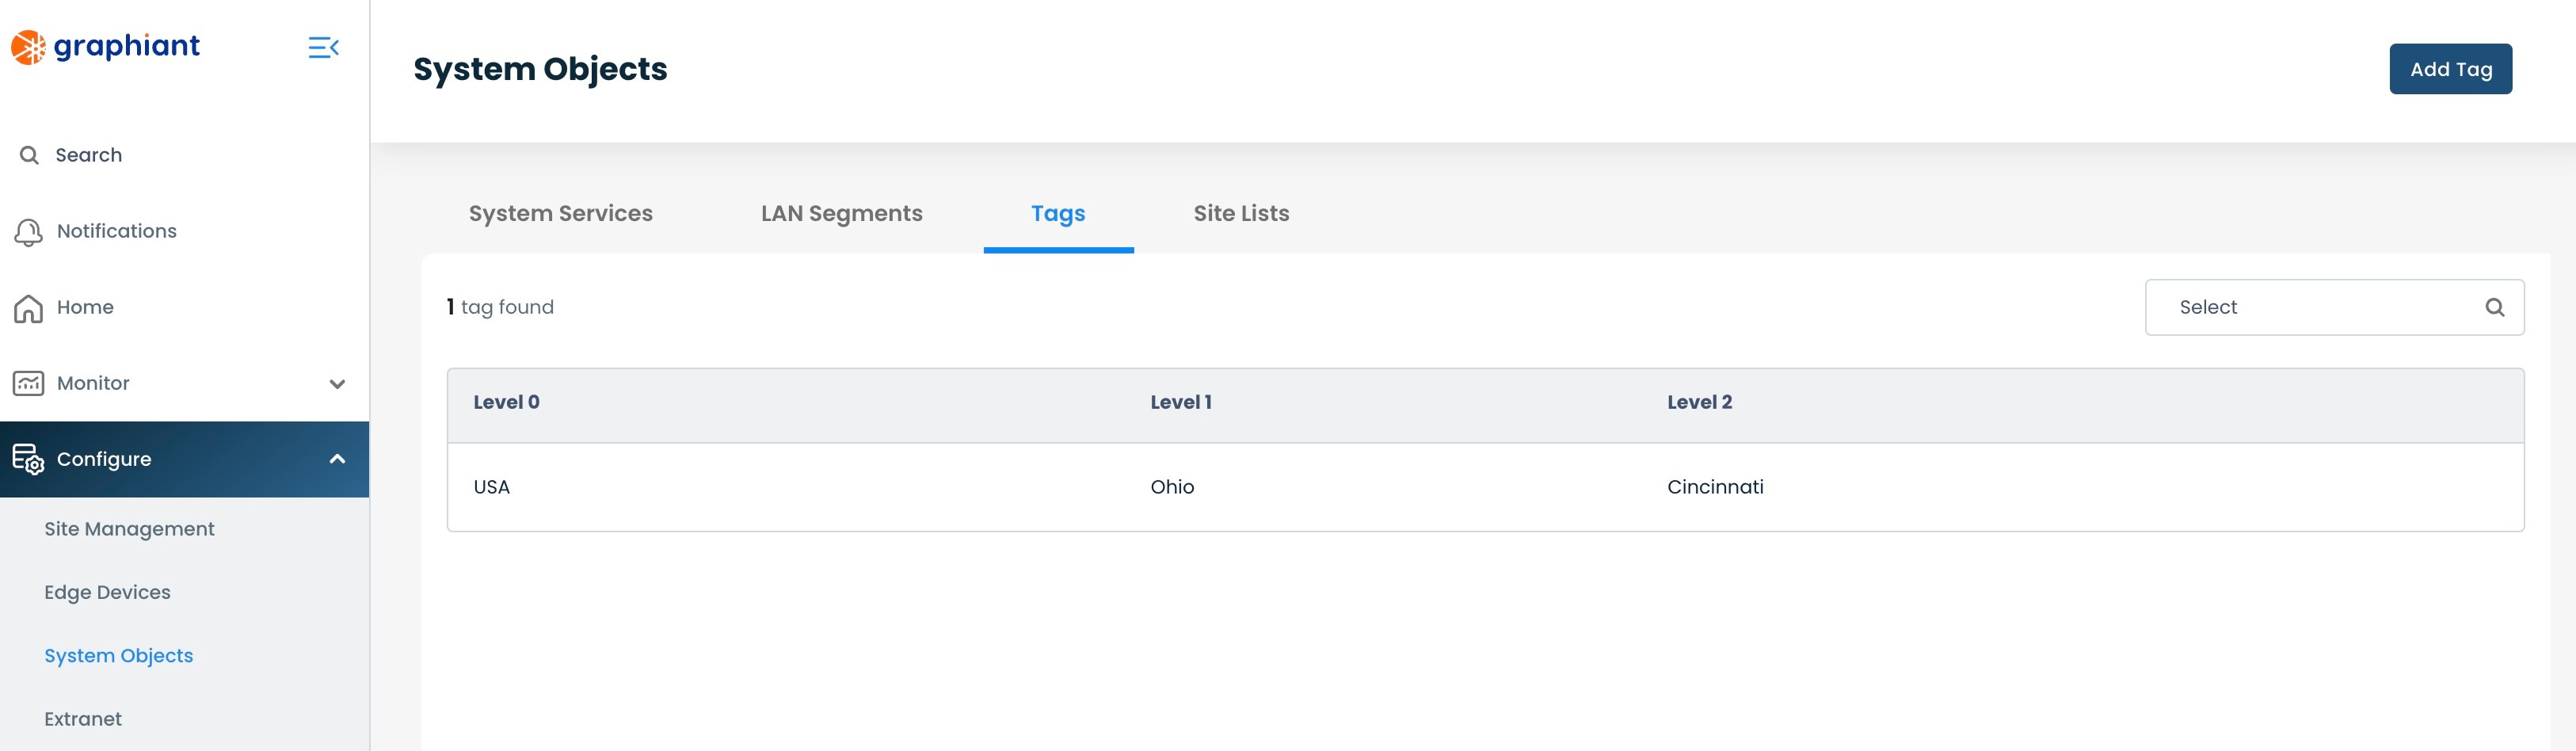
The Tag will now appear in the list of Tags within System Objects.
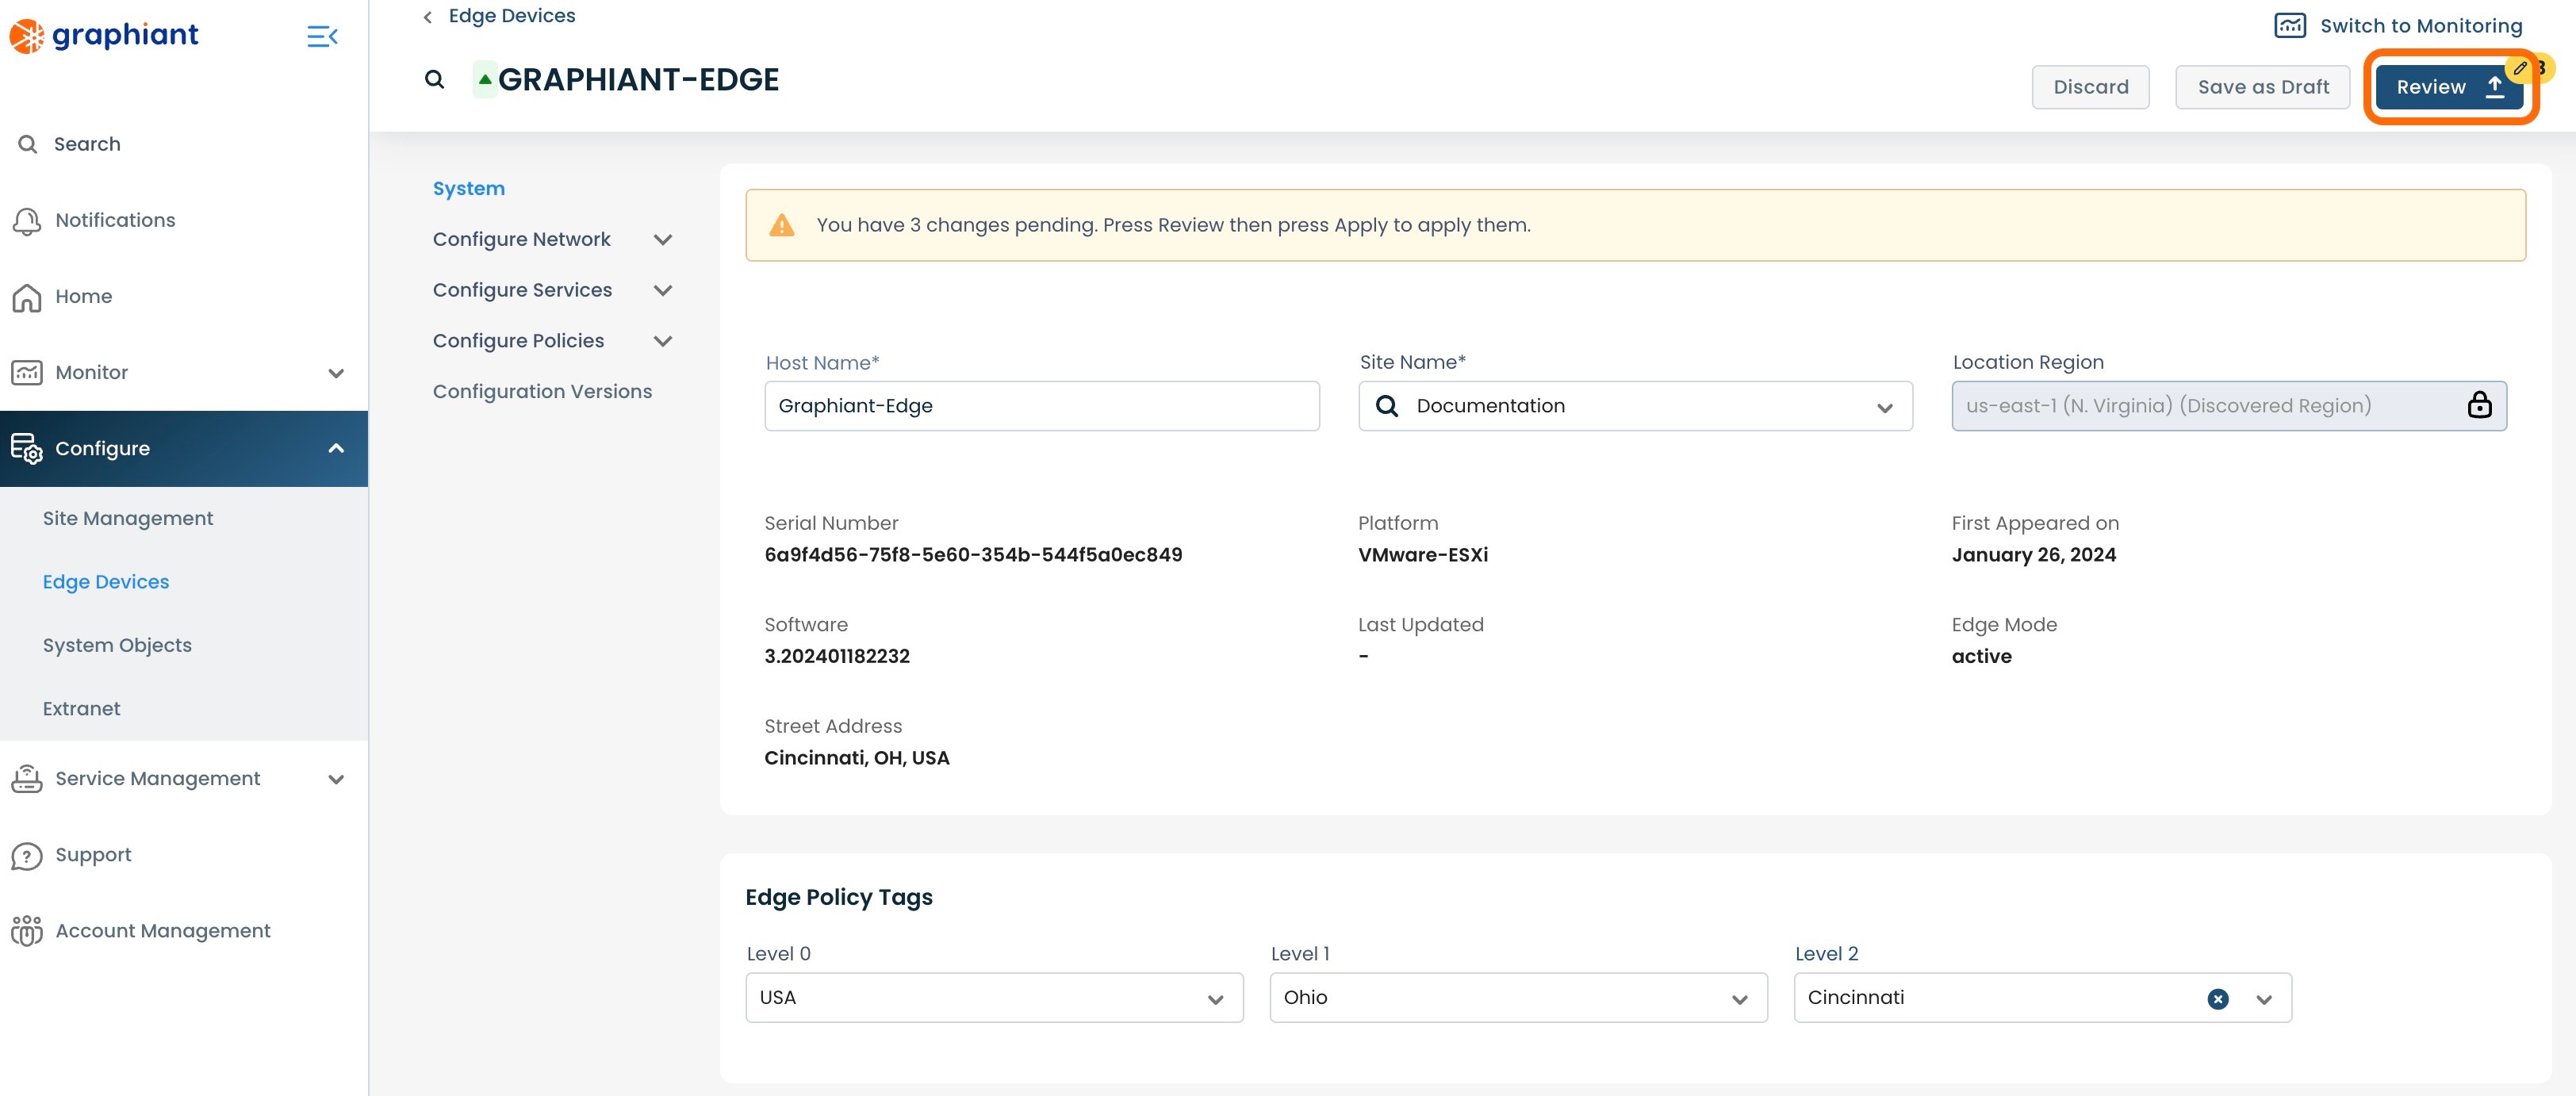
Assigning a Tag to a Graphiant Edge
A Graphiant Edge can have one of any existing Tags assigned to it.
From the main Dashboard in the Graphiant Portal, select either 'Configuring Edges', or Click on the 'Configuration' icon in the left sidebar.
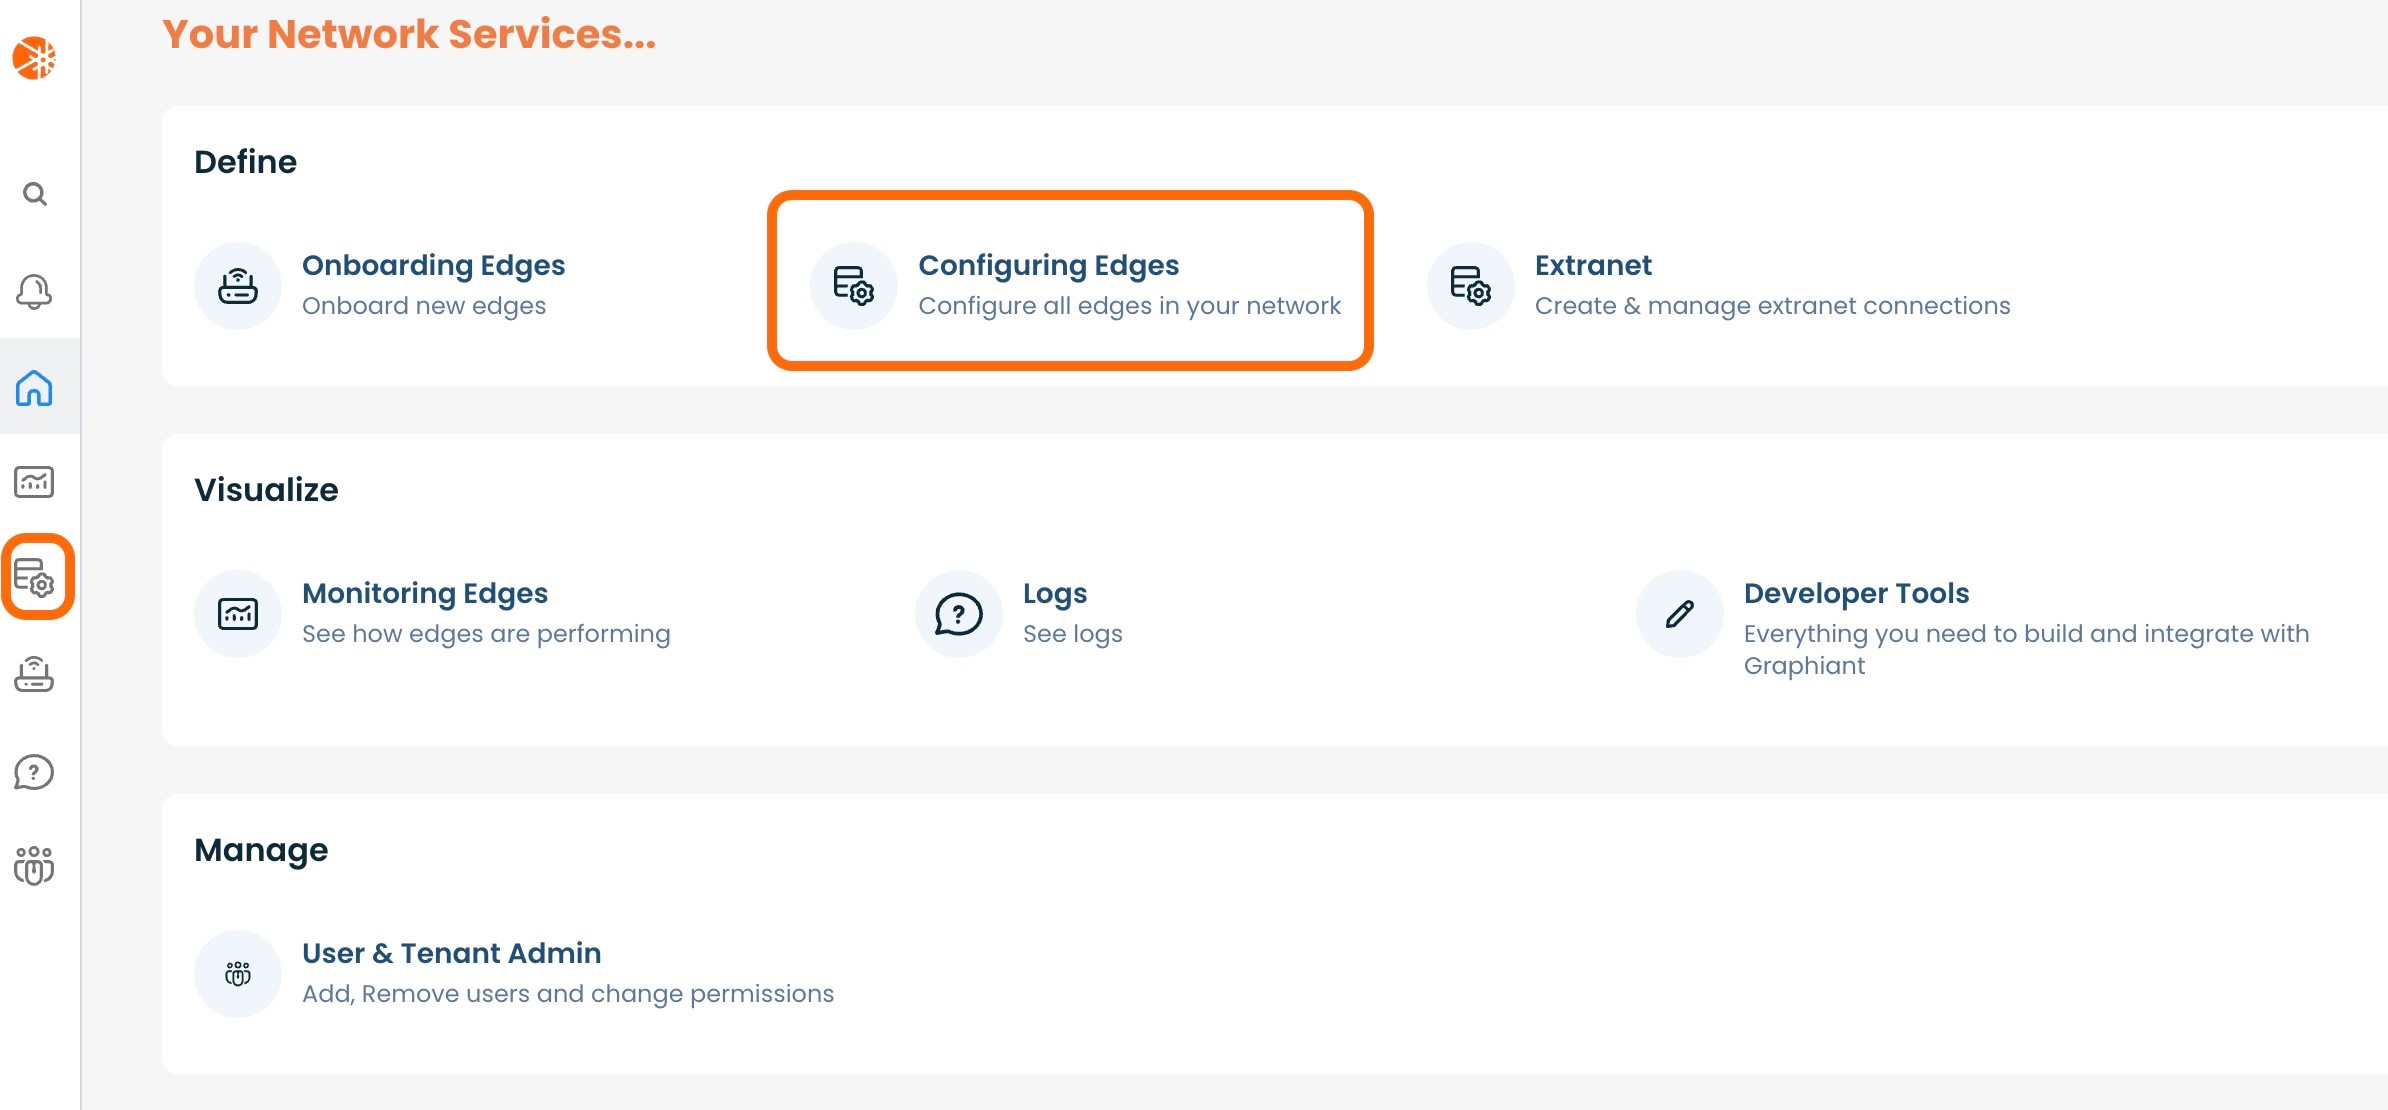
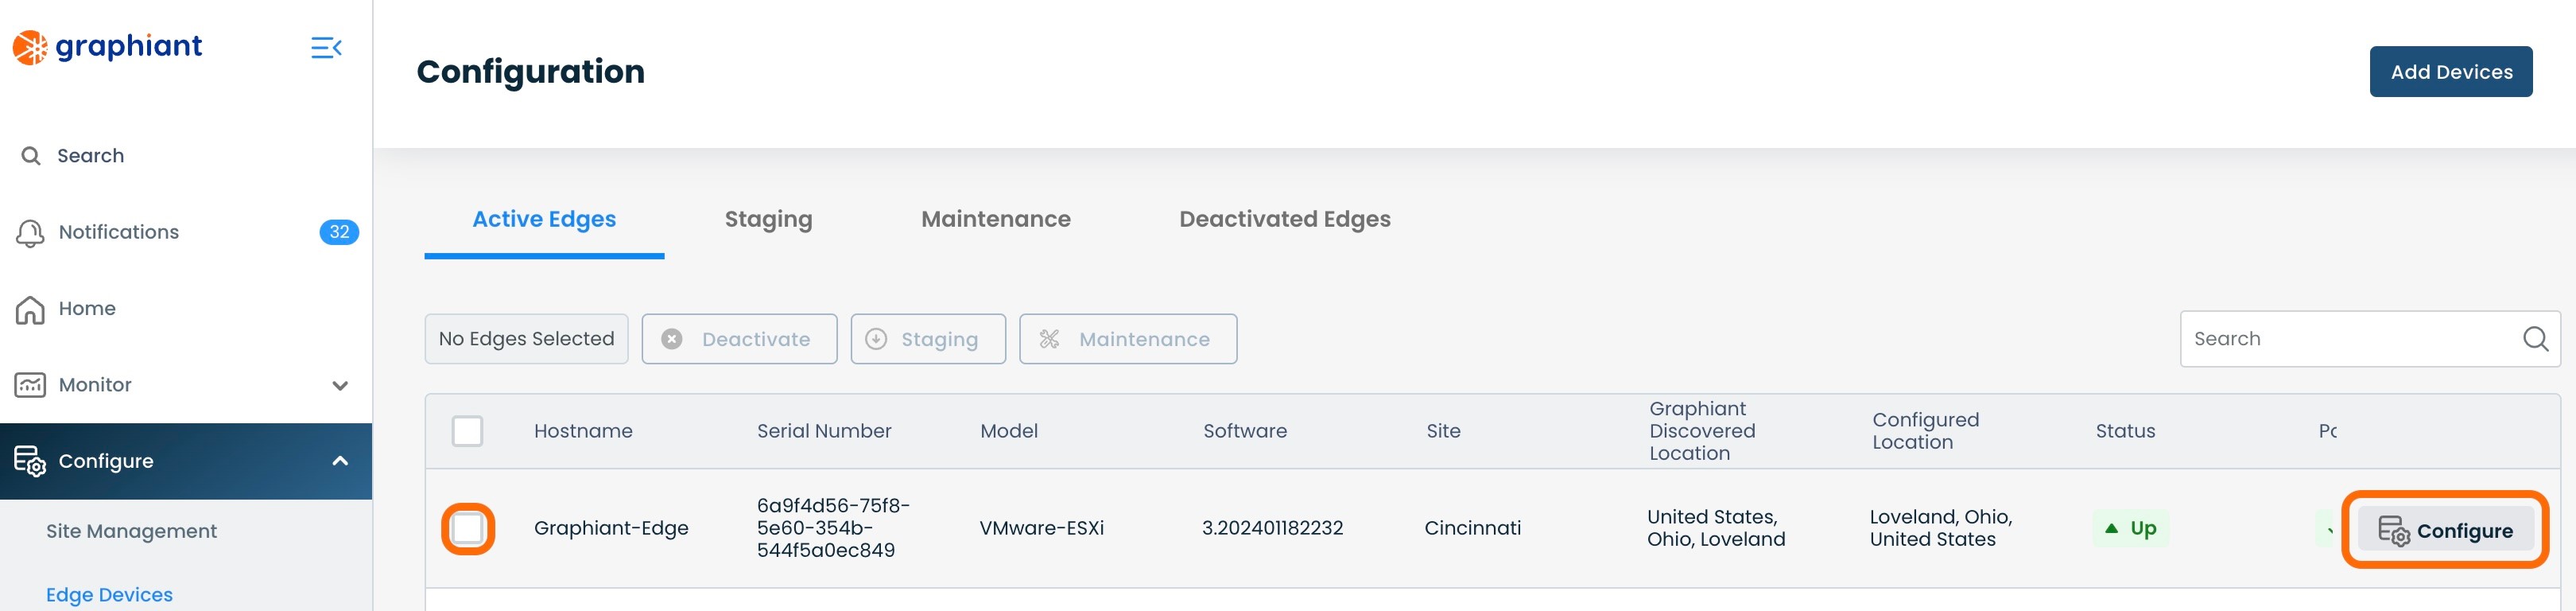
Select 'Configure' of the desired Edge that will have a Tag attached.
The Tags will be able to be selected at the bottom of the screen for the selected Edge.
From the drop-down, select the desired Tag.
Note:
Tags are selected here to attach to an Edge; they can only be created using Step 2 above.
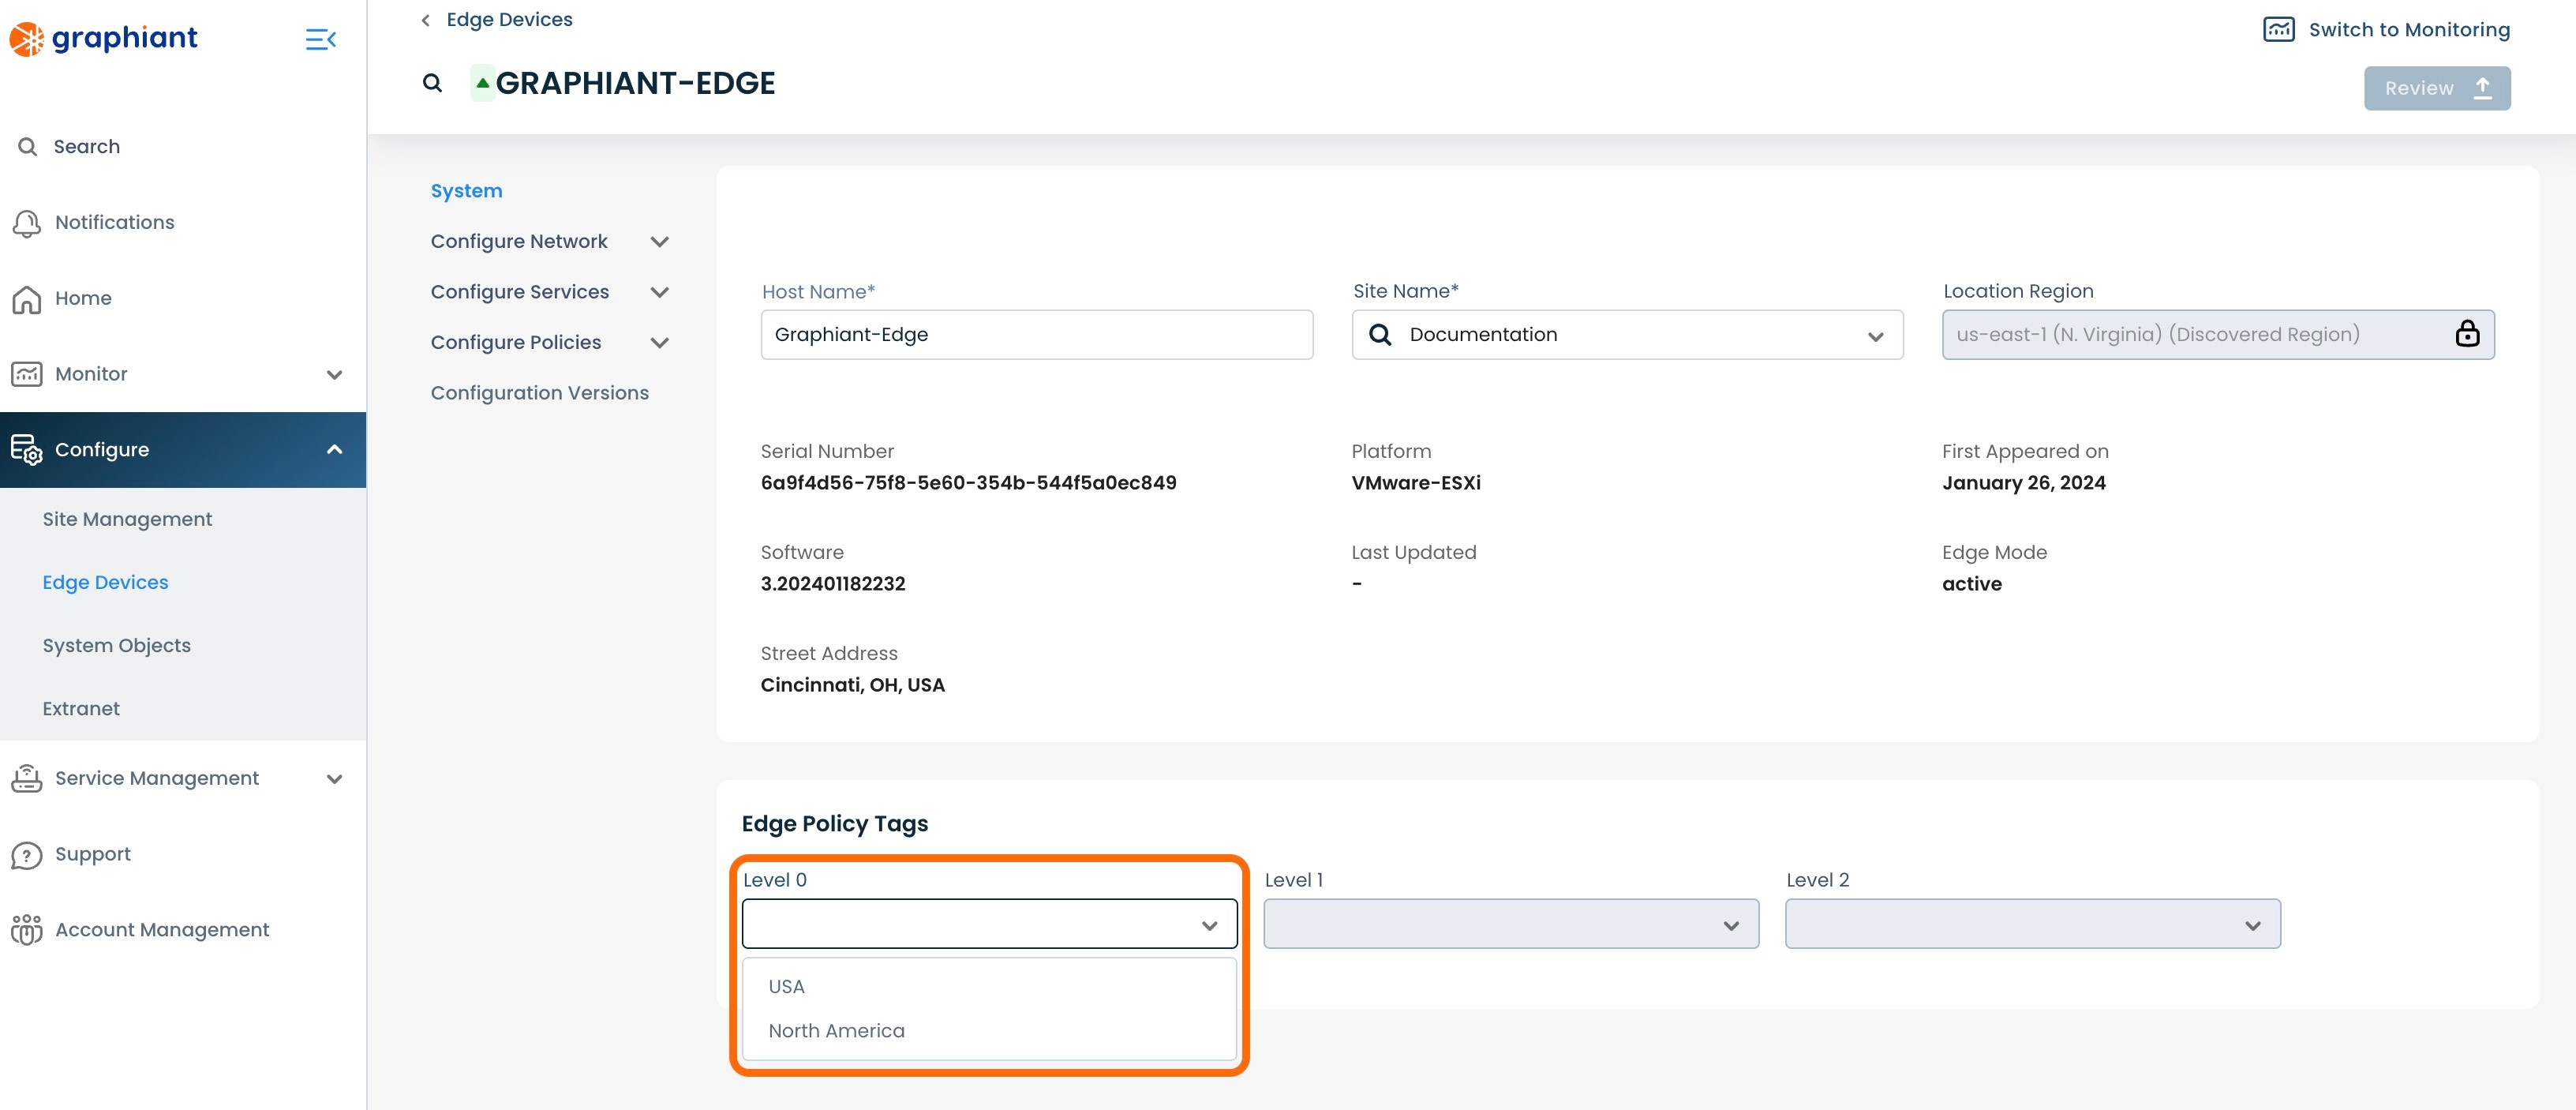
Note:
All Levels do not need to be selected, however the more Levels that are defined, the more options are available to select for configuration changes.
Review and Apply.