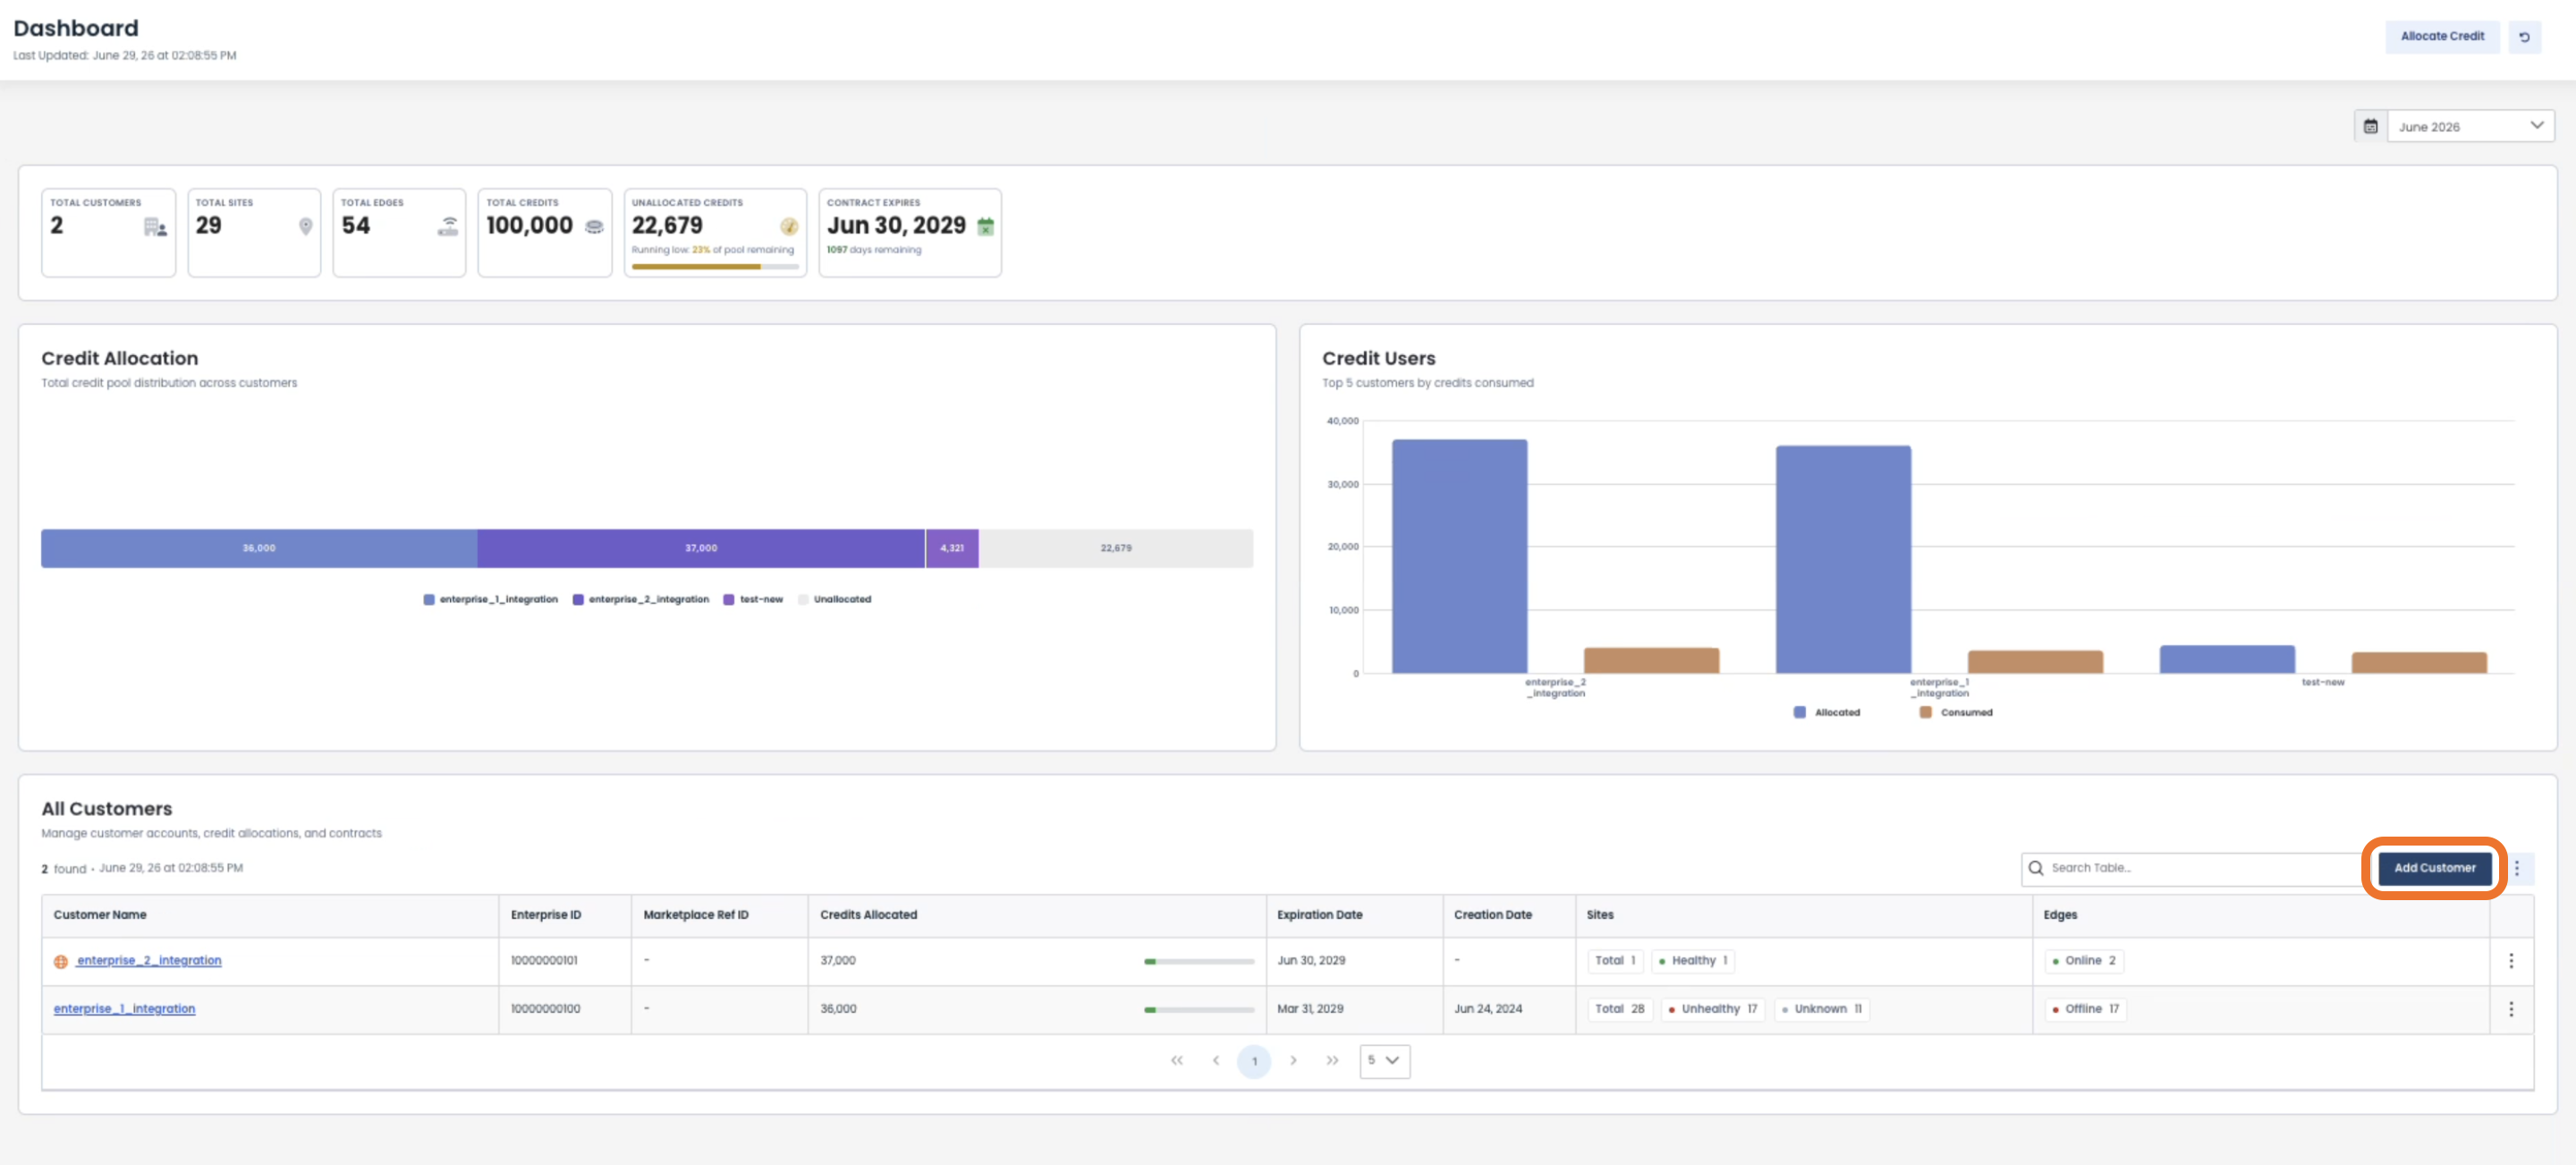
As a Managed Service Provider, your billing dashboard provides a centralized view of your account, displaying key metrics such as customer and Edge totals, credit allocation and utilization, available credits, and contract expiration.
Locating the MSP Dashboard [Home]
The MSP Dashboard is found by navigating to ‘Home’ in the sidebar

This will open the Home, where visual summaries help you understand credit distribution and consumption across customers, while your customer table provides quick access to account details, site and Edge health, and management actions.
Understanding the MSP Dashboard
All areas of the dashboard will respond to the time picker at the top right corner.
Summary Metrics
Total Customers: The total number of customer organizations currently managed within your MSP account.
Total Sites: The total number of customer sites across all managed customers.
Total Edges: The total number of deployed Edge devices across all customers.
Total Credits: The total number of service credits included in your MSP contract.
Unallocated Credits: The number of credits that remain available for assignment to customers. This metric also indicates the percentage of credits remaining in the pool.
Contract Expires: The expiration date of your current MSP contract, along with the number of days remaining until expiration.

Credit Allocation
The Credit Allocation section answers: “Where have my credits been assigned?”
It provides a visual breakdown of how your organization's credit pool is distributed across all managed customer accounts.
Each segment of the bar represents the number of credits allocated to an individual customer, while the remaining unallocated credits are displayed separately.
Use this chart to quickly assess credit distribution and identify available capacity for future customer allocations.

Credit Users
The Credit Users section answers: “How many of those assinged credits are actually being used?”
It compares the number of credits allocated to each customer with the number of credits currently consumed.
This allows you to monitor customer credit usage, identify underutilized allocations, and determine whether additional credits may be needed as customer environments grow.

“All Customers” Table
This table provides a centralized view of every customer managed within your MSP account.
From here, you can view customer account information, credit allocations, contract details, site and Edge status, and quickly access customer management actions.
The table gives details on the following:
Customer Name: The name of the customer account. Select the customer name to view and manage the customer's details.
Enterprise ID: The unique identifier assigned to the customer organization.
Marketplace Ref ID: The reference ID associated with the customer's marketplace subscription, when applicable.
Credits Allocated: The total number of credits currently assigned to the customer from your MSP credit pool.
Expiration Date: The date the customer's current contract or credit allocation expires.
Creation Date: The date the customer account was created.
Sites: Displays the total number of sites for the customer, along with their current health status.
Edges: Displays the total number of deployed Edge devices for the customer, along with their current operational status.
Adding a New Customer
If your MSP account is on a Monthly plan:
You will be limited to 2 customers, and 350 credits will be auto-allocated to each customer per month.
If your MSP account is on a Contract plan:
You must have enough credits to allocate to the new customer (minimum of 1,000 credits per month until their plan expiration date).
To purchase additional credits, contact Graphiant Customer Success.
To add a new customer, click ‘Add Customer’ at the right above the customer table.
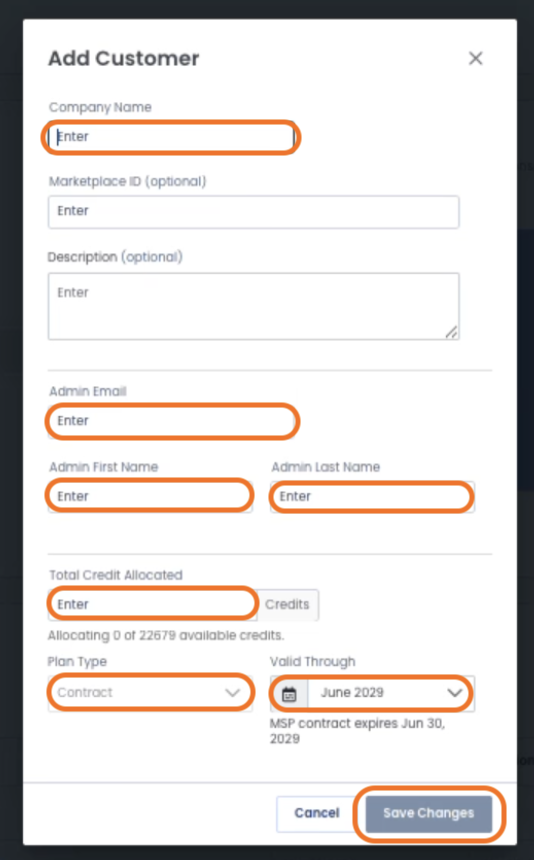
This will open a modal for you to enter all of the information for your customer, as well as allocate credits to them and select their plan type.
Enter the following information:
Company Name: Enter the name of the customer organization to create a new customer account.
Marketplace ID (optional): Enter the marketplace reference ID associated with the customer's subscription, if applicable.
Description (optional): Enter additional information about the customer account for reference purposes.
Admin Email: Enter the email address of the customer's primary administrator. This user will manage the customer account.
Admin First Name: Enter the first name of the customer administrator.
Admin Last Name: Enter the last name of the customer administrator.
Total Credit Allocated: Specify the number of credits to allocate to this customer from your available MSP credit pool.
If Plan Type will be “Contract”:
See note below, under “Plan Type”.
Plan Type:
Your customers’ Plan Type must match that of your MSP plan:
If your MSP plan is Monthly, your customers must be Monthly; if your MSP plan is Contract, your customers must be Contract.
Select either:
Monthly: A month-to-month billing option with no fixed contract term.
Contract: A fixed-term billing option that remains active until the selected expiration date.
A Contract plan must be given credits in increments of 1,000.
There must be a minimum of 1,000 credits per month until the plan expiration date.
Valid Through: Select the date through which the customer's plan or credit allocation remains valid.
The customer expiration date cannot exceed the expiration date for your MSP contract.
The modal will also show for your quick reference while configuring your customer’s plan:
How many credits you are allocating out of your remaining credits available.
The expiration date of your MSP contract.
Click ‘Save Changes’.
Your new customer will be added, their contract will be created, and their information will now appear in the “All Customers” table and be available to them in their billing information.
Adjusting Credits for an existing Customer
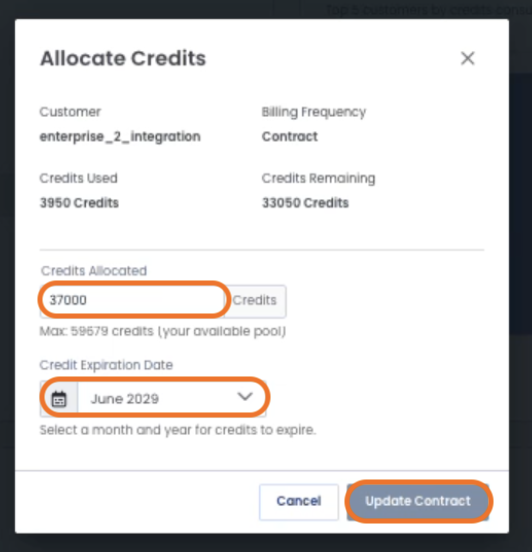
To adjust an existing customer’s credit allocation and/or expiration date, click the ellipses menu; select ‘Allocate Credits’.

Fill out the following fields as needed:
Credits Allocated: This value can be increased or decreased.
Credit Expiration Date: Select the date through which the customer's plan or credit allocation remains valid.
Click ‘Update Contract’.
Your customer’s credits and expiration date will be updated and the changes will be reflected in their billing information.
Deleting a Customer
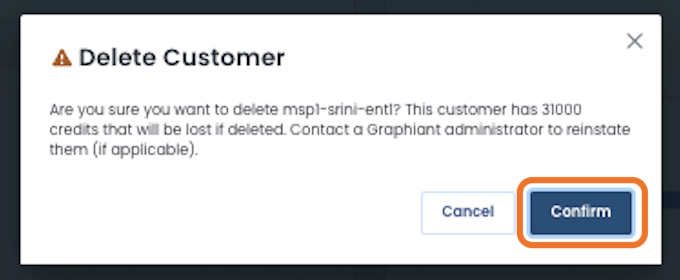
To delete a customer, click the ellipses menu; select ‘Delete Customer”.
Deleting a customer will cause their credits to be returned to Graphiant.
Ensure that you have adjusted their credits to only allow for the current month of billing, to return any additional credits back to your credit pool.

Click ‘Confirm’ to delete the customer.
The customer will no longer have a contract, and will be removed from your customer table.