Identity & Access Management (IAM) in the Graphiant Portal provides centralized control over who can access your enterprise environment and what actions they are permitted to perform.
Through IAM, administrators can manage users, define roles and permissions, and enforce authentication requirements to ensure secure, appropriate access across the organization.
This capability is designed to balance strong security practices with operational flexibility as teams grow and responsibilities evolve.
IAM is updated as of Feb 2026 to V2 with the release of 26.1.x:
All existing roles will still be recognized.
Should you upgrade to this updated version, any new users or roles will need to follow the new process.
Locating Identity & Access Management in the Graphiant Portal
From the Graphiant Portal Home Page, click the caret at the bottom left, to the right of your profile name.
Select ‘Settings’ from the dropdown menu.
.jpg)
Ensure that the toggle for "IAM V2” is on.
.jpg)
Choose the ‘IAM’ tab.

This will open the landing page for Identity & Access Management.
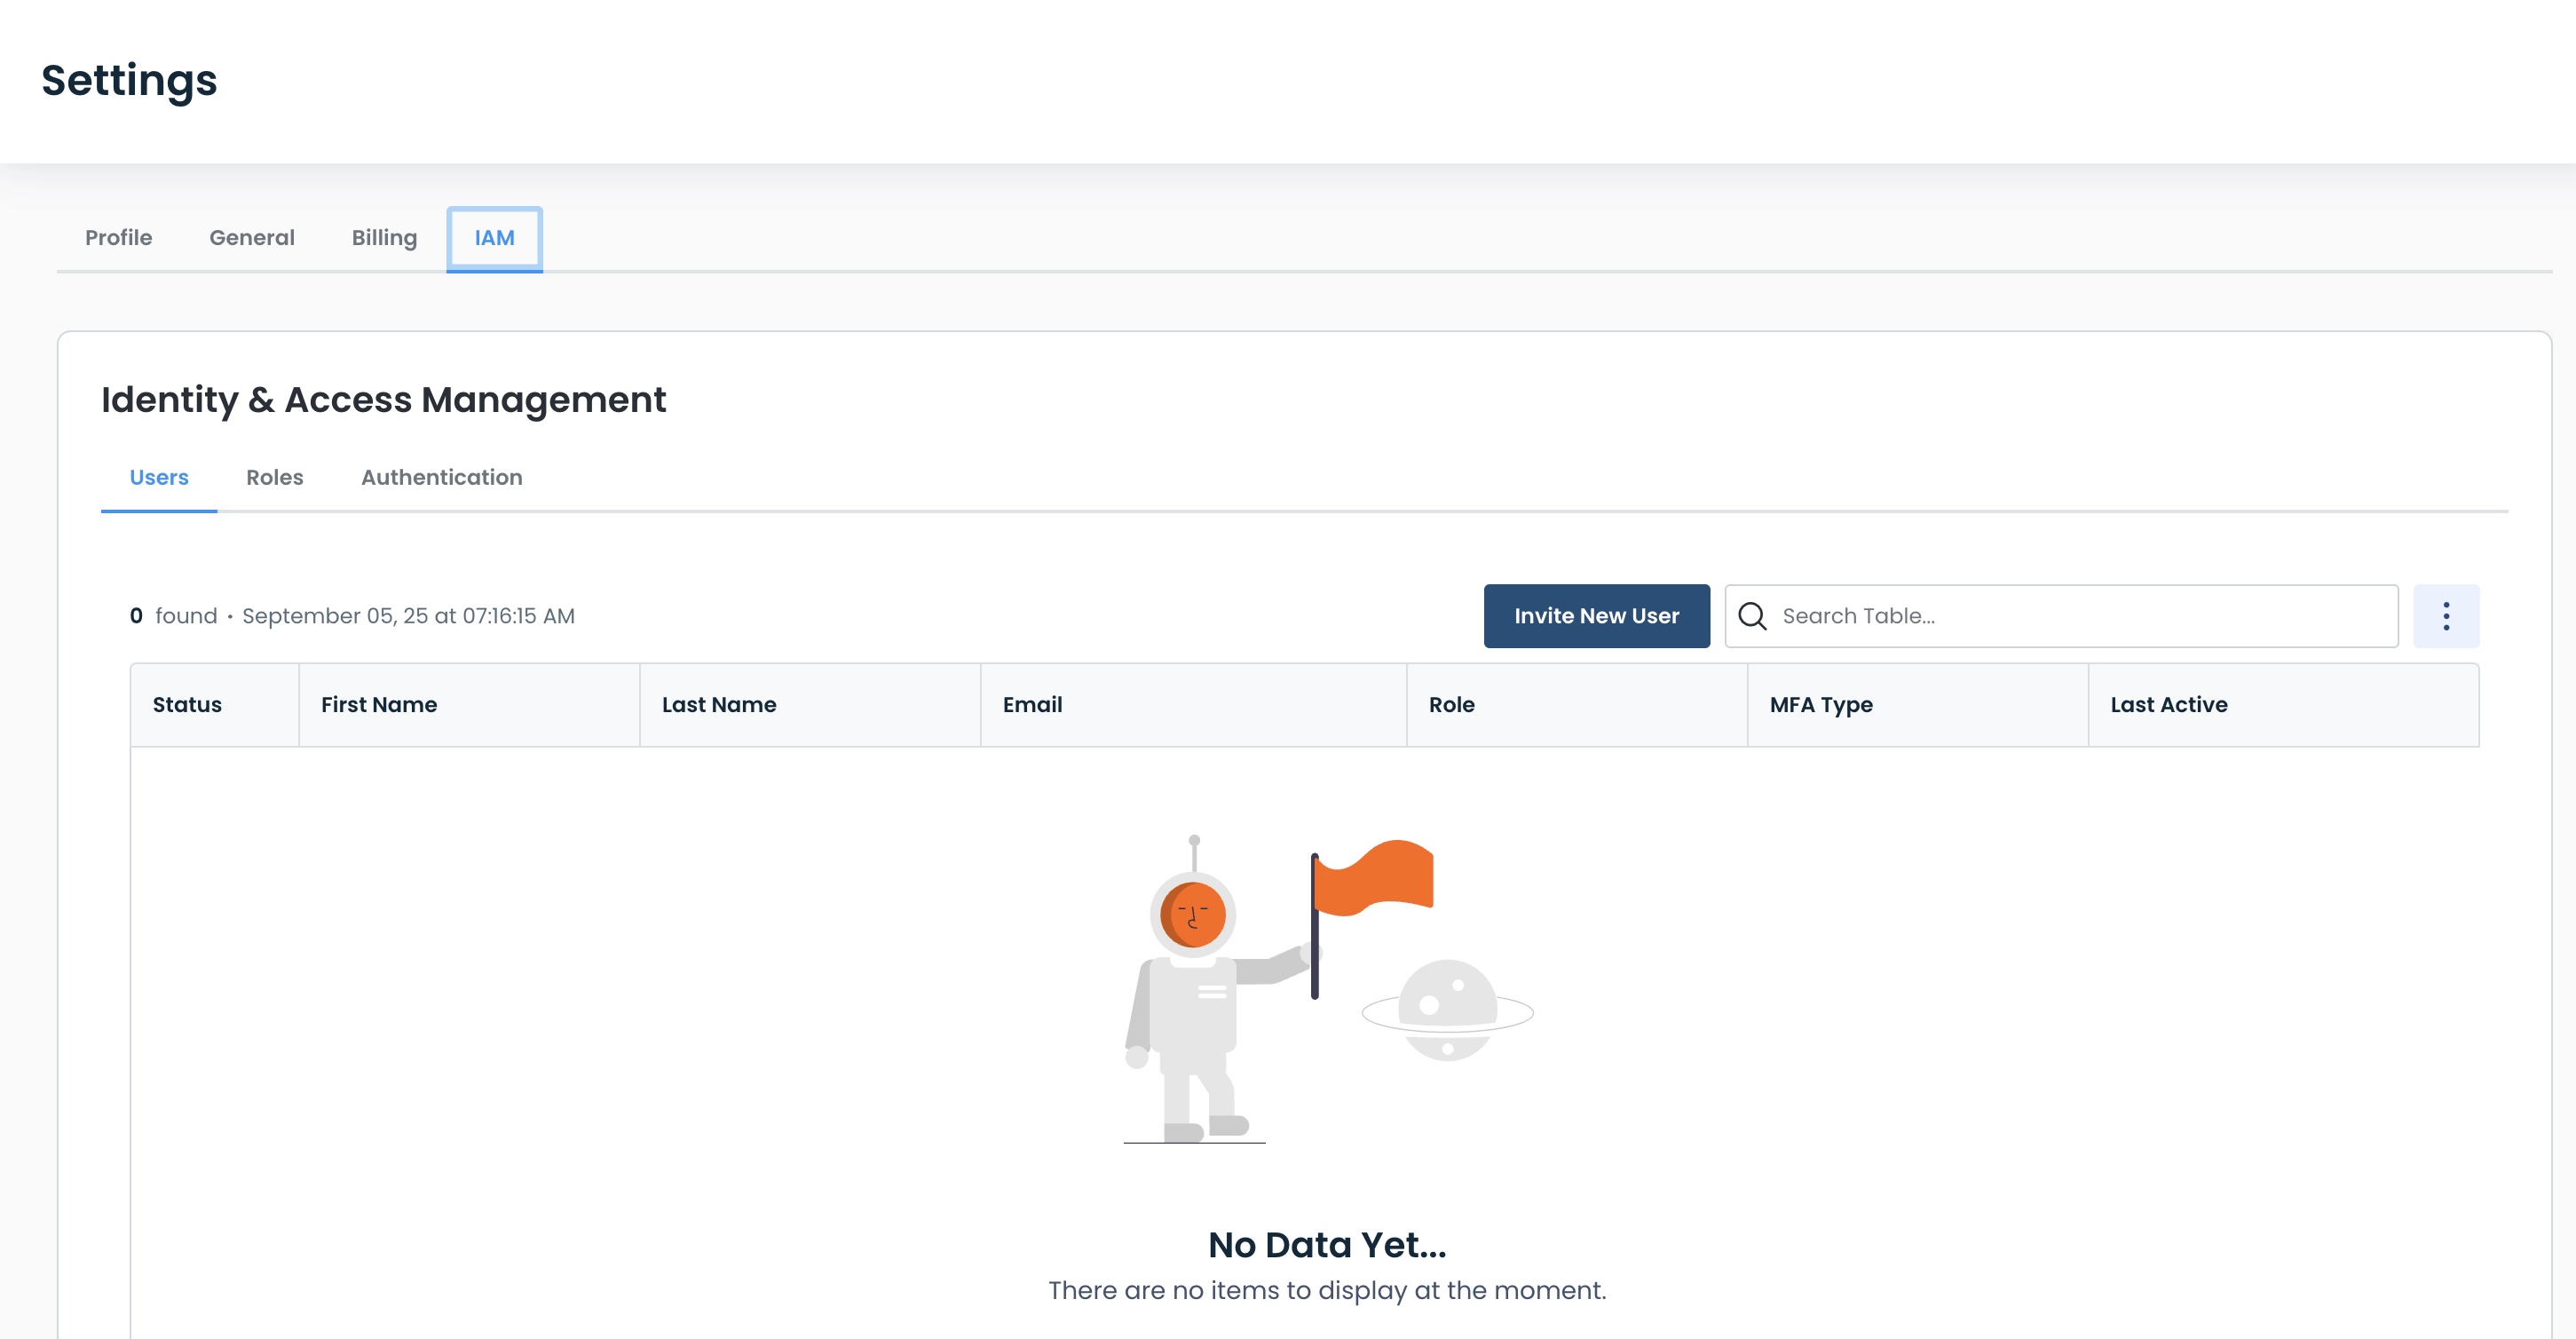
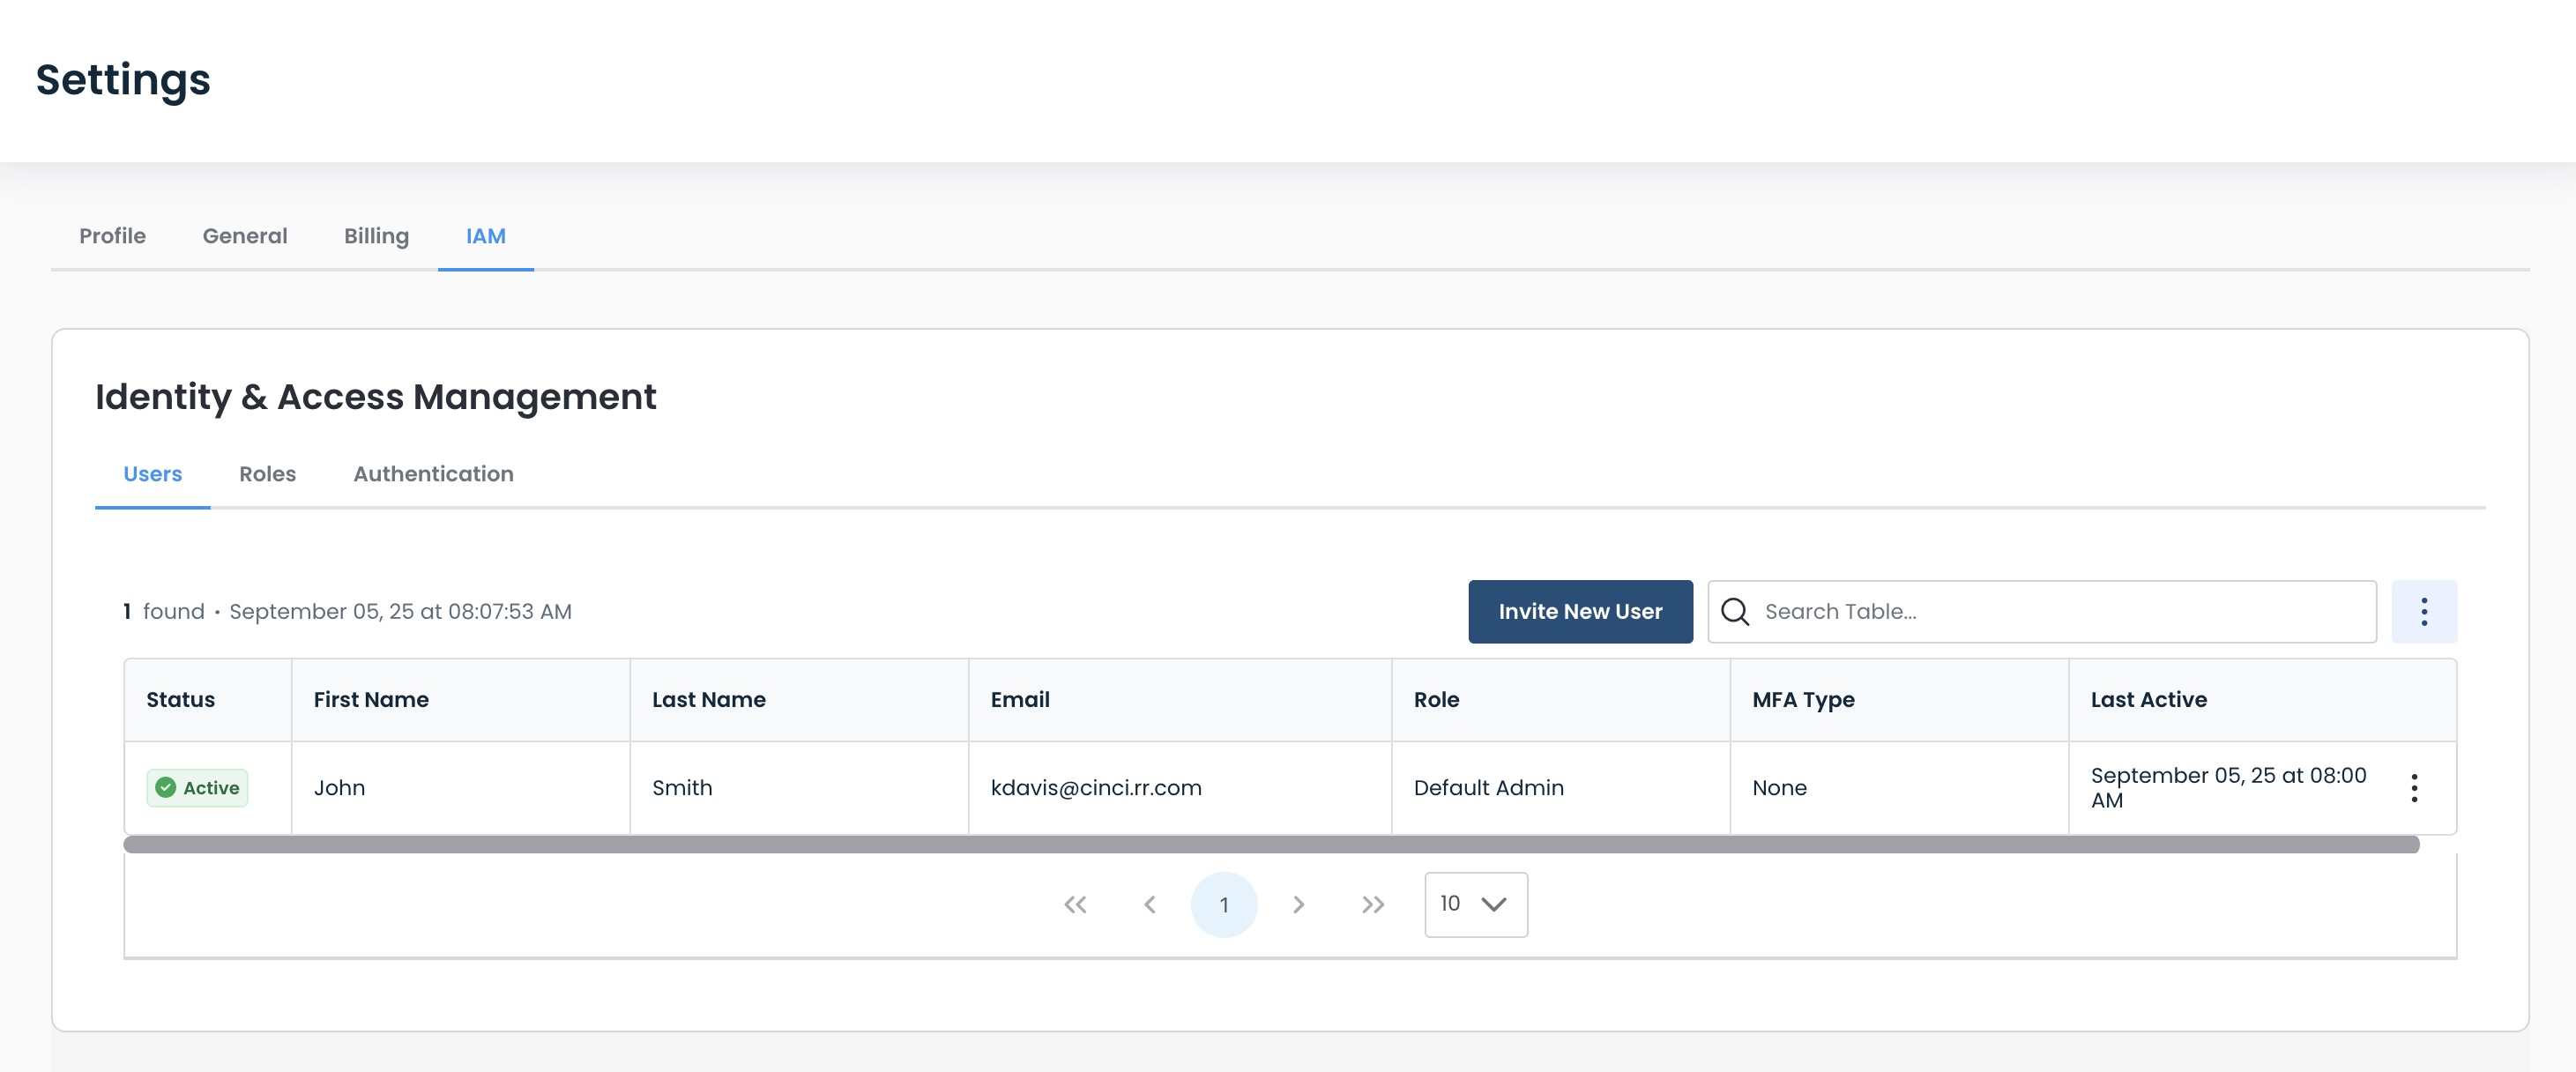
Managing Users
The IAM page will open directly to the Users tab.
Here, you can see the following information for each user:
Status: Whether the user is
Active: Can log in to the system
Pending: Not validated yet; cannot log in
First Name
Last Name
Email
Role: Role to which they are assigned
MFA Type: Which level of sign-on they must perform
Last Active: Date and time of their last activity
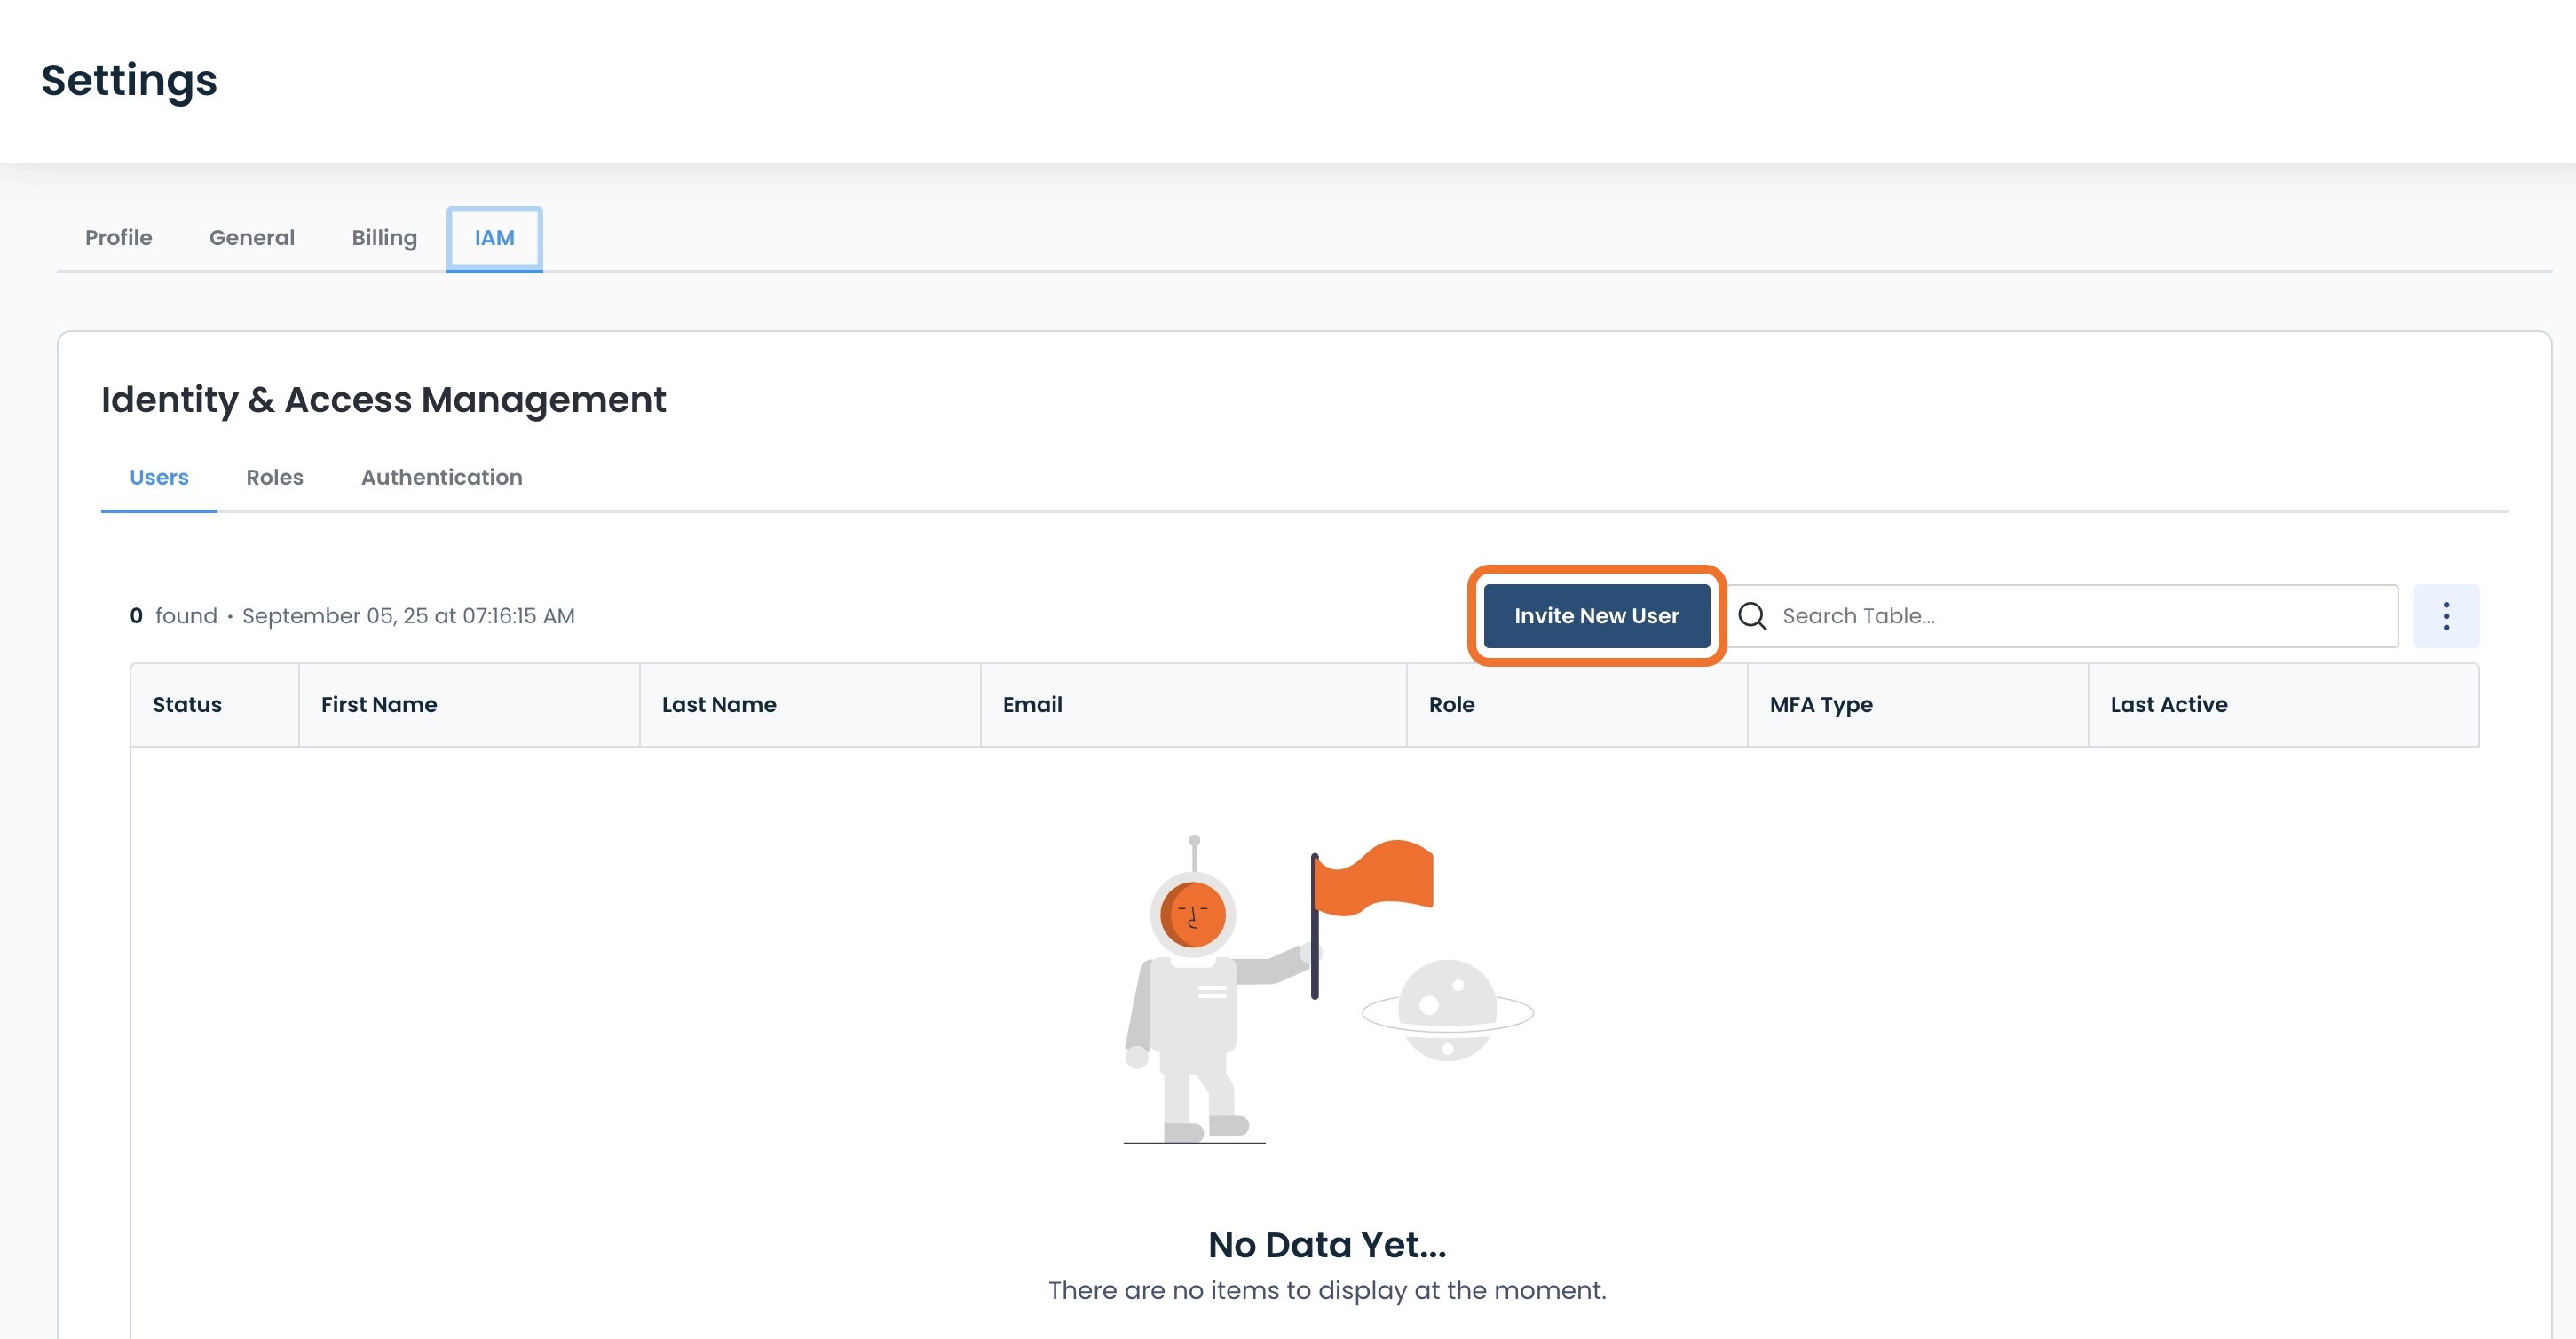
Adding a User
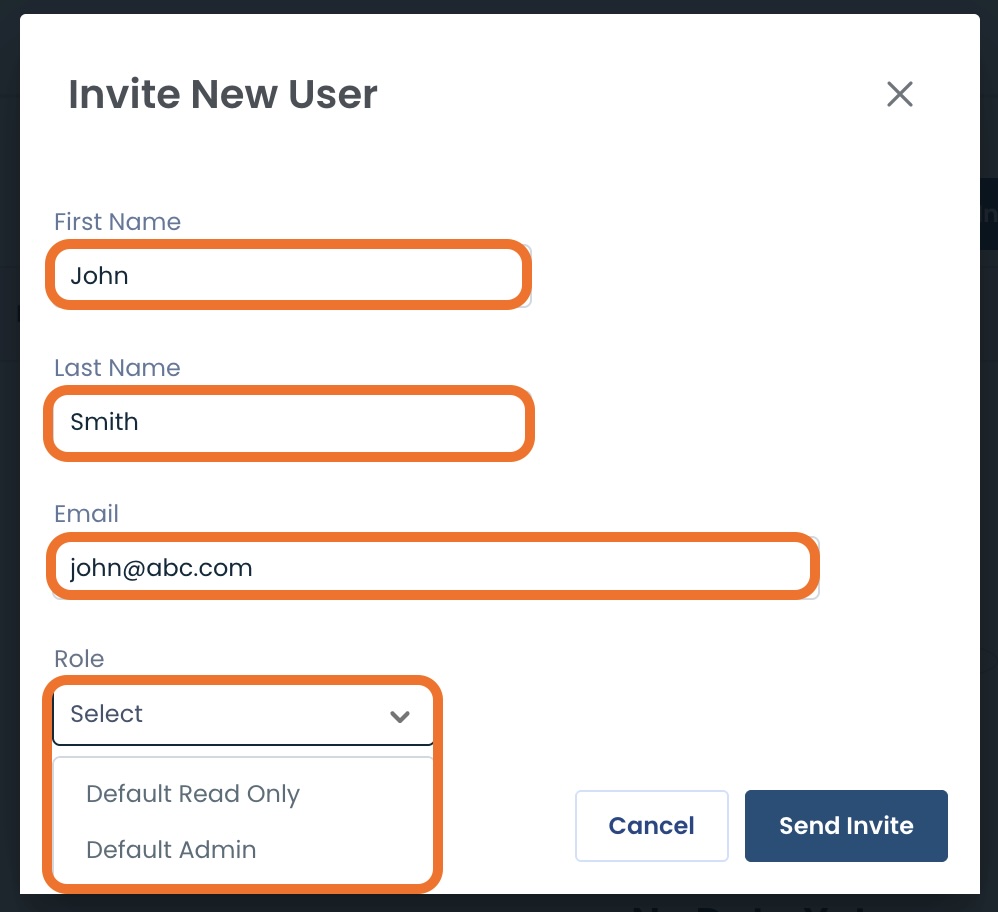
To add a new user, click ‘Invite New User’.
A modal will appear to enter the information for the new user:
First Name
Last Name
Email
Role: Select the appropriate role from the drop-down menu of existing roles
Click ‘Send Invite’.
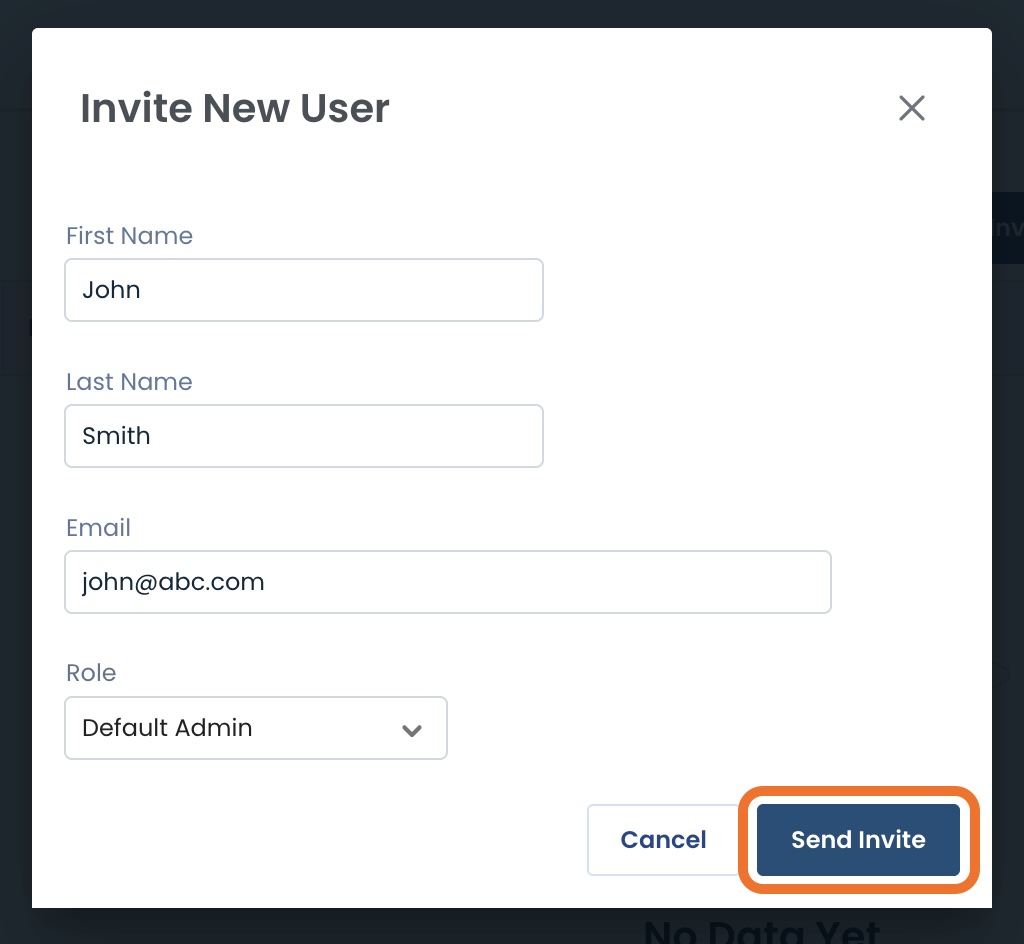
A green banner will appear stating that the invitation has been sent, and the user will appear in the table with Status of “Pending”.
.jpg)
Once the user has accepted the invitation and confirmed their account, the status will read “Active”.
Should the invitation need to be resent, click the ellipses and select ‘Resend Invite’.
.jpg)
Force Logout
To remove a user’s session, click the ellipses; select ‘Force Logout’.
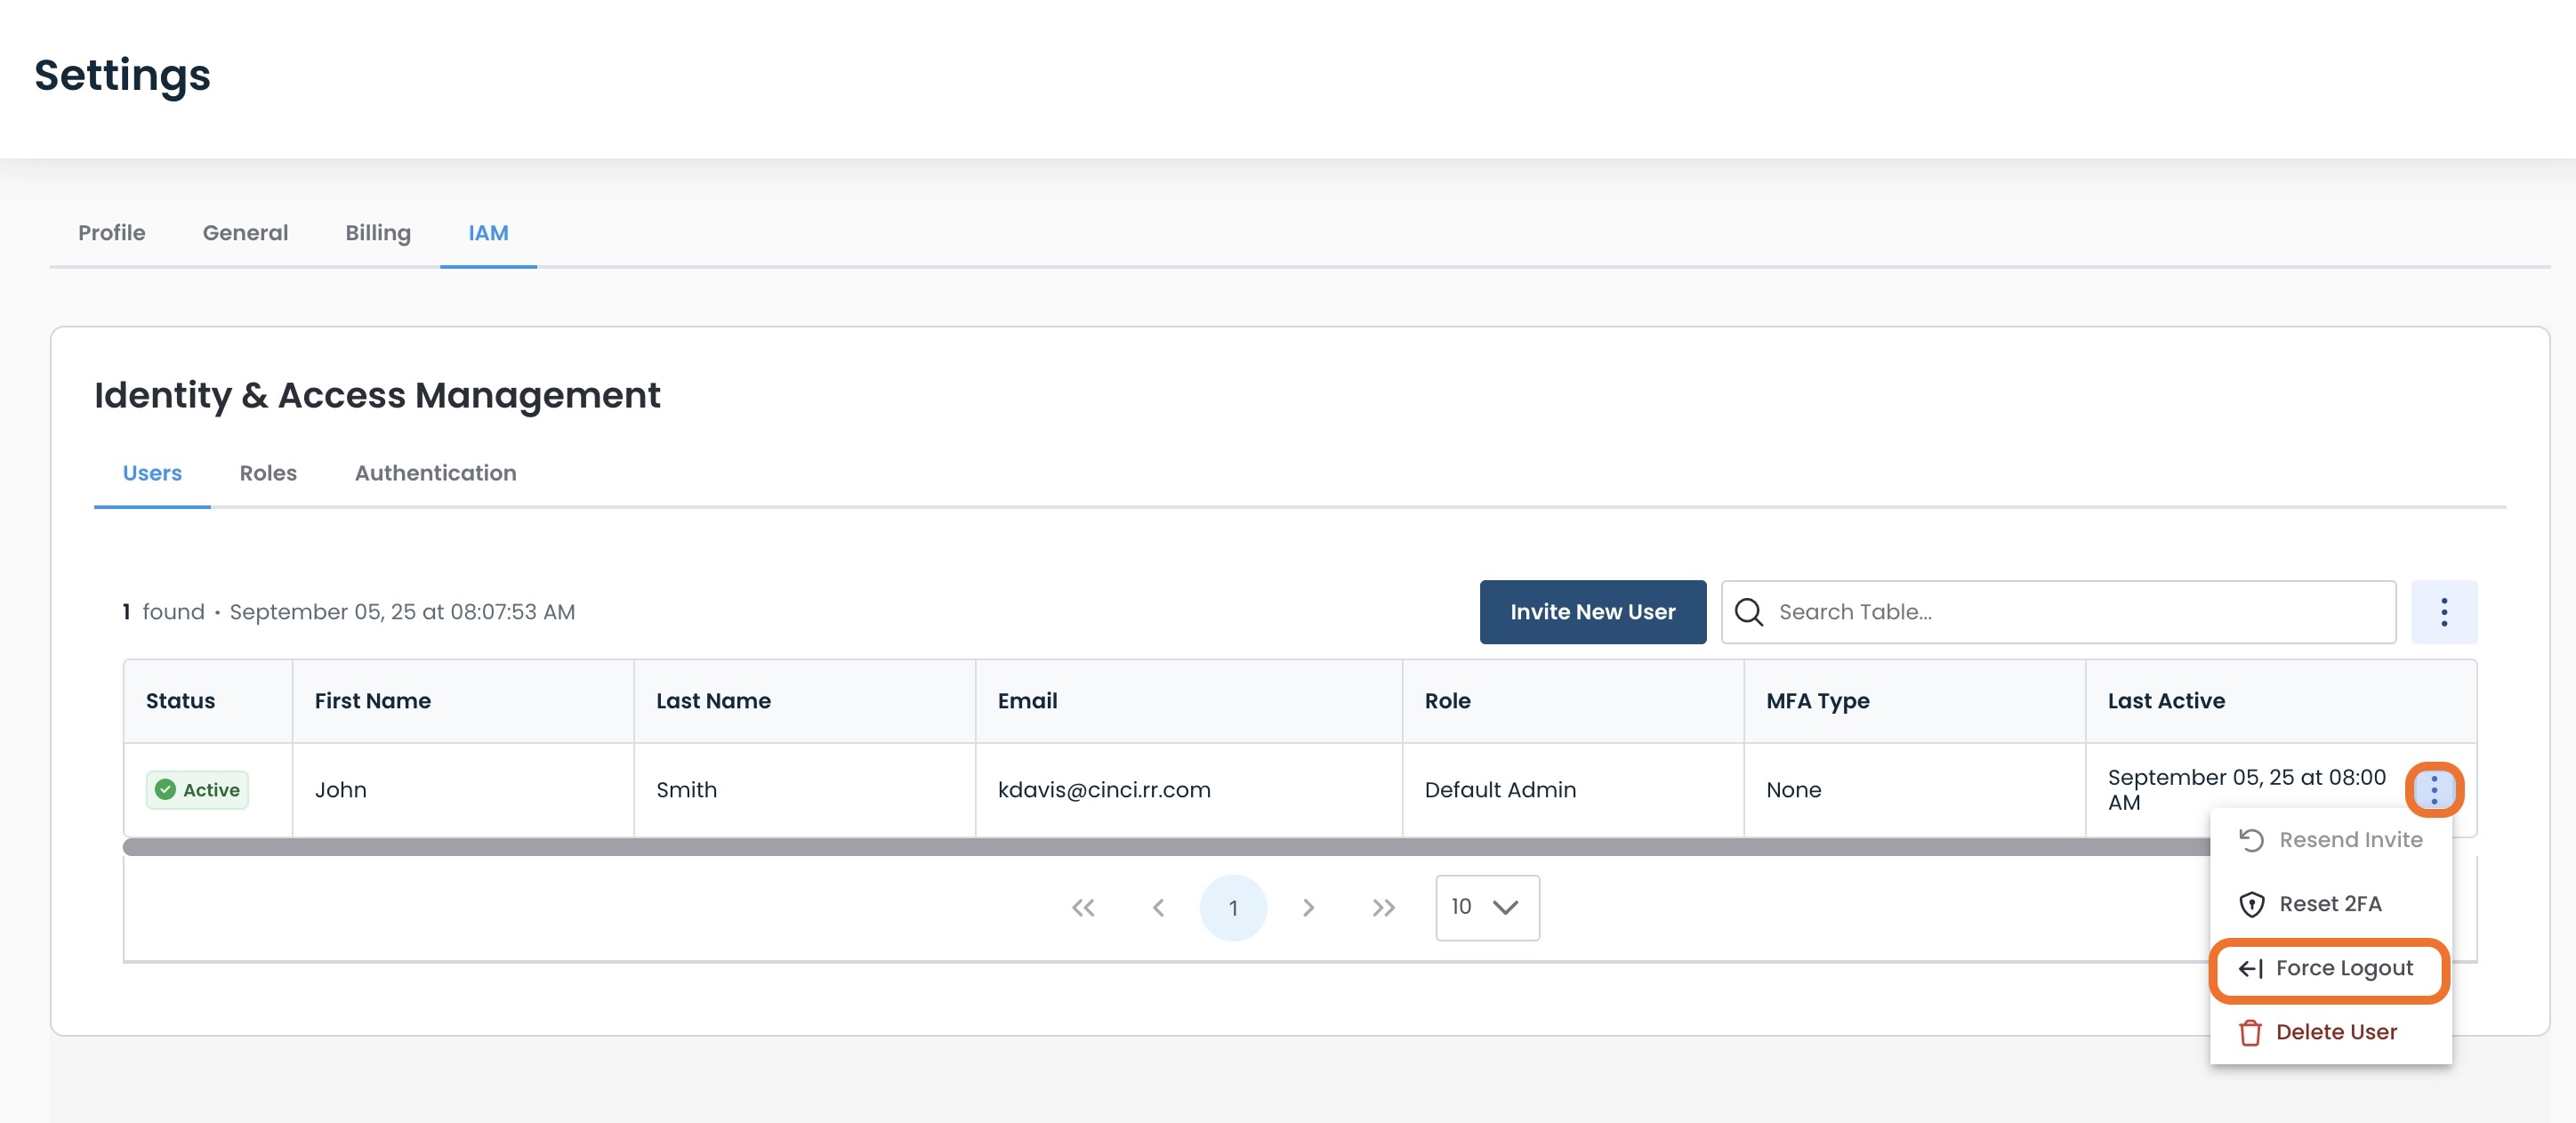
This will open a modal allowing you to confirm this action by clicking ‘Force Logout’.
Forcing Logout will cause:
The user to be immediately logged out of the Graphiant Portal.
They must log in again to regain access.

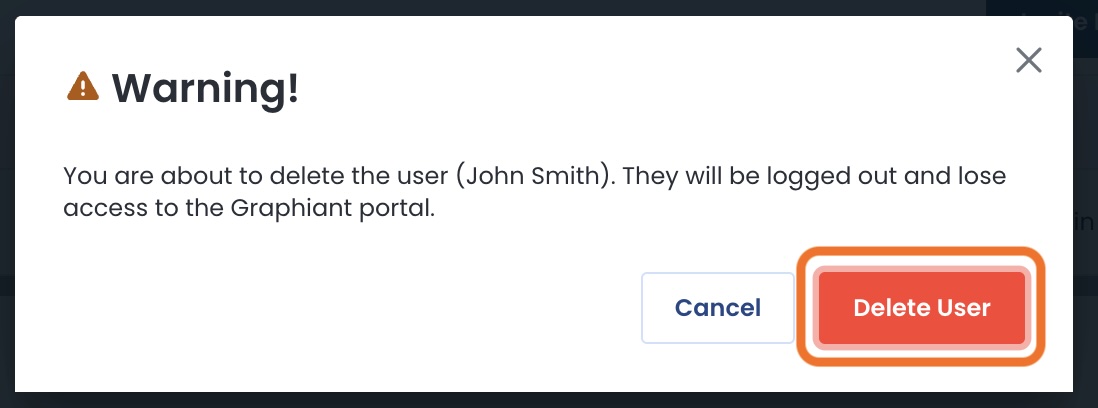
Deleting a User
To delete a user, click the ellipses; select ‘Delete User’.
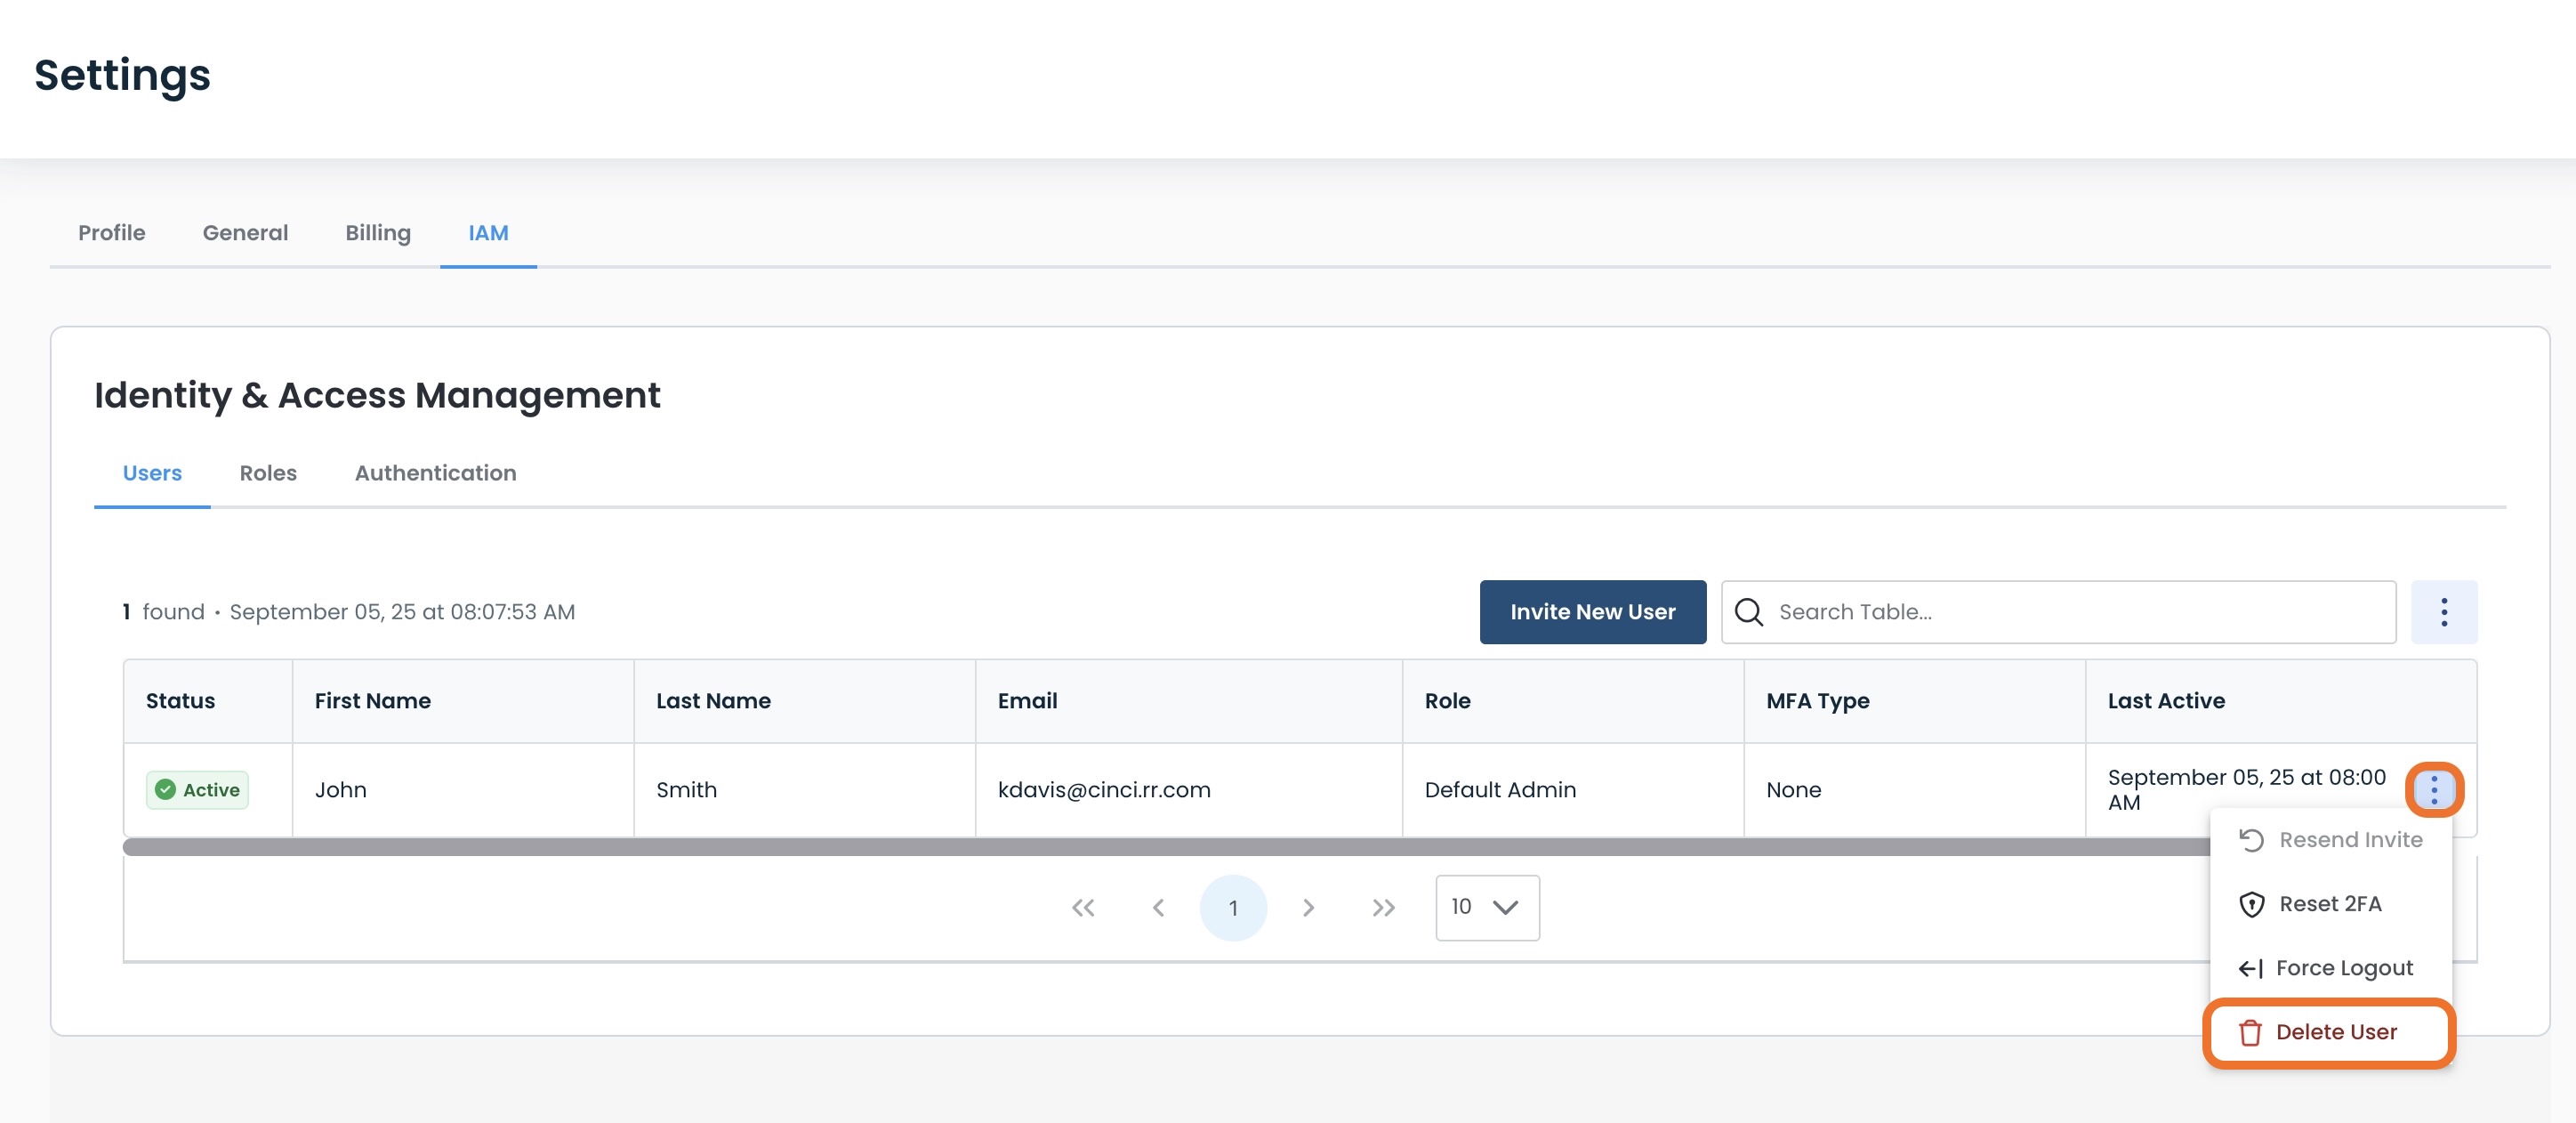
This will open a modal allowing you to confirm this action by clicking ‘Delete User’.
Deleting User will cause:
The user to be immediately logged out of, and lose access to, the Graphiant Portal.
They will not be able log in again nor have future access.
Transferring the Enterprise Owner
If you are the admin Owner of your enterprise, you can transfer the ownership to another admin.
Note:
Only the current Owner can see this option and transfer ownership.
Only other admins within the enterprise can be named “Owner” in the transfer.
Transferring Owner will cause:
The selected user to be the new admin Owner for your enterprise.
You will lose access to all Owner-only permissions.
Warning!
This action cannot be undone.
To transfer ownership, click the ellipses to the right of your owner user; select ‘Transfer Owner’.
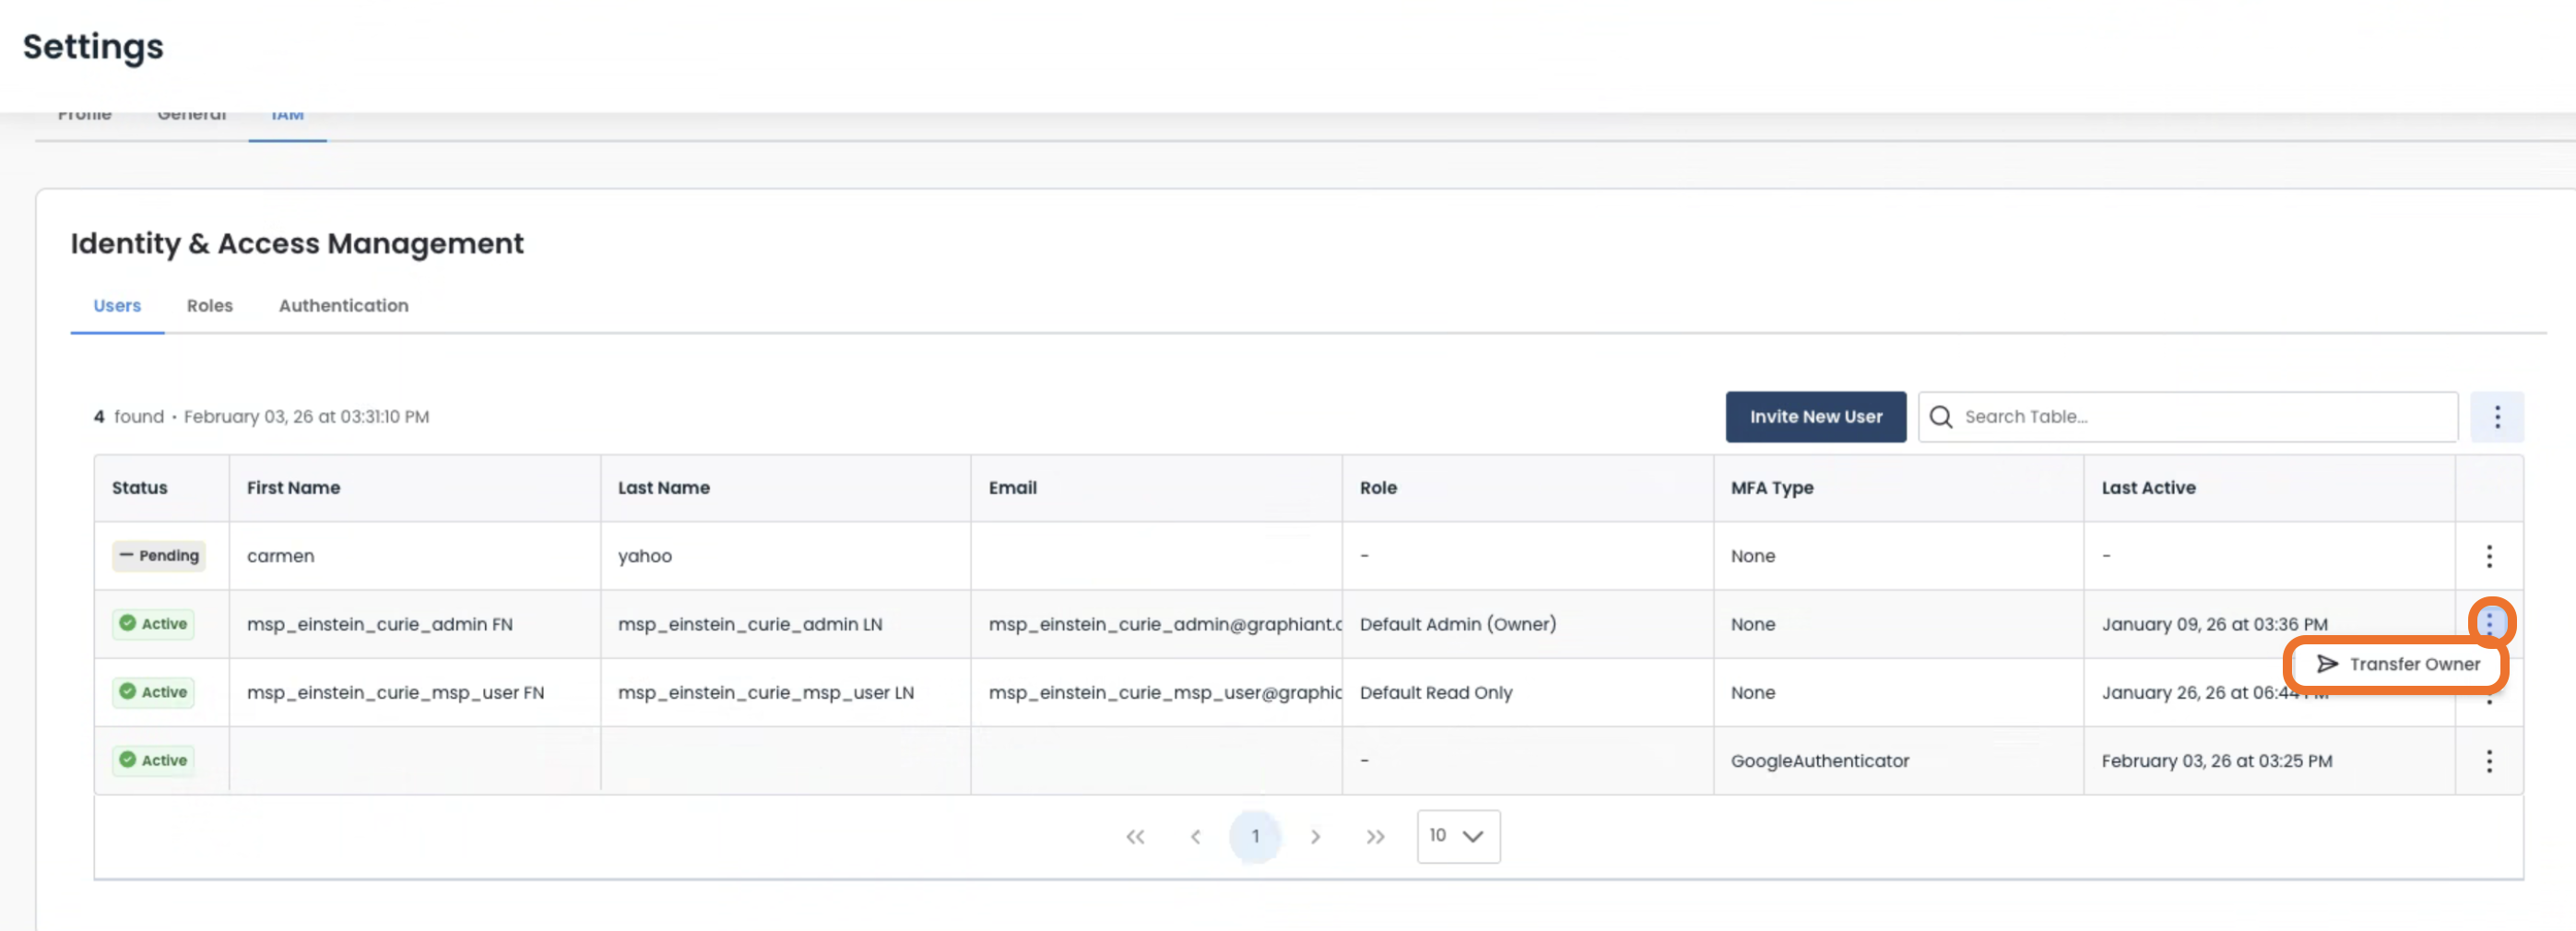
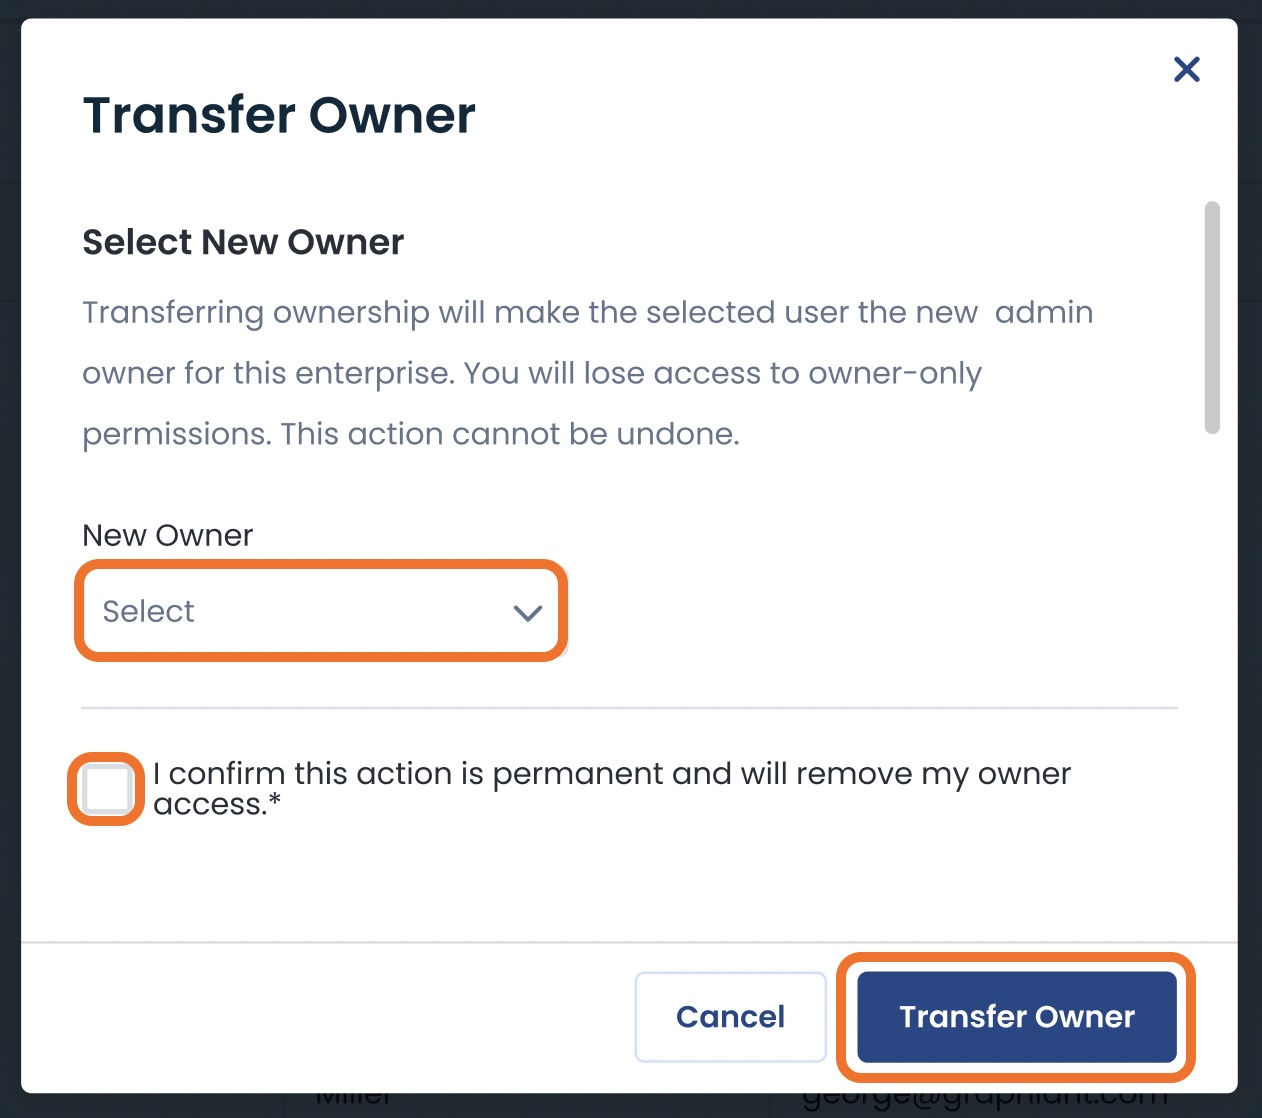
This will open a modal to select the new owner.
Complete the following fields:
New Owner: Select from the admins in the dropdown list
Confirm Action Box: Check to confirm
Warning:
This action cannot be undone.
Click ‘Transfer Owner’ to confirm.
A green banner will appear stating that the owner transfer has been successful, and “(Owner)” will now appear in the table next to that user.
.png)
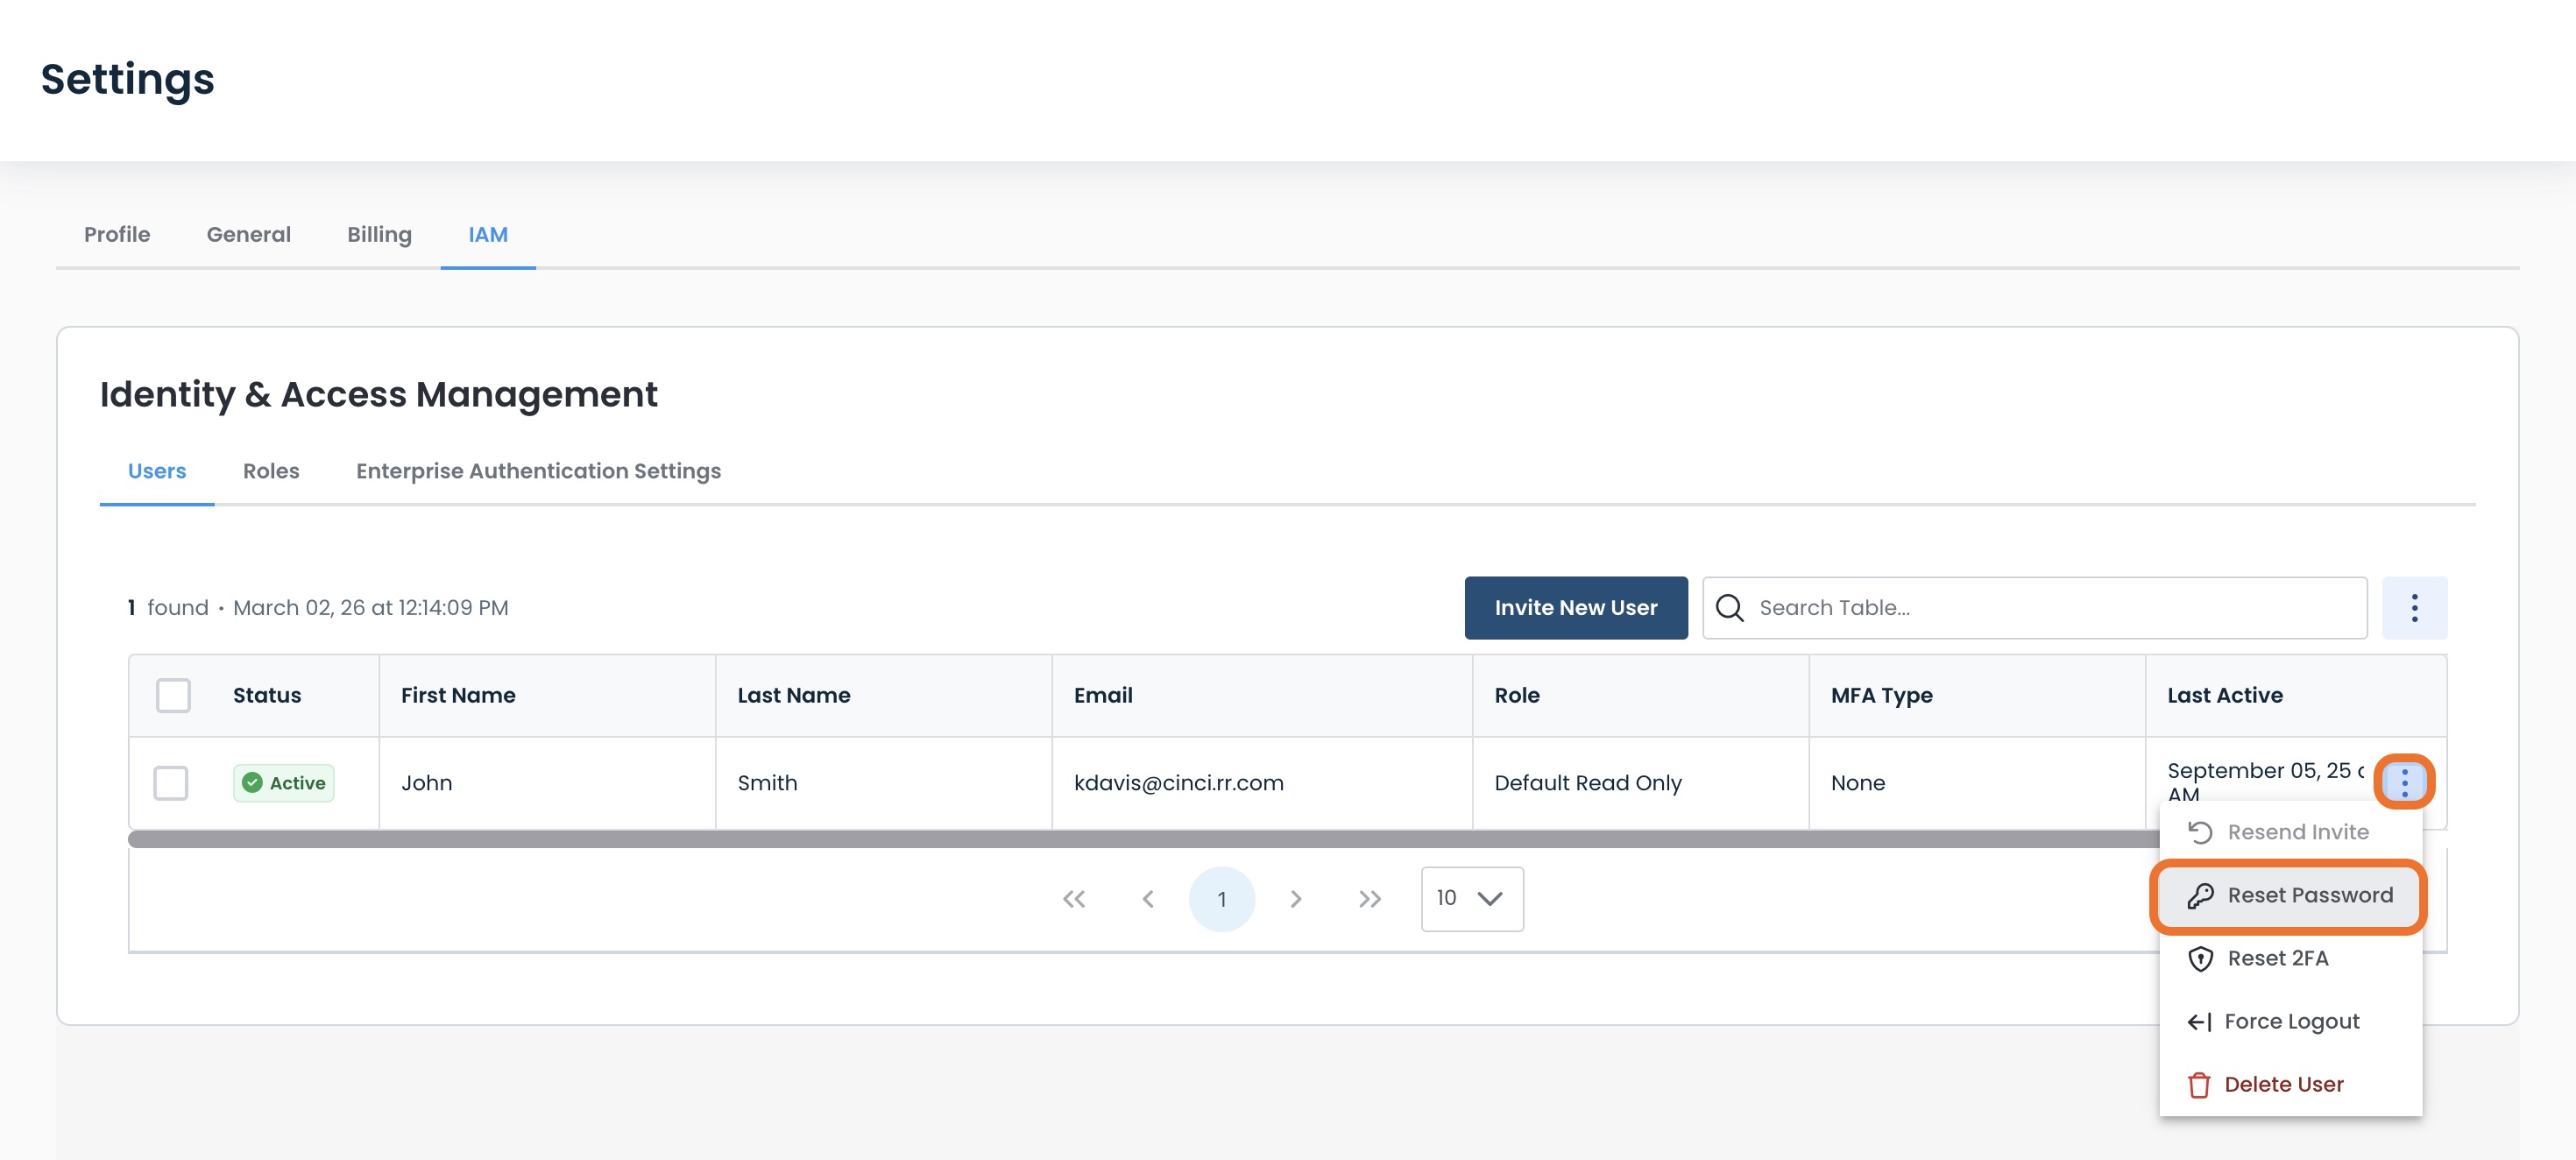
Forcing a Password Reset for Users
Should for any reason a user (or users) require a password reset, you can do that from the IAM “Users” table.
Select an individual user by clicking the ellipses menu; select ‘Reset Password’.
Or you have the option of doing a bulk command user reset by:
Clicking either: .
The box to the left of each user
The box above to select all users
Then click ‘Reset Password’.
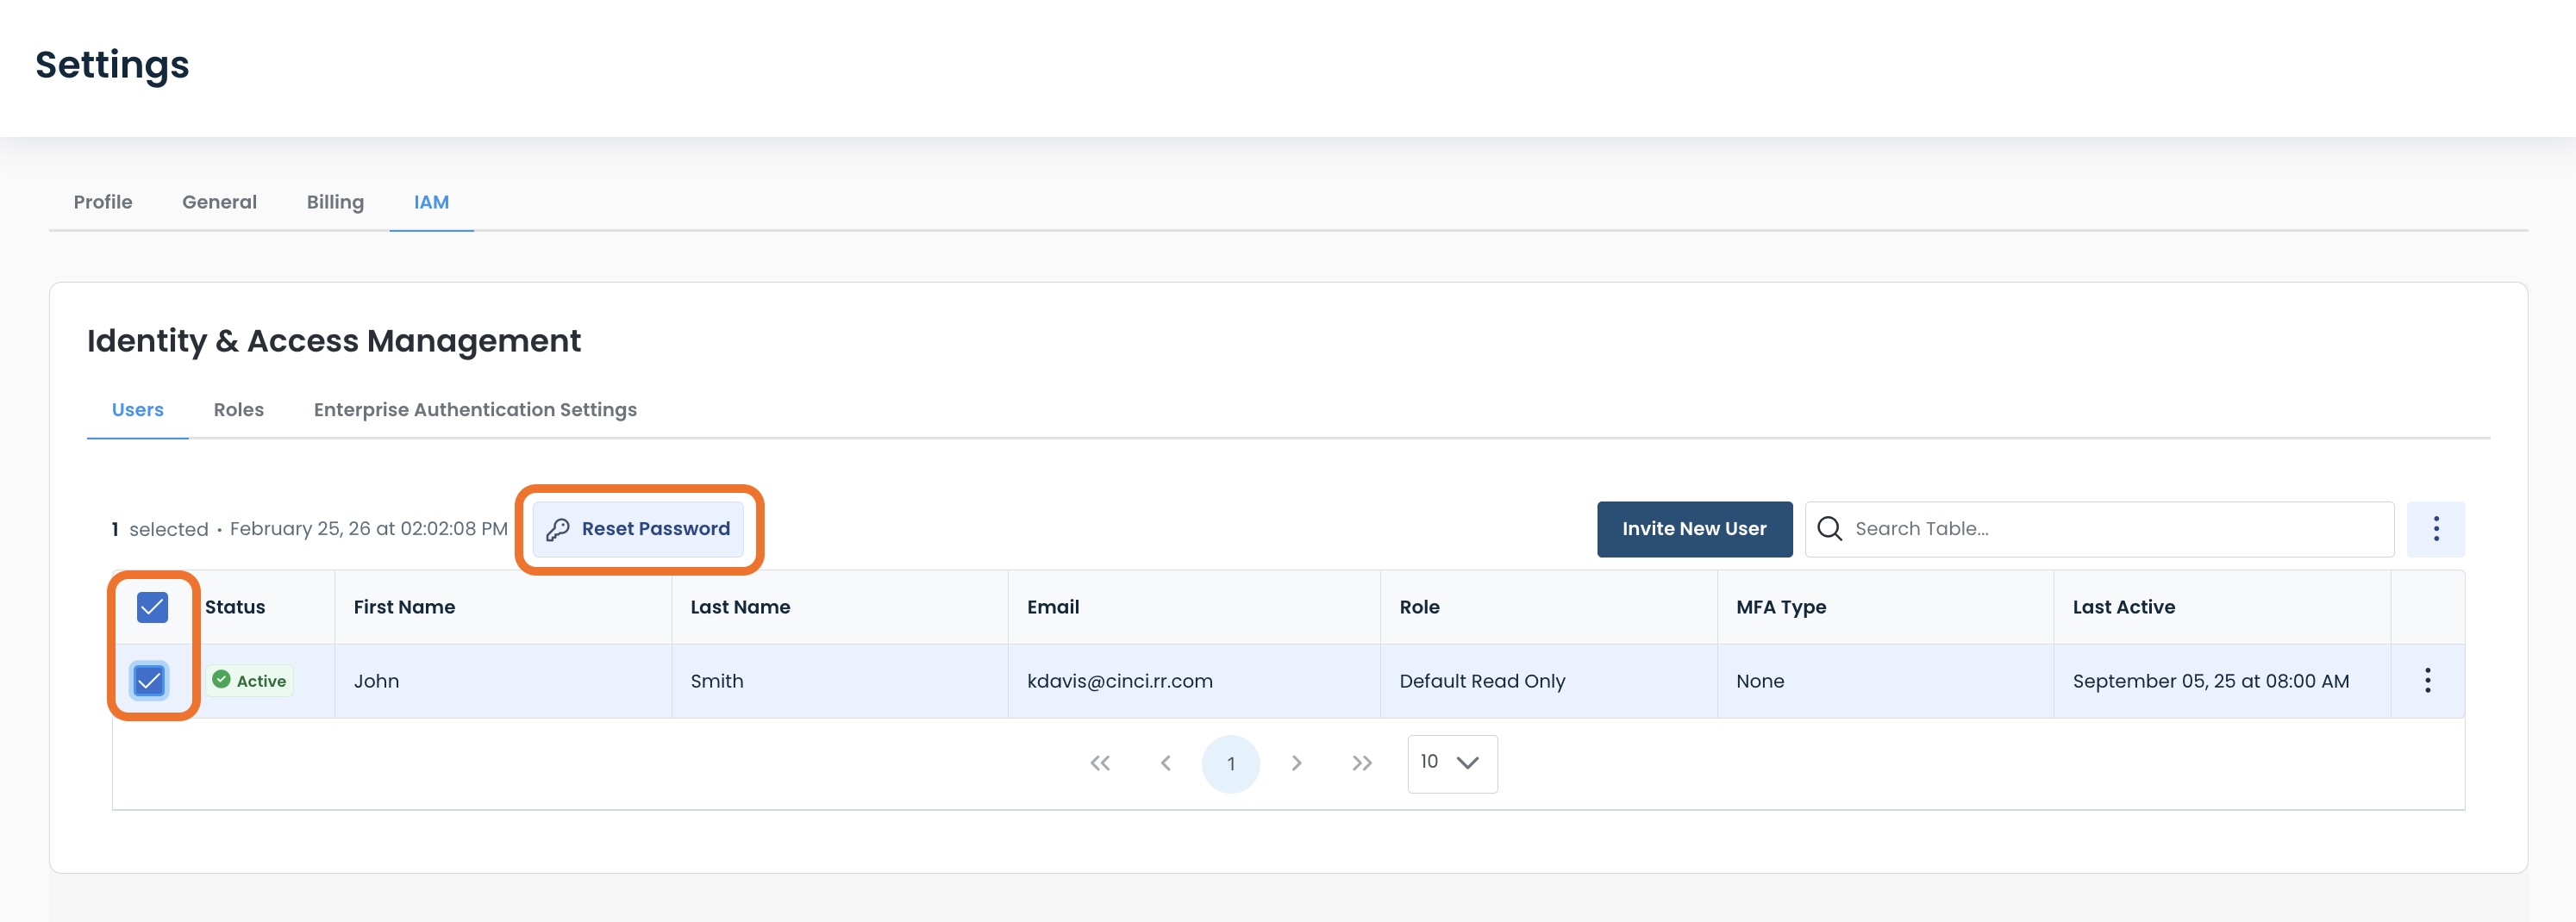
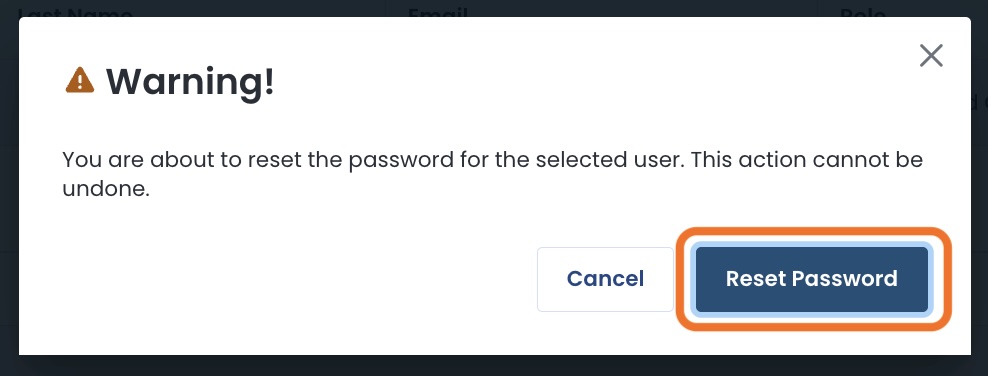
A modal will appear to confirm that you wish to reset the password for the selected user(s),
Click ‘Reset Password’
Warning:
This action cannot be undone.
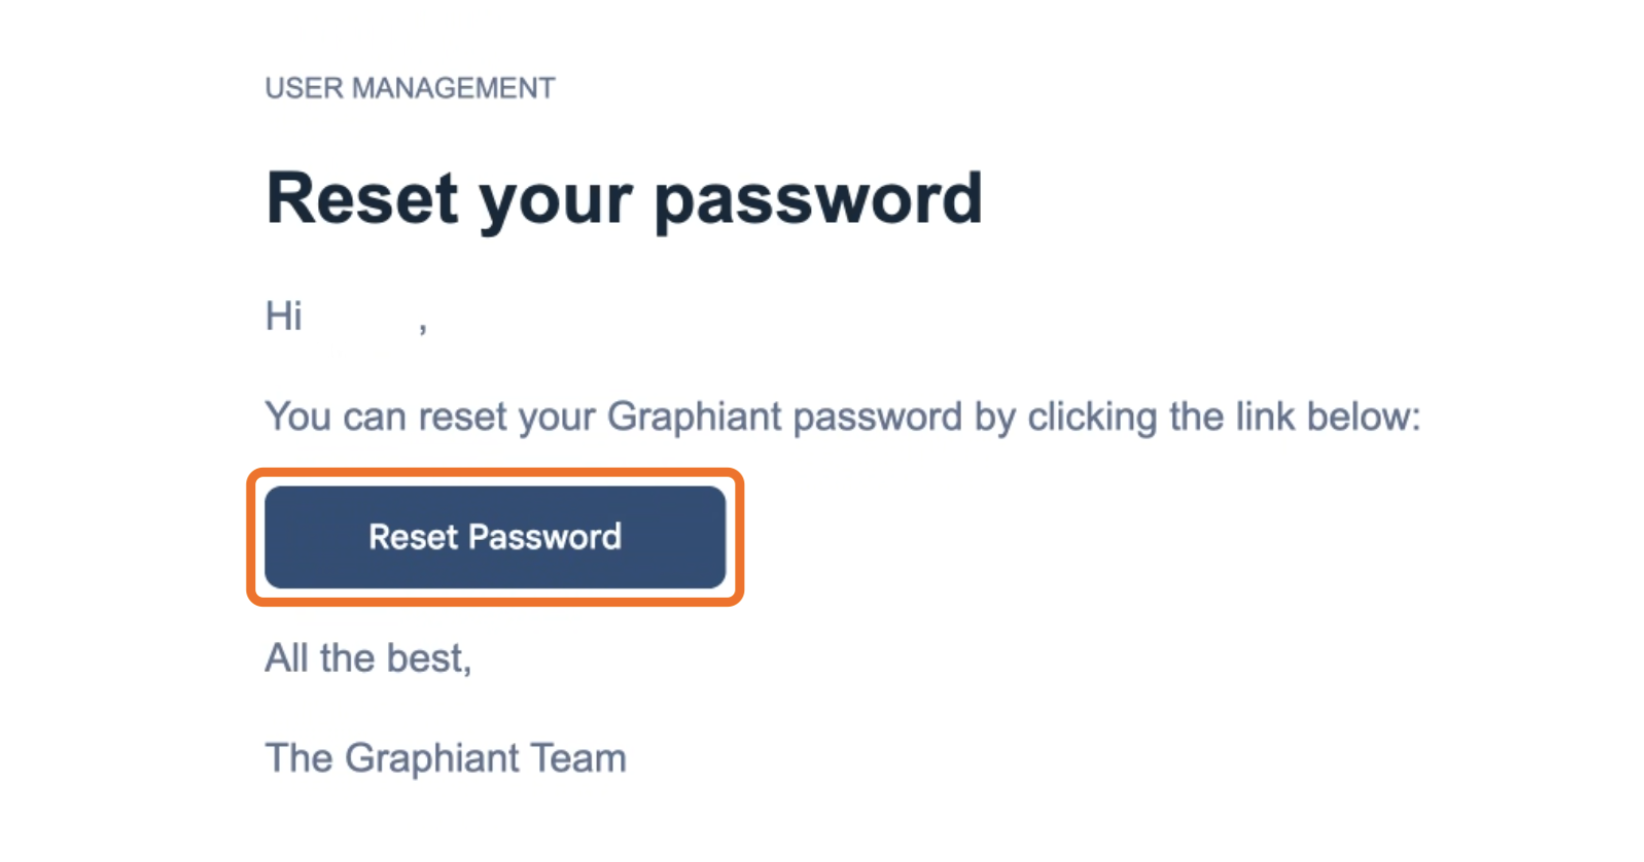
Your user(s) will receive an email from Graphiant stating that they need to reset their password.
They will just need to click the ‘Reset Password’ link.
Note:
Users will not be logged out of any current work they are actively doing within the Graphiant portal
They will just need to reset their password before the next time they will login
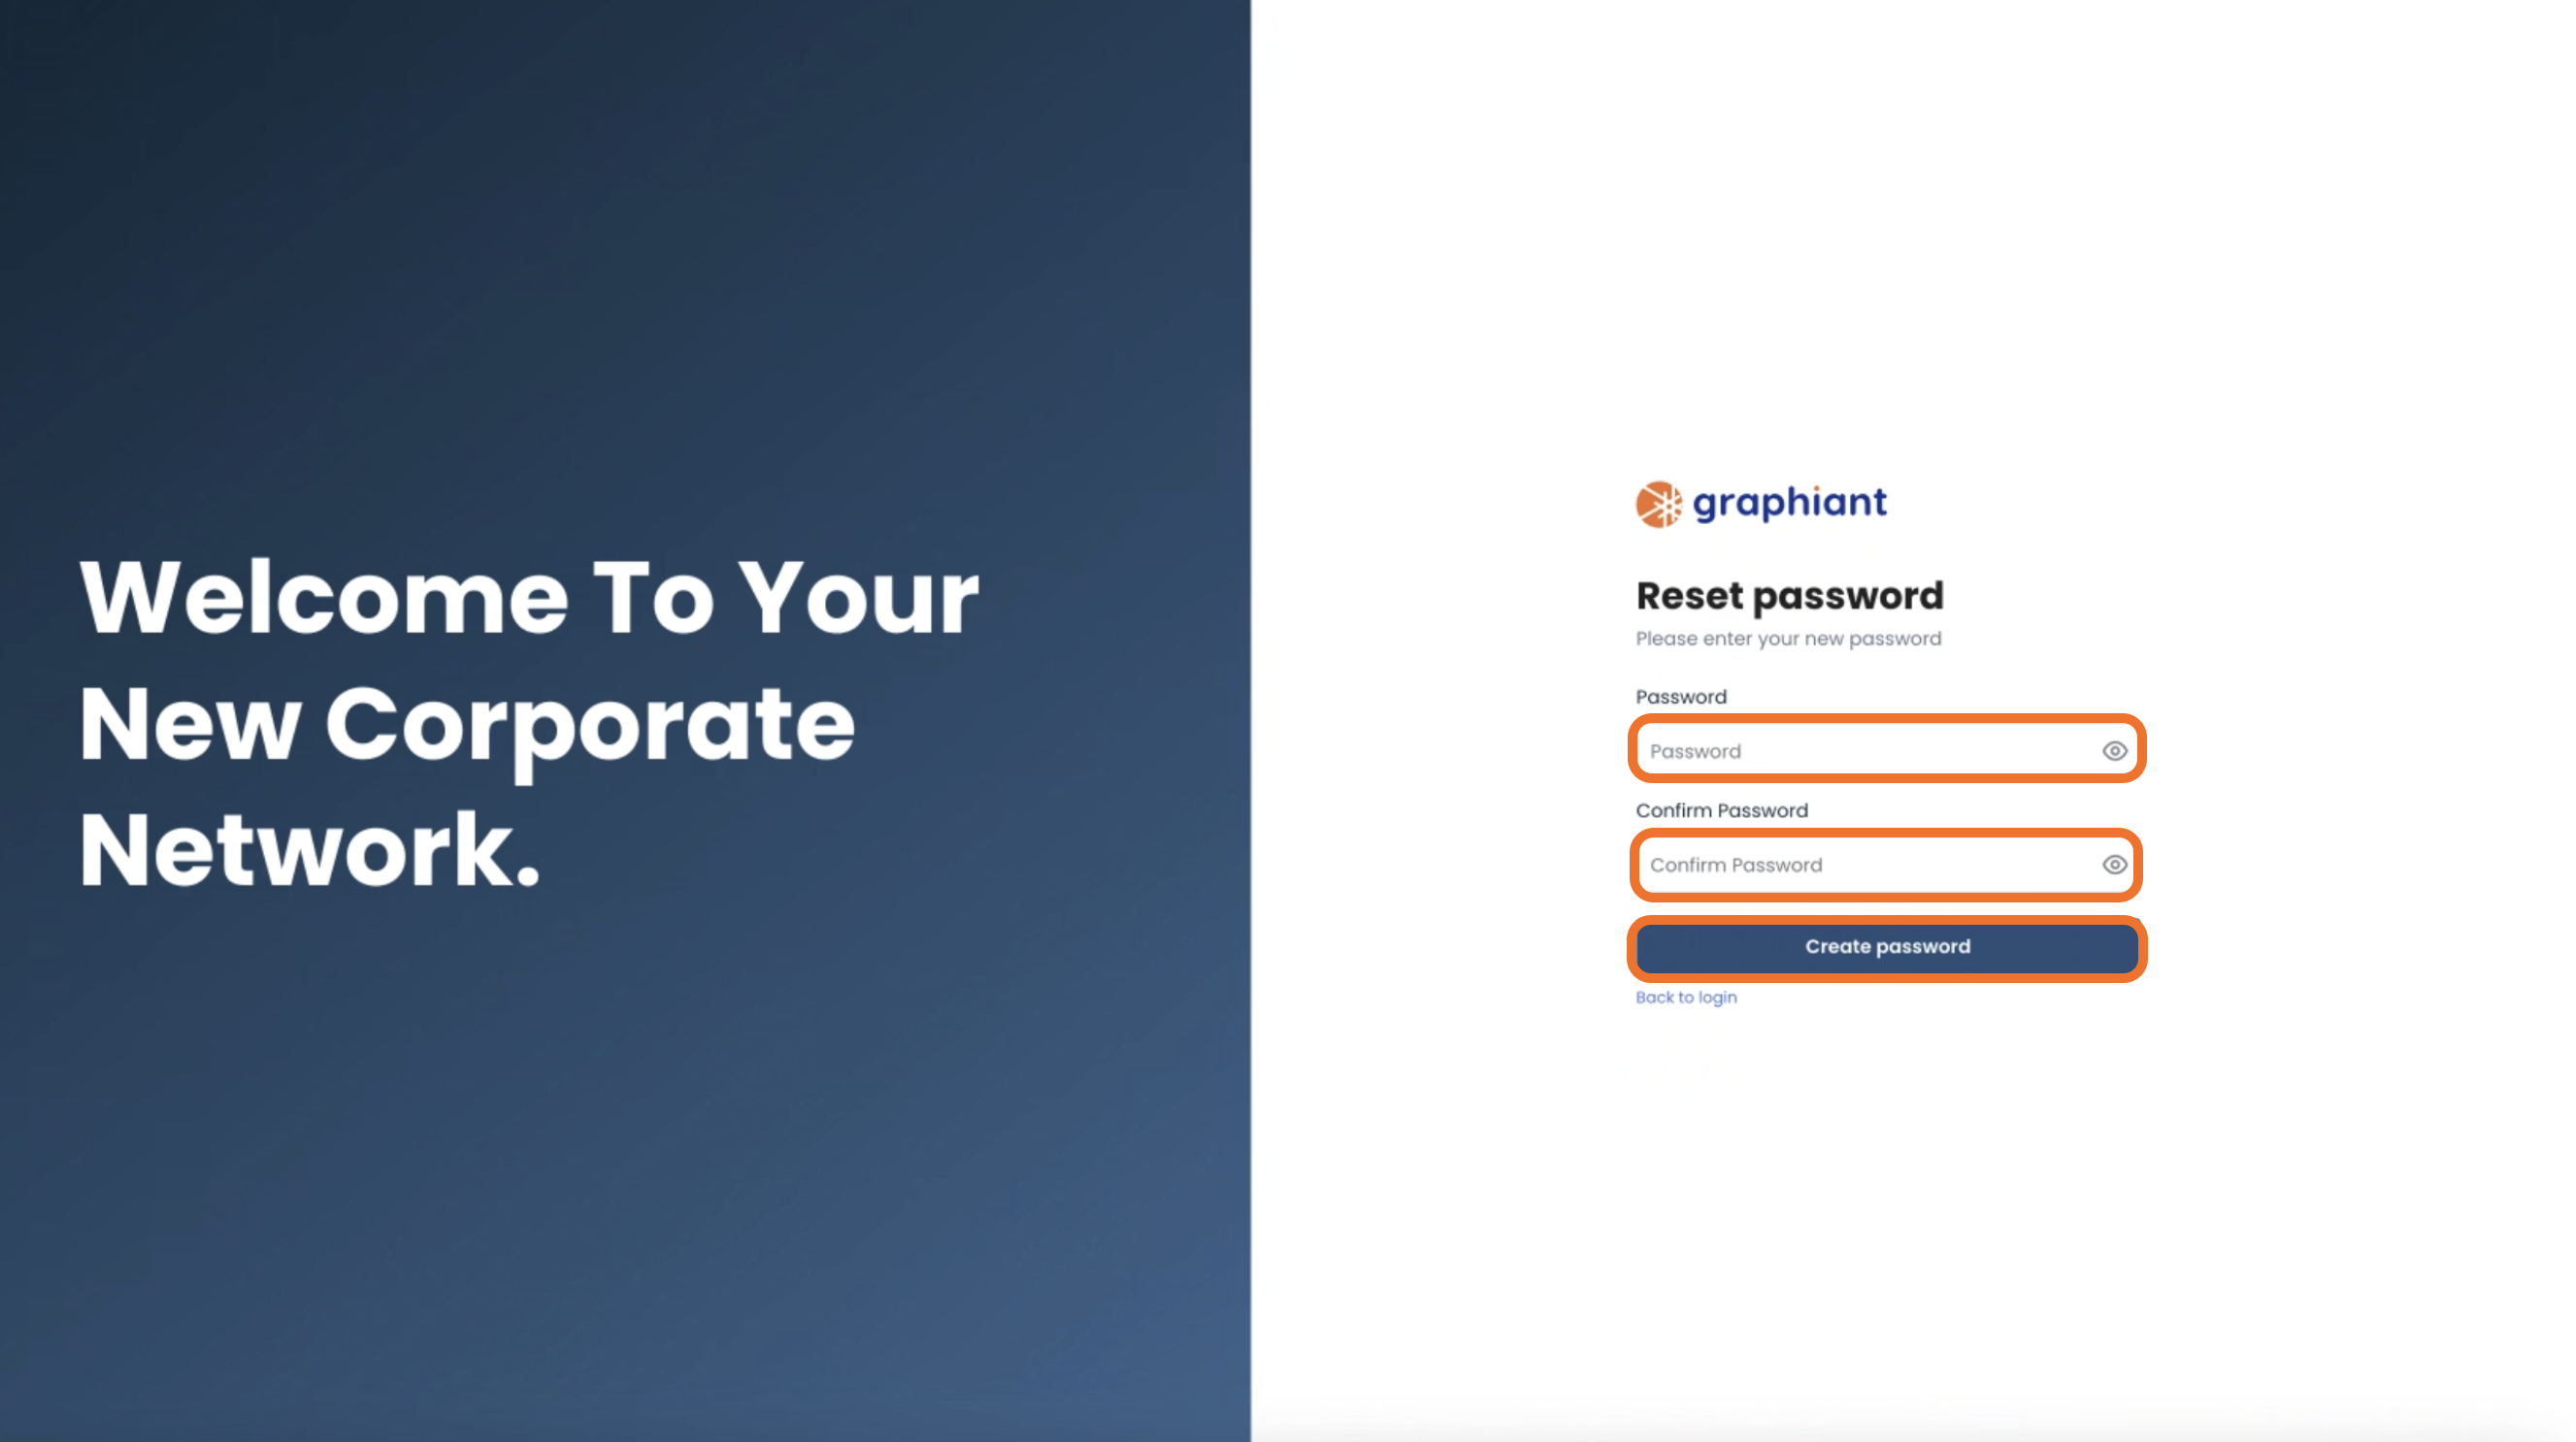
That link will take users to the page for creating and confirming their new password.
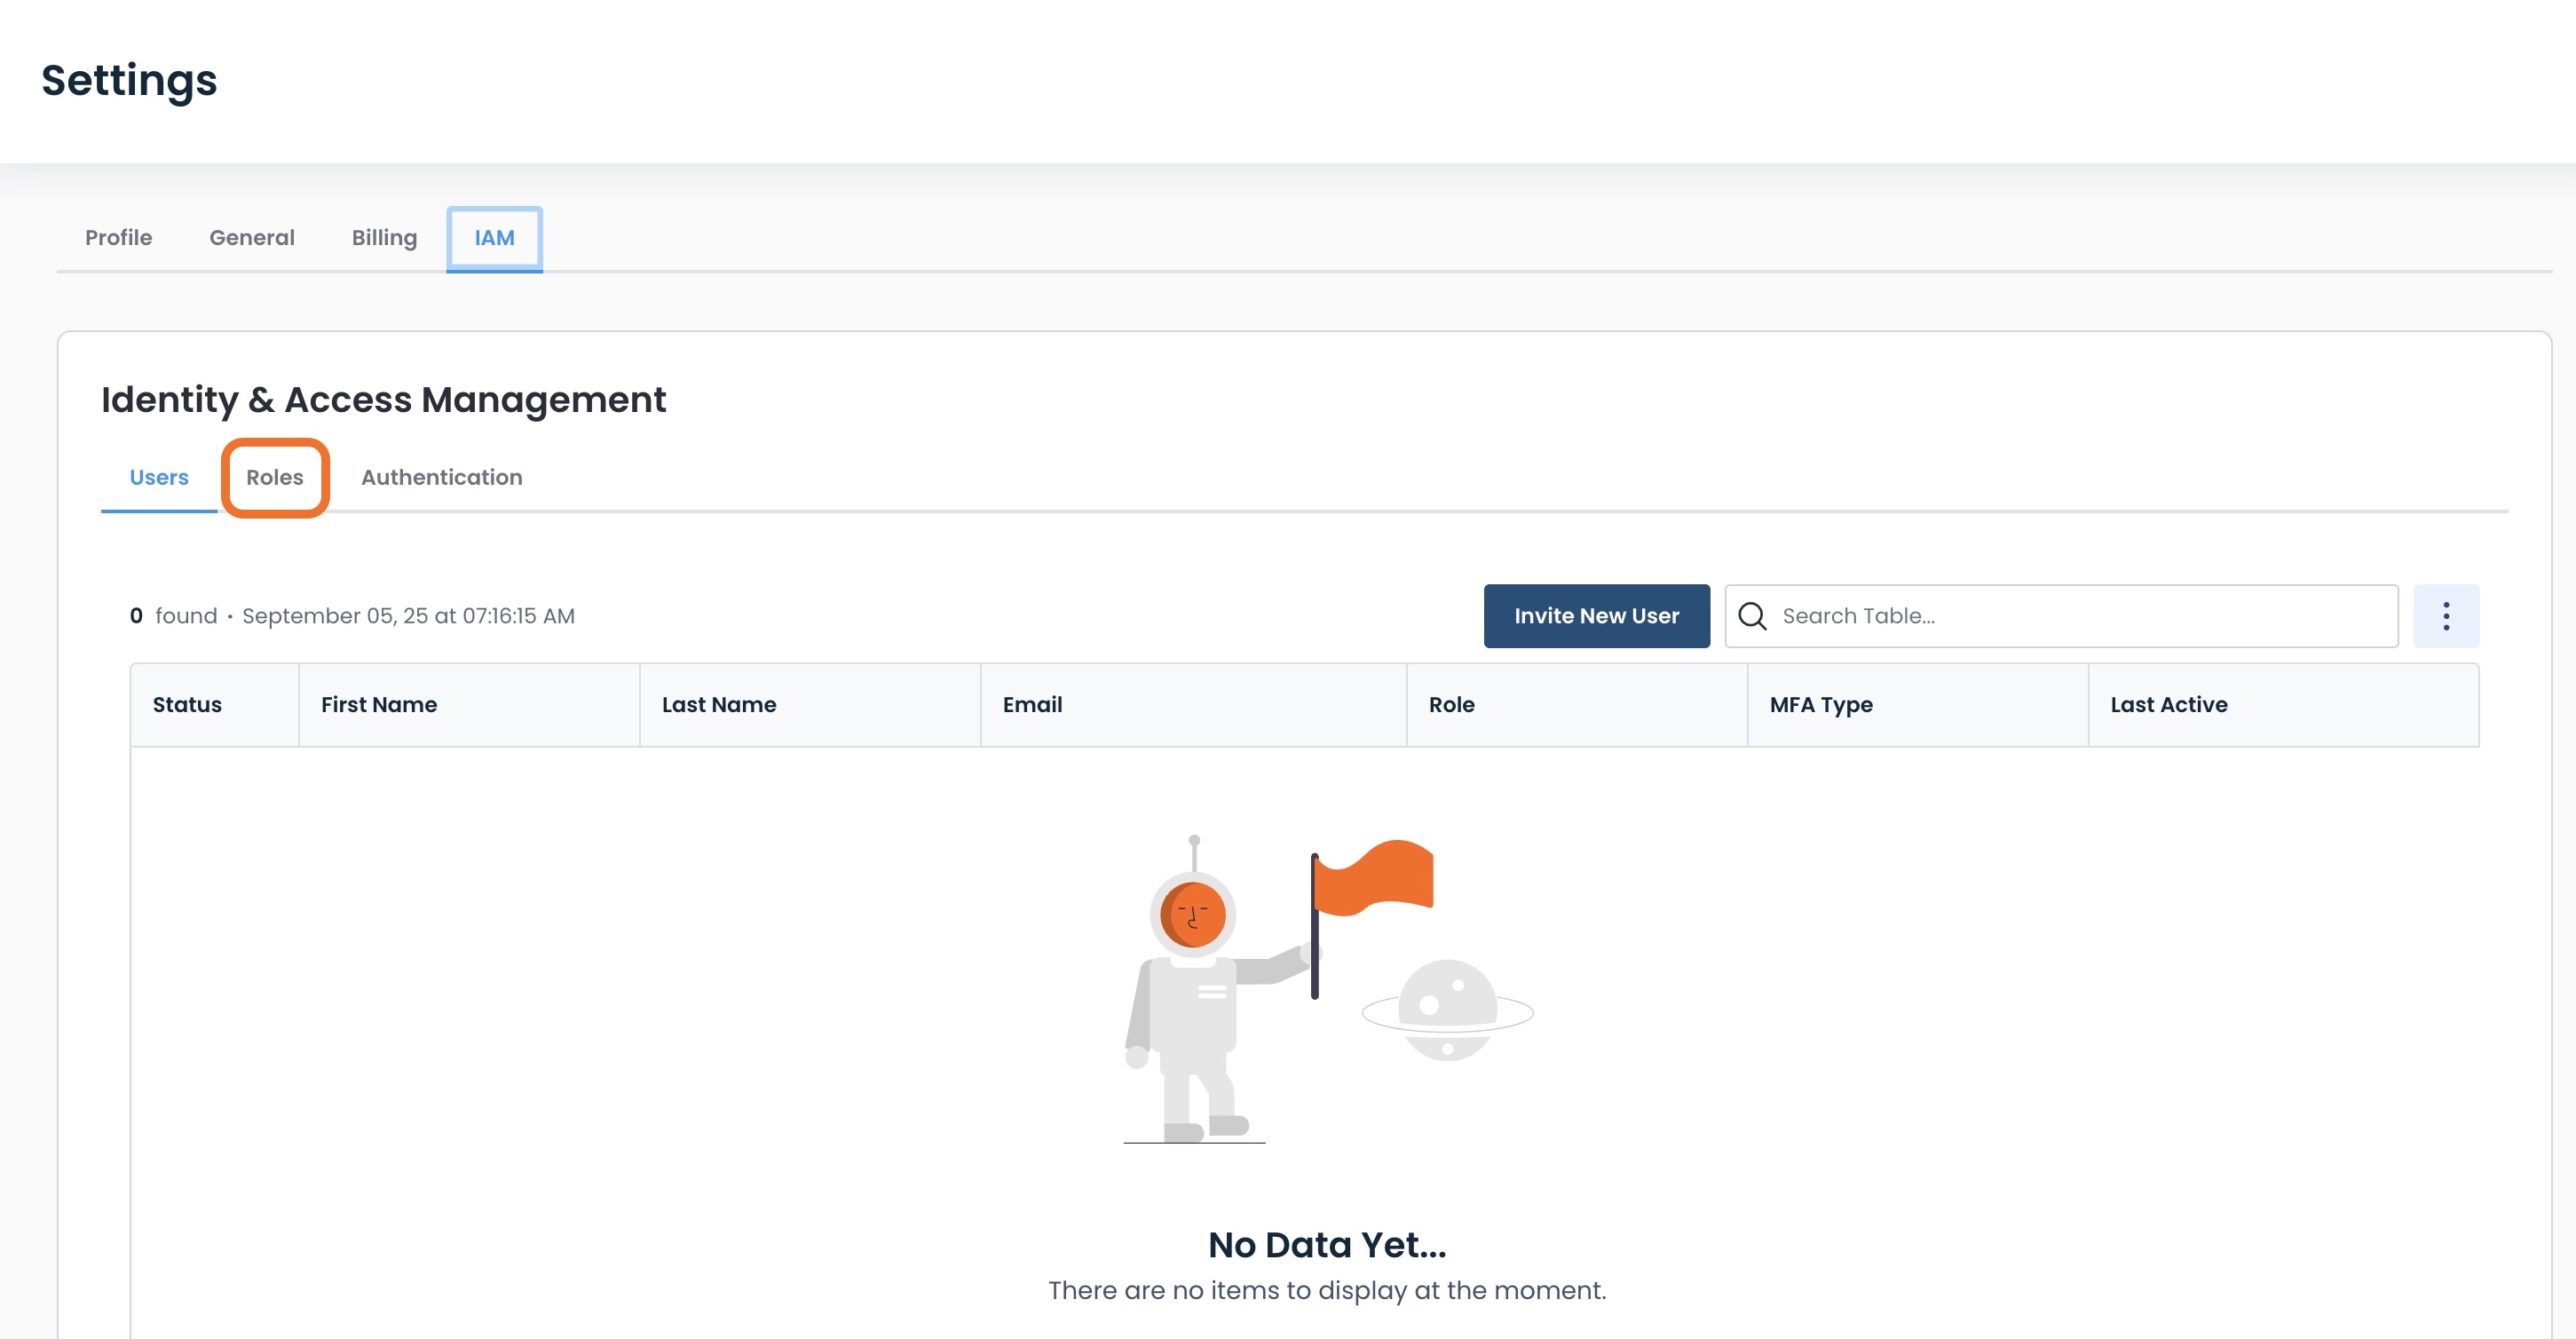
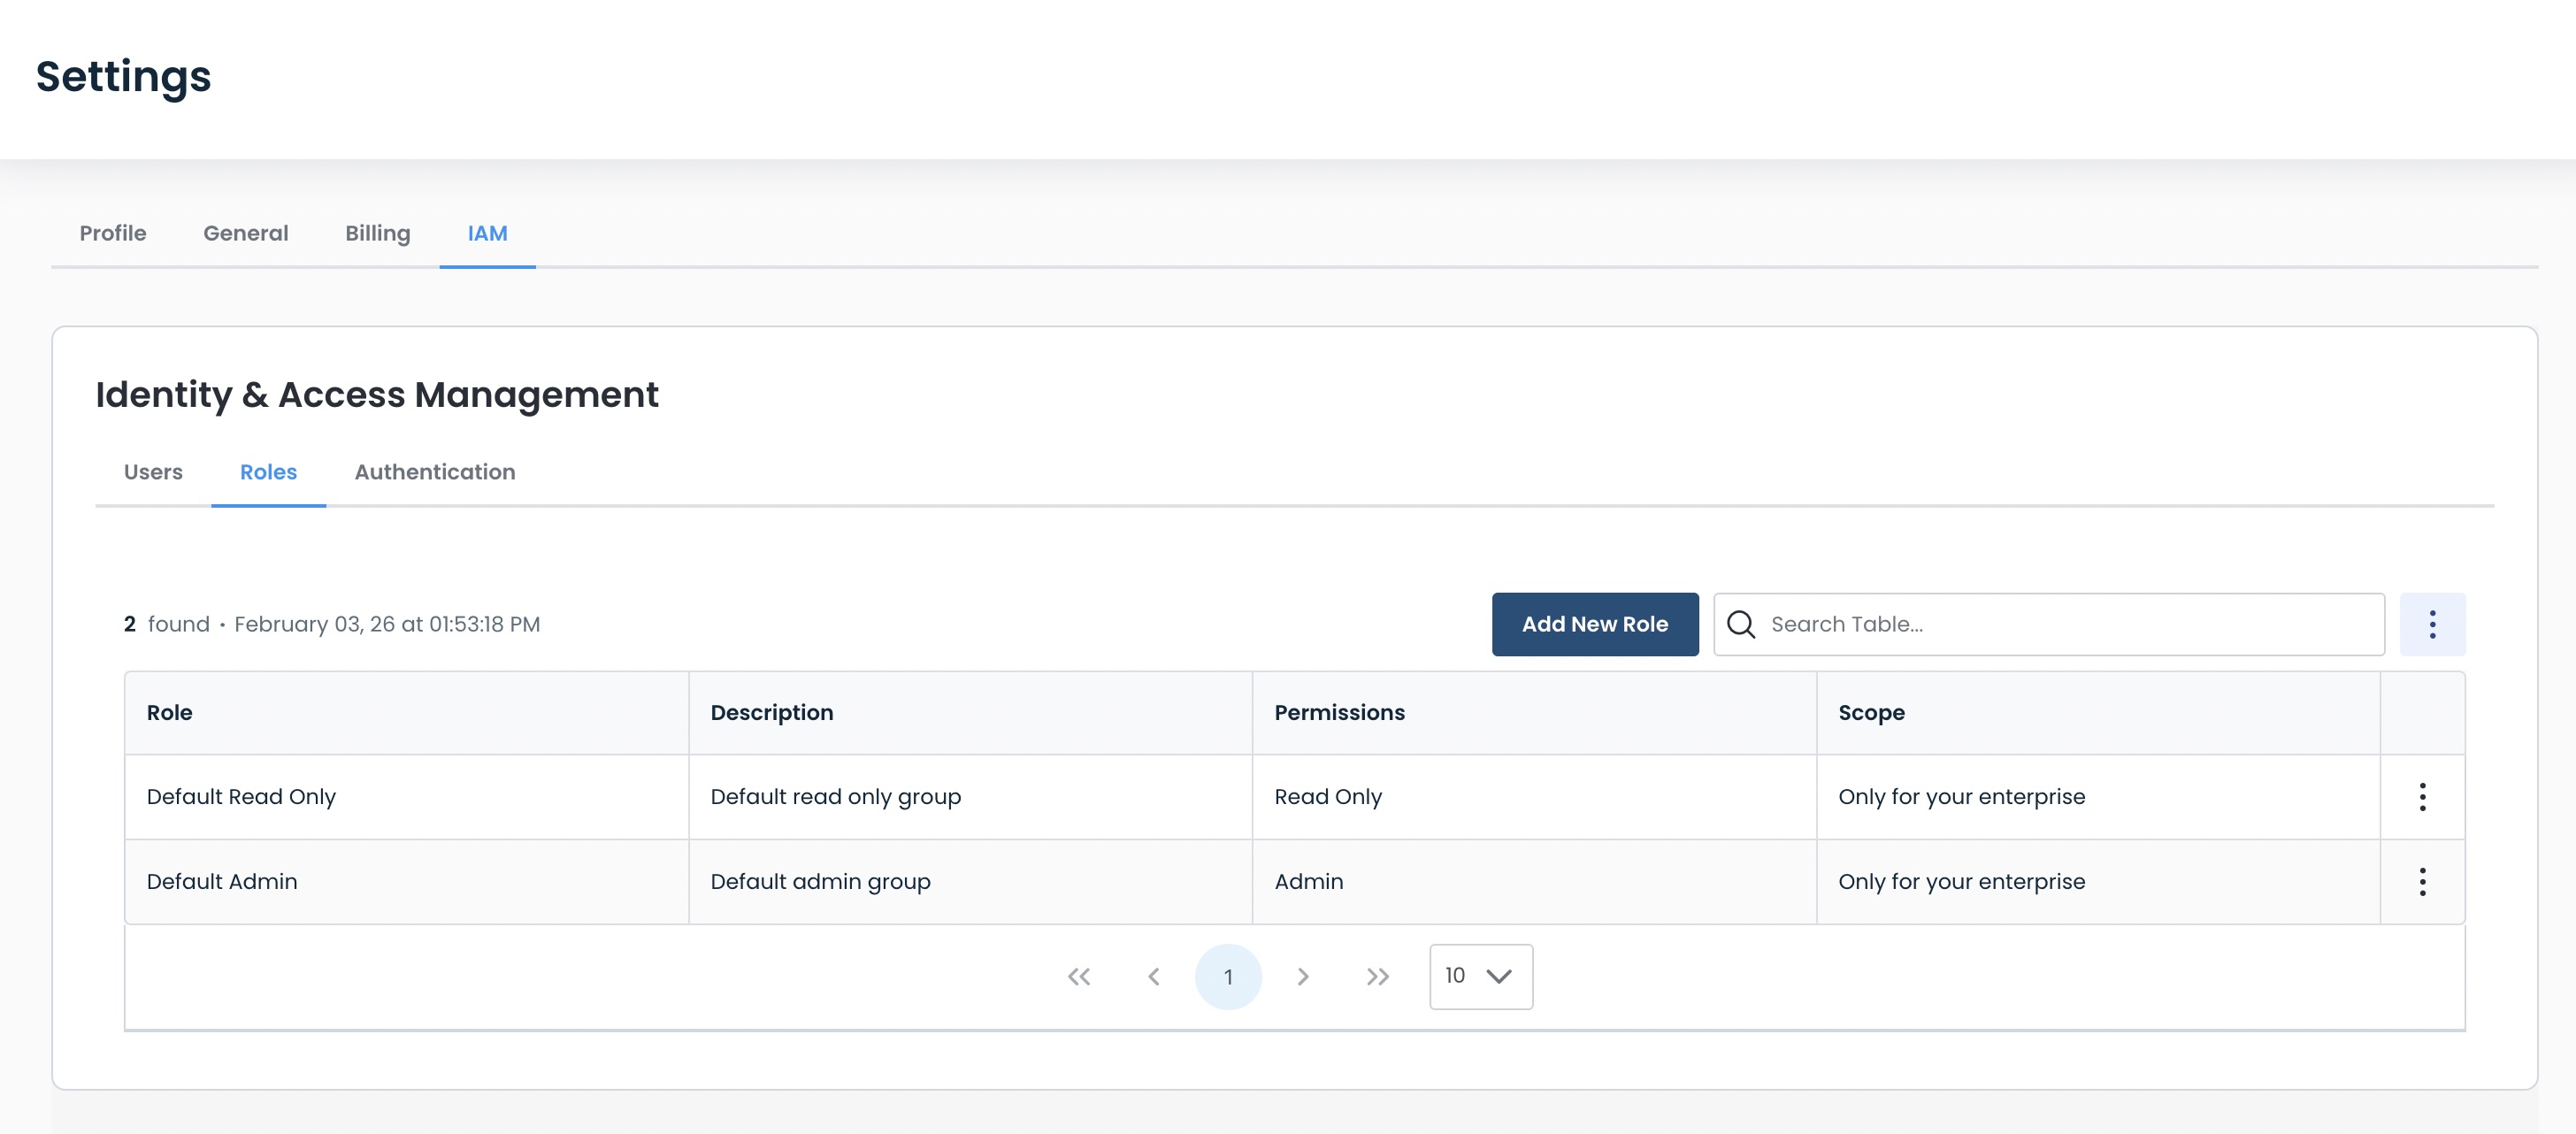
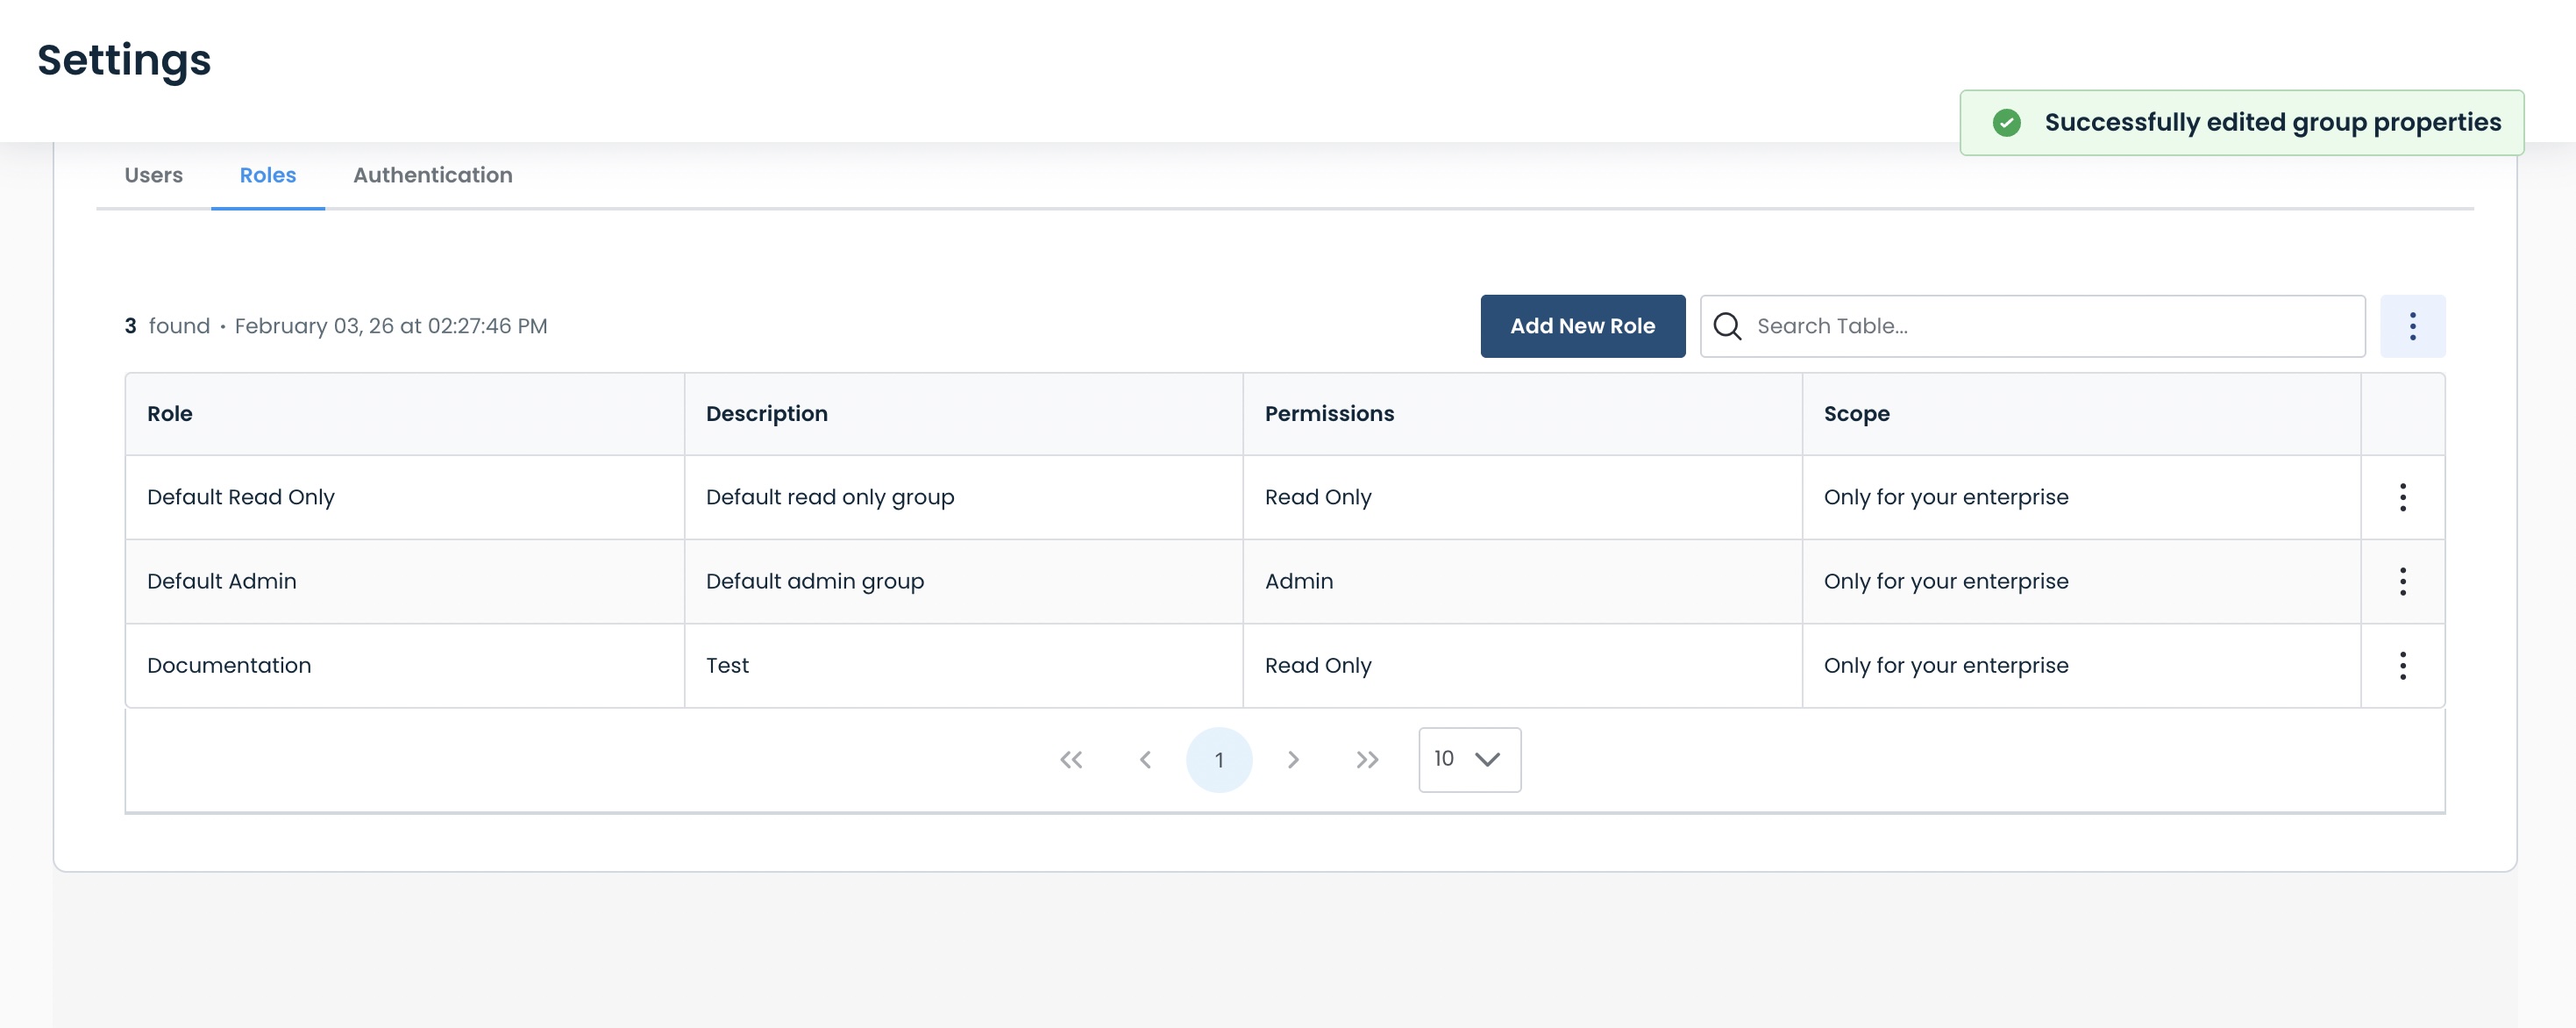
Managing Roles
To get to the roles within your enterprise, click the ‘Roles’ tab at the top of the IAM page.
Here, you can see the following information for each role:
Role: Name of the role
Description: What the role covers (owner admin-entered)
Permissions: What the users in the role can do
Scope: Whether the role is for:
Only your enterprise
For other enterprises in an MSP
Note:
The “Default Read Only” and “Default Admin” roles are automatically present, and cannot be edited or deleted.
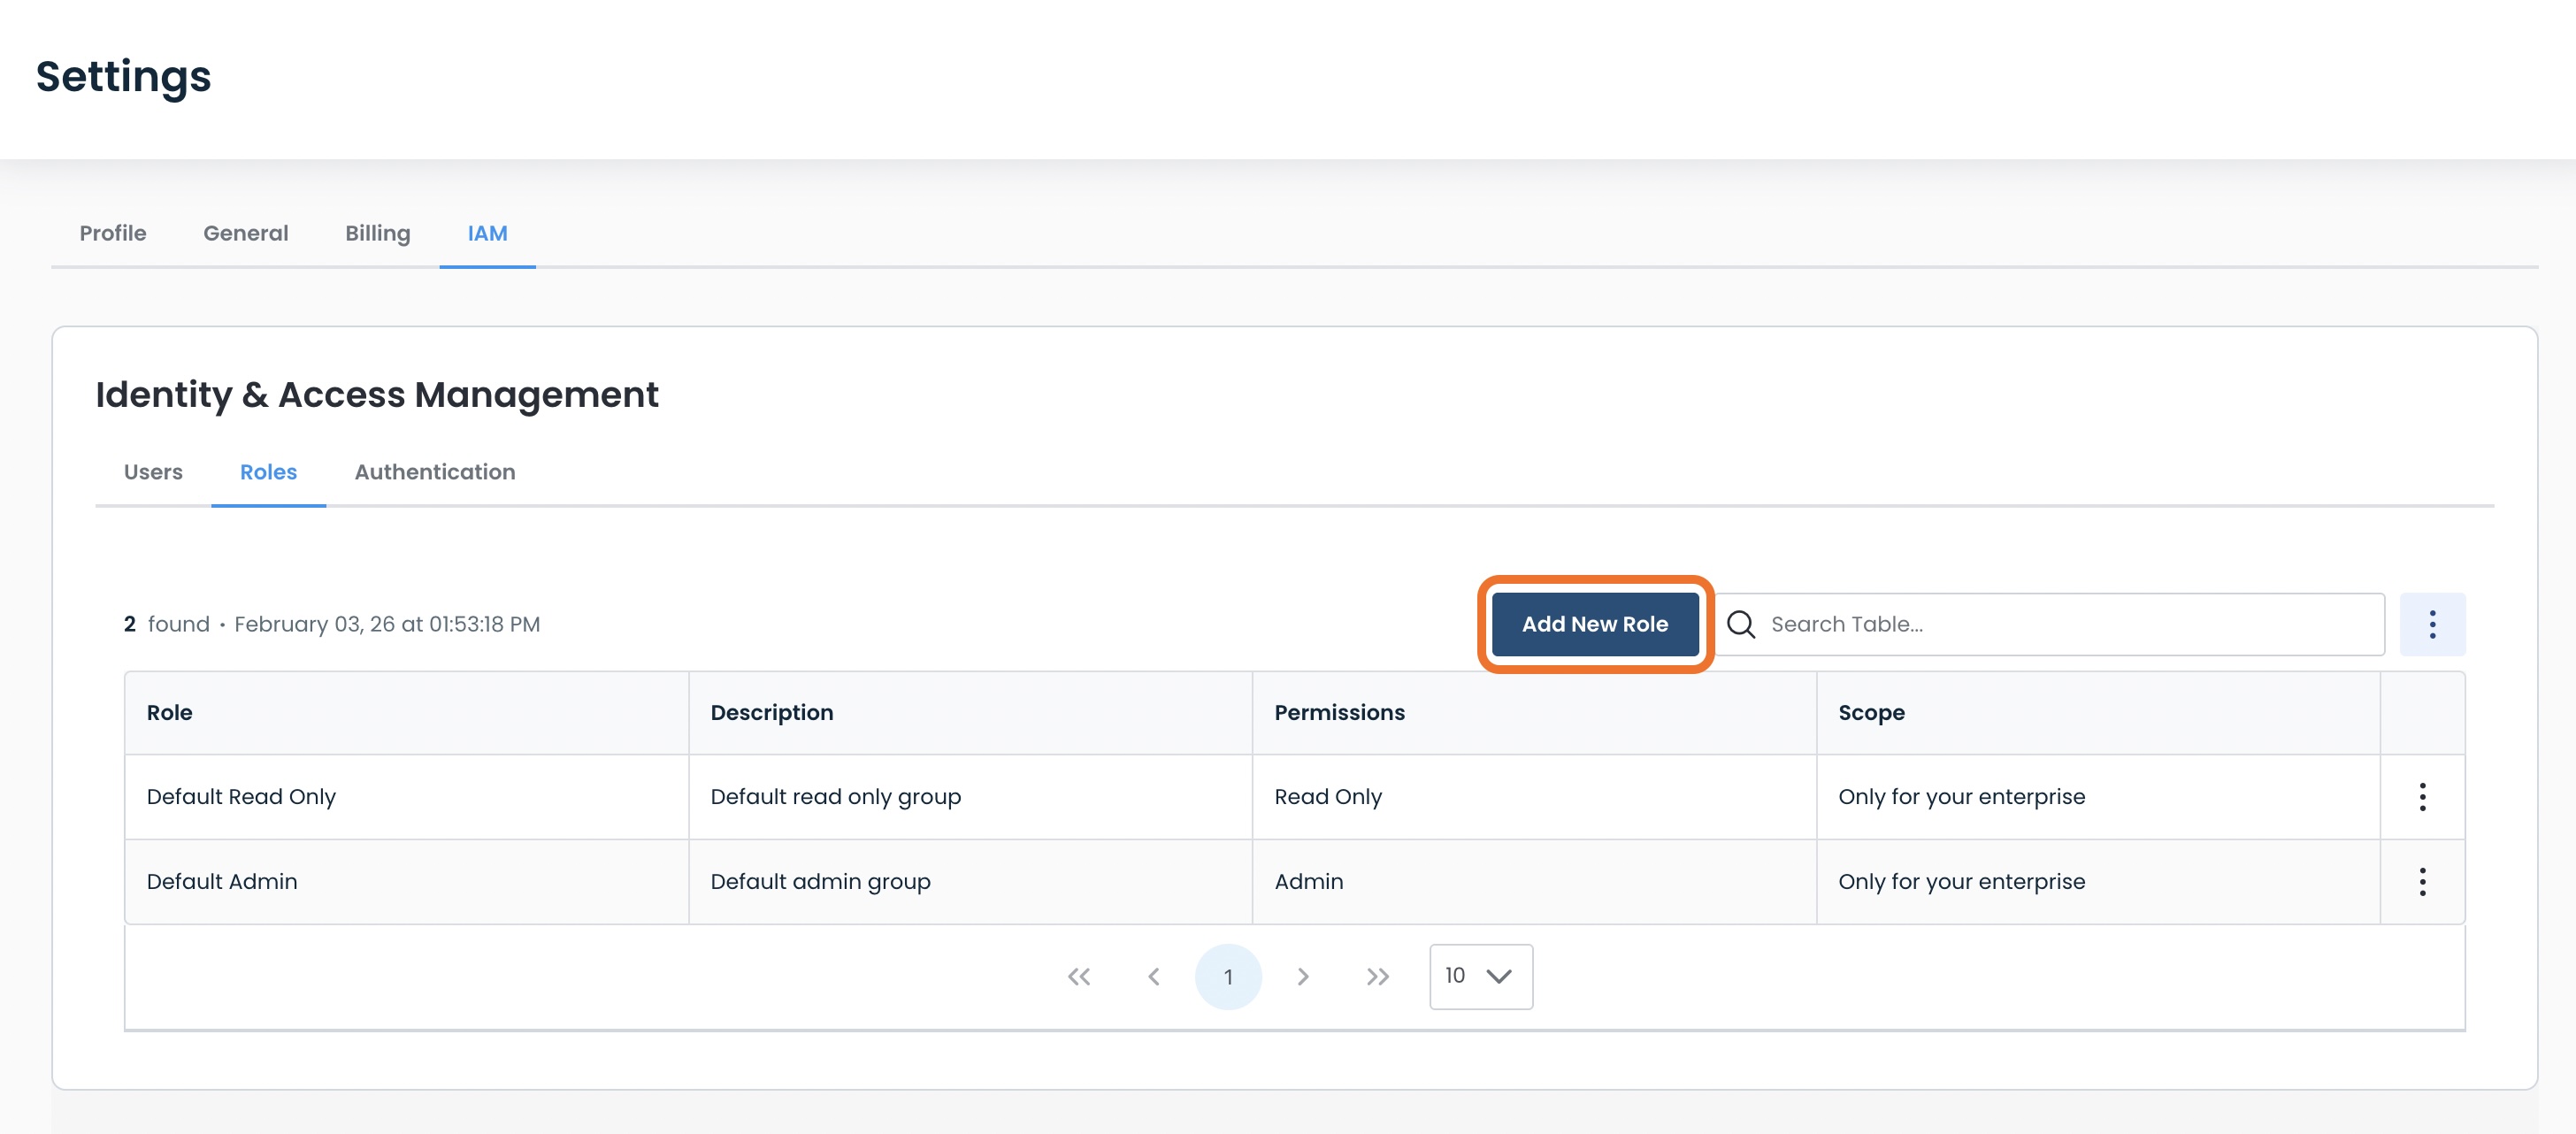
Adding a New Role
To add a new role, from the IAM Roles landing page, click ‘Add New Role’.
Complete the following fields:
Role Name: Name you would like to label the new role
Role Description: Description of the role for your convenience
Permissions by Service: Choose one of the following
Read Access: Read-only access for every category
Full Access: Read and edit access for every category
Custom: A combination of no access, read-only access, and full access depending on your needs per category for that role; select each checkbox accordingly
.jpg)
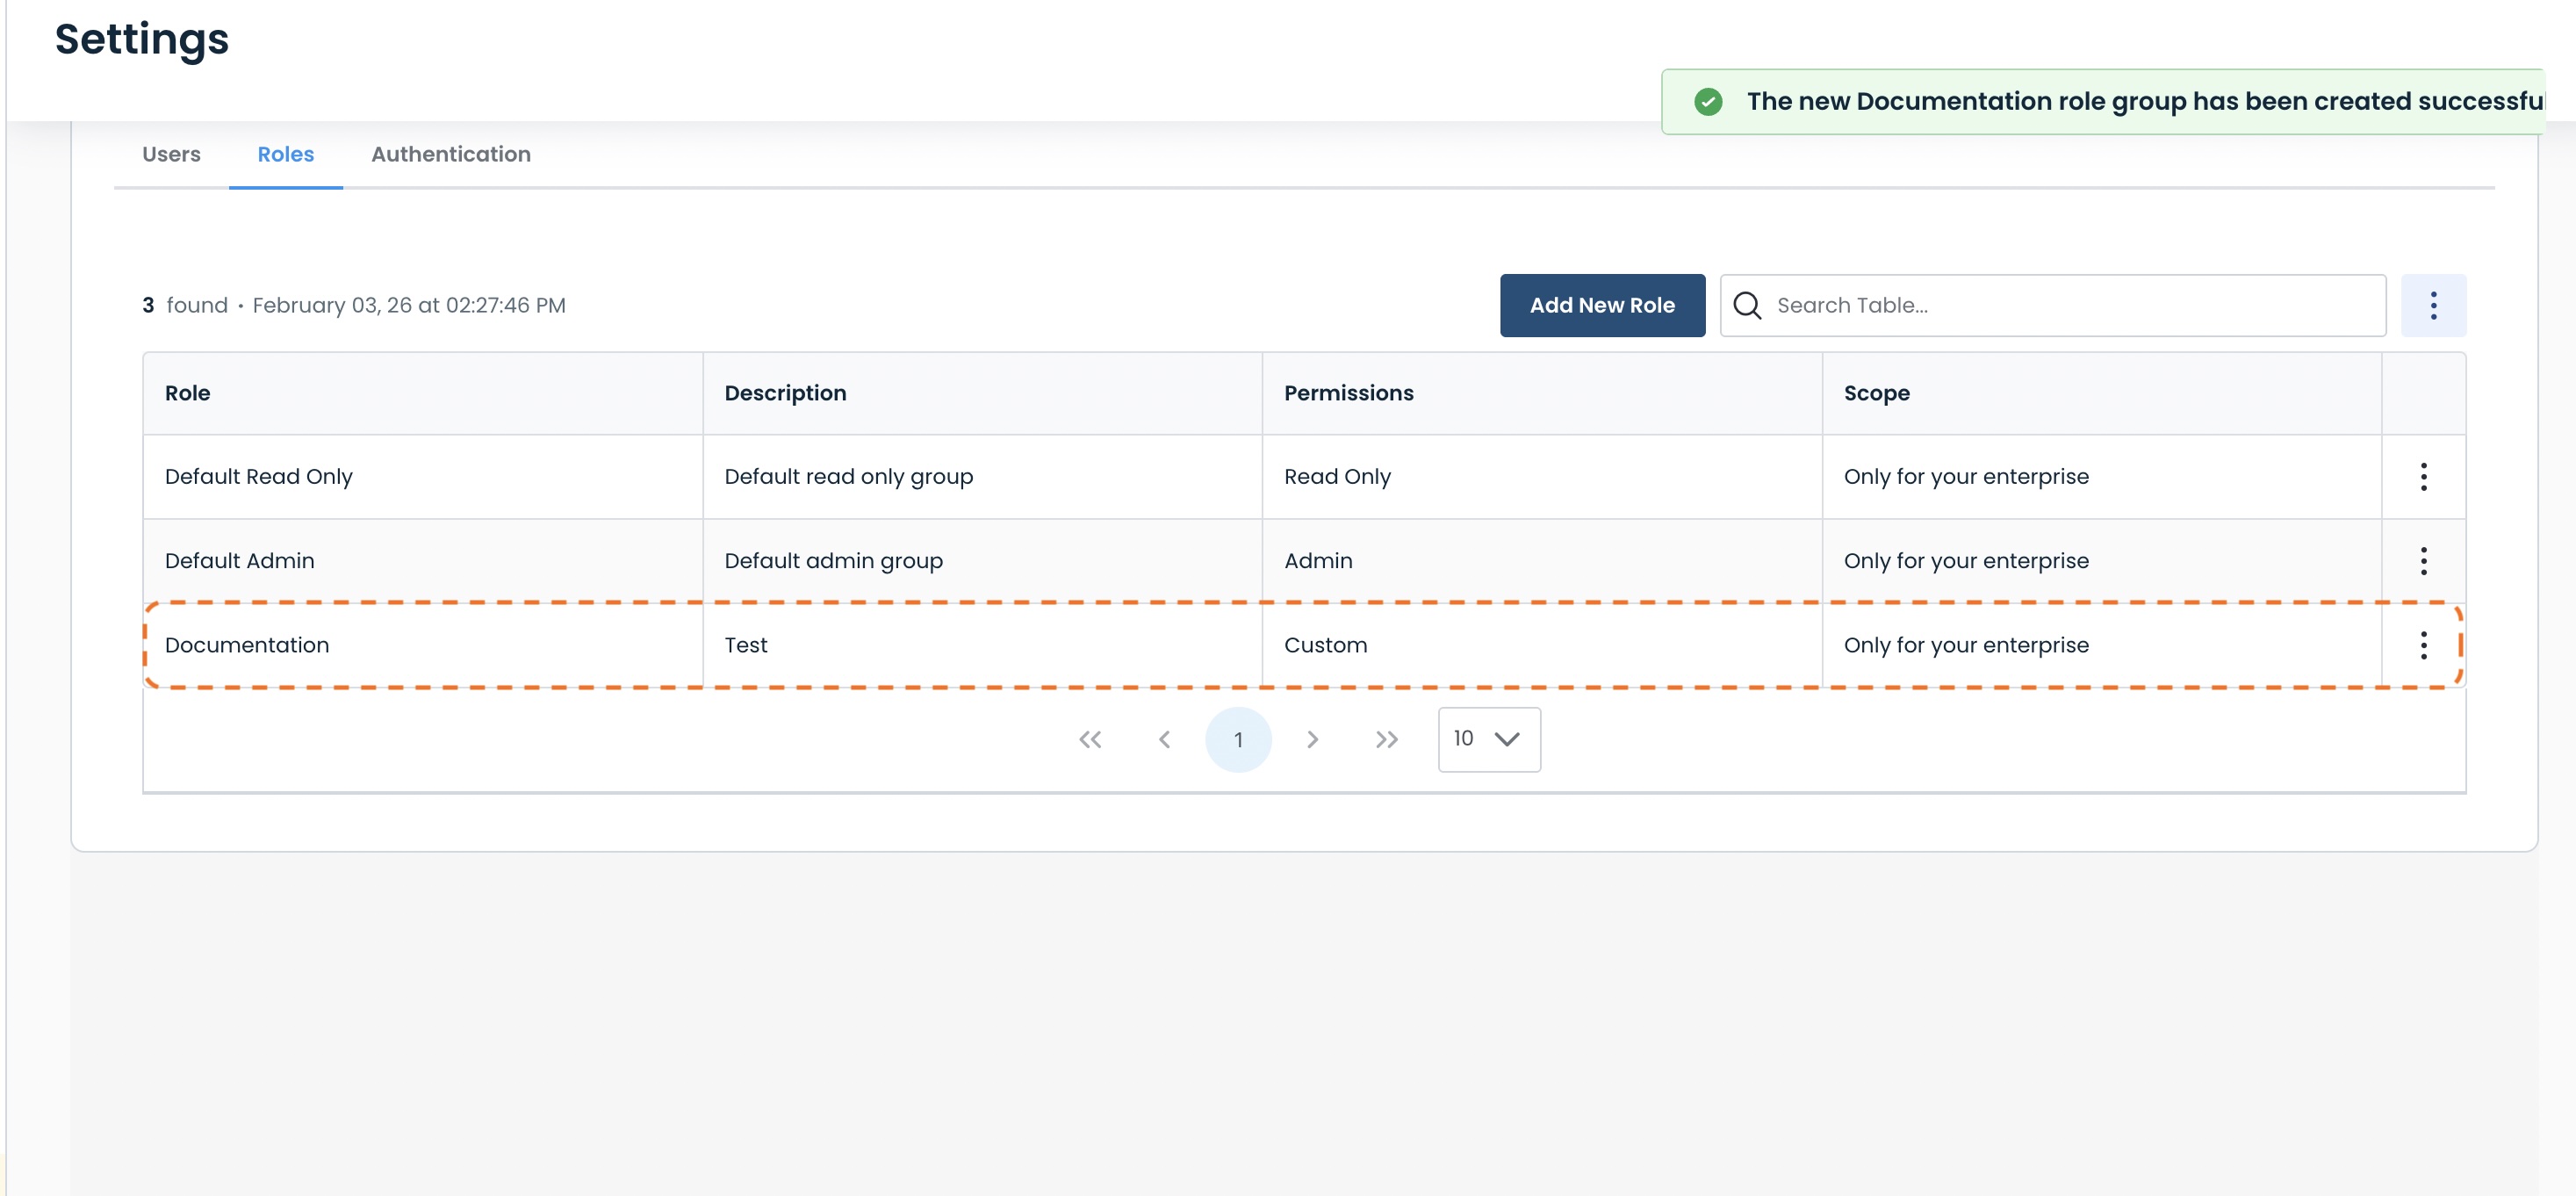
Once your selections are complete, click ‘Create Role’.

A green banner will appear stating that the role has been successfully created, and the new role will be in the table.
Adding a New Role for MSP (Managed Service Provider) Enterprises
If you are a Managed Service Provider for other enterprises, you will also have an option to impersonate those enterprises to assign role access.
Toggle the ‘Impersonation Enabled’ to on.
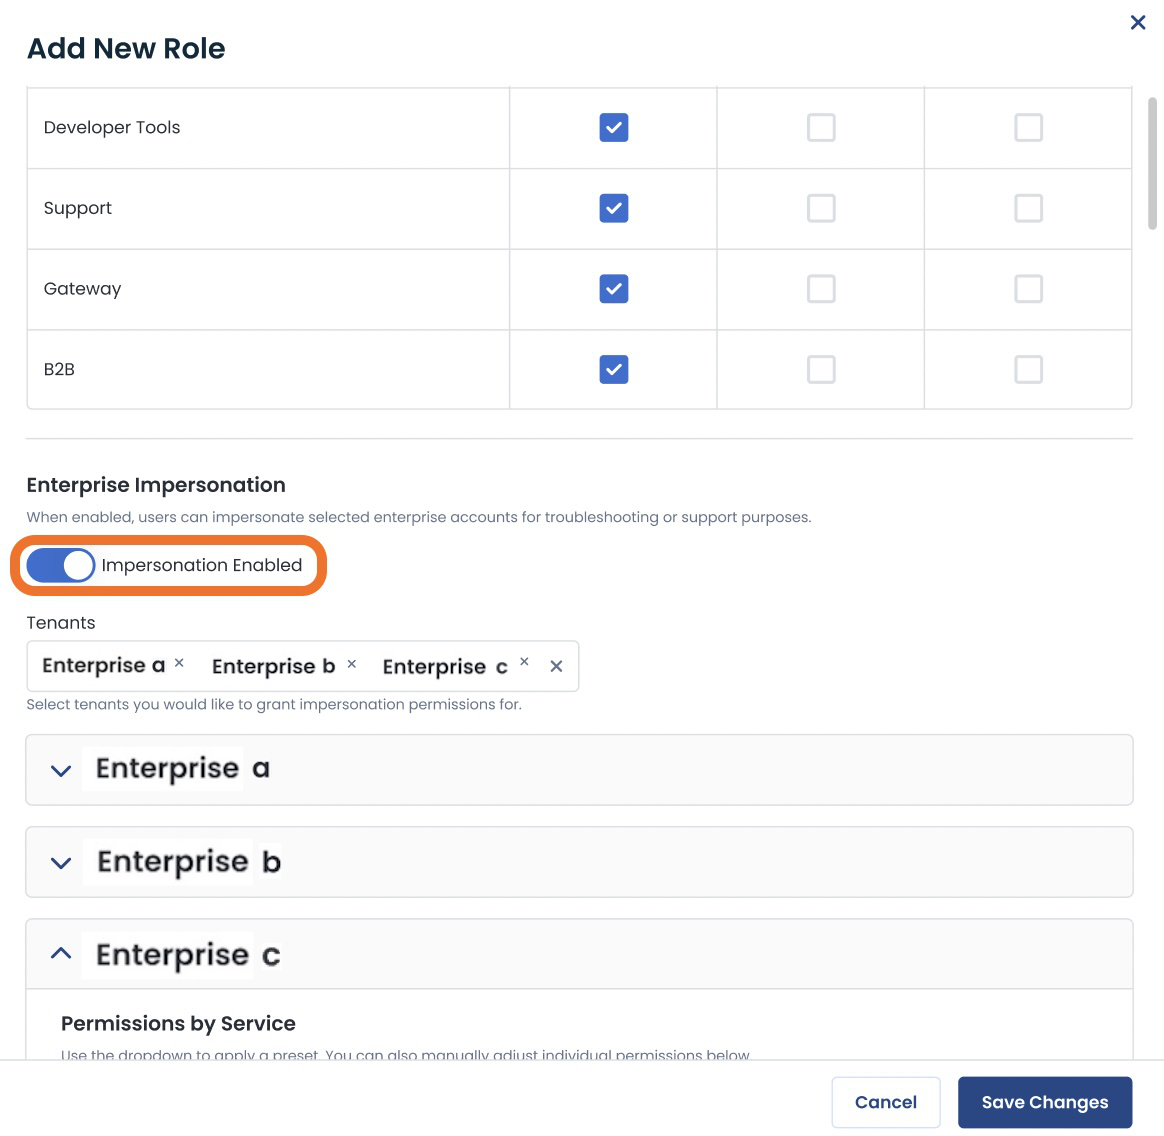
After you have configured the roles as desired, click ‘Save Changes’.
.jpg)
The new roles are successfully created for your MSP enterprises.
Editing a Role
Should you need to change a role, click the ellipses to the right of that role, and select ‘Edit Role’.

Make the desired changes; click ‘Edit Role’.
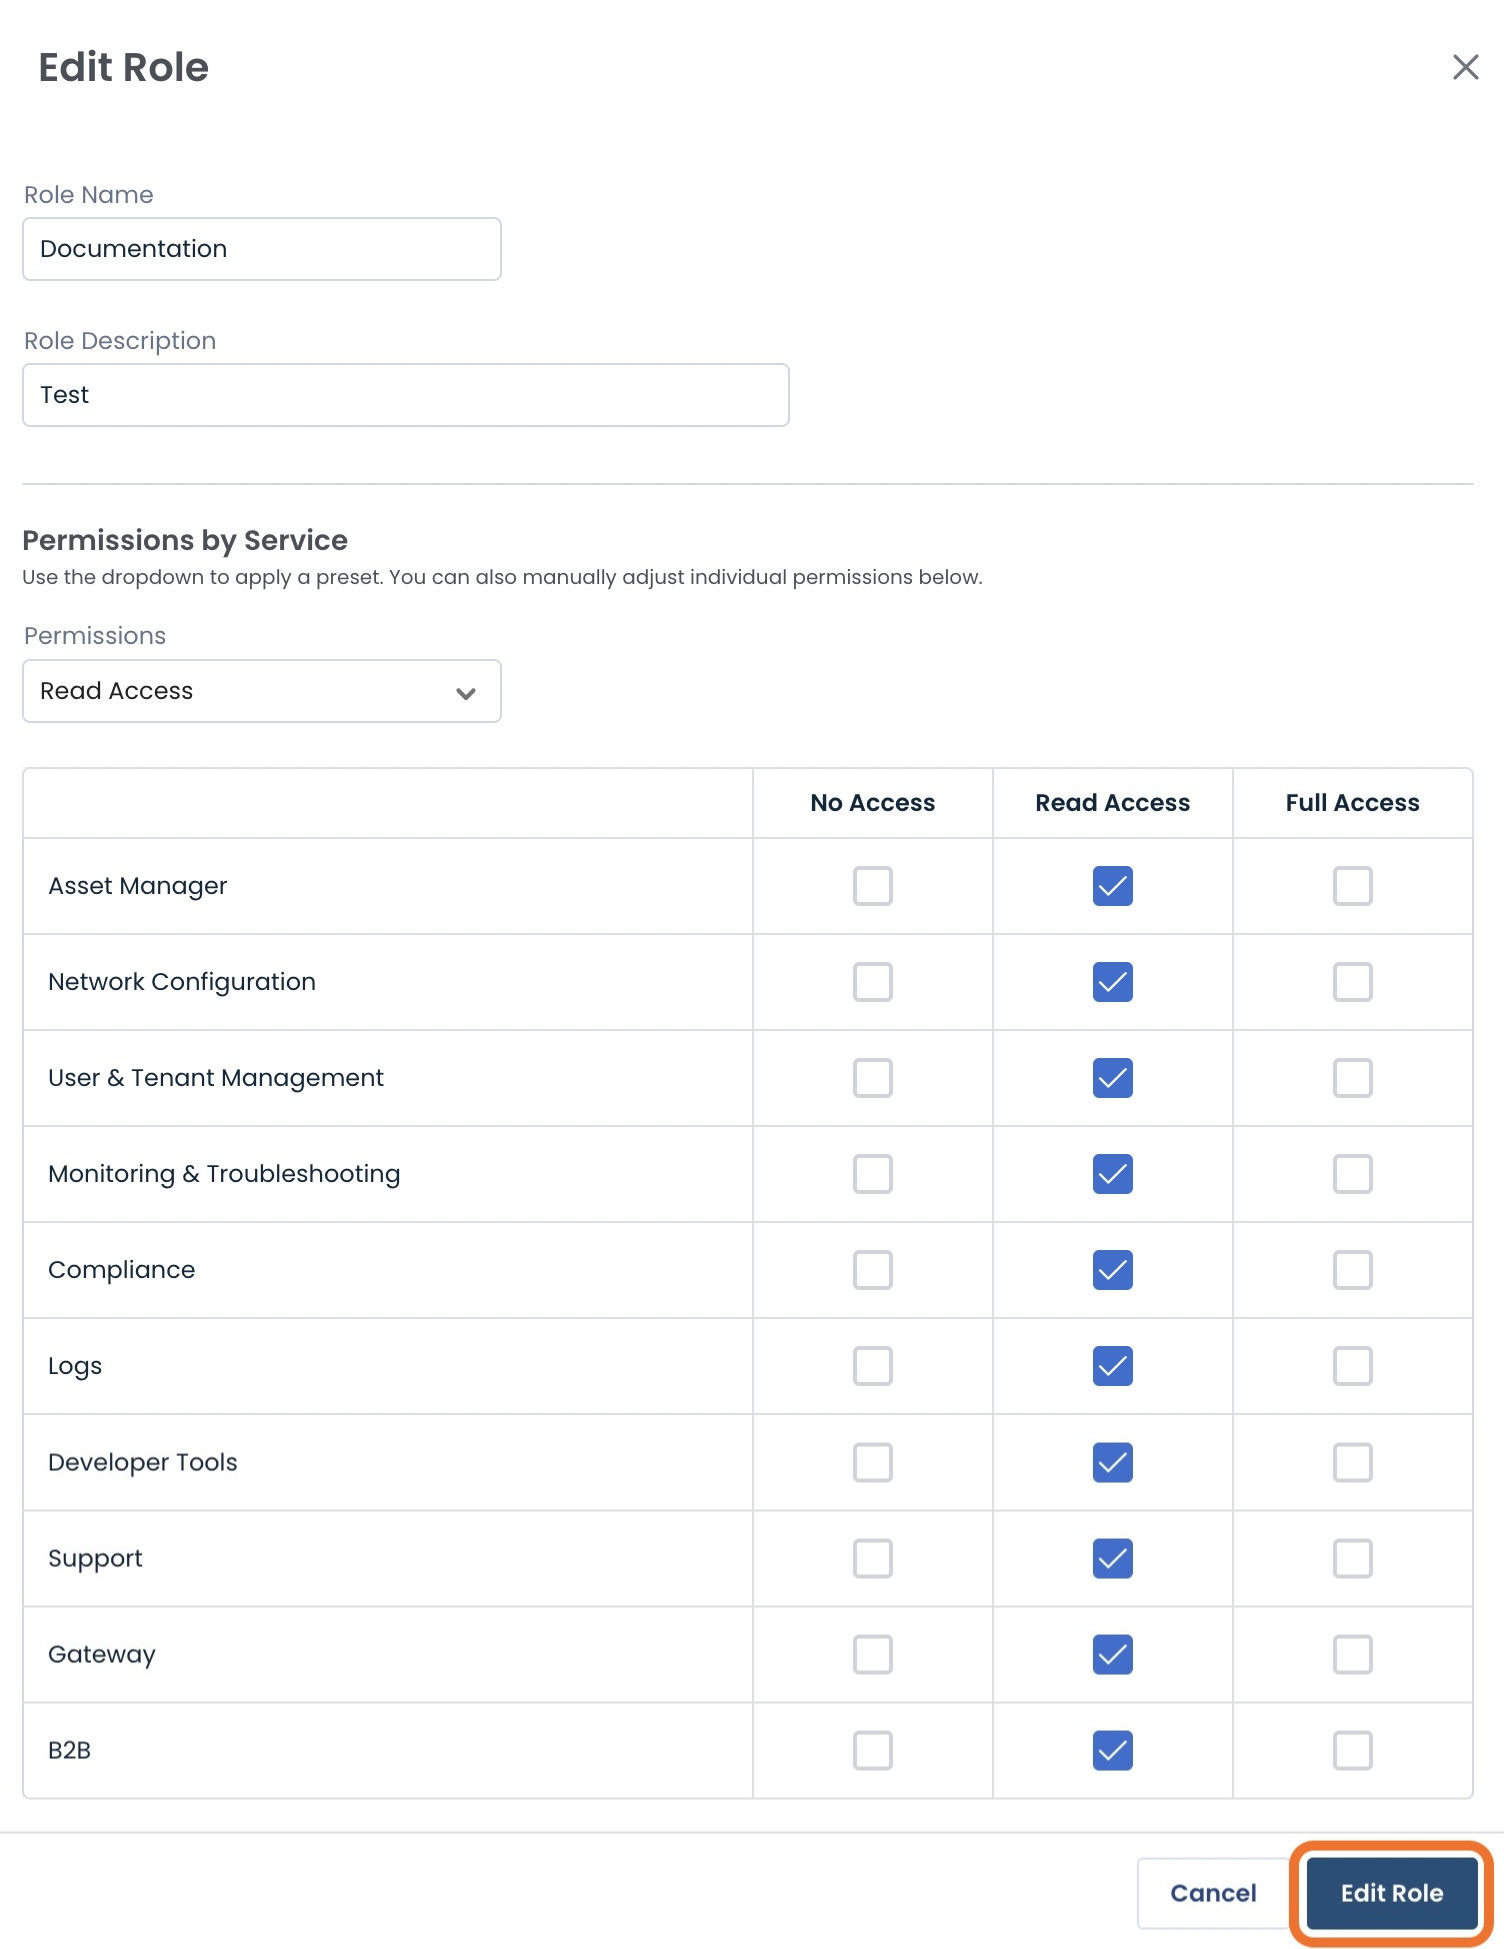
A green banner will appear stating that the role has been successfully edited.
Adding Users to a Role
To add users to a role, click the ellipses to the right of that role, and select ‘Add Users to Role’.
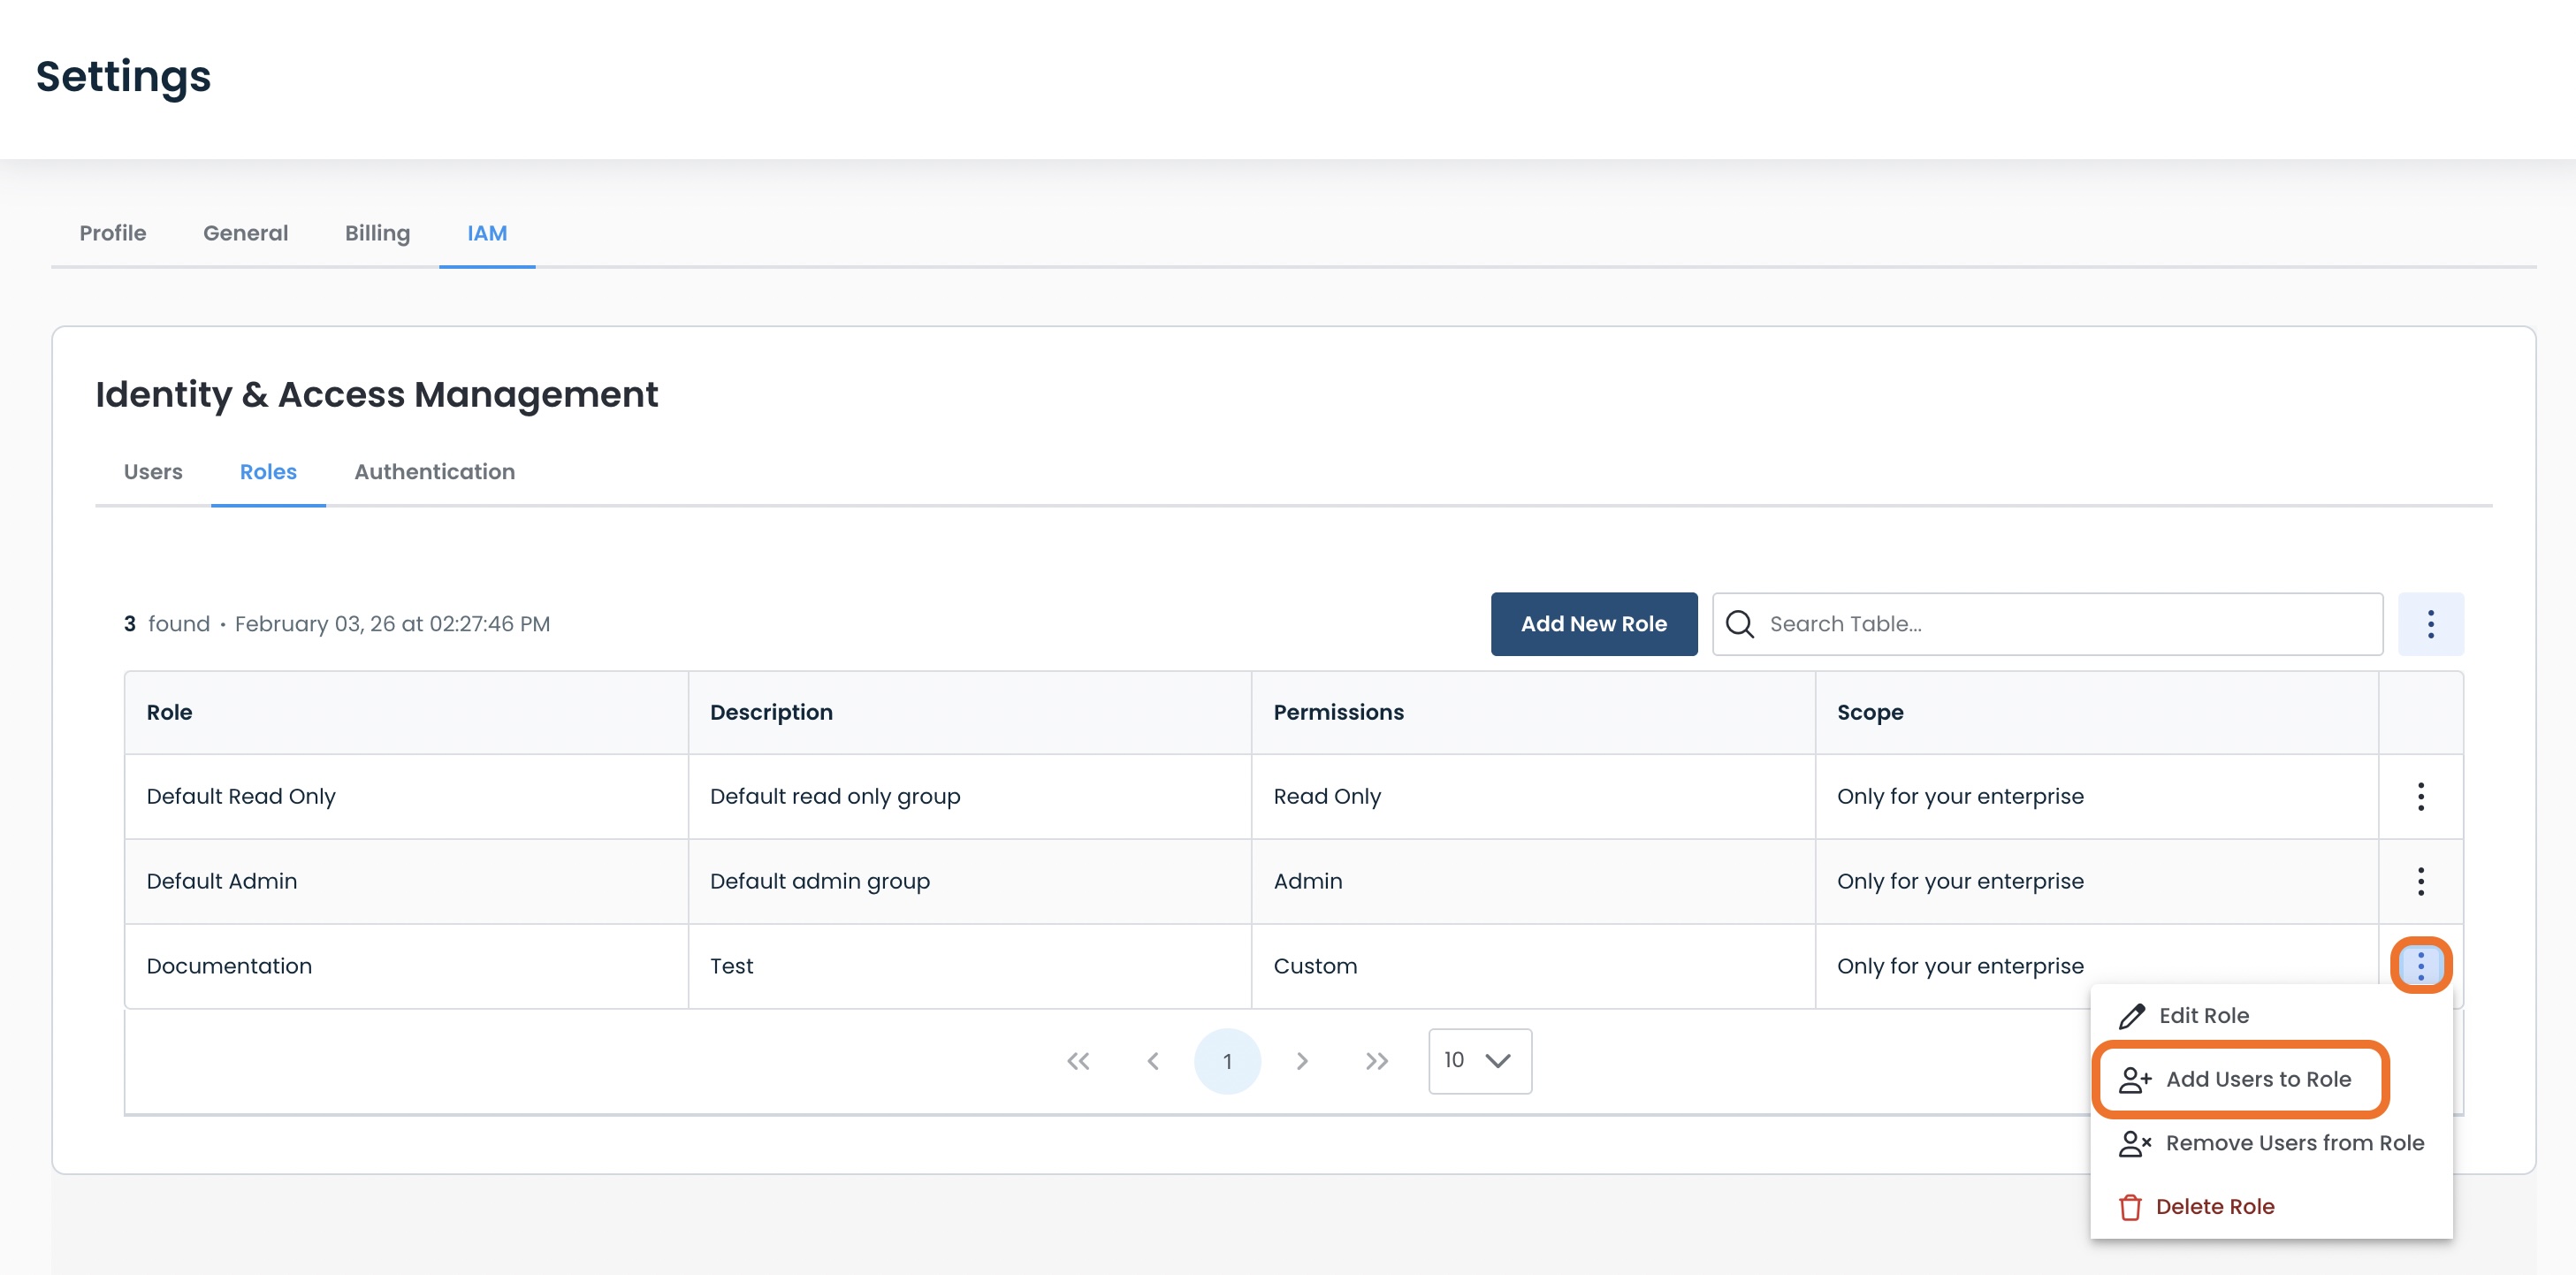
Select the users you wish to add to this role.
Caution:
Every user can only be under one role.
Assigning the user to a new role will replace the prior role of that user.
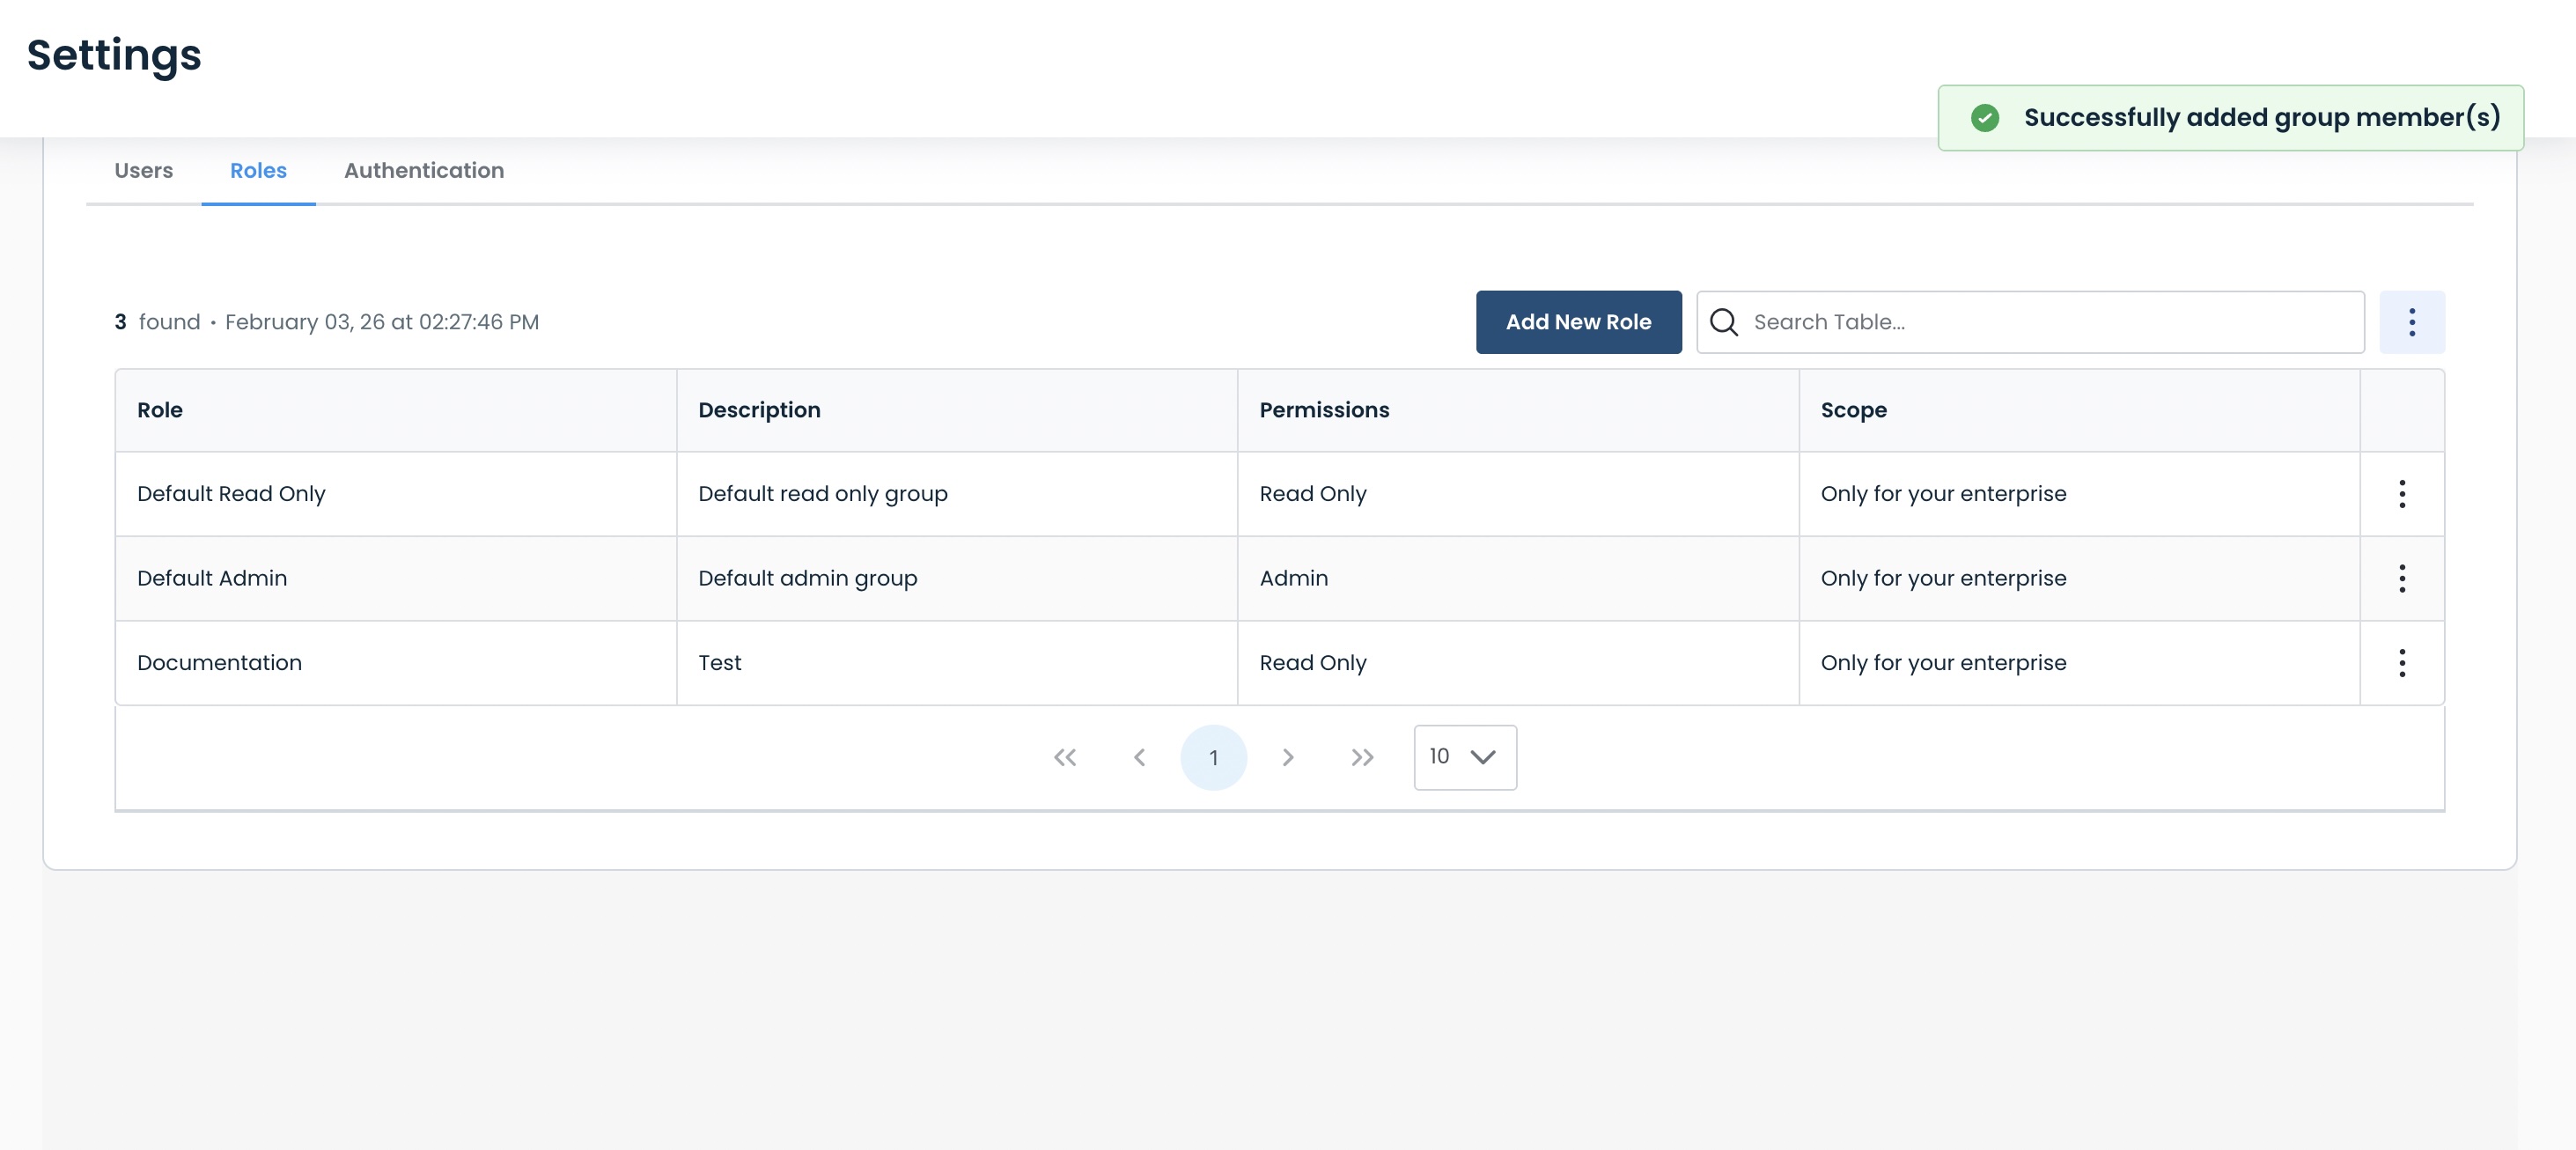
Click ‘Add Users’.
.jpg)
A green banner will appear stating that the user(s) has been successfully added.
Removing a User from a Role
To remove users from a role, click the ellipses to the right of that role, and select ‘Remove Users from Role’.
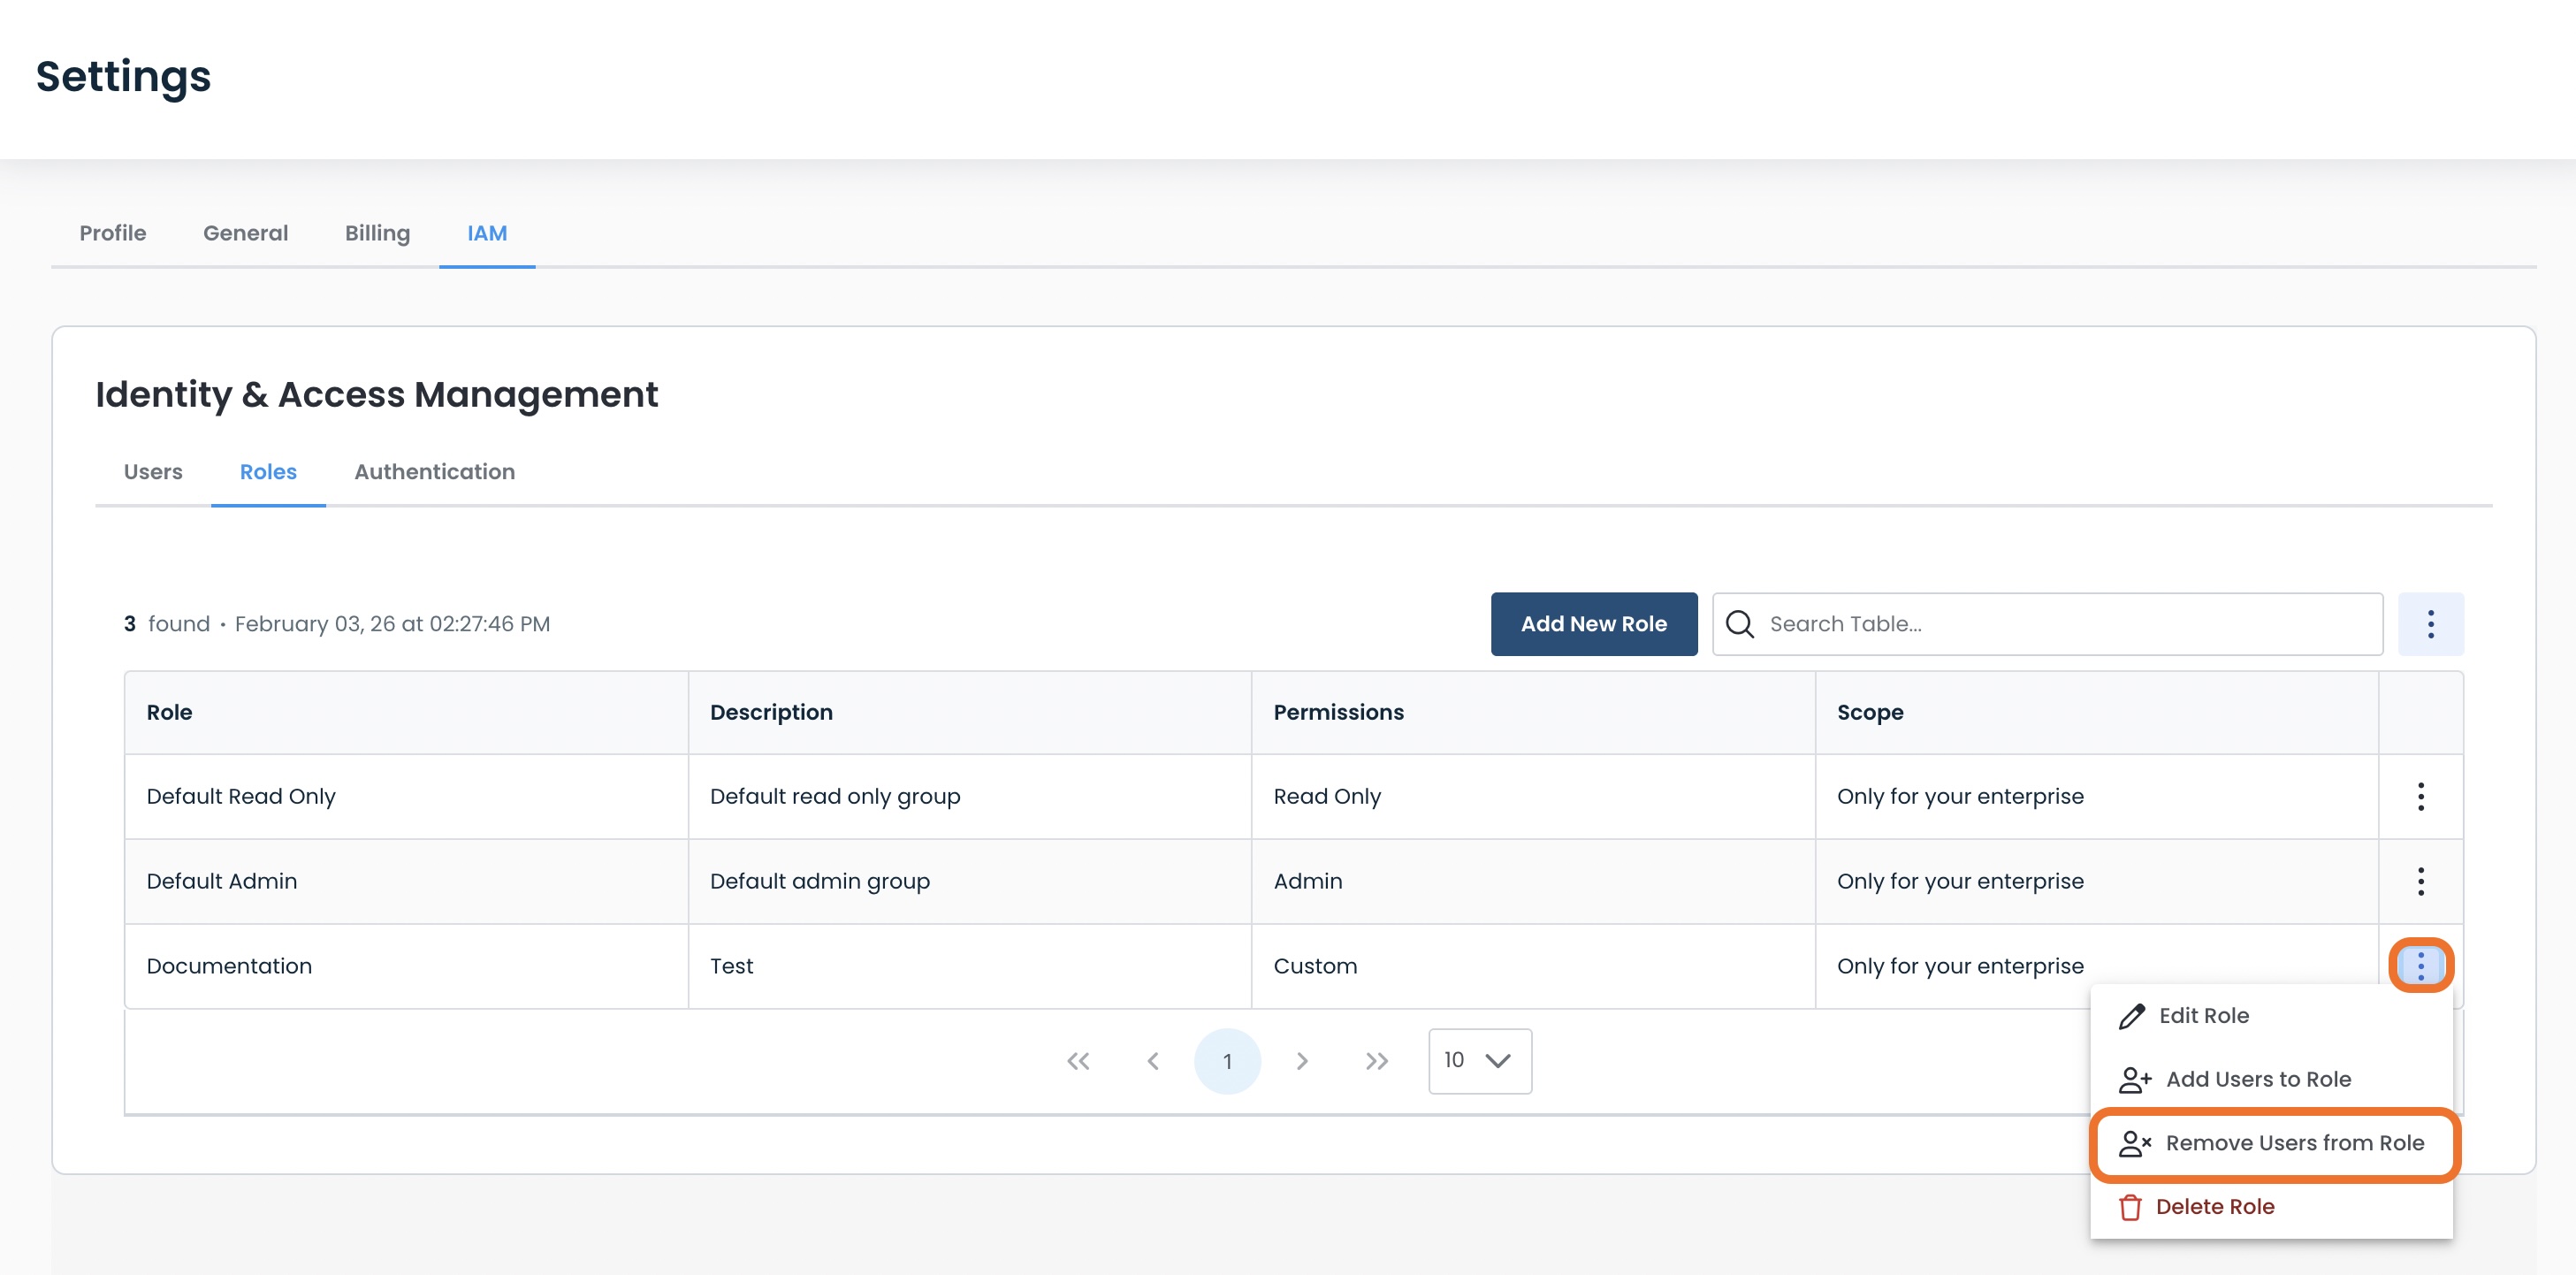
Select the users you wish to remove from this role.
Click ‘Remove Users’.
.jpg)
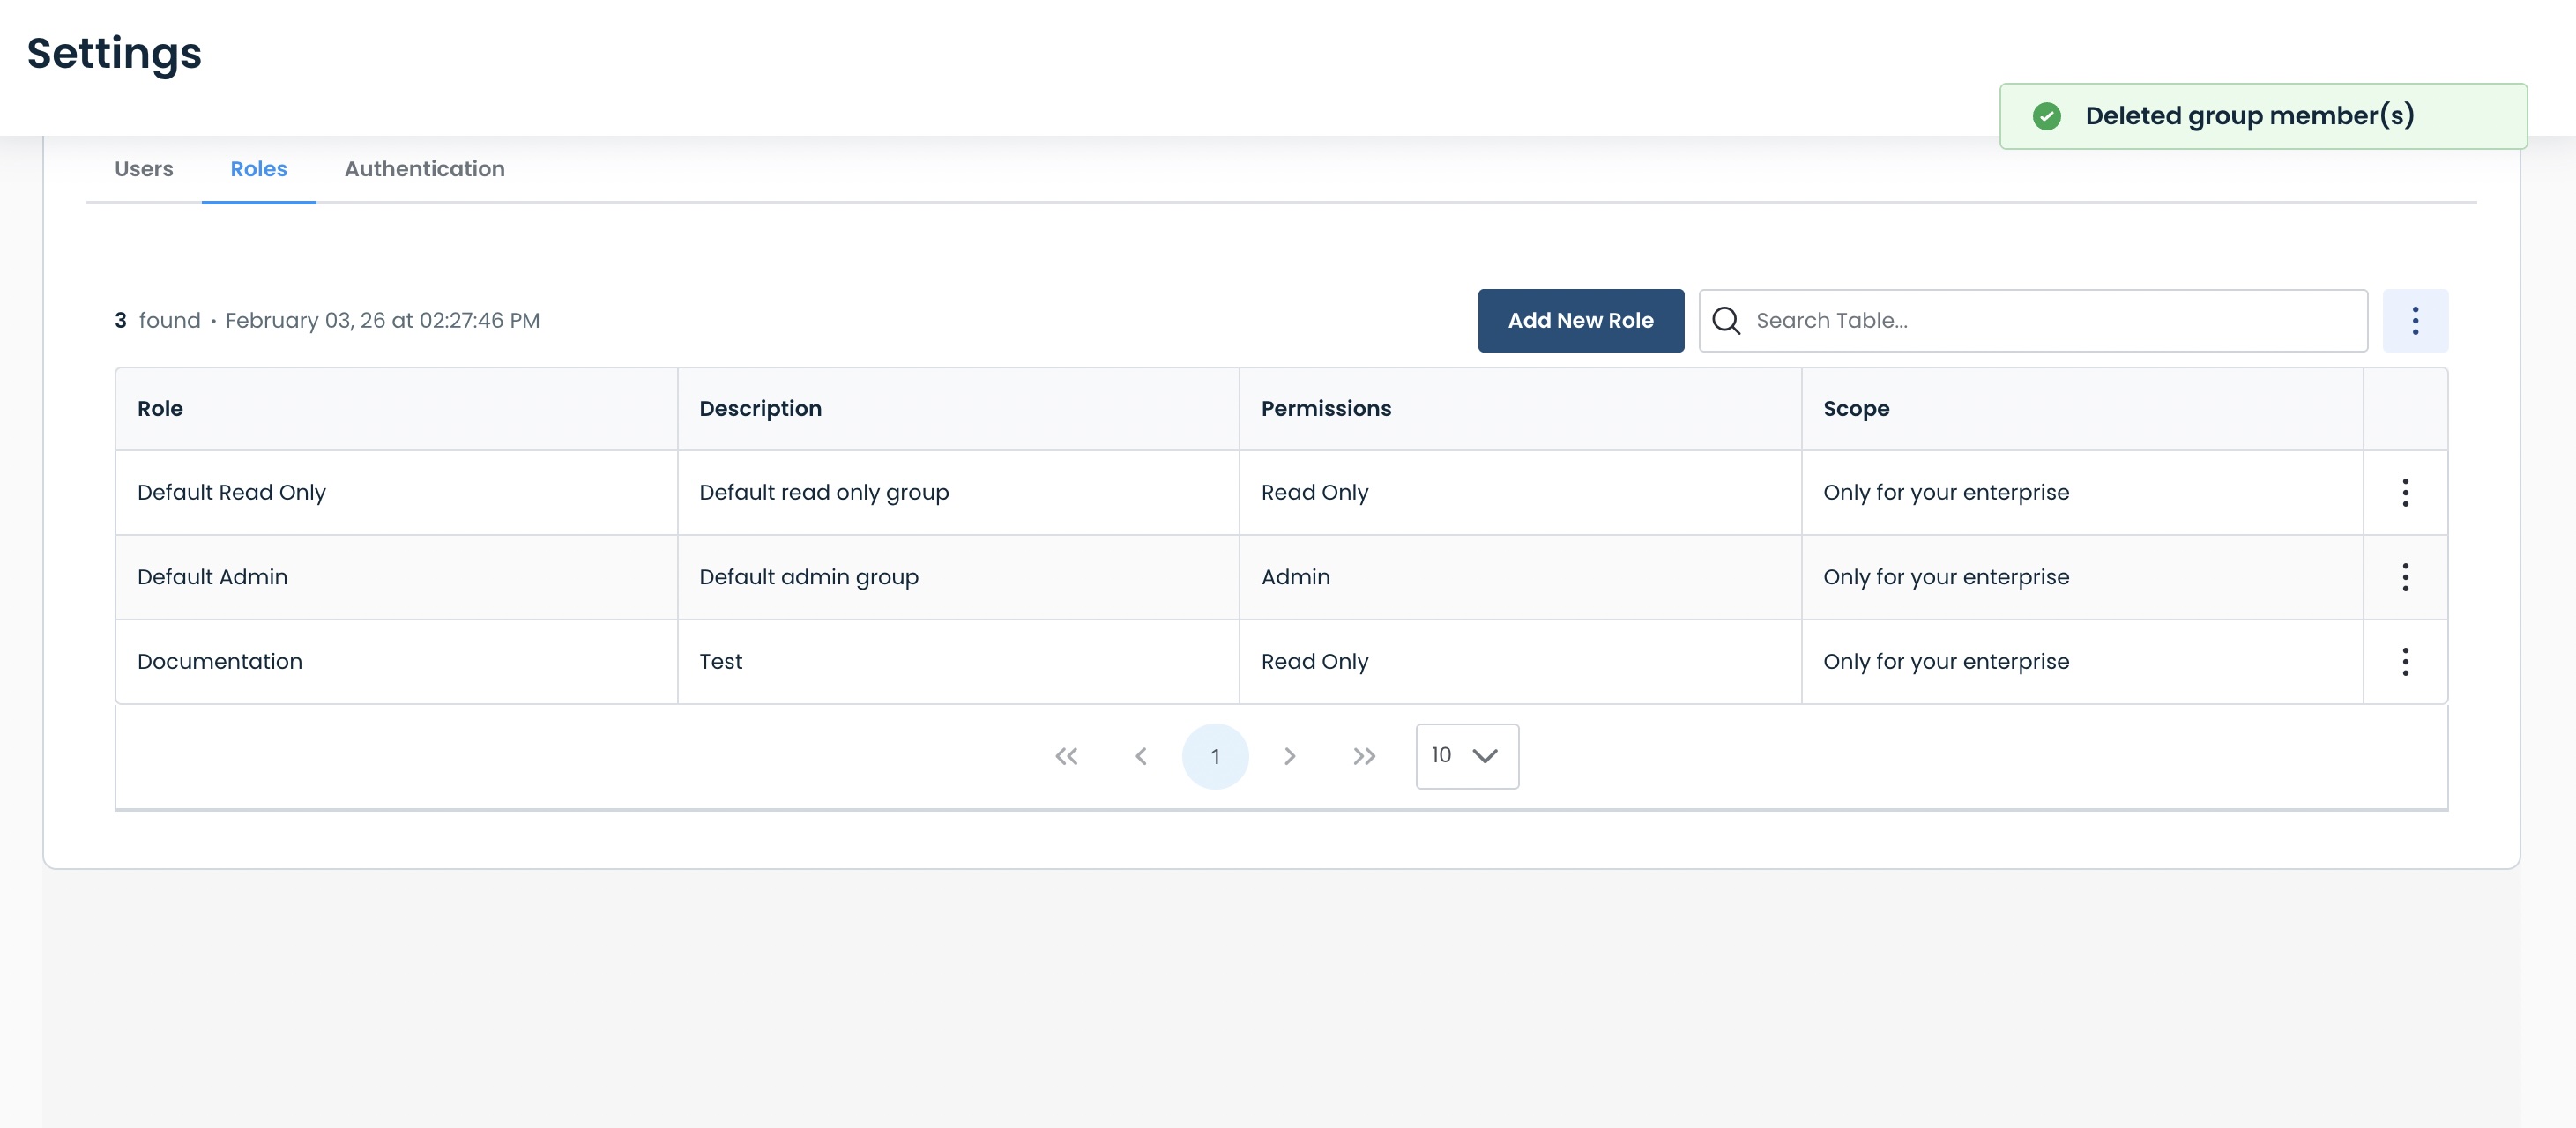
A green banner will appear stating that the user(s) has been successfully deleted.
Deleting a Role
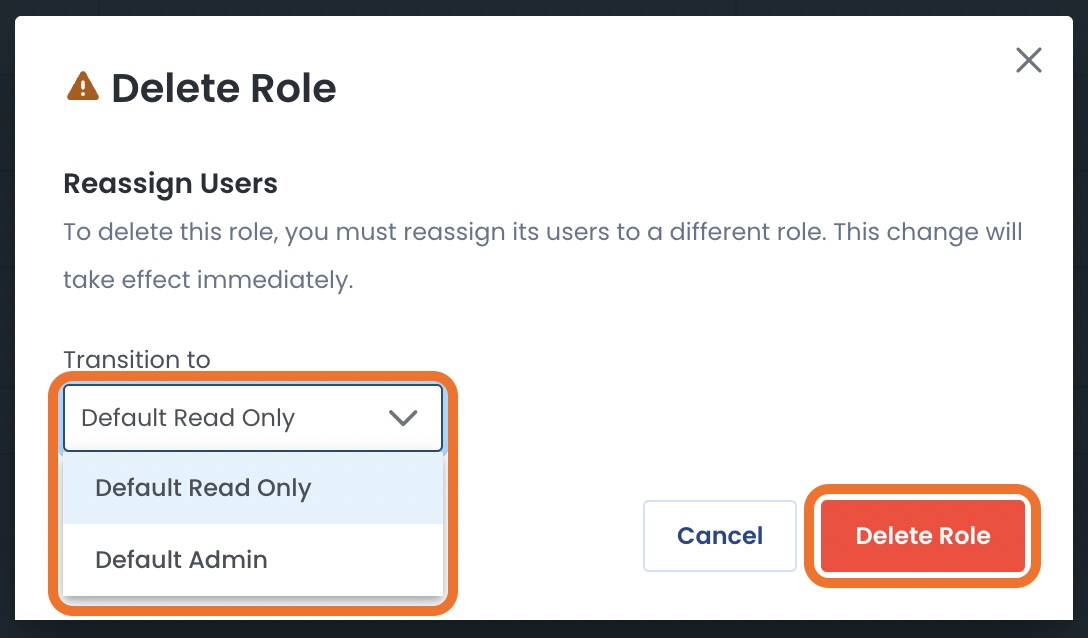
Should you need to delete a role, click the ellipses to the right of that role, and select ‘Delete Role’.

Before deleting the role:
Any users still assigned must be moved to one of the following:
Default Read-Only
Default Admin
Select the role that current users to which current users will be changed.
Select ‘Delete Role’.
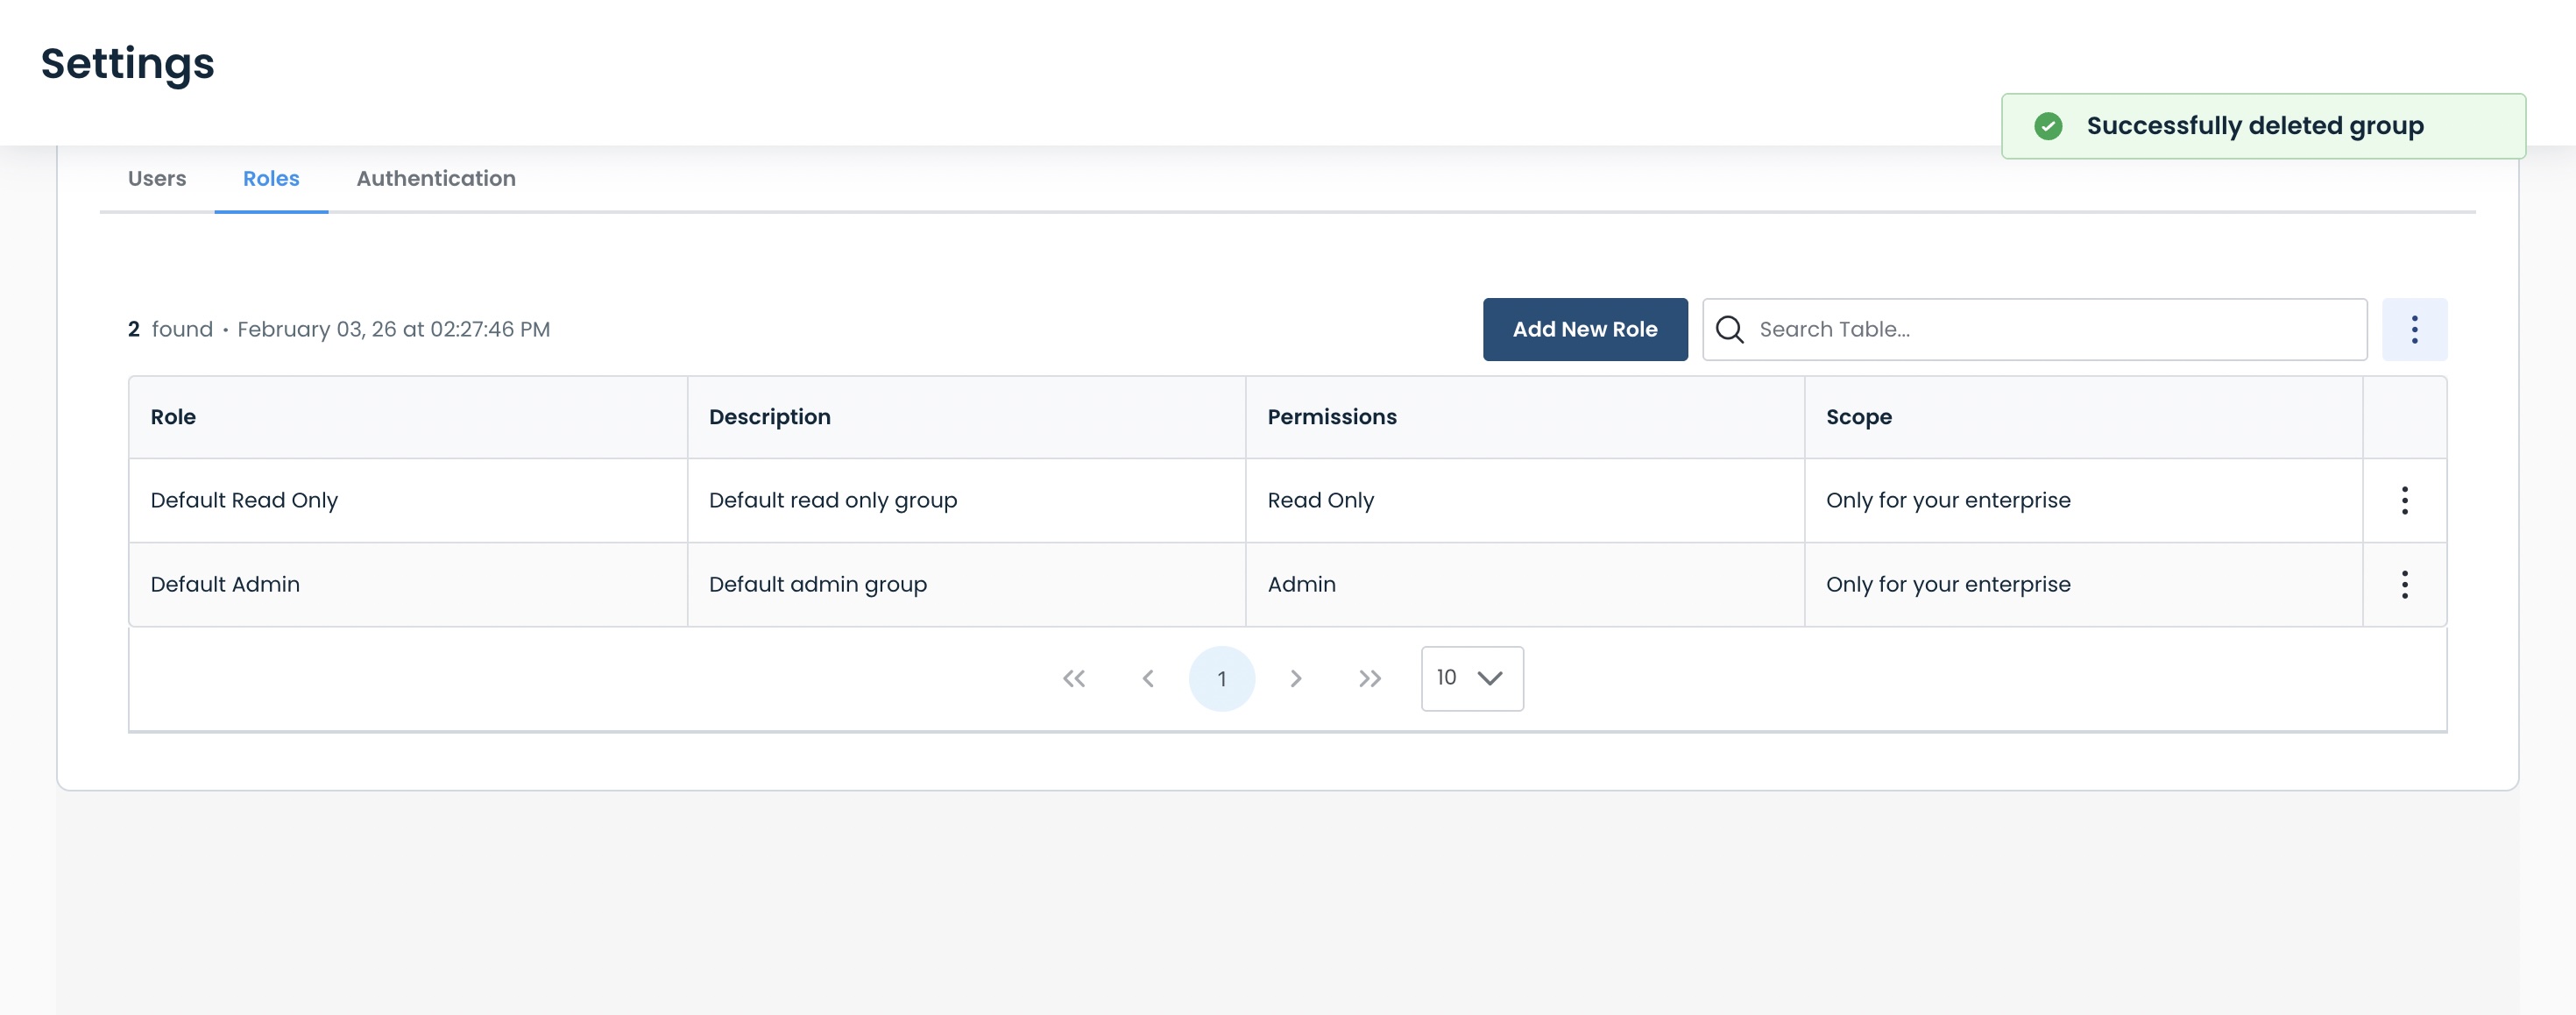
A green banner will appear stating that the role has been successfully deleted, and the role will no longer appear in the table.
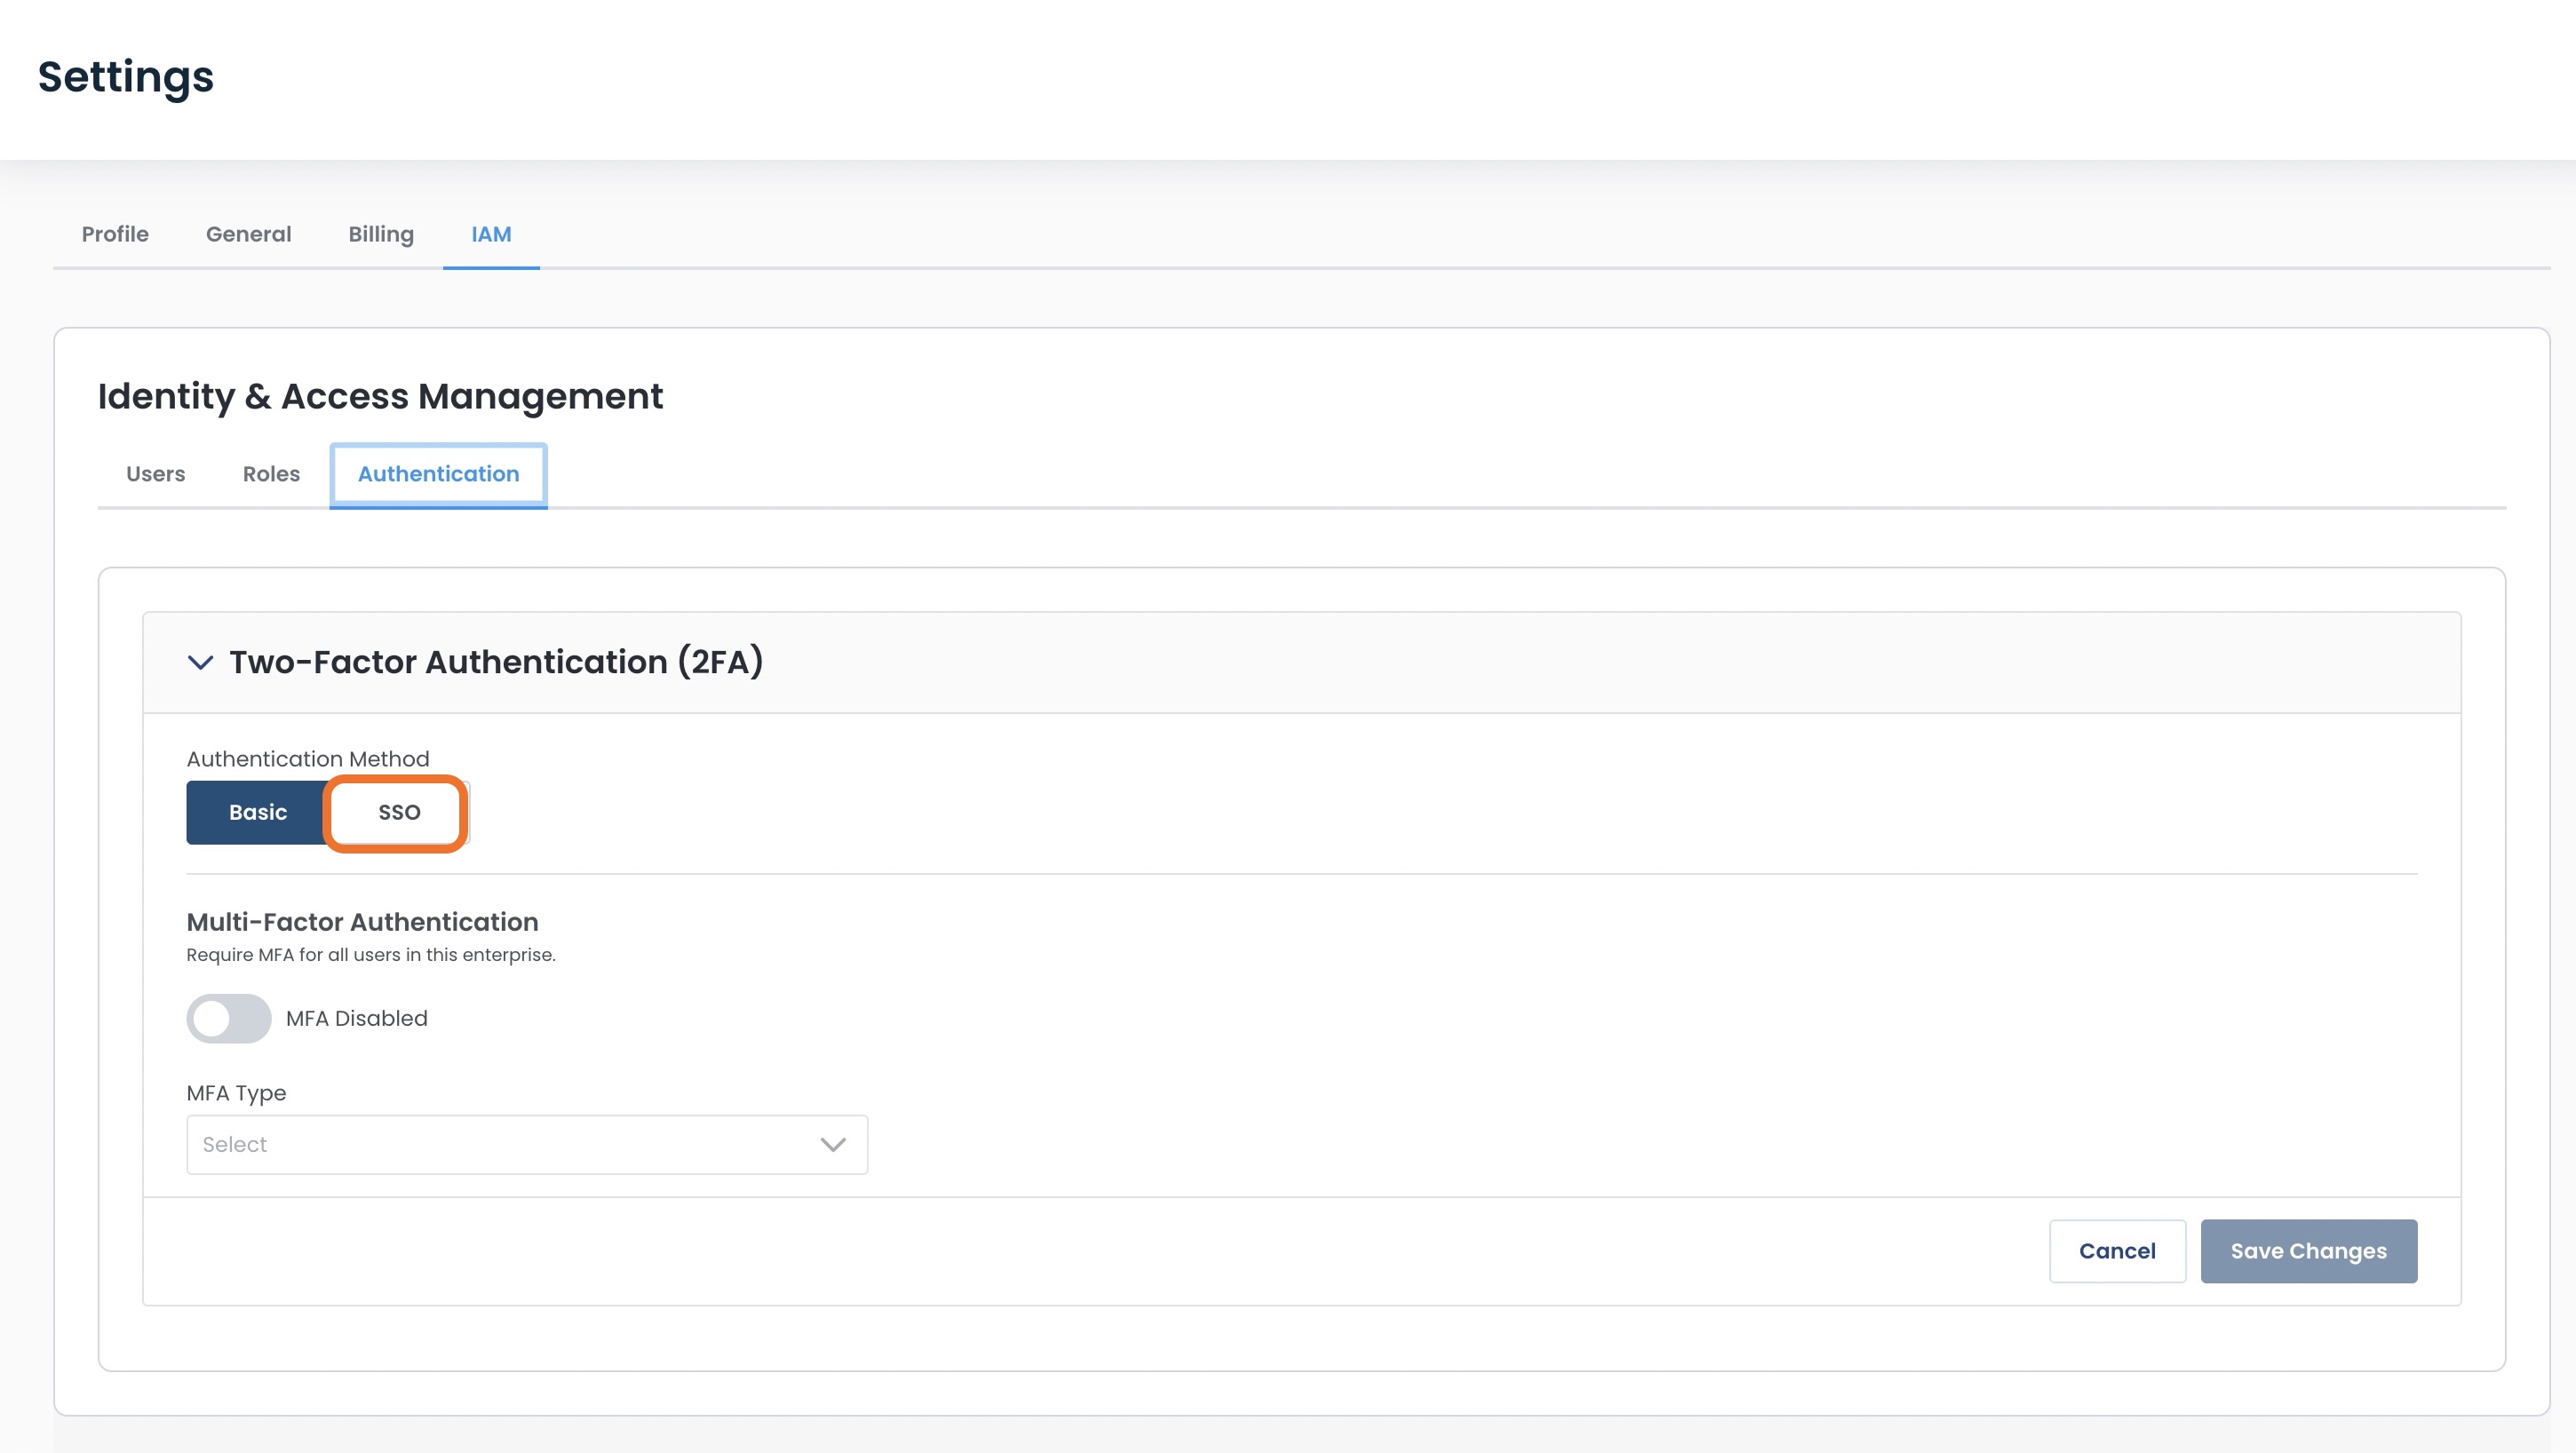
Managing Authentication
To get to the authentication page within your enterprise, click the ‘Authentication’ tab at the top of the IAM page.
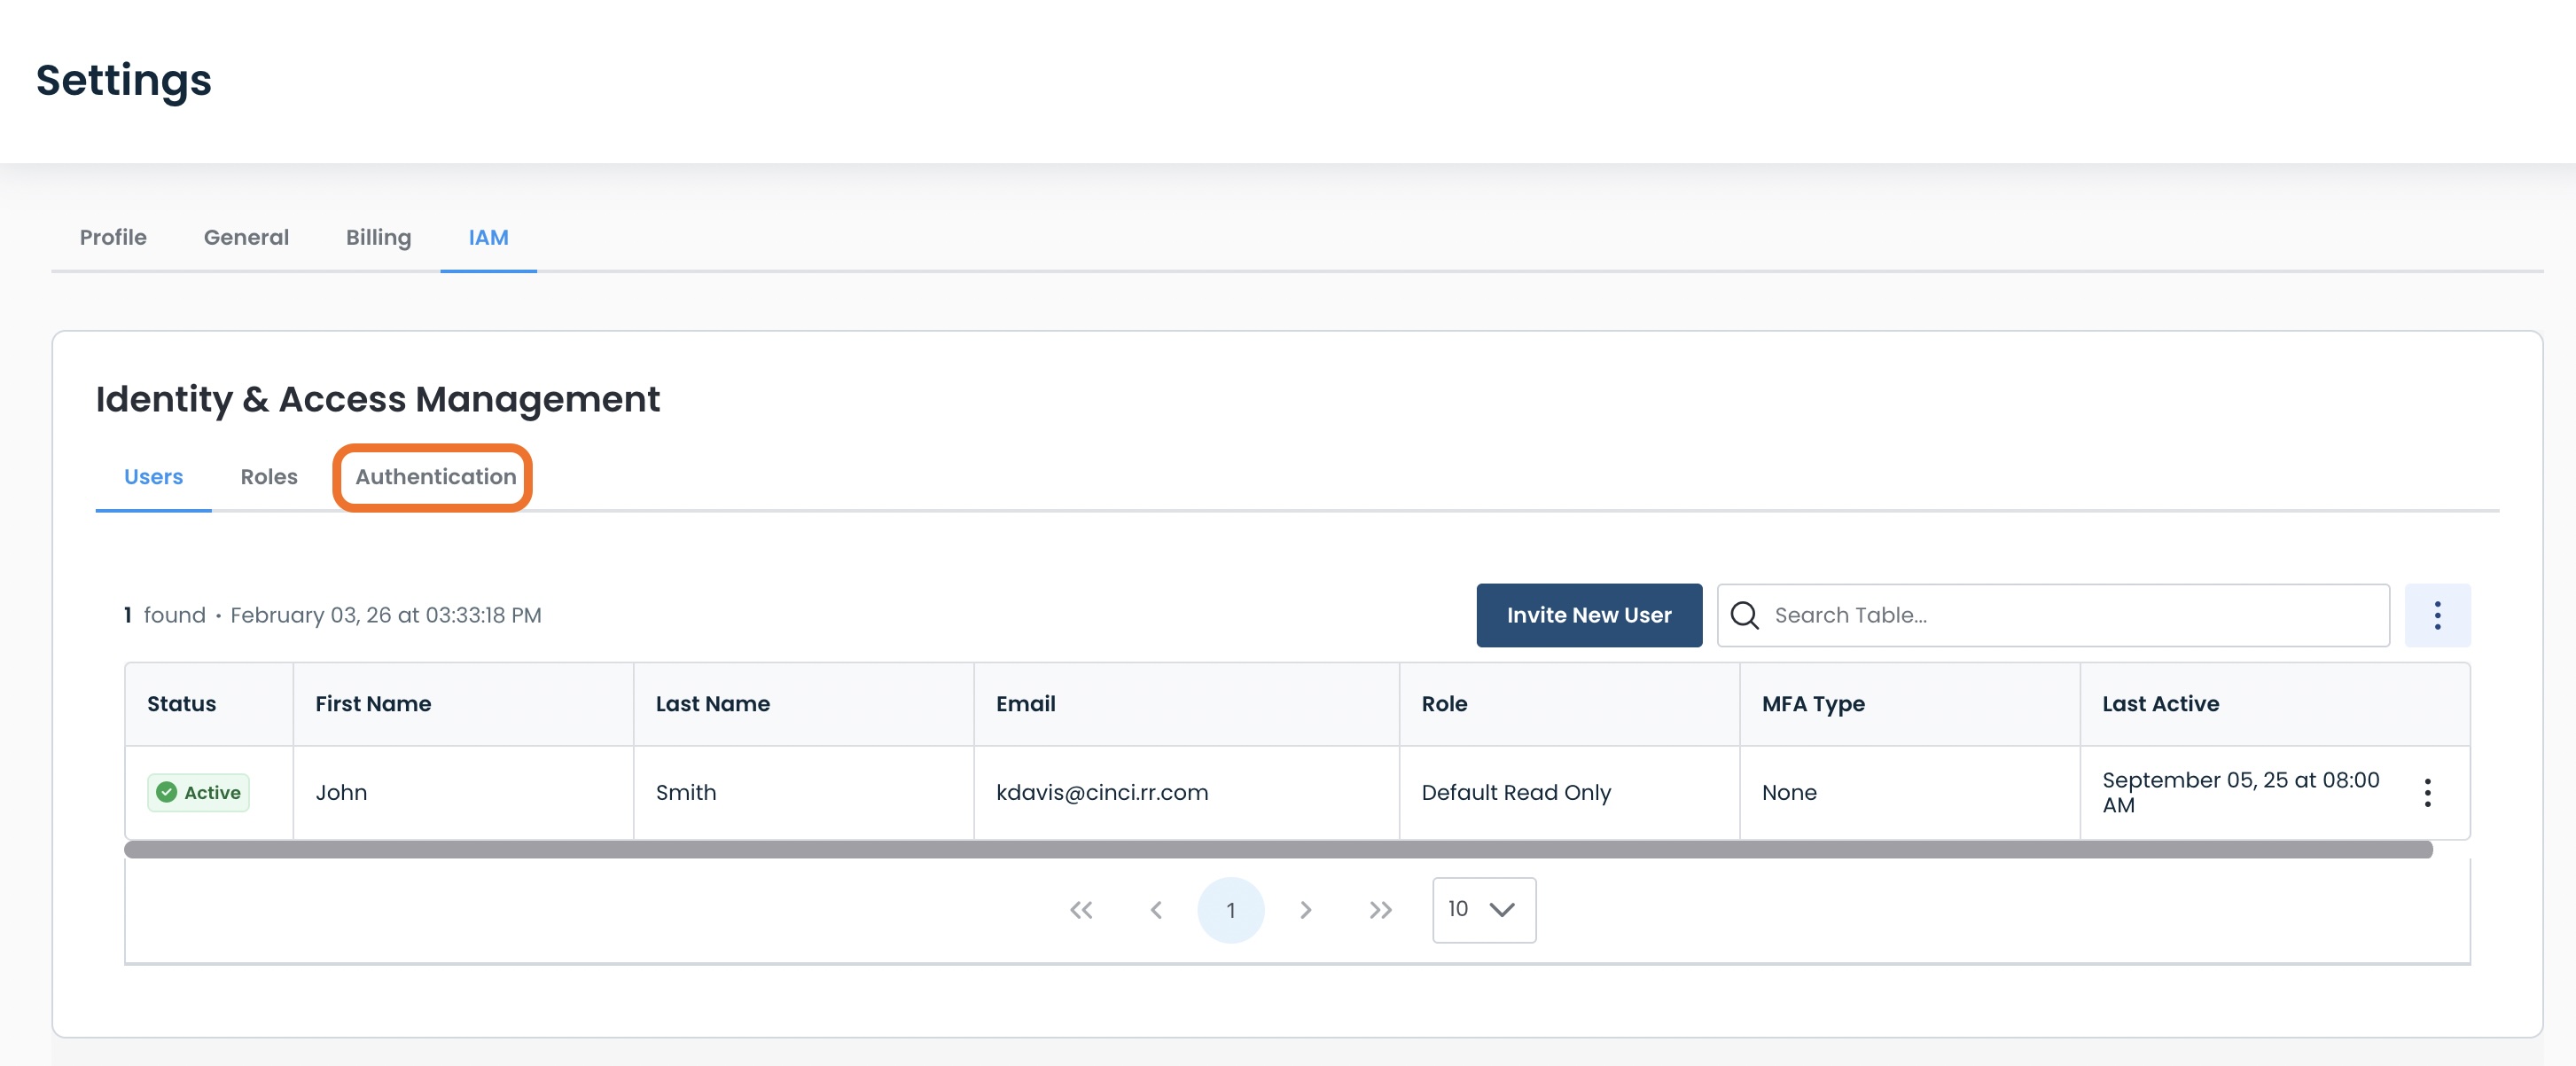
This will open the Authentication landing page, where you can determine authentication method for your enterprise.
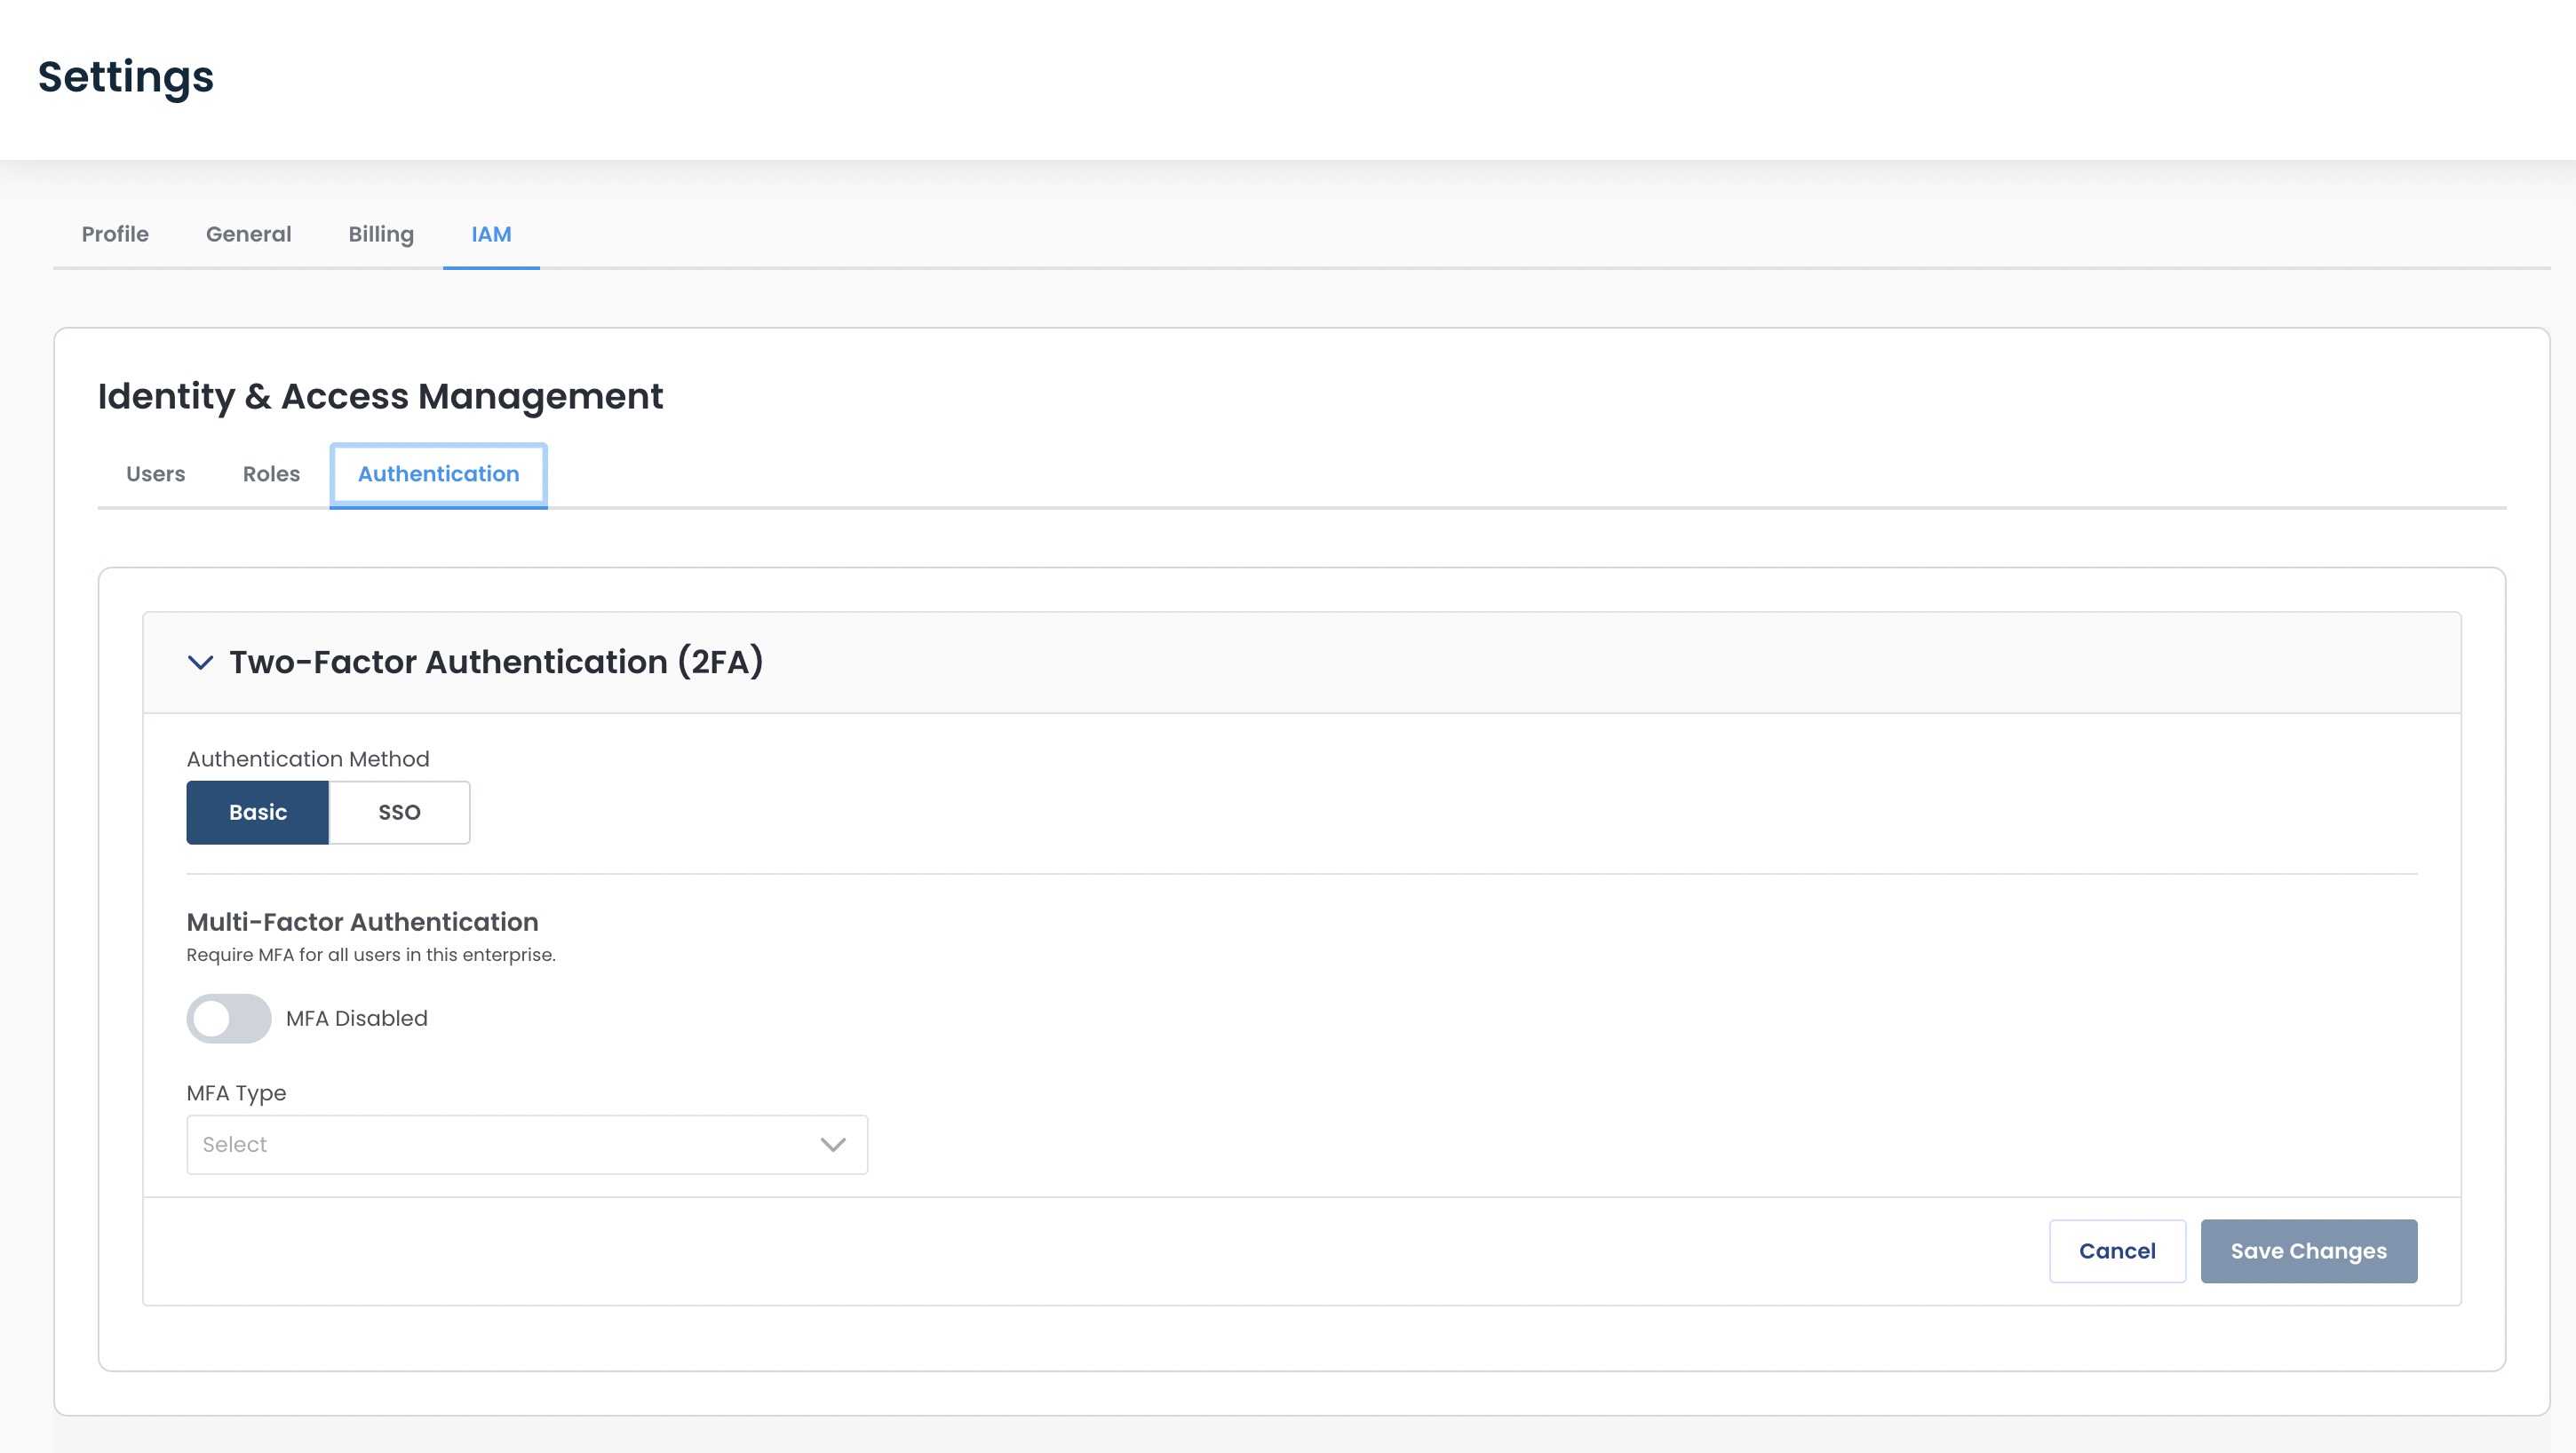
You have the choice of three Authentication options:
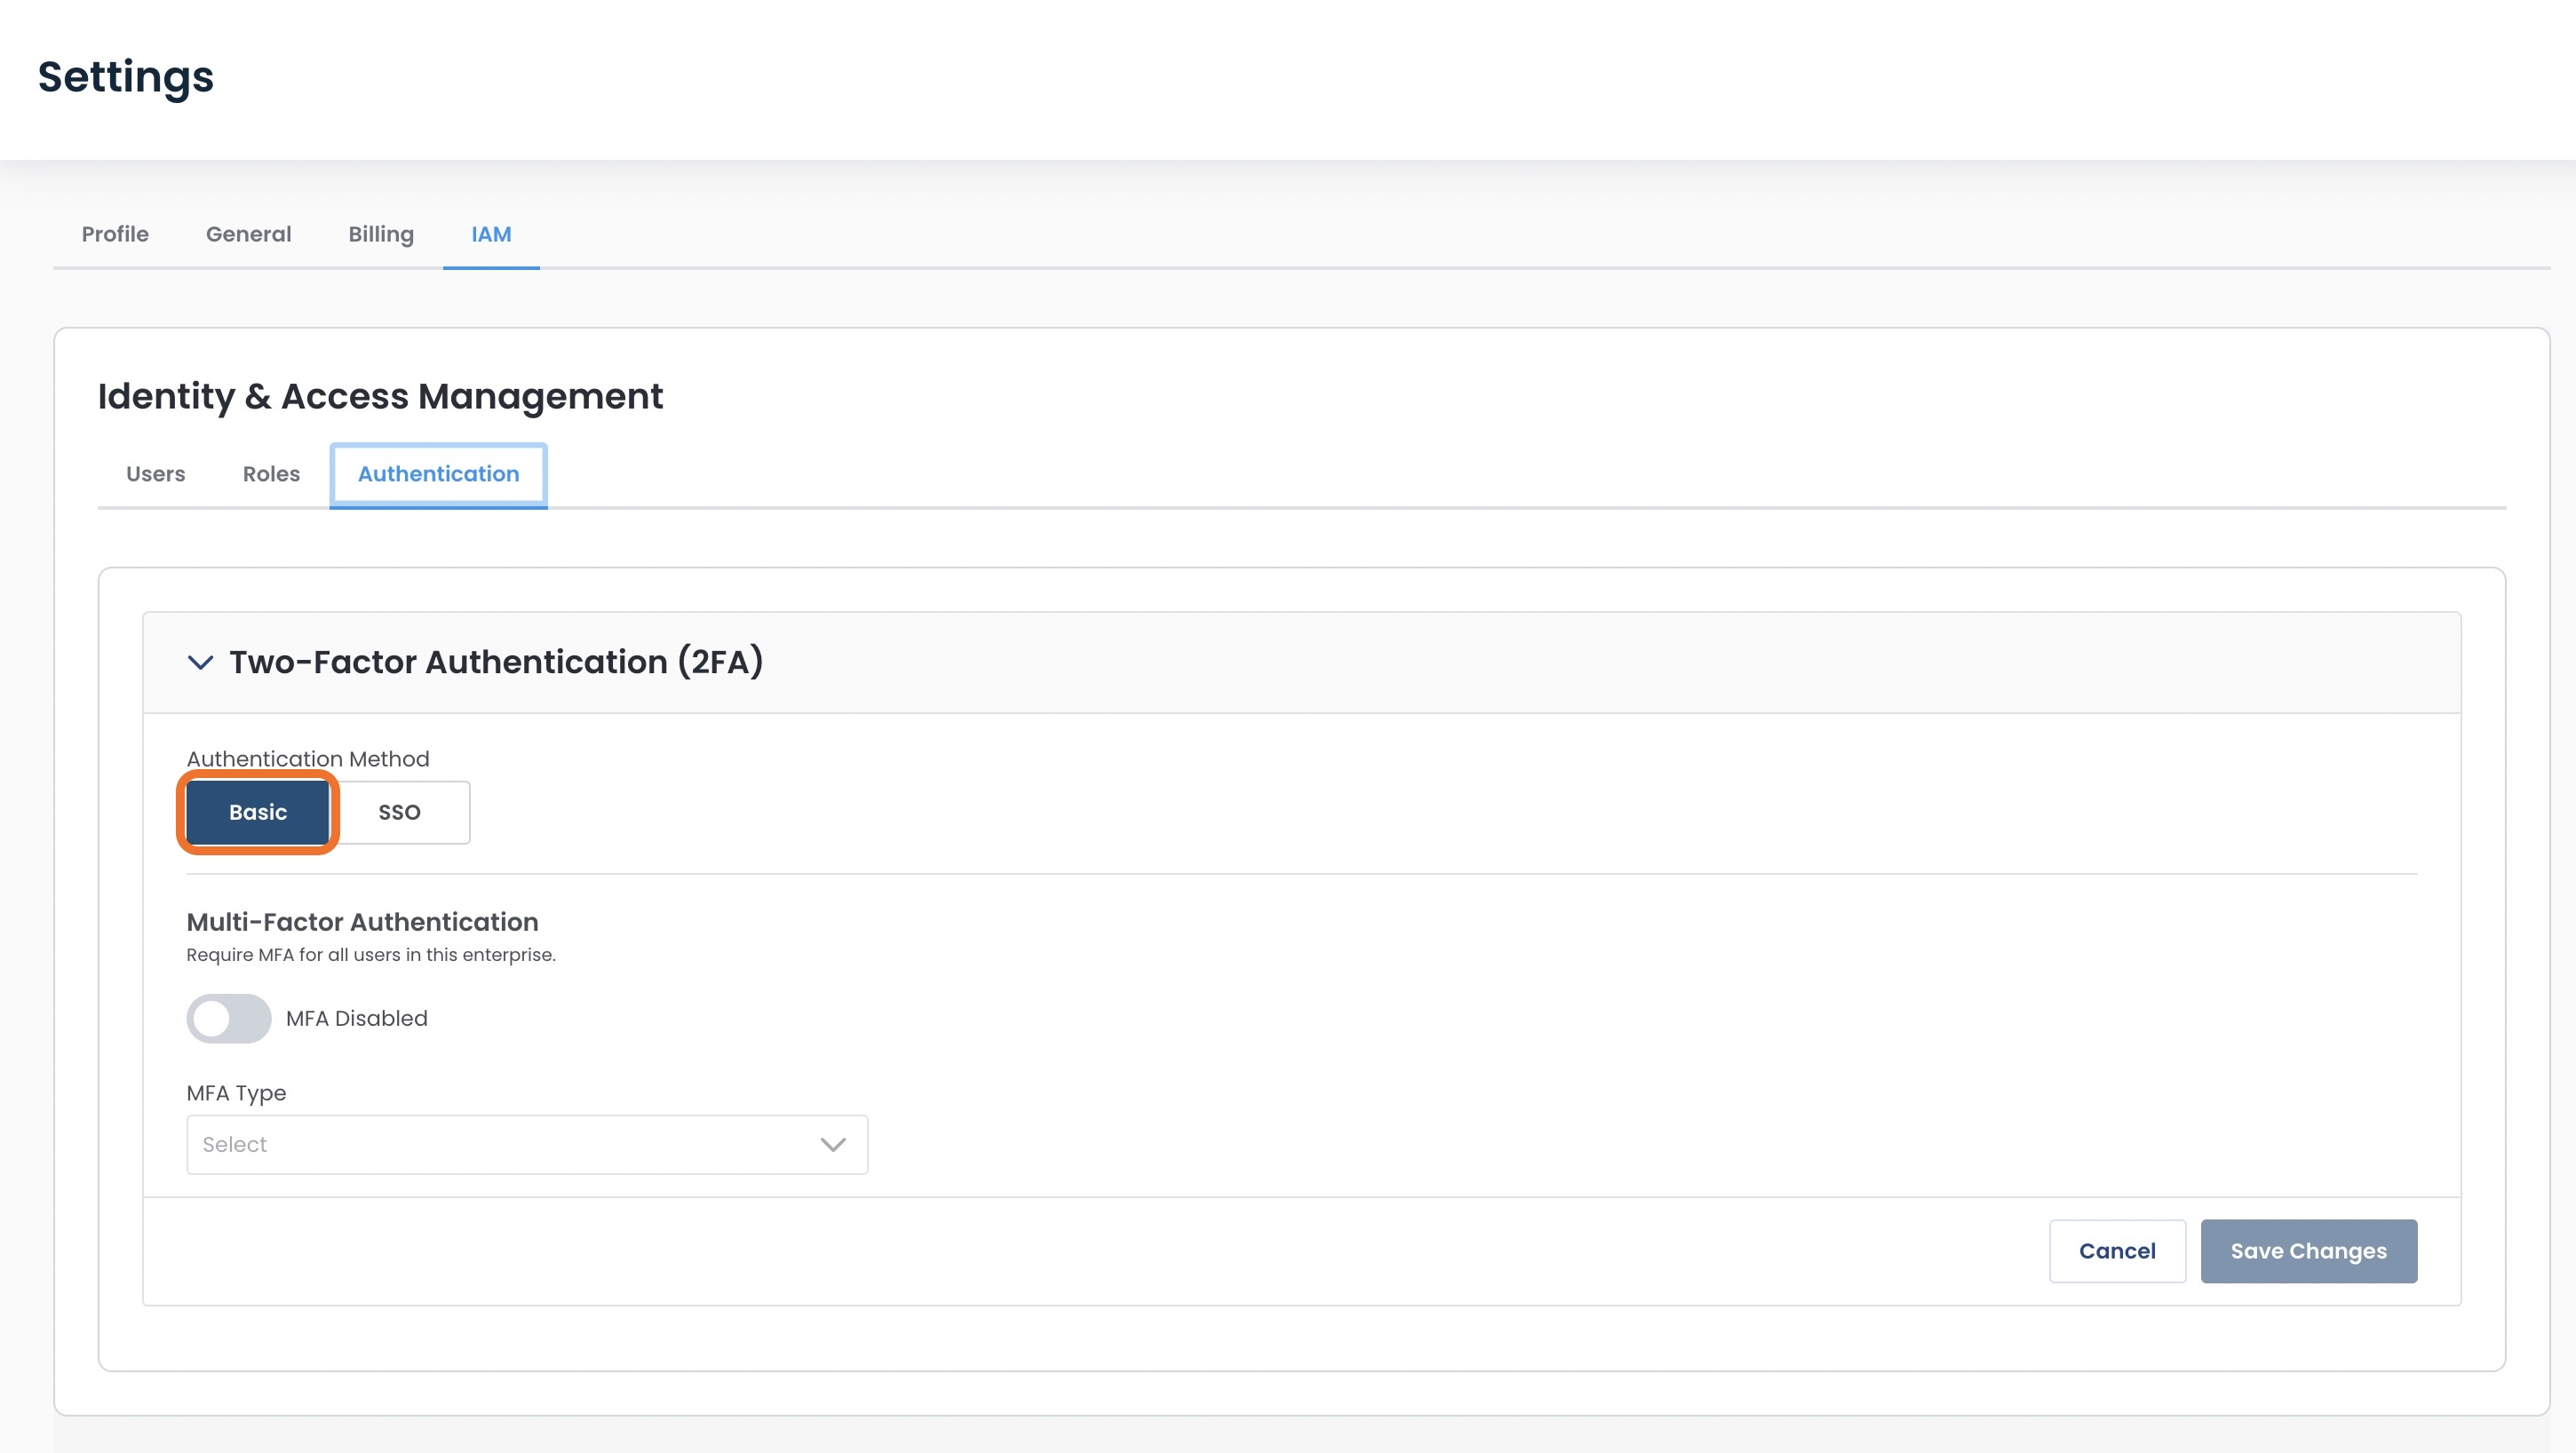
Basic: Email and password (on by default)
Basic with Multi-Factor Authentication (MFA): Require two or more independent proofs of identity before granting access
Single Sign-On (SSO): Authenticate once and then access multiple applications without logging in again
Note:
The method of authentication chosen will be the authentication for your entire enterprise.
Basic Authentication
Basic authentication is selected by default, and requires your users only to use their email and a password.
No further action is necessary to enable Basic authentication.
Basic with Multi-Factor Authentication (MFA)
You can add further security for your users and add Multi-Factor Authentication to your Basic authentication by toggling ‘MFA Enabled’ to on.
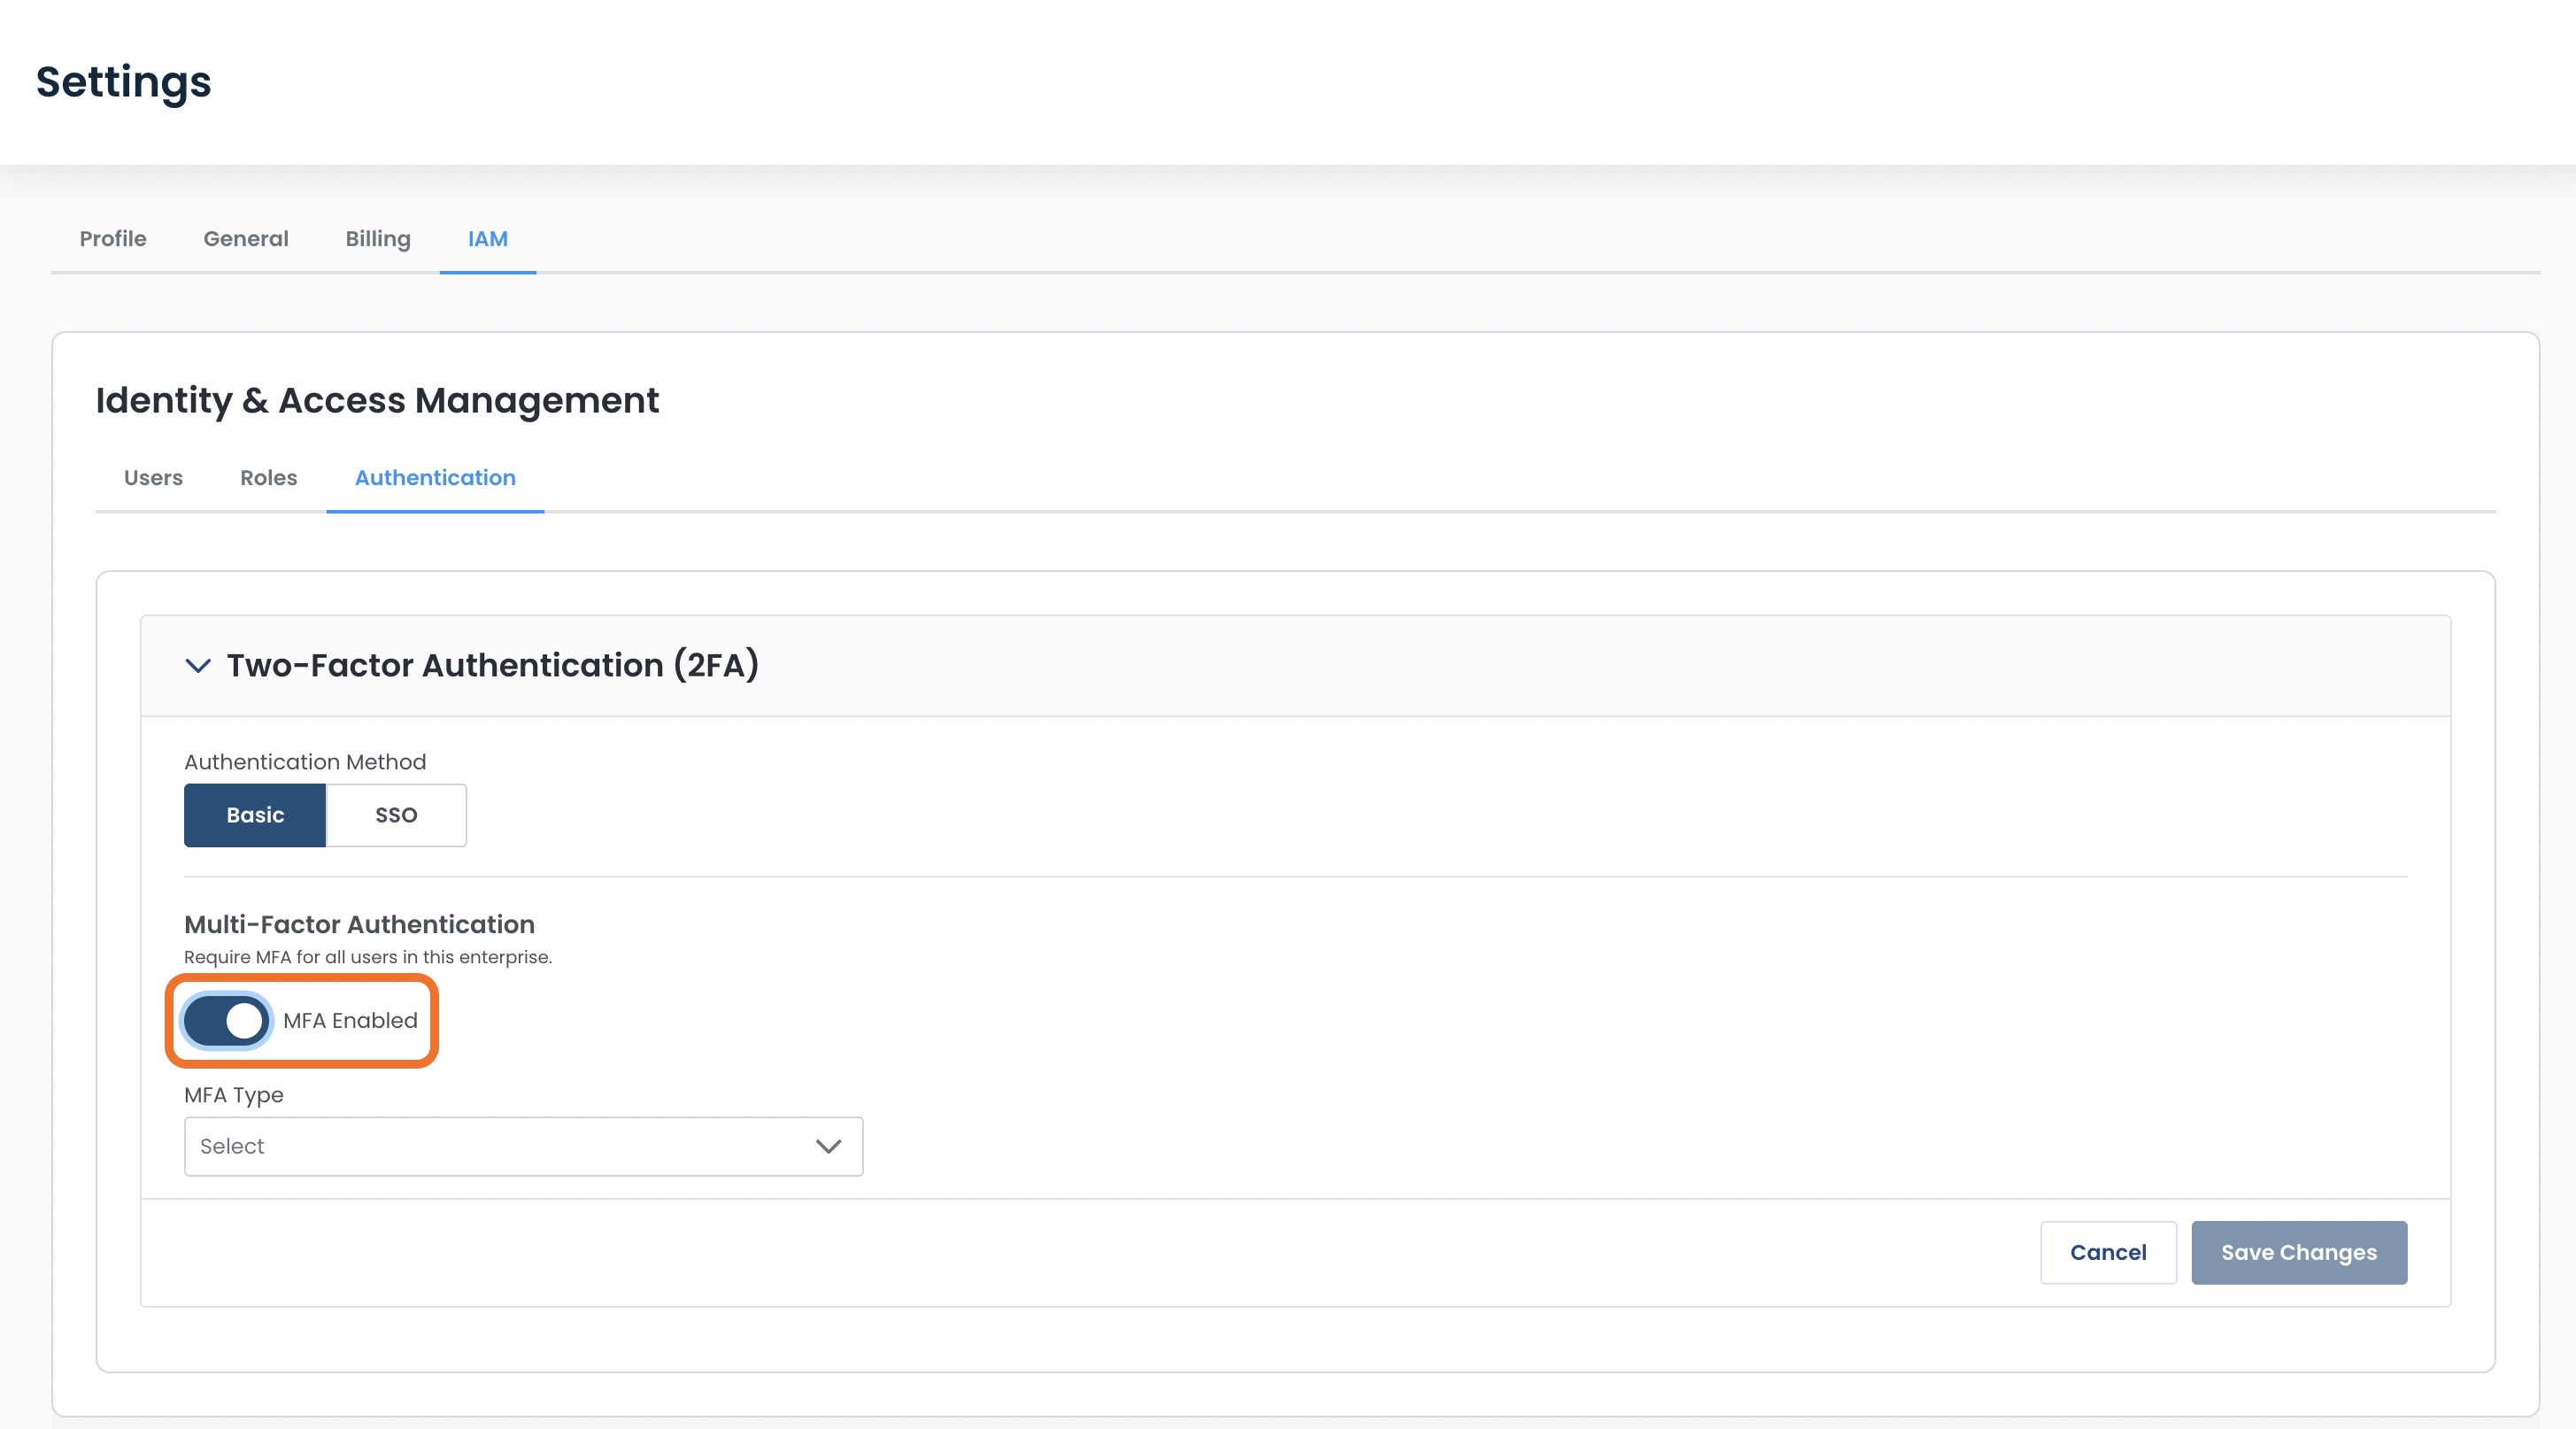
Select the MFA Type from the dropdown.
Currently Graphiant supports Google Authenticator.
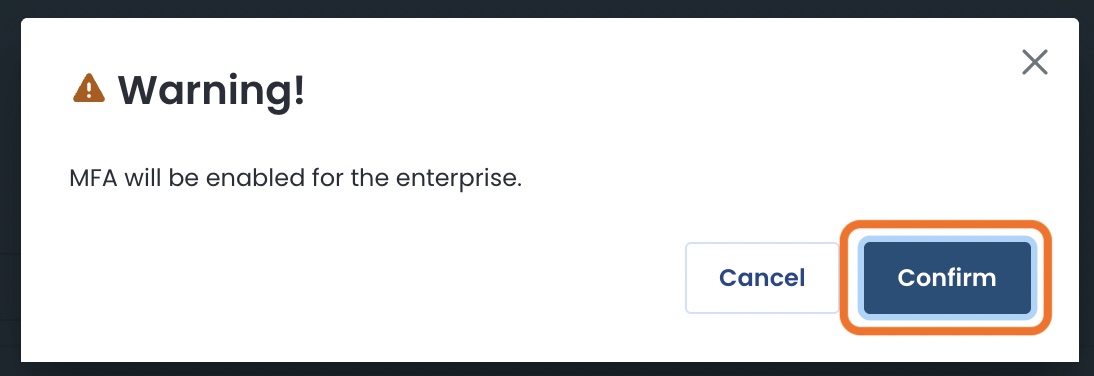
Click ‘Save Changes’.
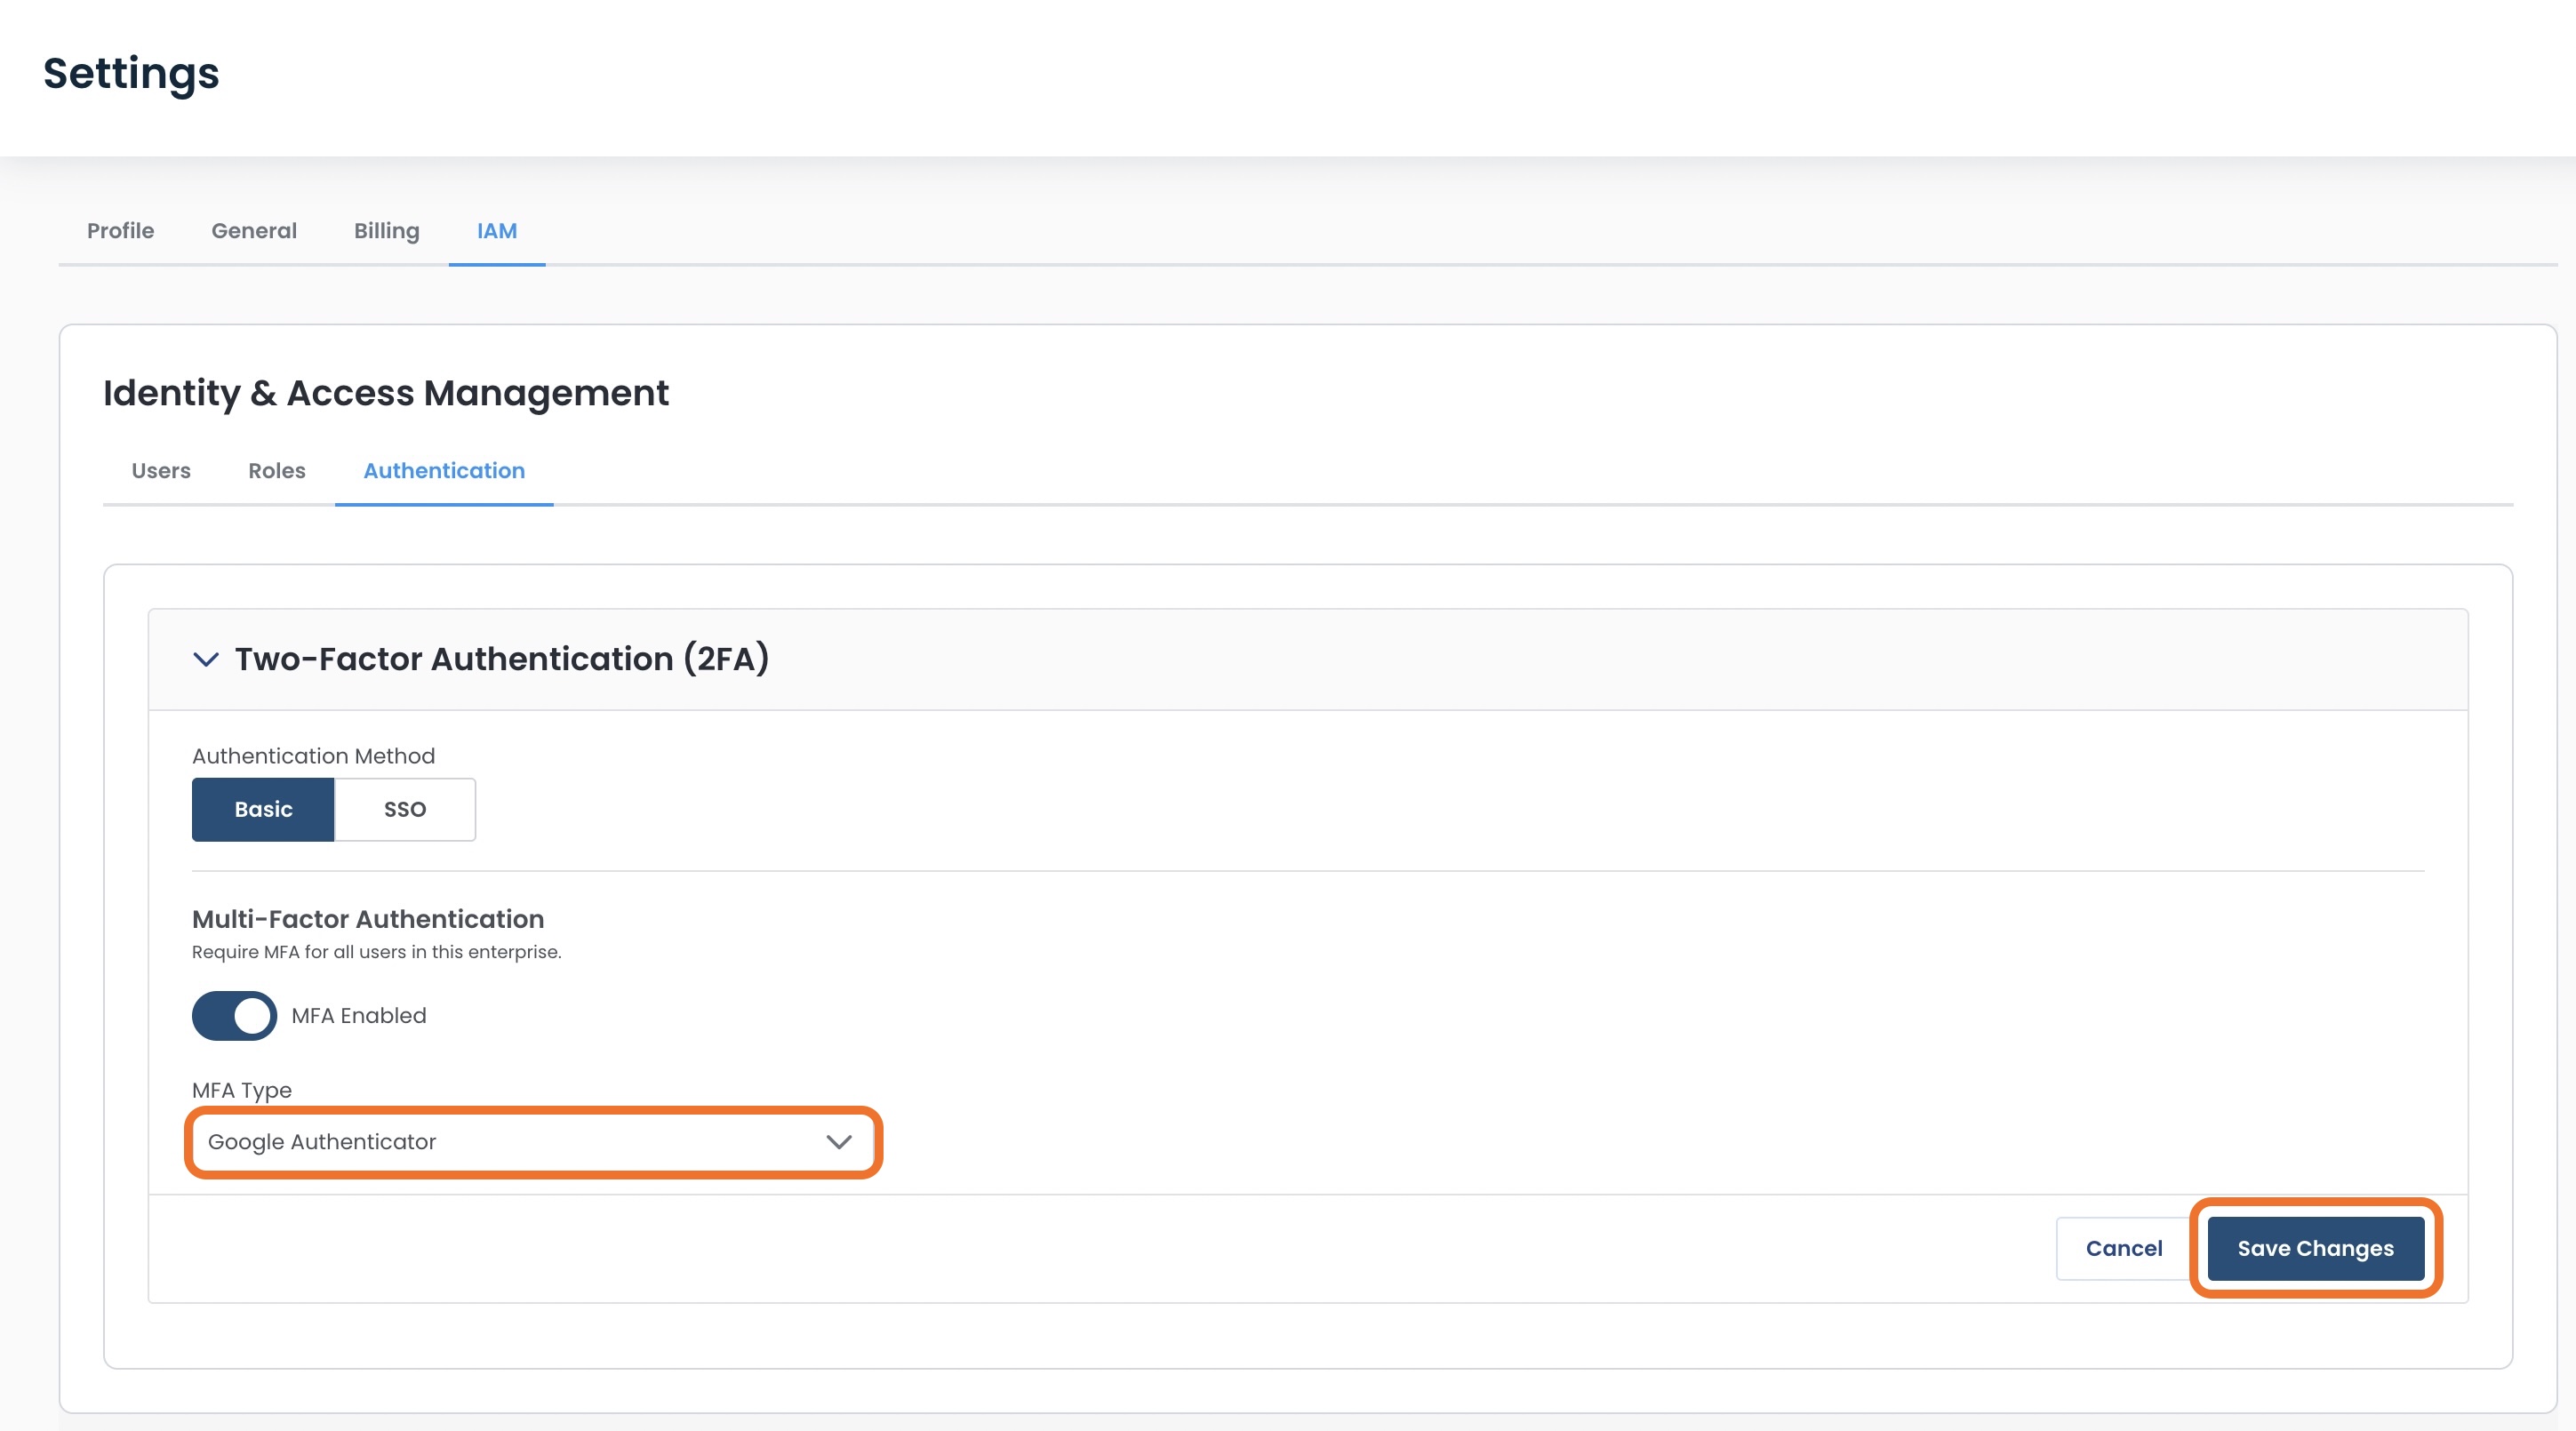
You will receive a warning stating that all users in your enterprise will now be required to authenticate via an identity provider.
Click ‘Confirm’.
Your users will now be required to use both their email and password, along with Google Authenticator to login to the Graphiant portal.
Resetting Multi- Factor / Two-Factor Authentication (2FA)
To allow a user to change their method of Two-Factor Authentication, go to the ‘Users’ tab of IAM; click the ellipses for that user; select ‘Reset 2FA’.
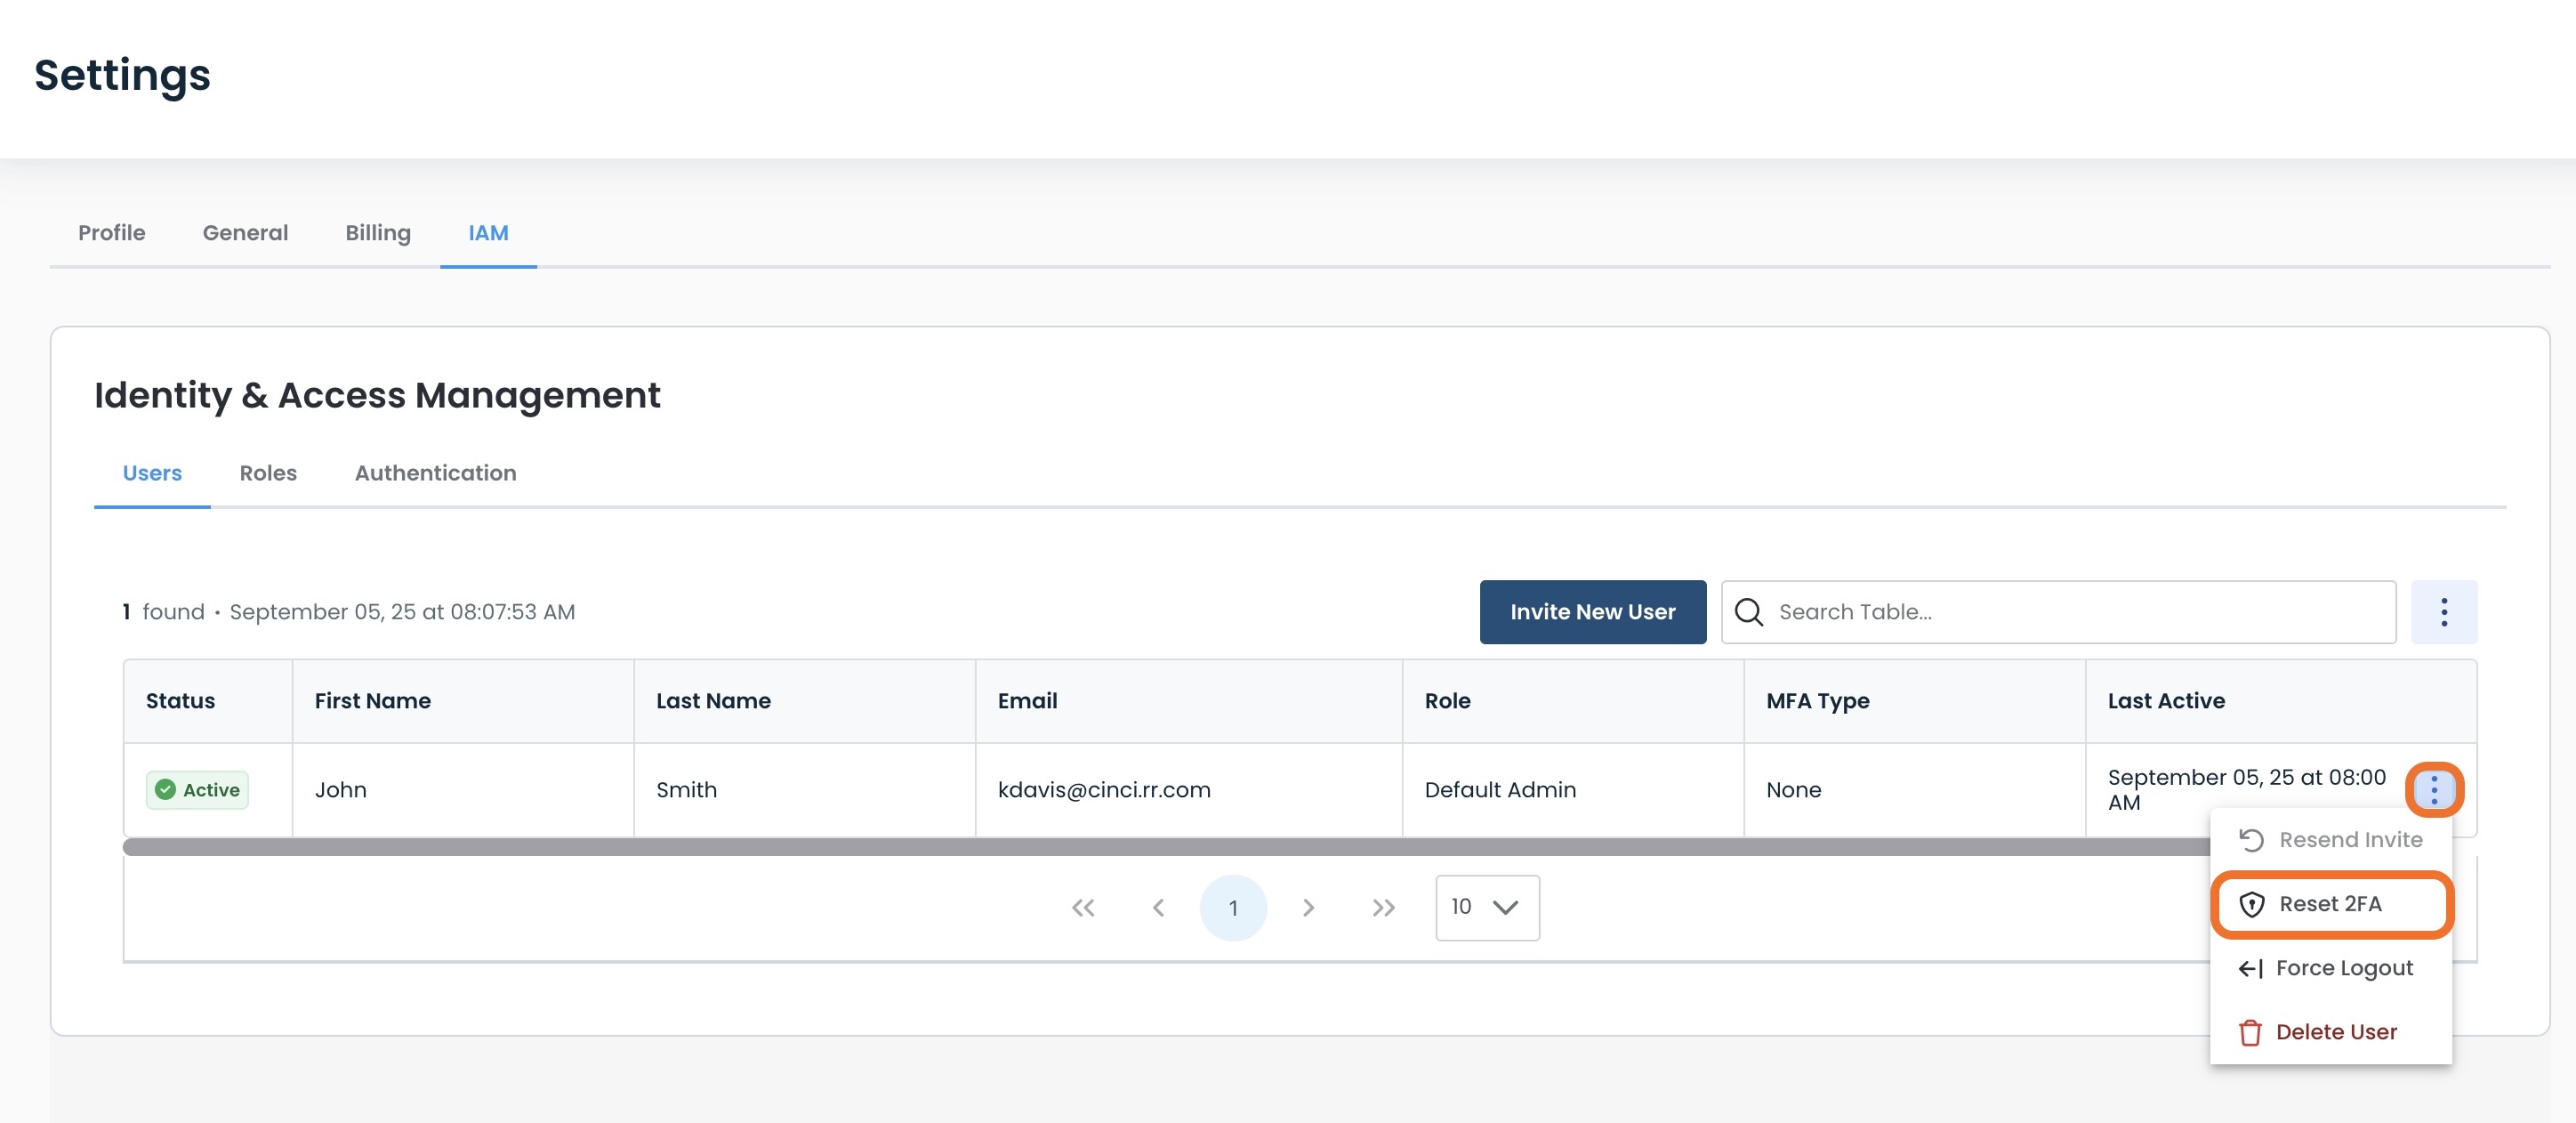
This will open a modal allowing you to confirm this action by clicking ‘Reset 2FA’.
Resetting 2FA will cause:
The user’s authentication method to be removed.
They must set it up again upon the next login.
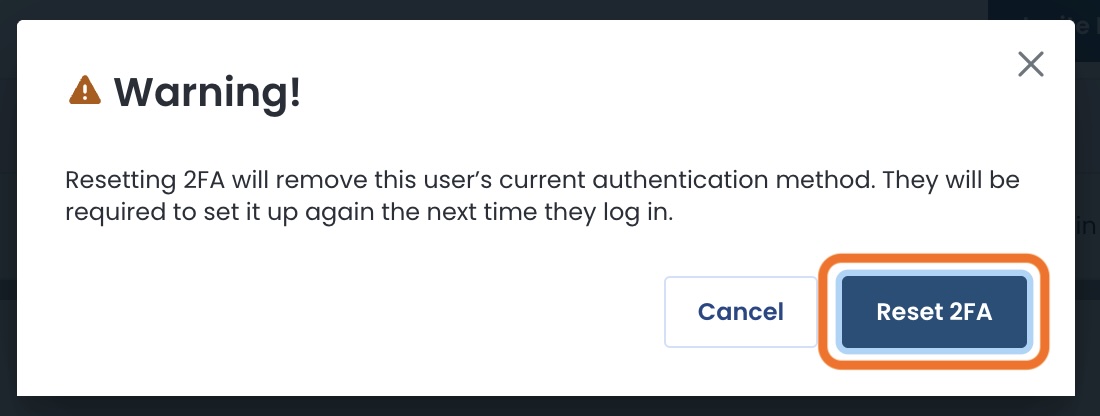
The user will no longer have their former multi-factor authentication login, and will need to set it up again upon the subsequent login.
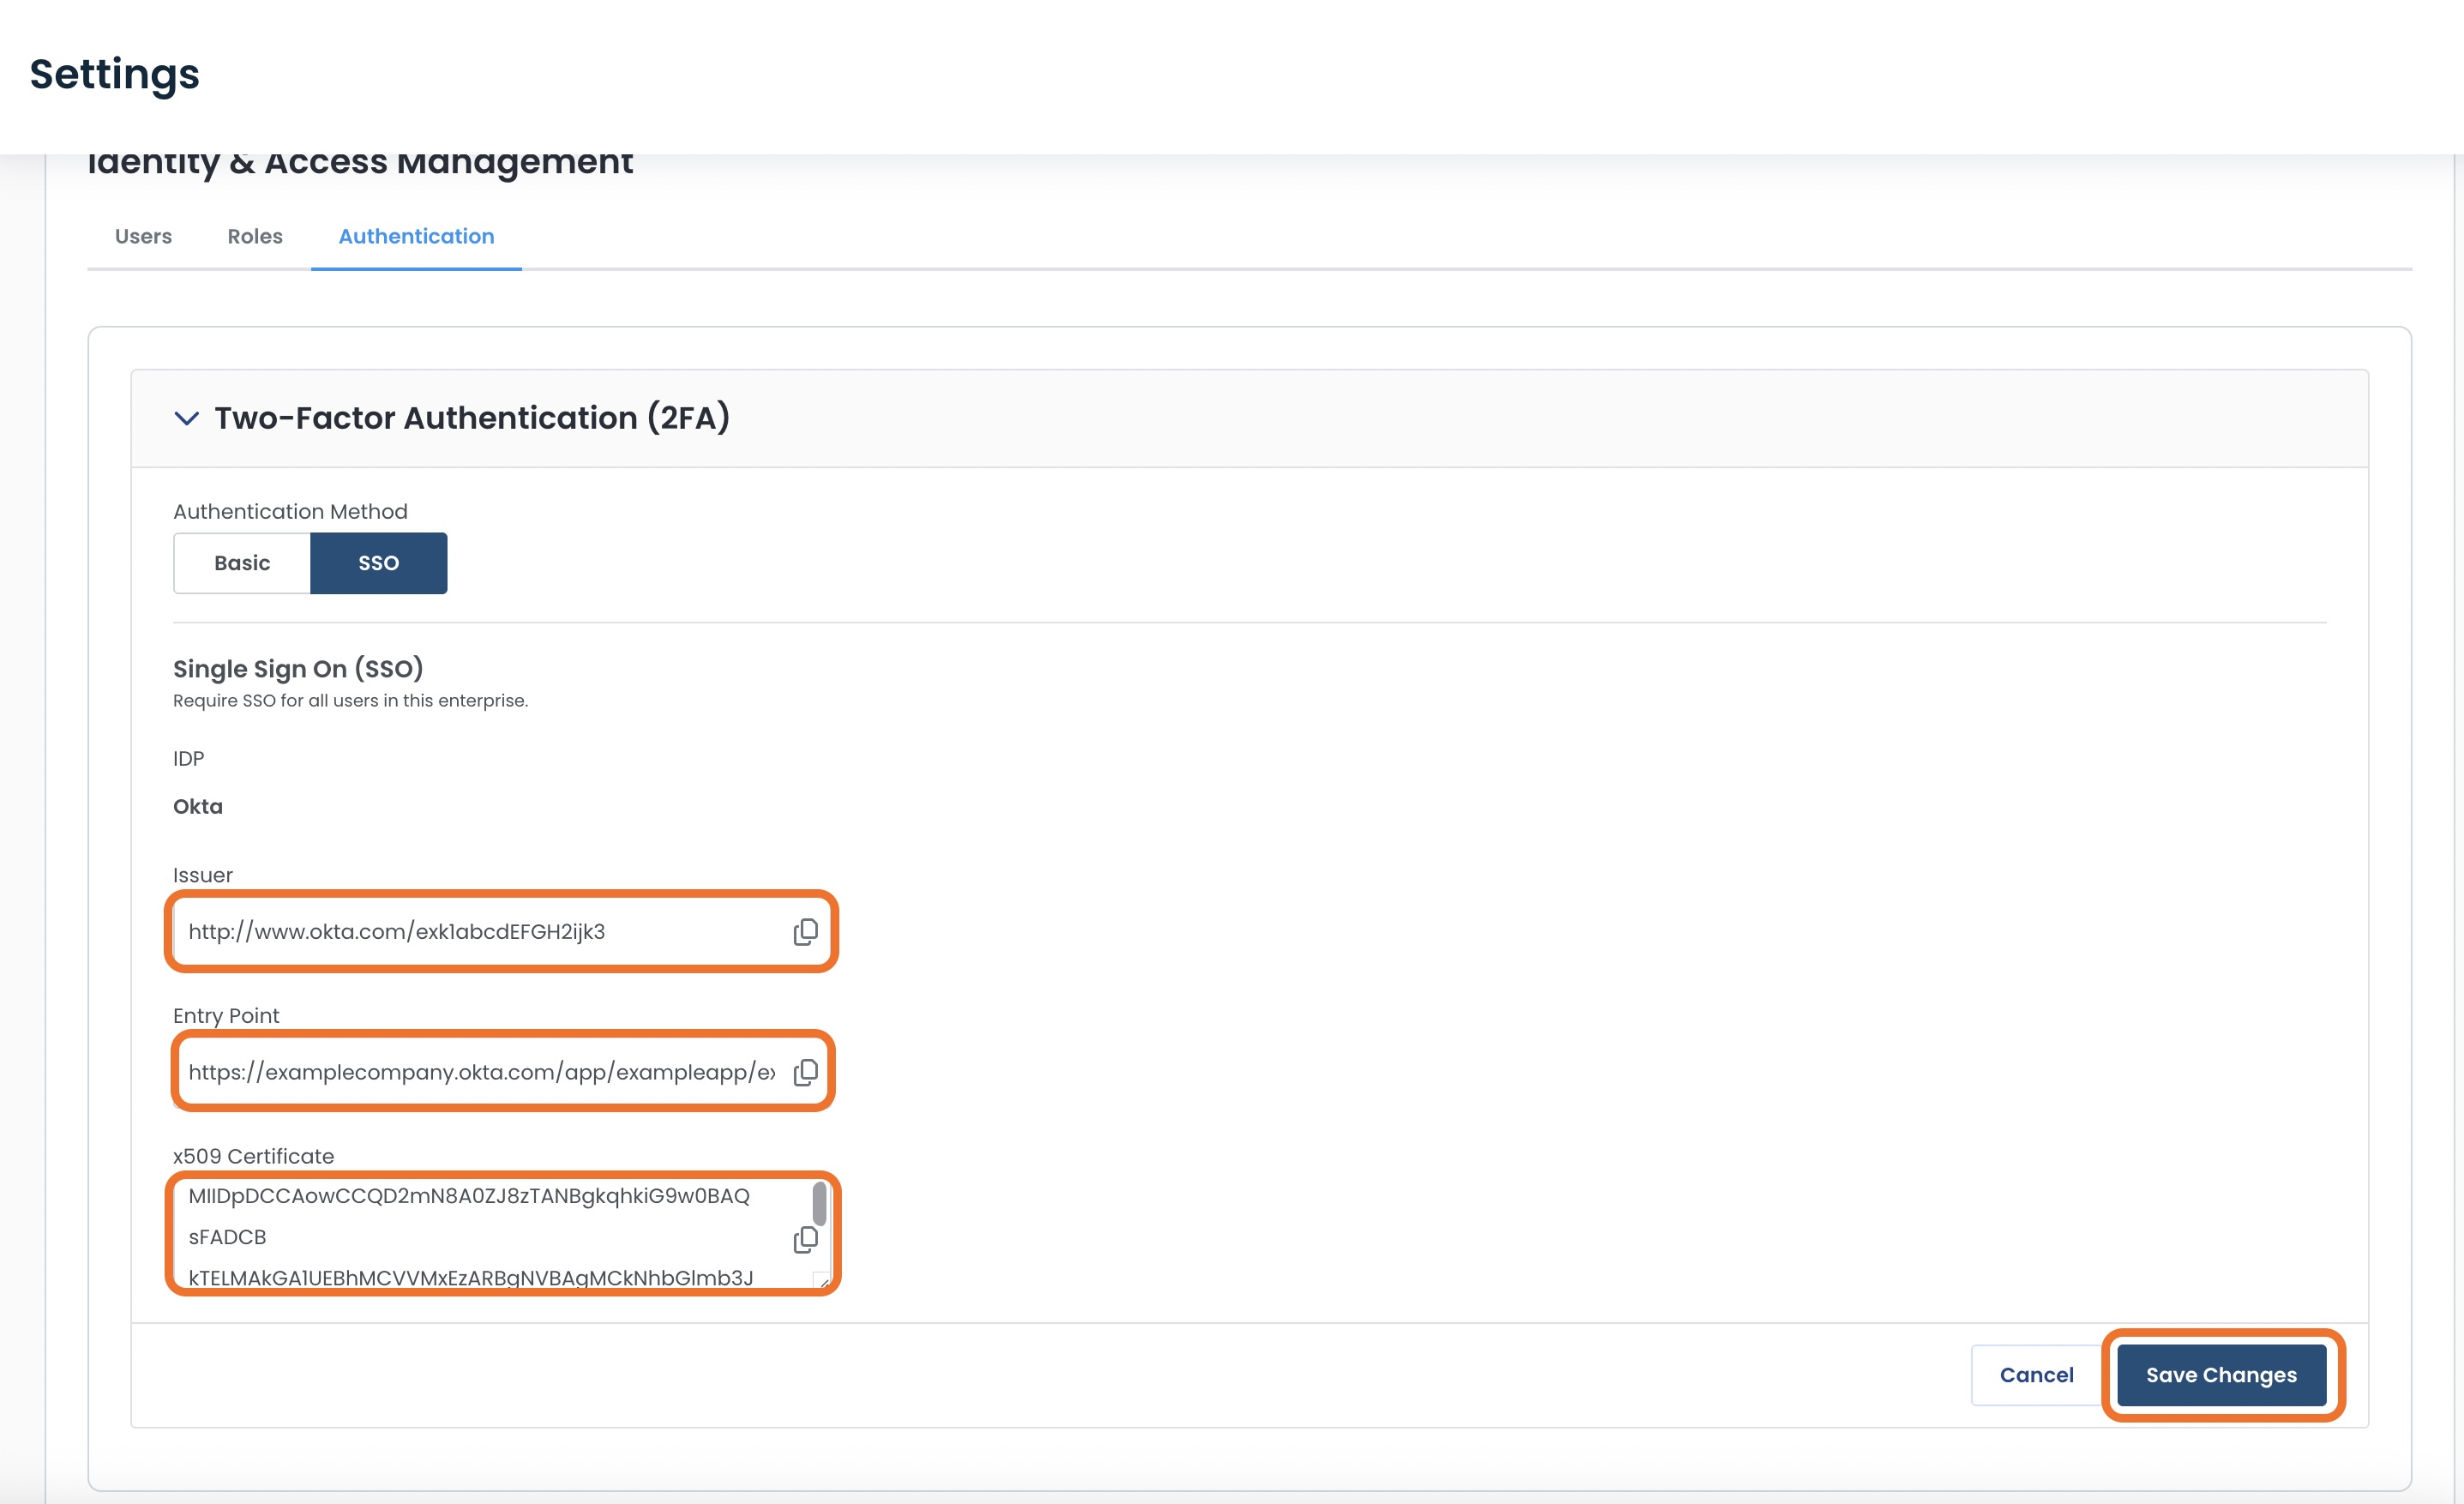
Single Sign-On (SSO)
If you’d like your users to be able to long in once for convenience, and still have access to multiple applications, click ‘SSO’.
Graphiant uses Okta SAML for SSO authentication.
Complete the following fields:
Issuer: Uniquely identifying the Okta tenant
Entry Point: Login URL where users are redirected to authenticate
x509 Certificate: That contains the public key used to verify the SAML response
Click ‘Save Changes’.
You will receive a warning stating that all users in your enterprise will now be required to authenticate via an identity provider.
Click ‘Confirm’.
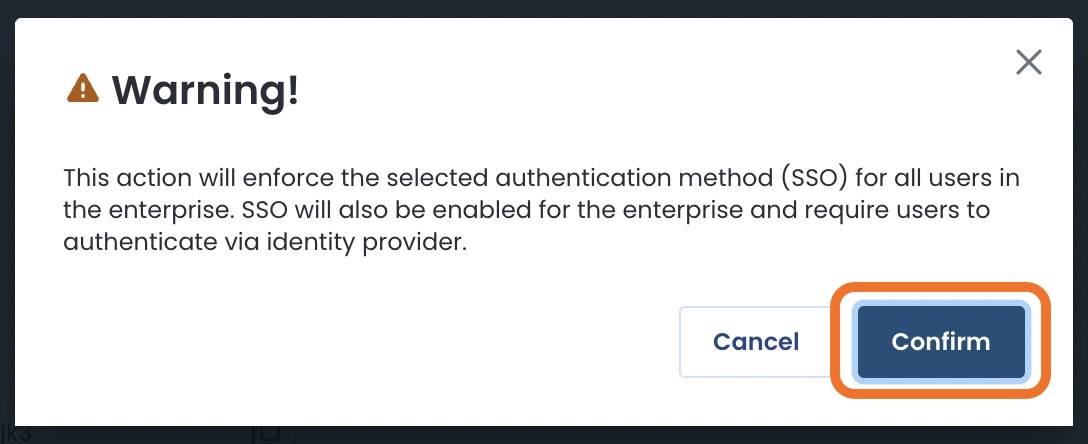
Your users will now be required to use Okta SAML to login to the Graphiant portal.