Graphiant Automation Workflows is the implementation of Graphiant AI-Ready Automation as a Service in the Graphiant Portal. It is the single place to handle all of your Graphiant network automation in the Graphiant Portal. You pick a task from a catalog, provide one YAML file, and Graphiant validates it and applies the changes across your network. You don't need to install or run any automation tools yourself.
It is built on graphiant-playbooks, the open-source automation framework for Graphiant. Anything you can automate with graphiant-playbooks, you can now run as a managed, template-based service.
It is also ready for agentic workflows from the start. AI copilots and orchestrators use the same catalog, validation and audit trail as your human operators, so you can bring AI into network operations without giving up control.
Automate
Select Automate in the left navigation to open it. Automate has three areas: Catalog, for bundle templates and the workspace; Workflows, for staged runs and execution history; and Documentation, for related guides and reference material. Together they take you from preparing a configuration through deployment and review.
Catalog
In Catalog, choose the bundle for the operation you want to configure or de-configure. The available bundles are:
System Bundle; Network Bundle; Services Bundle; Gateway Services Bundle; Data Exchange Local Bundle; Policies Bundle; Routing Bundle; System Objects Bundle; and Data Exchange Bundle.
For this example, select System Bundle to create three sites. Each bundle card offers Download and Open Workspace. Download gives you a local template; Open Workspace starts the portal workflow.

Example Workflow (System Bundle - Site Module)
Create, validate, approve, and deploy a configuration bundle in the Graphiant Portal. The example in this guide creates three sites with the System Bundle.
1. Download the template. In Catalog, select Download on the System Bundle card. Extract system_bundle_templates.zip on your computer.
2. Edit the sites file. Open sample_sites.yaml and enter the site configuration for each of the three new sites. Save the updated YAML file.
3. Open the workspace. Select Open Workspace on the System Bundle card. In the Import Files step, upload the updated sample_sites.yaml under Site Module. The System Module is optional for this site creation example.
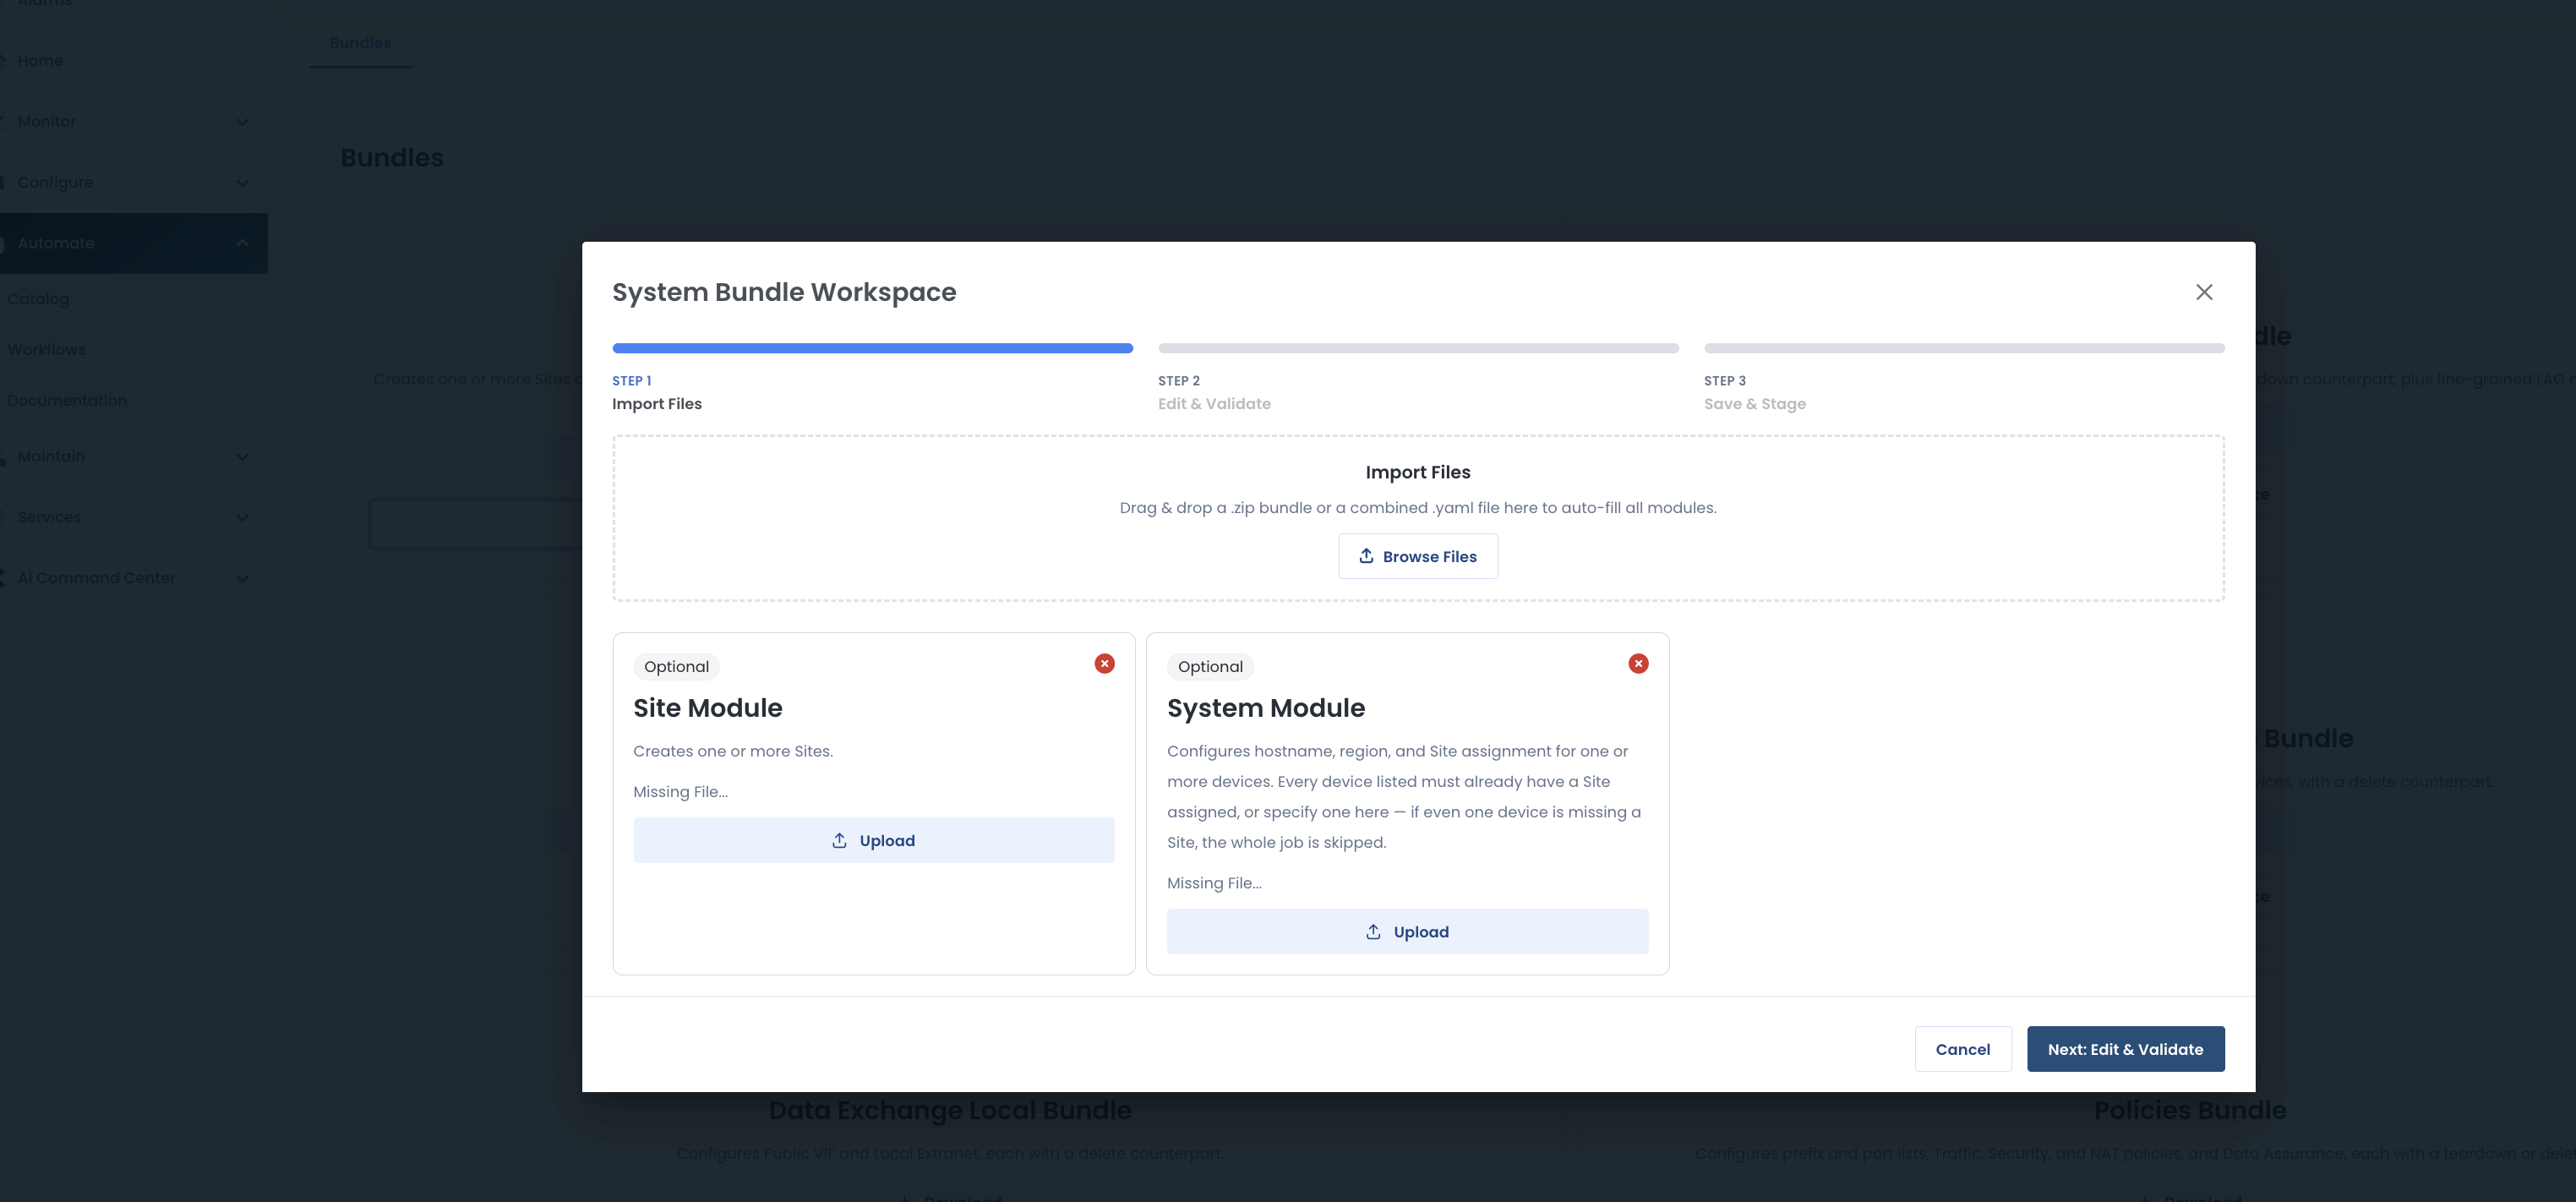
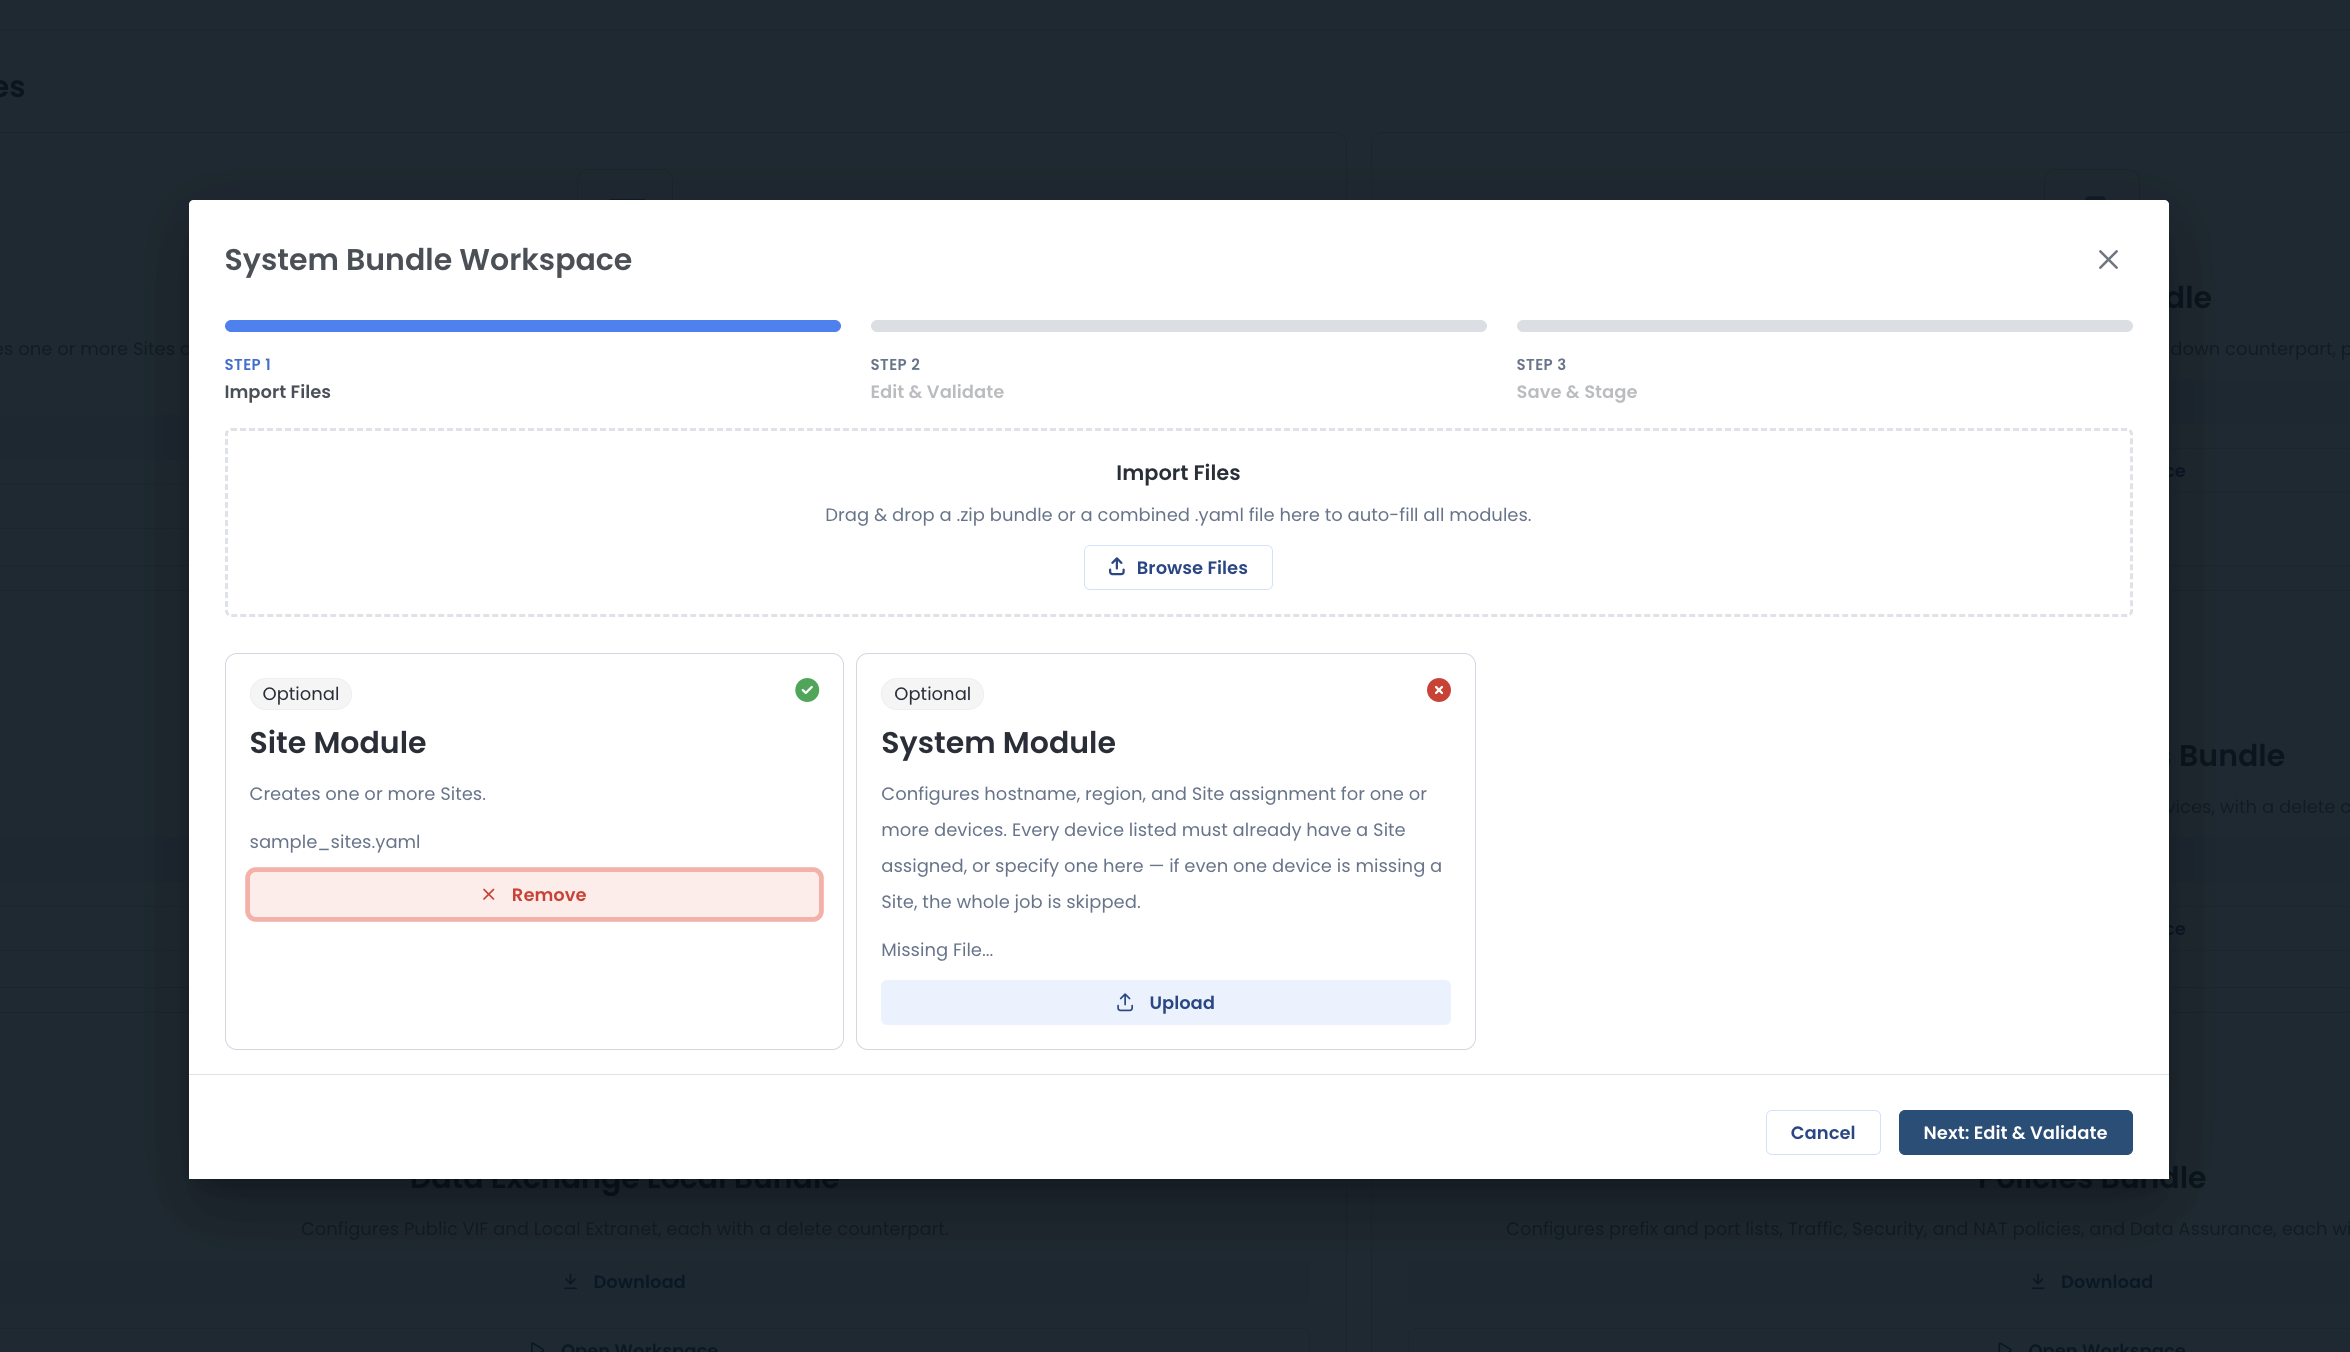
The updated sites file is attached to the Site Module in the System Bundle workspace.
4. Review and validate. Select Next: Edit & Validate. Review or update the YAML in the editor, then select Validate Bundle Syntax. After validation succeeds, select Next: Save & Stage.
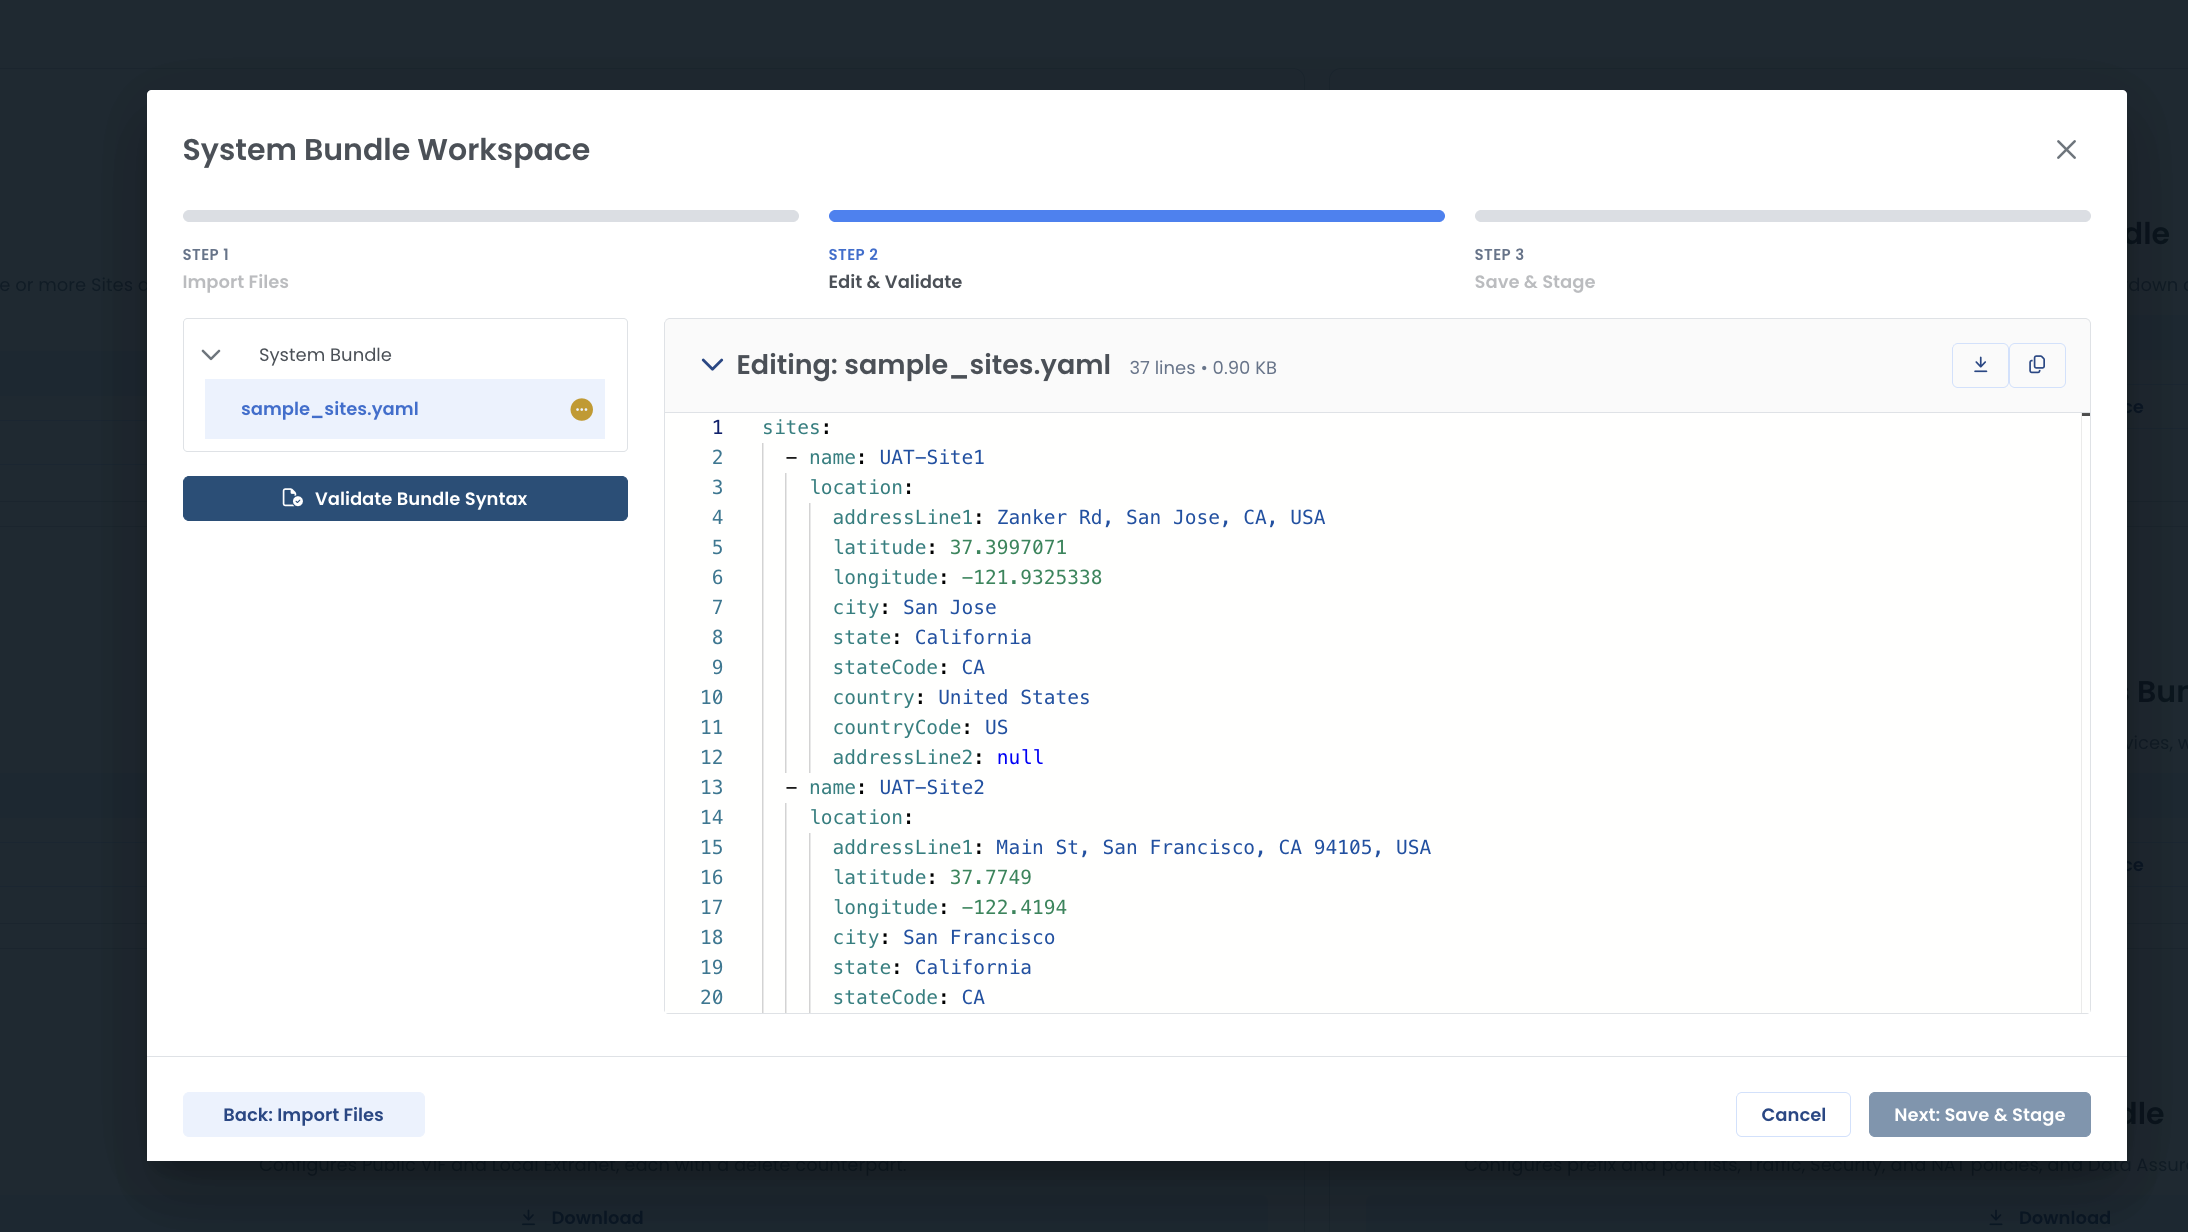
Review the site YAML in the editor and use Validate Bundle Syntax.
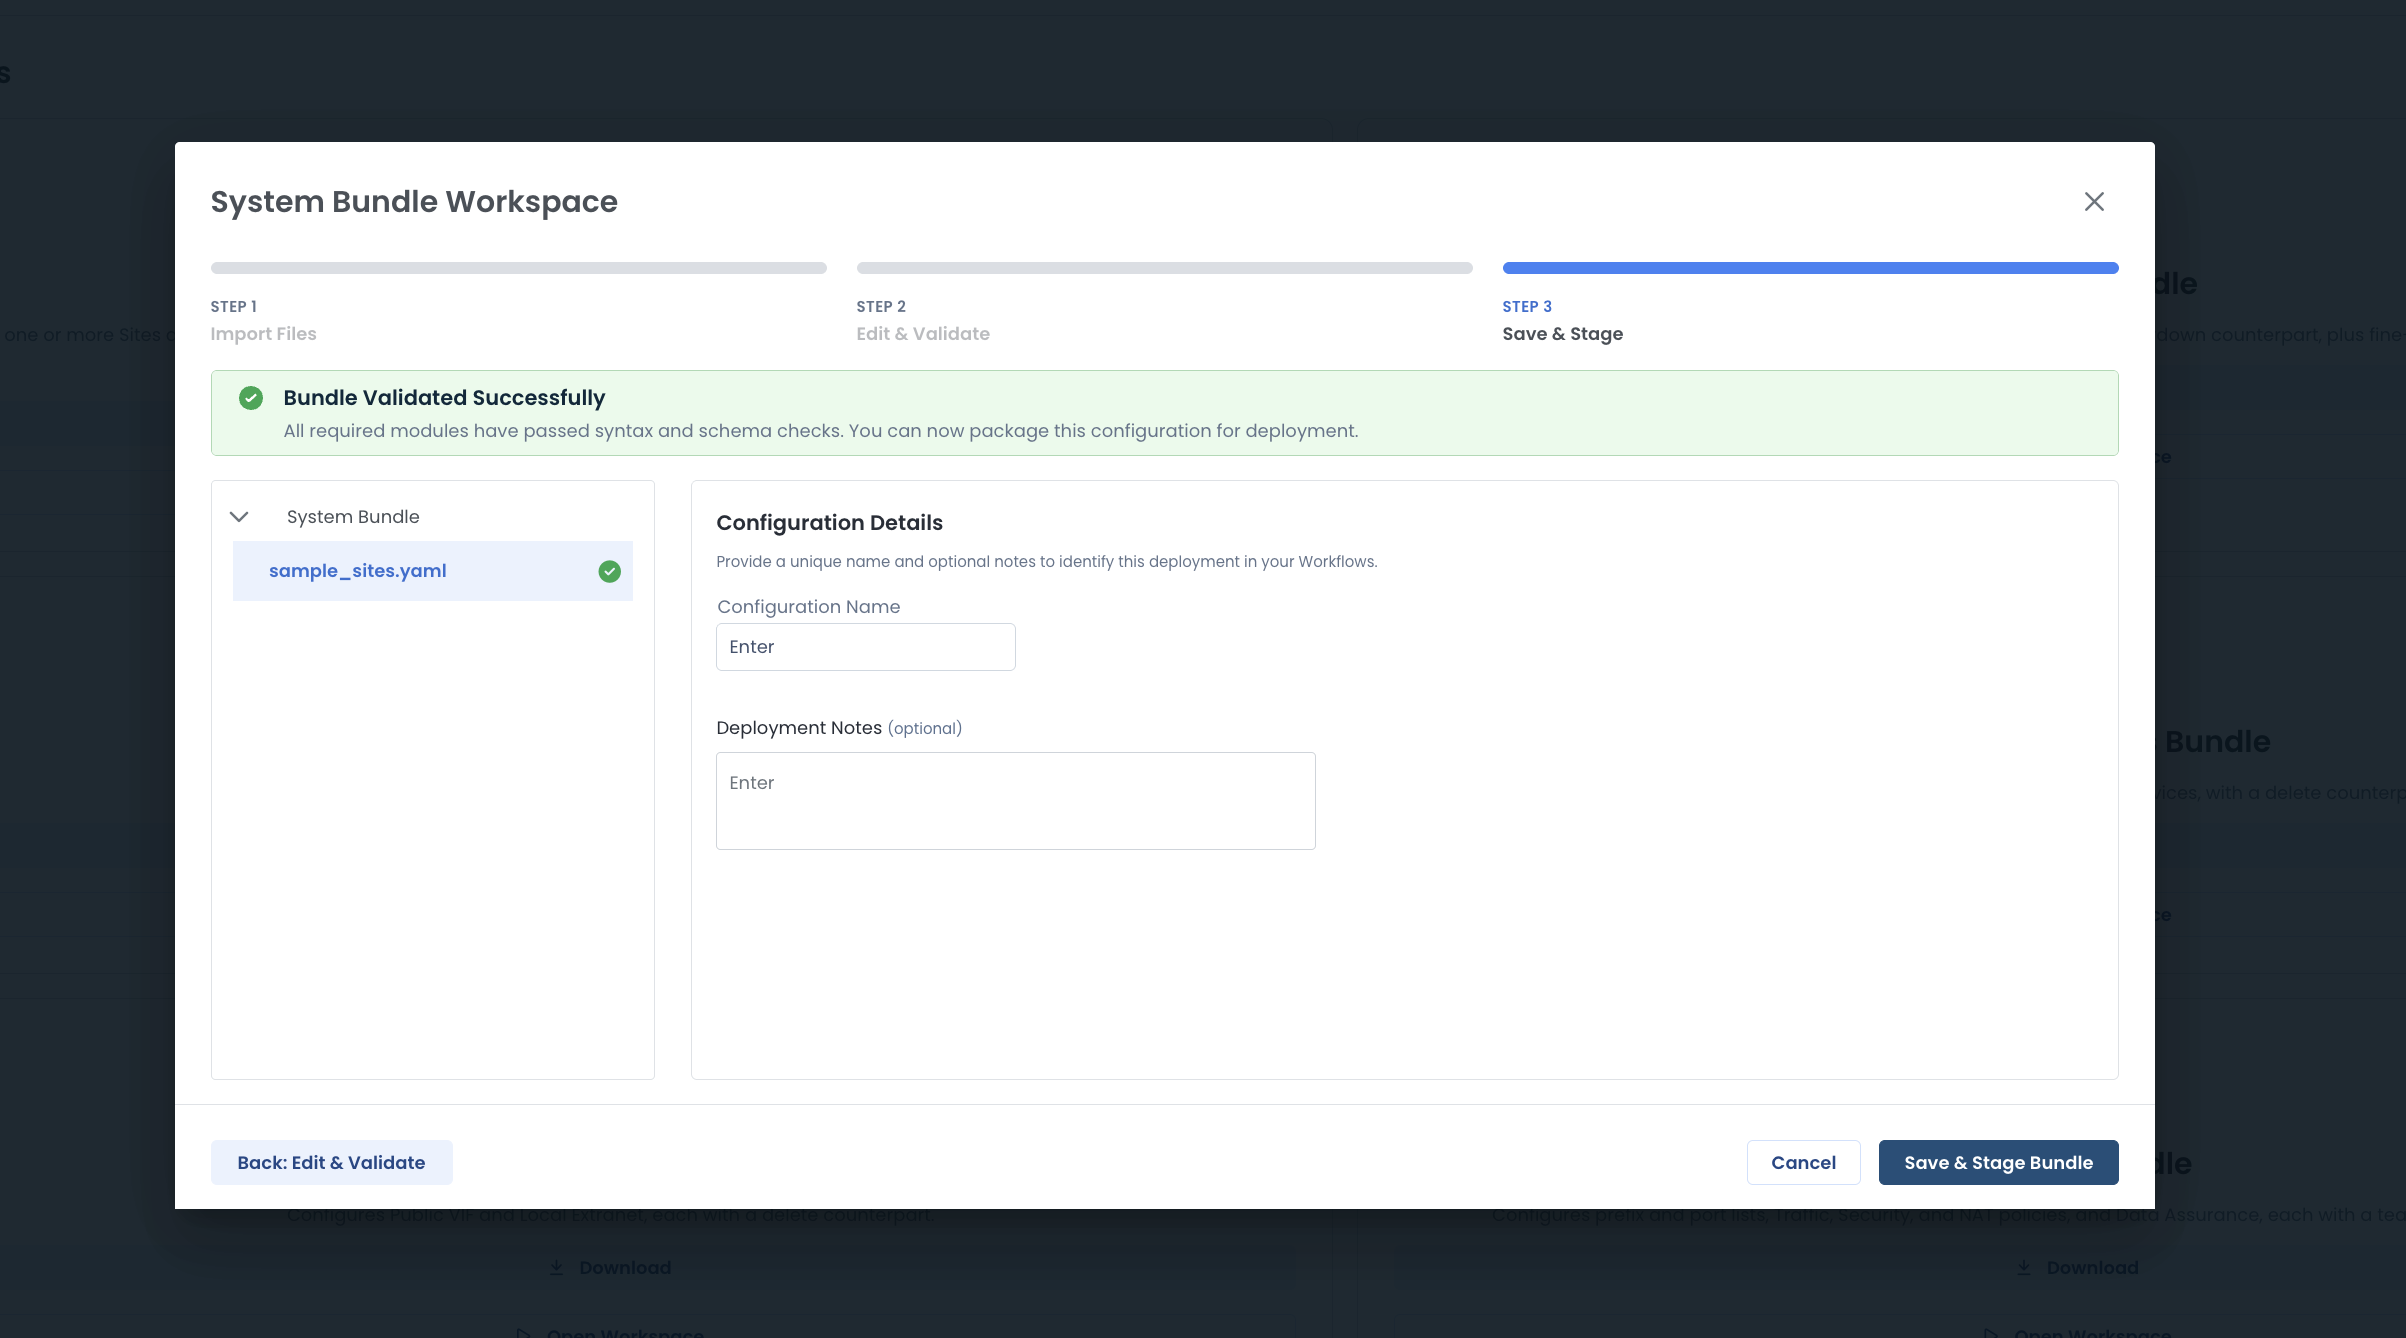
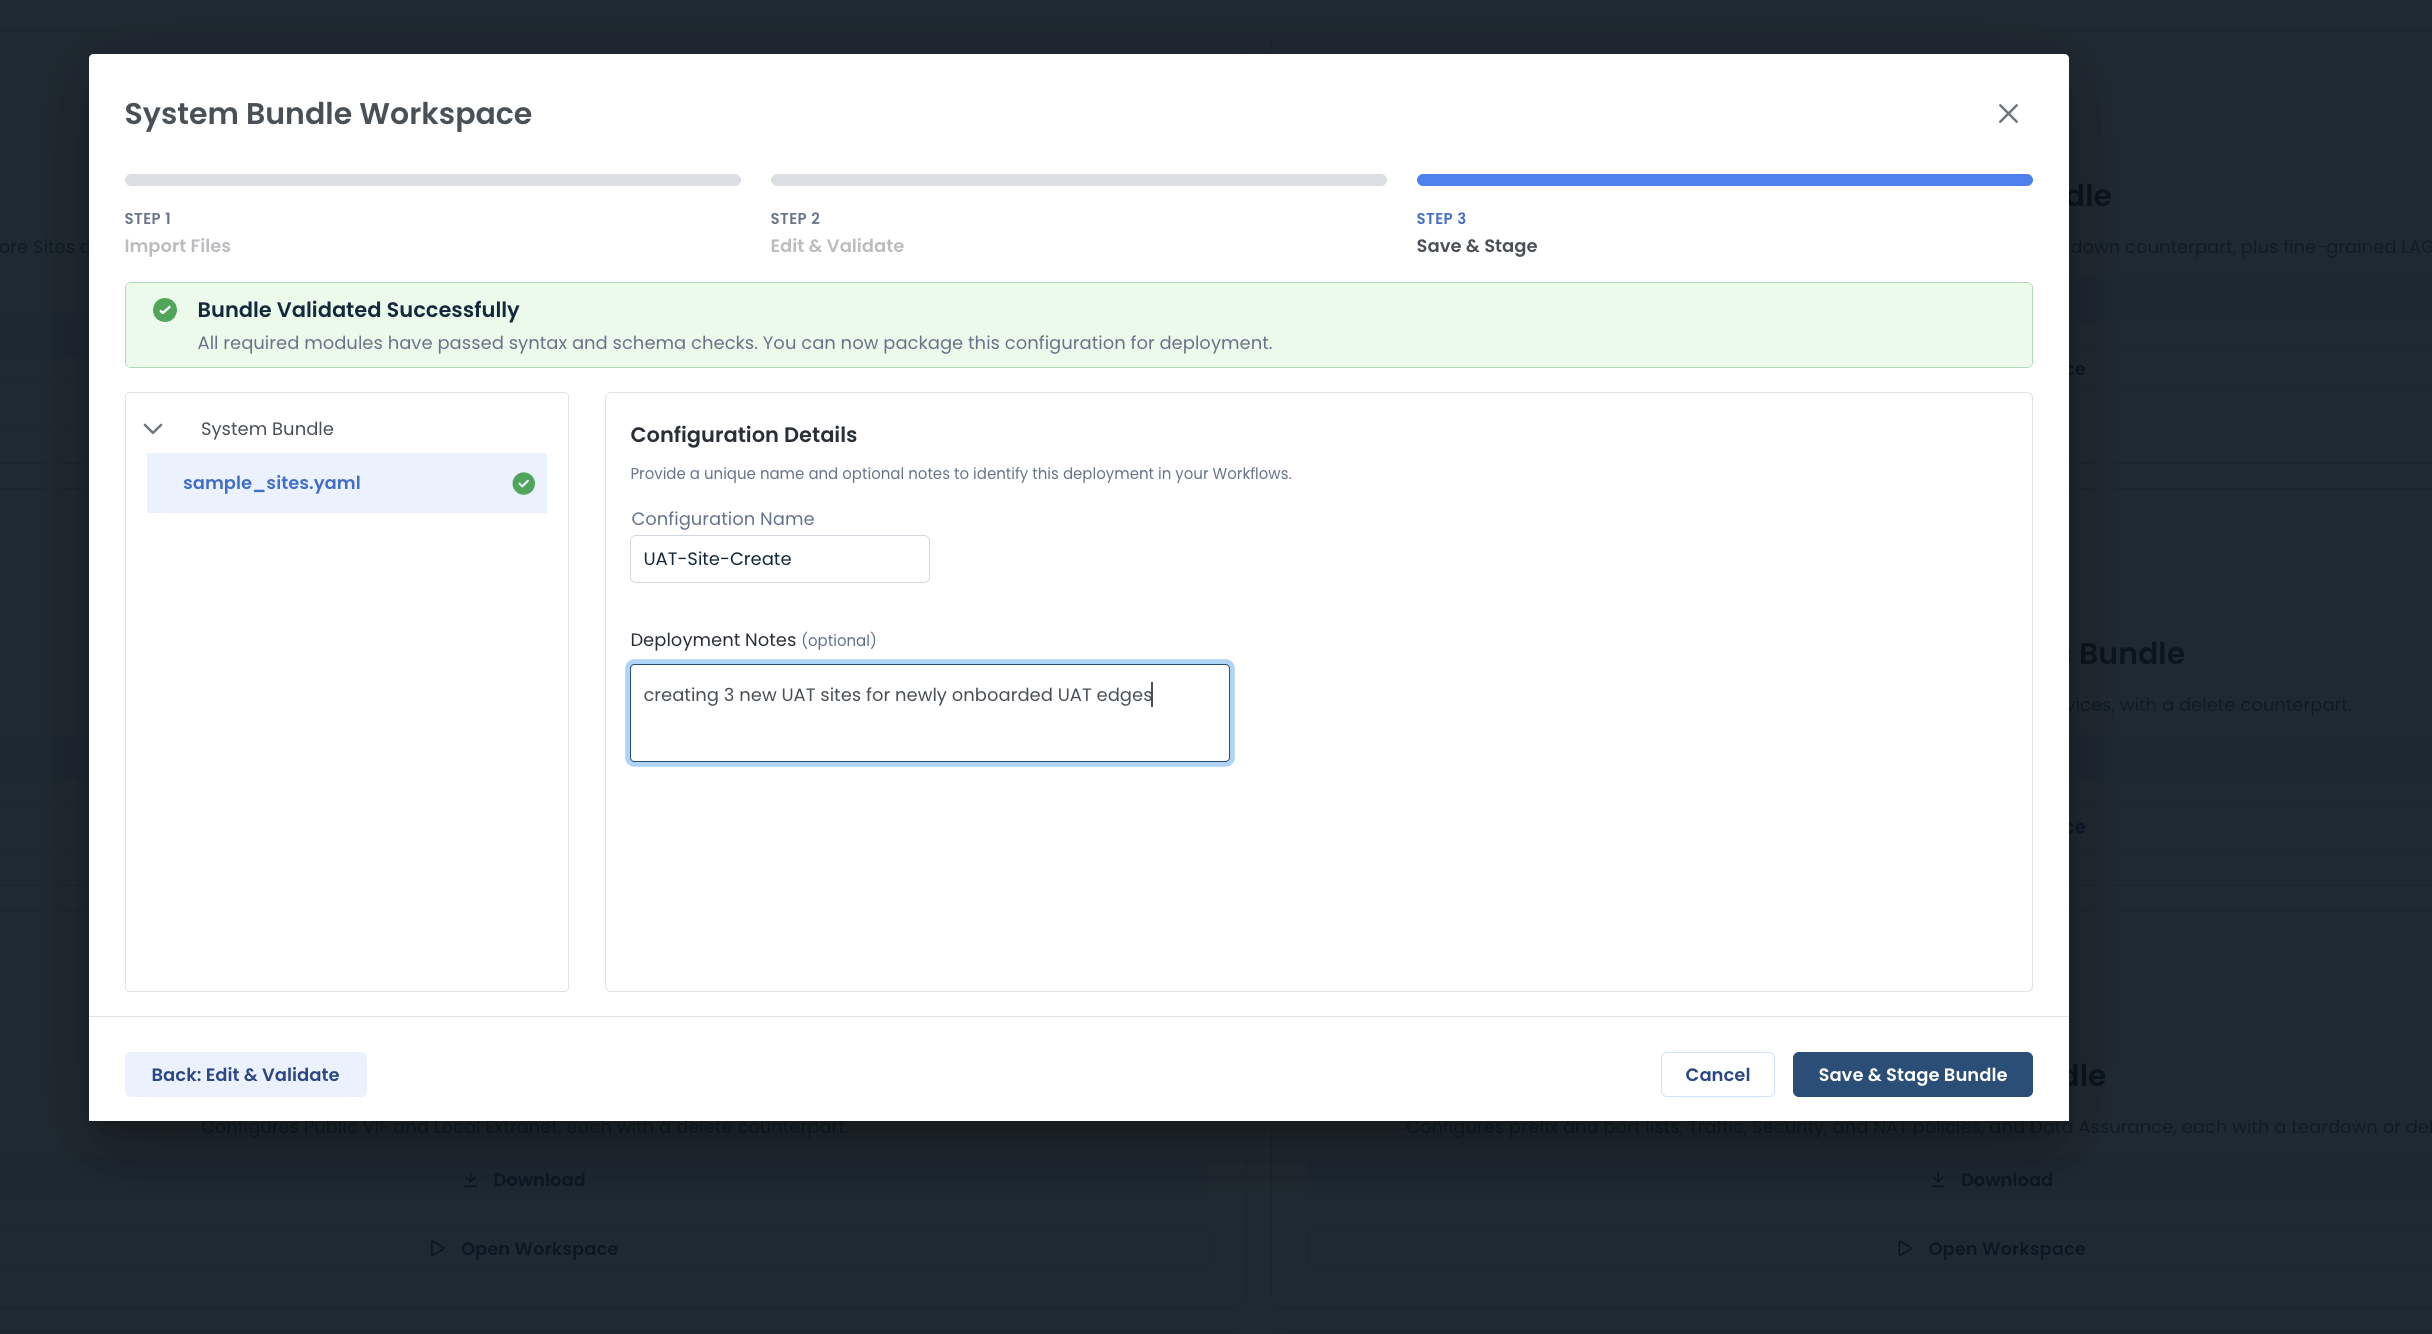
5. Save and stage. Enter a configuration name, such as UAT-Site-Create, and deployment notes. Select Save & Stage Bundle to place the bundle in Workflows.
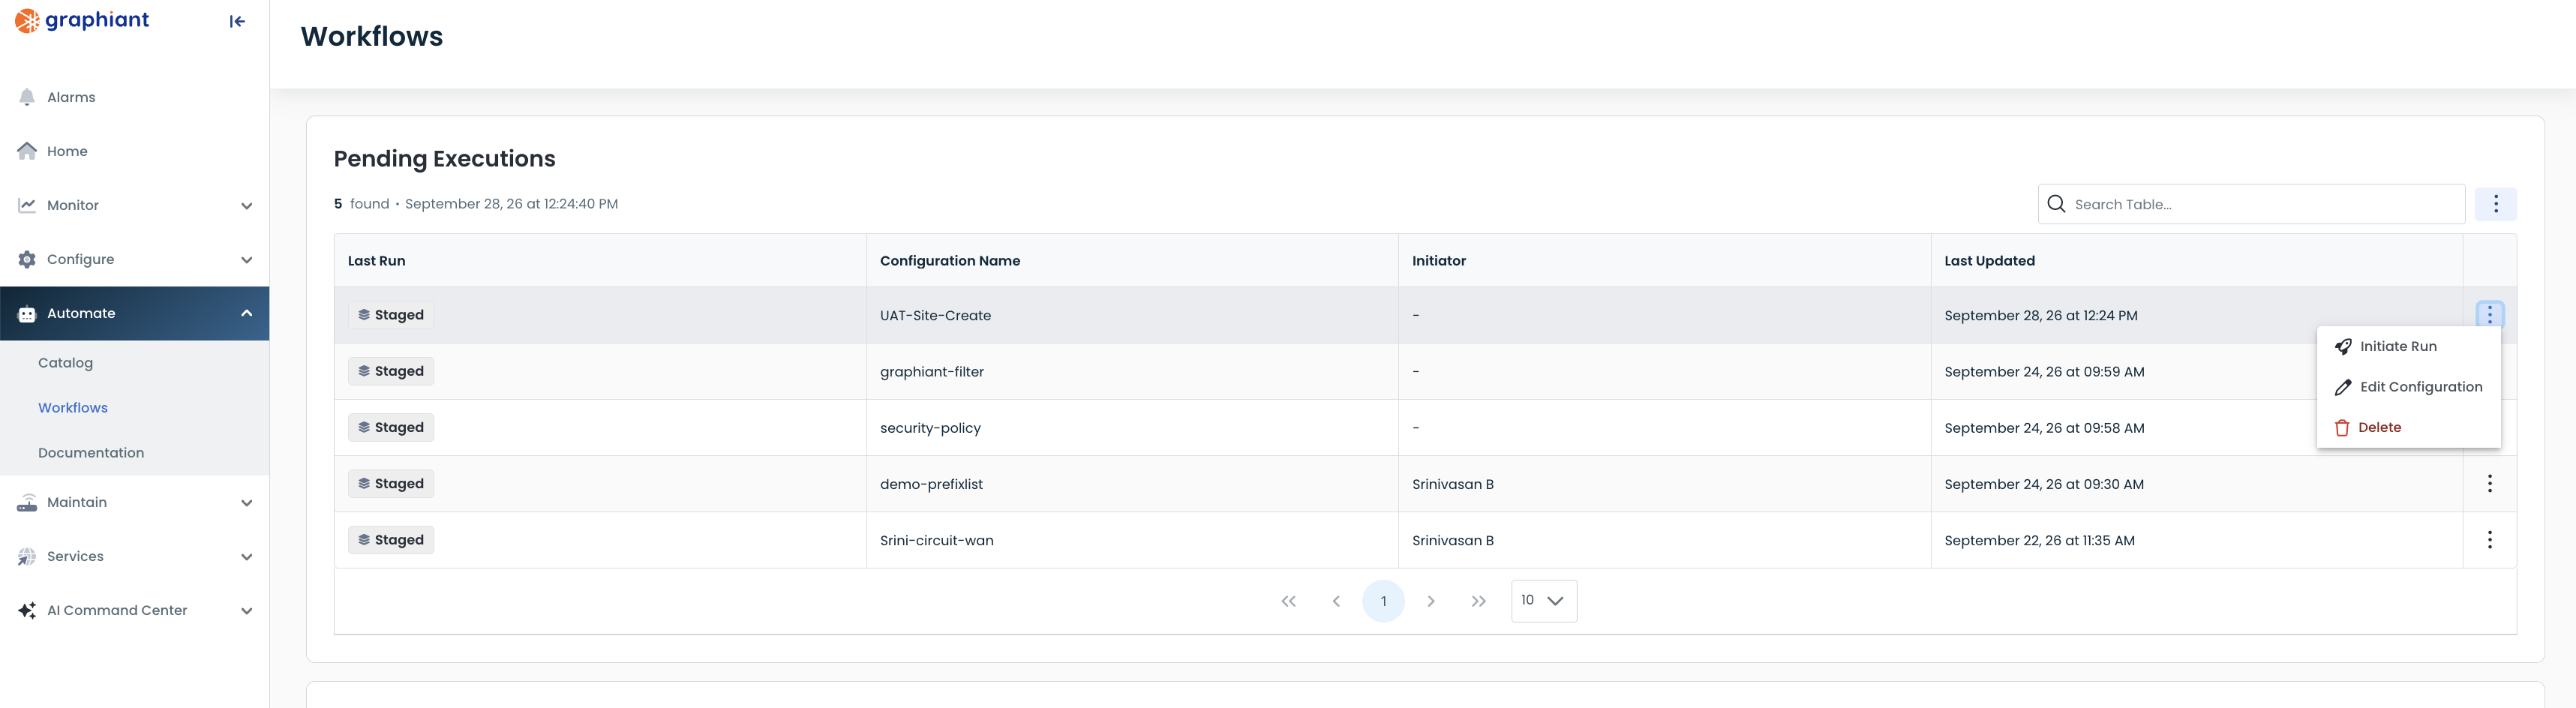
6. Find the staged task. Go to Automate → Workflows → Pending Executions. Locate UAT-Site-Create. Completed workflows that passed are removed from Pending Executions and can be viewed in Execution History.
Workflows
For a pending task, you can initiate the run, edit its configuration before execution, or delete the pending workflow. Review the configuration before starting.
7. Initiate the run. Choose the run action. In the Initiate Run dialog, optionally select Enable Debug Mode (Verbose Logs), then select Start Verification. The mandatory dry run begins; live changes wait for a separate approval.
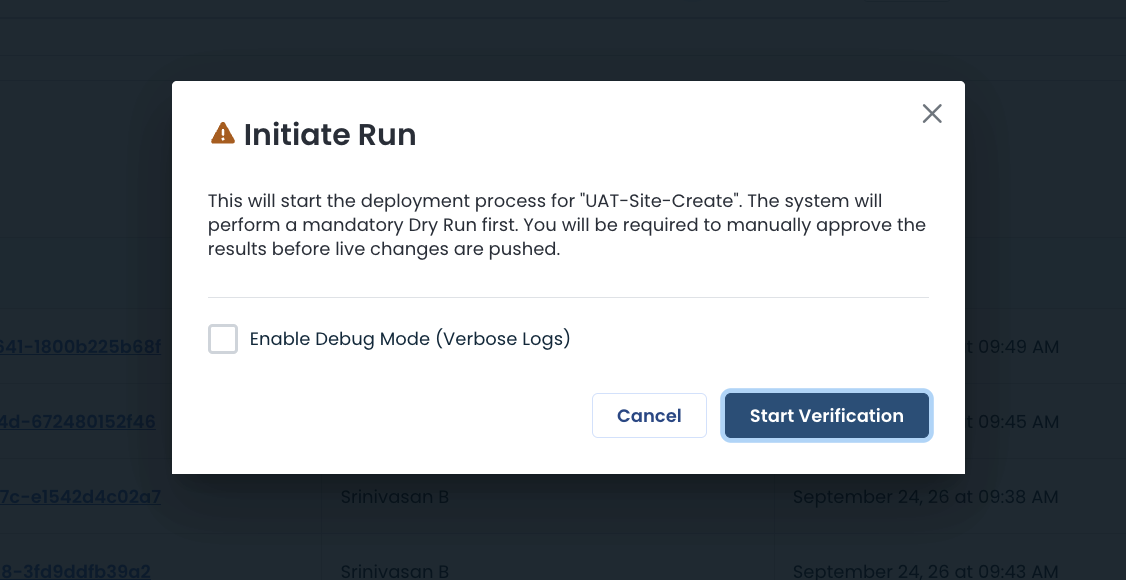
The initiation dialog offers optional debug logs and starts verification.
Dry Run
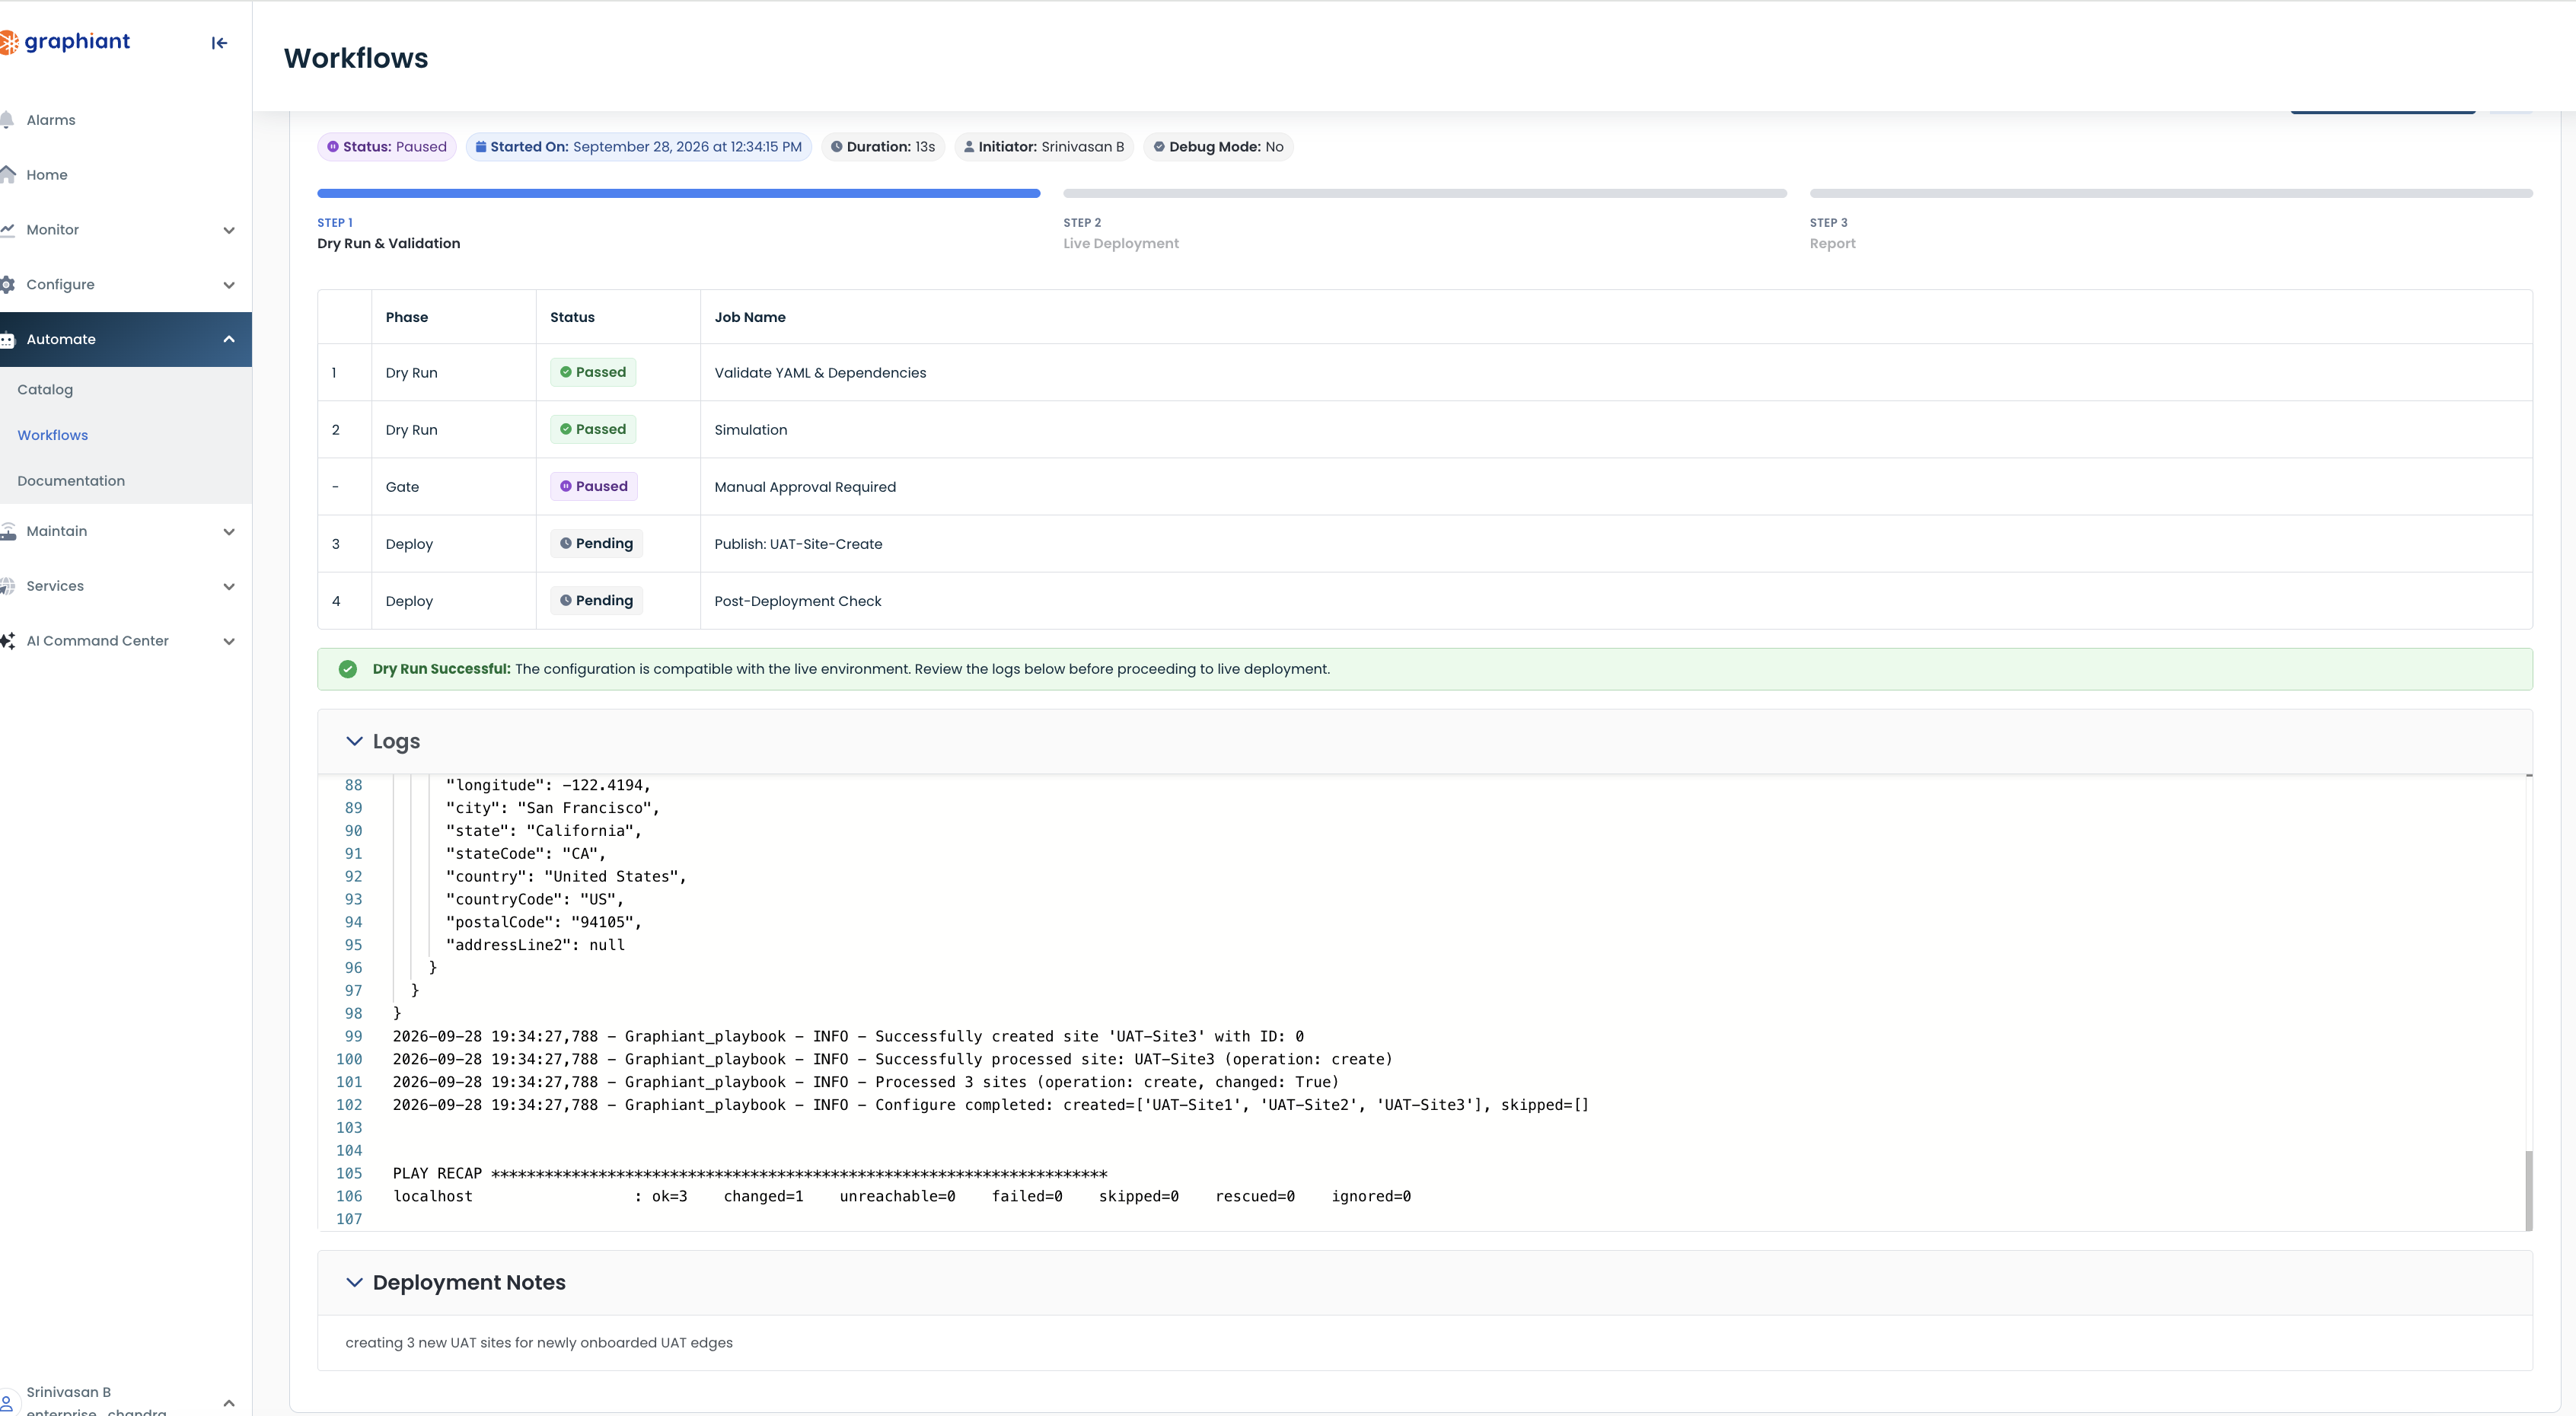
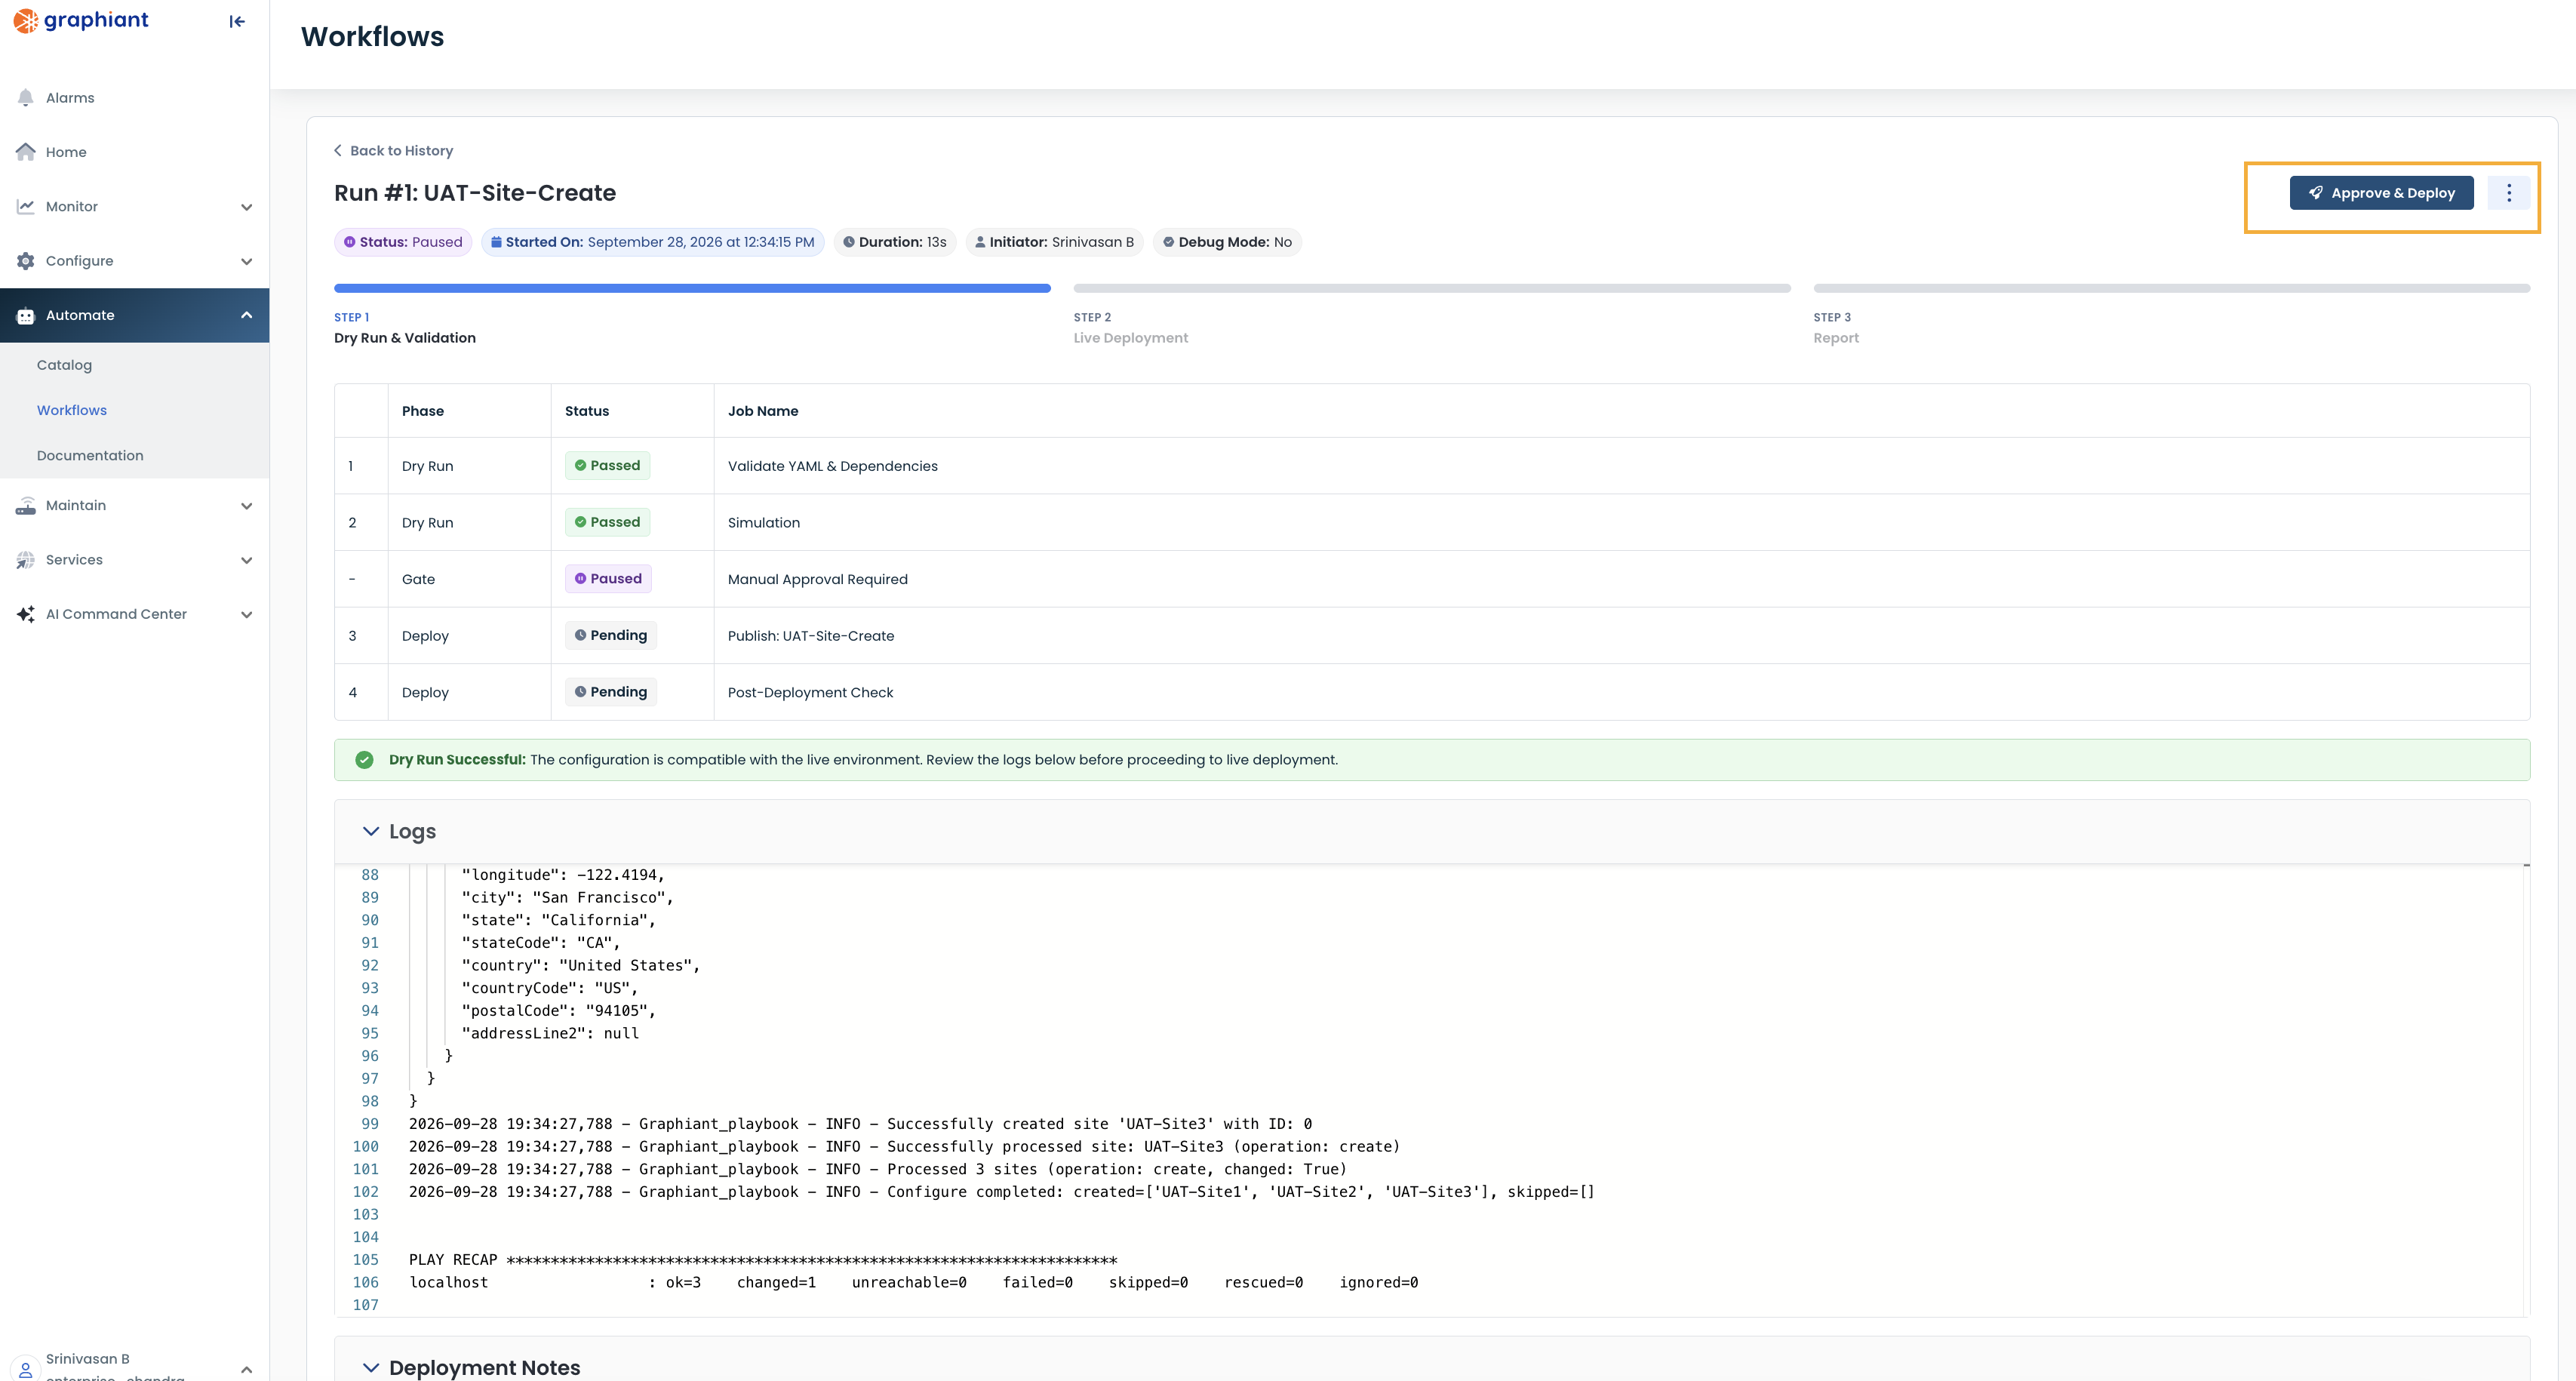
The run first validates YAML and dependencies, then simulates and validates the configuration. Use the run details and logs to review these results. When both dry run jobs pass, the run pauses at Manual Approval Required.
Approve and Deploy
8. Review the dry run Confirm that the dry run succeeded and inspect the logs and intended changes. Select Approve & Deploy when ready to make the live change.
9. Confirm live deployment In the Approve Live Deployment dialog, select Deploy to Production. This confirmation authorizes the live configuration change.
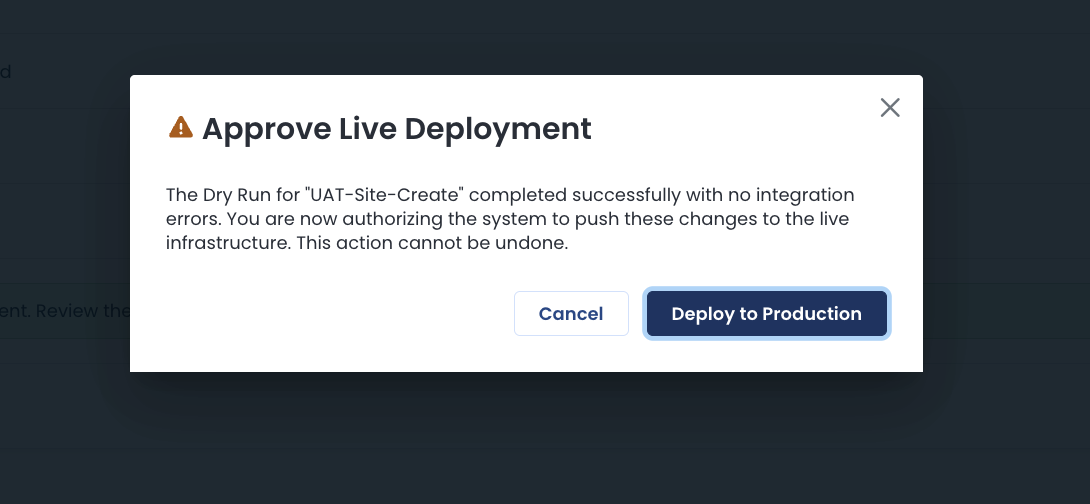
The confirmation dialog warns that the live action cannot be undone.
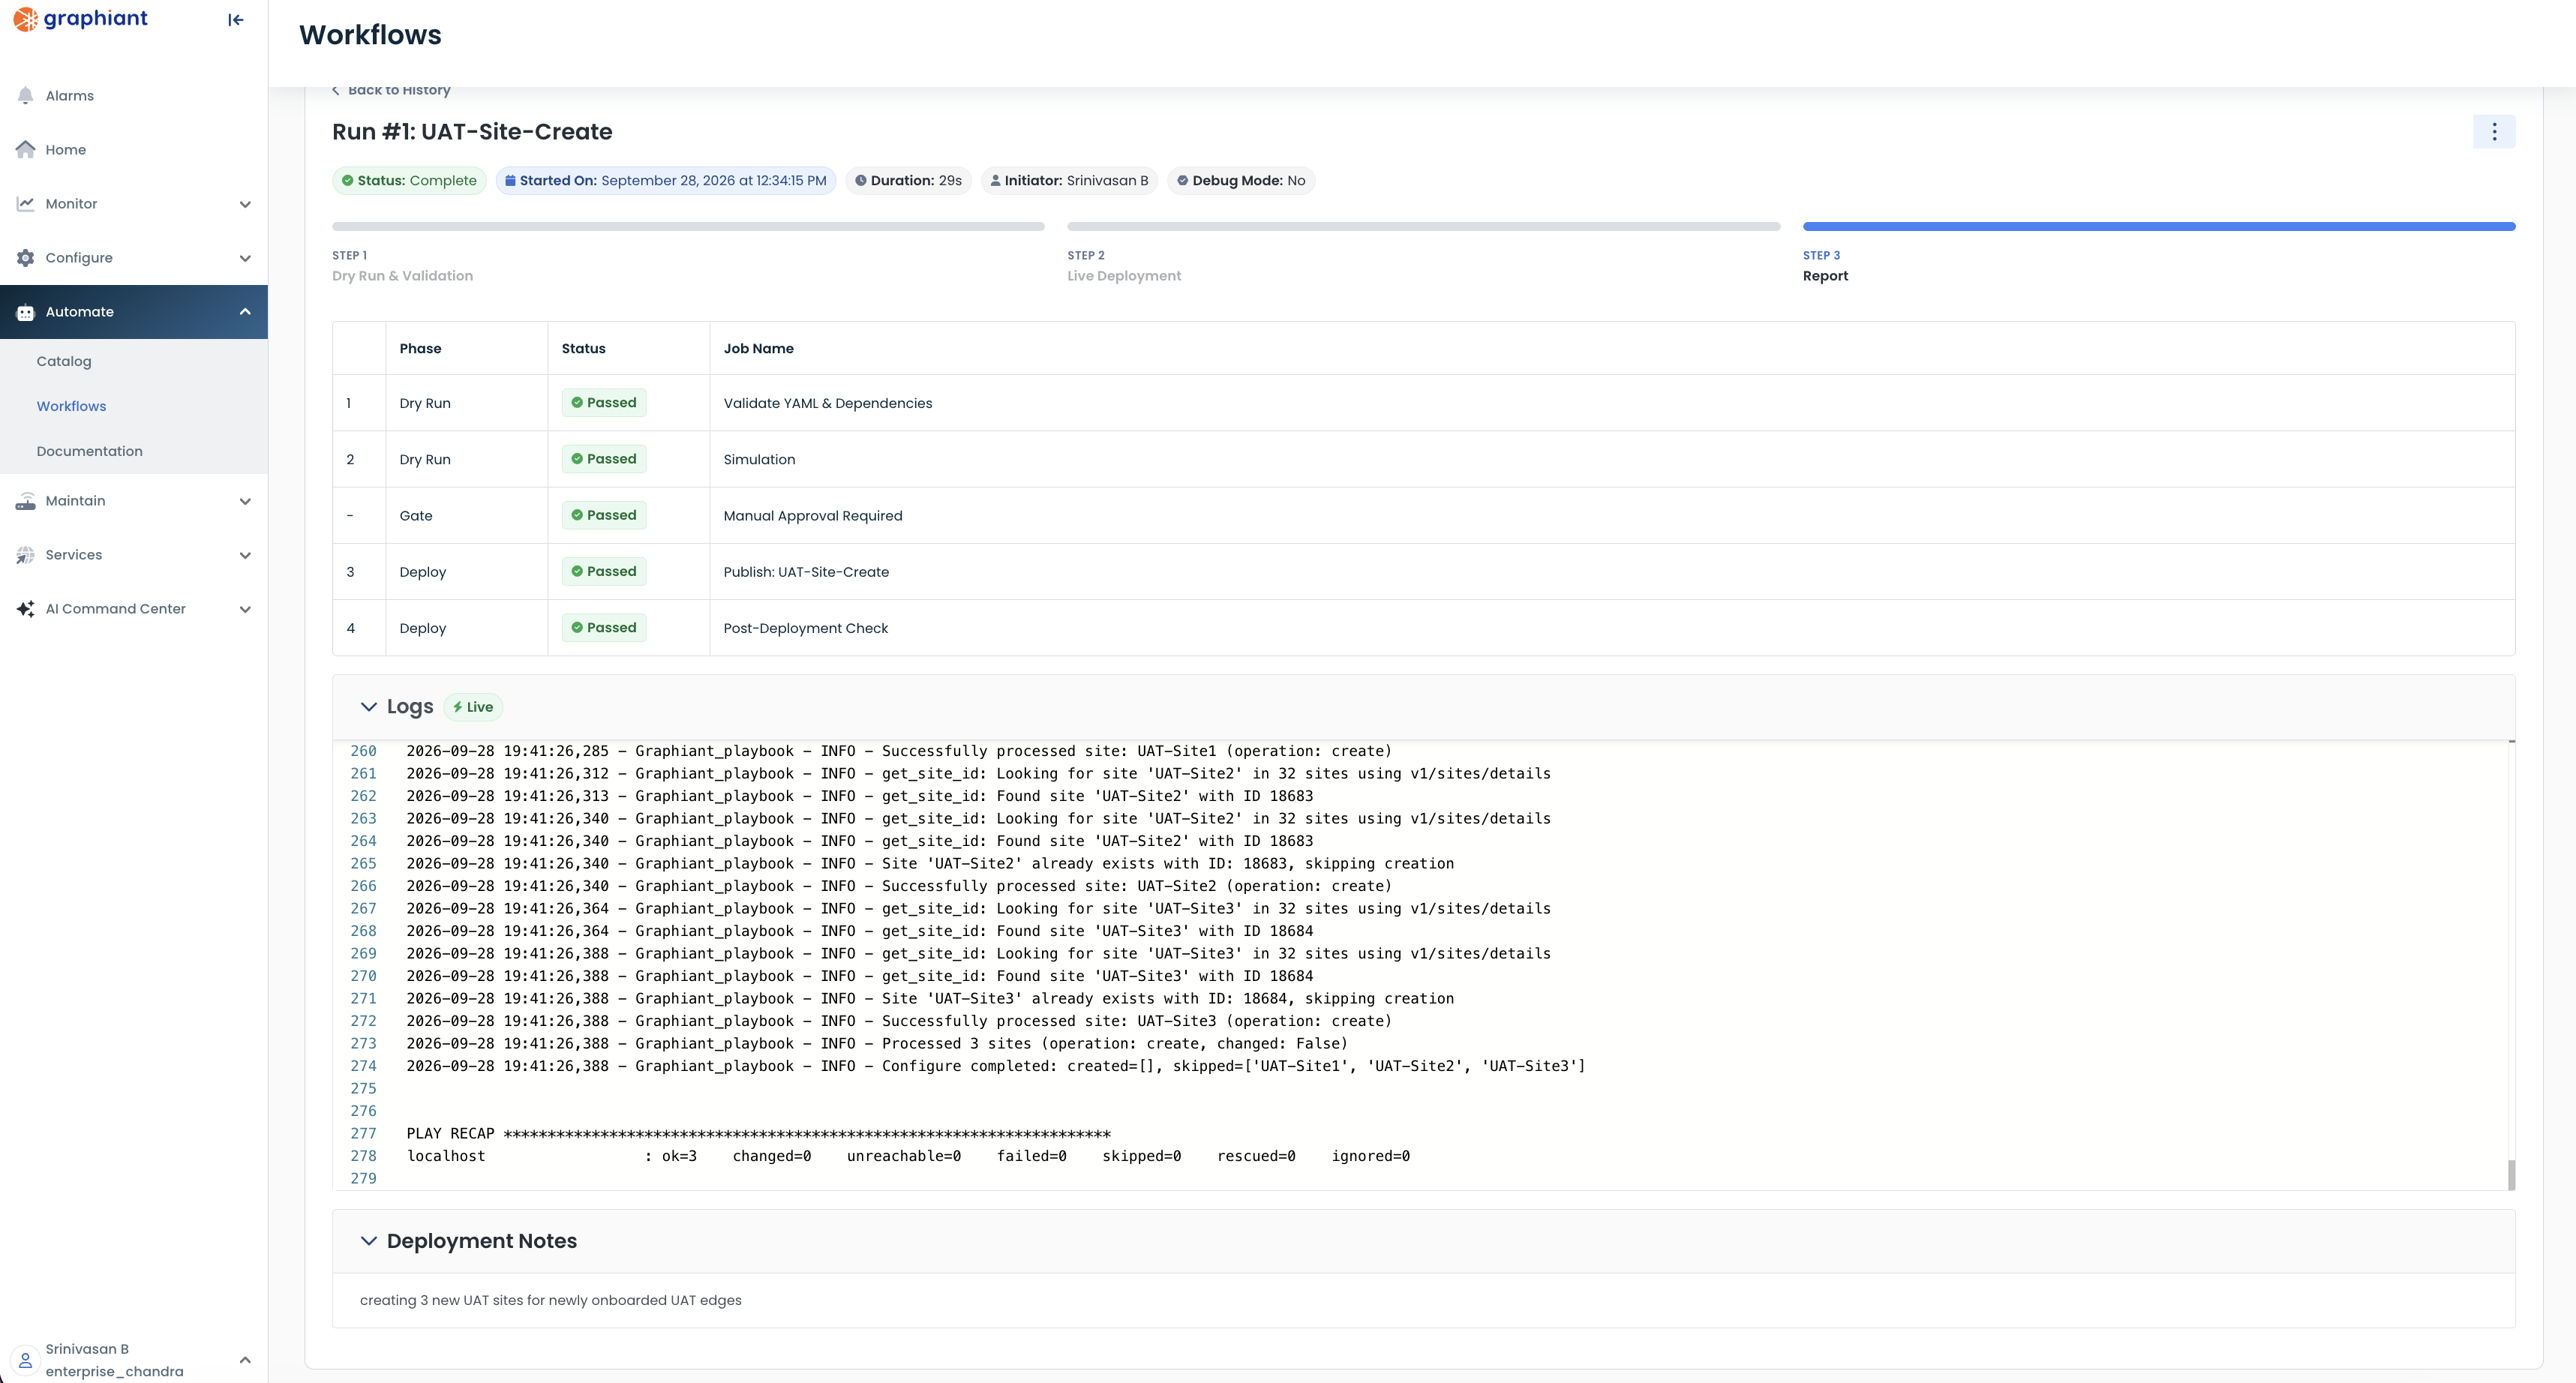
10. Check the result. Watch the Publish job and Post-Deployment Check. A successful run shows both deploy jobs as Passed and the overall status as Complete. Review the logs and execution history for the record of the run.
Execution History
In Execution History, a successful run marked Complete offers Download Logs and View Source YAML. It has no Re-run action. A Failed run offers those two actions plus Re-run.
Completed Run
.png)
Failed Run
.png)
Documentation
The Documentation page collects Getting Started material, Configuration Playbooks, Power Users resources, and Installation Modules.
