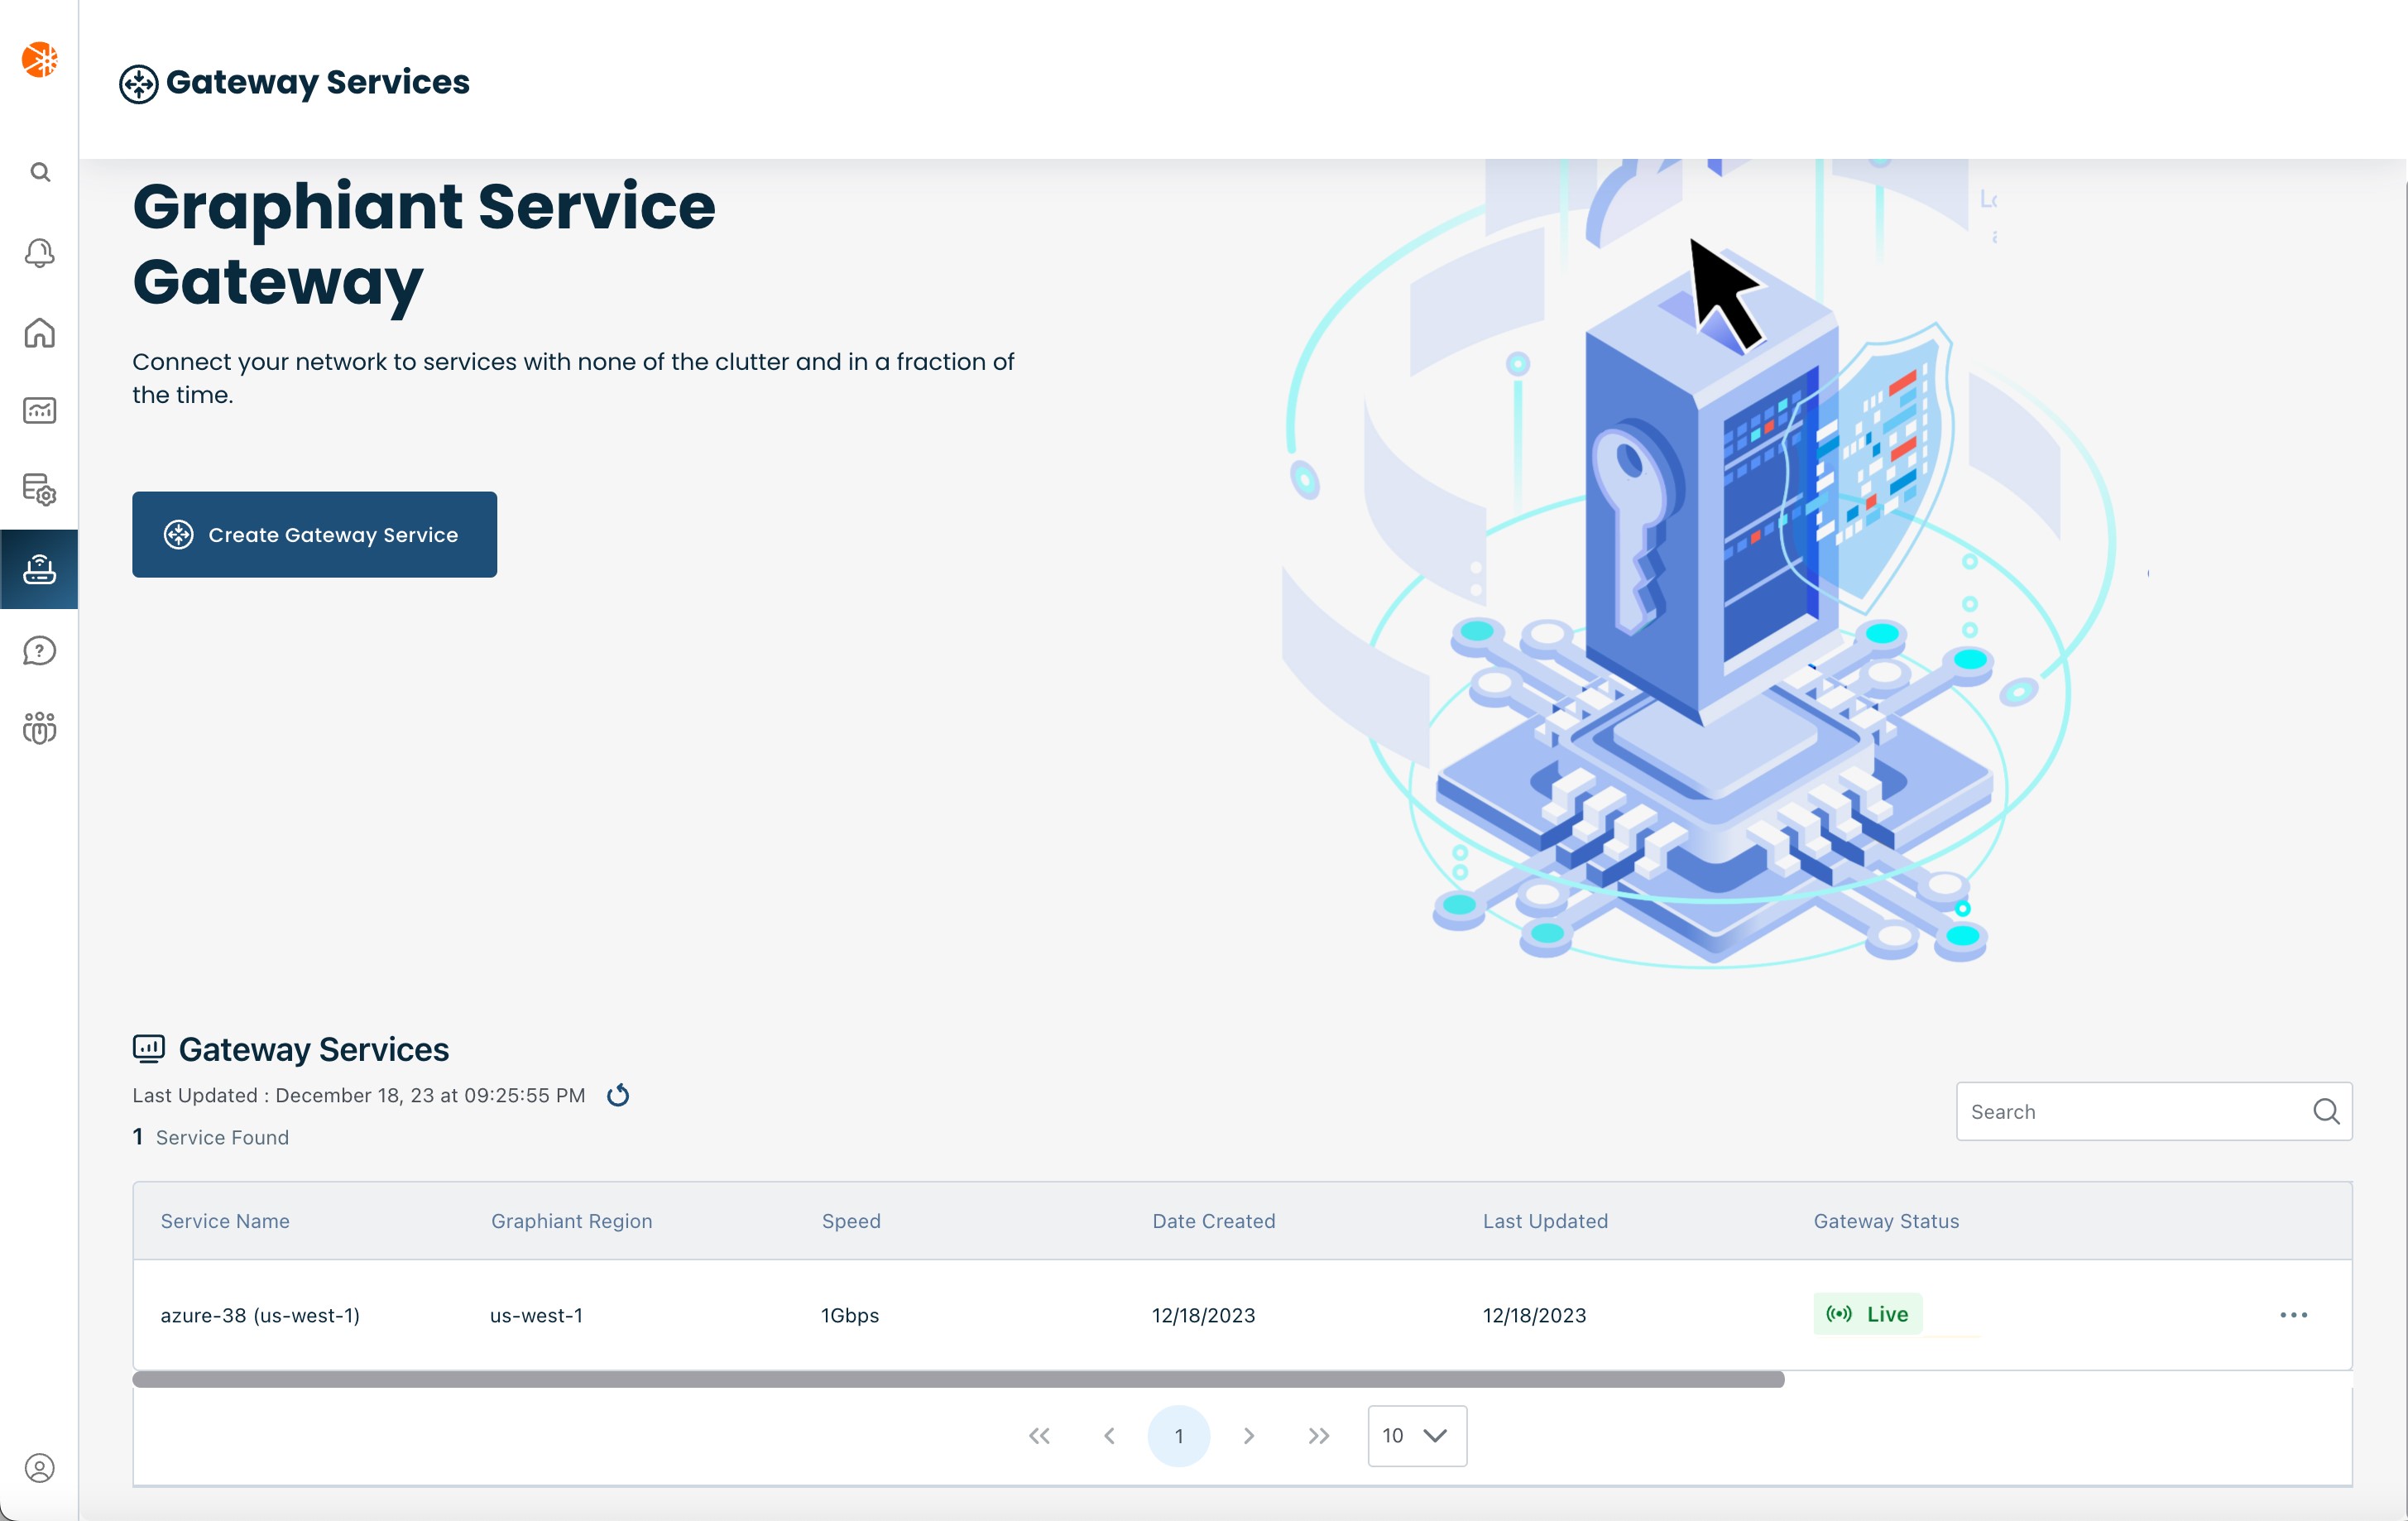
What is the Graphiant Gateway service?
The Graphiant Gateway allows you to connect your on-premises Graphiant network to your public cloud workloads, using a private connection. It is the preferred way to connect your Graphiant on-premises, cloud and multi-cloud environments together to create a hybrid network. This document explains how to setup the Graphiant Gateway service and connect it your Azure ExpressRoute.
To learn more about the Graphiant Gateway service check out the Gateway Overview.
The first step in creating the gateway service for Azure is to create the Expressroute in the Azure portal.
Note:
Any needed Azure VNets will need to have been created (along with any subnets and associated route tables) to be accessible by the Graphiant network.
Building Cloud Connectivity in Azure
Step 1: Creating an ExpressRoute in Azure
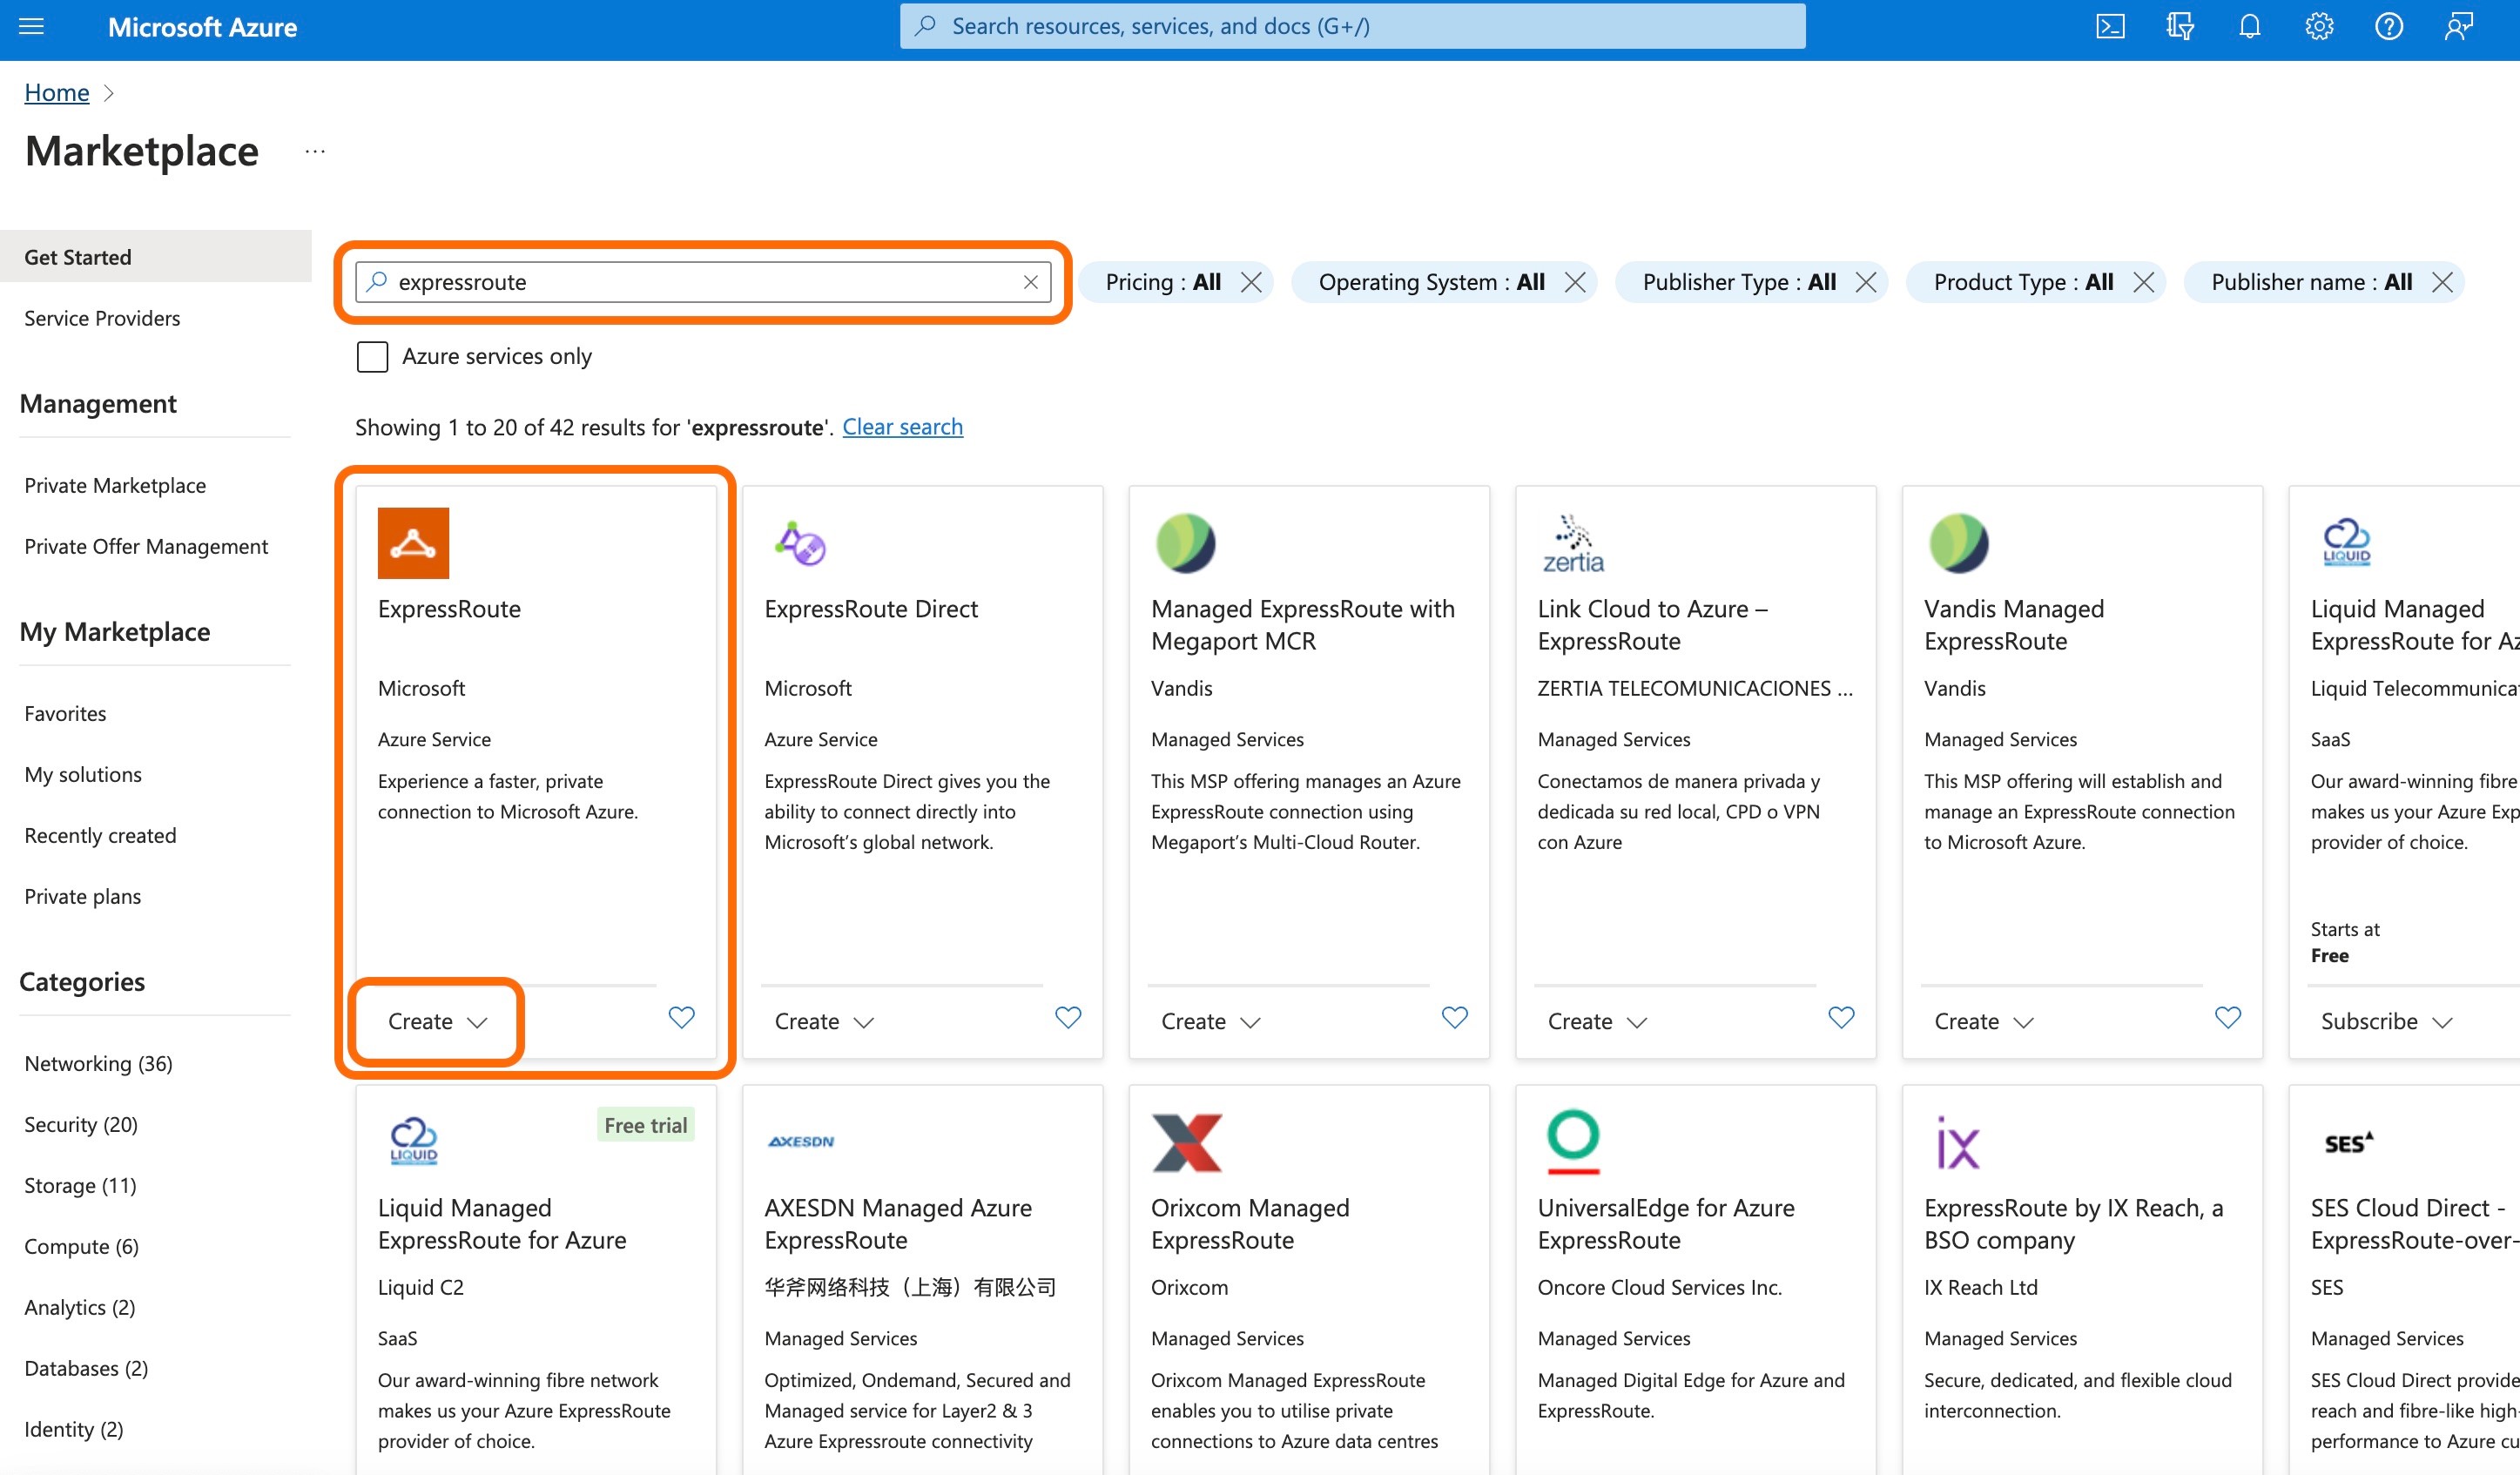
Log into the Azure Portal, and go to the Marketplace.
Type 'ExpressRoute' in the search window.
Select 'ExpressRoute' from the options presented.
Click on 'Create' within the ExpressRoute box.
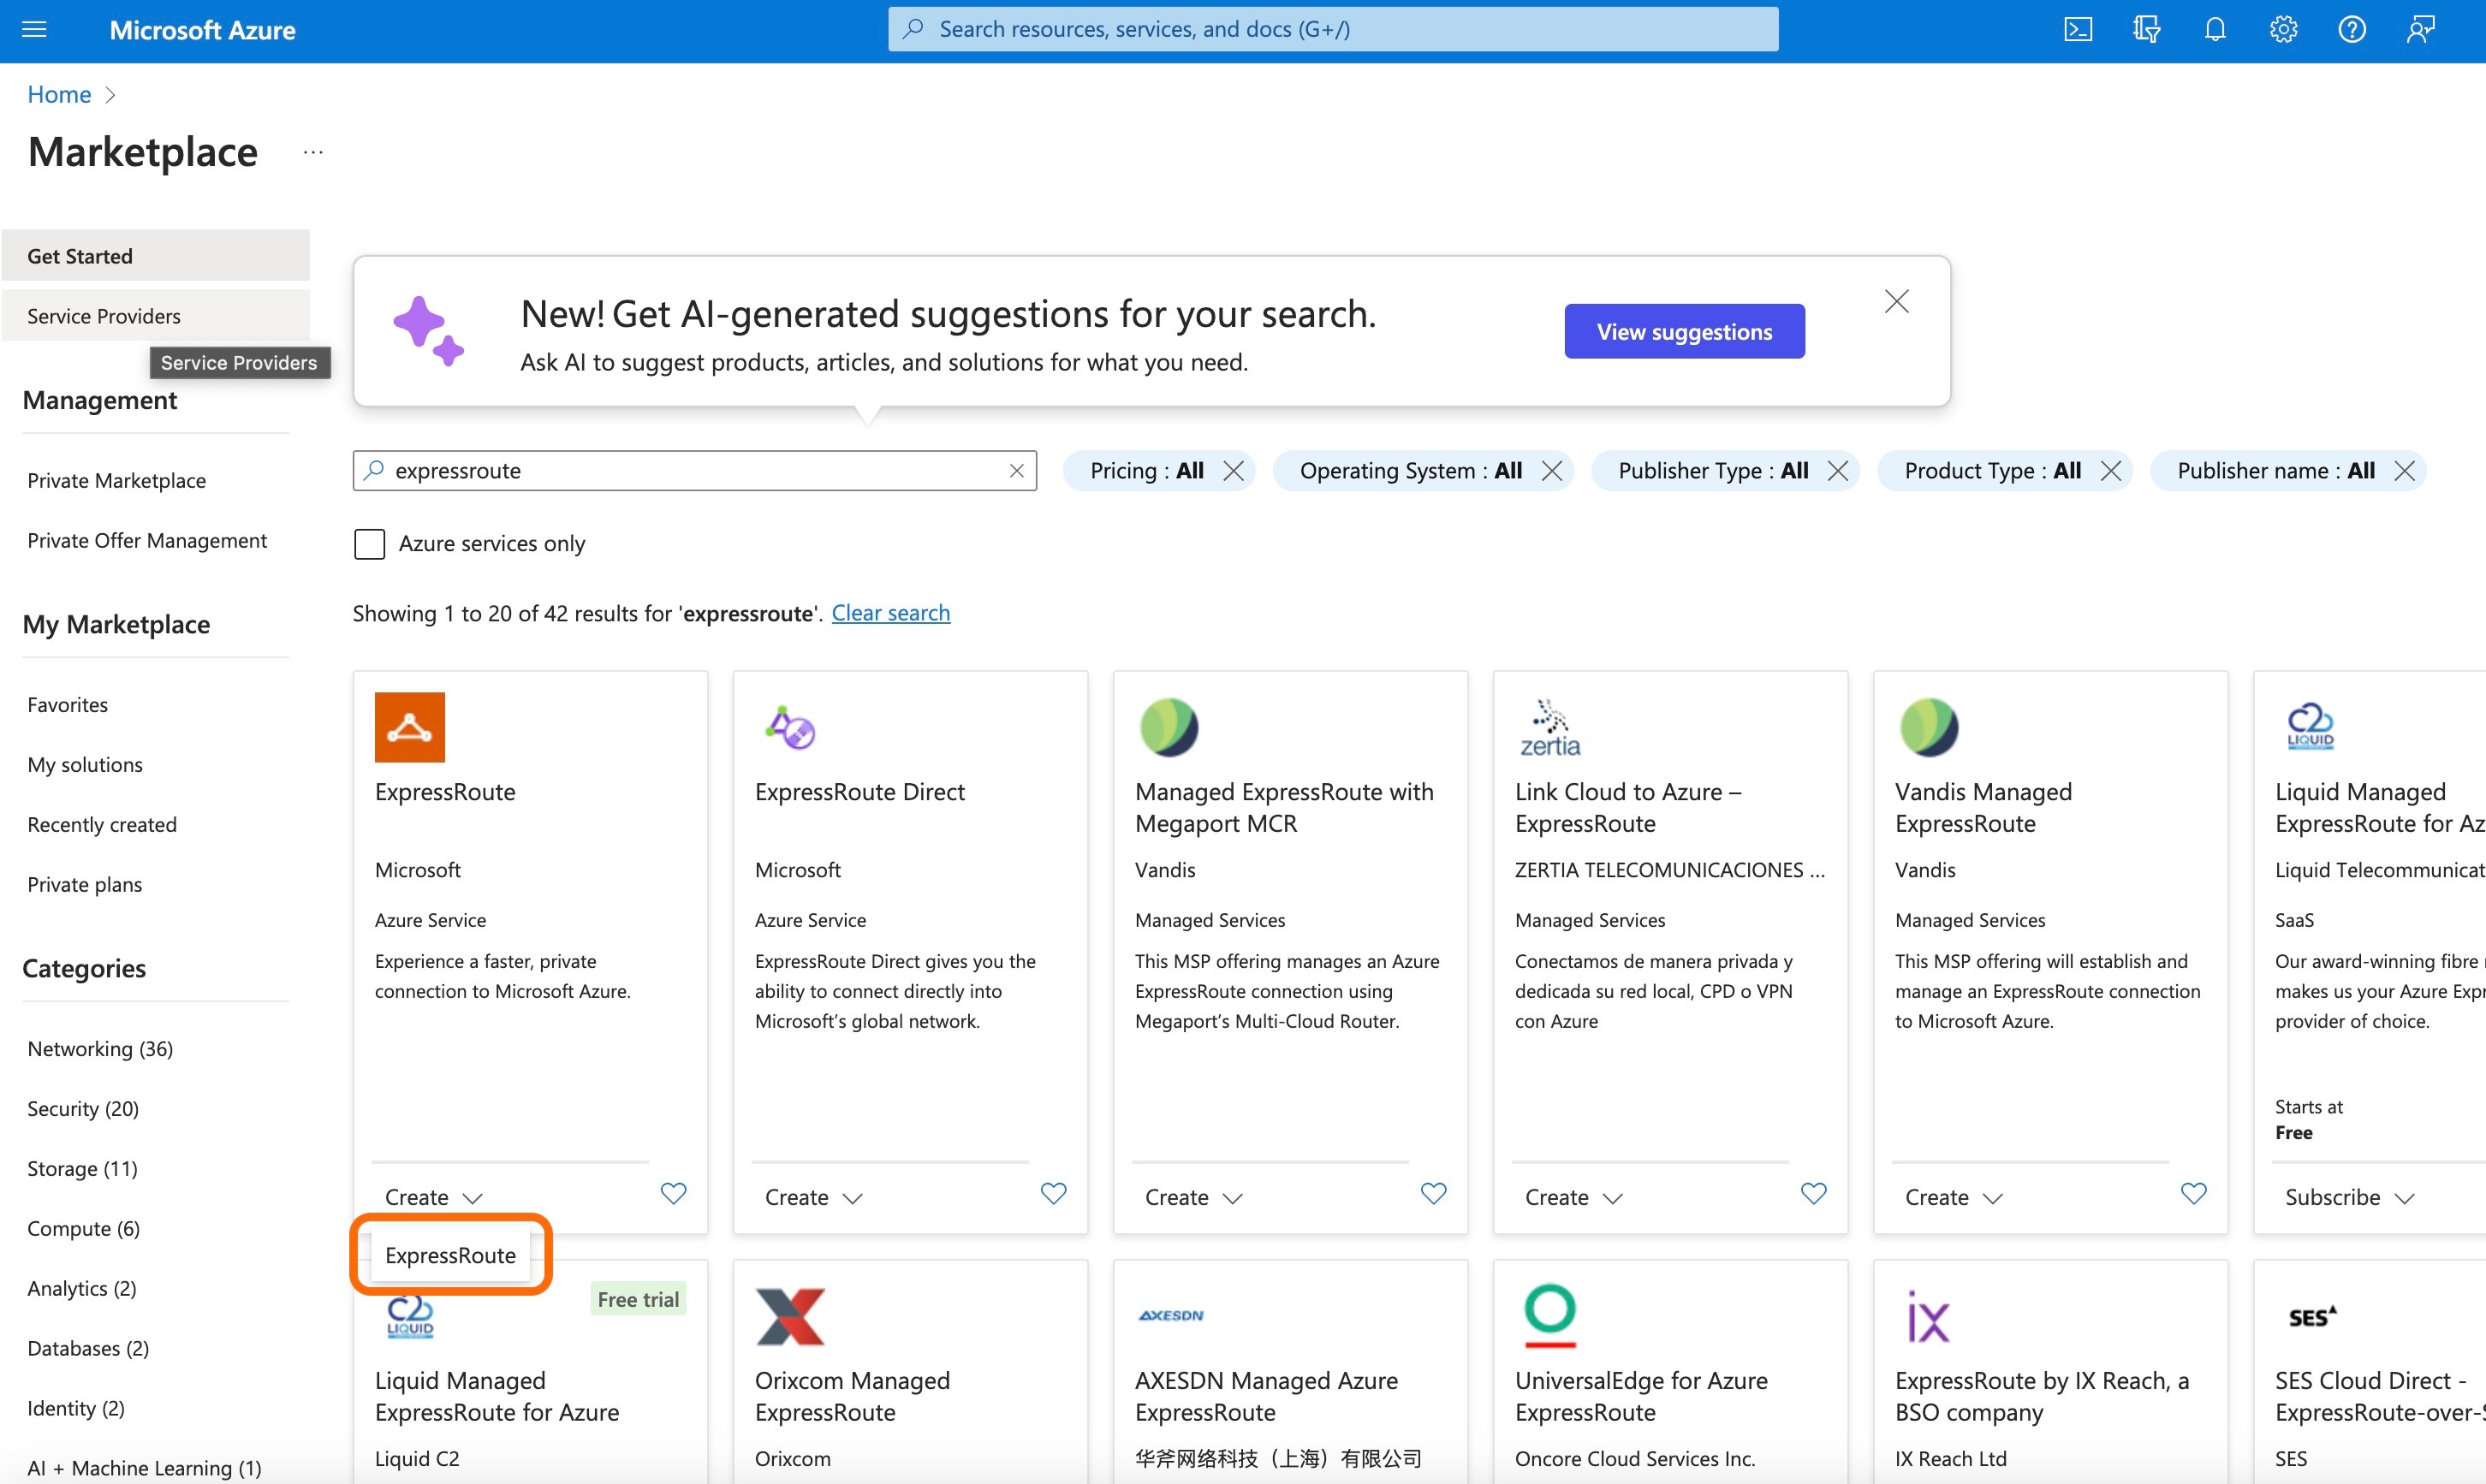
Click 'ExpressRoute' from the drop-down.
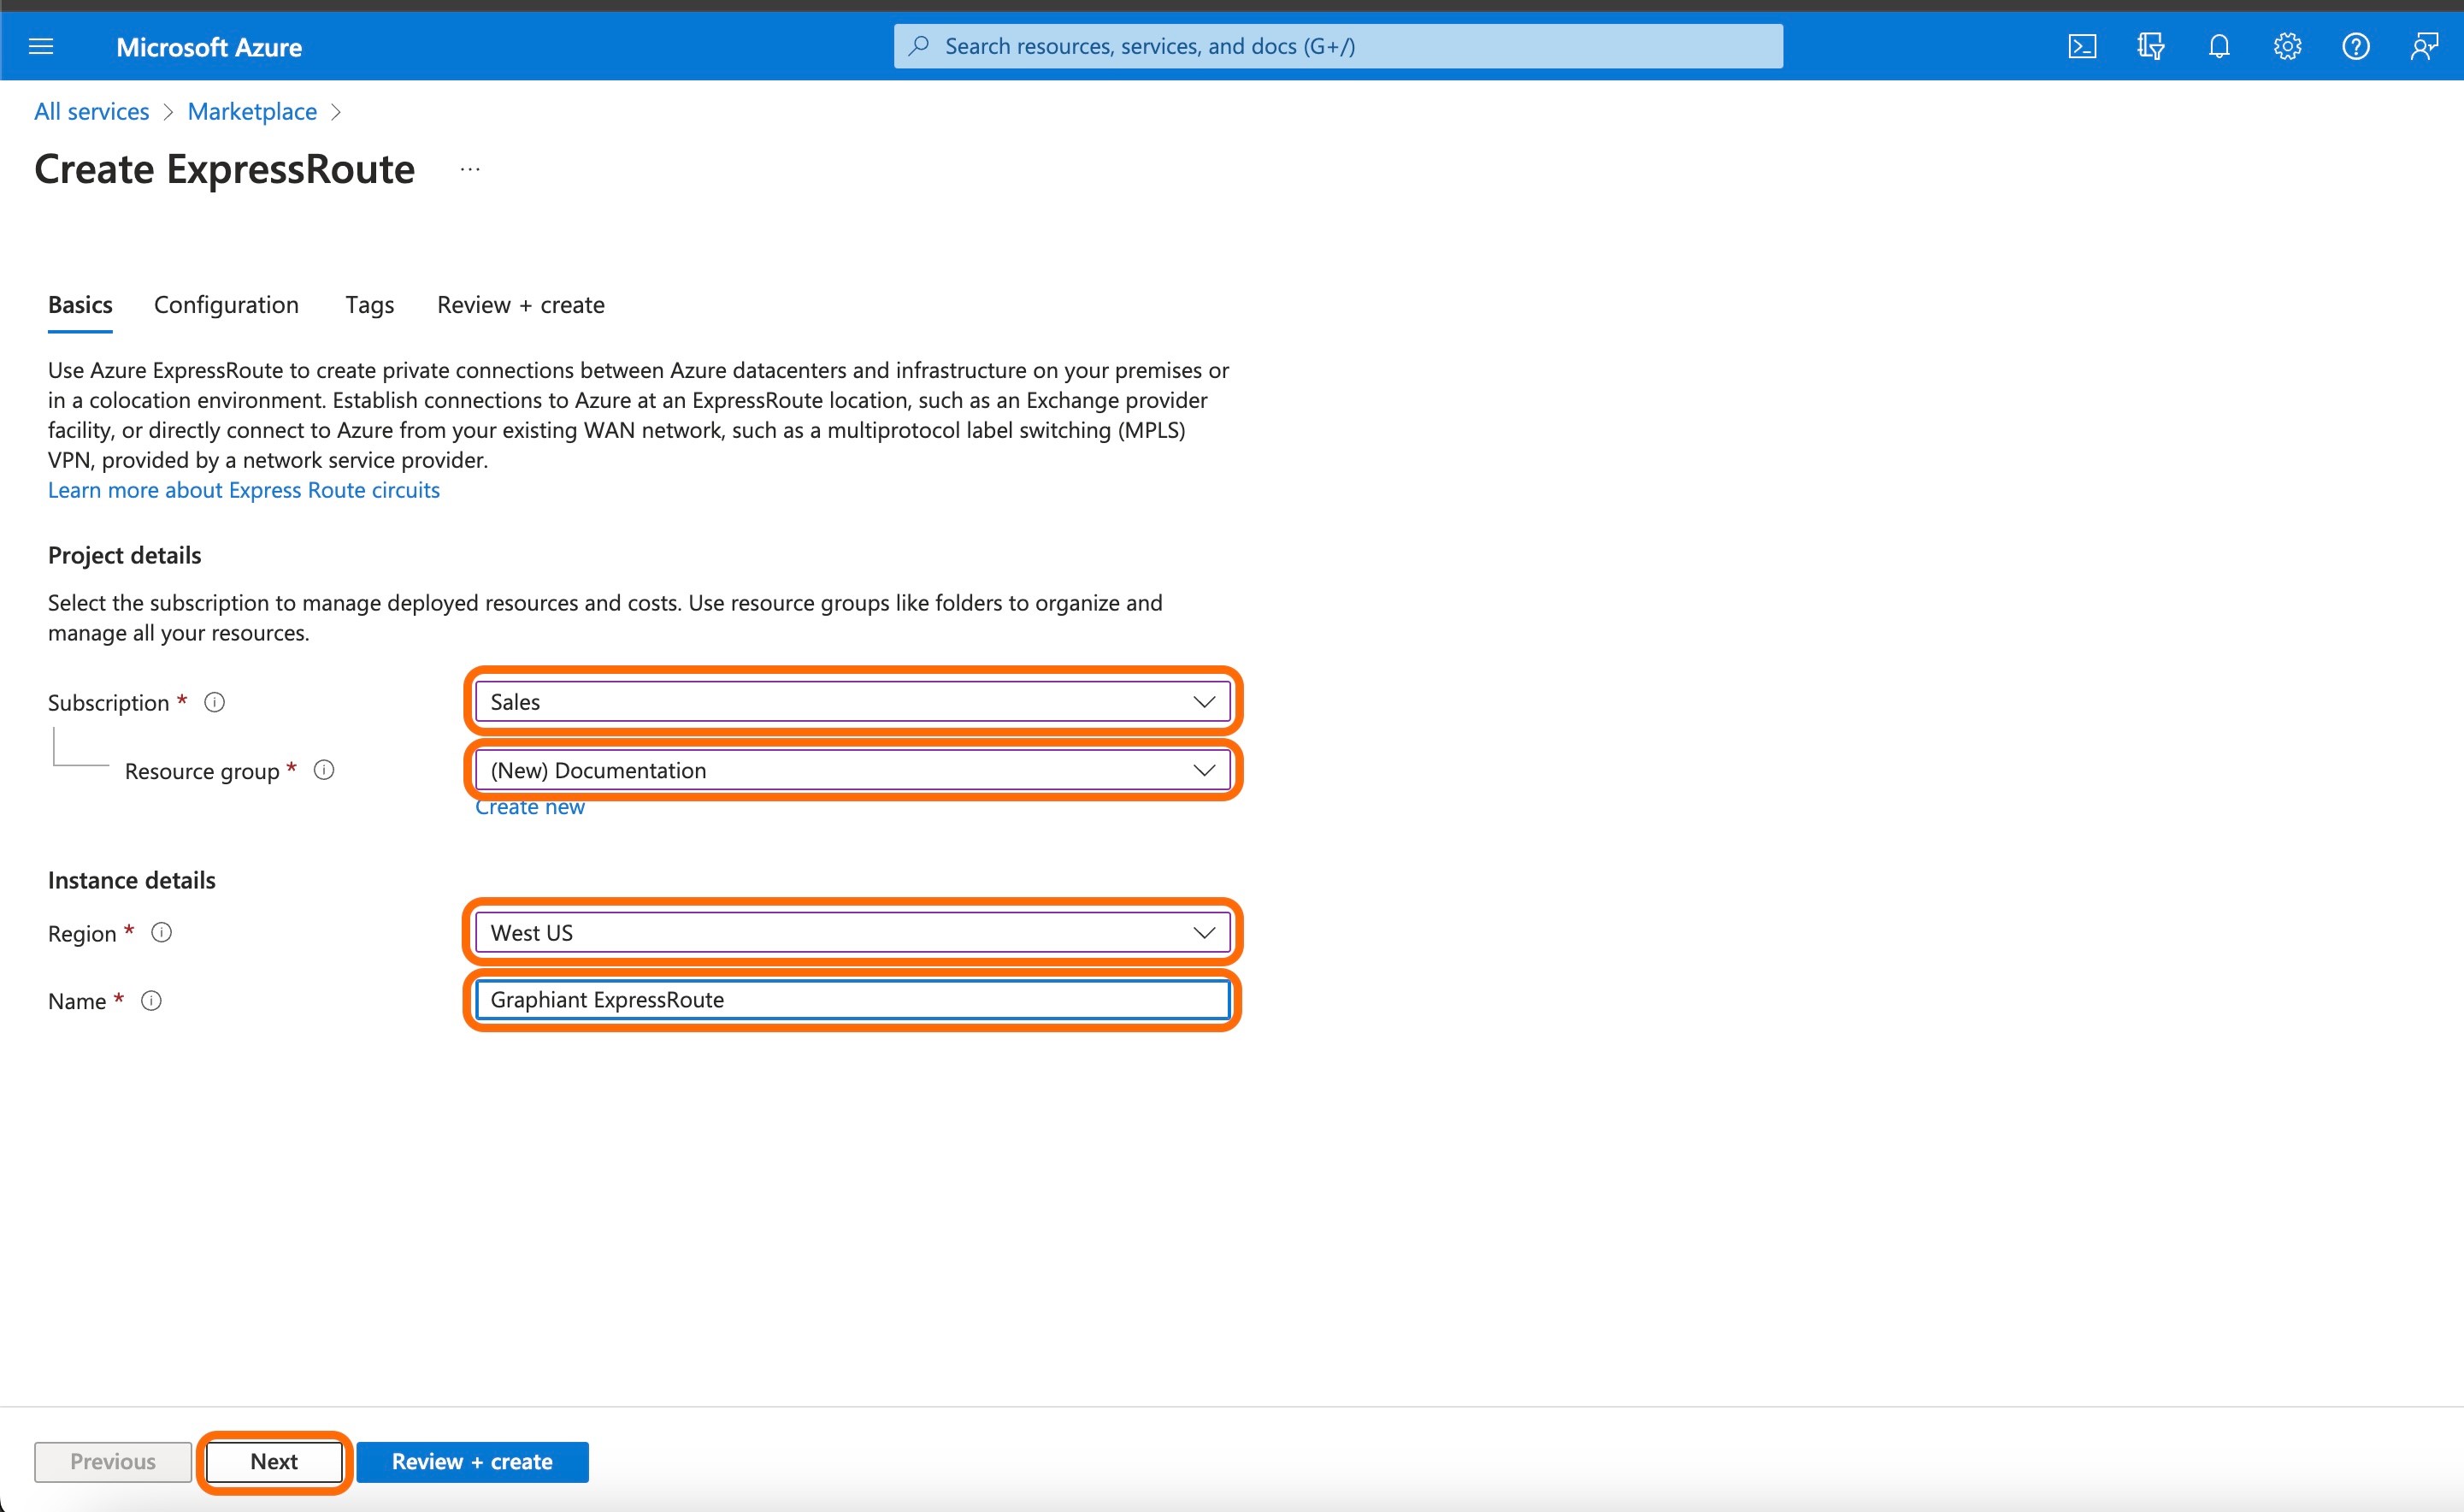
Complete the following fields:
Subscription: The appropriate subscription from the drop-down.
Resource Group: The appropriate resource group from the drop-down / 'Create new'.
Region: Select the desired Azure region from the drop-down.
Name: The name for the ExpressRoute.
Click 'Next'.
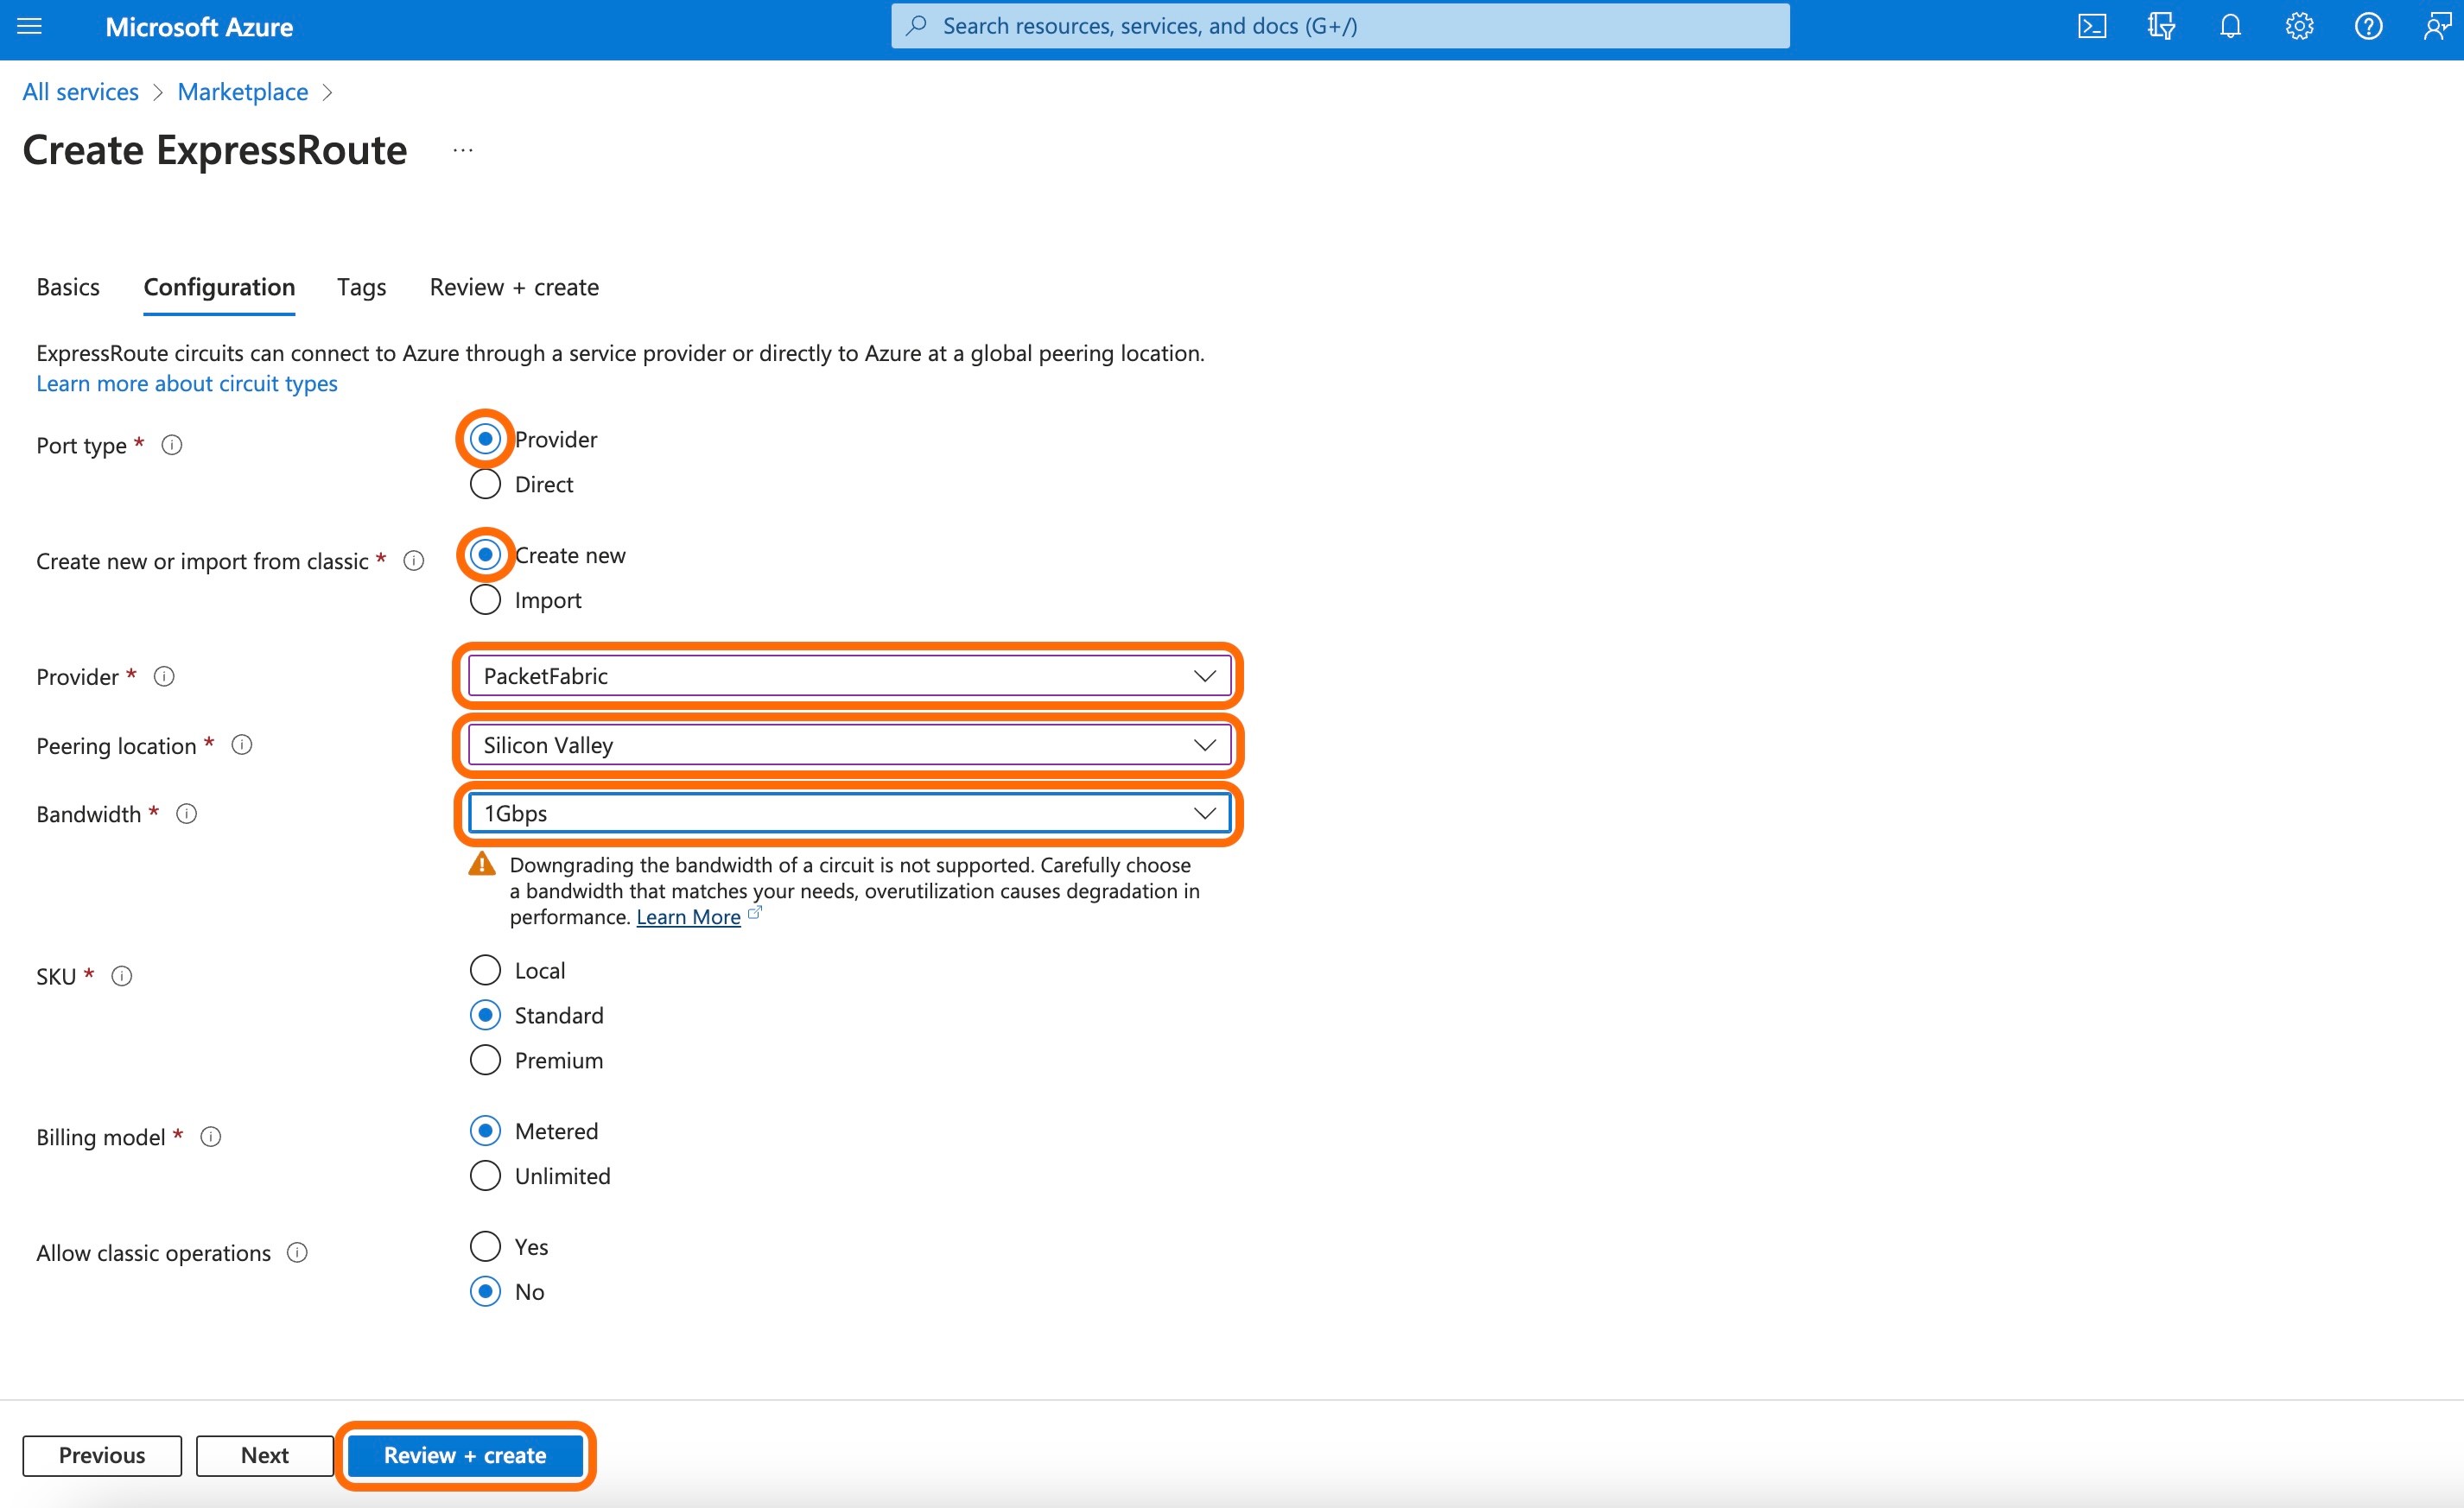
Complete the following fields:
Port type: Select "Provider".
Create new or import from classic: Select "Create new".
Provider: Choose "PacketFabric" from the drop-down.
Peering location: Select the desired location from the drop-down.
Bandwidth: select the desired bandwidth from the drop-down.
Click 'Review + create'.
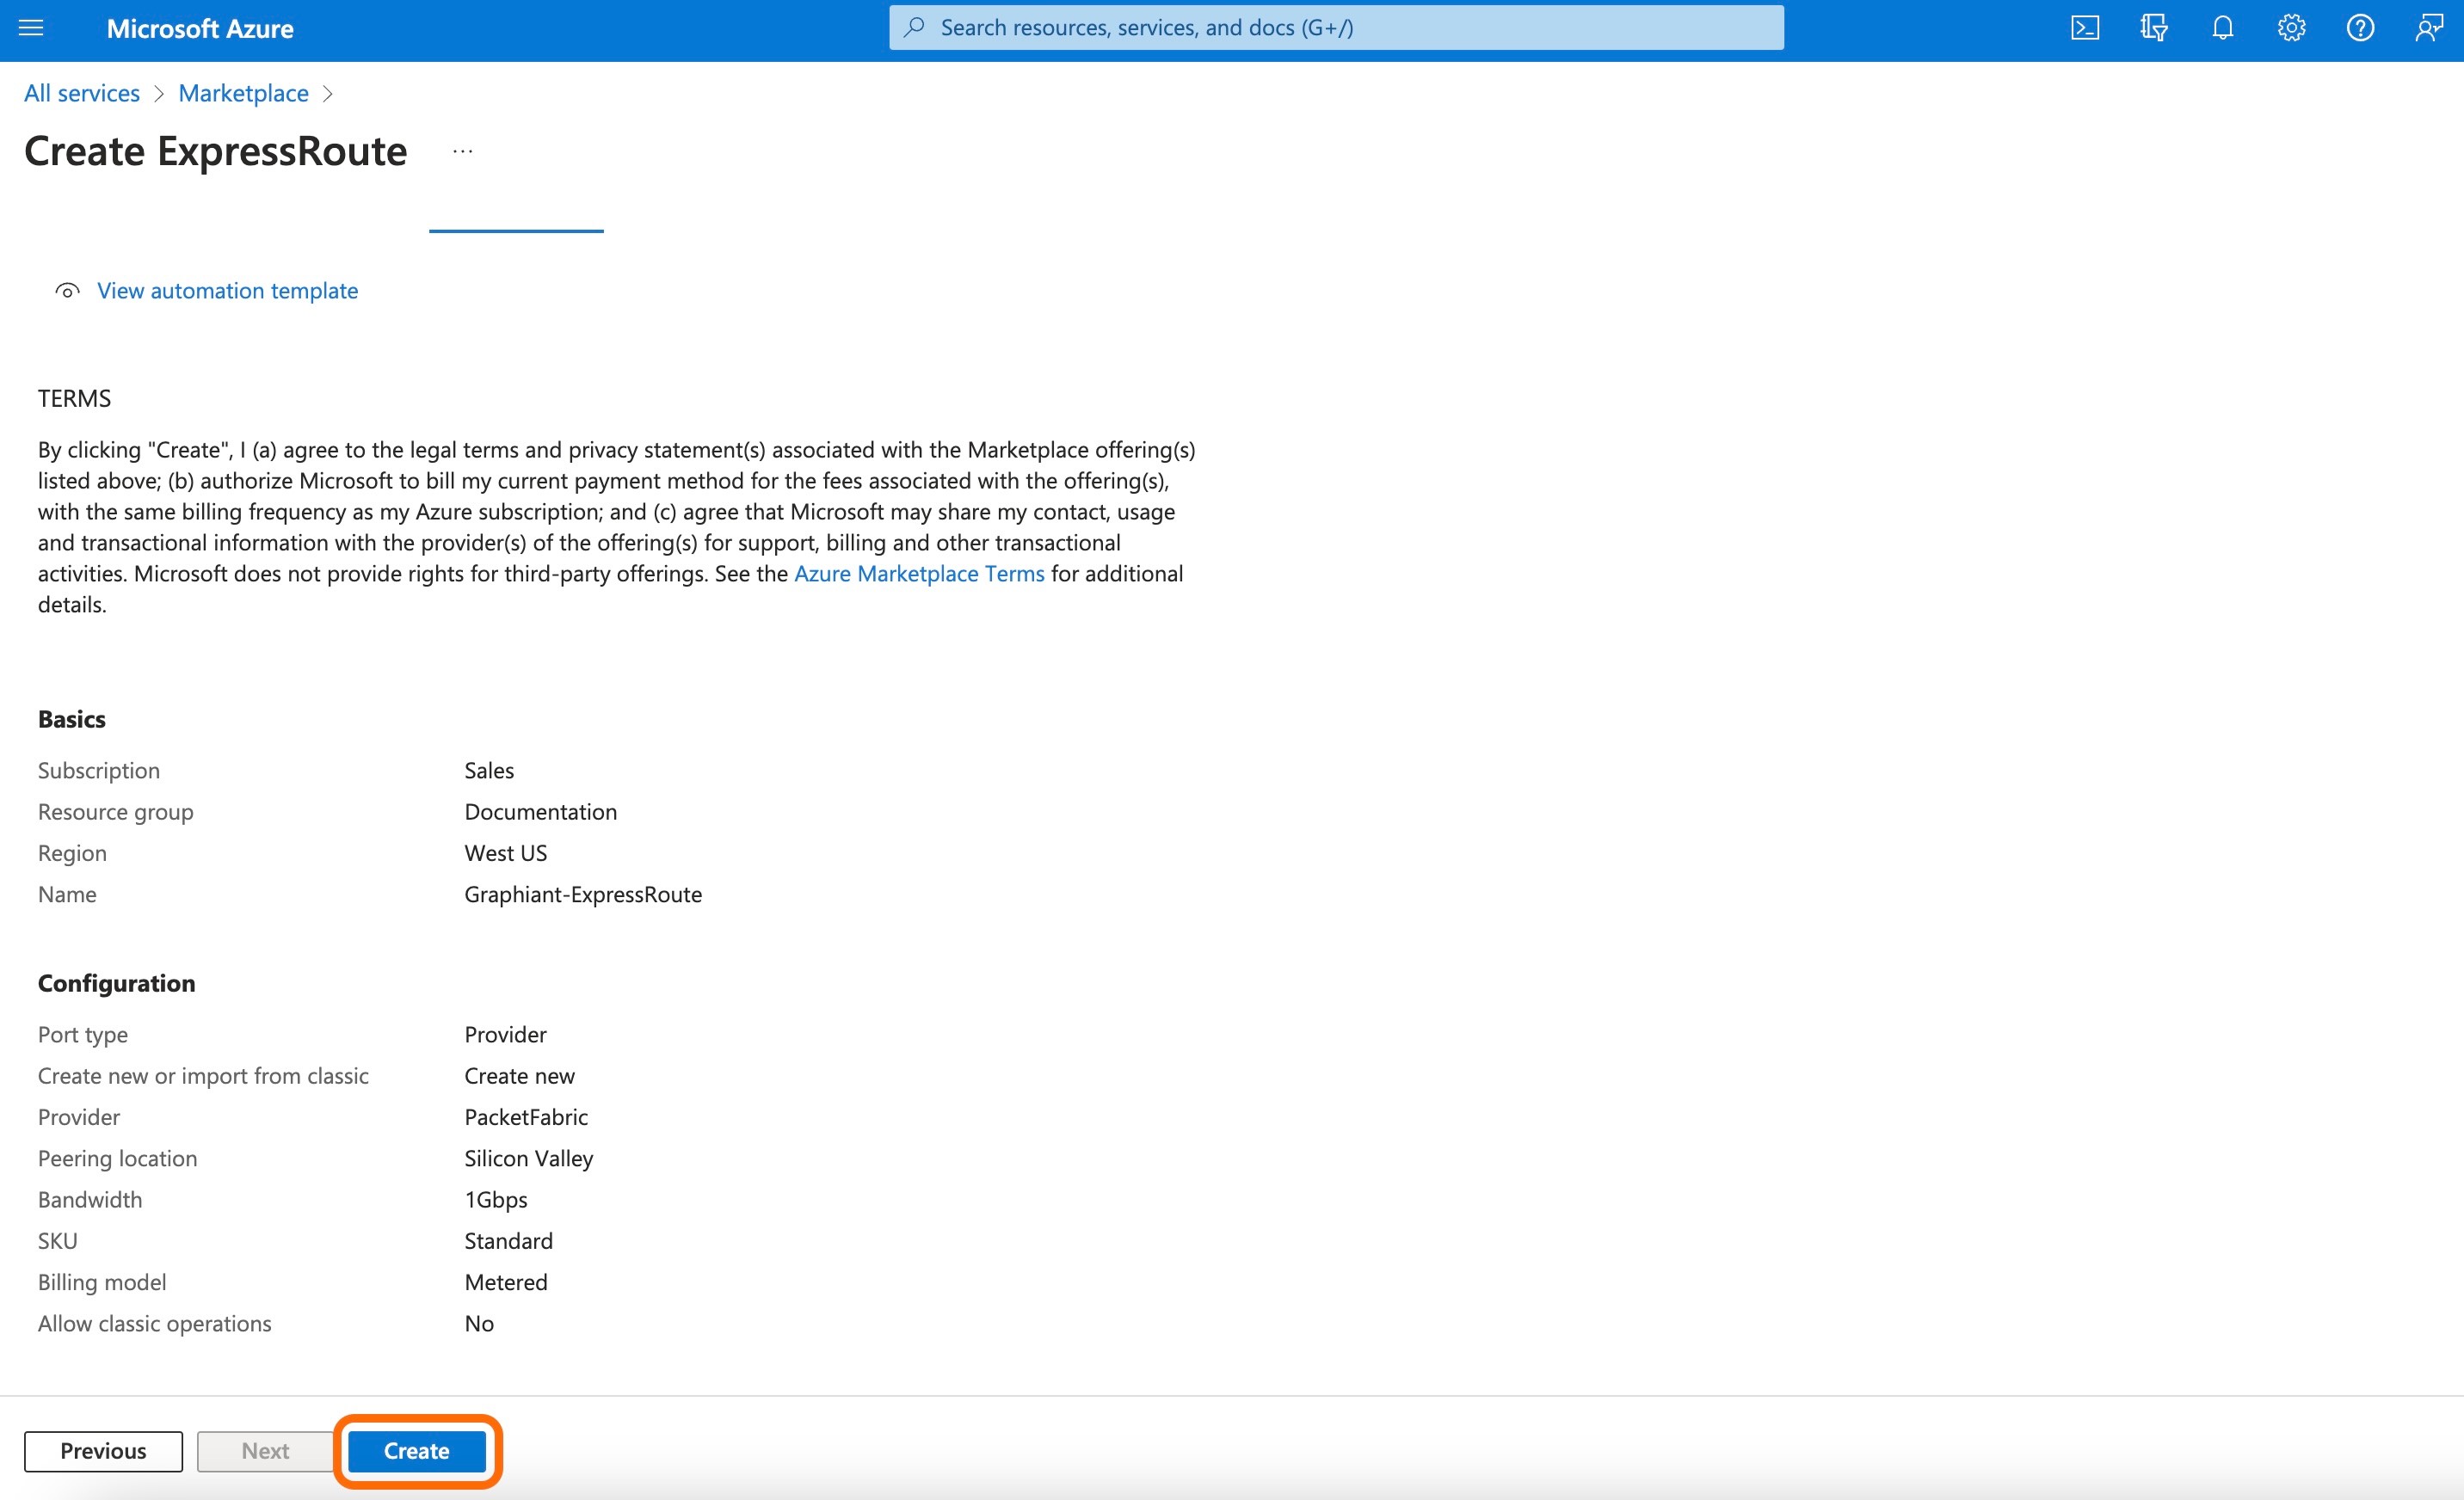
This will bring up a summary screen to verify the ExpressRoute information chosen.
Click 'Create' to finalize the ExpressRoute.
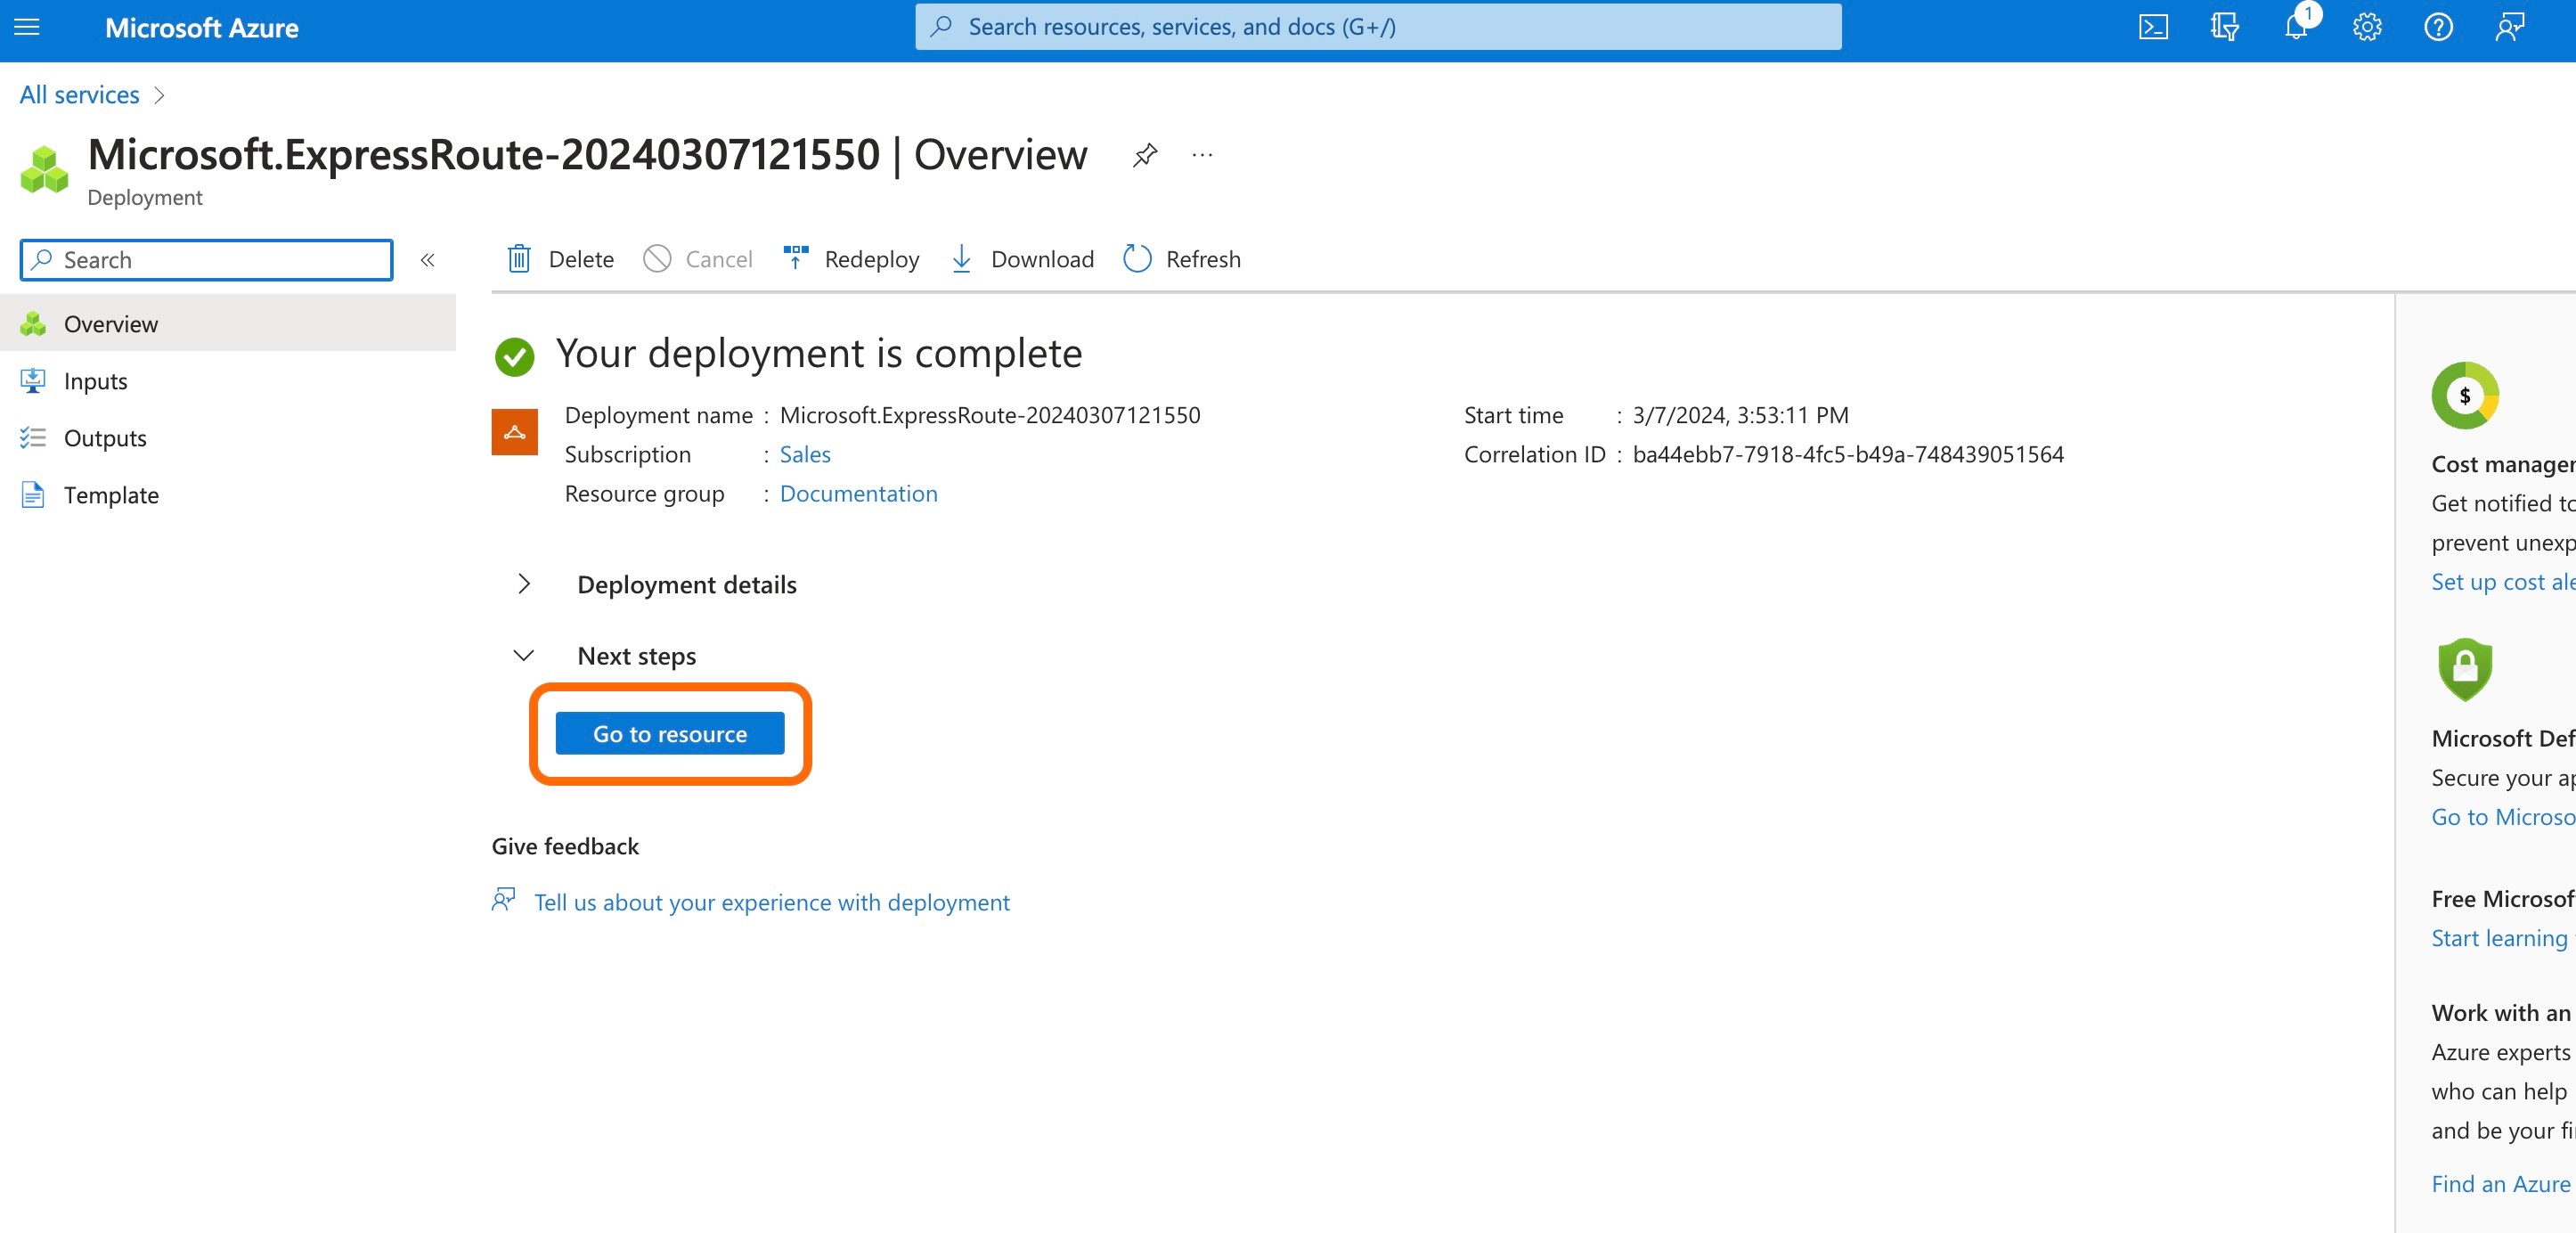
When the next screen processes and shows the message "Your deployment is complete", click 'Go to resource".
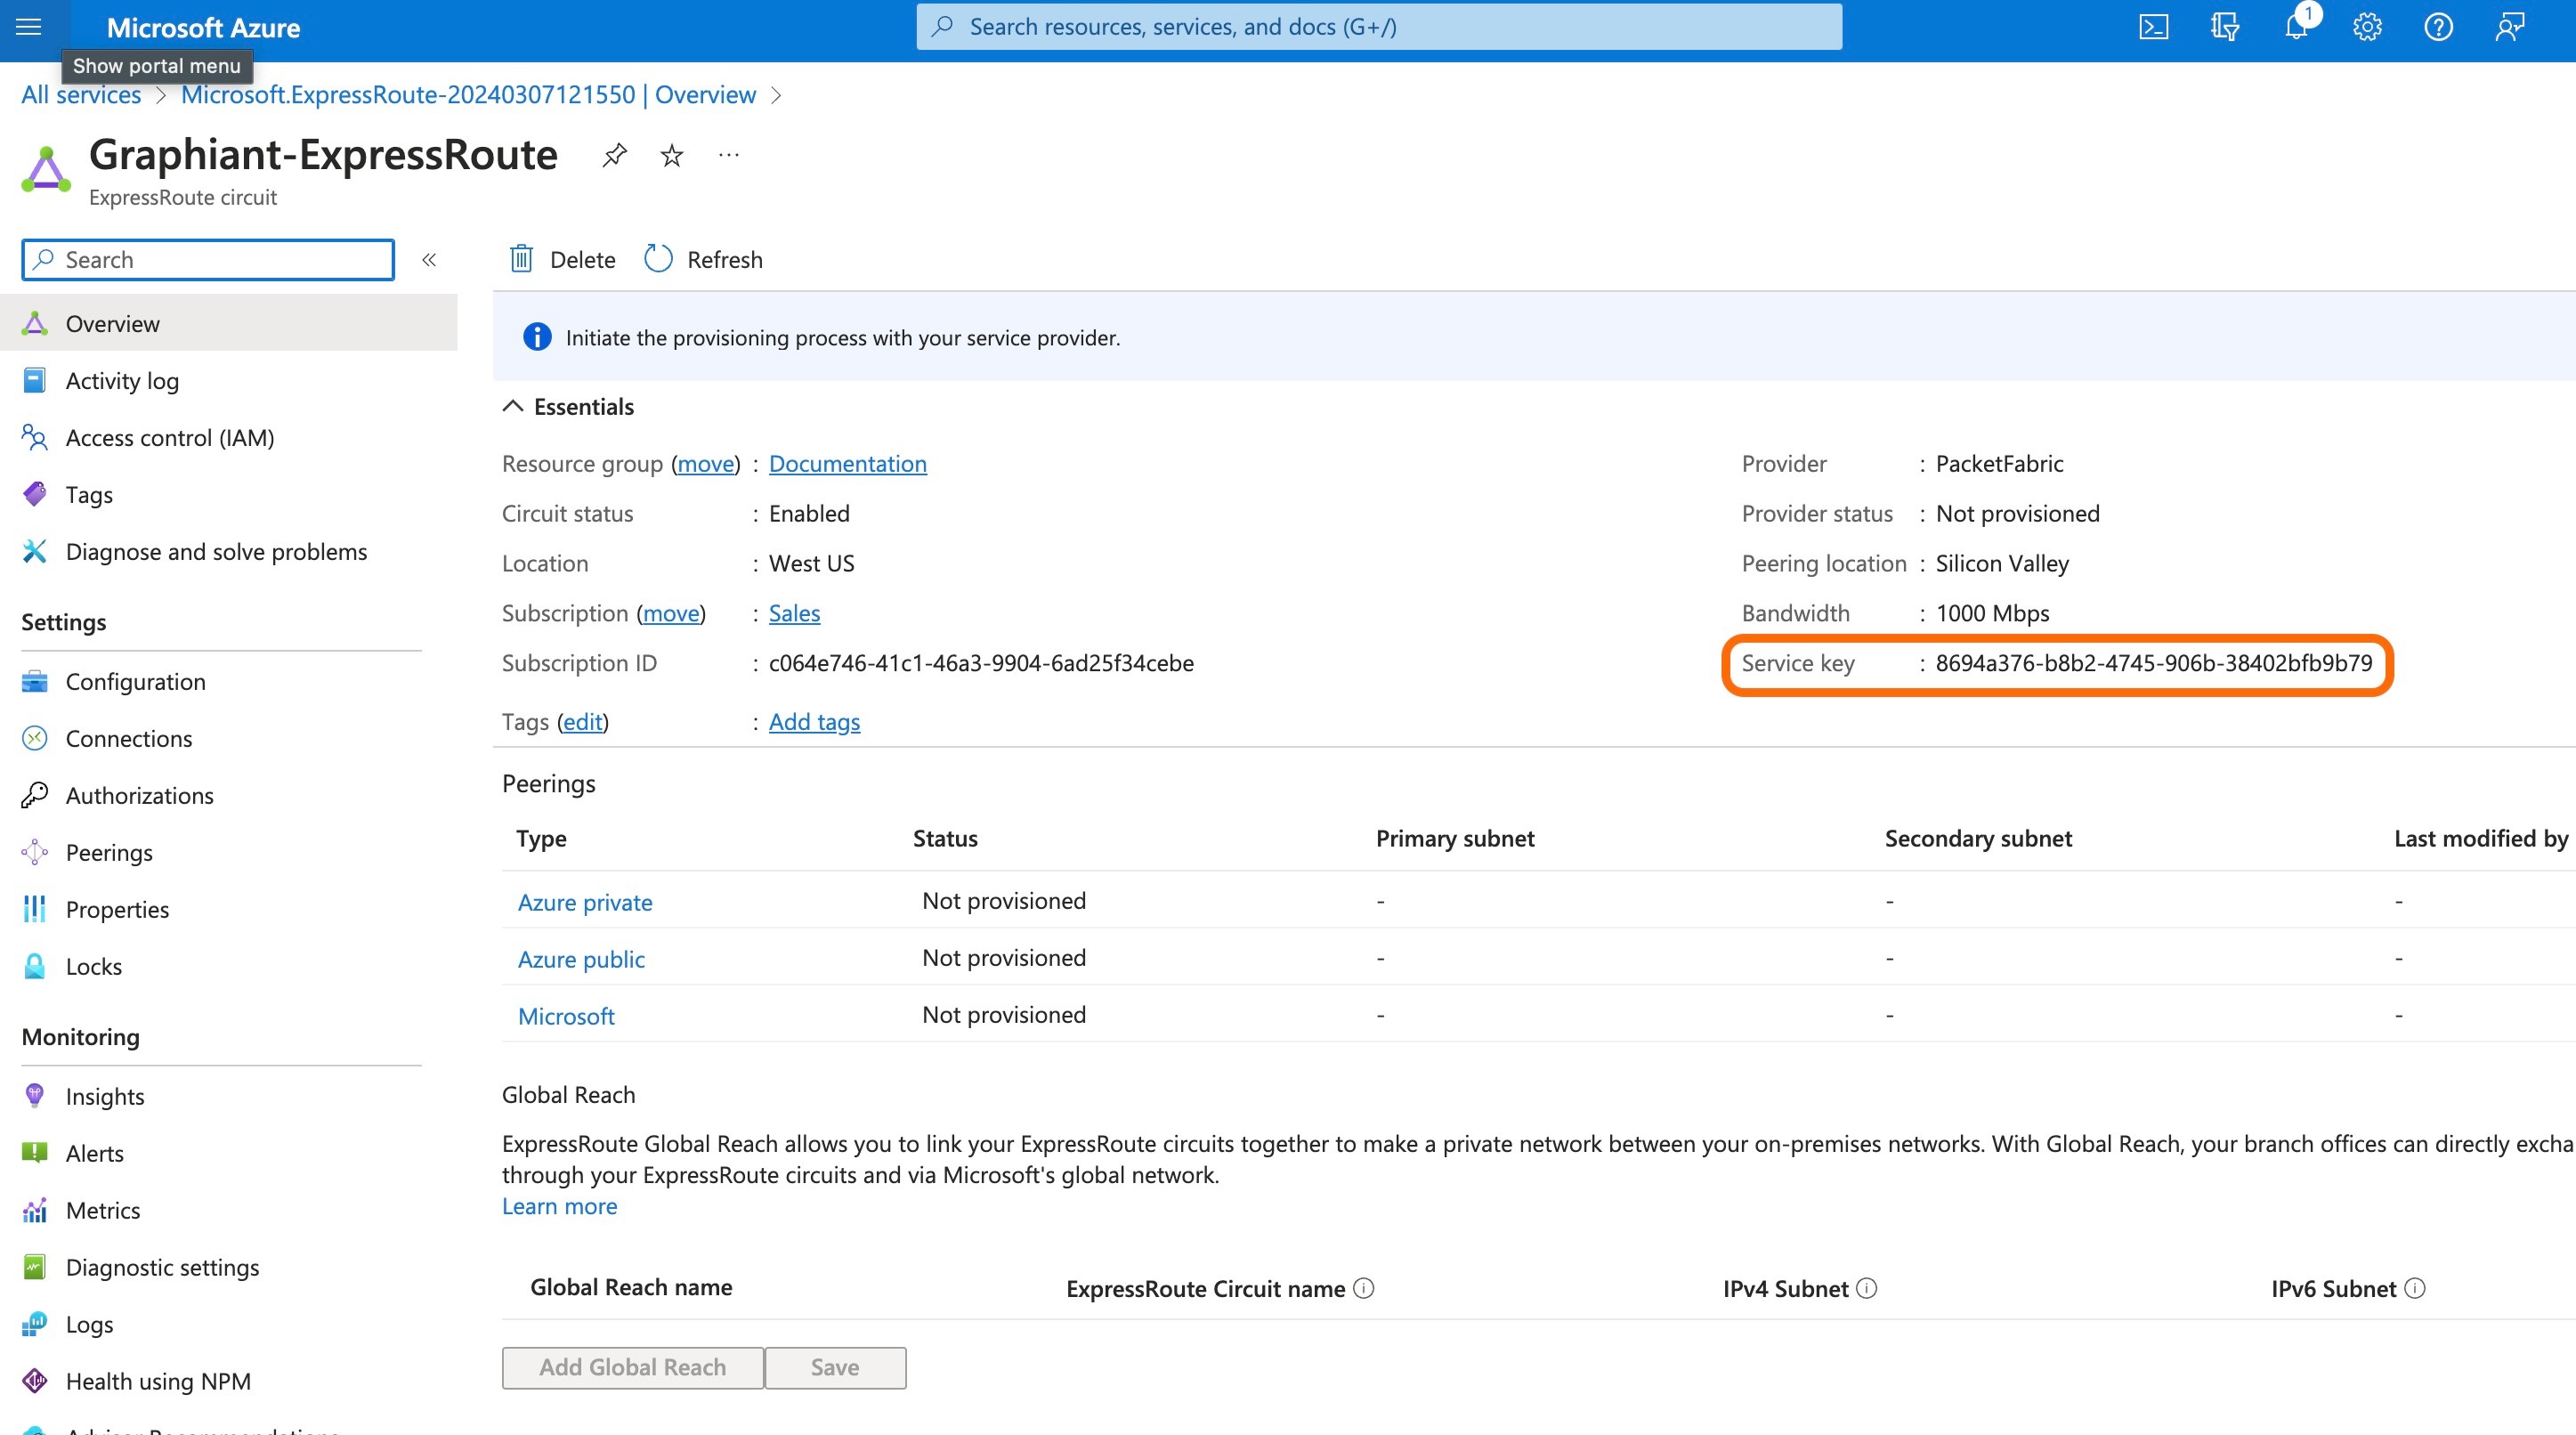
This will bring up the Overview page. (If not, click 'Overview' in the left side menu.)
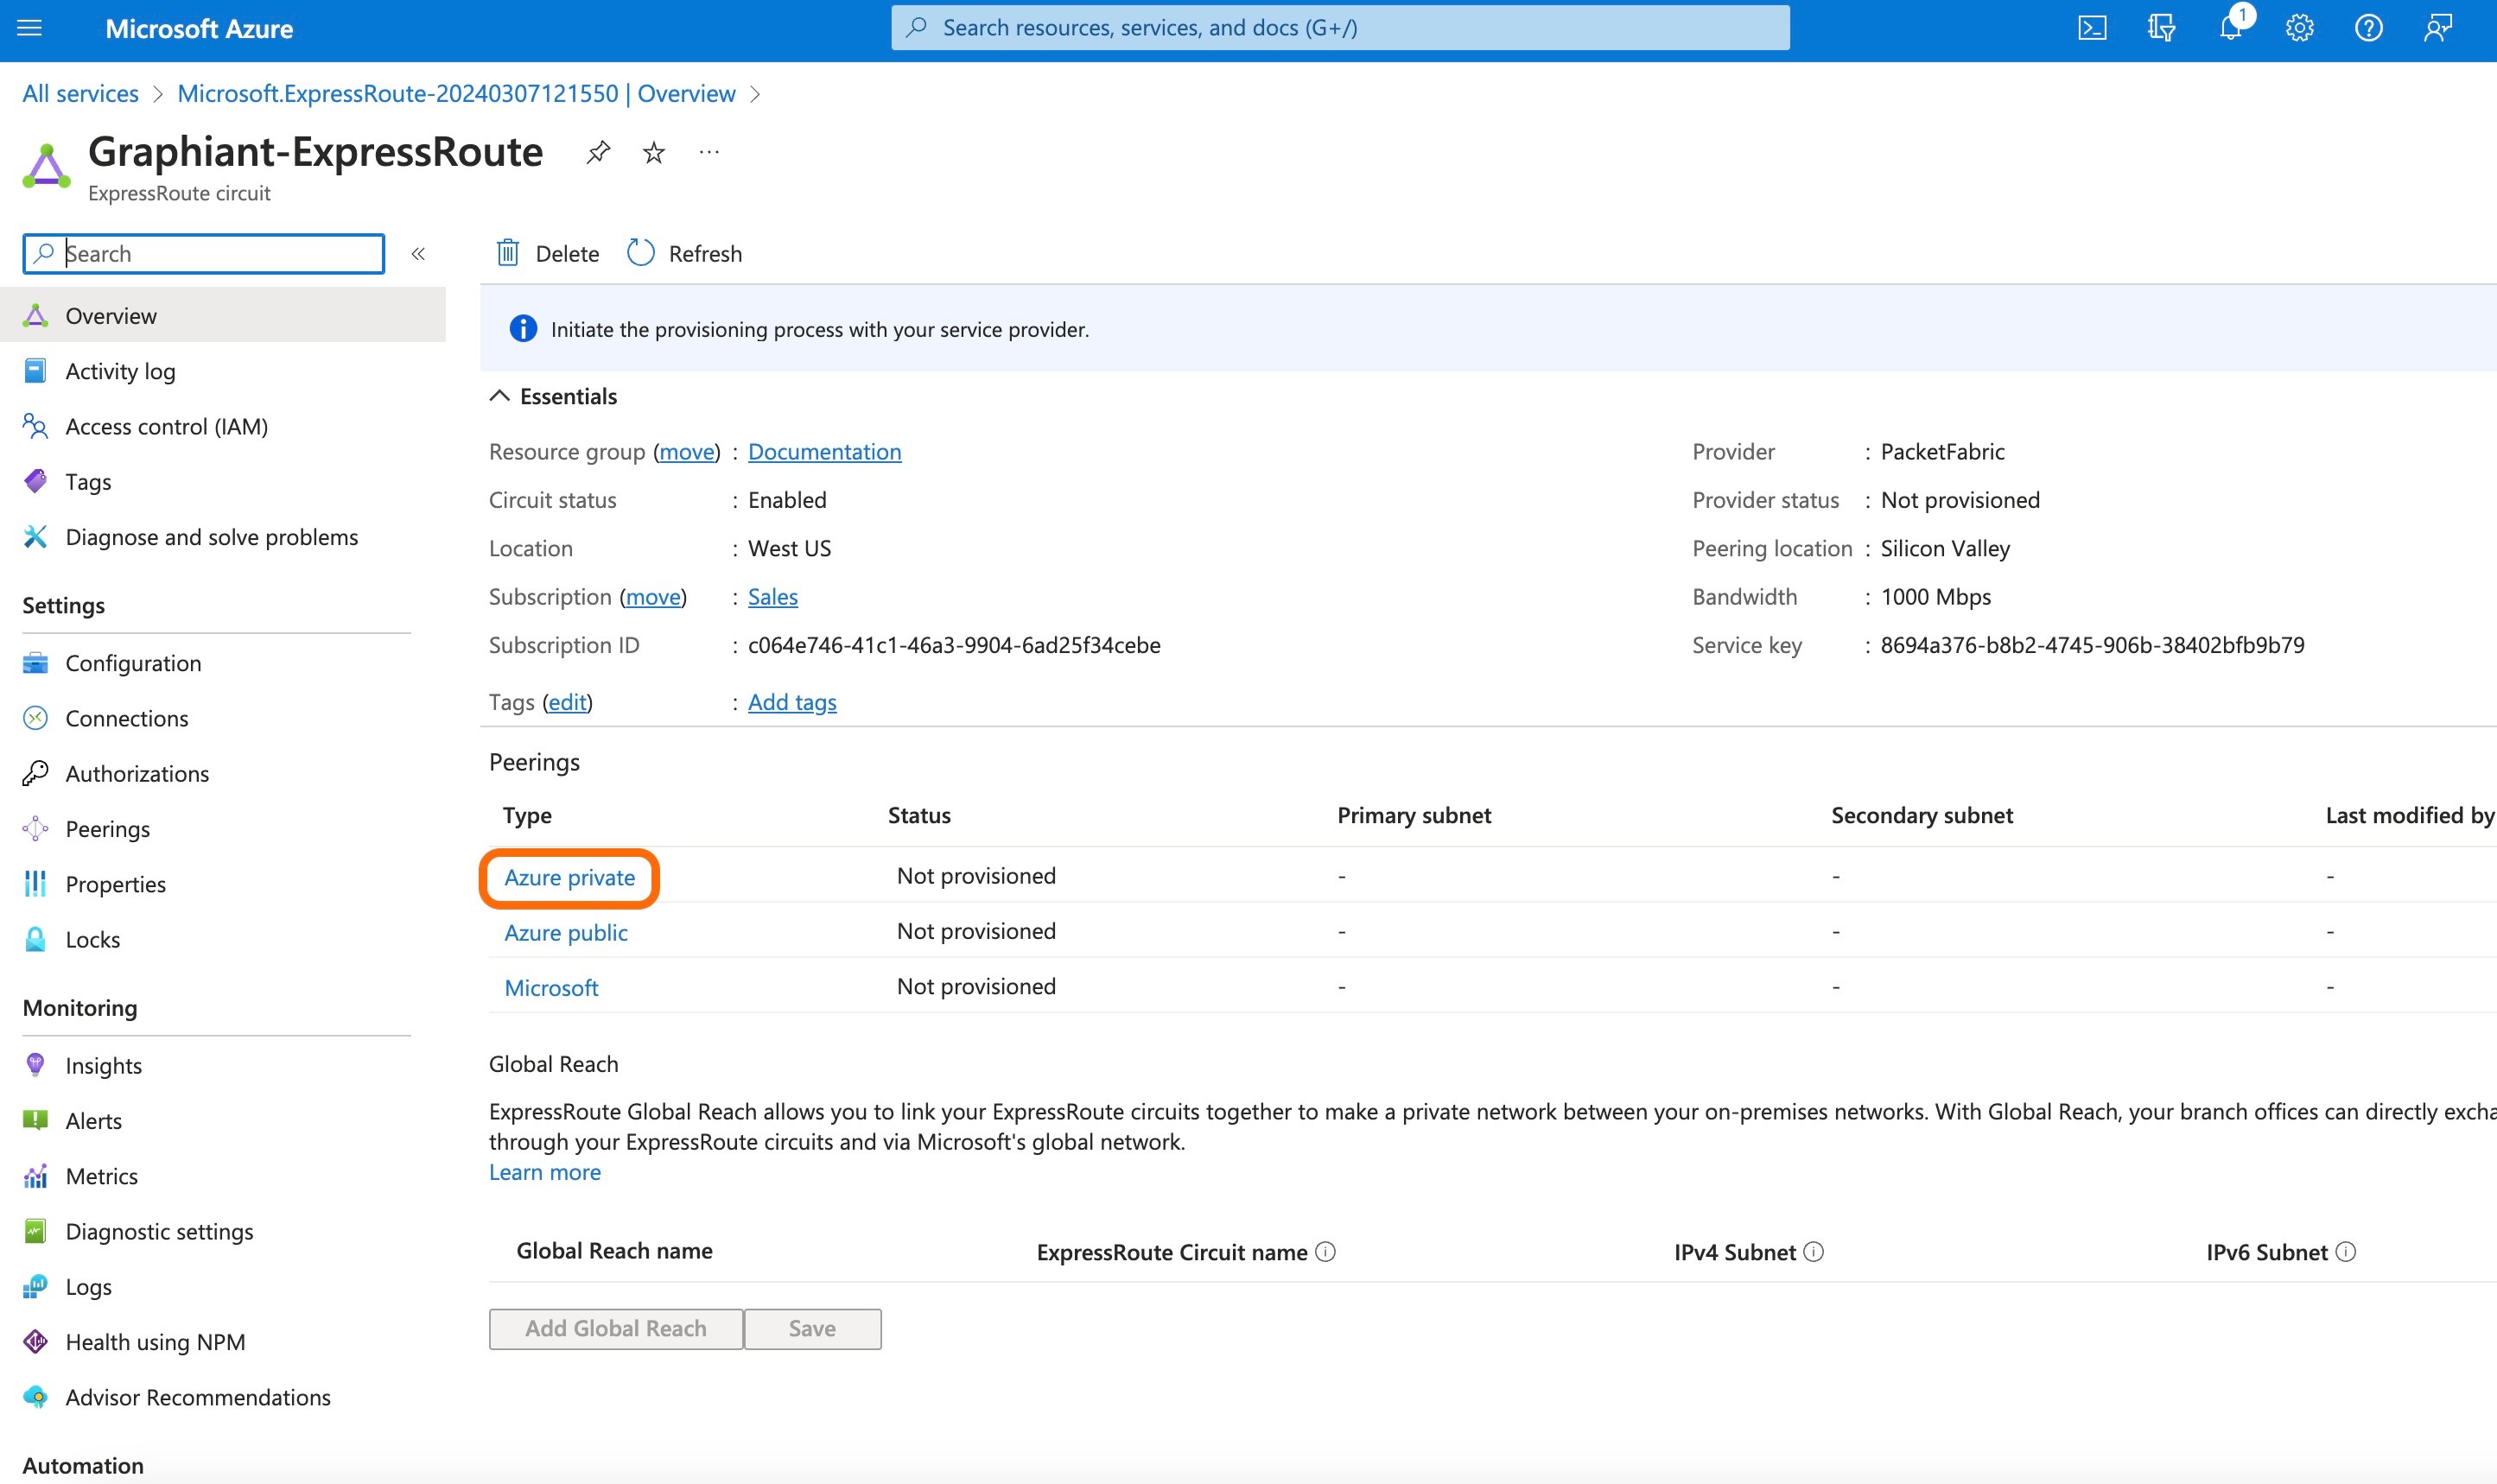
Take note of the Service key.
Graphiant will need the Service Key for connecting the ExpressRoute to the Graphiant Core.
The next step is to create a vWAN in the Azure portal.
Step 2: Creating a vWAN in Azure
In the 'Search Resources' bar, type "Virtual WAN".
Select 'Virtual WANs' from the results.

On the Virtual WANs page, select '+ Create'.

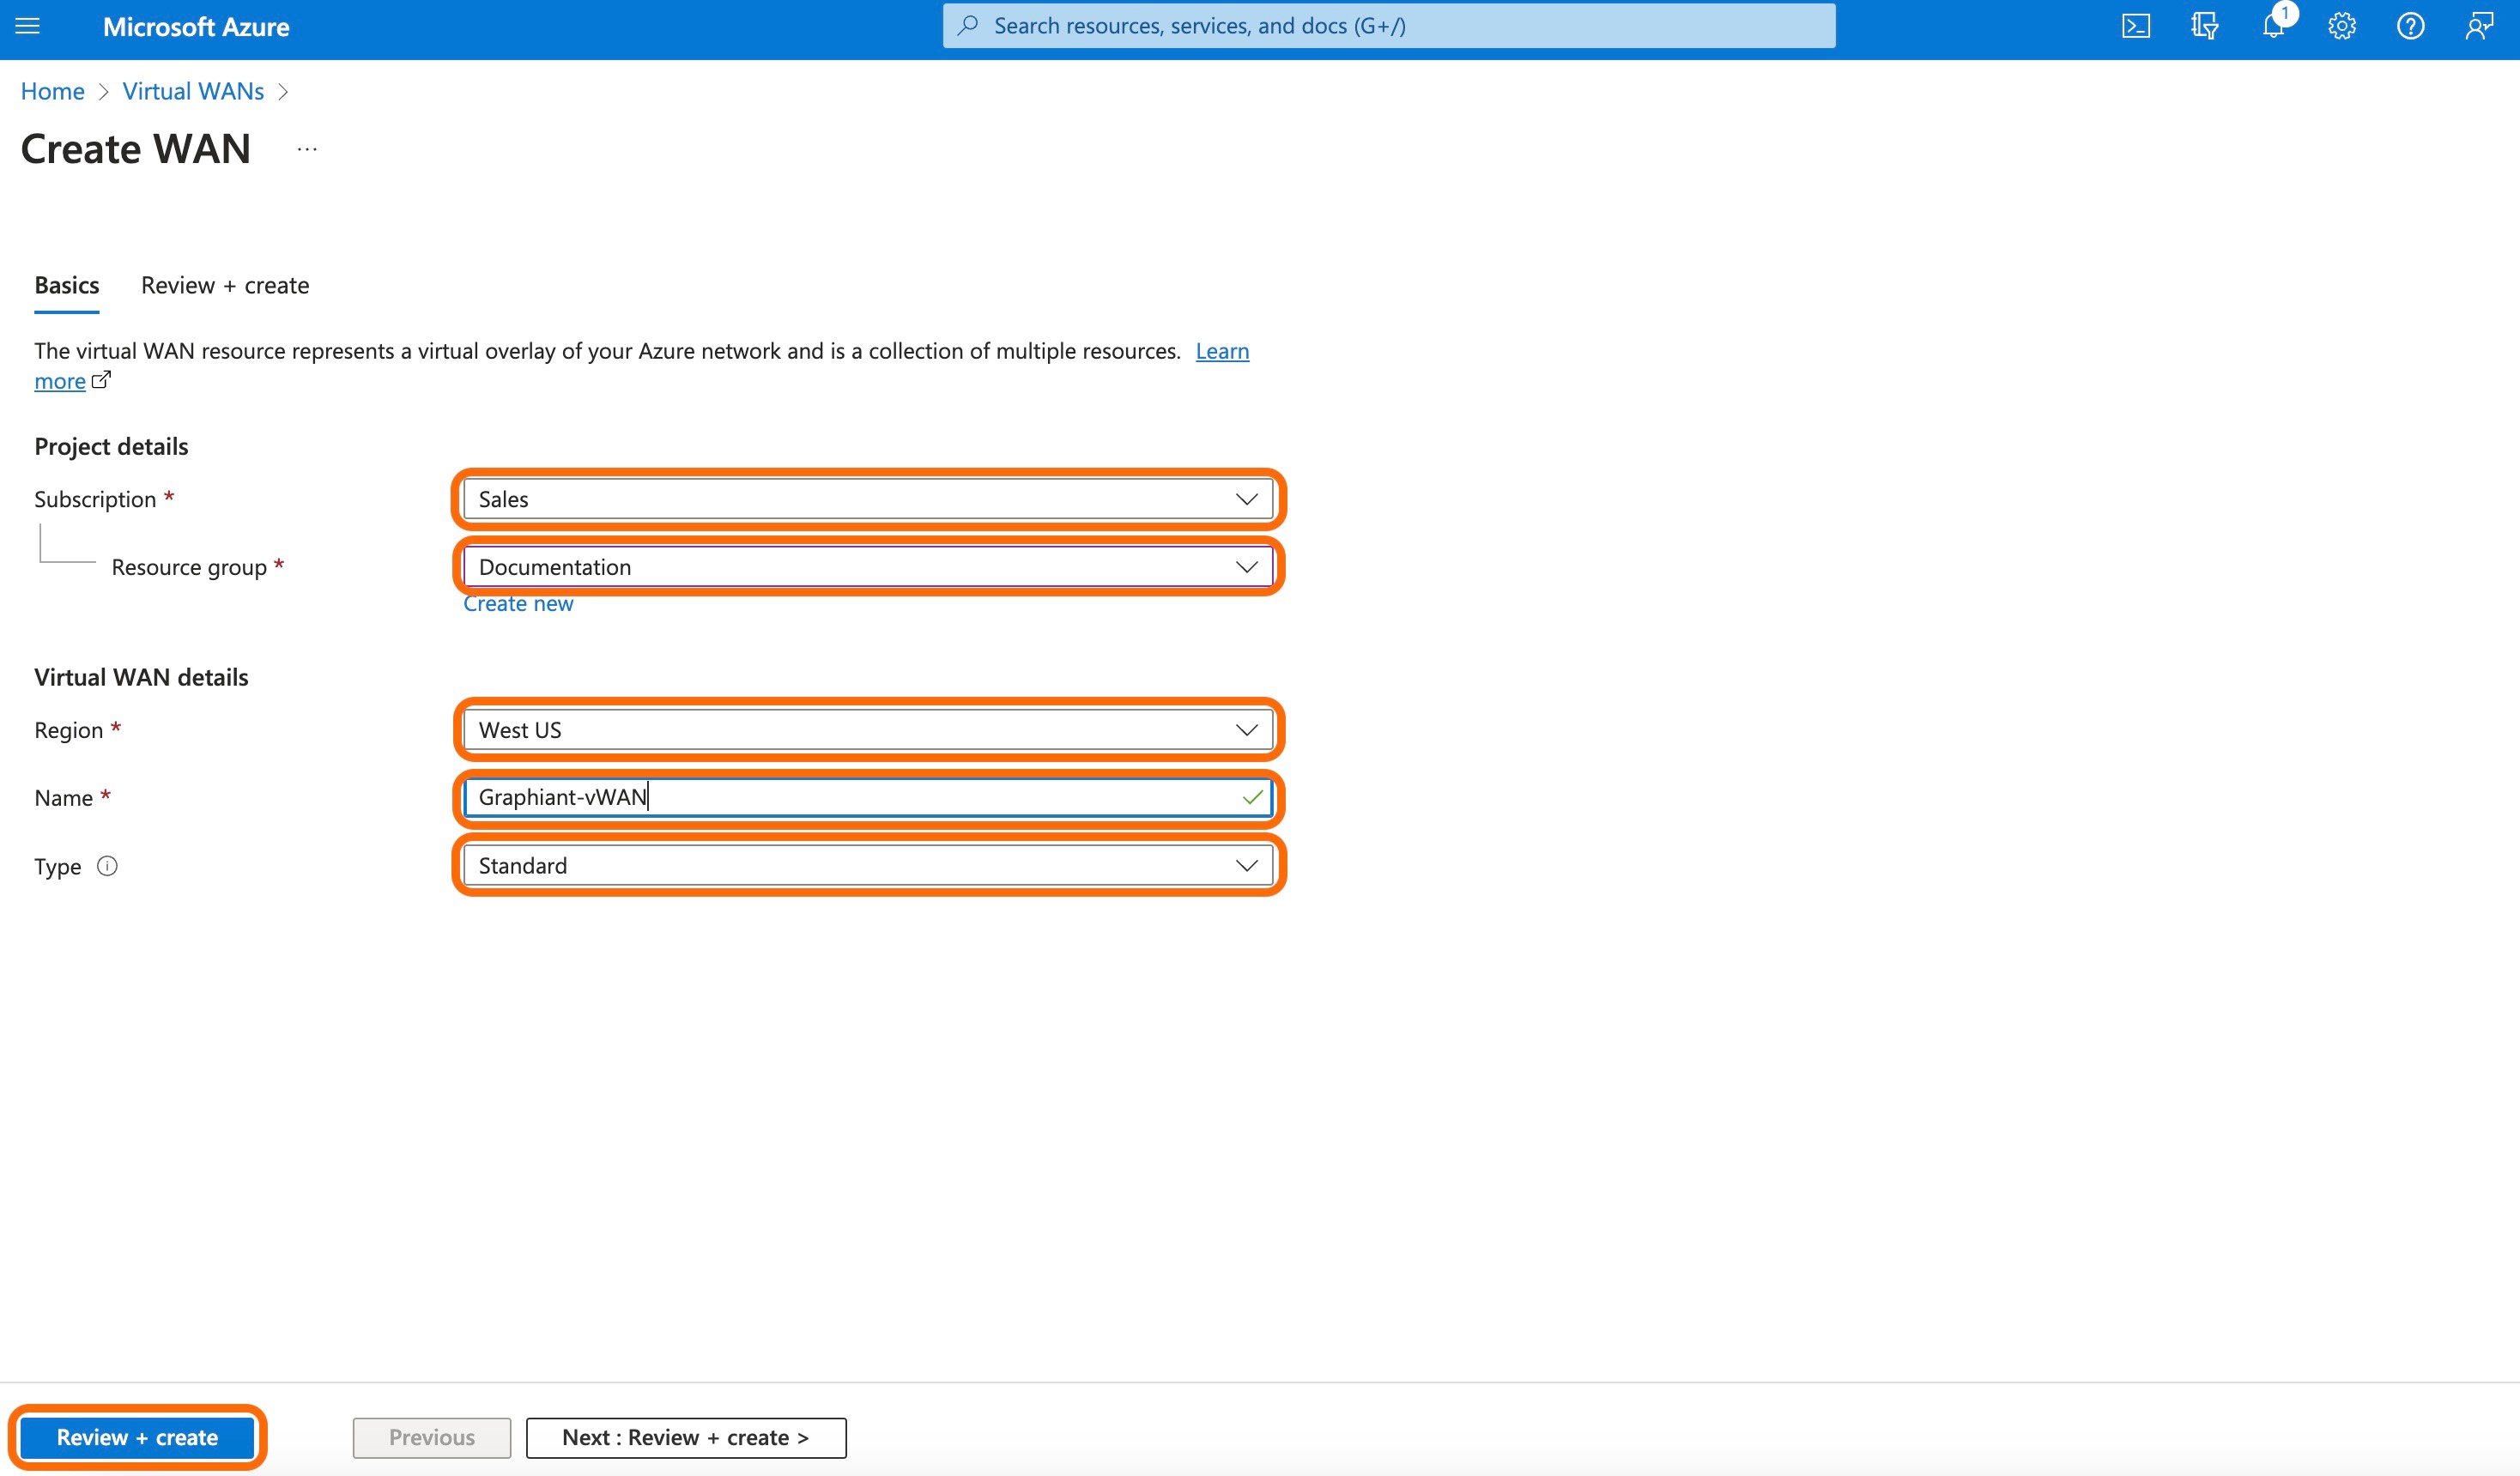
On the 'Create WAN' page, in the 'Basics' tab, complete the following fields:
Note:
The first two fields must match the entries for the 'Basics' fields in the ExpressRoute configuration.
Subscription: The appropriate subscription from the drop-down.
Resource Group: The appropriate resource group from the drop-down.
Region: Select the desired Azure region from the drop-down.
Name: The name for the ExpressRoute.
Type: Select 'Standard'.
Click 'Review + create'
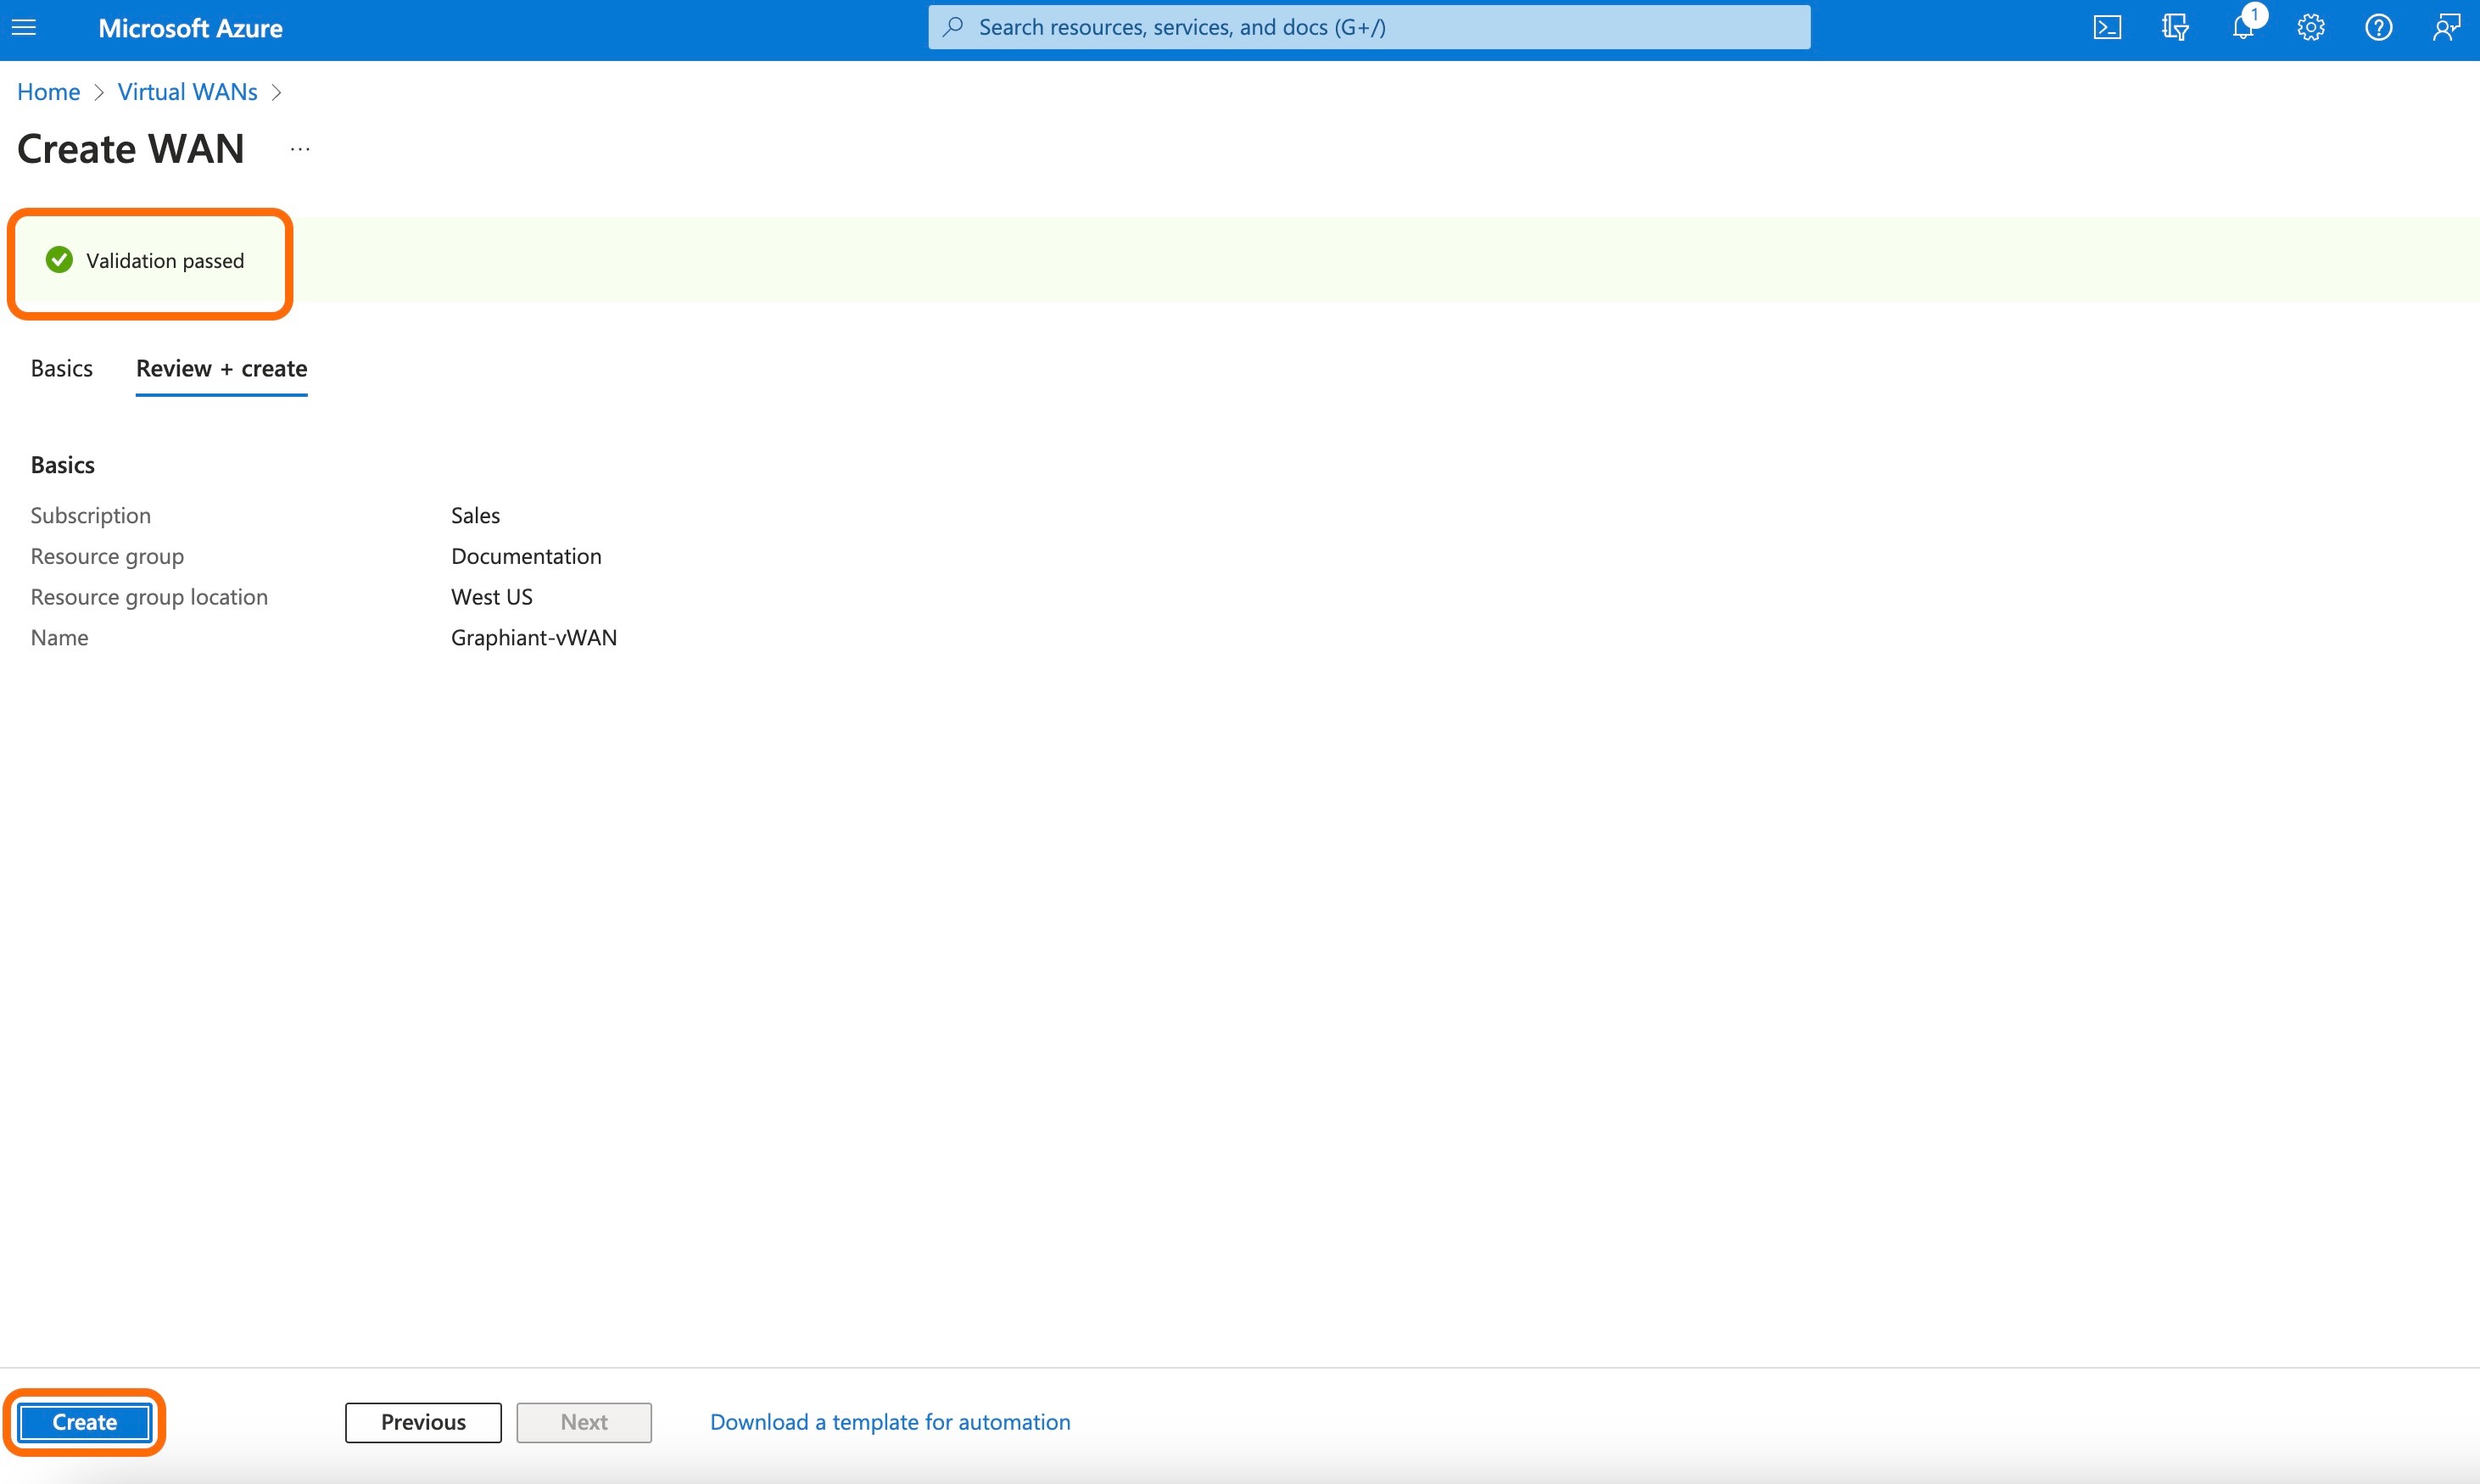
Once the message "Validation passed" is received, click 'Create' to create the Virtual WAN.
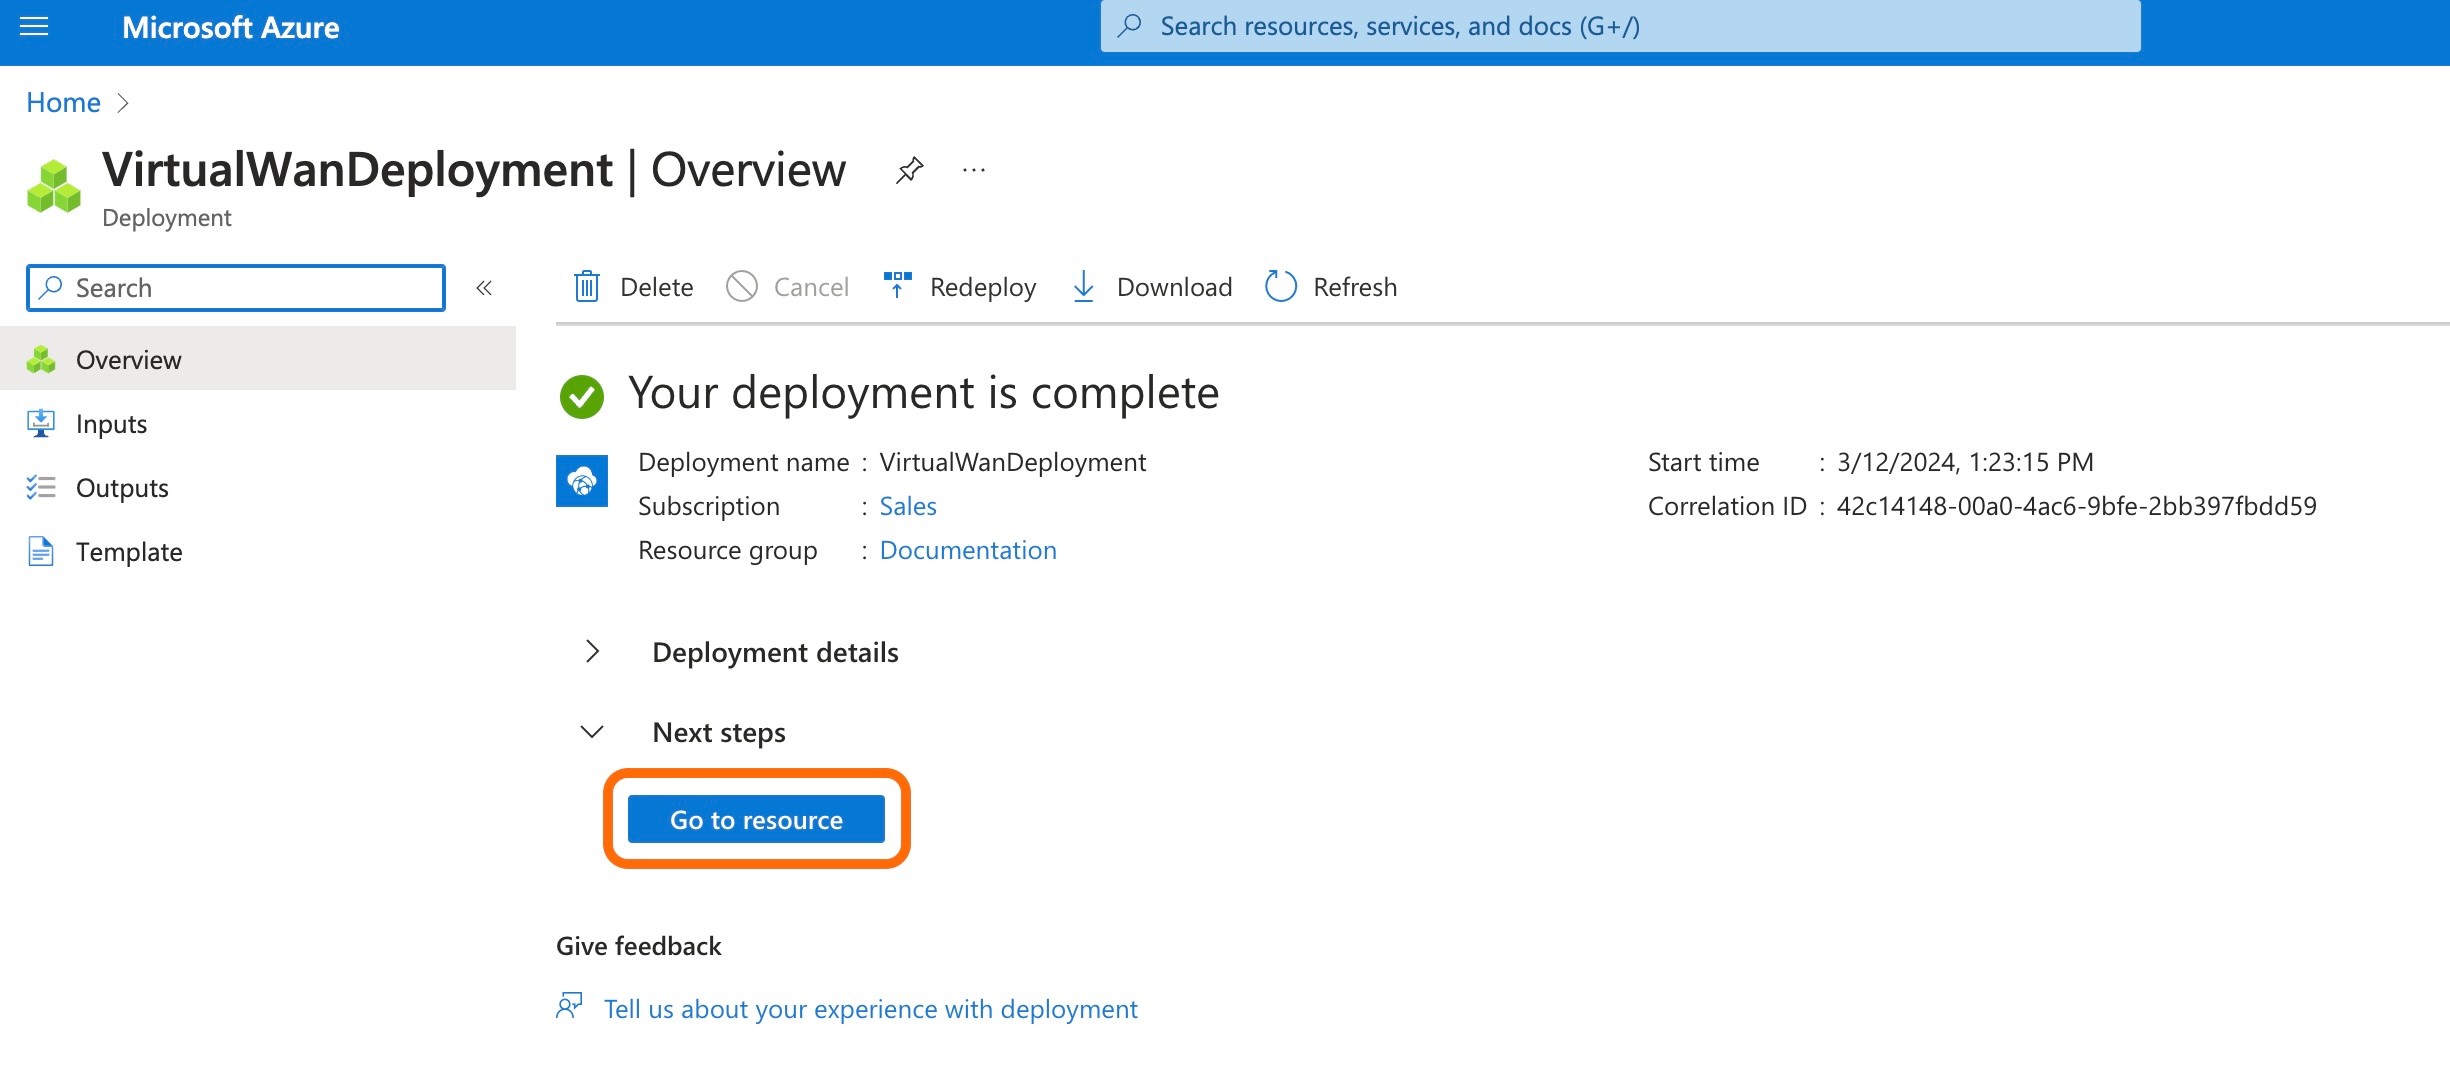
The Virtual WAN deployment is now complete.
Click 'Go to resource' to navigate to the vWAN.
The next step is to create a virtual hub and an ExpressRoute gateway.
If a virtual hub already exists where the ExpressRoute gateway will be created, click here.
Step 3: Configuring a Virtual Hub and ExpressRoute Gateway in Azure
An ExpressRoute Gateway can be created either in tandem with creating a new virtual hub, or in addition to a previously existing virtual hub.
To create a new virtual hub along with a new ExpressRoute Gateway, proceed to step a) below, or click here.
To create a new ExpressRoute Gateway to be included in an existing virtual hub, proceed to step b) below, or click here.
a) Creating a New Virtual Hub and ExpressRoute Gateway in Azure
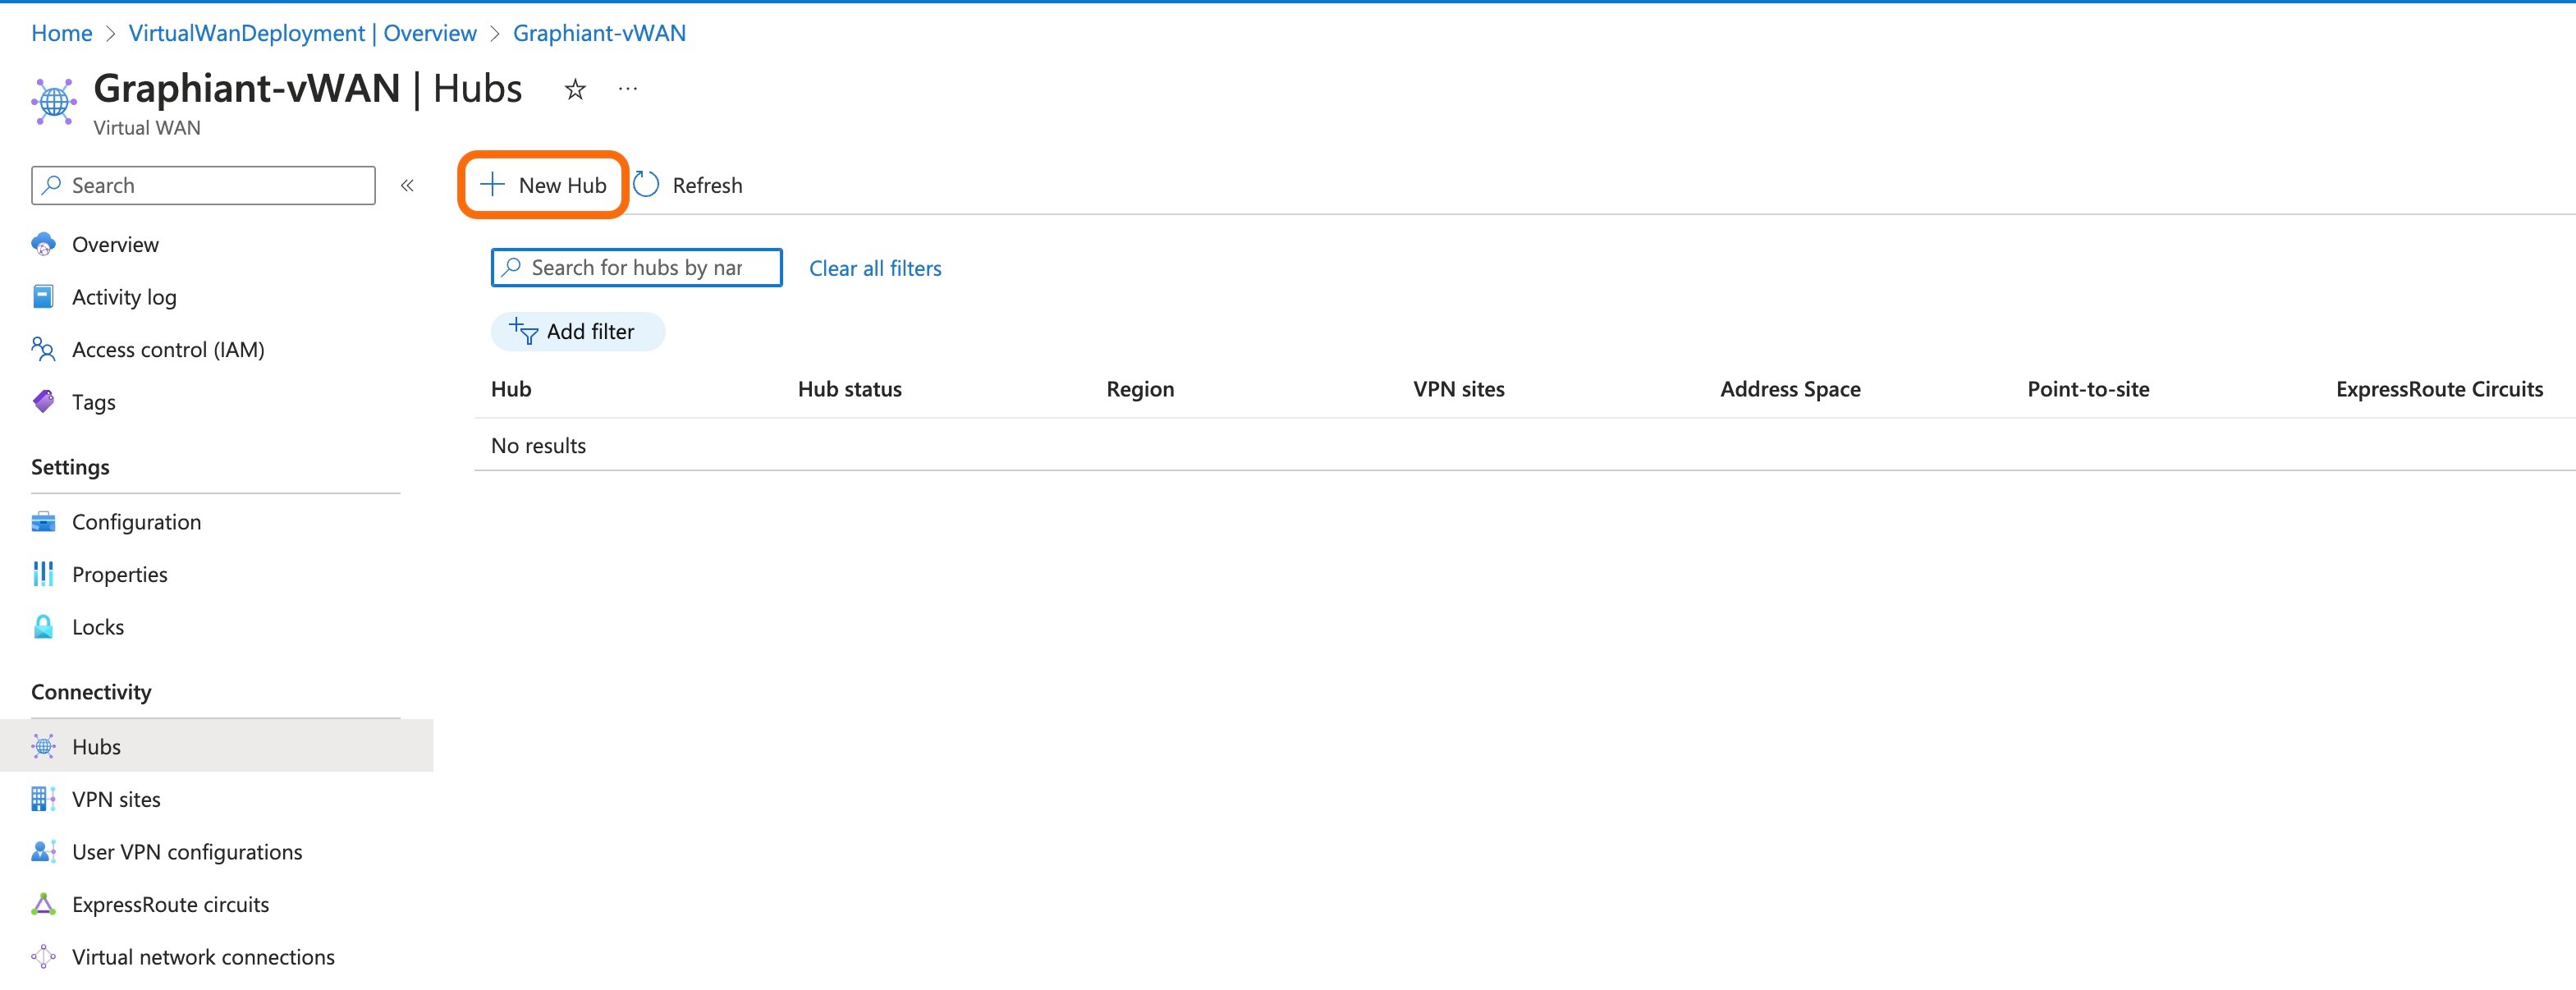
From the VWAN page, select 'Hubs' under the "Connectivity" section in the left side menu.
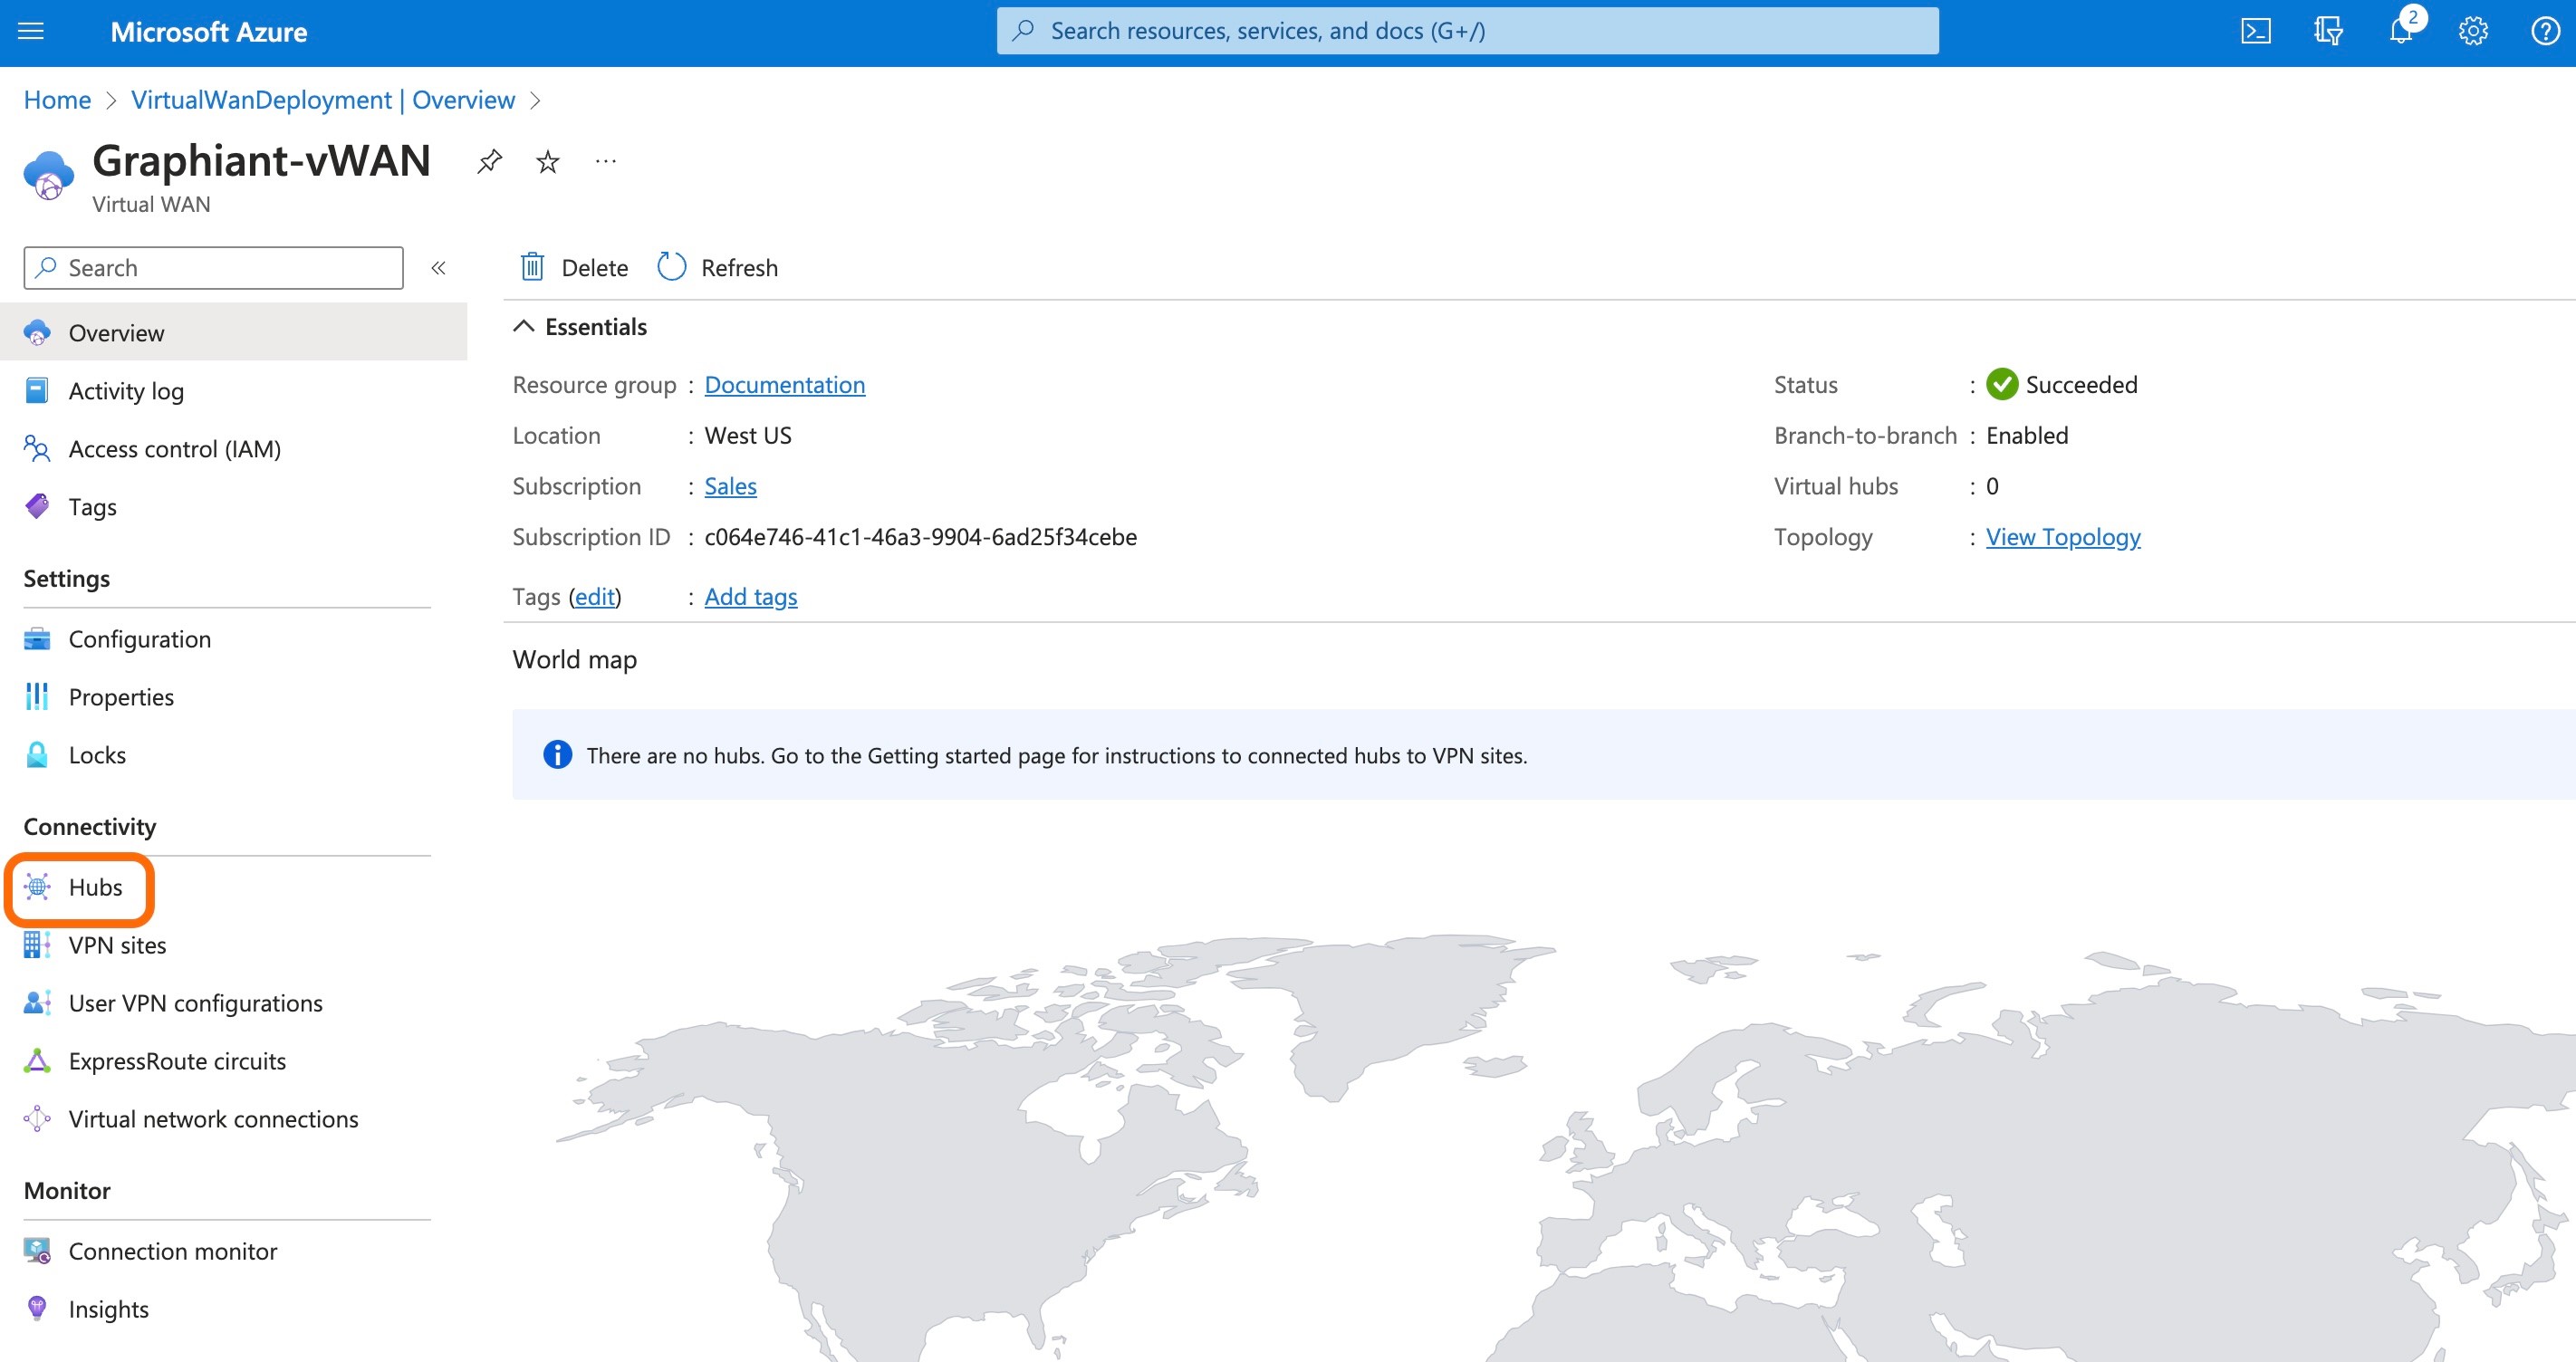
On the Hubs page, select '+ New Hub'.
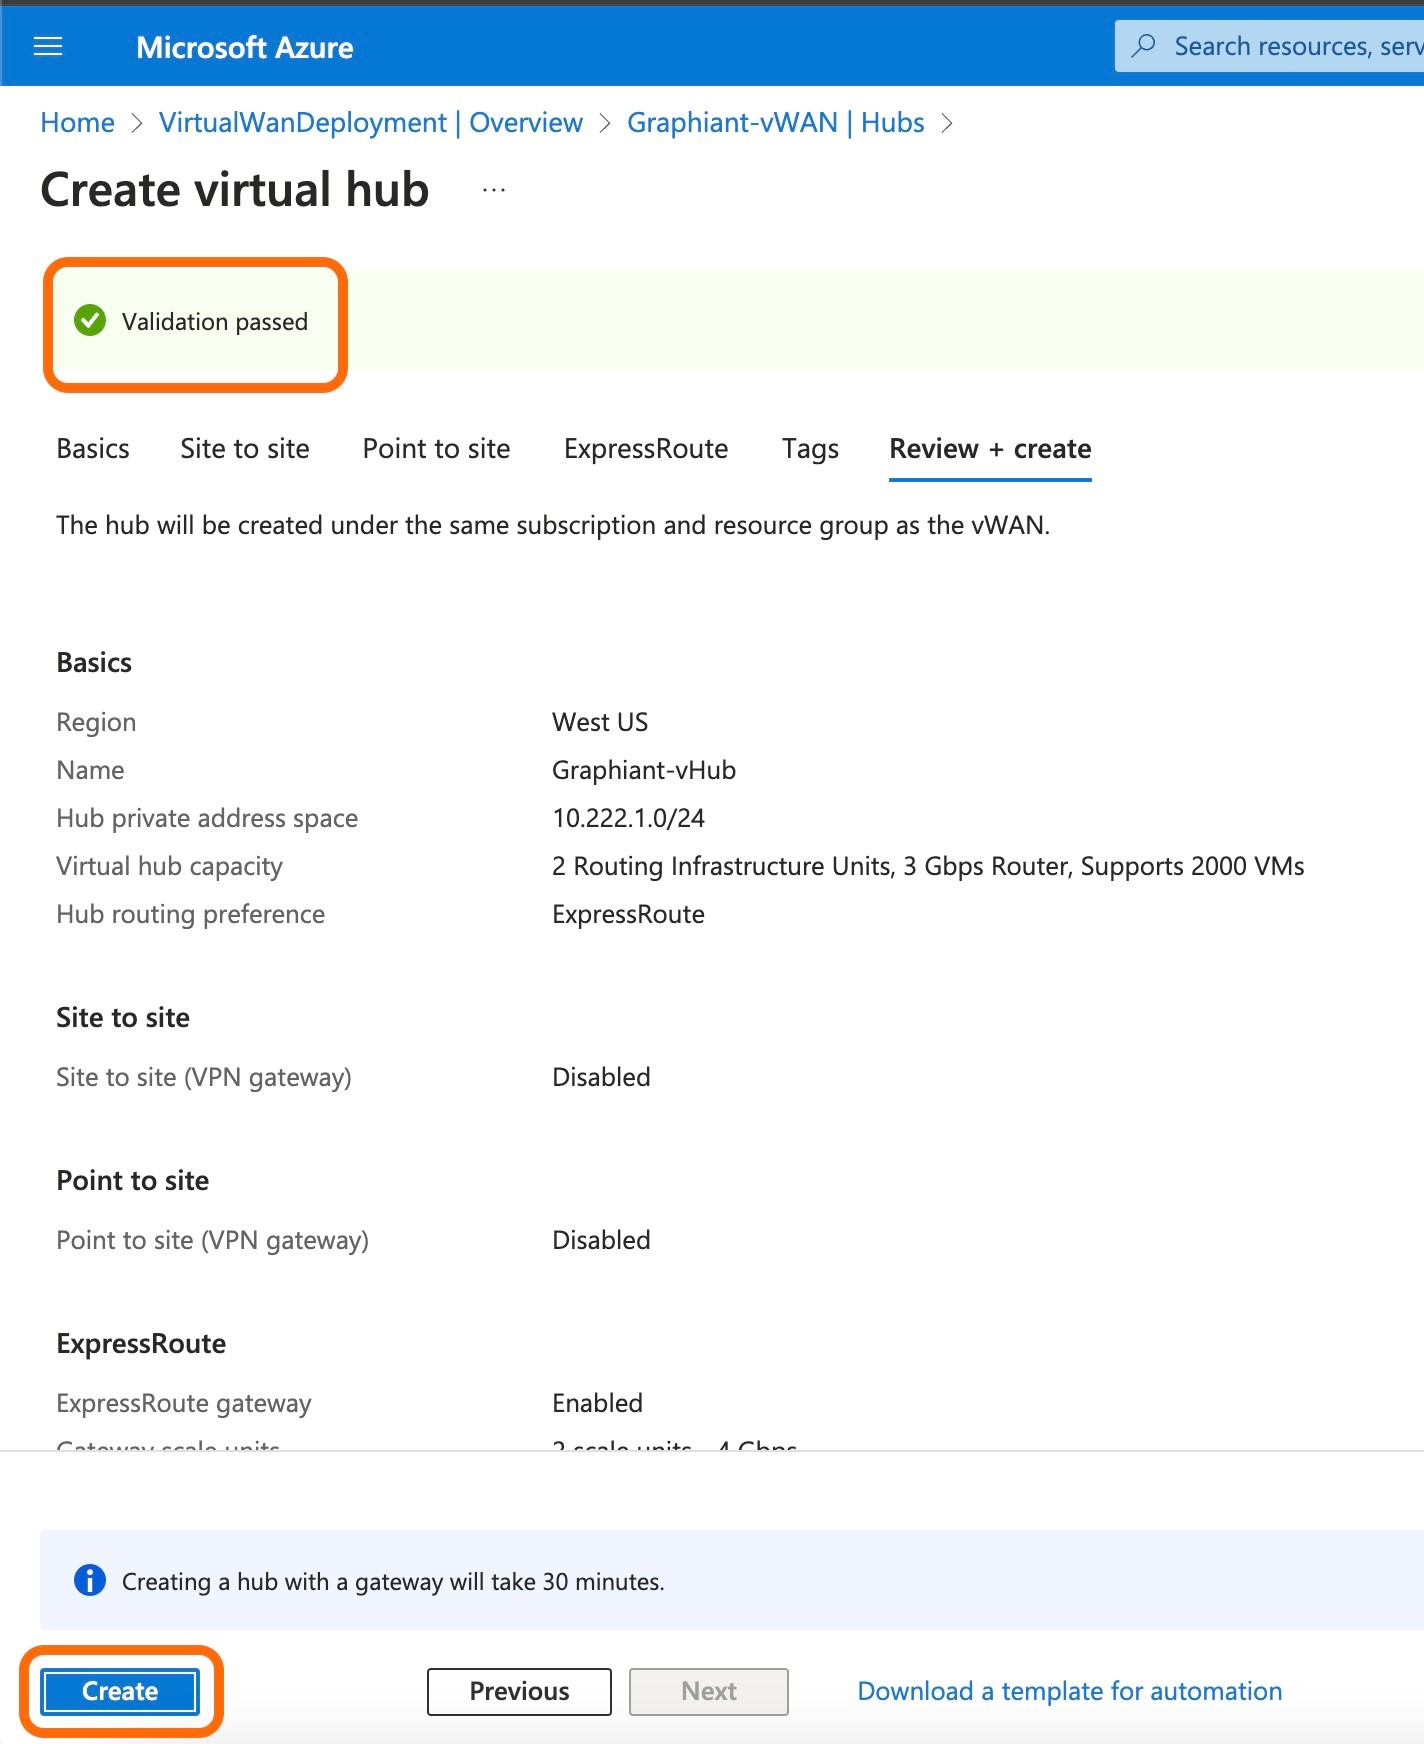
Complete the following fields:
Region: Select the region in which to deploy the virtual hub.
Name: The name for the virtual hub.
Hub private address space: The hub's address range in CIDR notation. The minimum address space is /24 to create a hub.
Virtual hub capacity: Select the desired value from the drop-down.
Hub routing preference: Leave as default of "ExpressRoute".
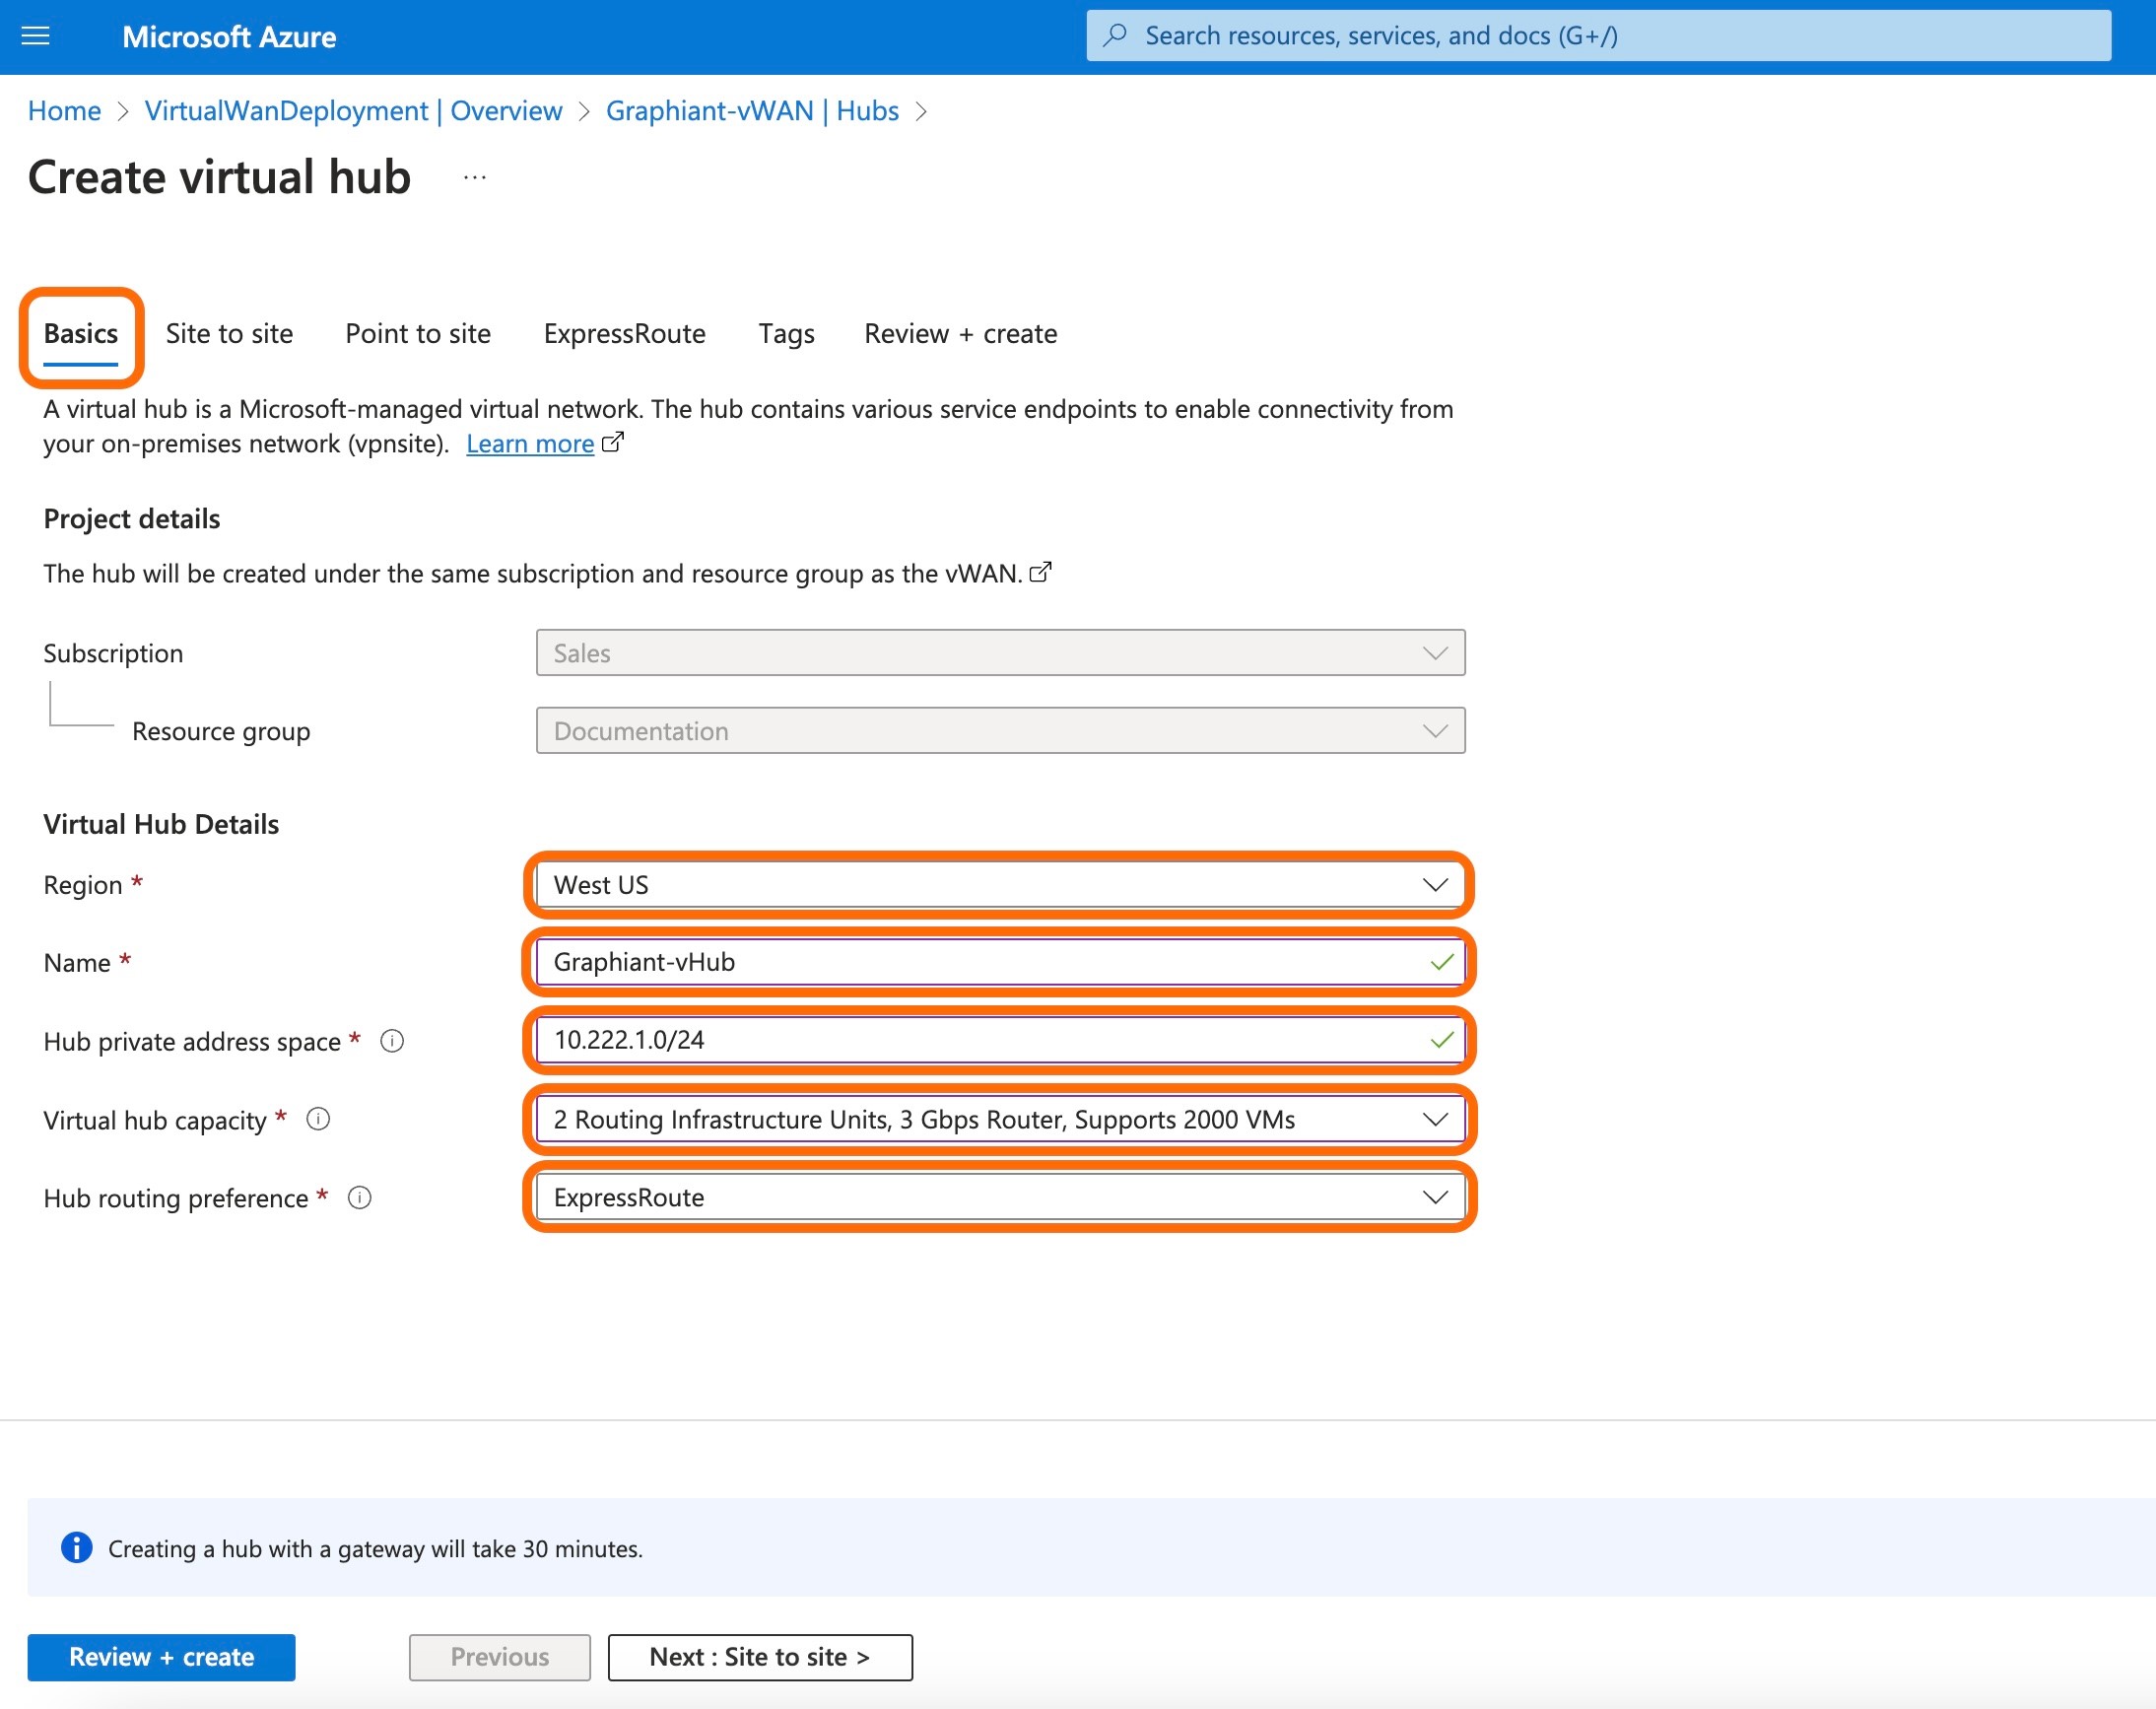
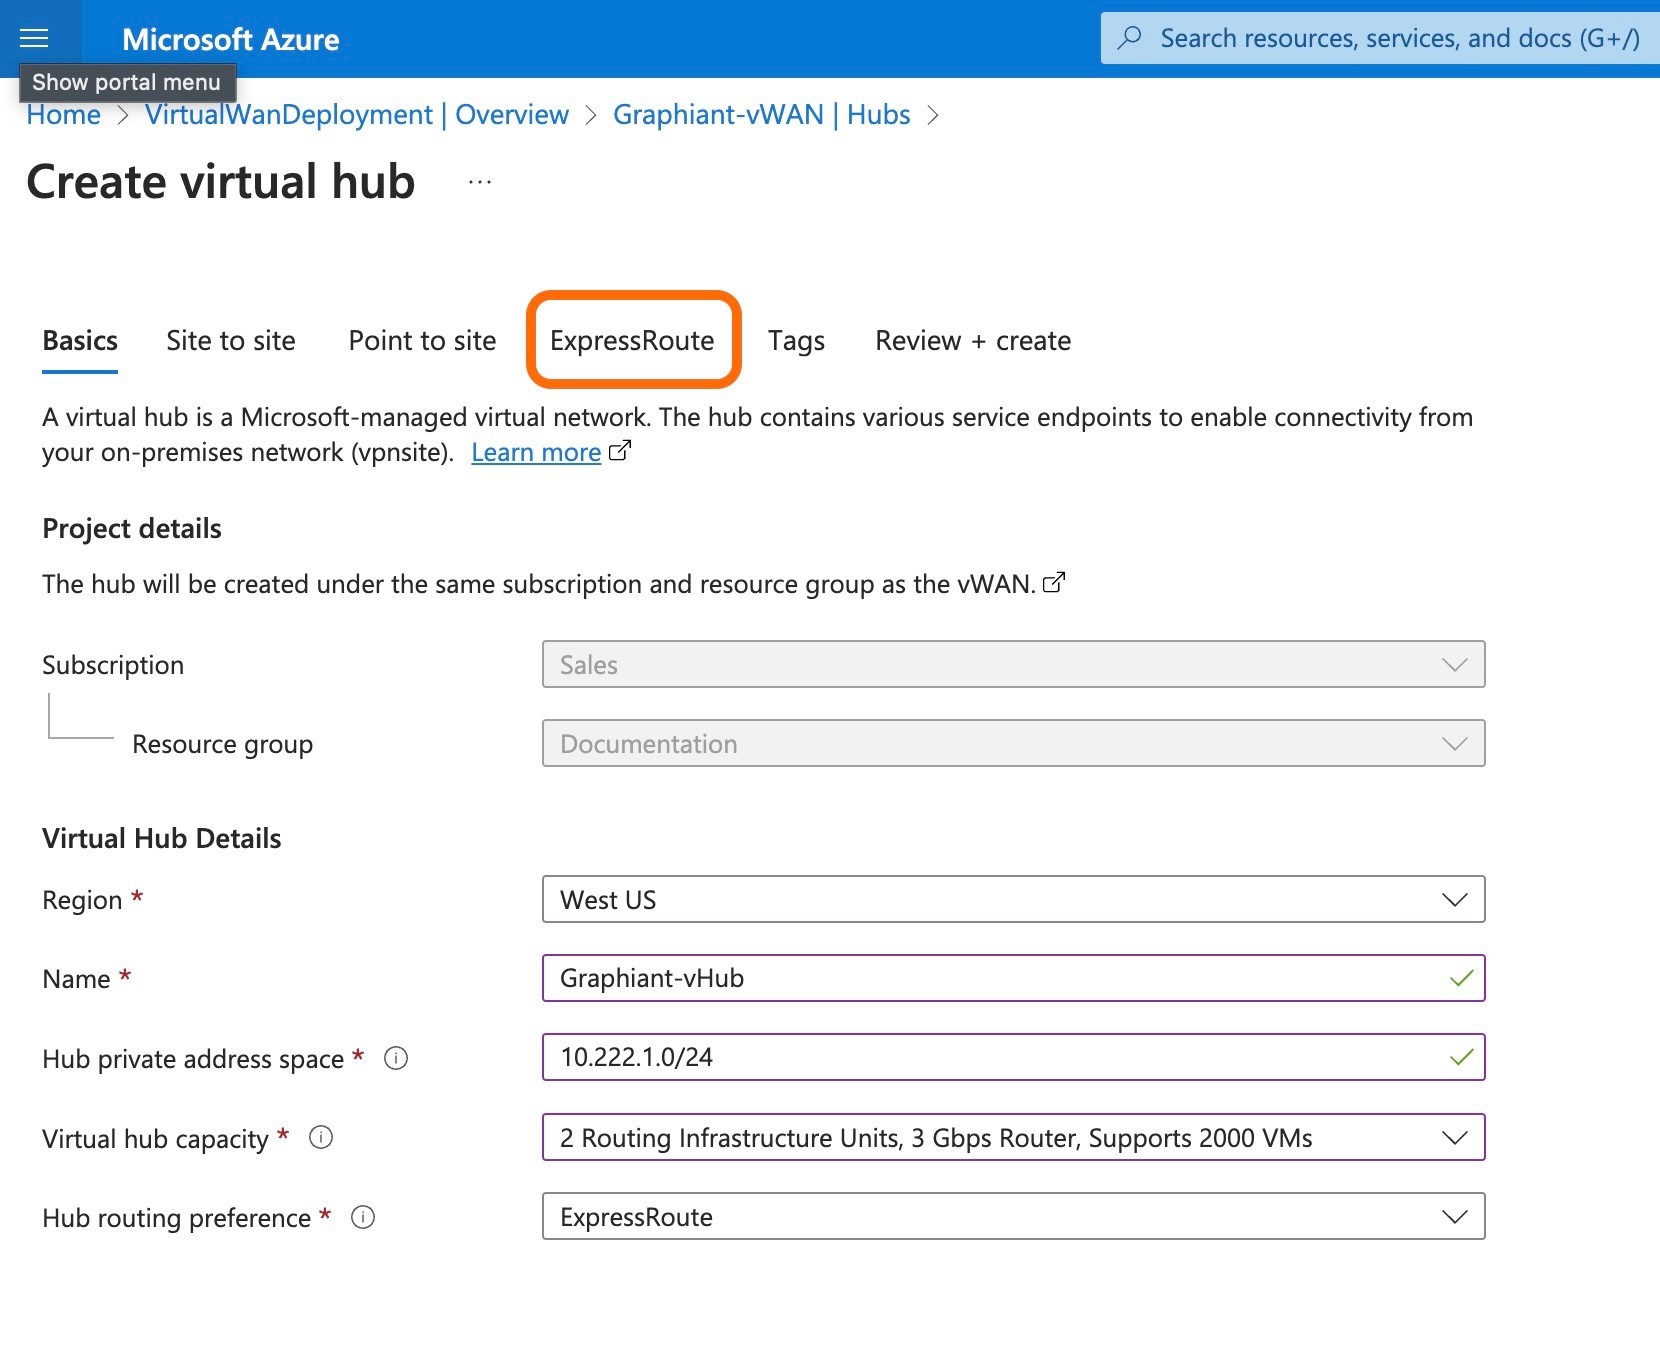
Select the 'ExpressRoute' tab.
Click 'Yes' to create an ExpressRoute gateway. This will reveal the configuration settings.
Gateway scale units: Select the desired value from the drop-down.
Select 'Review + create' to validate.
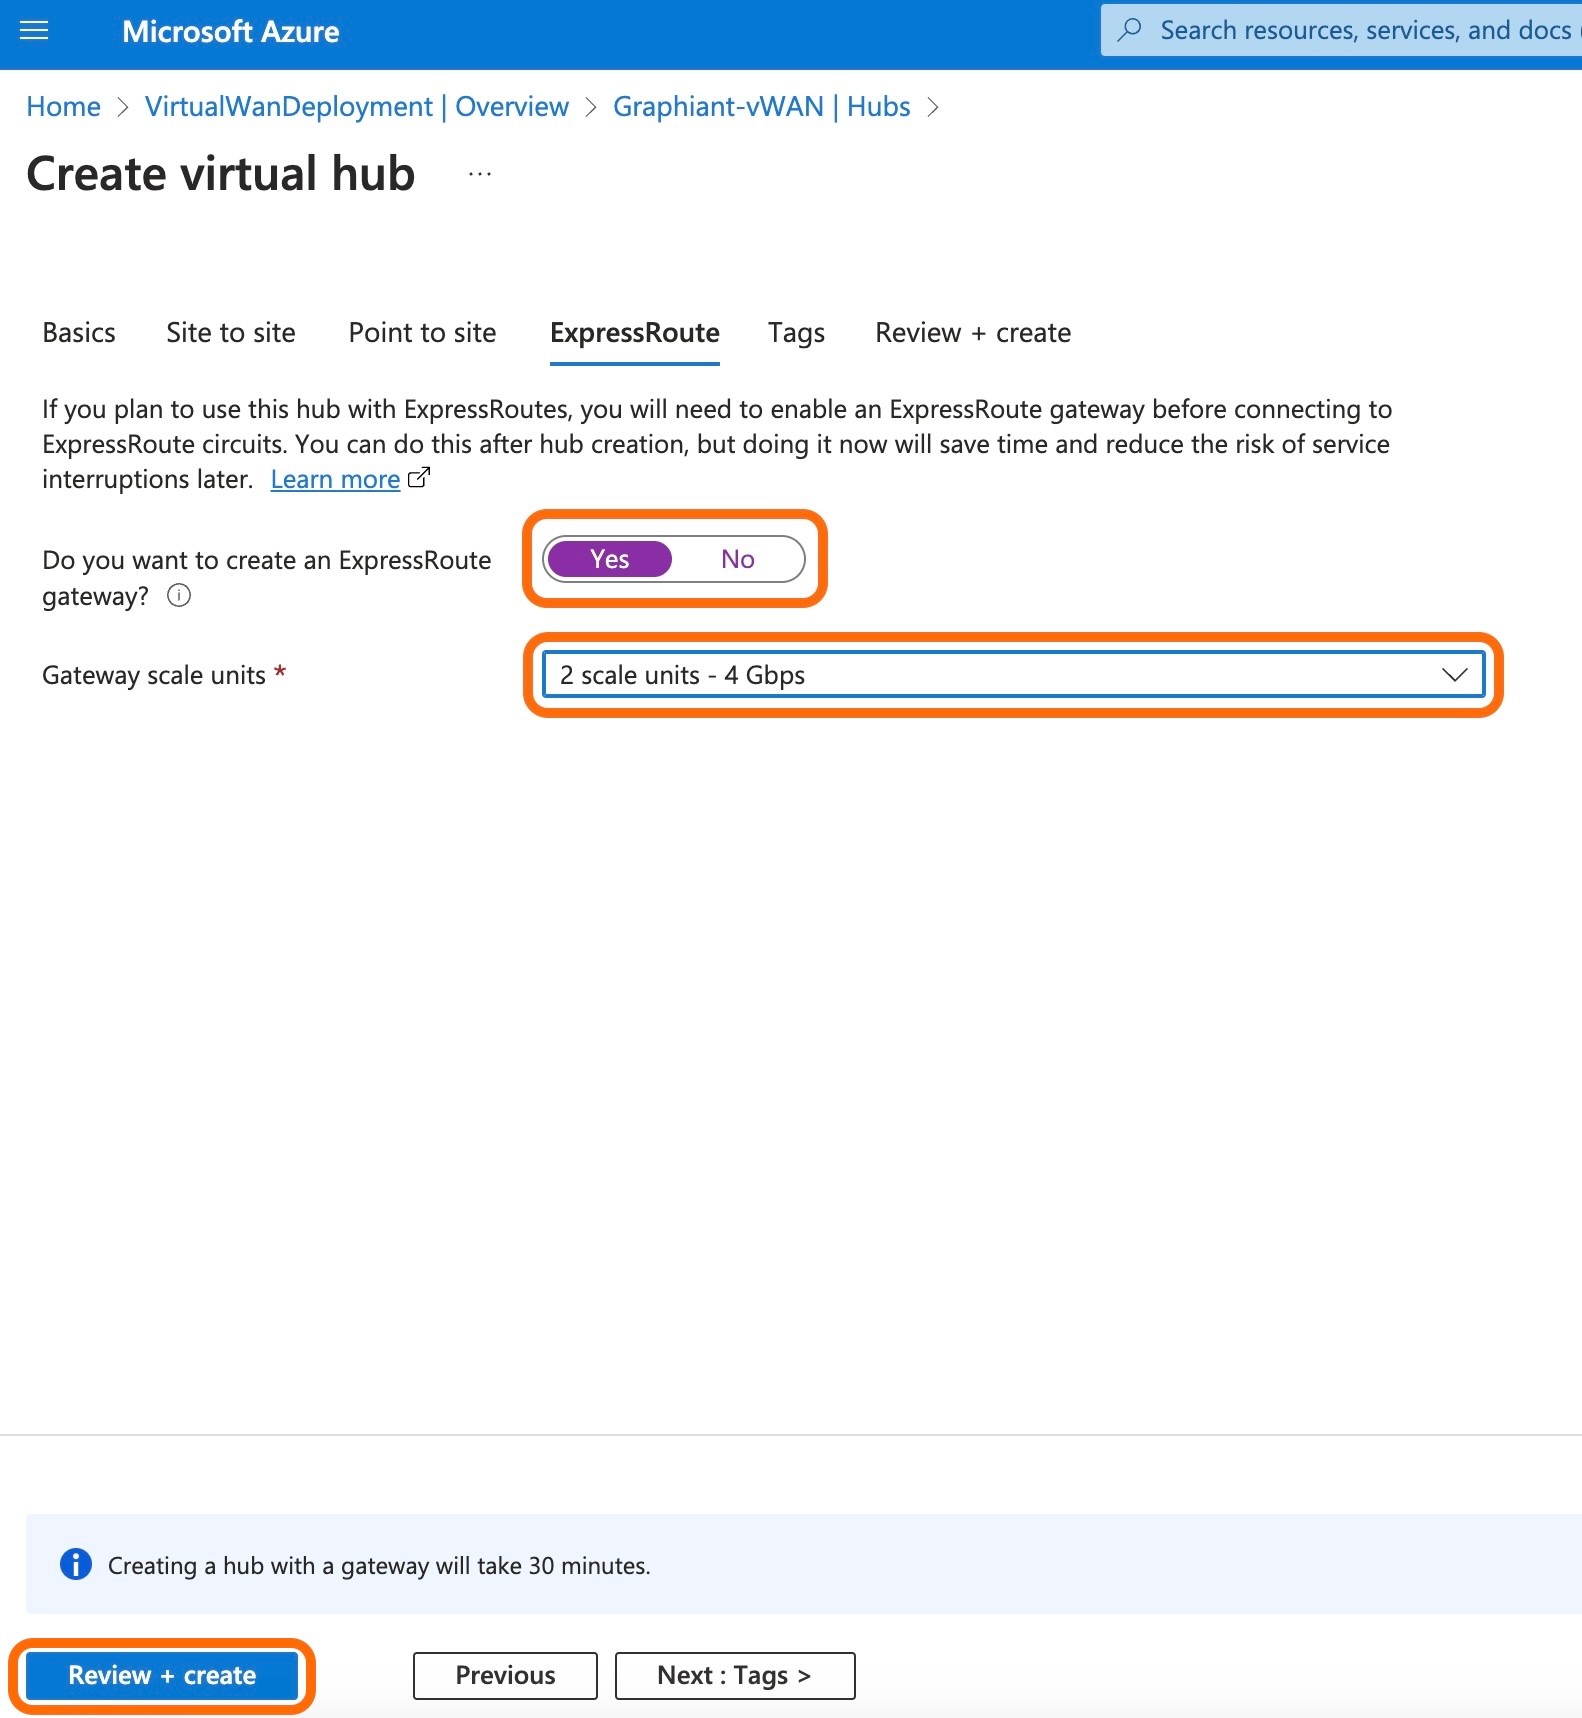
When the message "Validation passed" appears, click 'Create'.
Note:
Hub creation can take approximately 30 minutes to complete.
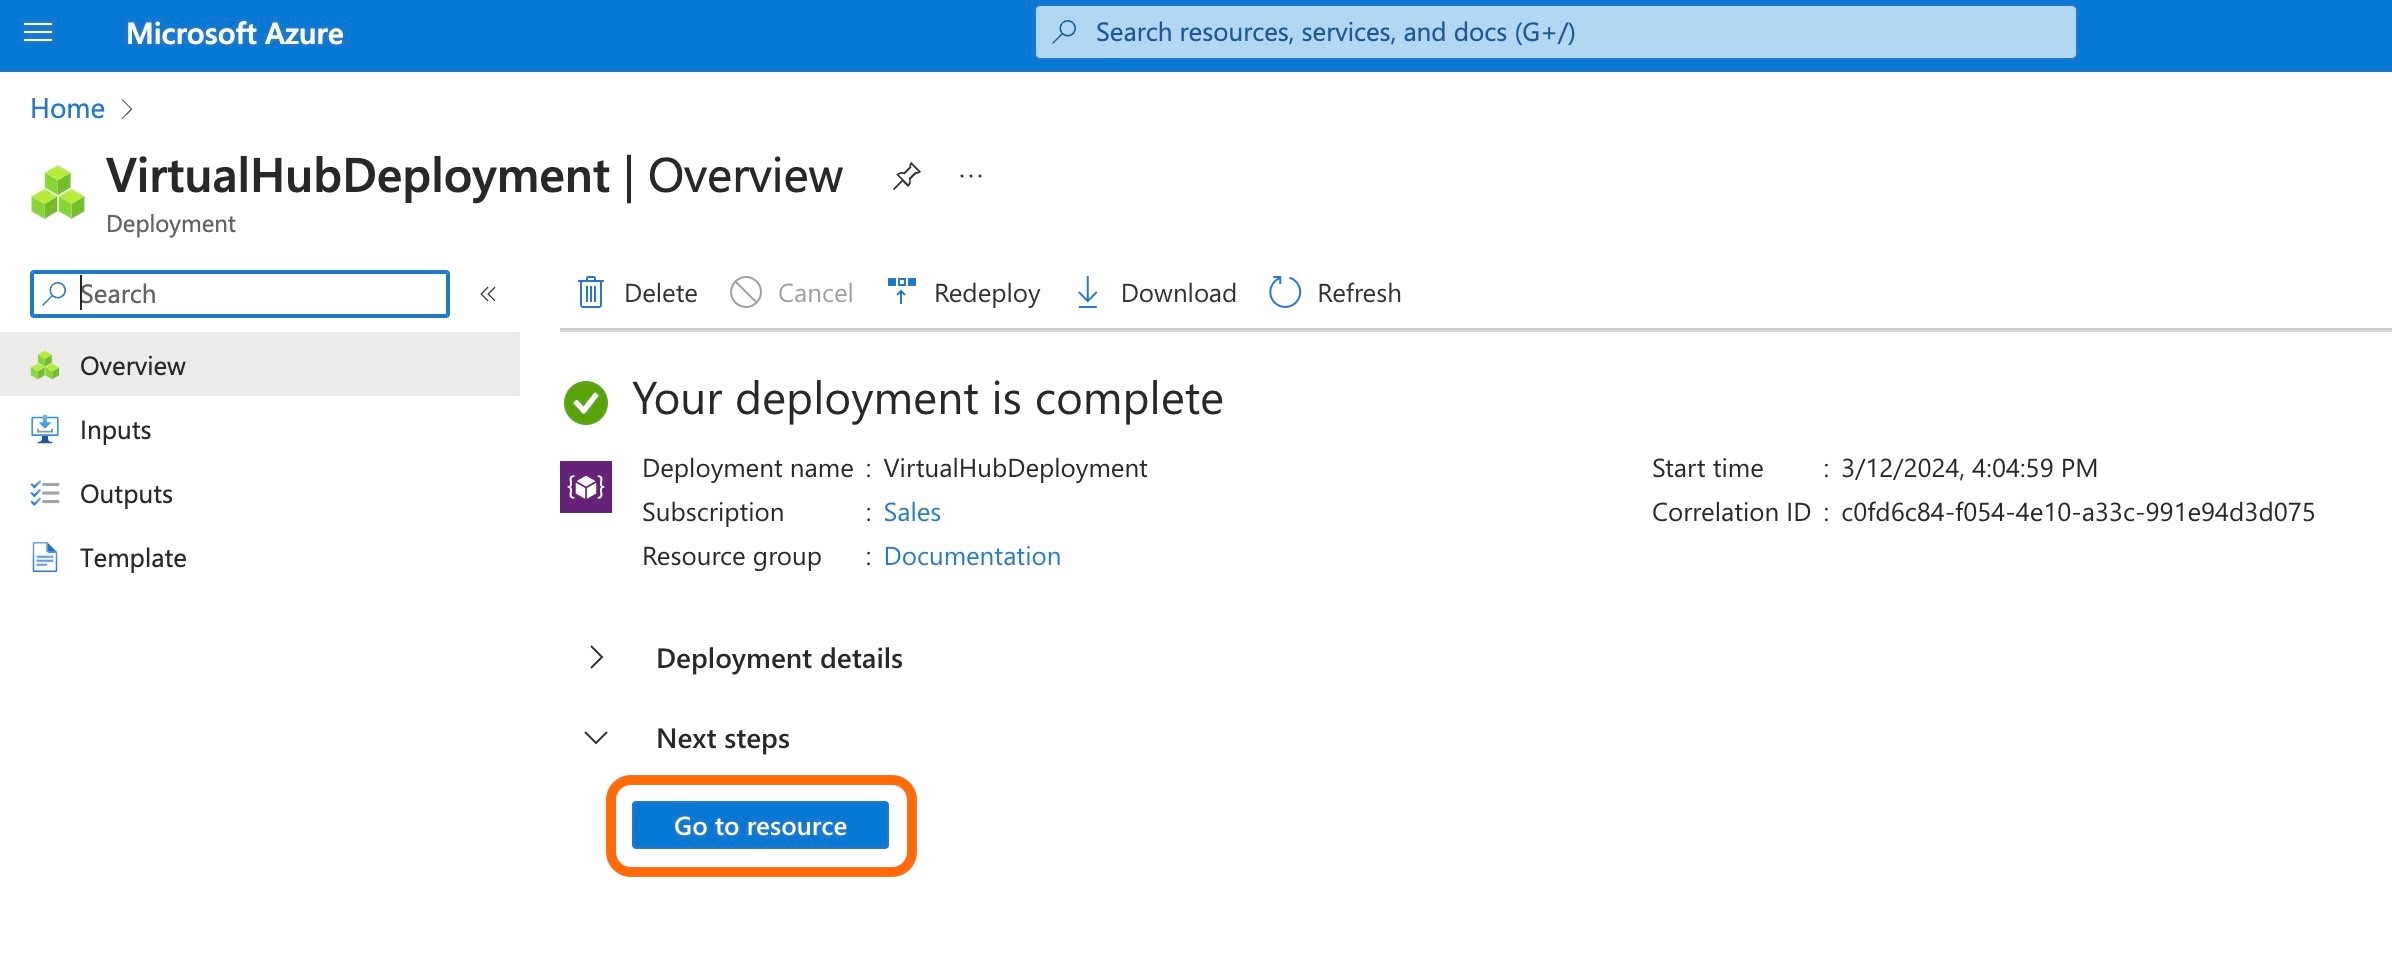
When the deployment is complete, select 'Go to Resource' to navigate to the virtual Hub.
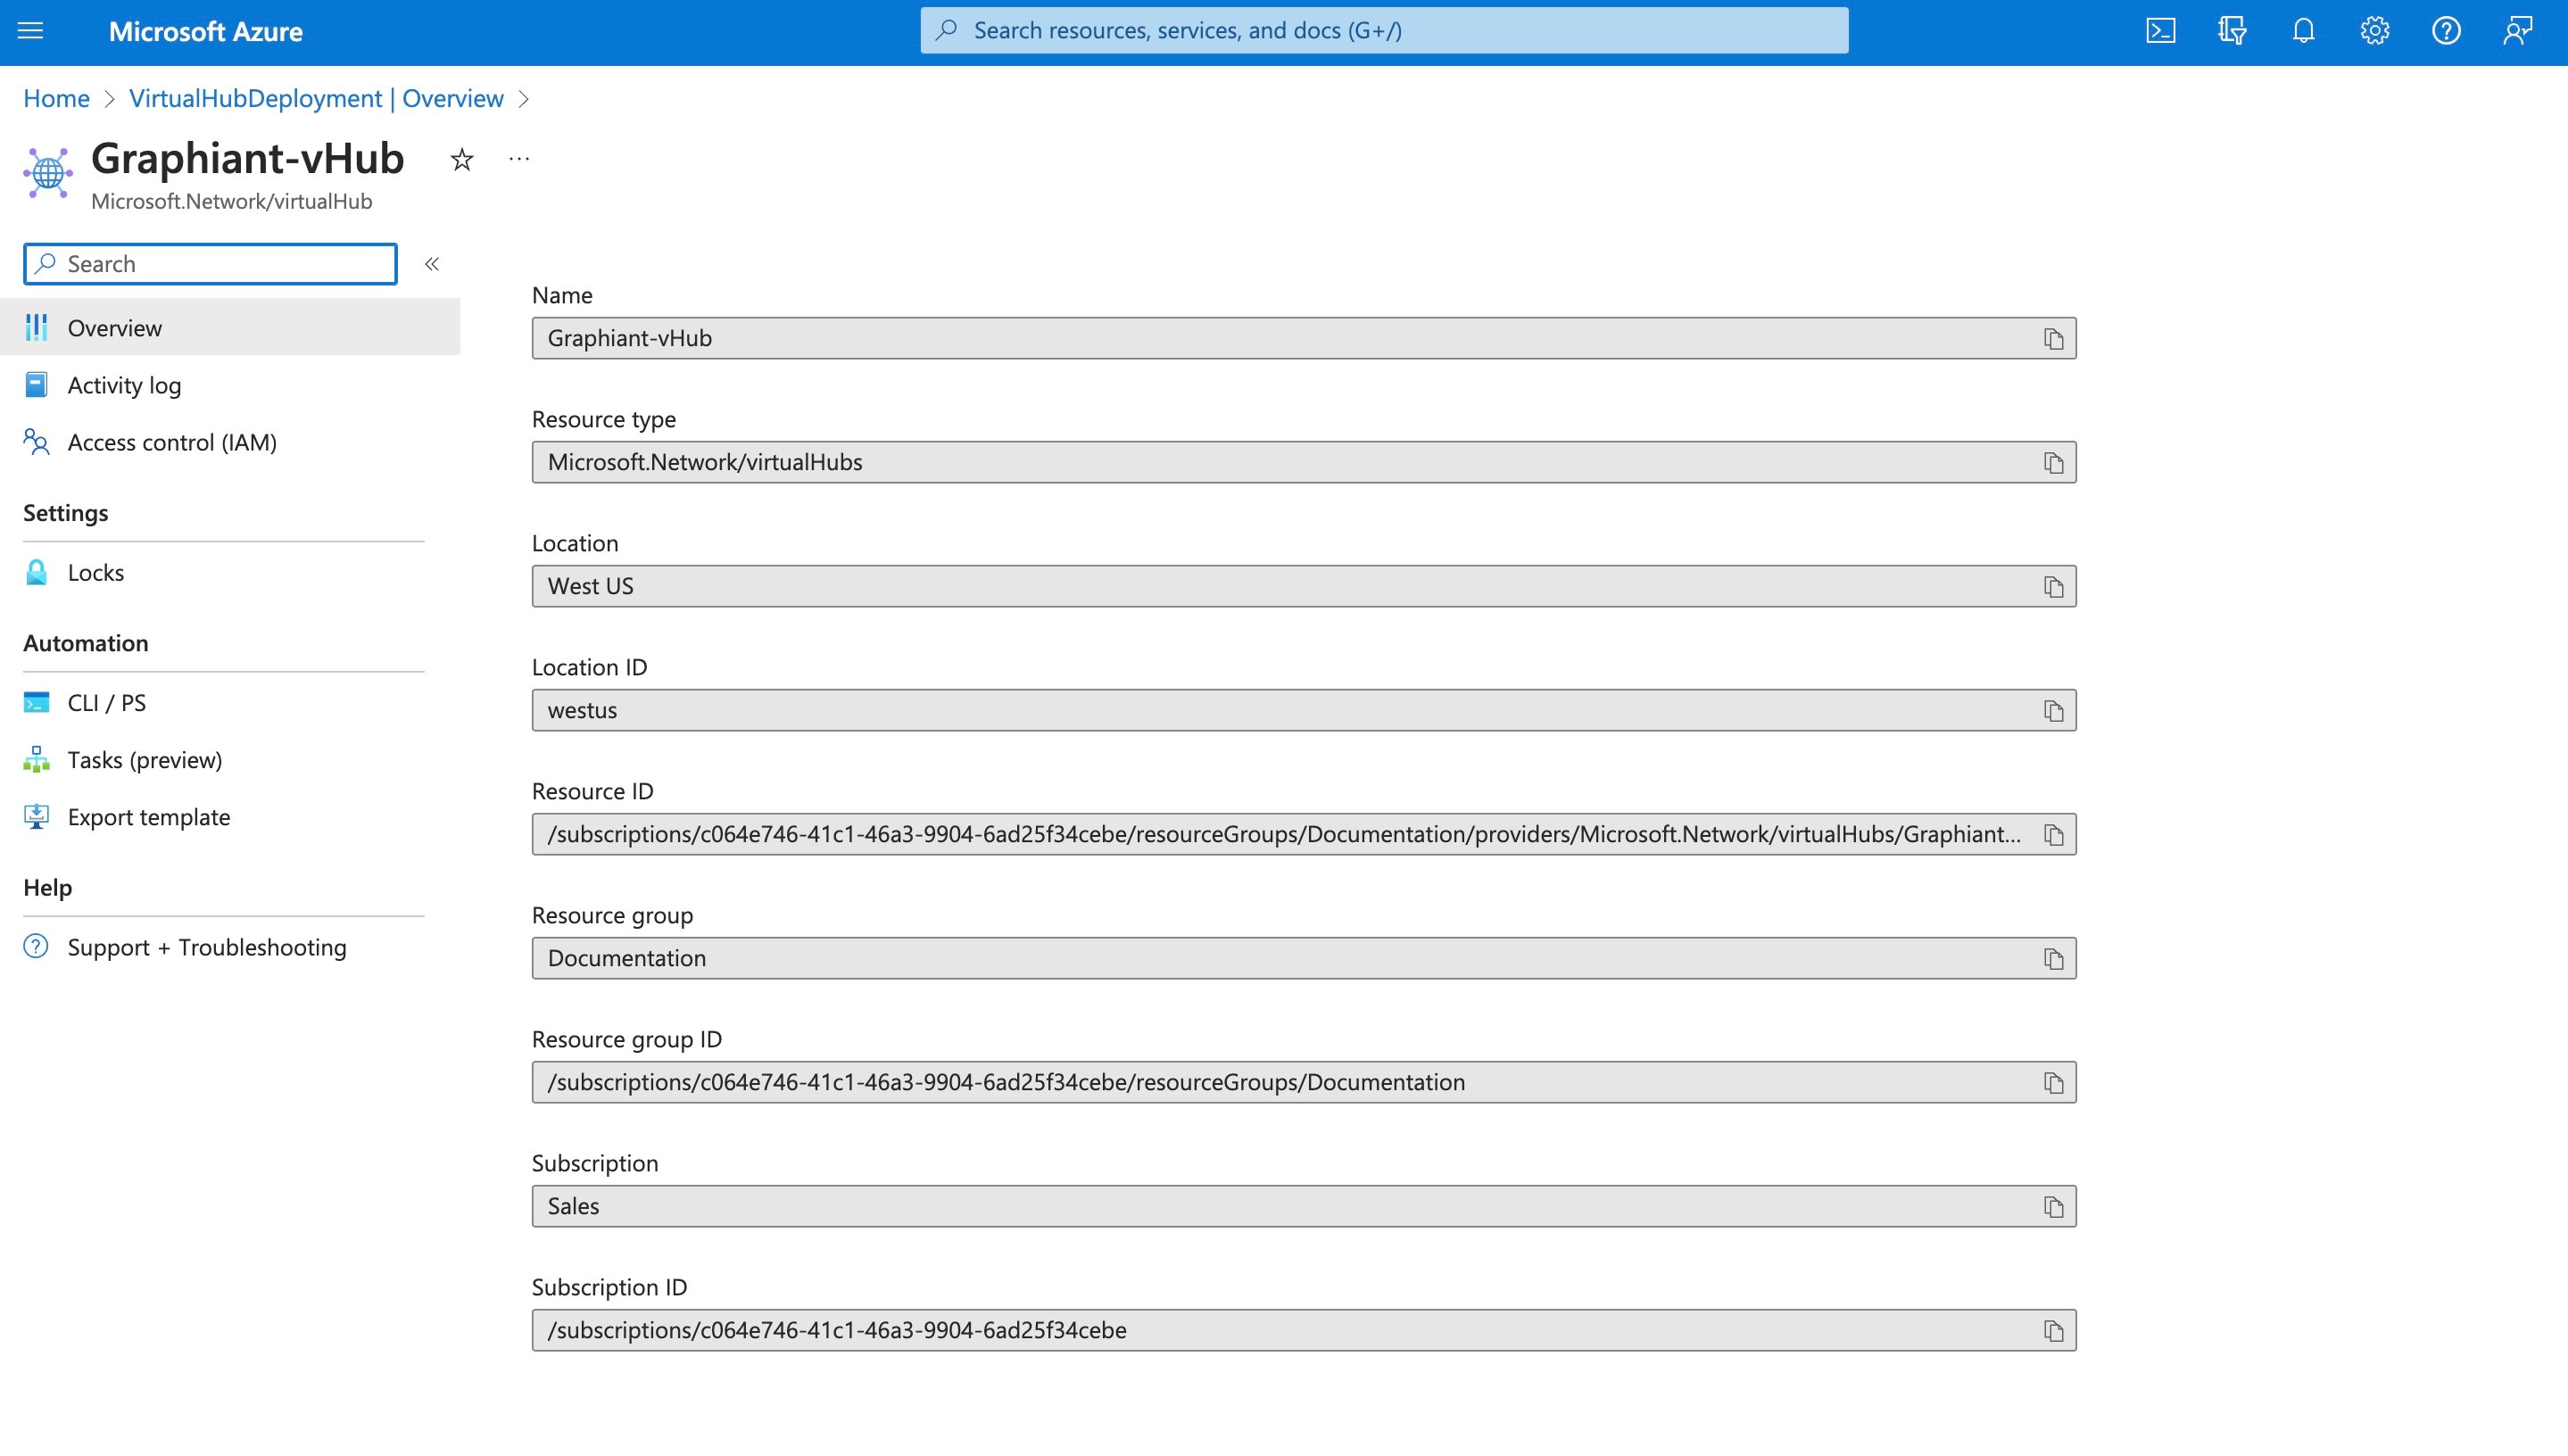
The details of the virtual Hub can be found on its page.
Proceed to the process for Gateway service for Azure connectivity in the Graphiant portal.
b) Creating an ExpressRoute Gateway in an Existing Hub
A gateway can be created in an existing Hub by editing the Hub.
Go to the virtual WAN, and click 'Hubs' in the left side menu under "Connectivity".
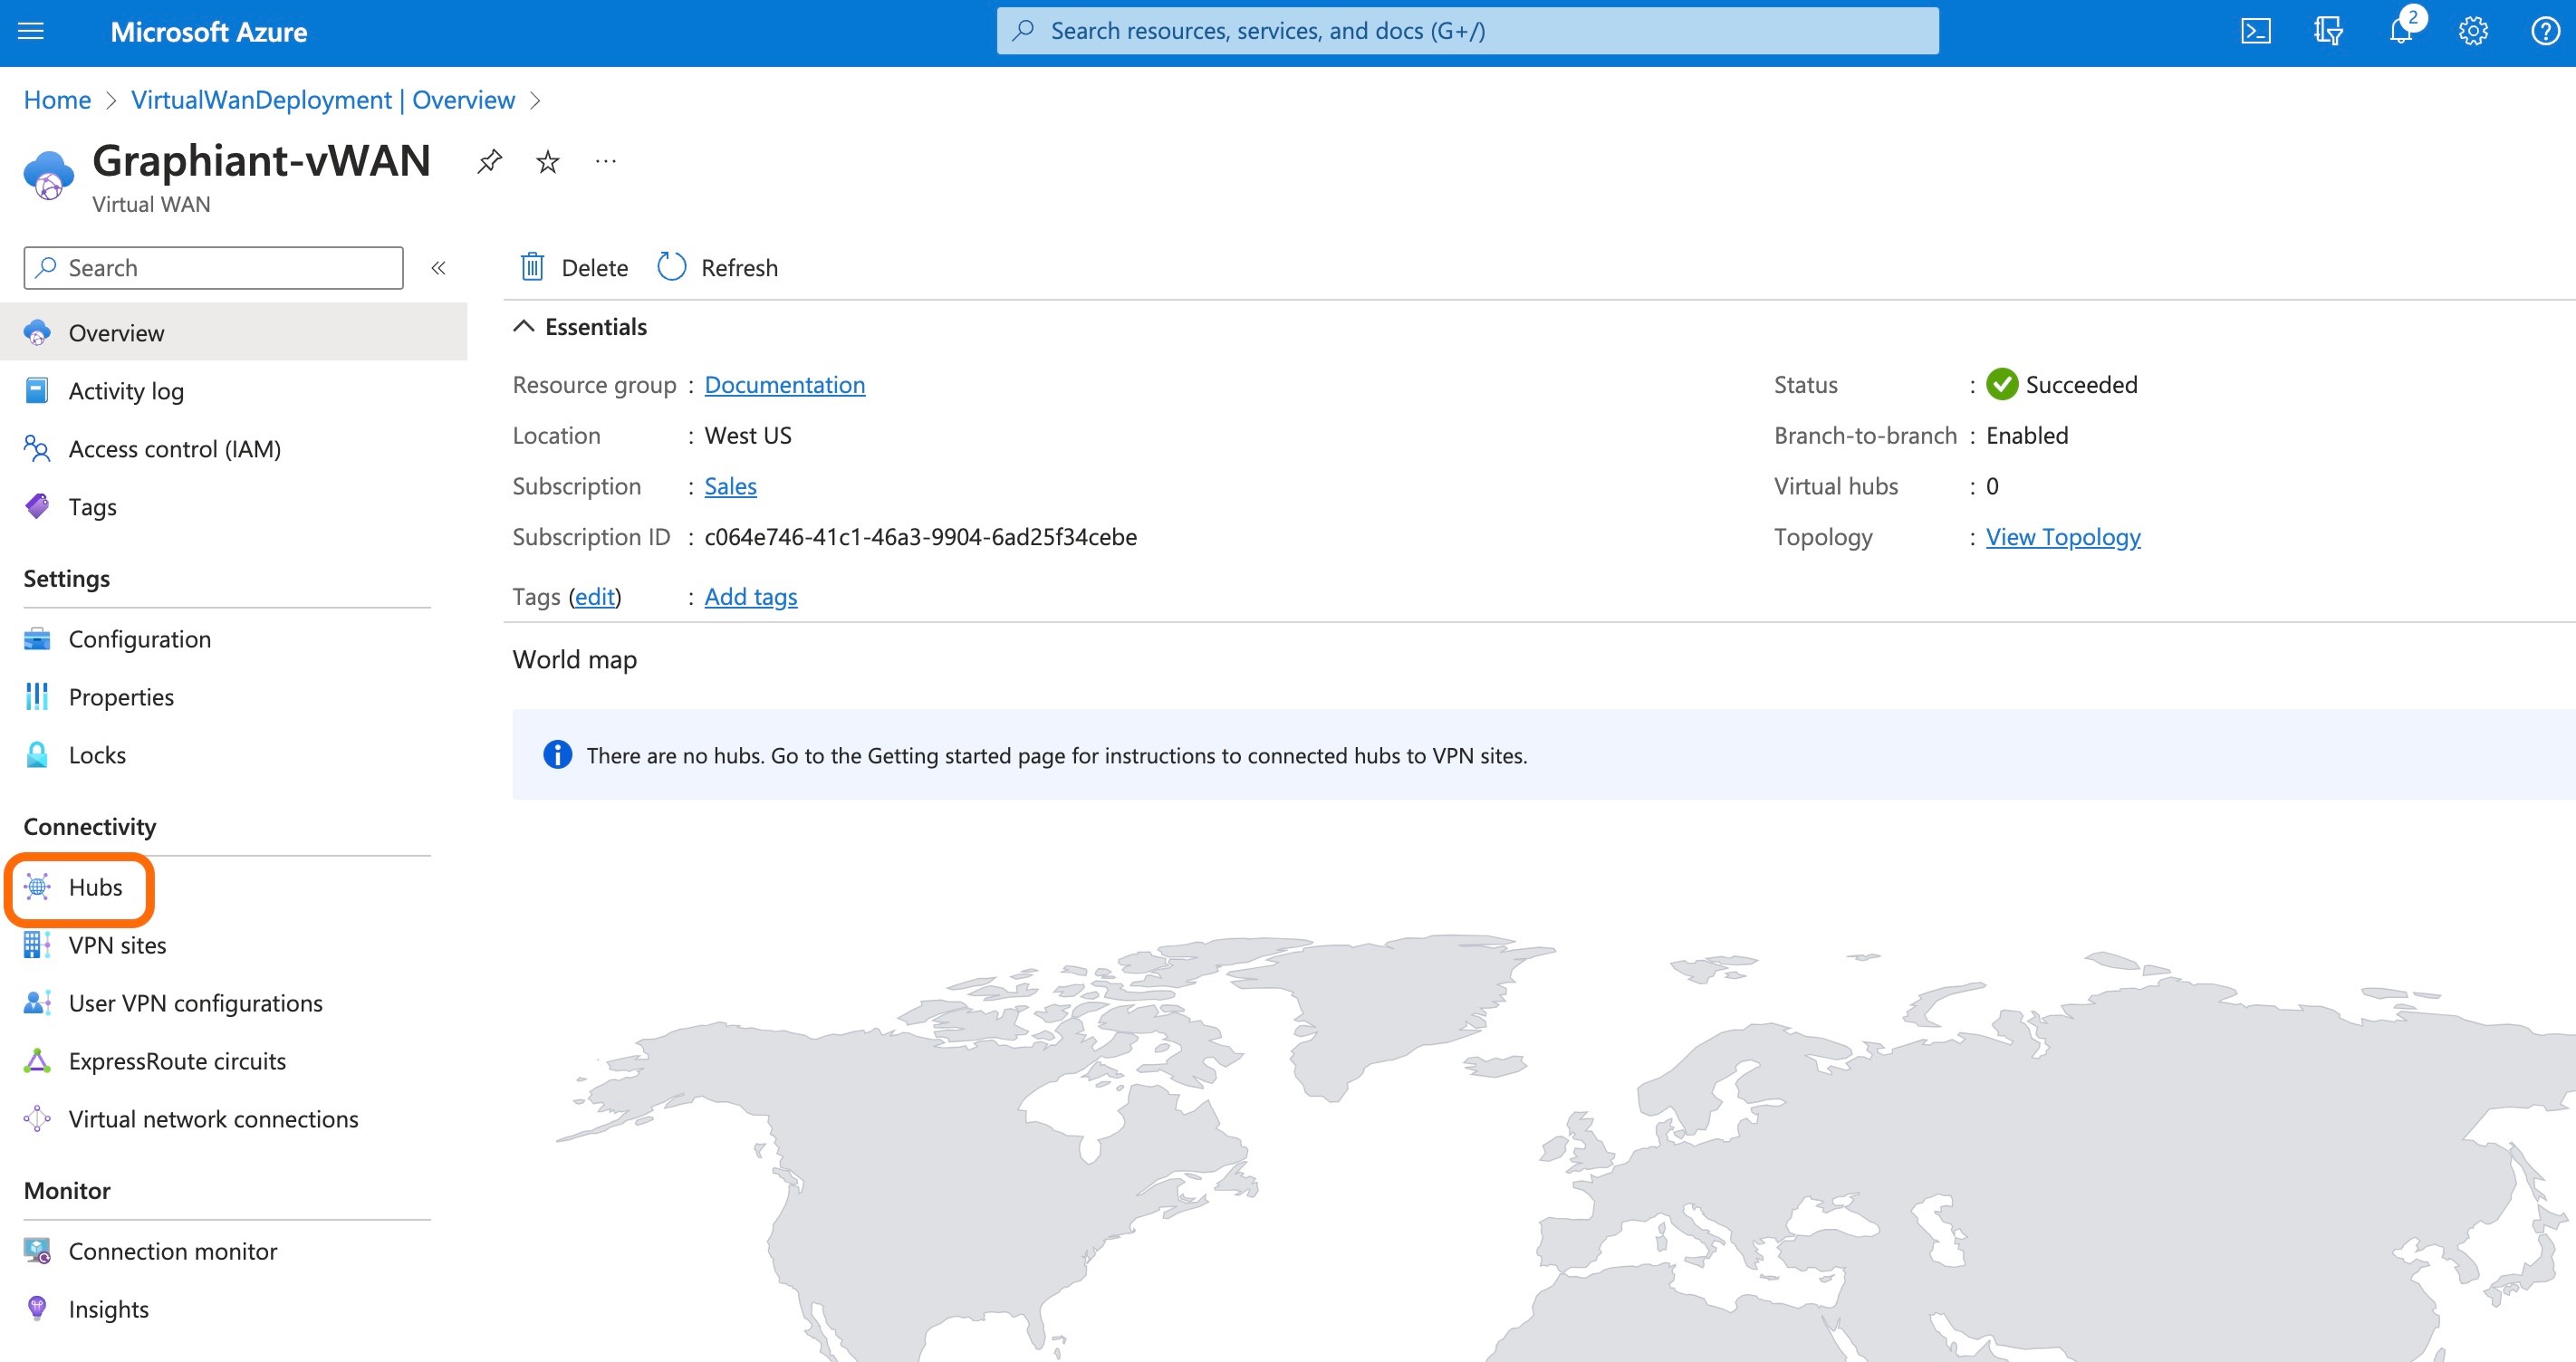
Click the Hub that is to be edited to include the ExpressRoute gateway.
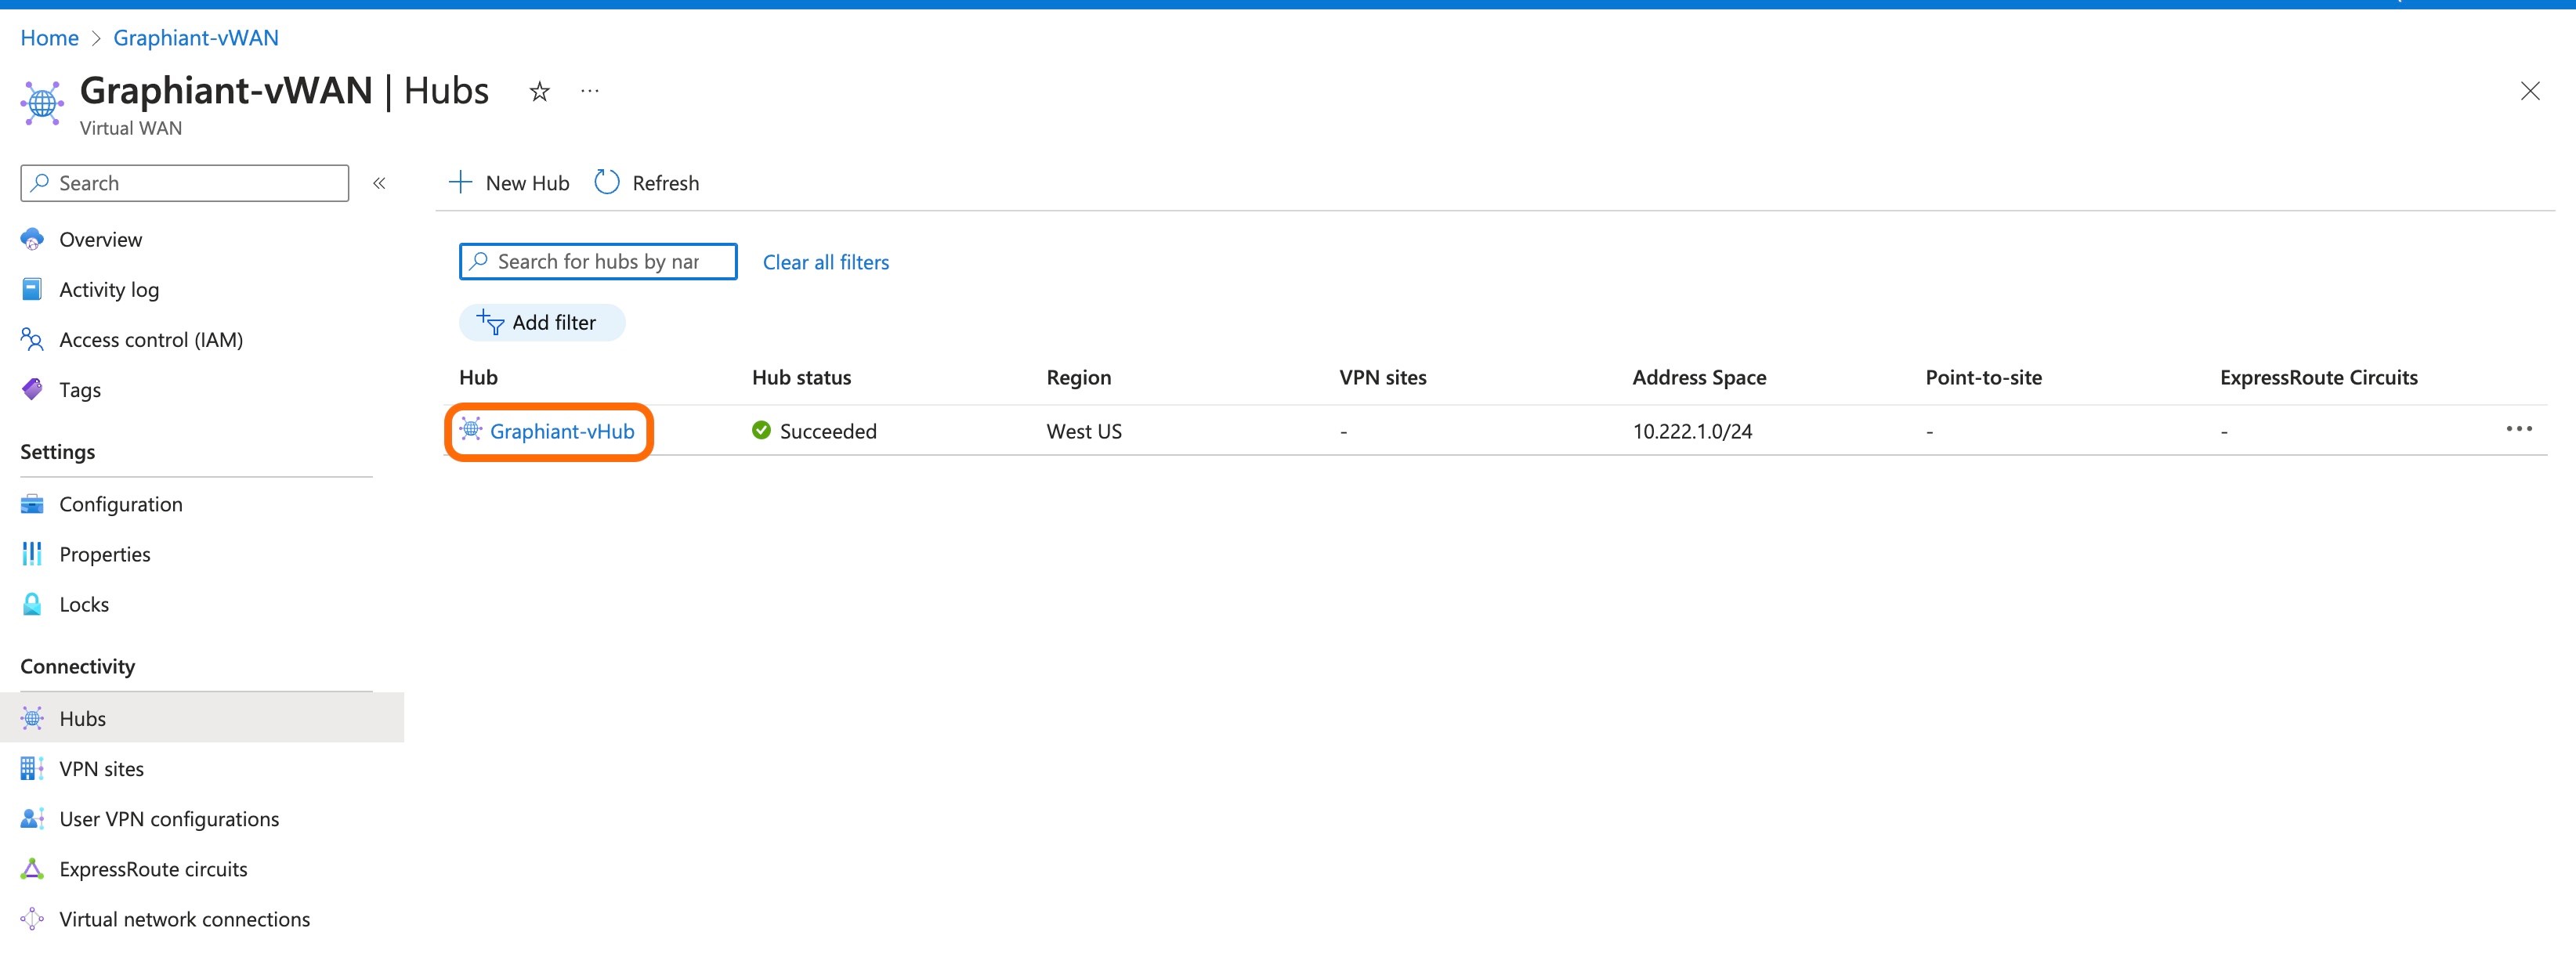
At the top of the page, click 'Edit virtual hub'.

Select the checkbox 'Include ExpressRoute gateway'.
Adjust any other settings desired.
Click 'Confirm' to confirm changes.
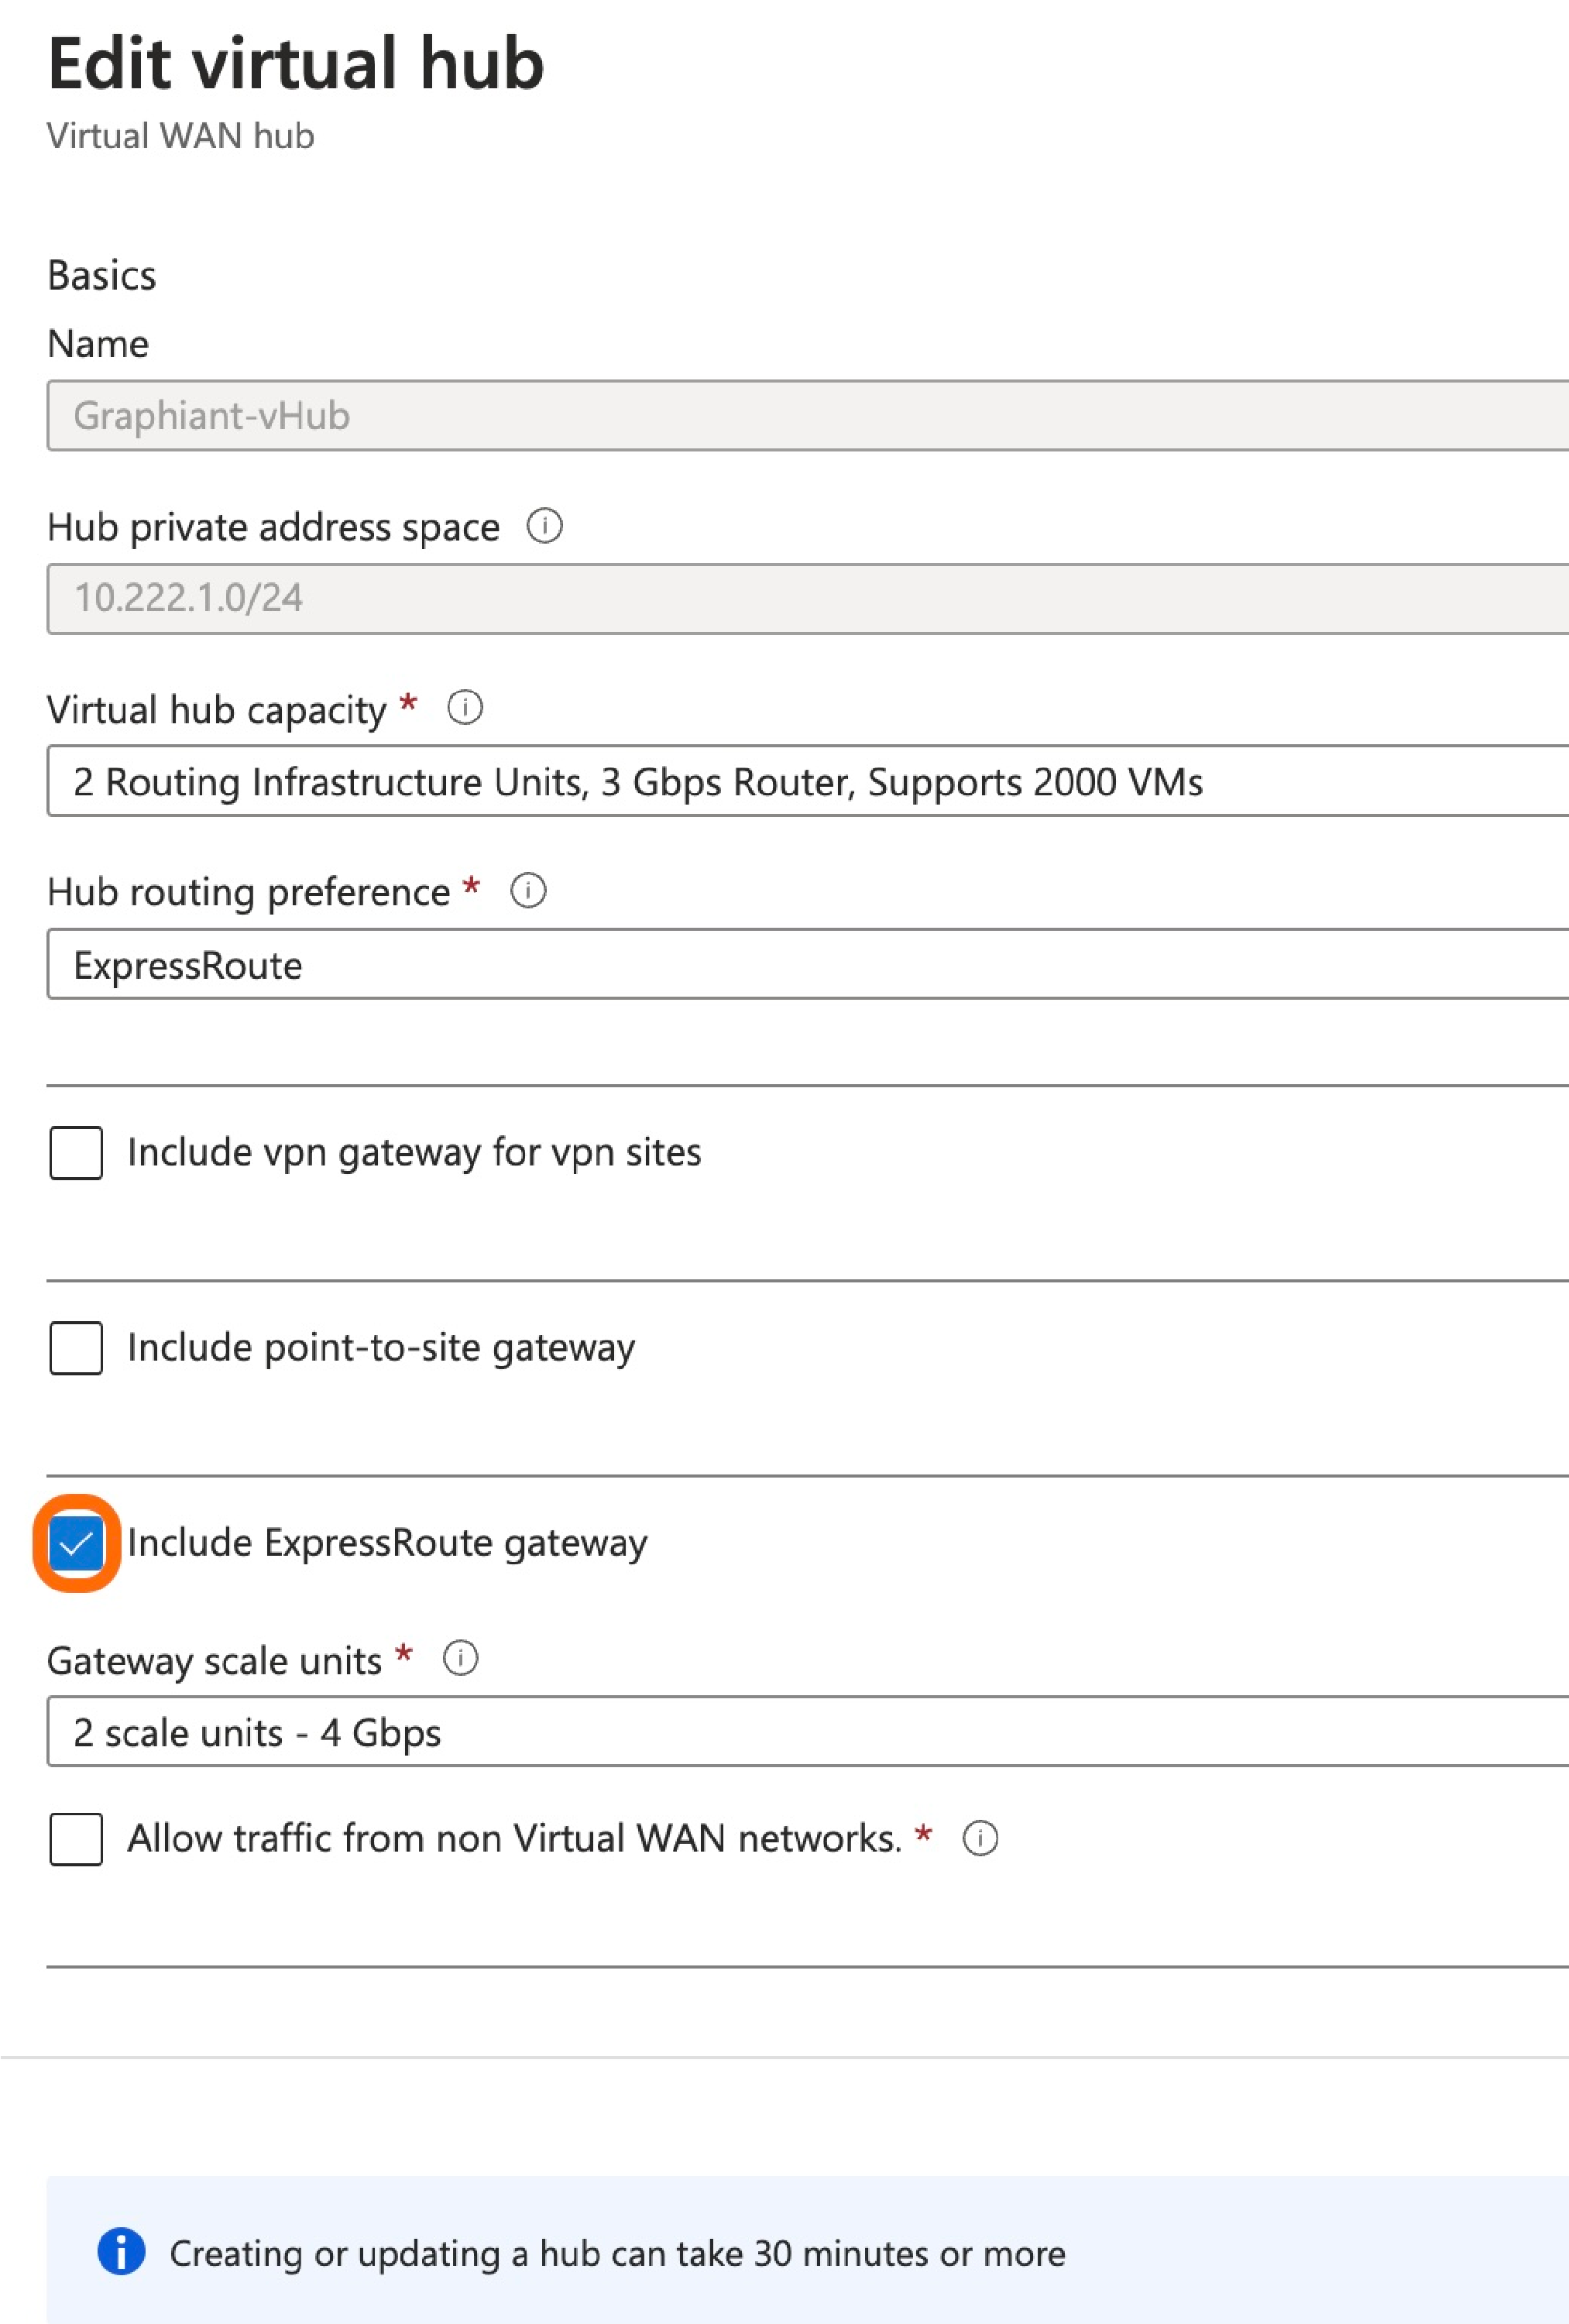

Note:
Changes can take approximately 30 minutes to complete.
The next step is to request gateway service for Azure in the Graphiant Portal.
Gateway Service for Azure connectivity in the Graphiant Portal
Step 1: Locating Gateway Service in the Graphiant Portal
From the Home screen, navigate to the Create Gateway Services screen by one of the following options:
Option A: Reaching the Gateway Service via Quickstart
Locate the "Quickstart" section on the left of the screen; select 'Setup Gateway Service'.
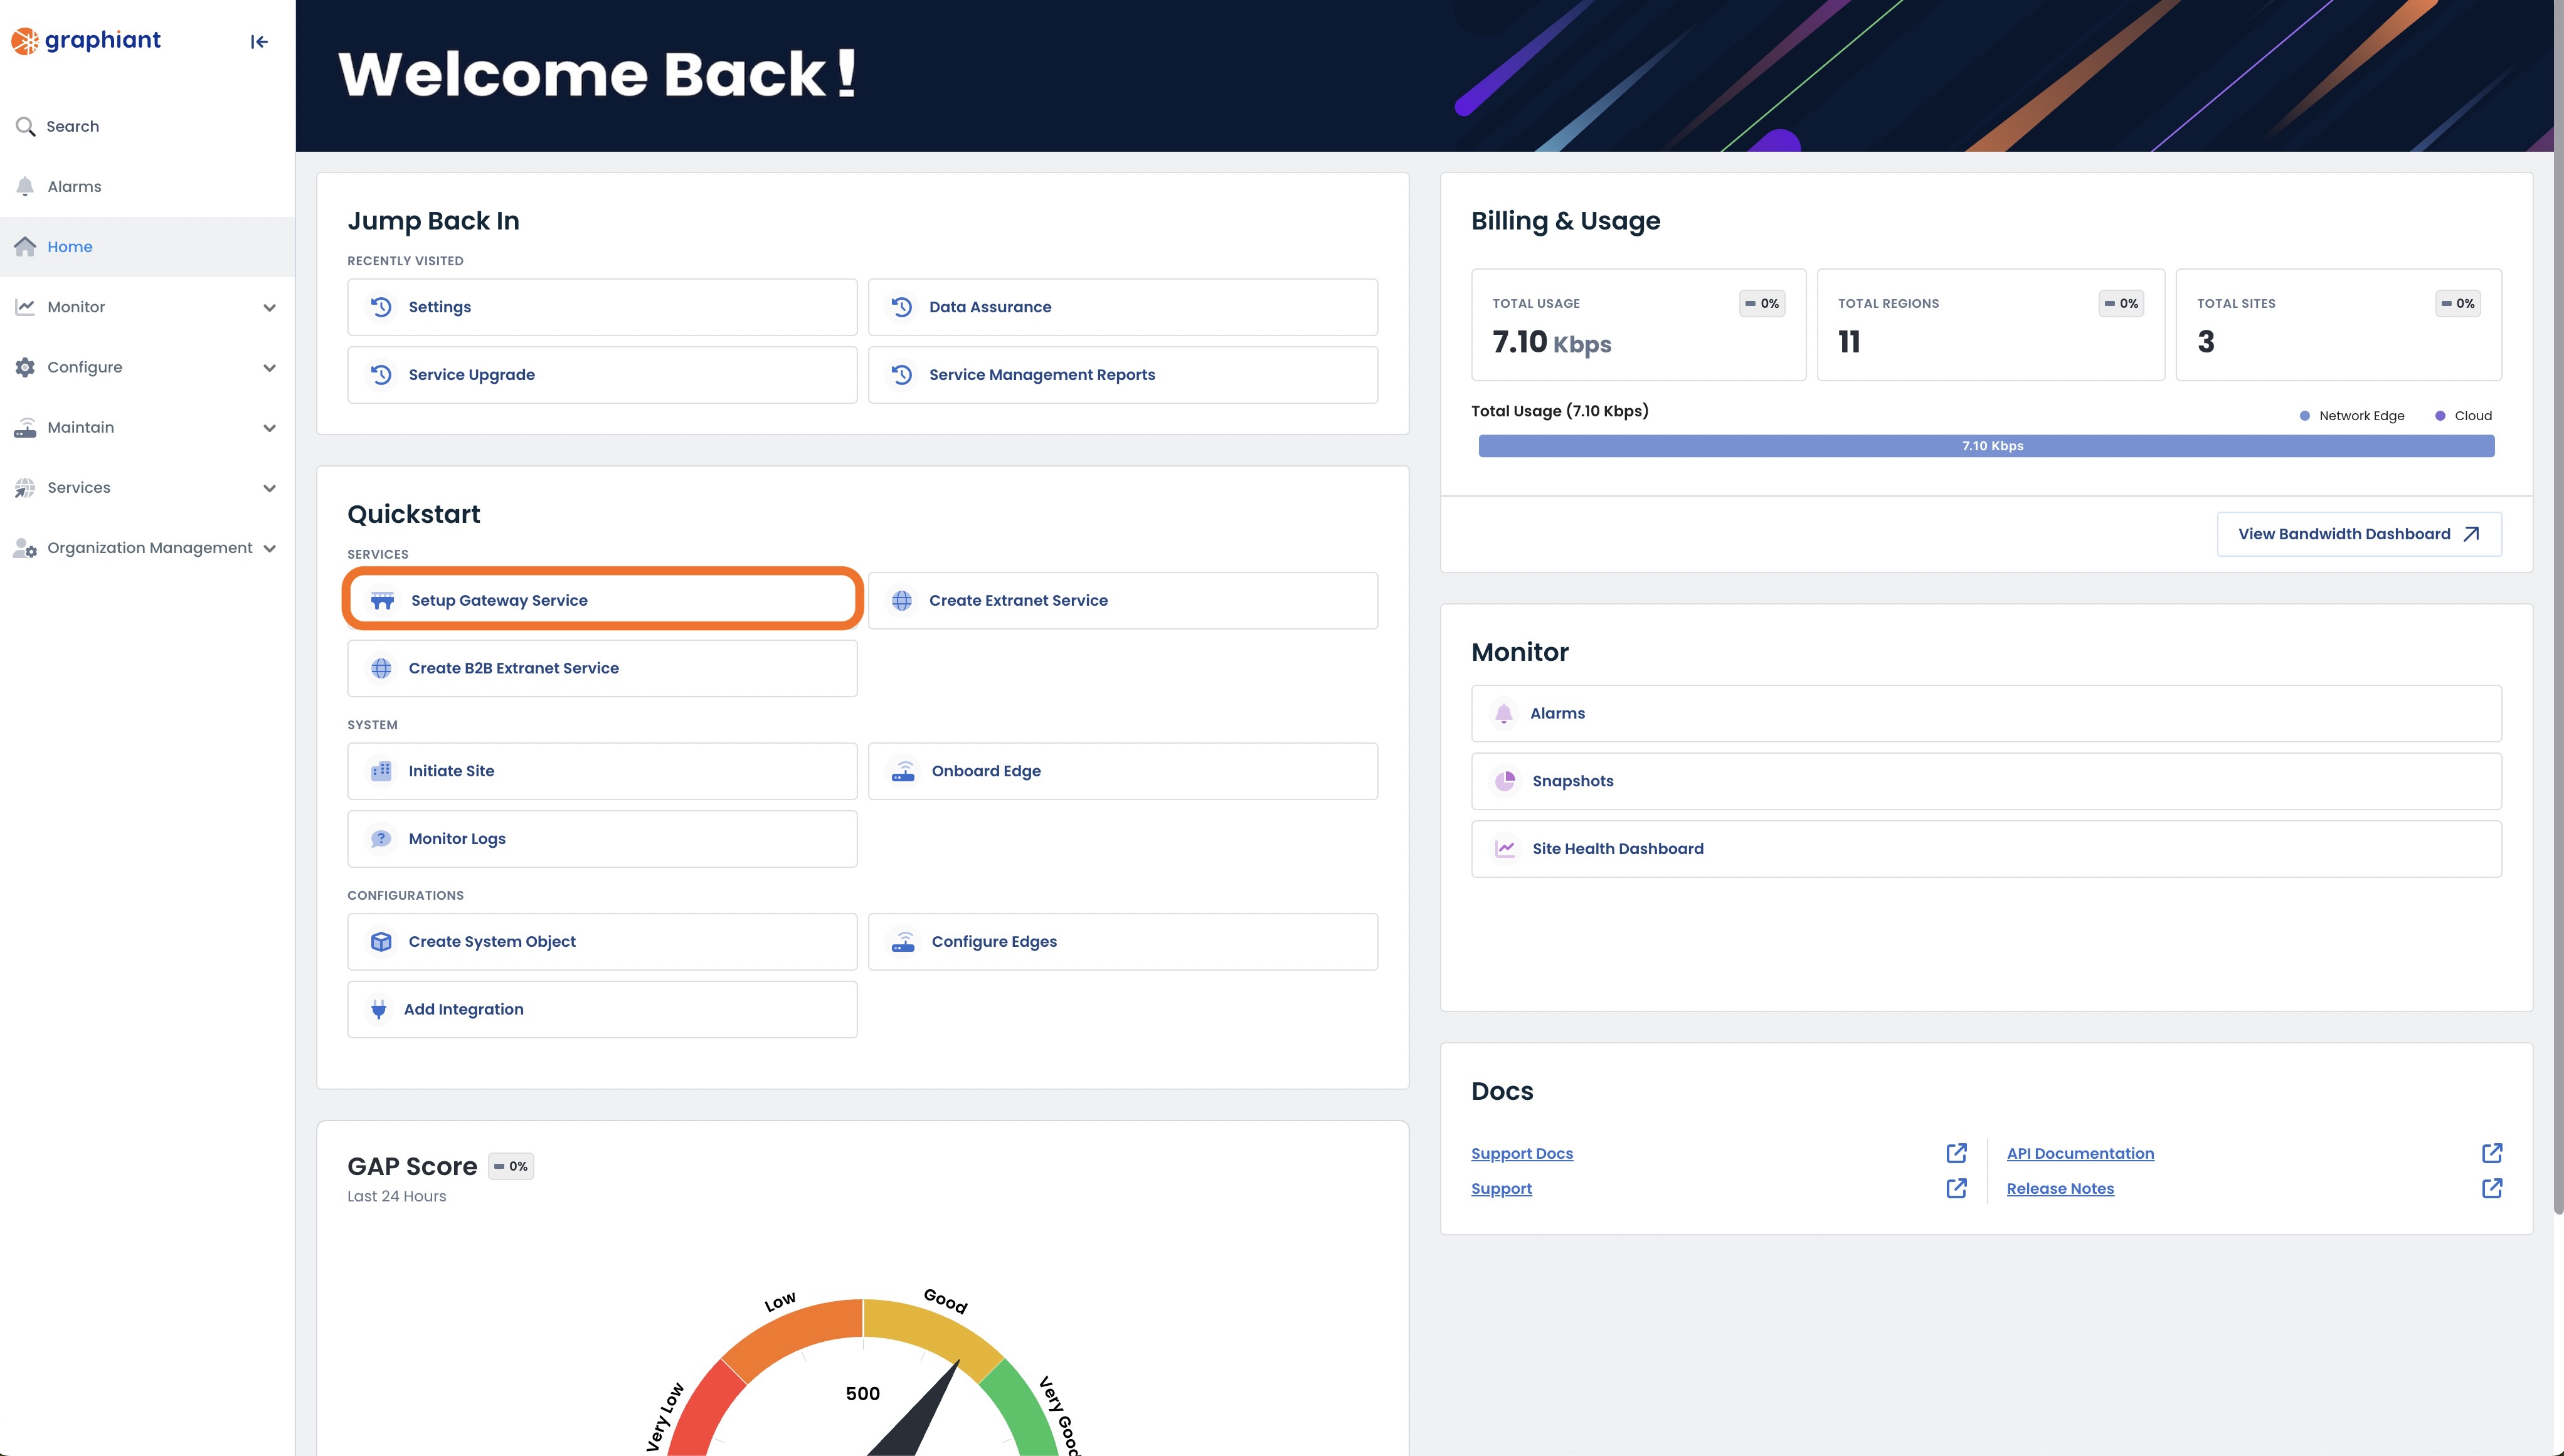
This will take you to the Gateway Services page of the Graphiant Portal where you will be able to provision a new gateway service.
.png)
Follow the instructions here to configure your gateway service.
Option B: Reaching the Gateway Service via the sidebar menu
Click 'Services' in the sidebar; select 'Gateway’.
.jpeg)
This will take you to the Gateway Services page of the Graphiant Portal where you will be able to view existing Gateway services as well as provision new ones.
.jpg)
To configure the Gateway service click the 'Create New' button.
Note:
To view an existing gateway service, simply click on the ellipses to the right of that service in the table.
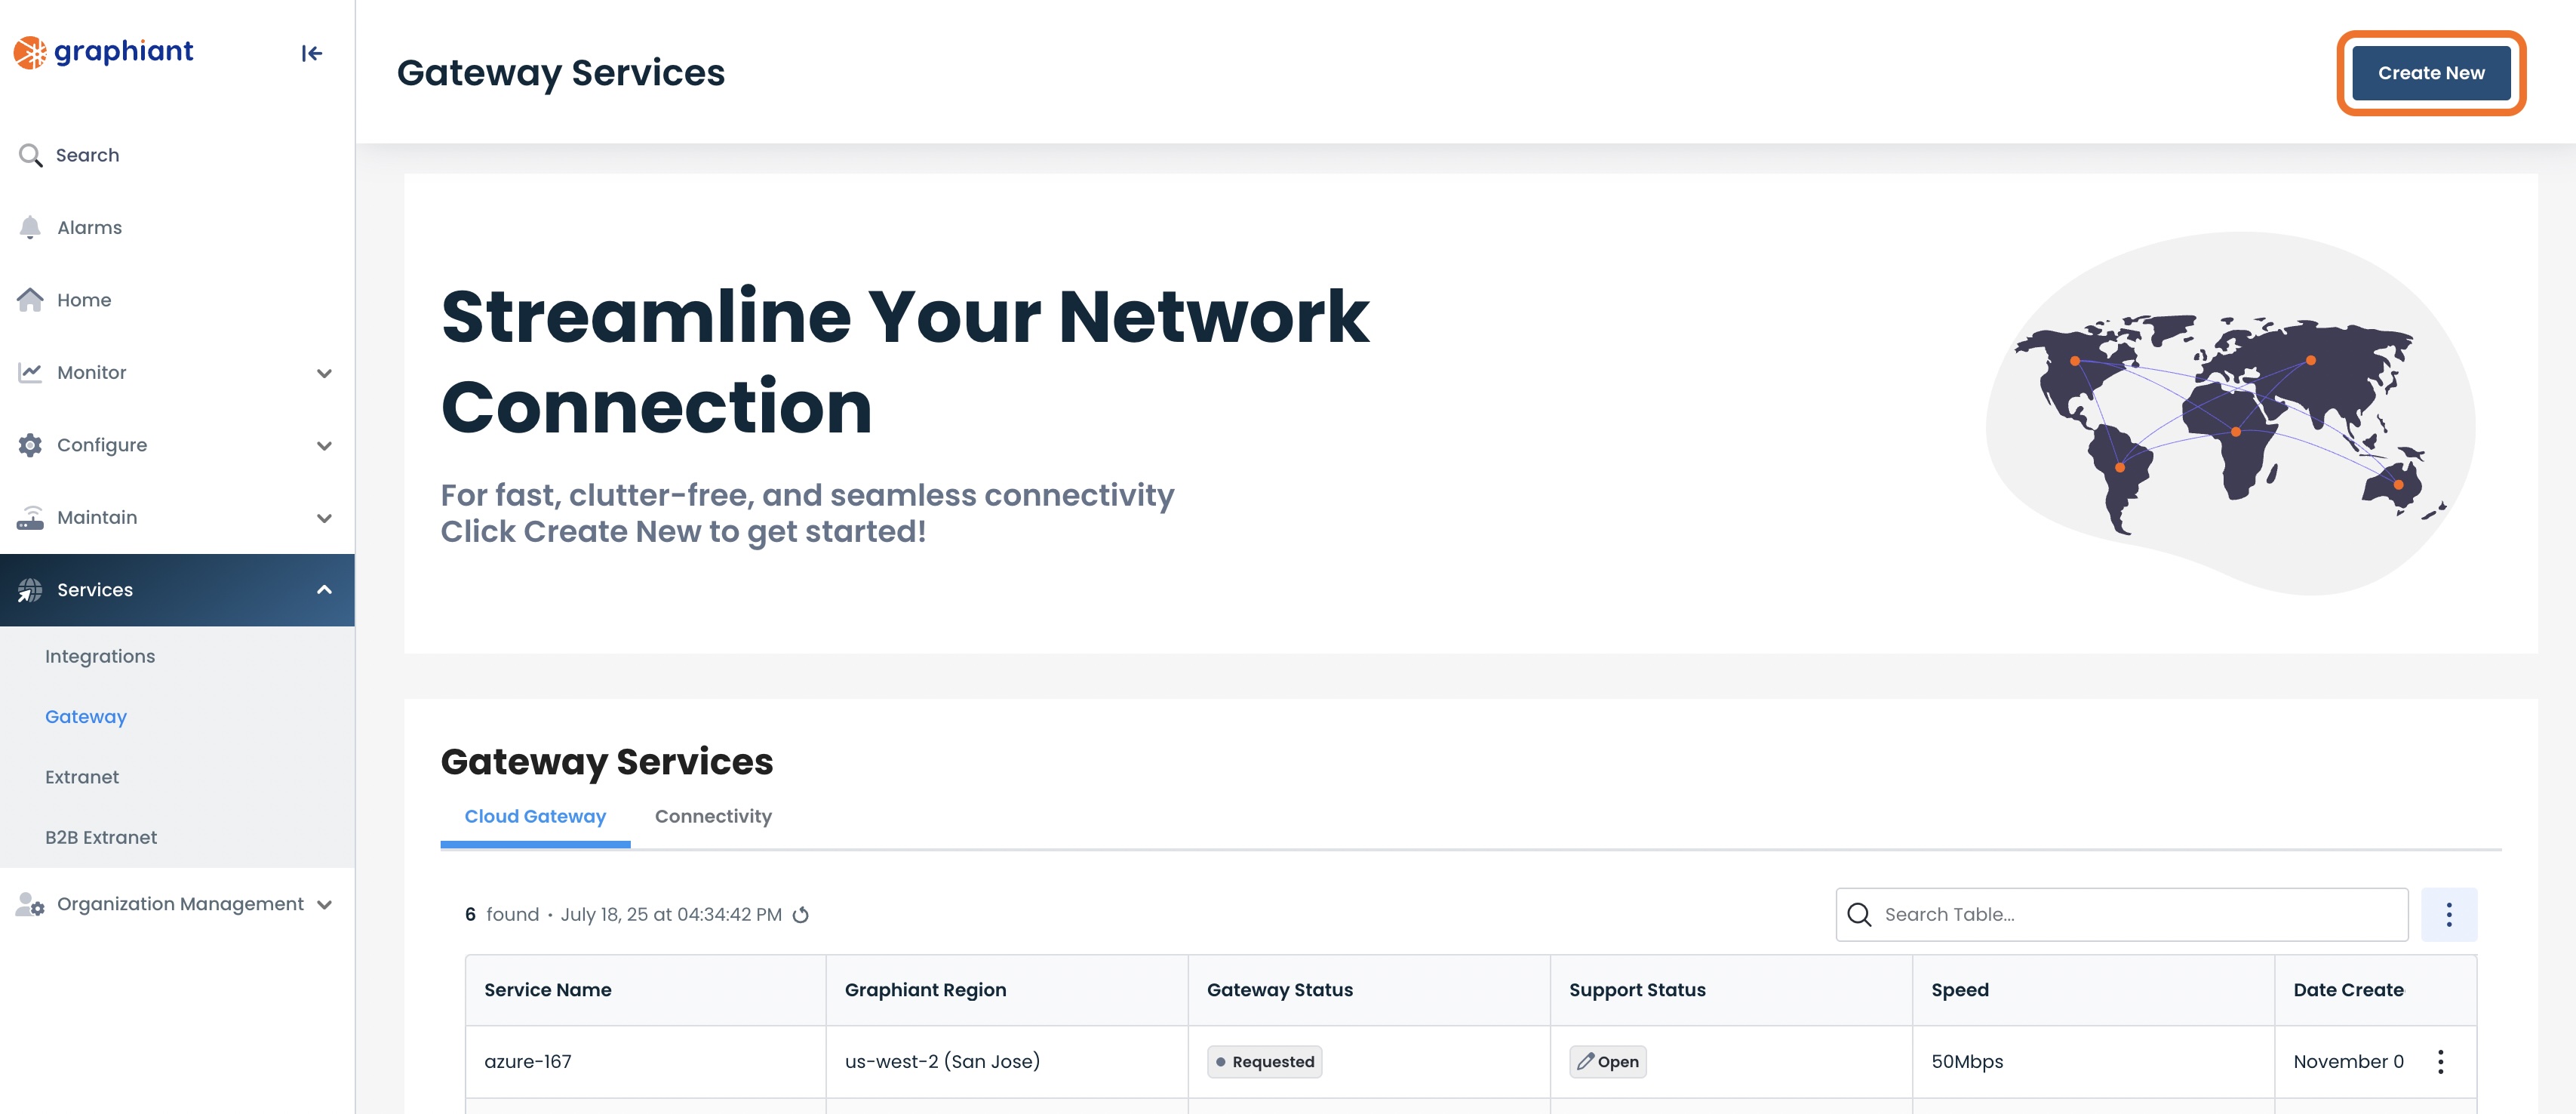
This will take you to the Gateway Services page of the Graphiant Portal.
Follow these instructions to configure your gateway service.
.png)
Step 2: Configuring Gateway Service in the Graphiant Portal
To configure the Gateway service click the 'Create Gateway Service' button.
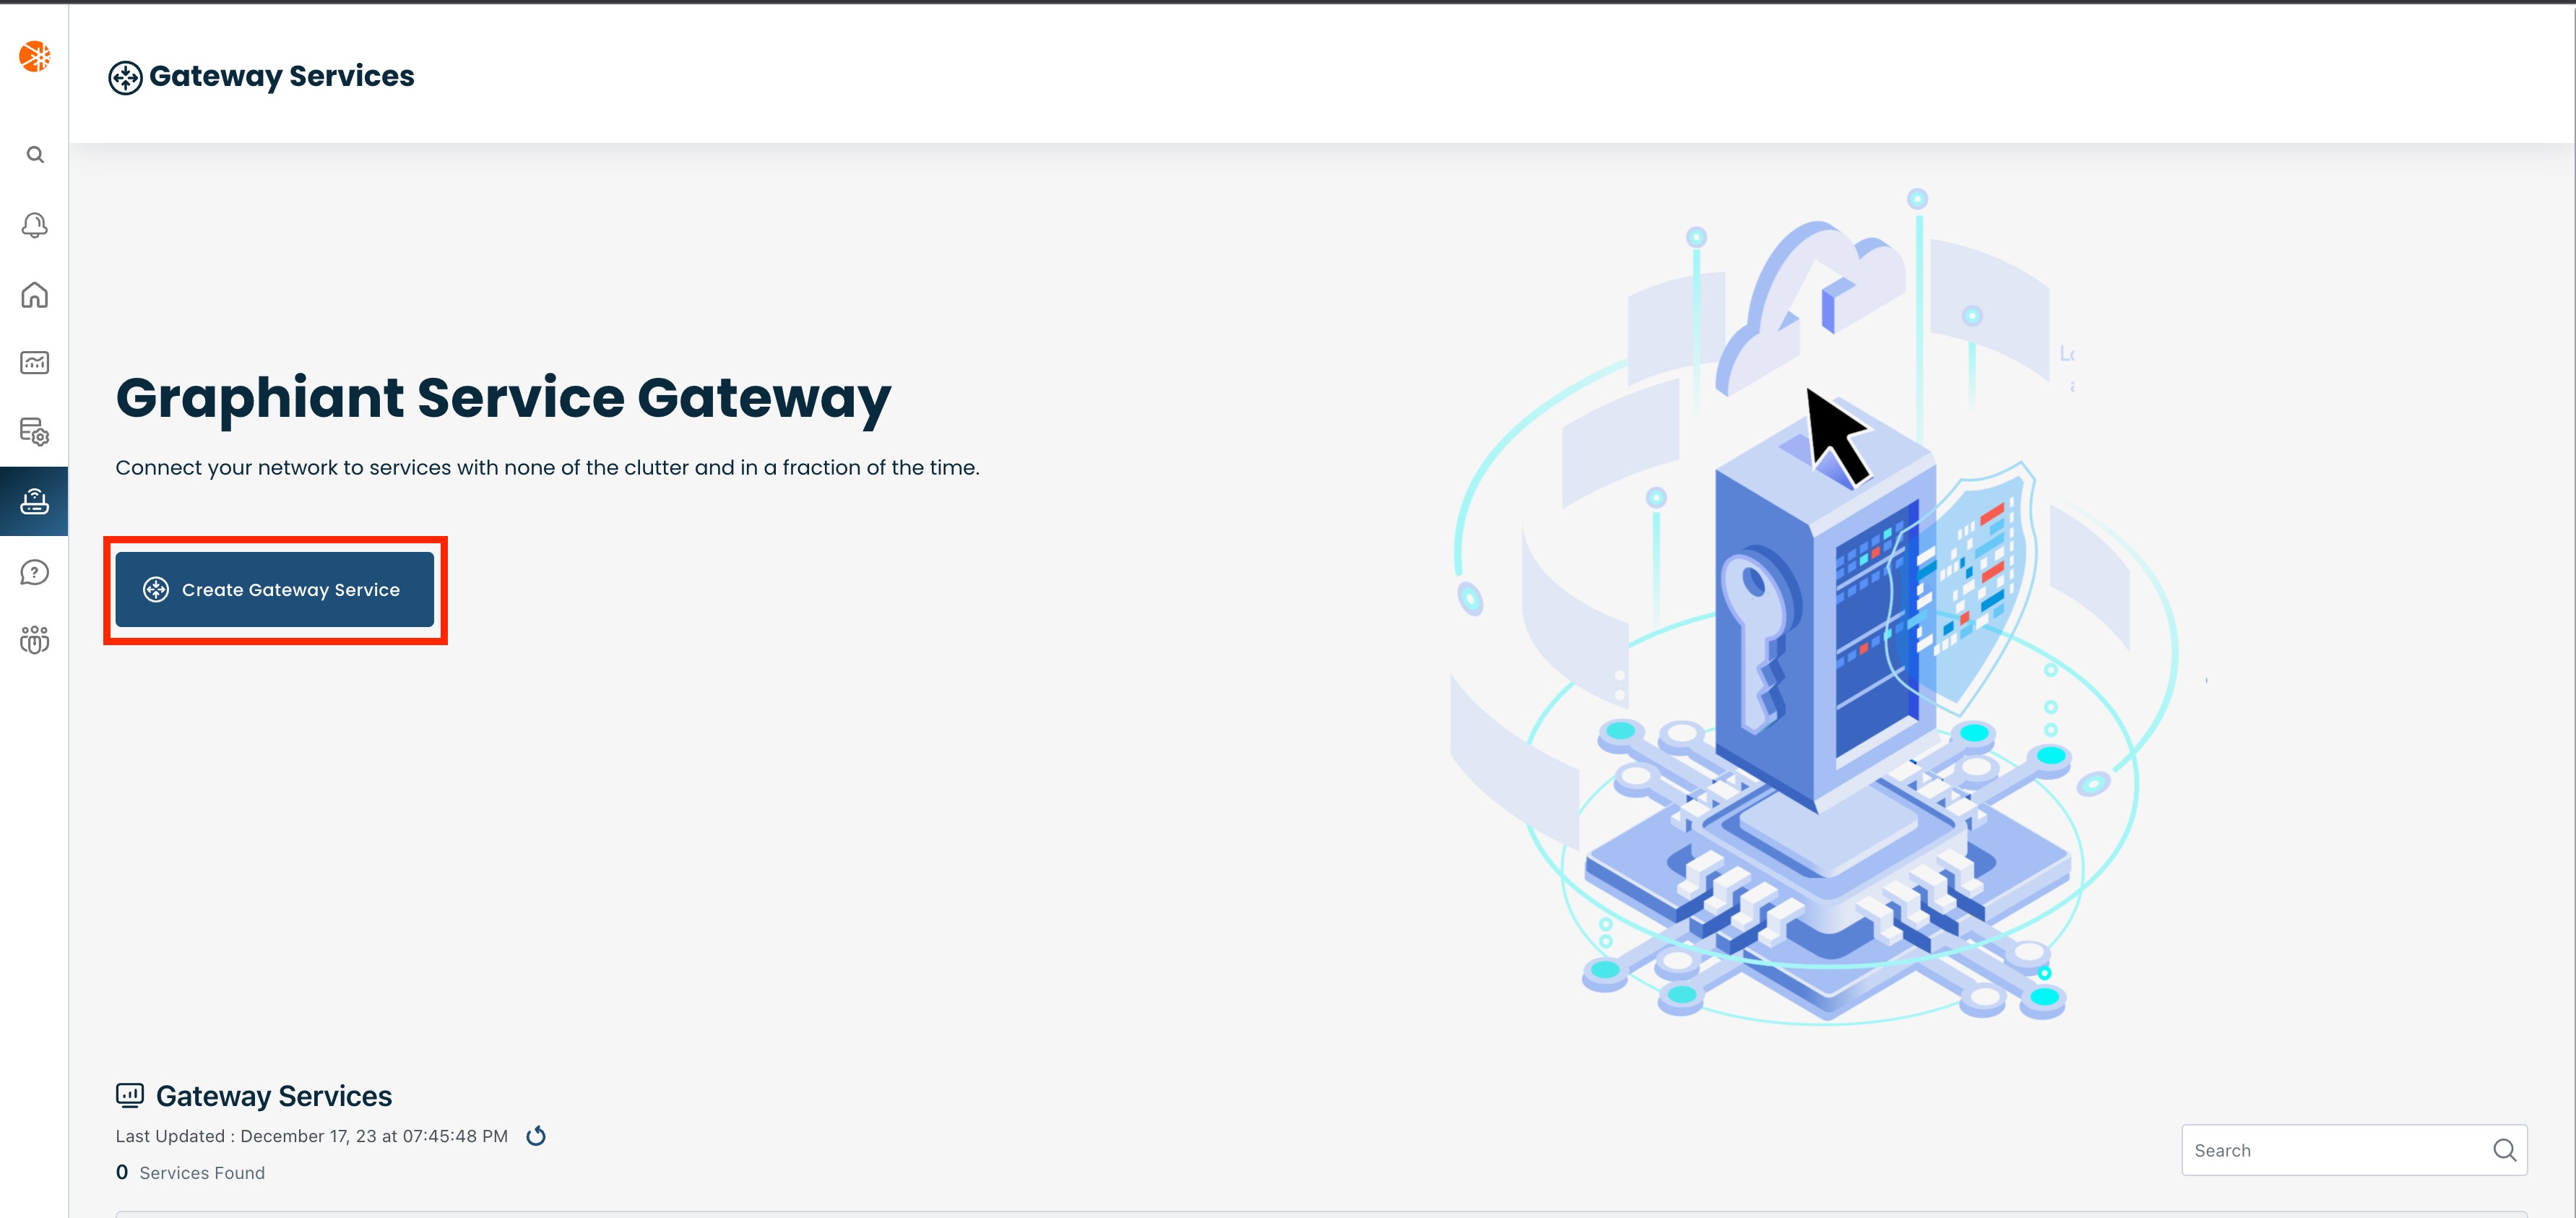
Next select the Graphiant region where you want to deploy the gateway service. This region should be the same as the cloud region where you have your ExpressRoute circuit deployed.
.png)
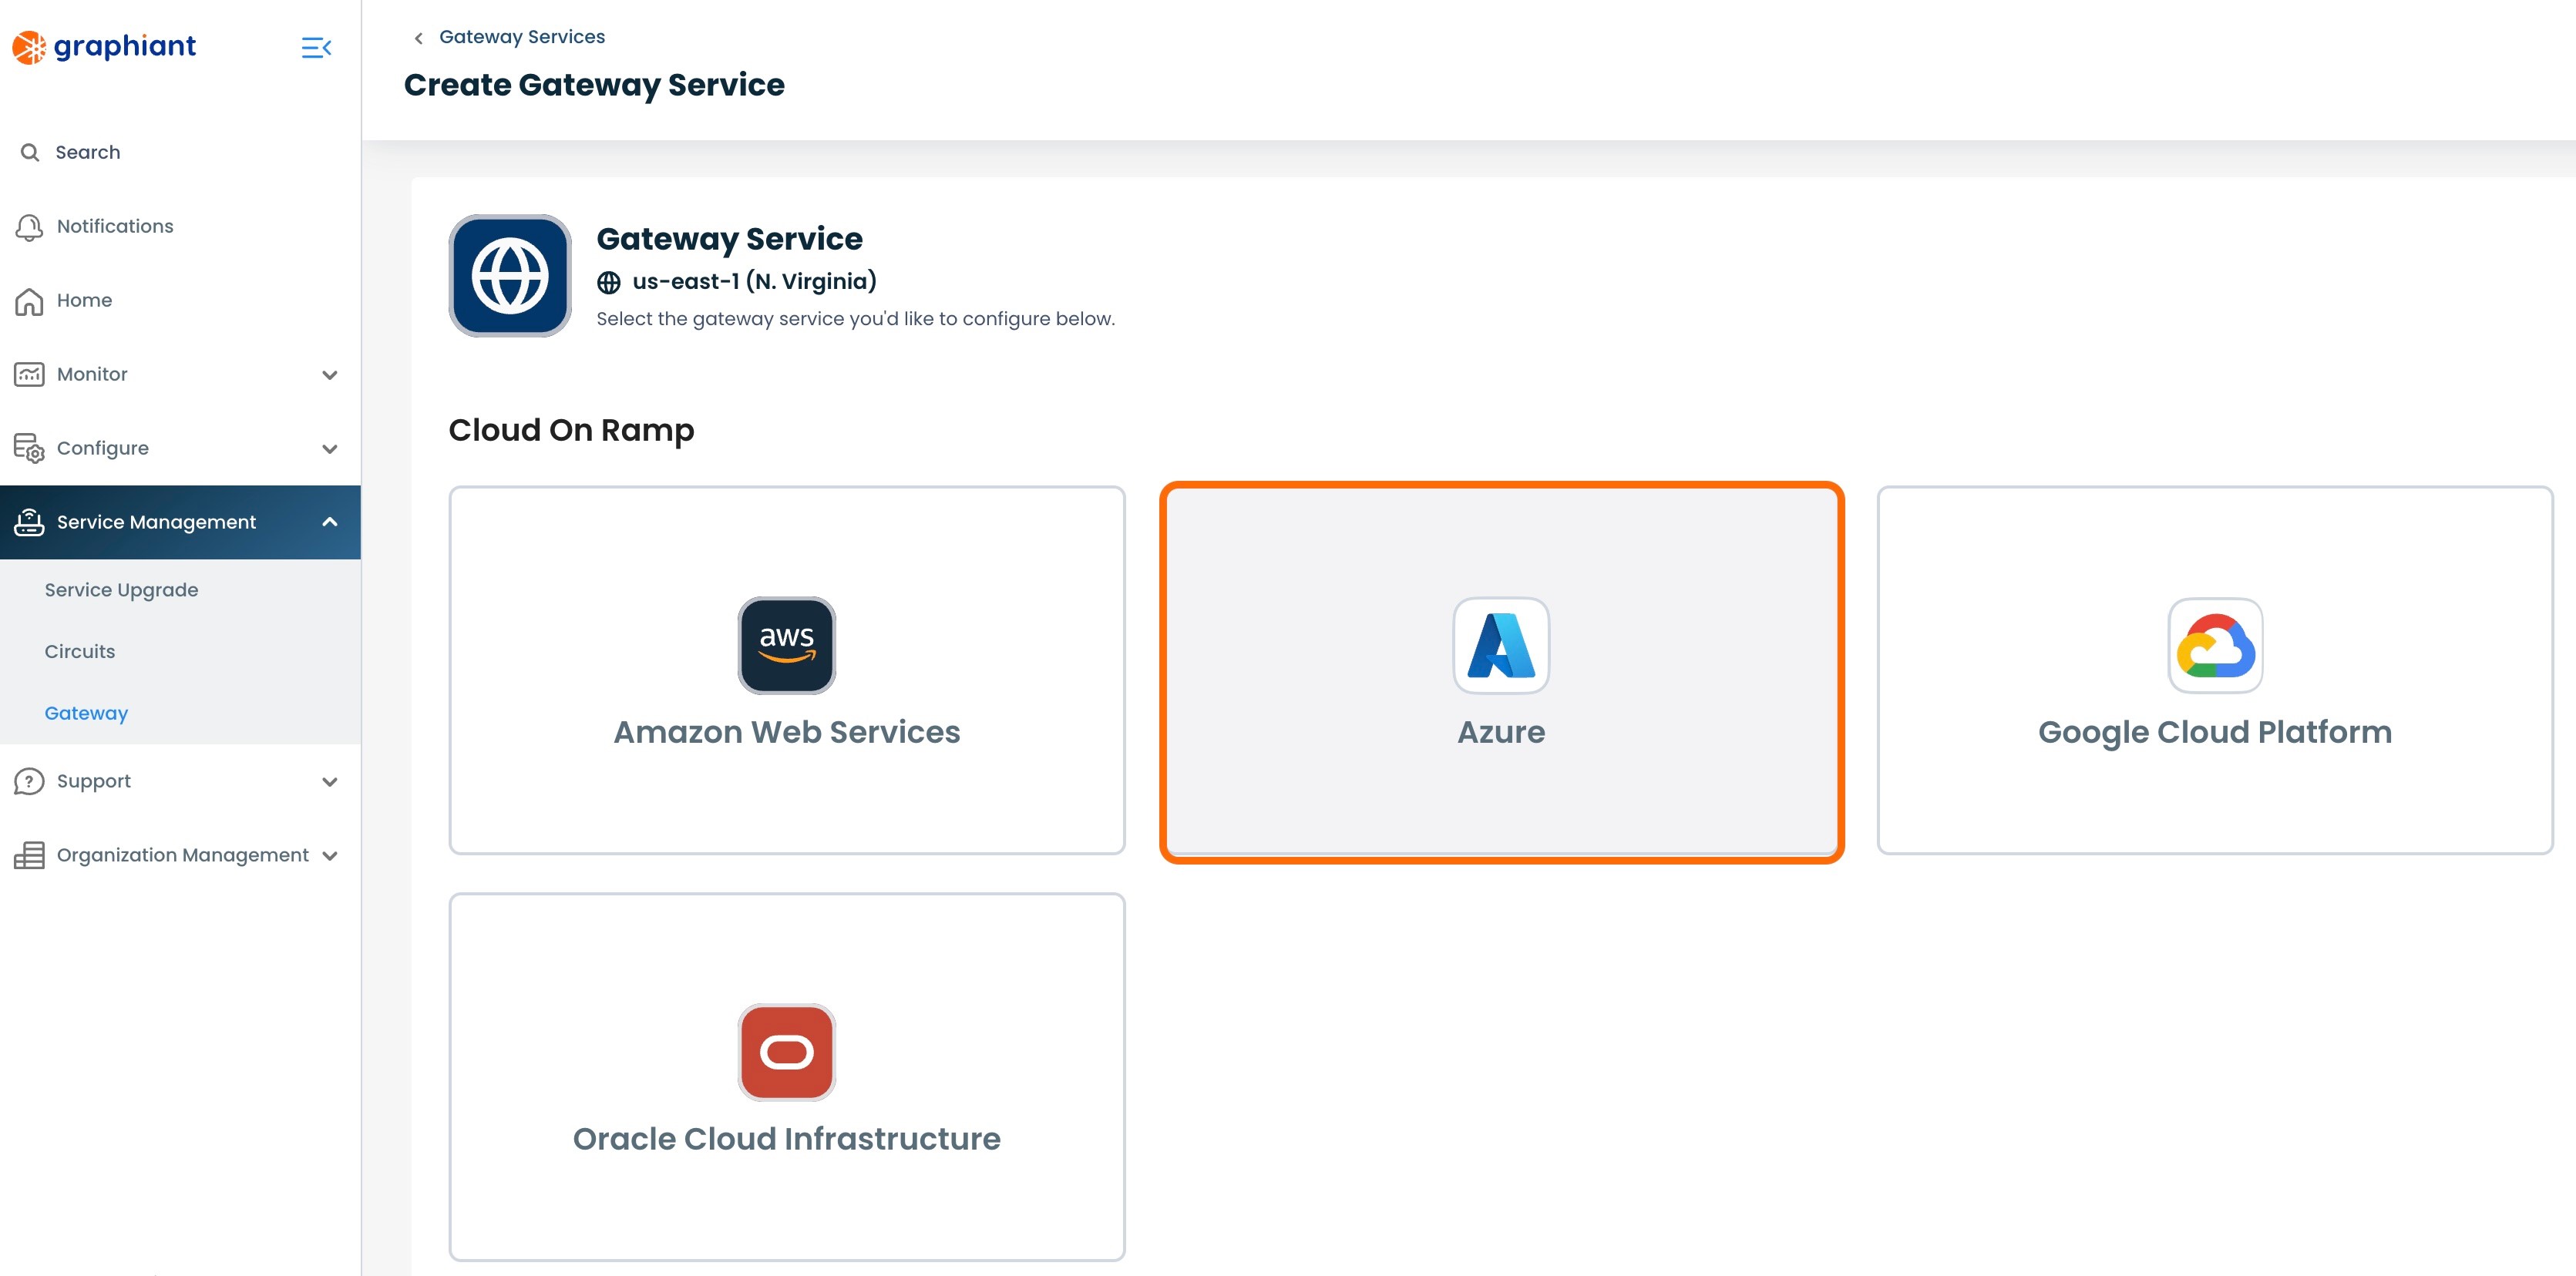
This opens the Cloud On Ramp screen.
Select 'Azure'.
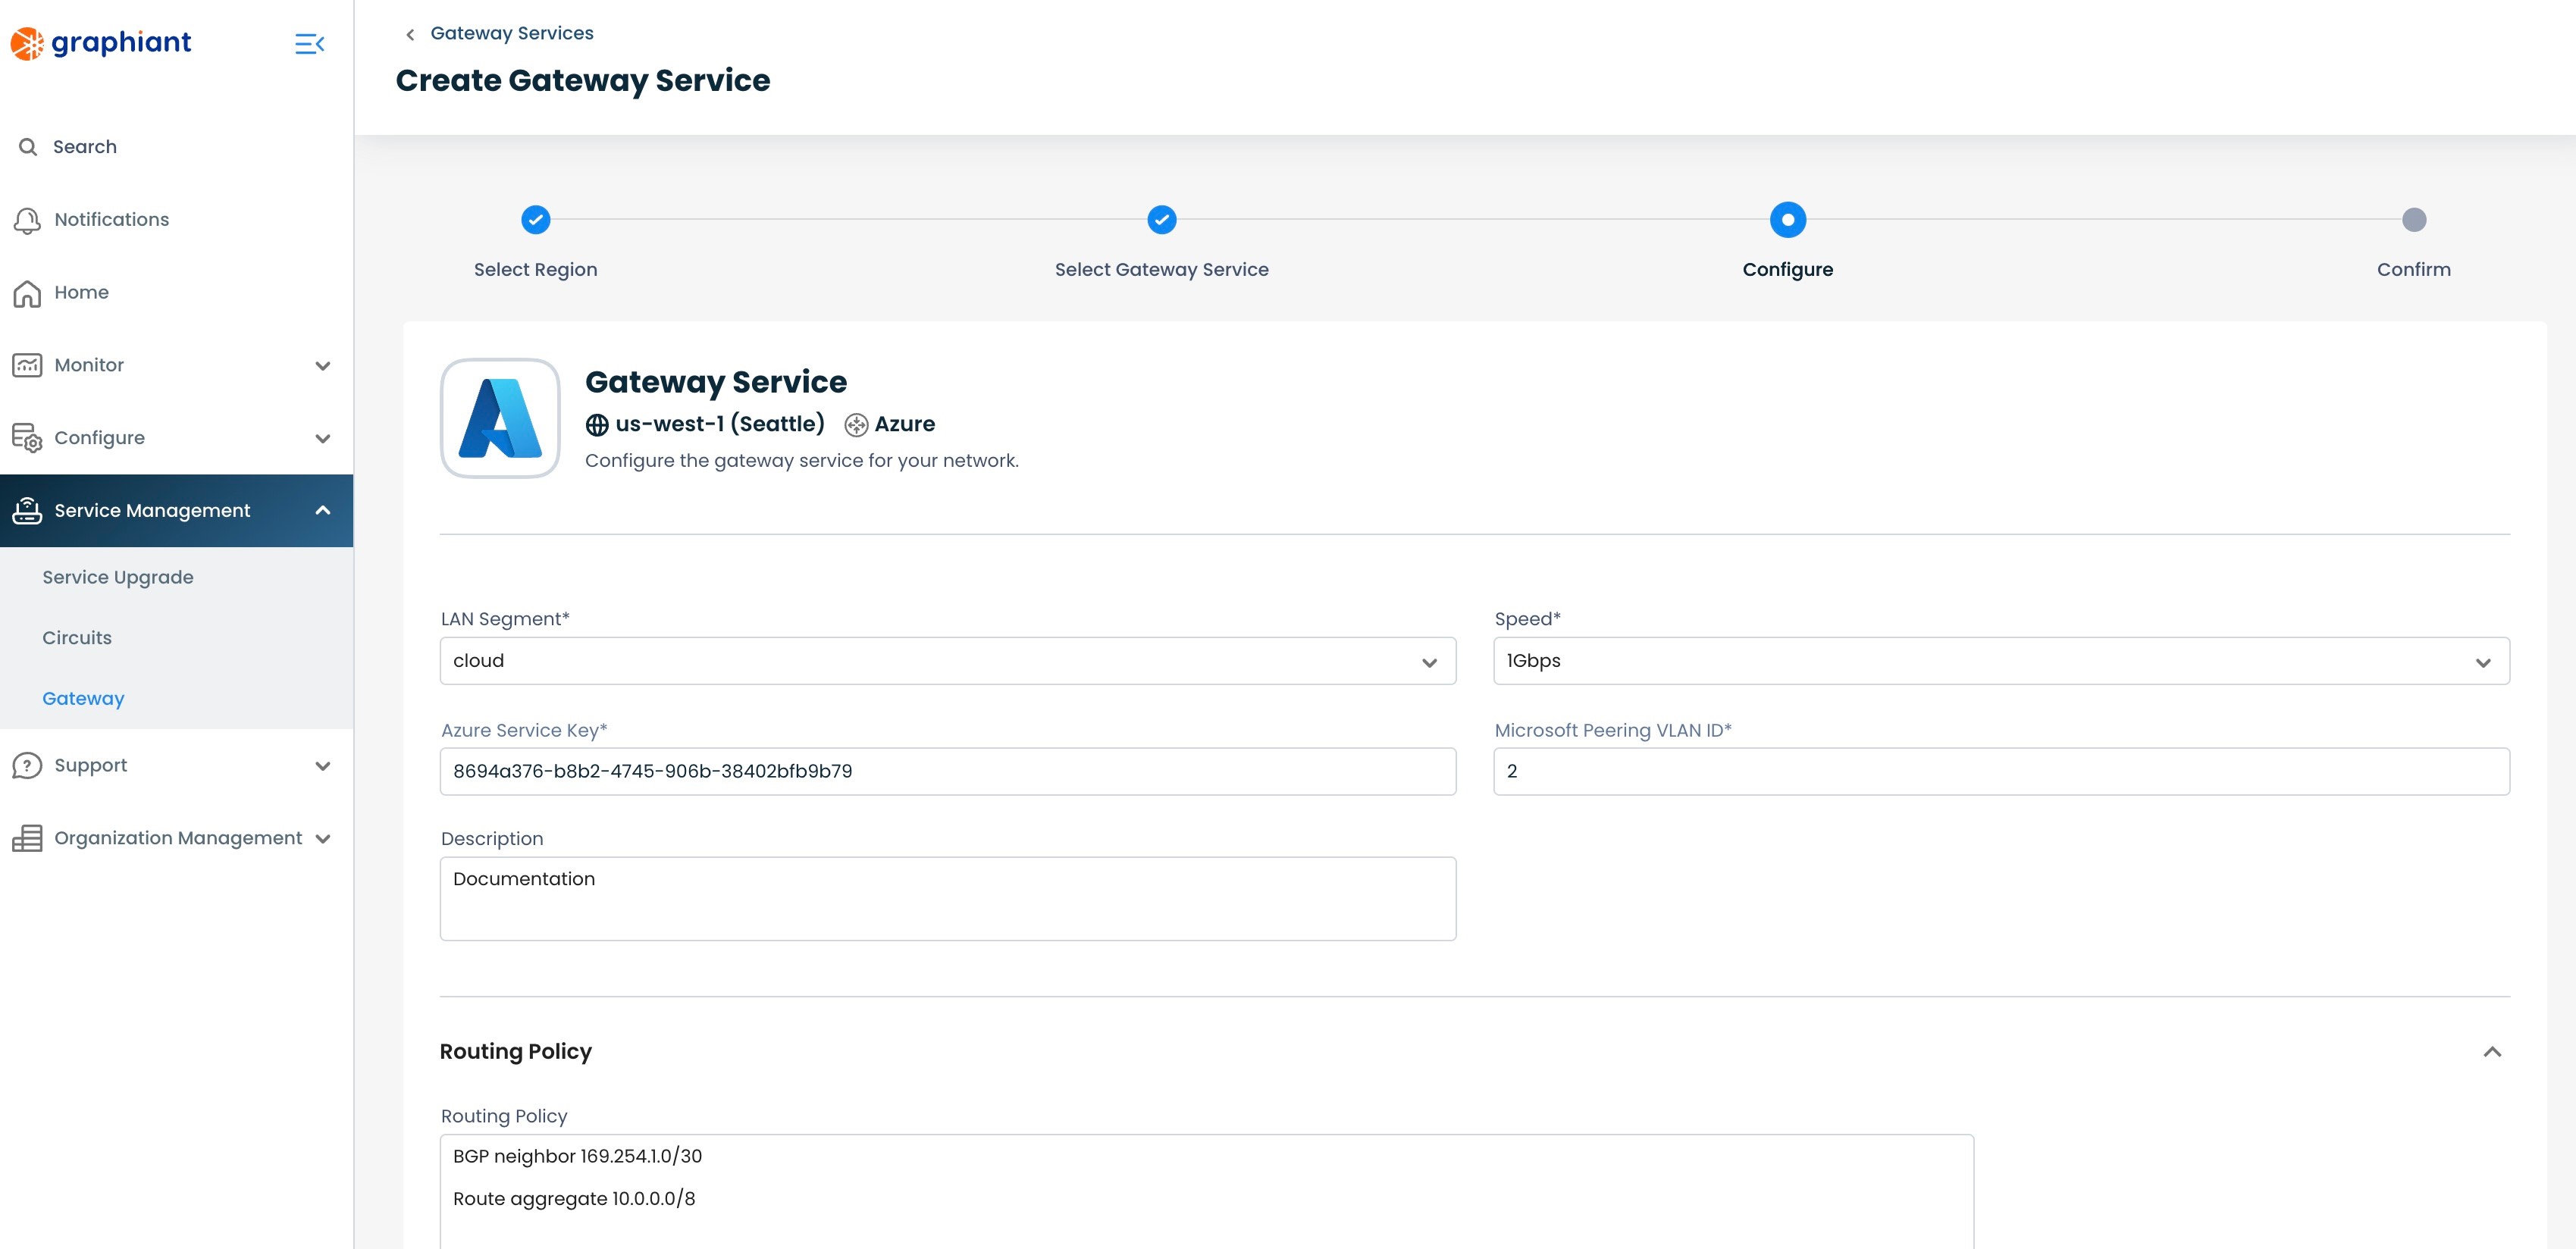
Next you need to configure the Graphiant Gateway to connect to your Azure
ExpressRoute instance. Below are descriptors for each of the fields required in order to configure the Gateway.
Speed: Speed of the circuit from the Gateway to the cloud.
Microsoft Peering VLAN ID: Enter a desired VLAN ID for the ExpressRoute connection to the Graphiant Core. This value should be in the range of 101-200.
Note:
The VLAN ID may change as the service is provisioned, based on the availability of that VLAN.
Routing Policy: This is a free form text field that should include the subnets of the ExpressRoute BGP neighbor (in the form of "169.254.___.___" /30 Link-Local Only CIDR) as well as any BGP policy you wish to apply to the Graphiant Gateway. This policy will be reviewed with a Graphiant Customer Support agent at a later stage and can be updated if needed.
Click 'Next'; this will bring you to a review screen for your configurations.
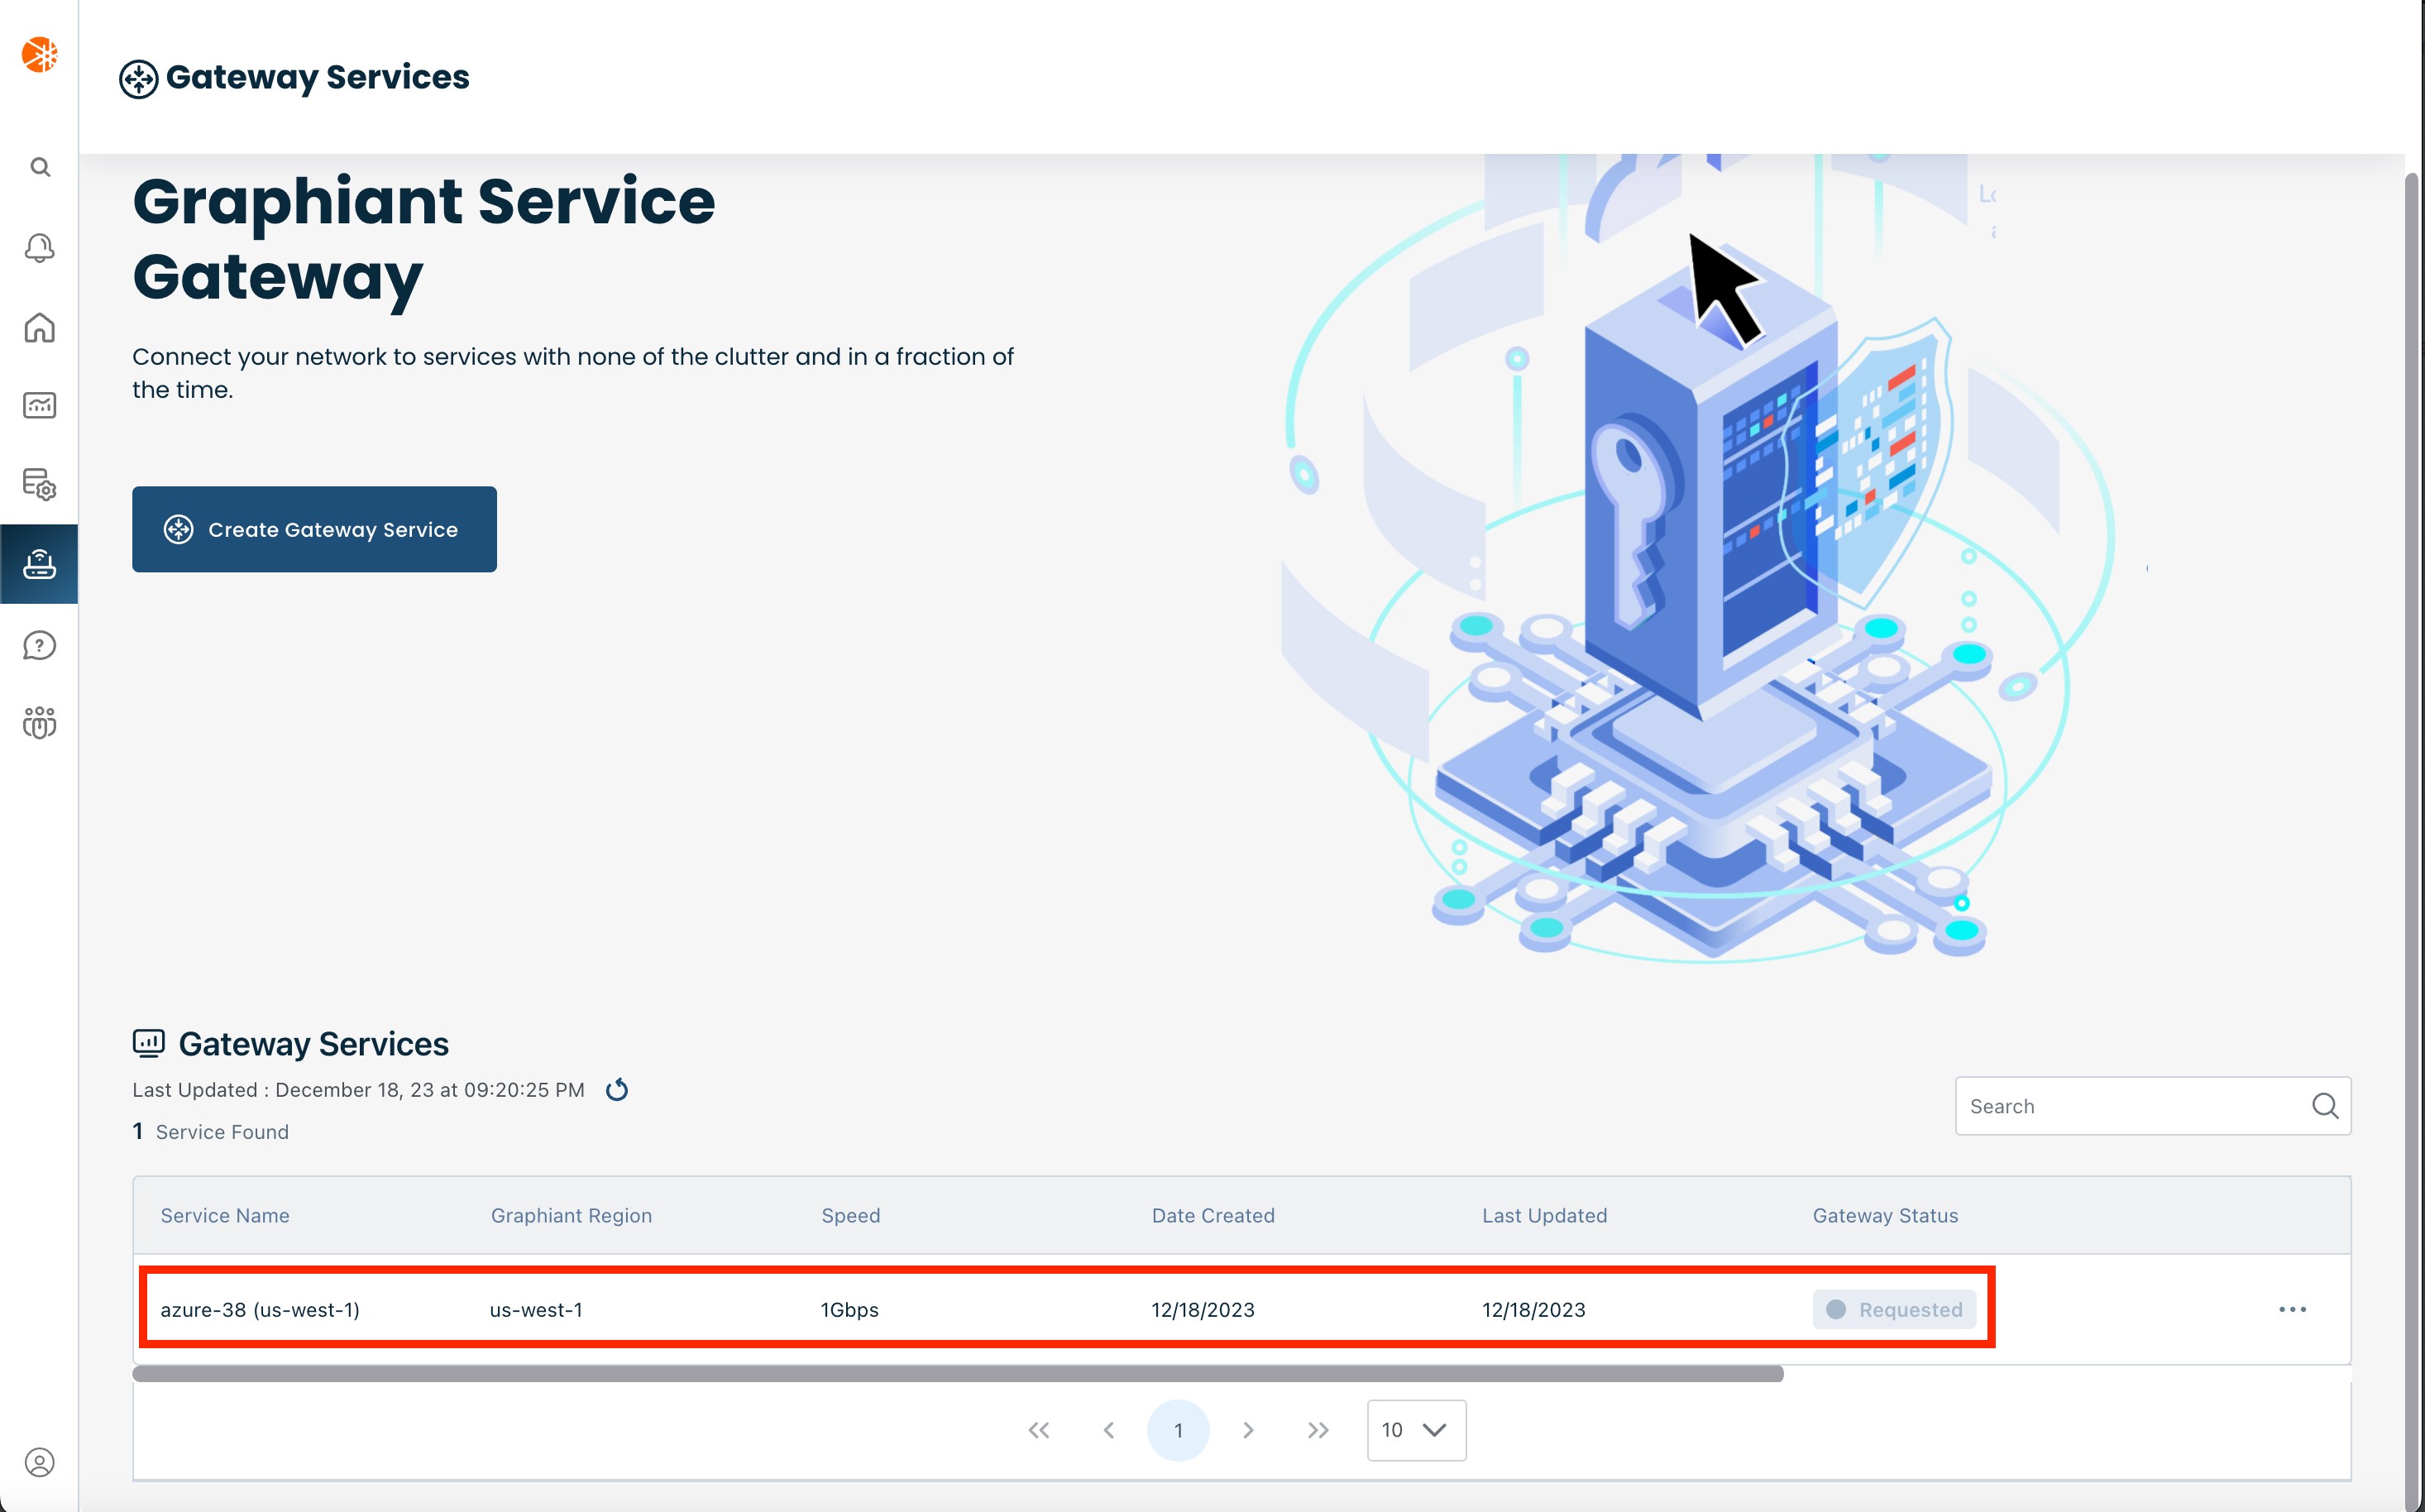
After you have reviewed that your configurations are correct, click ‘Confirm'.
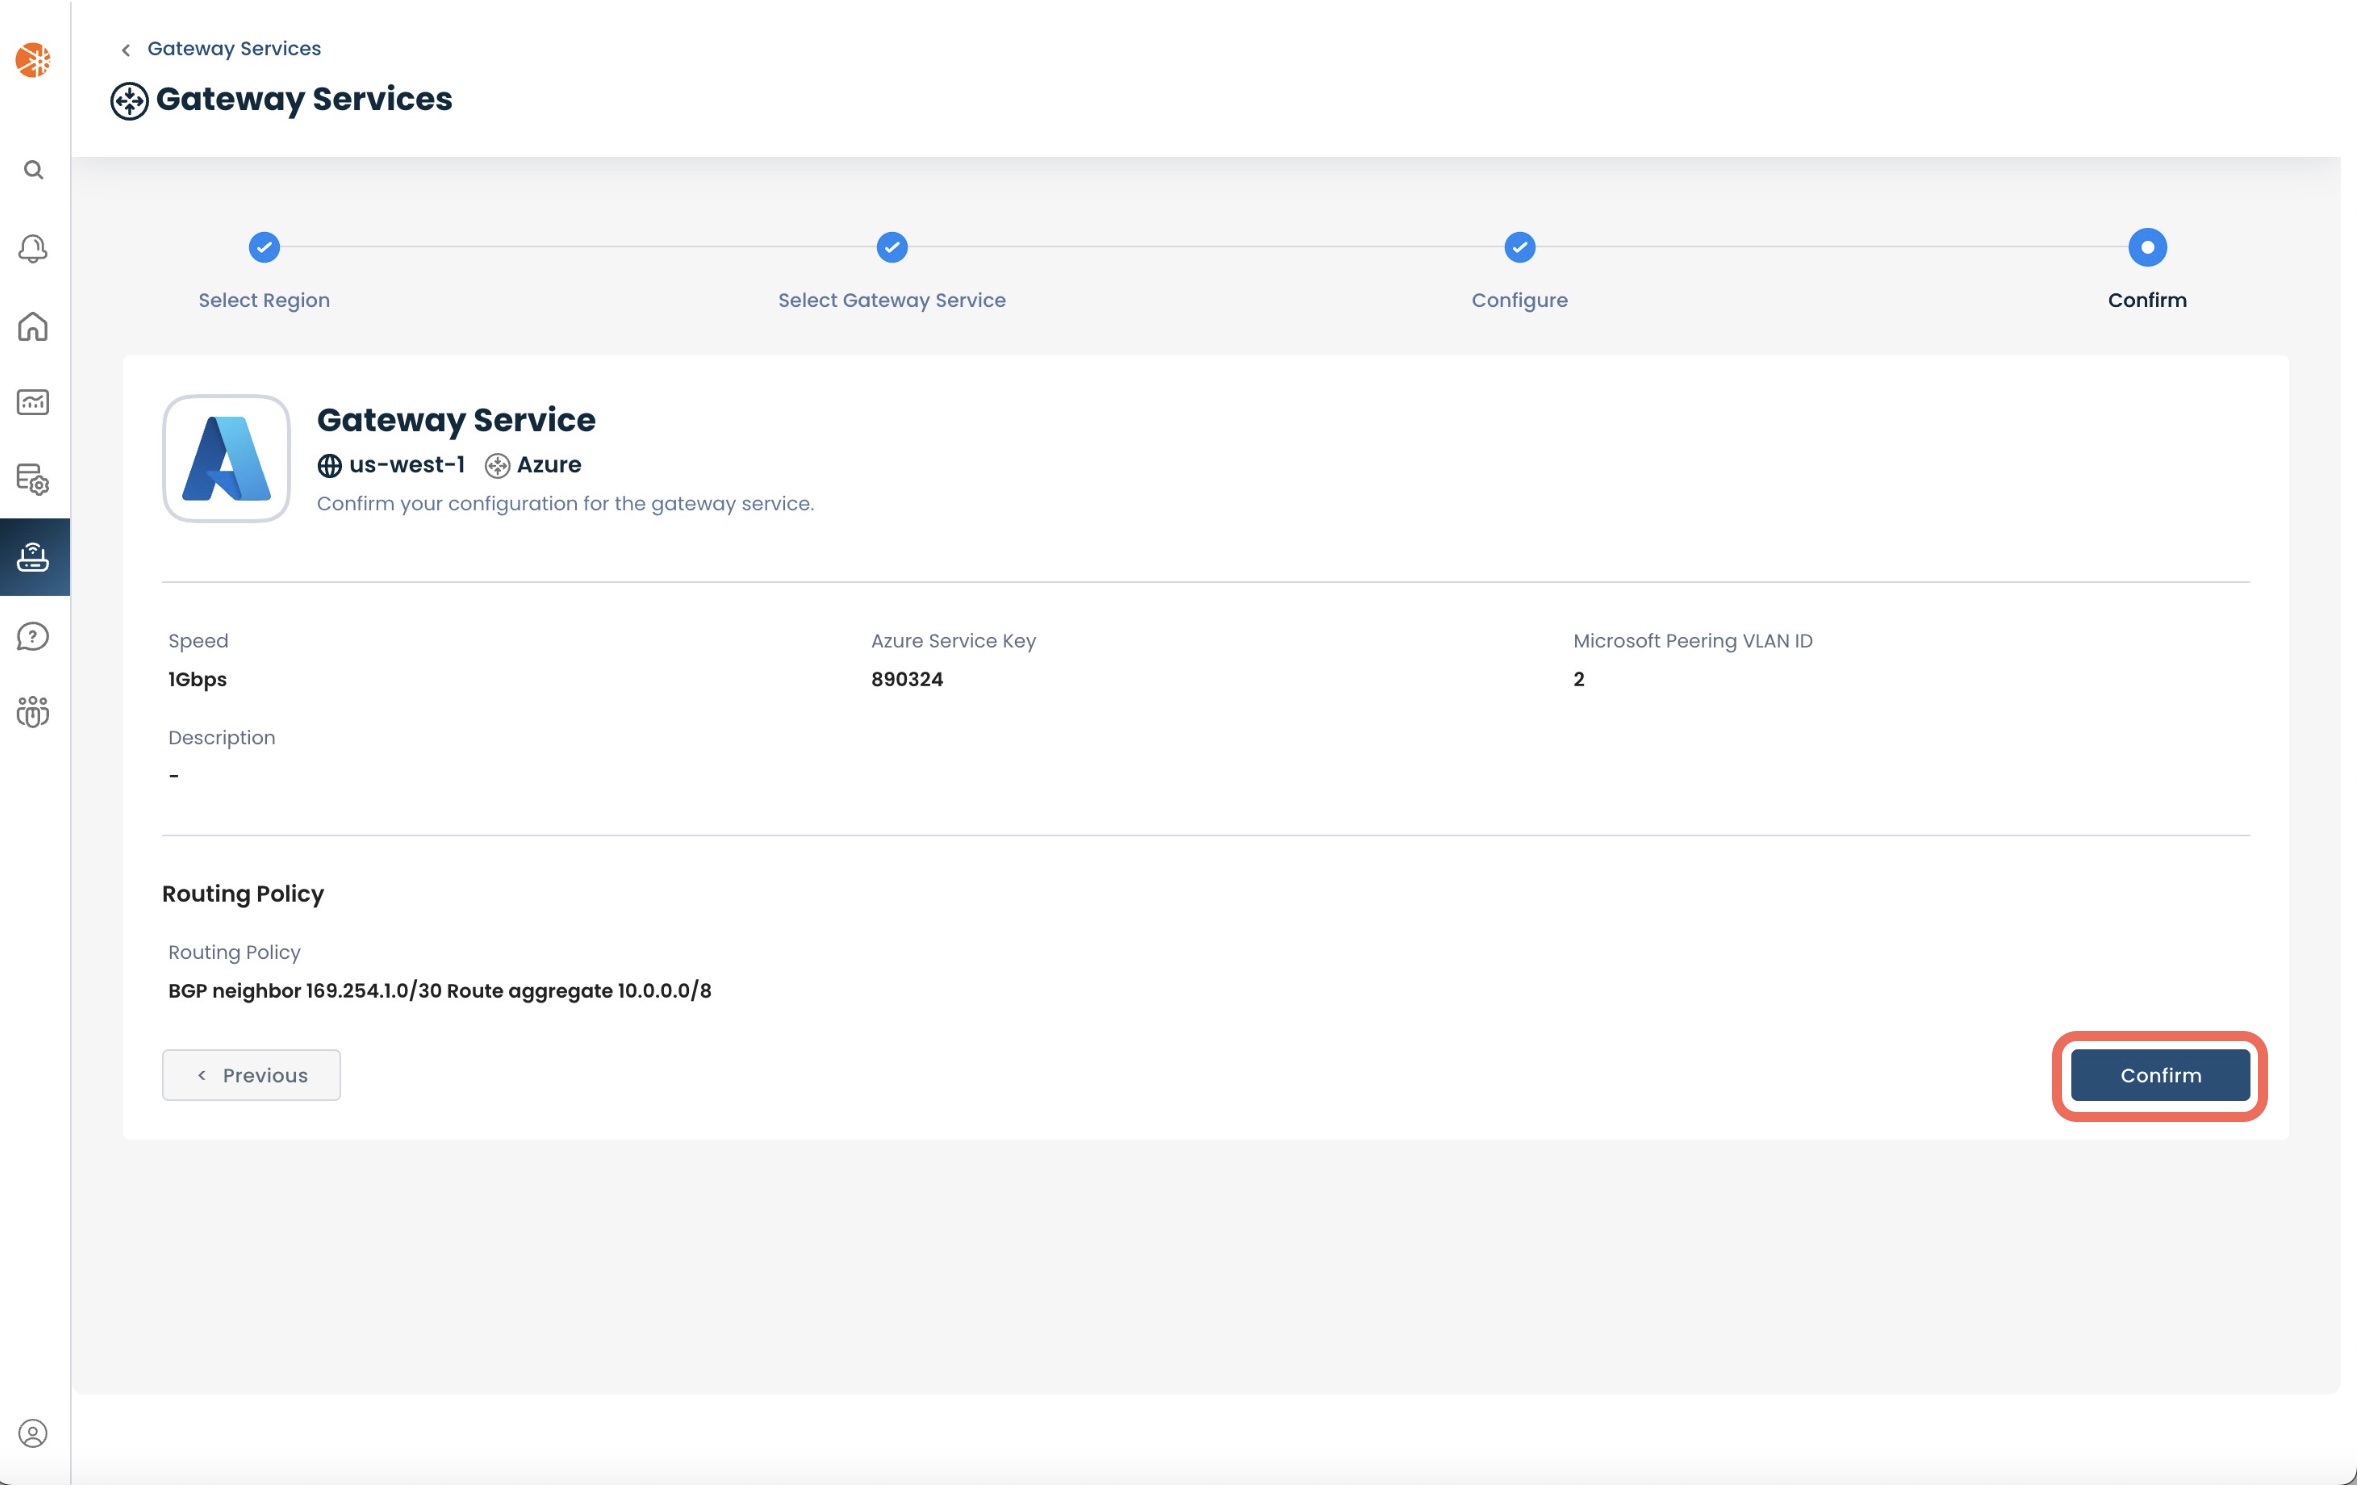
Once you click 'Confirm', the next step is to configure the ExpressRoute BGP private peering.
Configuring ExpressRoute BGP Private Peering in Azure
From the ExpressRoute Overview screen, click 'Azure private'.
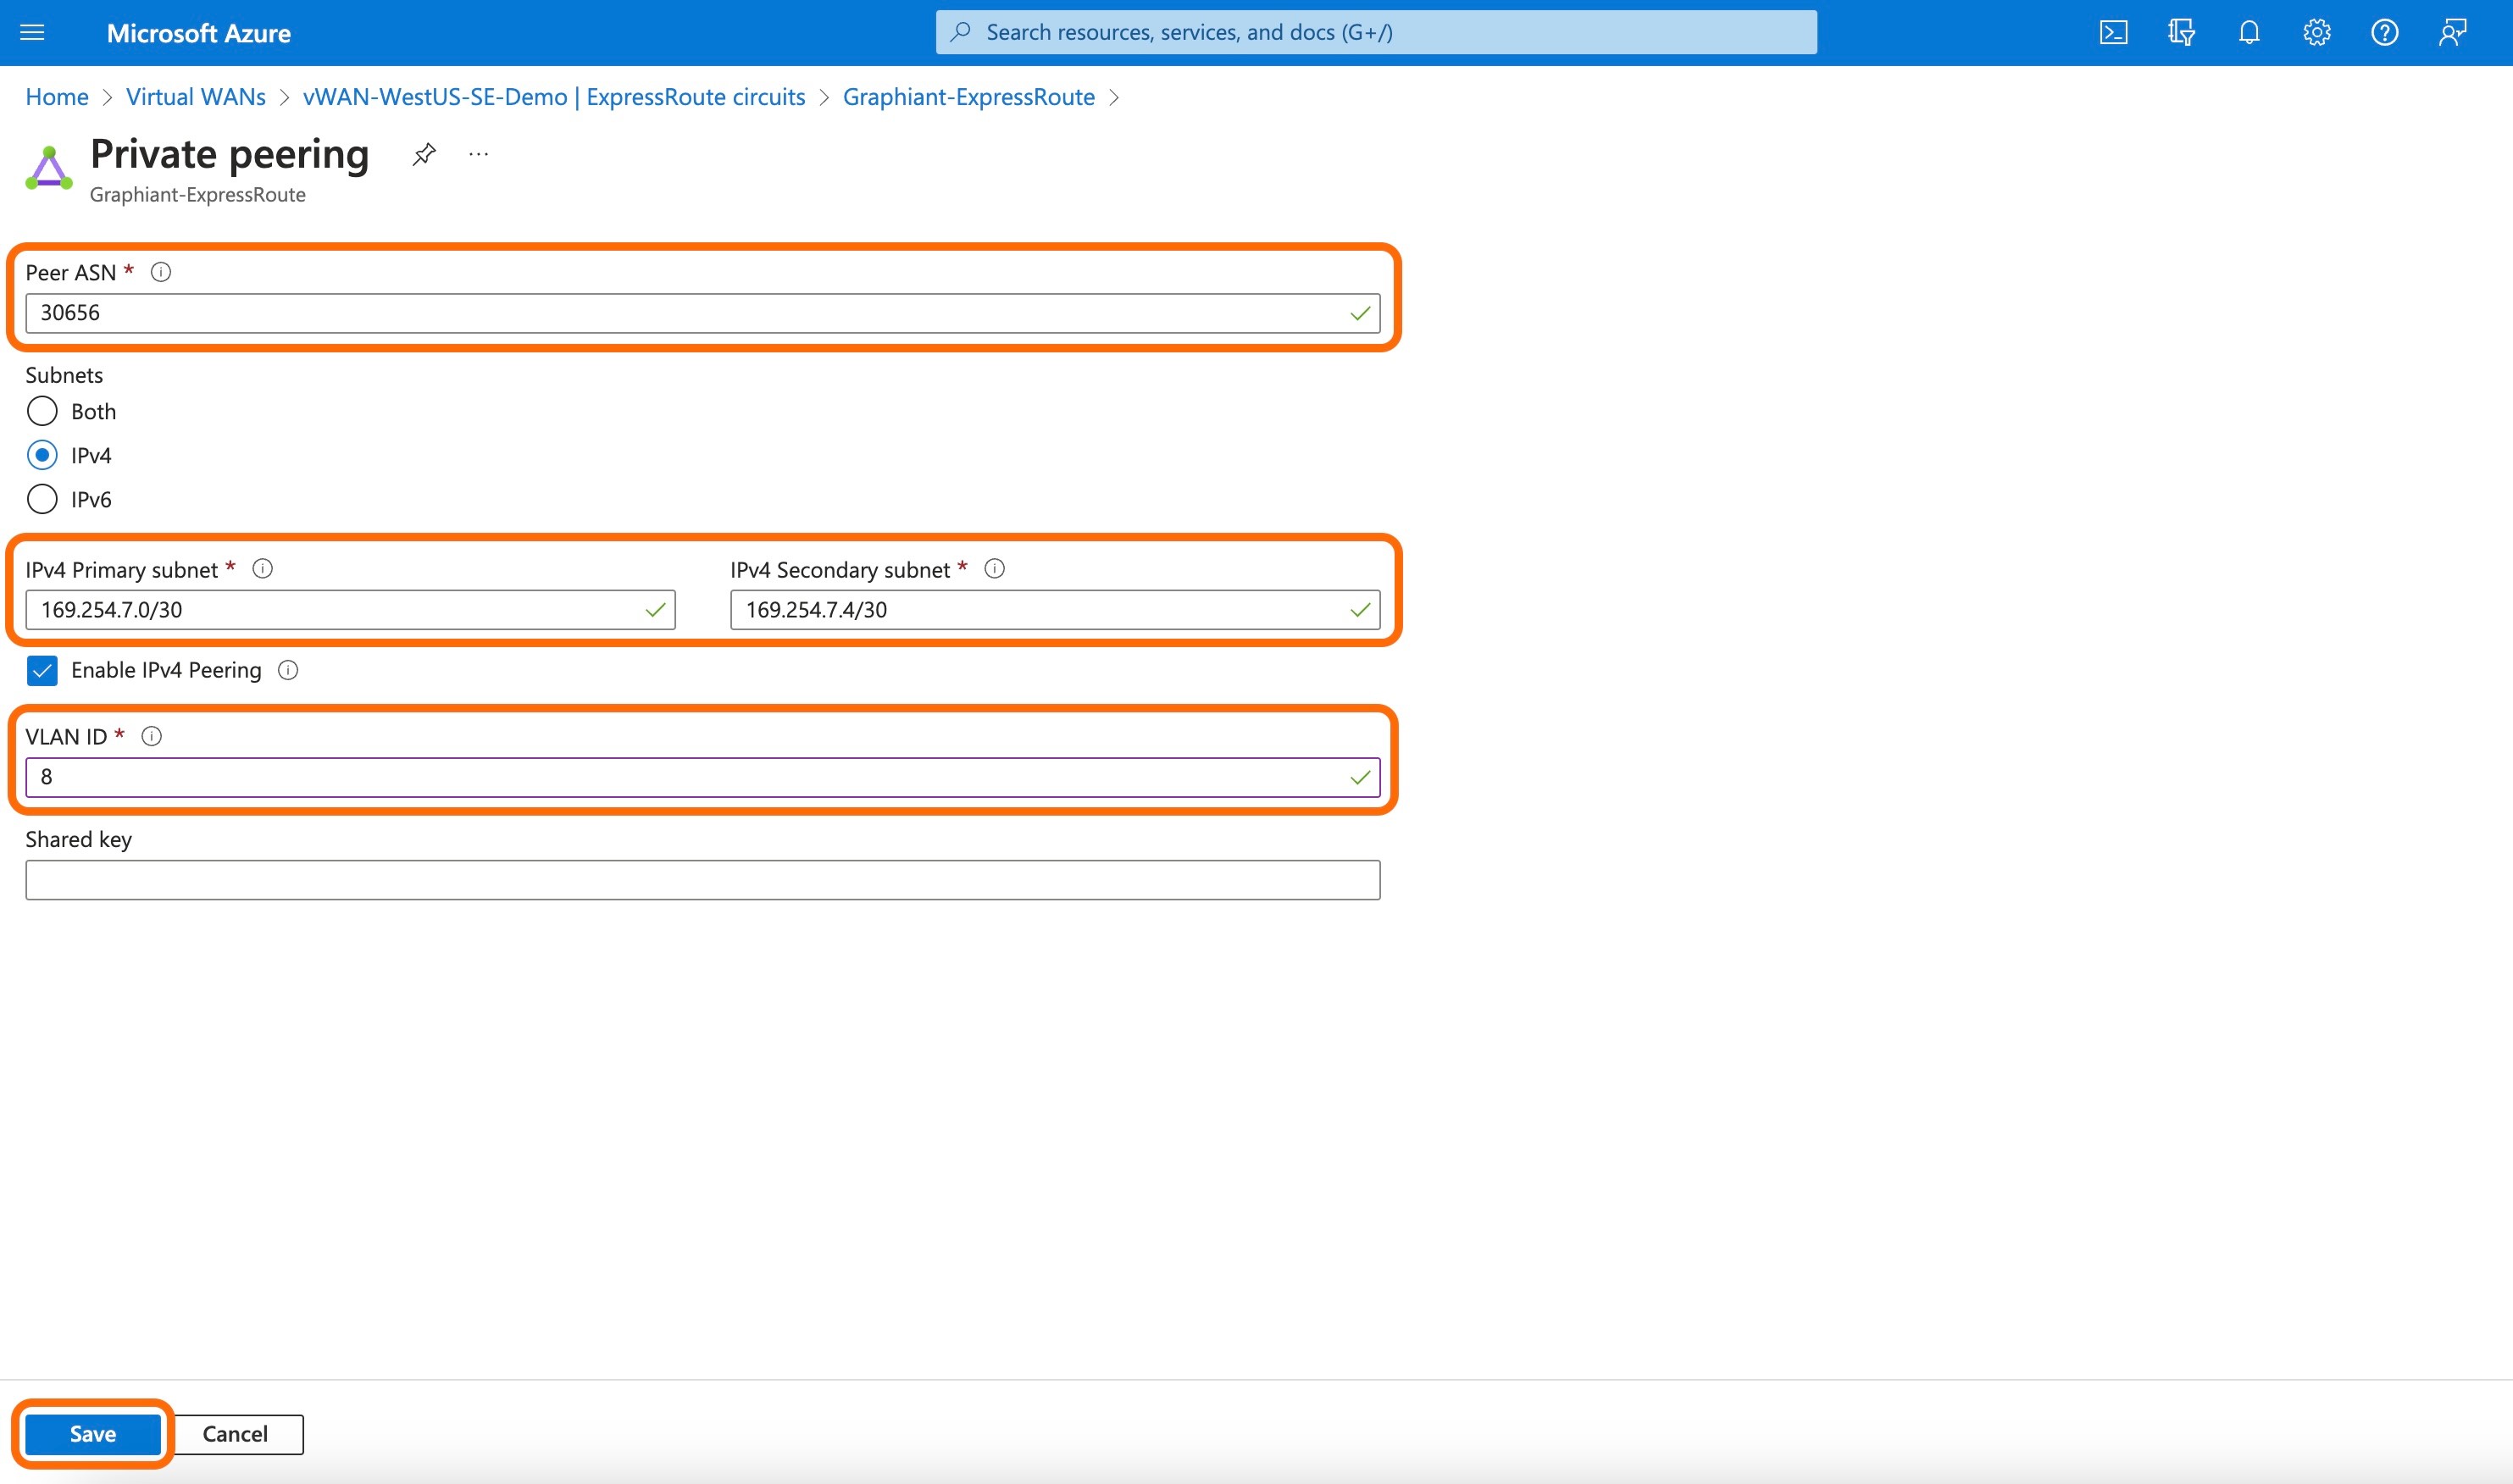
Complete the following fields:
Peer ASN: Enter the Graphiant ASN of "30656".
Primary Subnet: Provide a "169.254.___.___" /30 Link-Local Only CIDR
Secondary Subnet: Provide a "169.254.___.___" /30 Link-Local Only CIDR VLAN ID: The VLAN ID confirmed by the Graphiant Customer Support Engineer.
Click 'Save'.
On the Virtual Hub page, click 'ExpressRoute' under the "Connectivity" section of the left side menu.

Select the desired circuit.
Click 'Connect circuits'.

Enabling the BGP Connection to the Graphiant Core
You can now enable the BGP neighbor connection to the Graphiant Core and complete the provisioning of your Gateway Service.
Instructions on creating the BGP neighbor connection can be found here.
After the BGP connection is enabled, the 'Gateway Status' for your Gateway Service in the Graphiant Portal will change to "Live" and it will be ready to use!
Note:
The status of "Live" is an indicator that the Gateway has been provisioned. It does not reflect the current status of the connection.
