What is the Graphiant Gateway Service?
The Graphiant Gateway allows you to connect your on-premises Graphiant network to your public cloud workloads, using a private connection. It is the preferred way to connect your Graphiant on-premises, cloud and multi-cloud environments together to create a hybrid network. This document explains how to setup the Graphiant Gateway service and connect it to Oracle Cloud Infrastructure (OCI).
To learn more about the Graphiant Gateway service check out the Gateway Overview.
The first step in creating the gateway service for Oracle is to create the Dynamic Routing Gateway in the Oracle portal.
Note:
Any needed Oracle VCN's (Virtual Cloud Networks) will need to have been created in the desired Compartments (along with any subnets and associated route tables) to be accessible by the Graphiant network.
Caution:
Always ensure that the correct Compartment is selected for every step.
Building Cloud Connectivity in OCI
Step 1: Creating a Dynamic Routing Gateway (DRG) in OCI
Log into the Oracle Cloud Infrastructure.
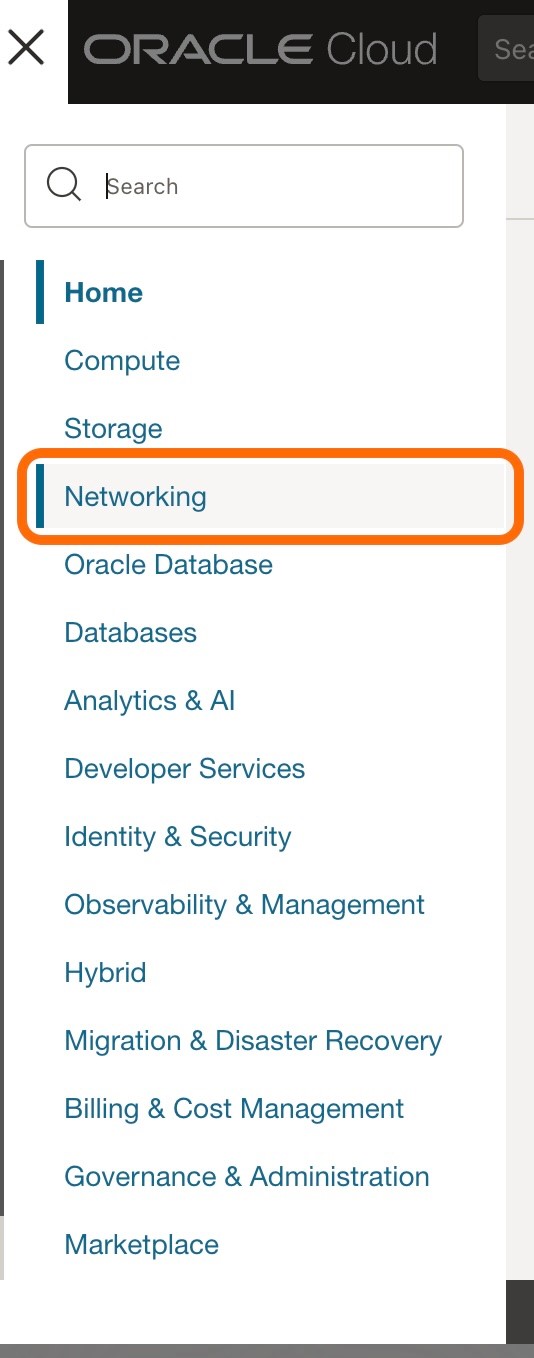
From the top left, click on the 3 lines to get to the menu.
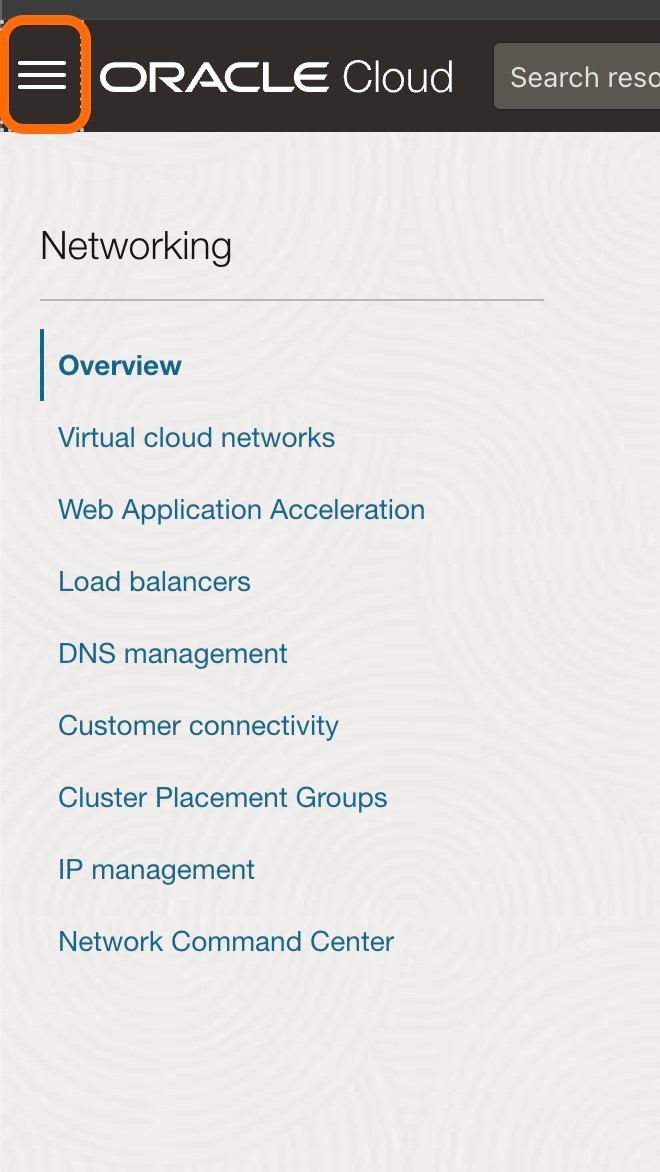
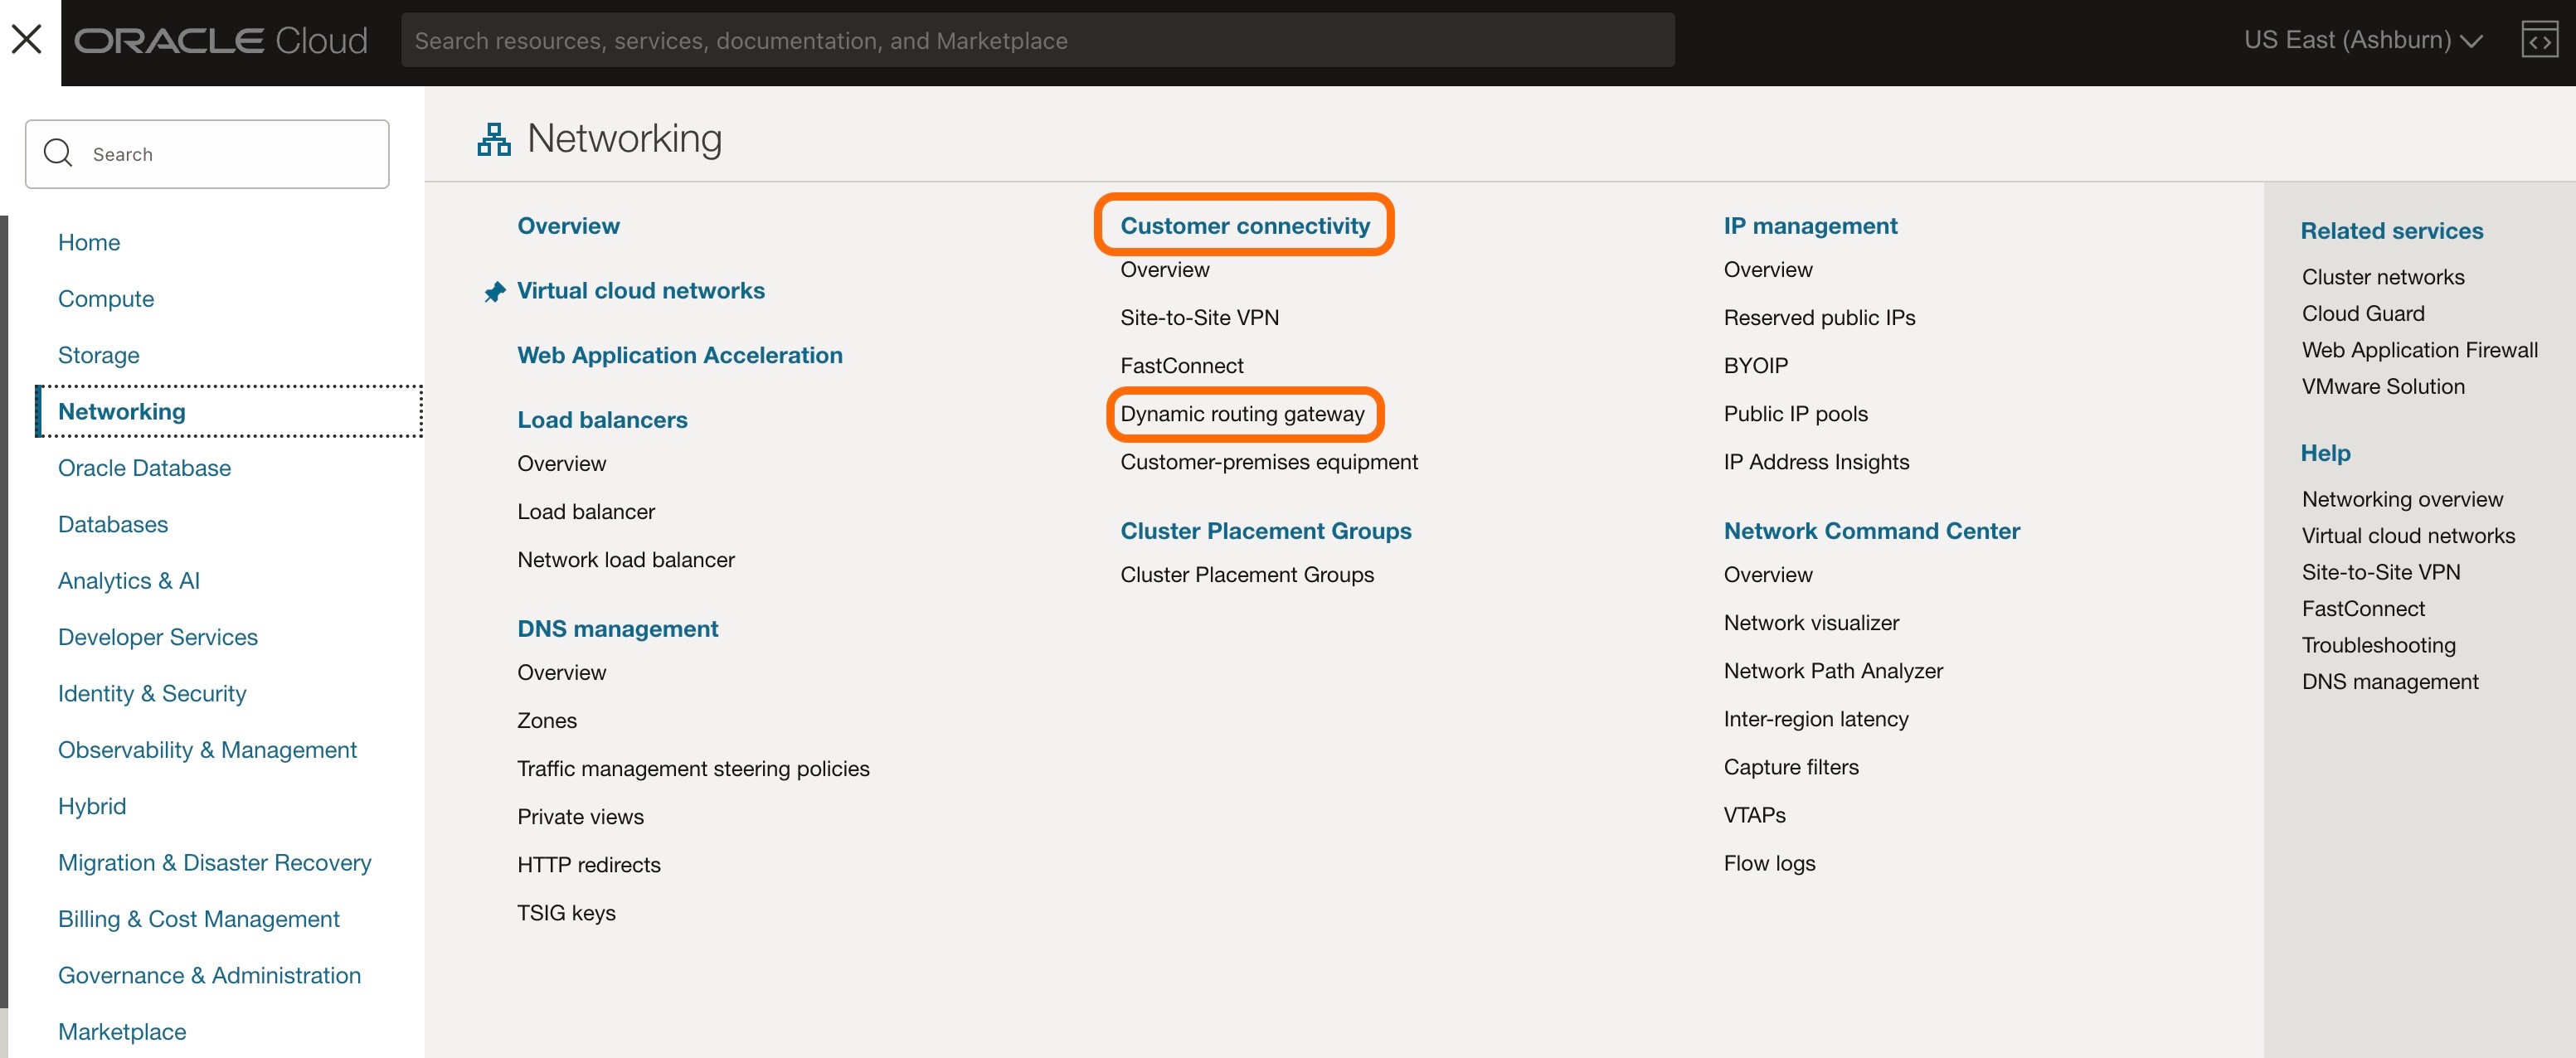
Click on 'Networking'.
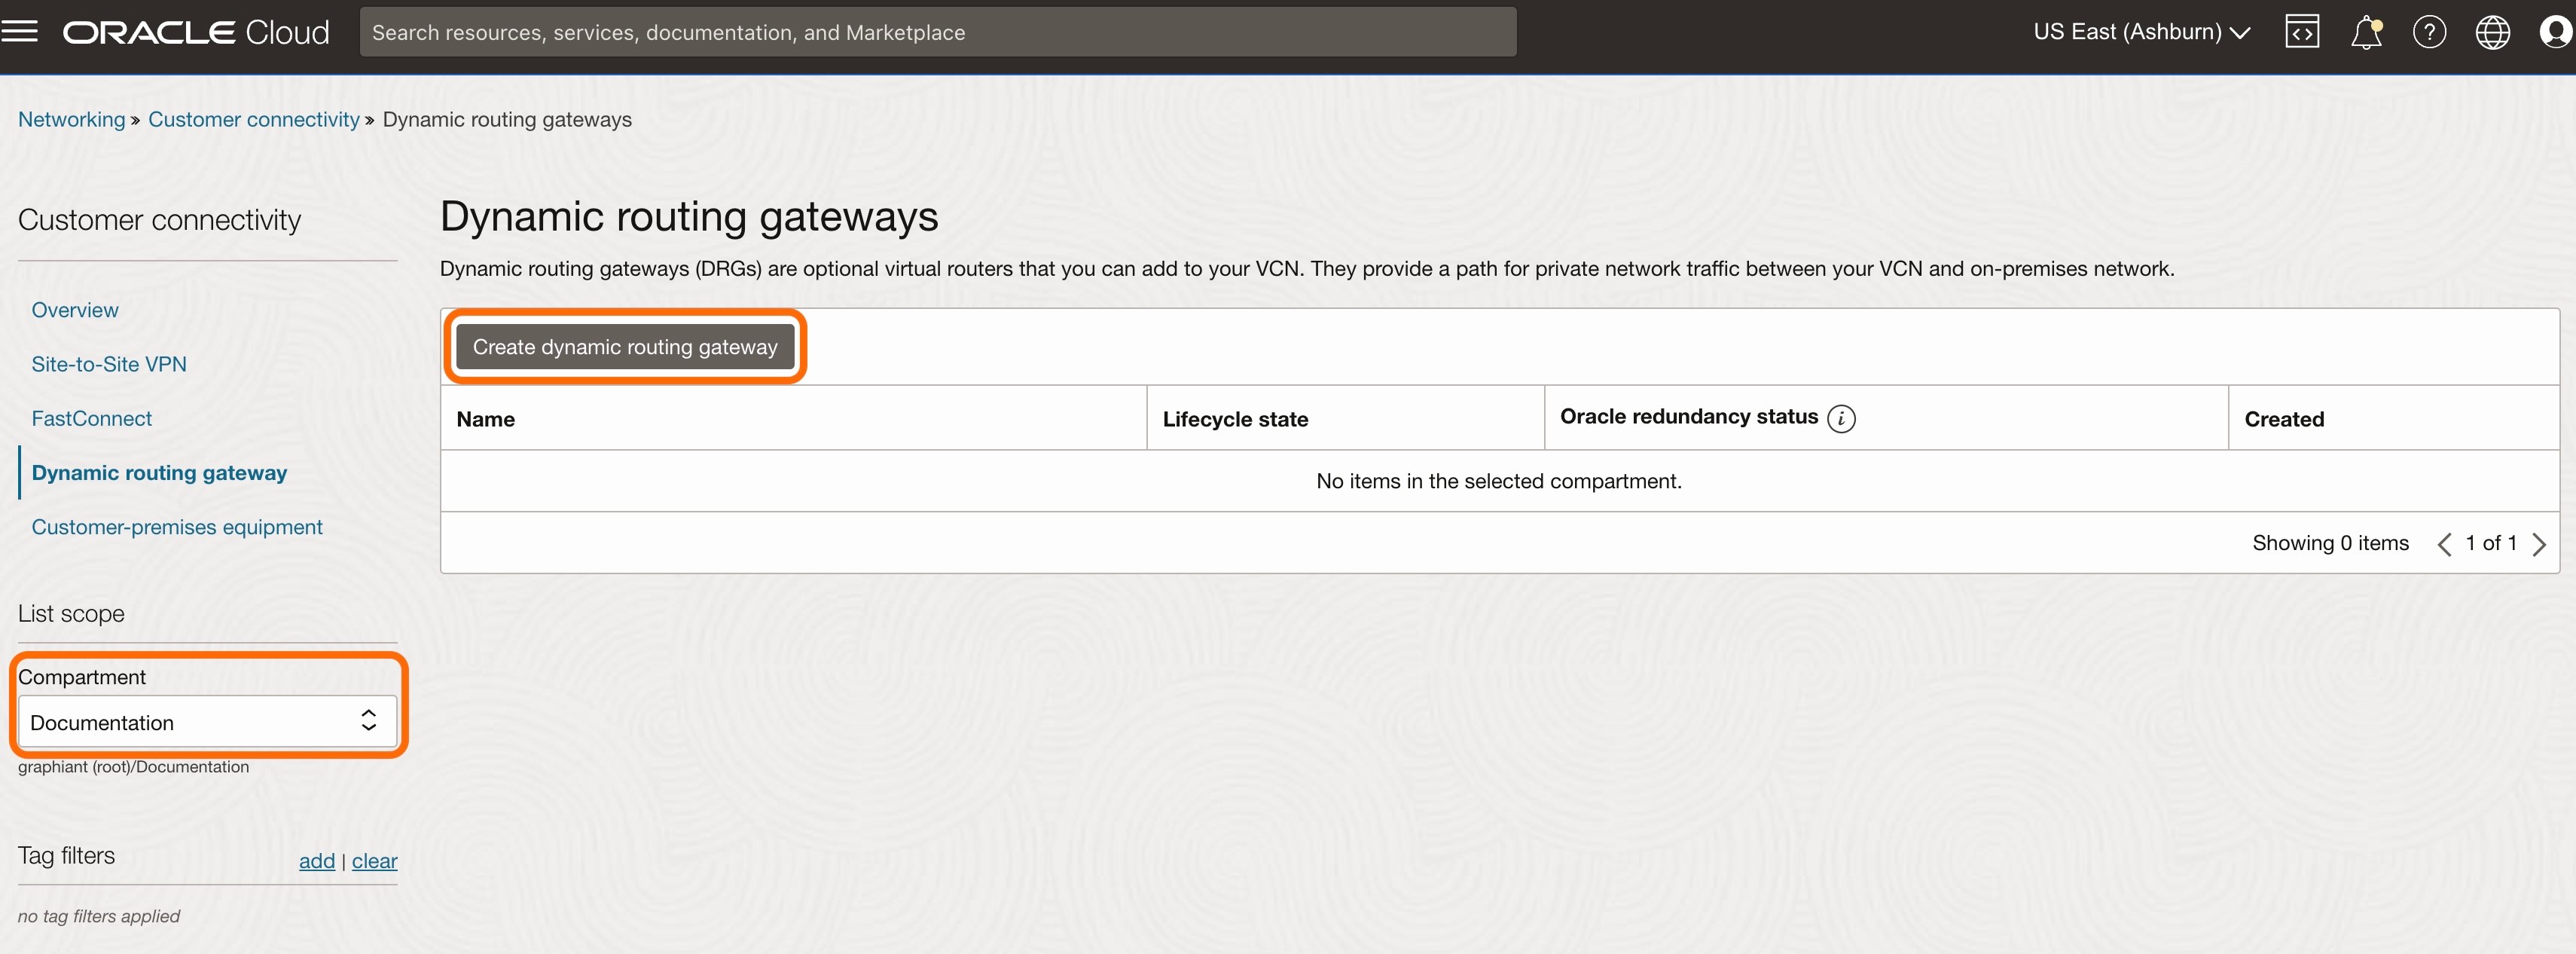
Under the Customer connectivity list, select 'Dynamic routing gateway'.
Make sure that the Compartment selected is correct, and contains the VCN that will be connected to the gateway.
Click 'Create dynamic routing gateway'.
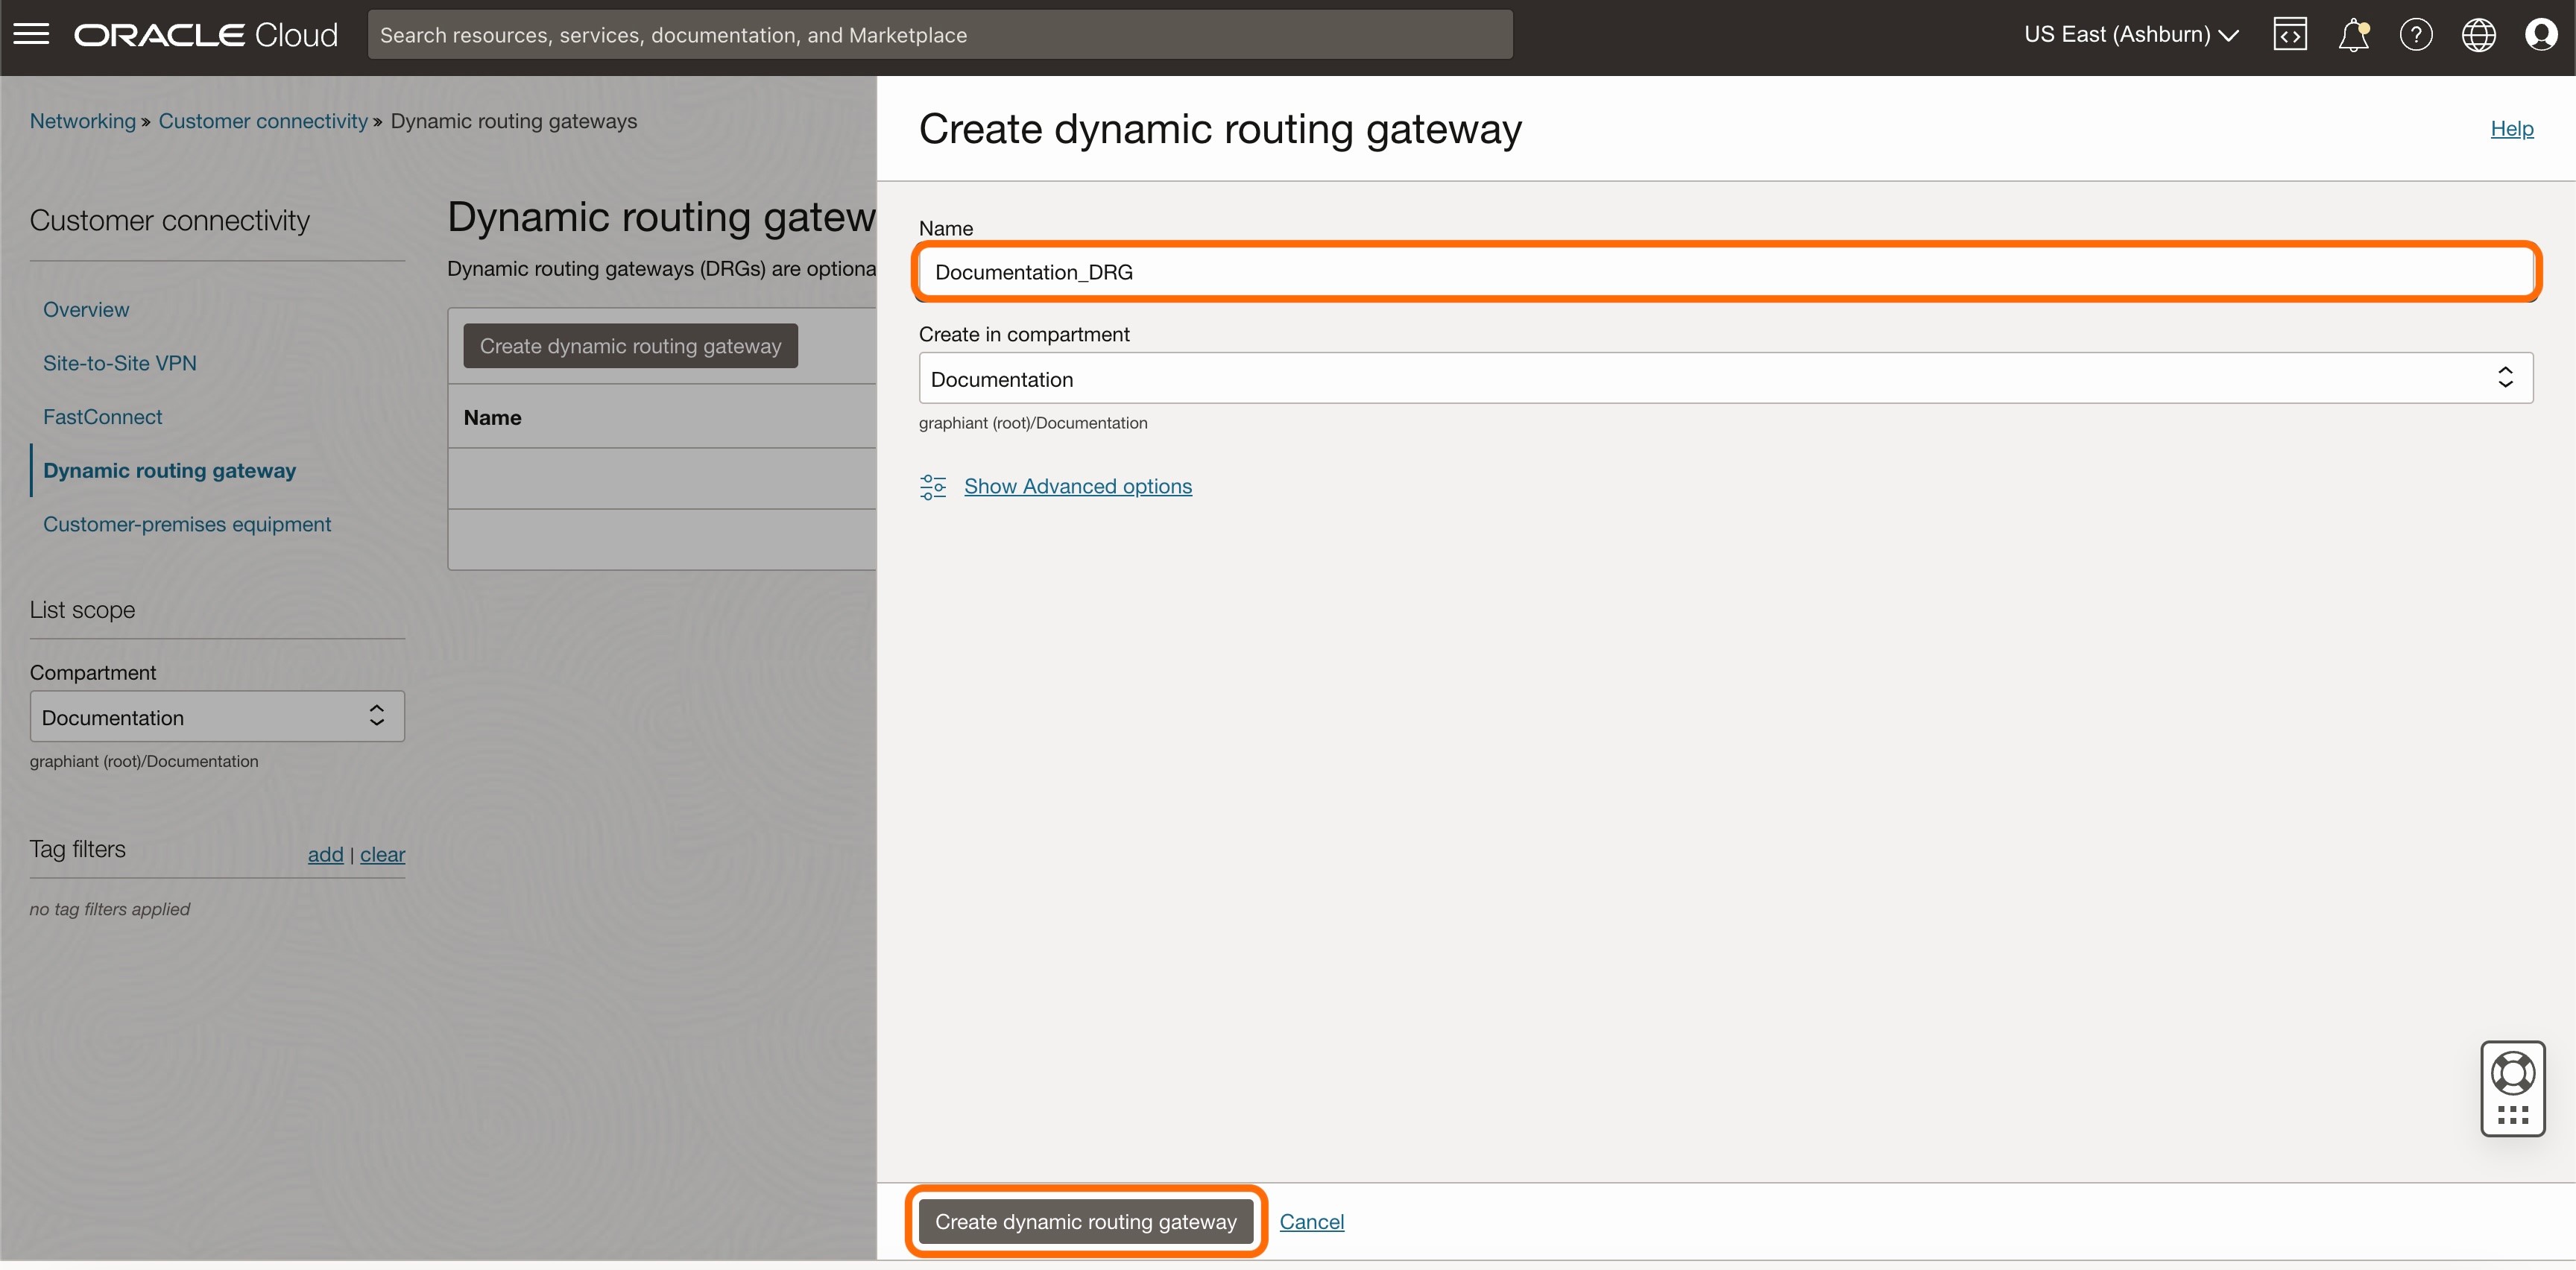
Name: Enter the name of the DRG.
Click 'Create dynamic routing gateway'.
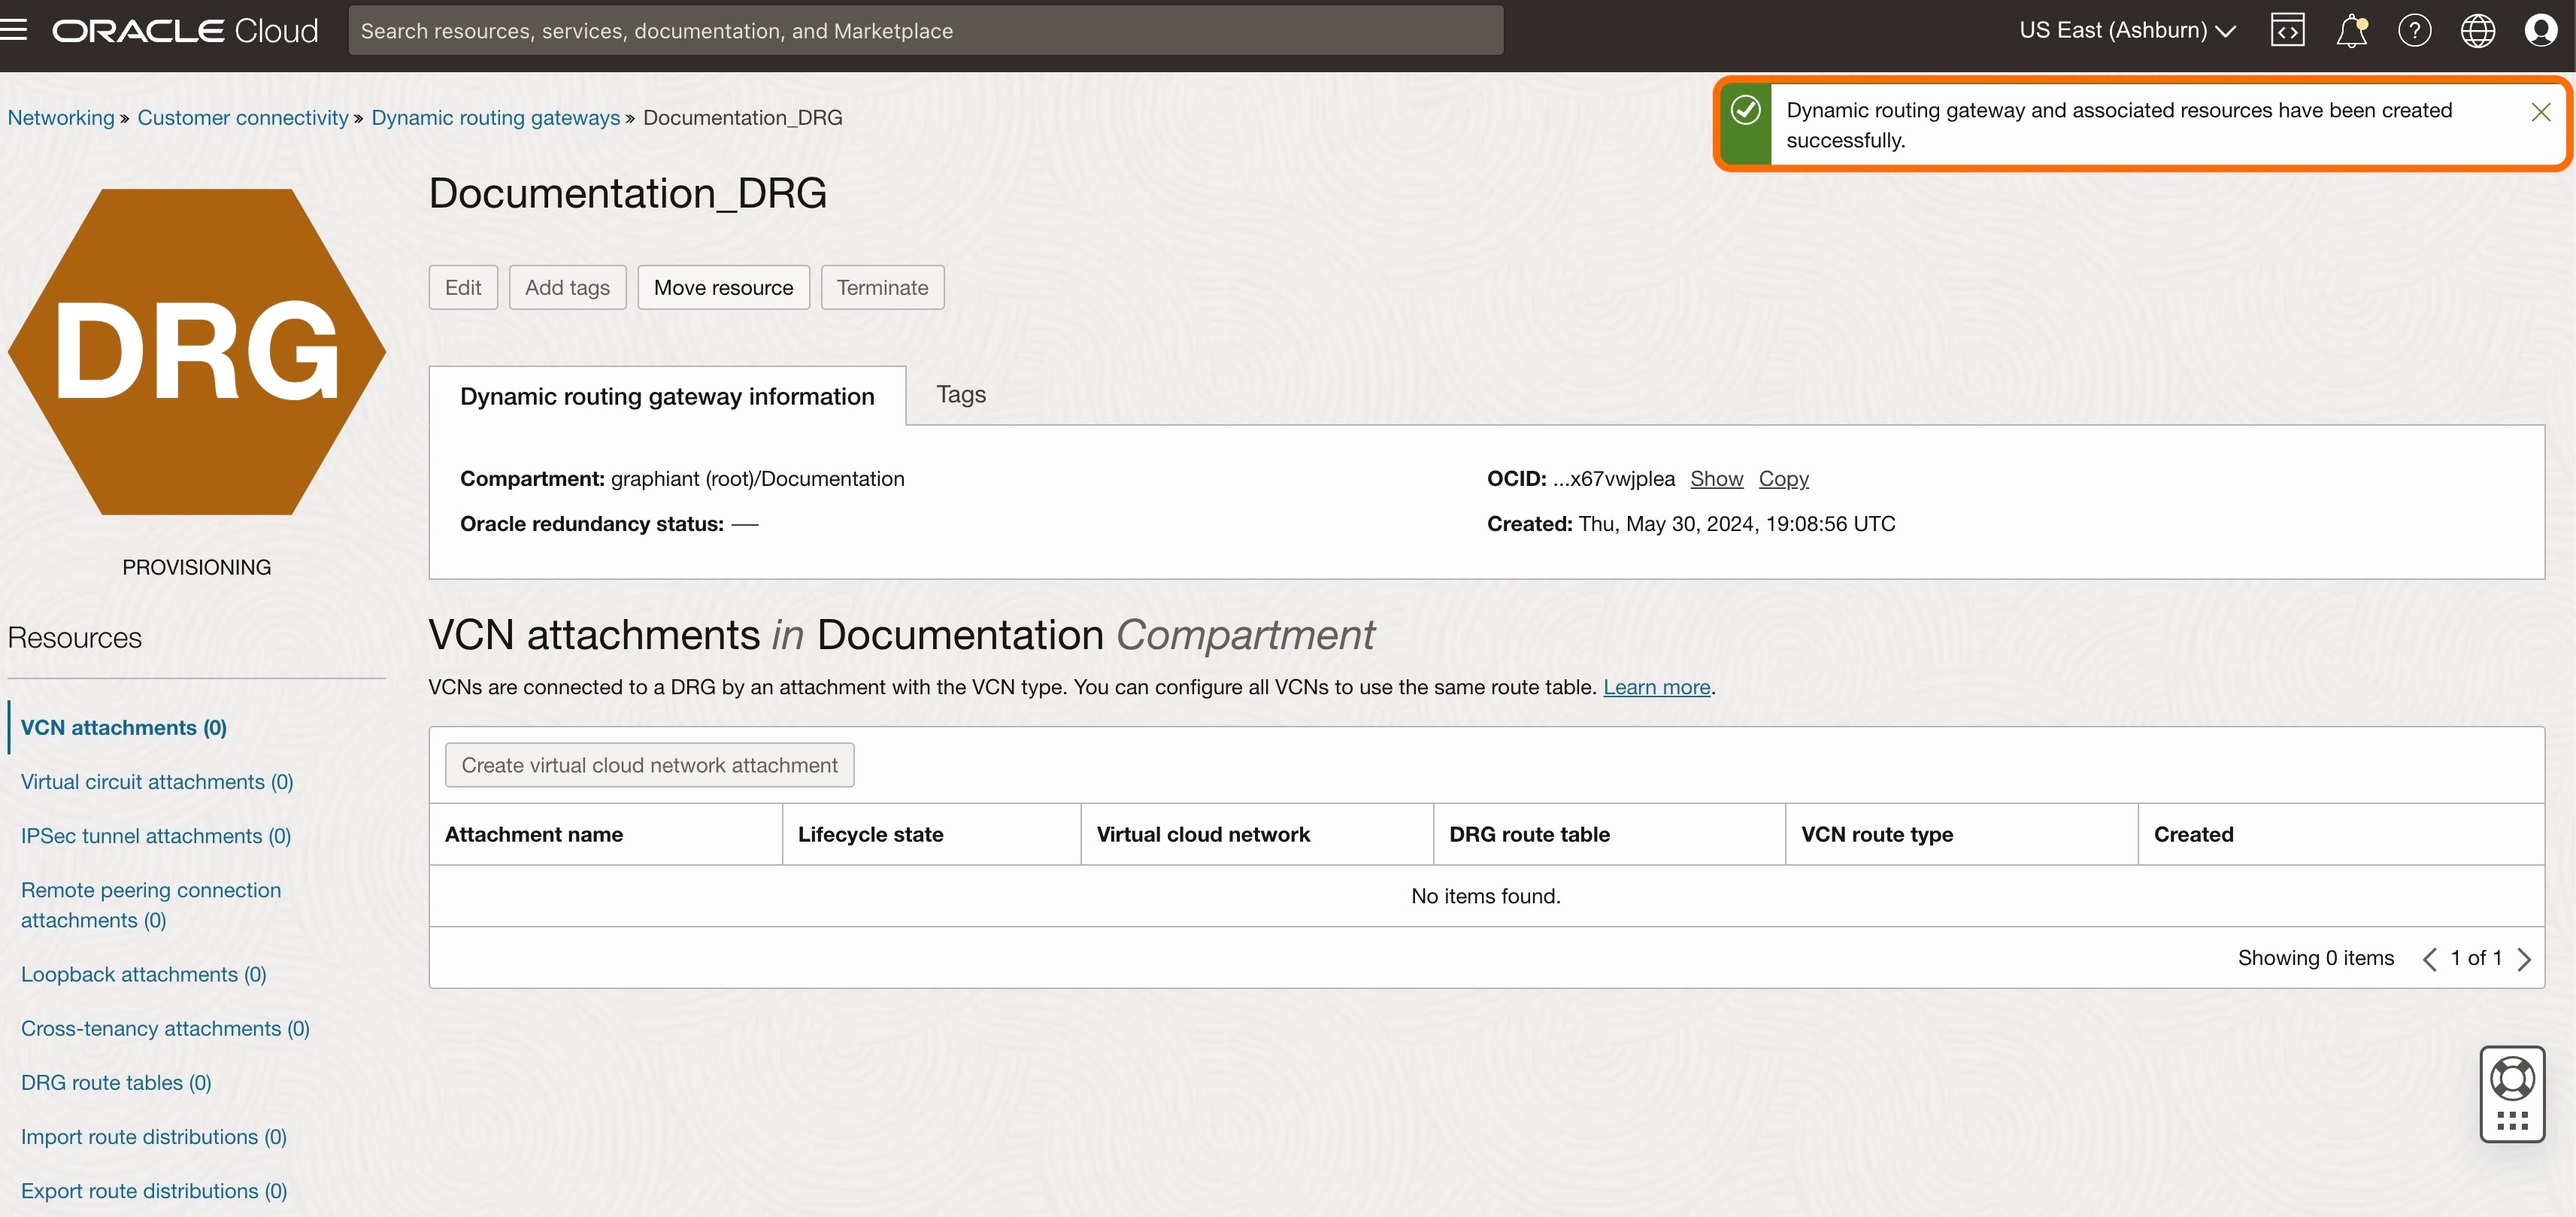
A message will appear that the DRG was created successfully.
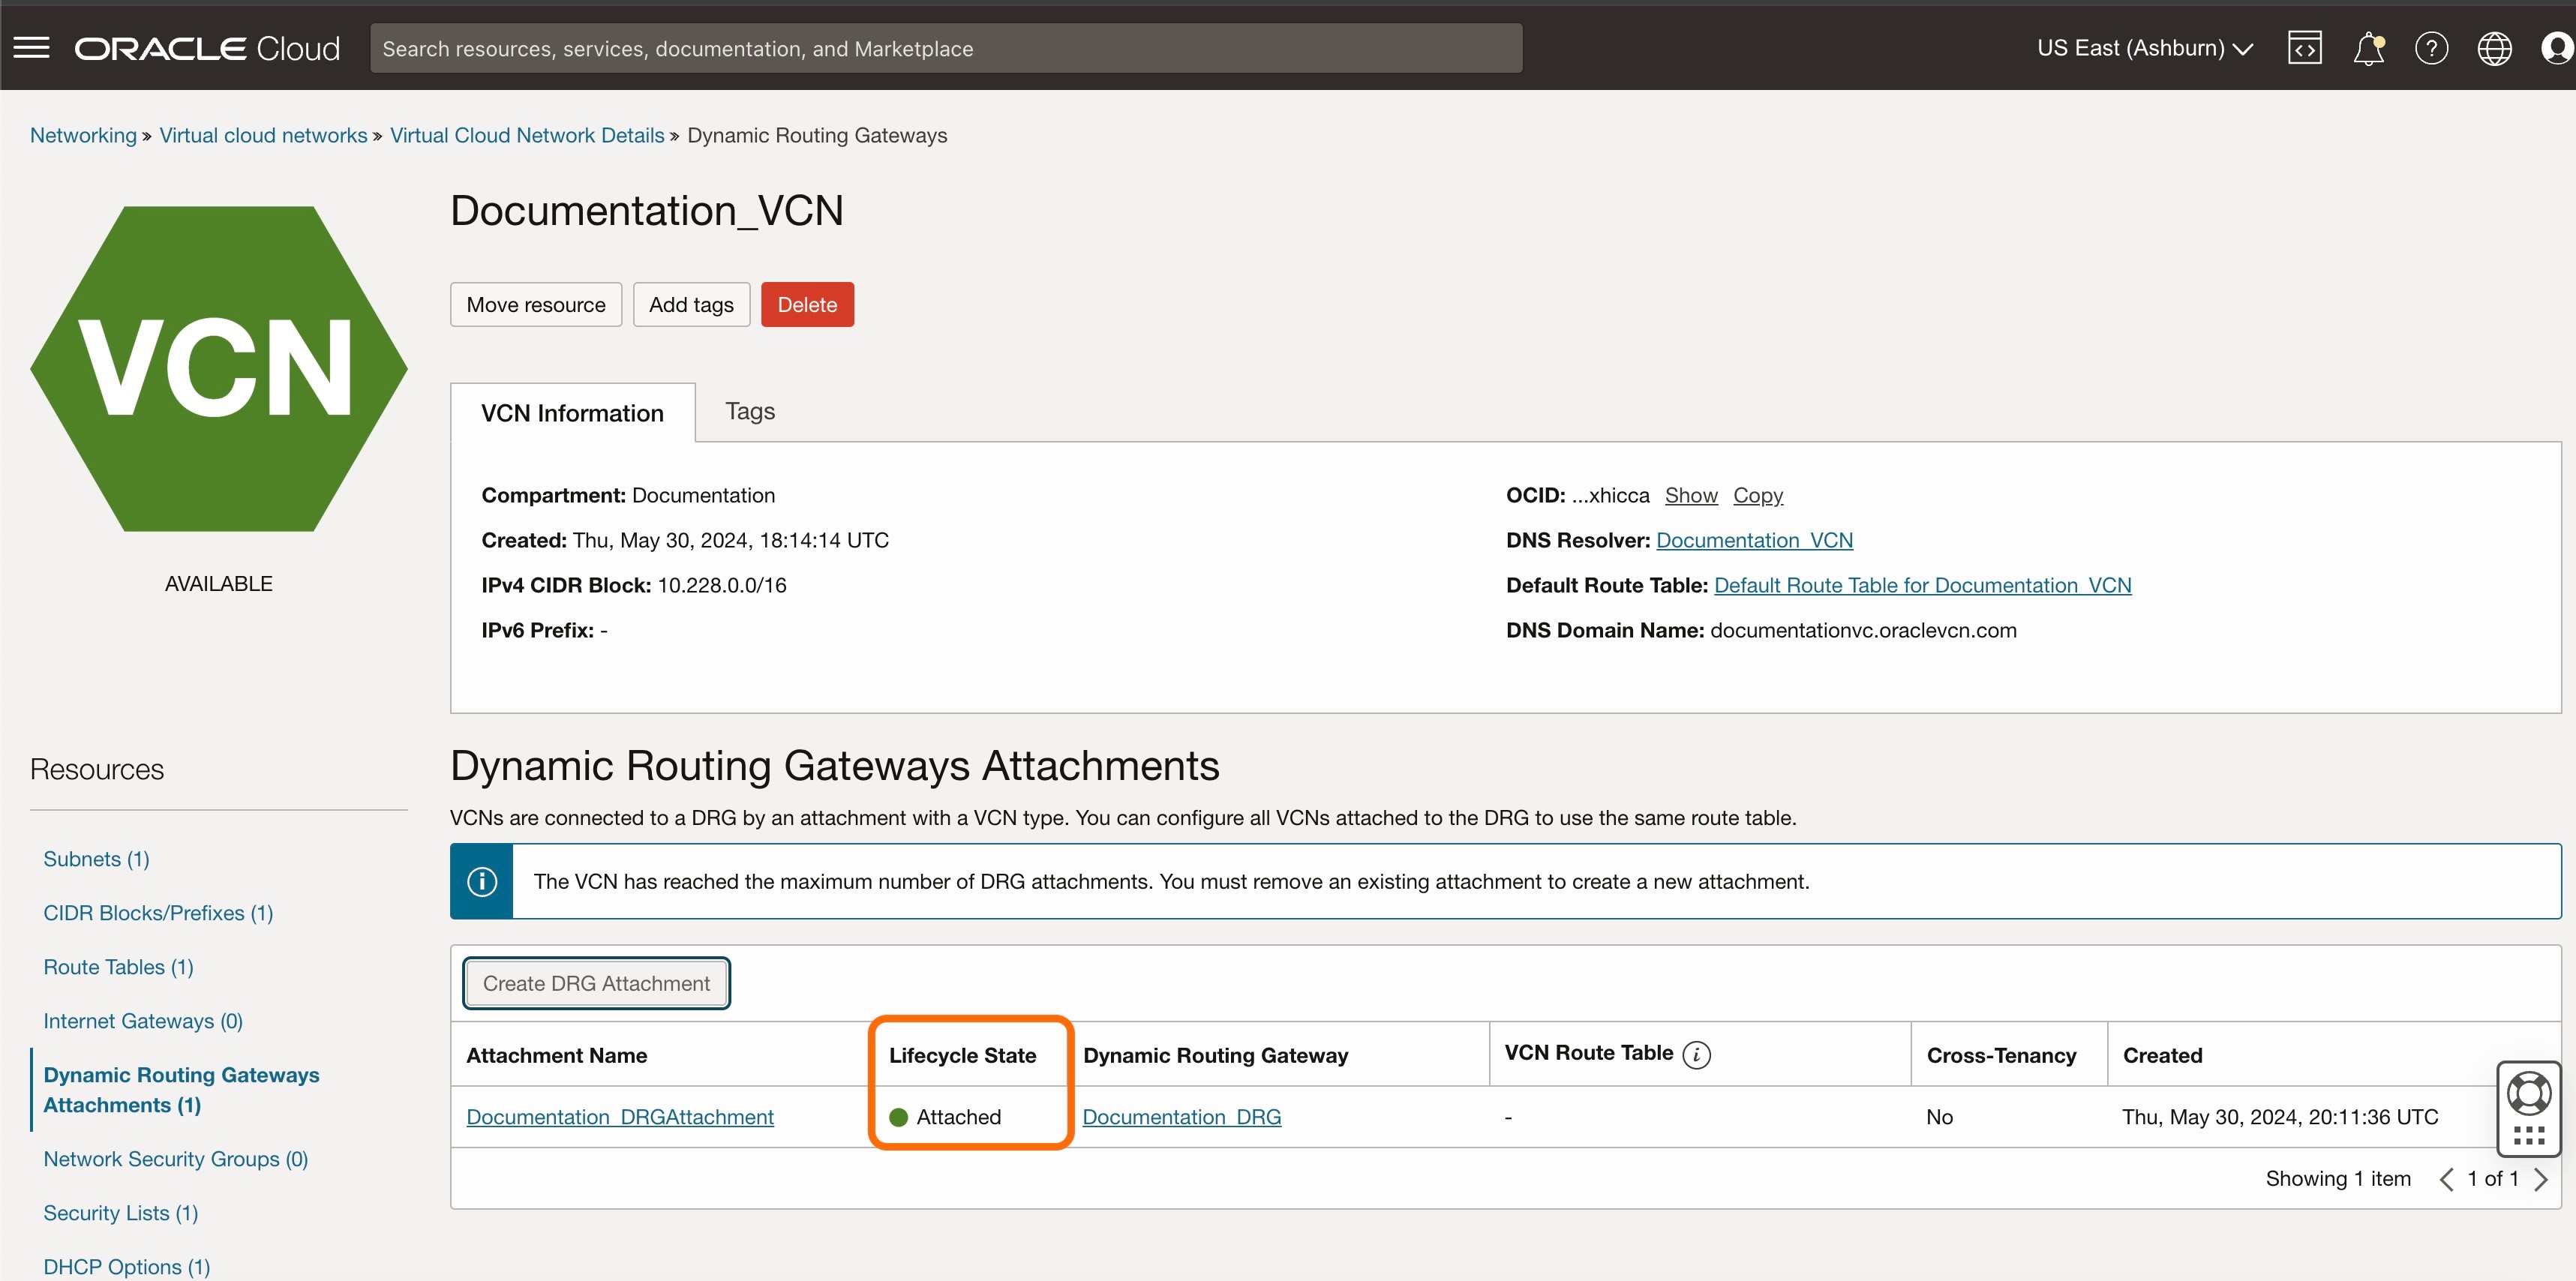
Step 2: Creating the DRG Attachment in OCI
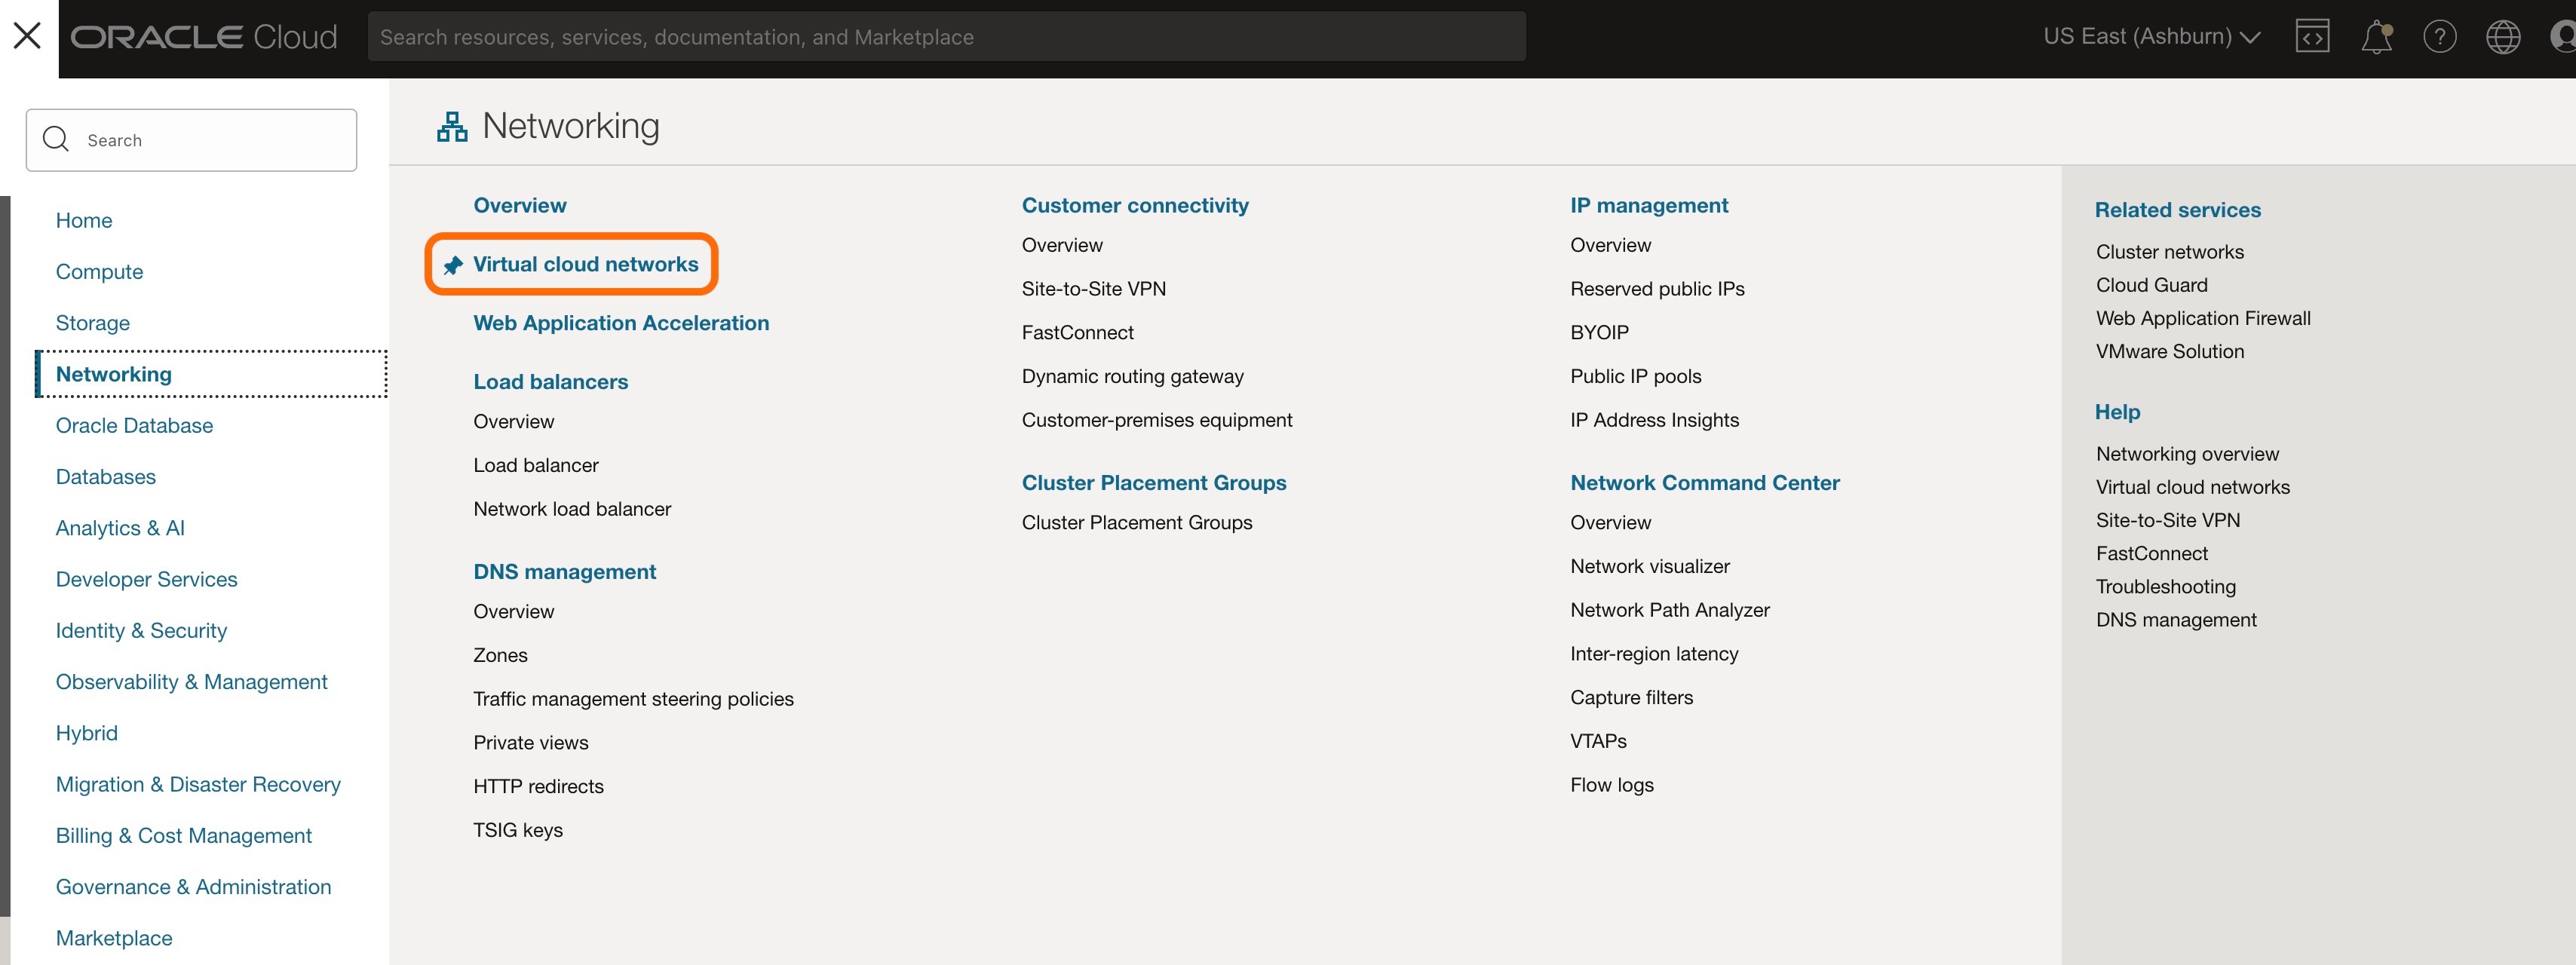
From the 3 lines menu, select 'Networking'.

Select 'Virtual cloud networks'.
Select the VCN to which the DRG will be attached.
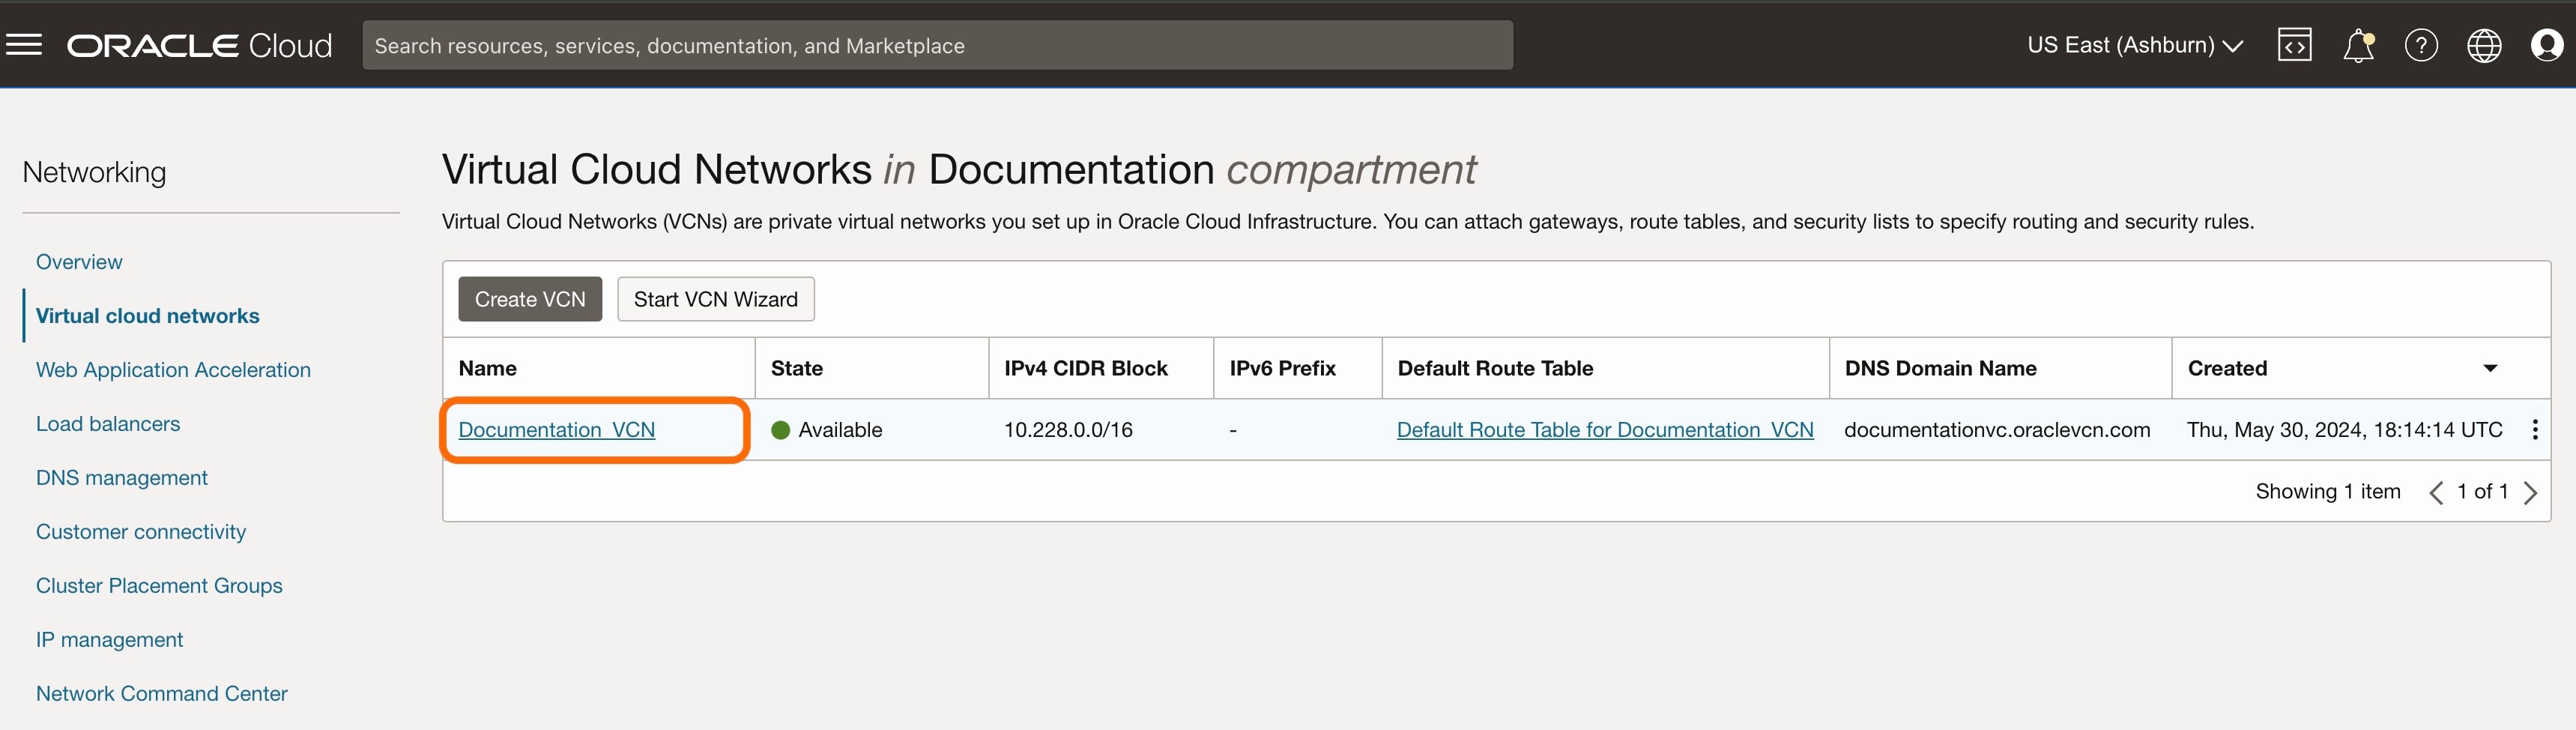
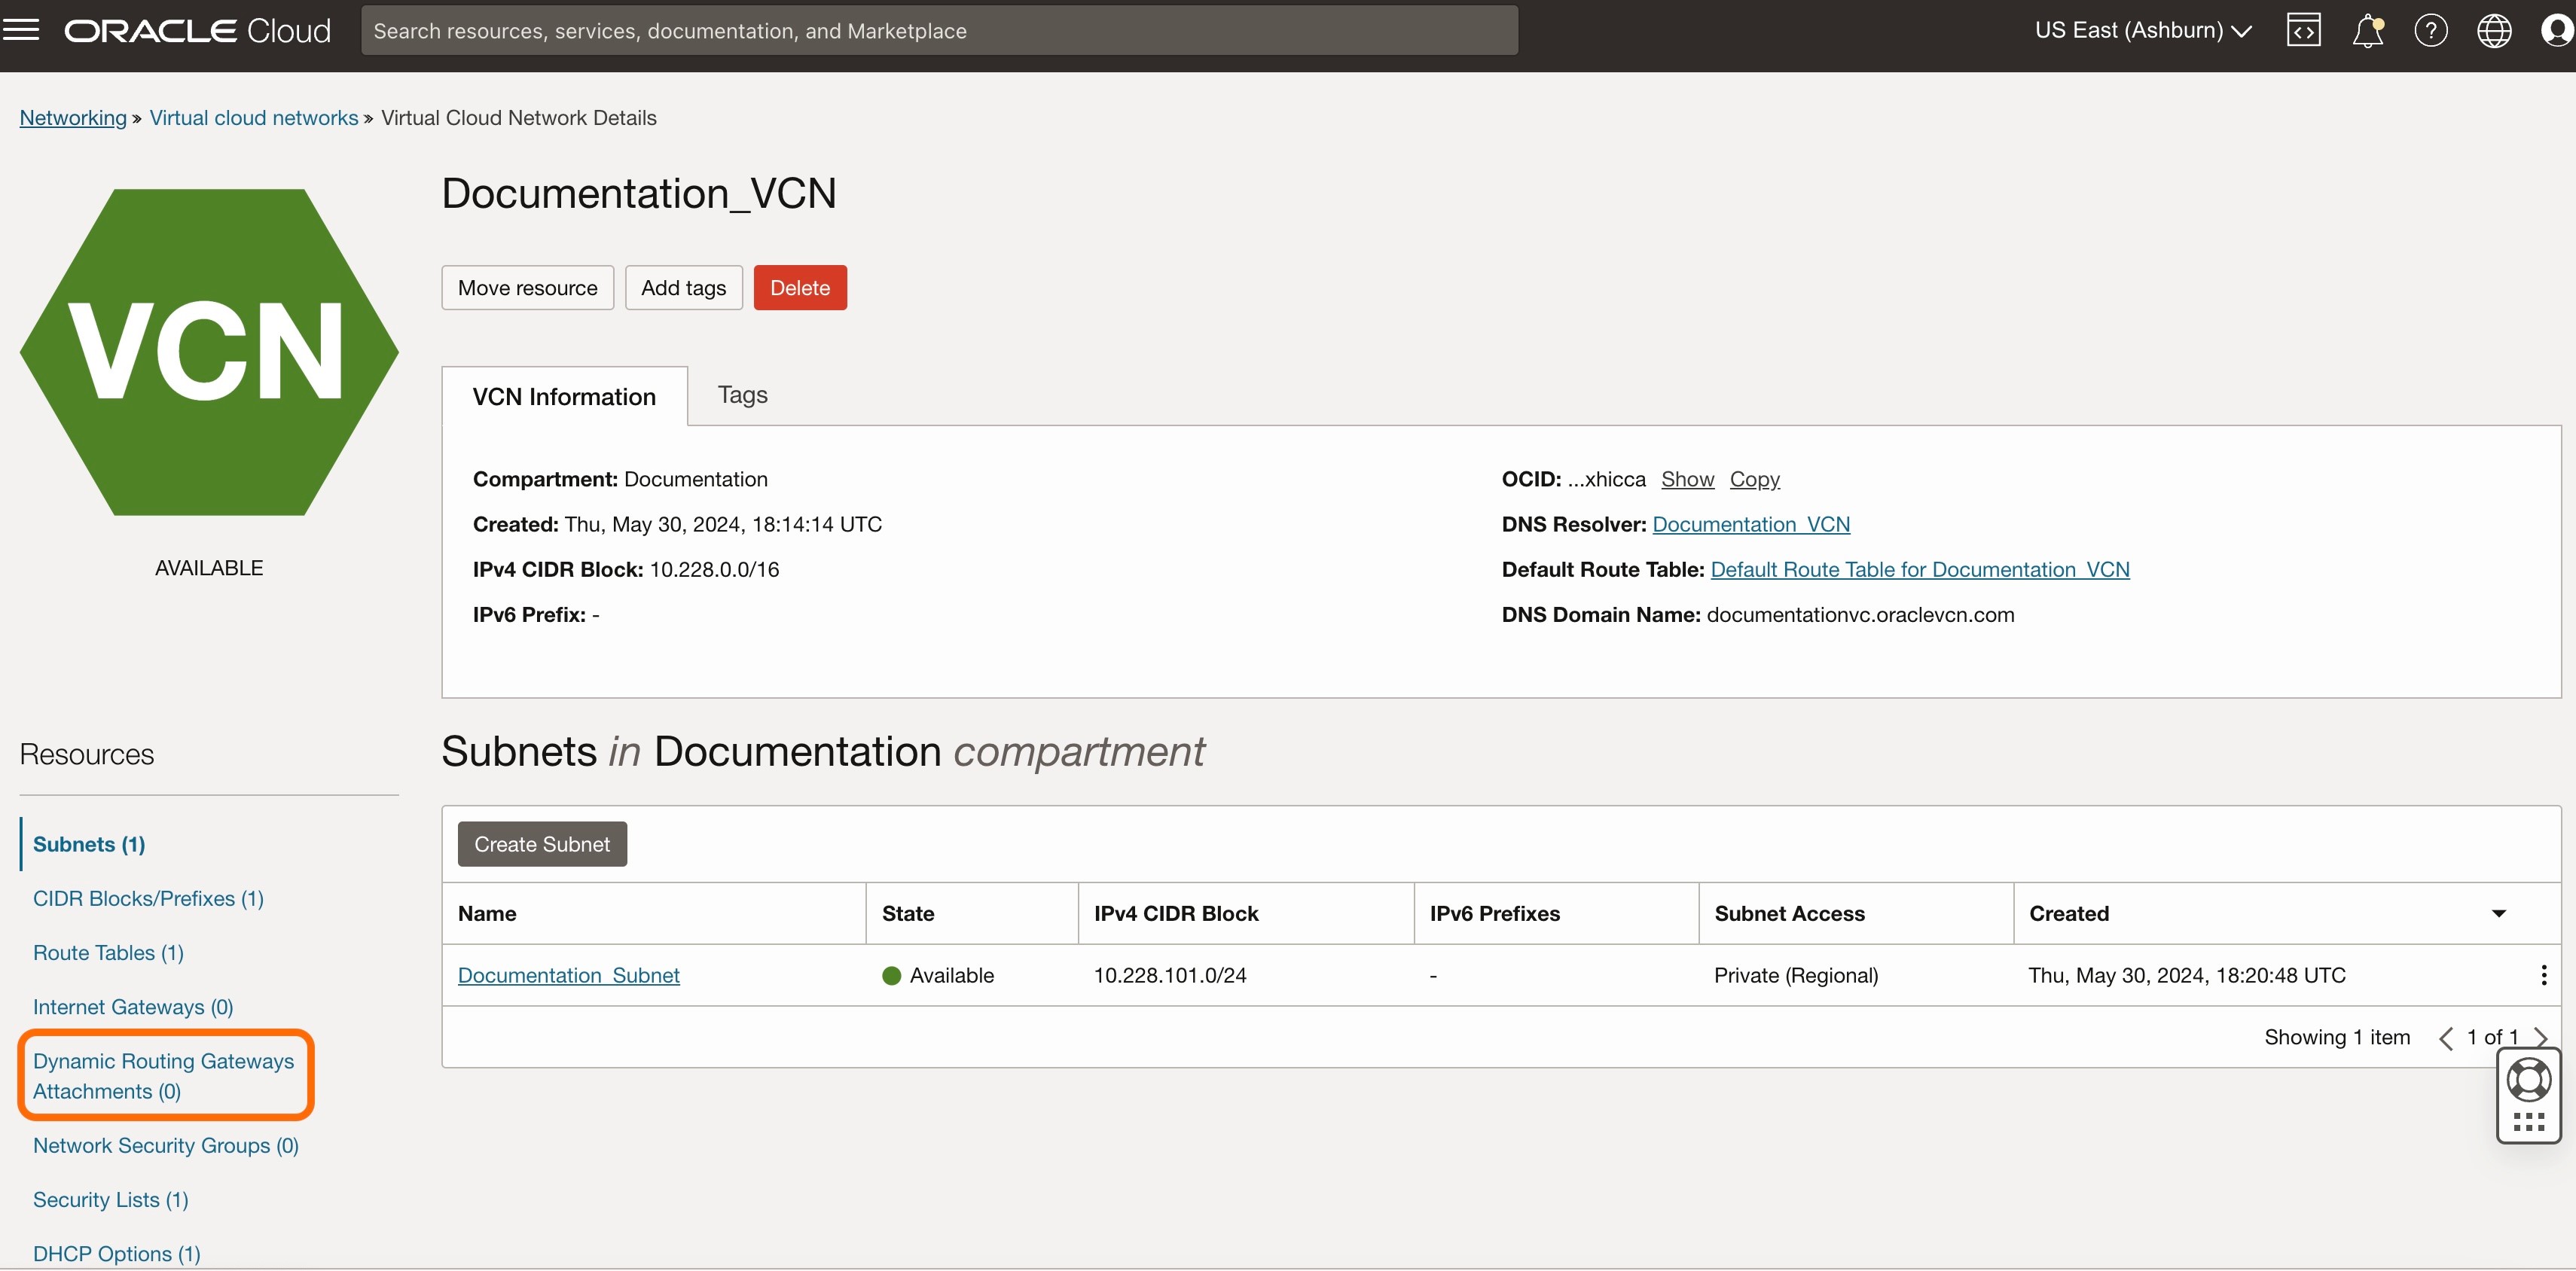
This will open the page for the VCN.
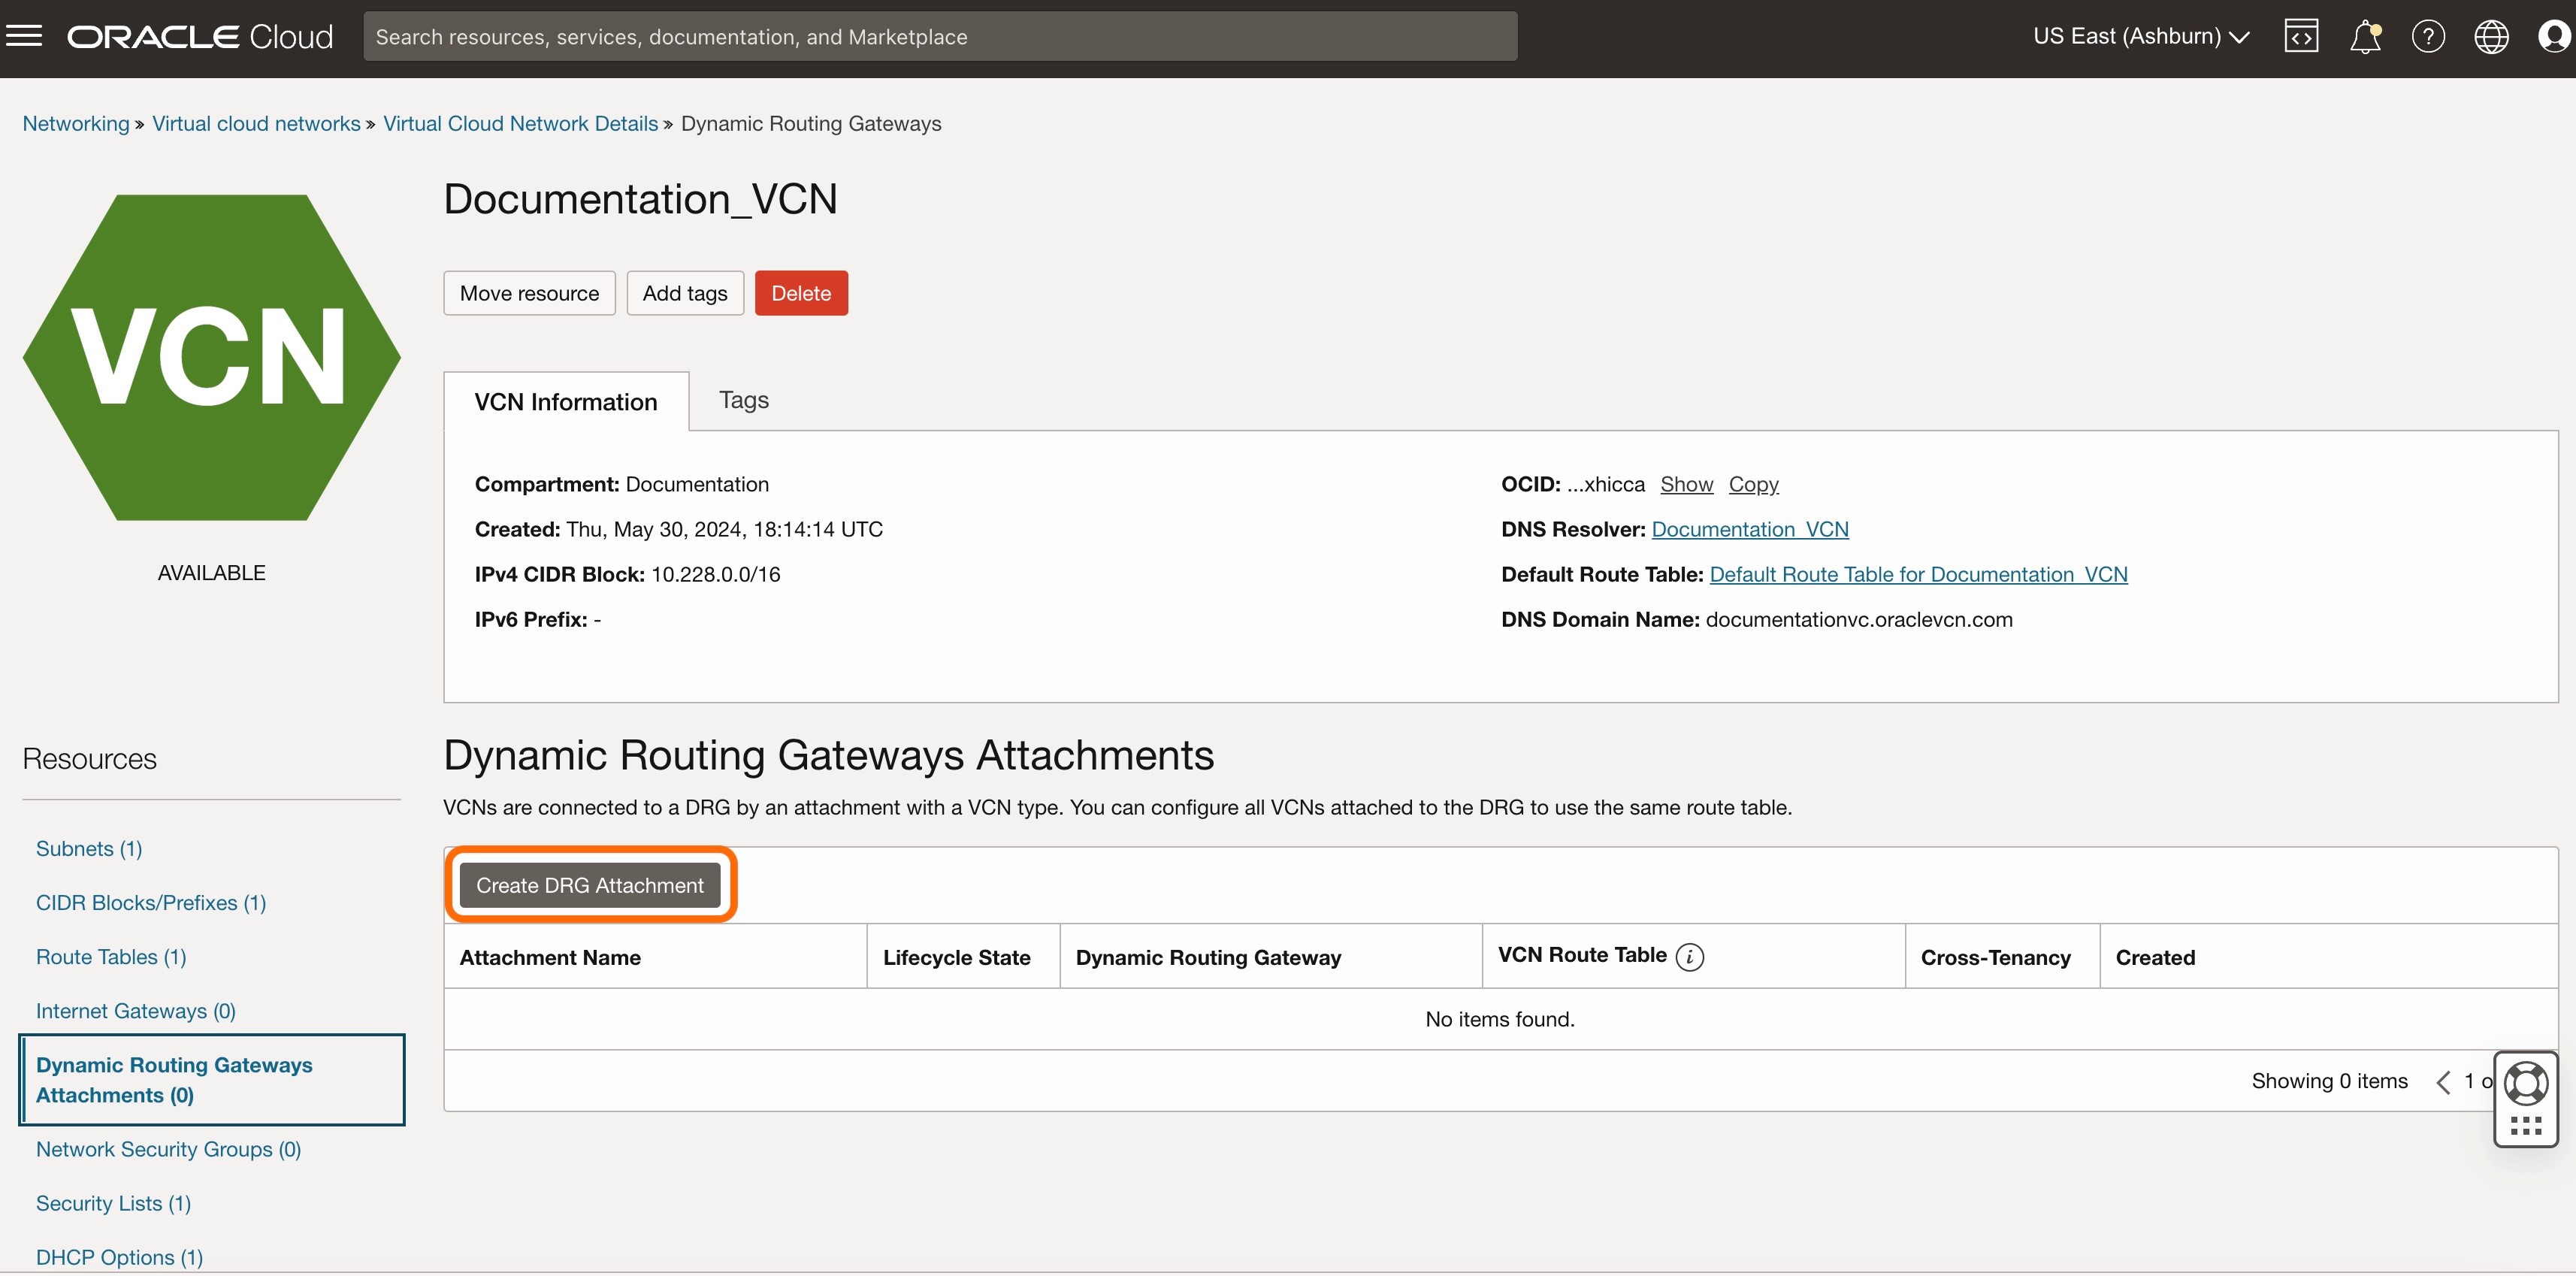
Select 'Dynamic Routing Gateway Attachments' in the left side menu.
Click 'Create DRG Attachment'.
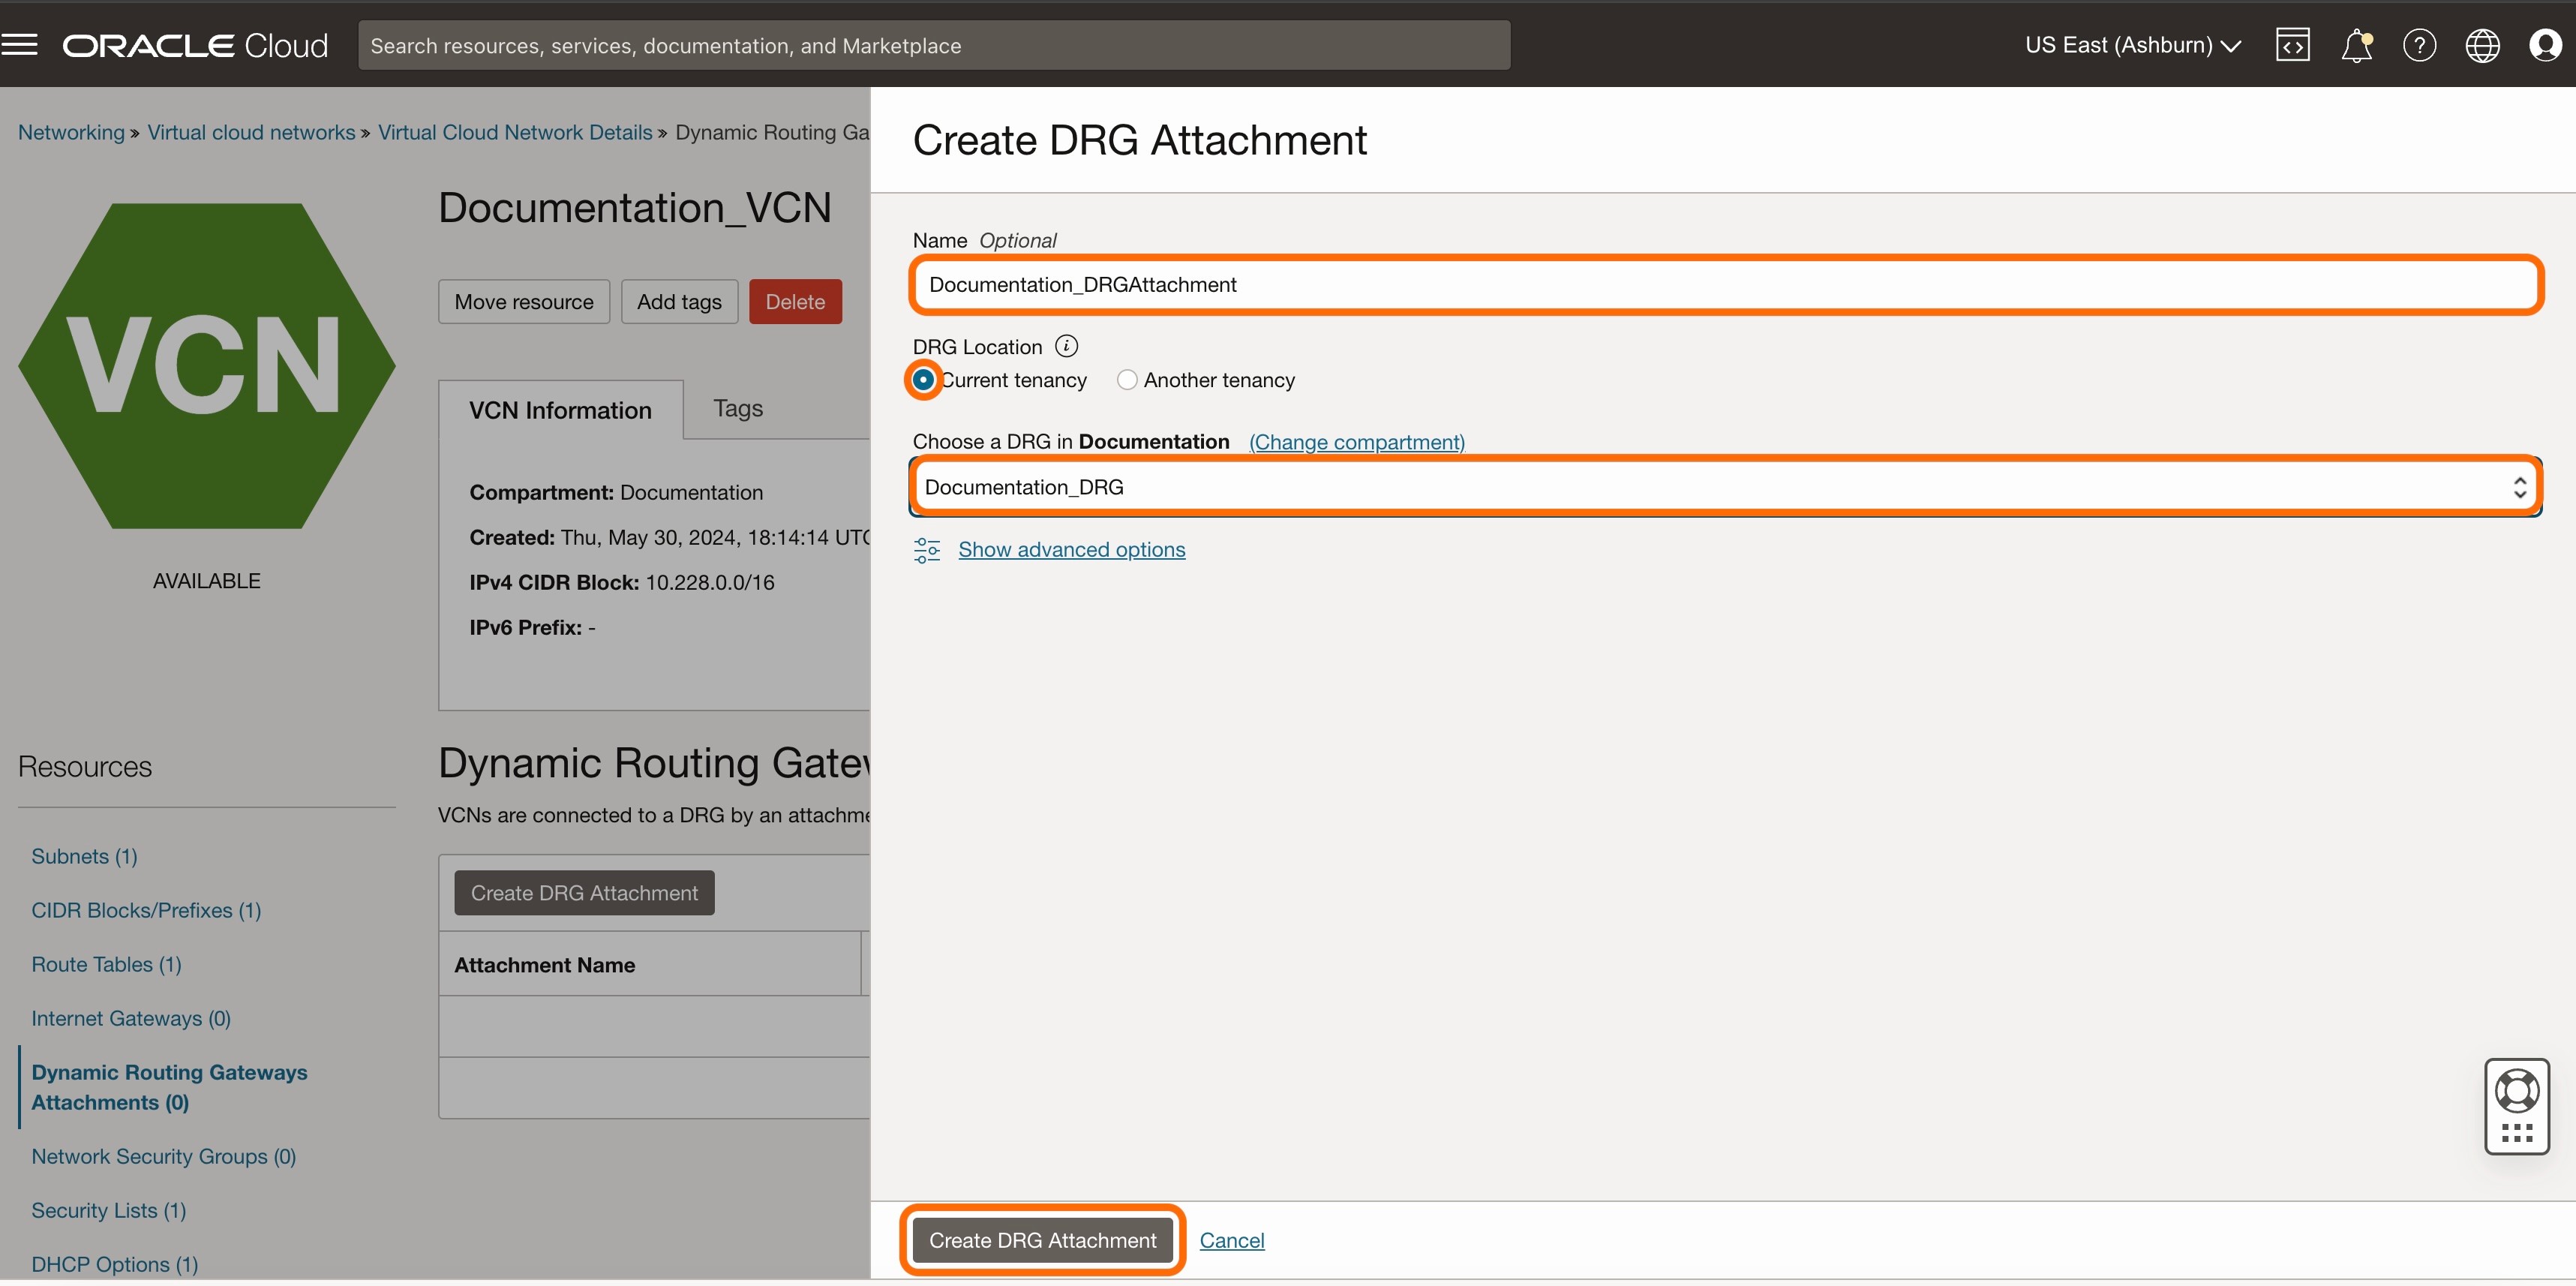
Complete the following fields:
Name: Enter the name of the DRG Attachment
DRG Location: Choose 'Current tenancy'
Choose a DRG: From the drop-down, select the DRG to attach to the VCN
Click 'Create DRG Attachment'.
When completed, the Lifecycle State will change from an orange "Attaching" state to a green "Attached" state.
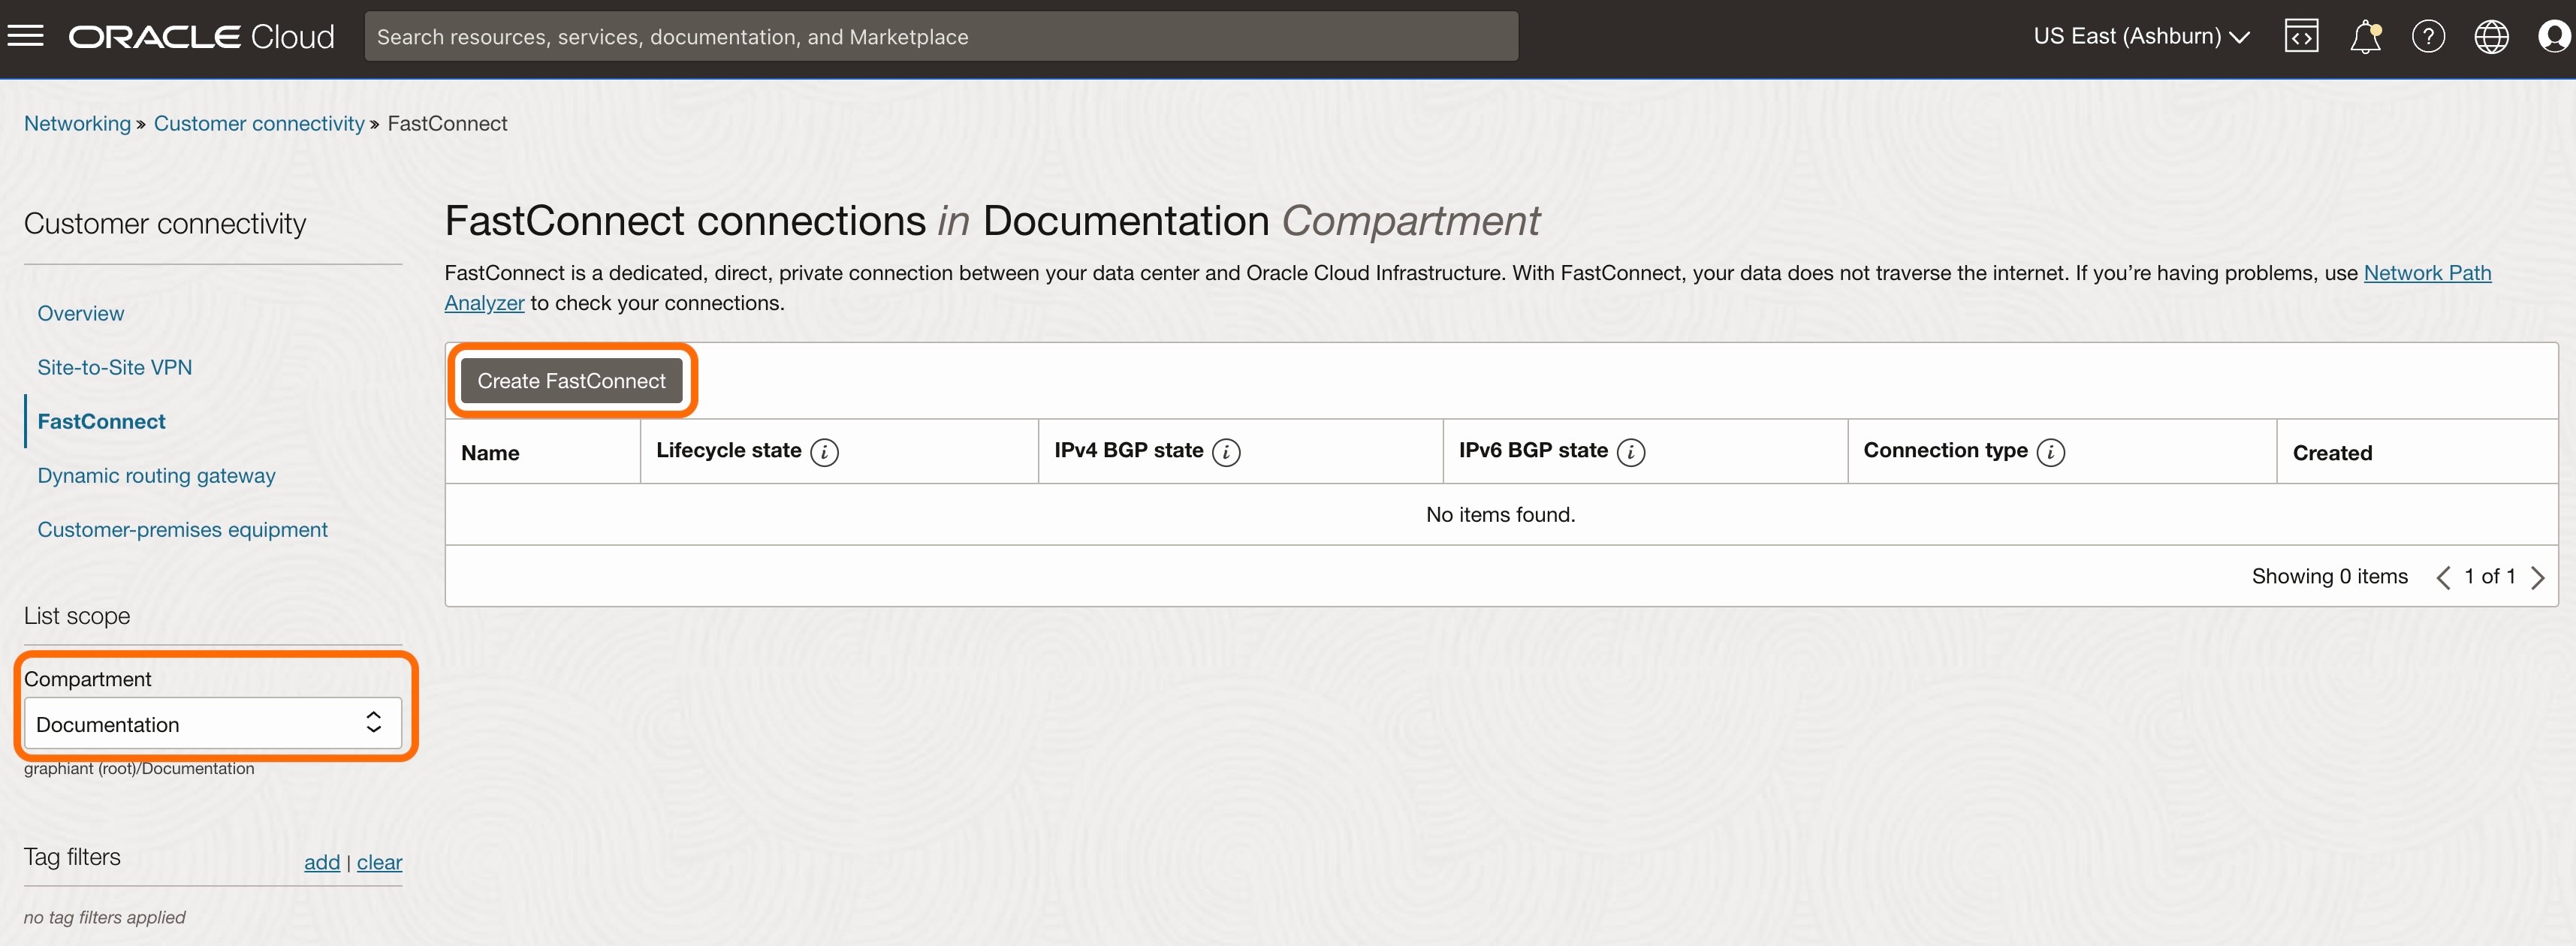
Step 3: Creating the FastConnect in OCI
From the 3 lines menu, choose 'Networking'.

Under the “Customer connectivity” list, select 'FastConnect'.

Ensure that the Compartment selected is correct for which to connect the FastConnect.
Click 'Create FastConnect'.
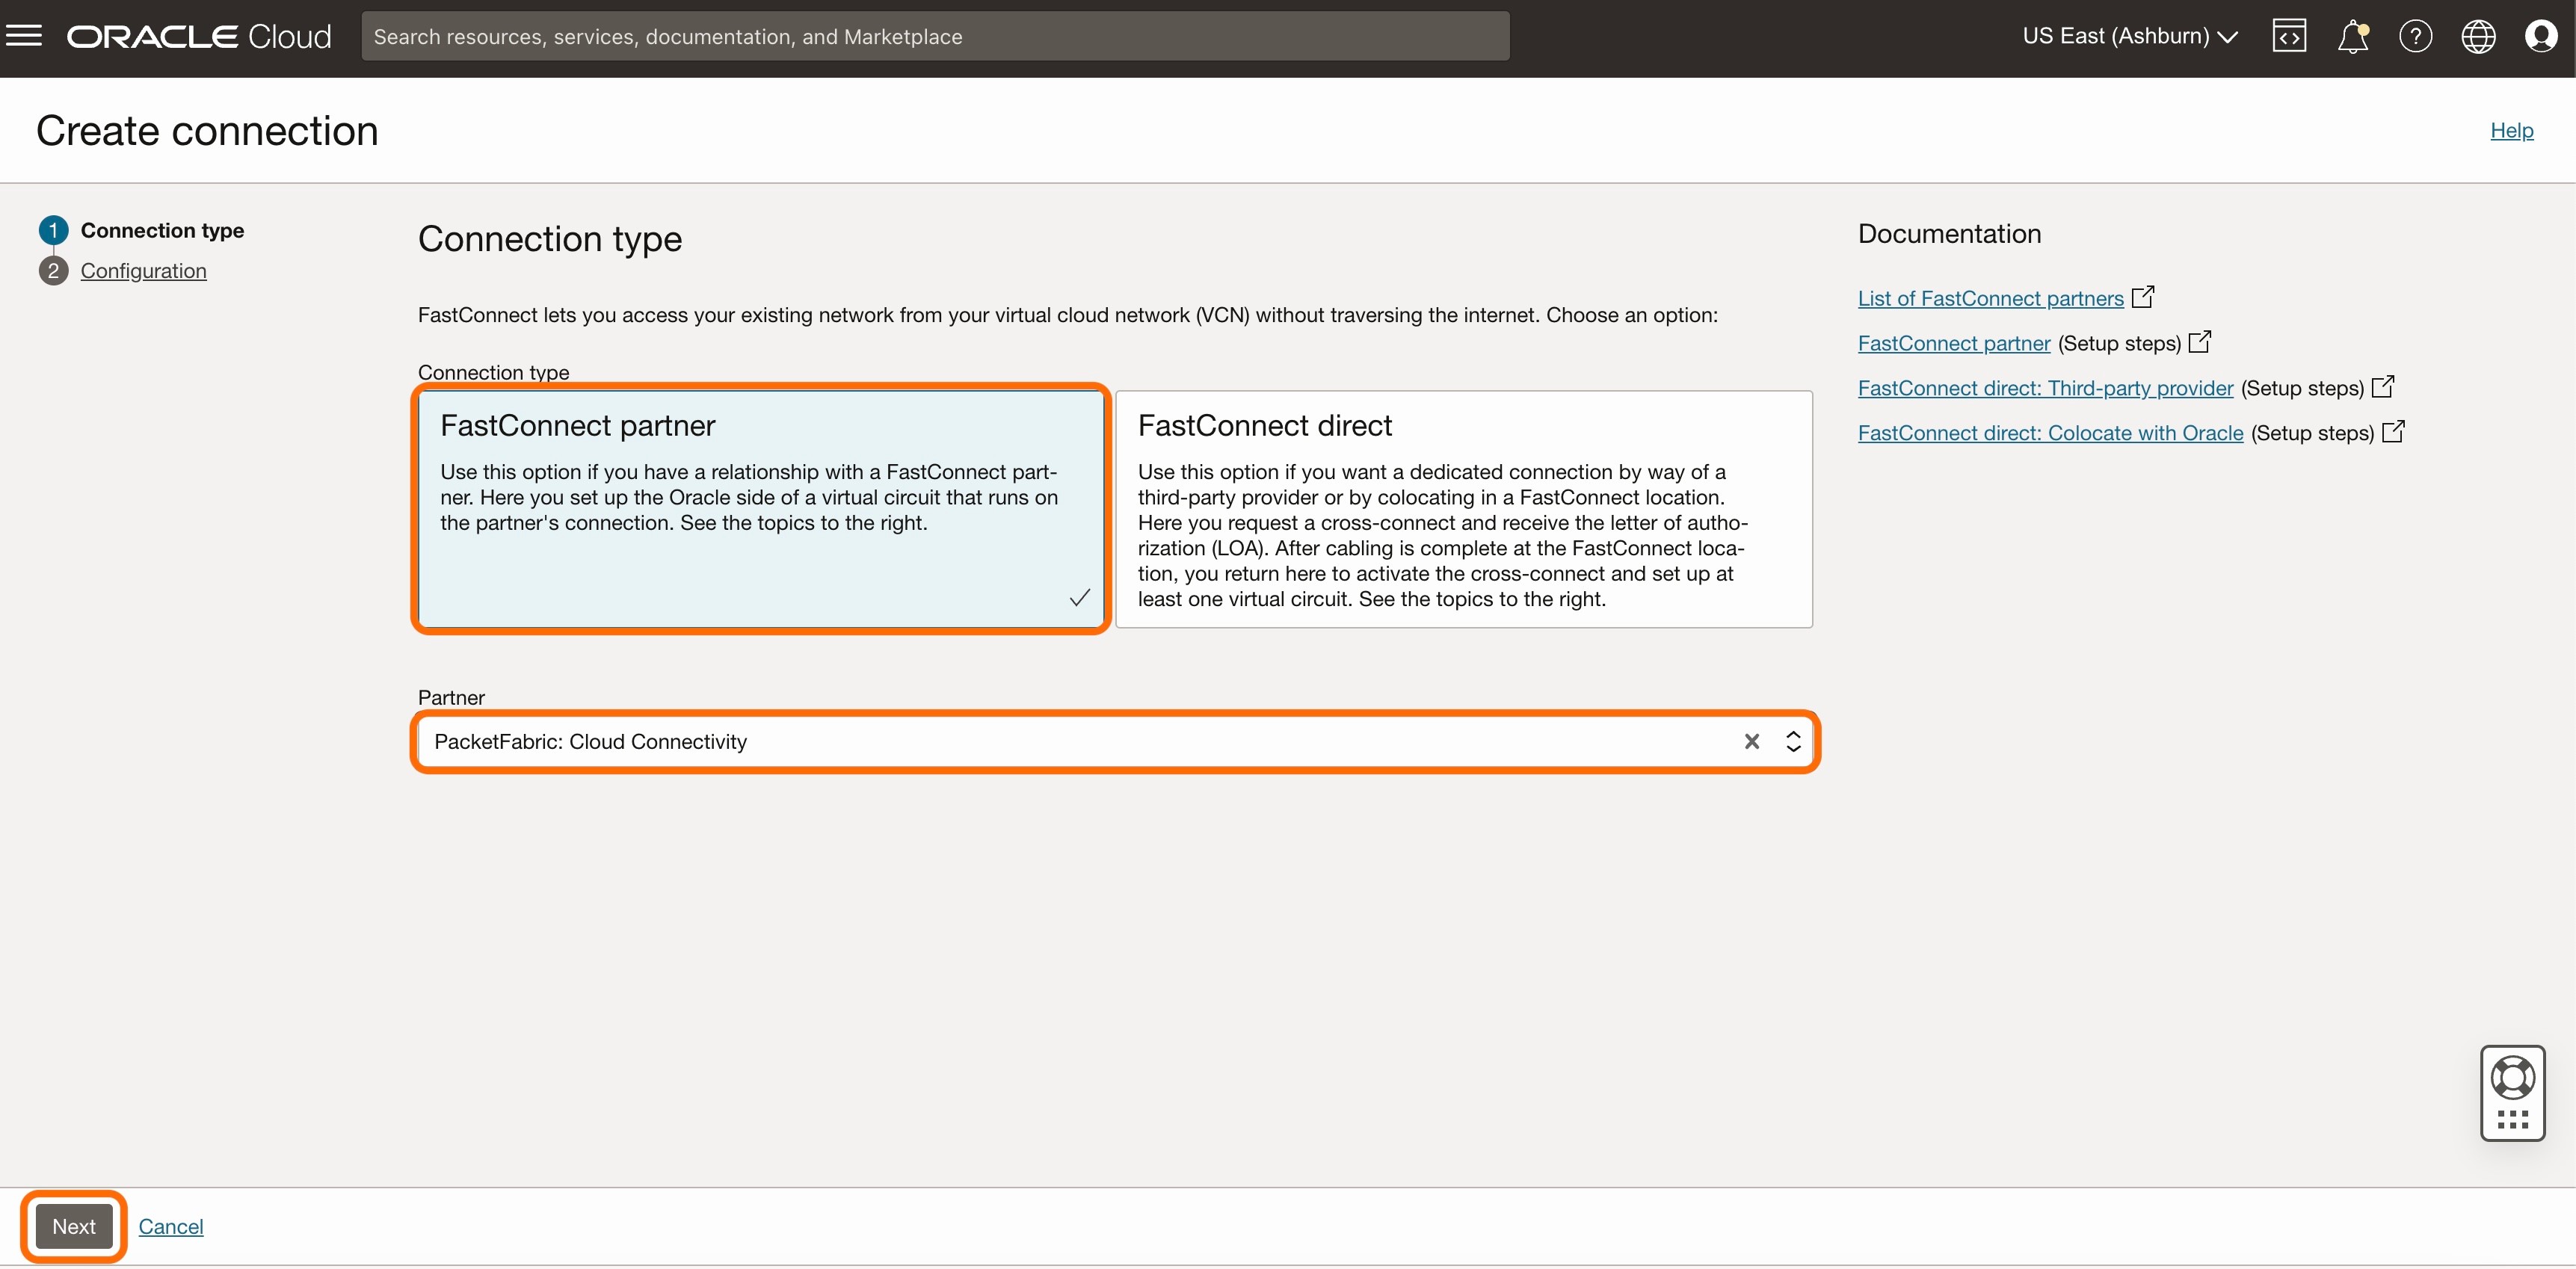
Select the following:
Connection type: Choose 'FastConnect' partner
Partner: Select 'PacketFabric' from the drop-down.
Click 'Next'.
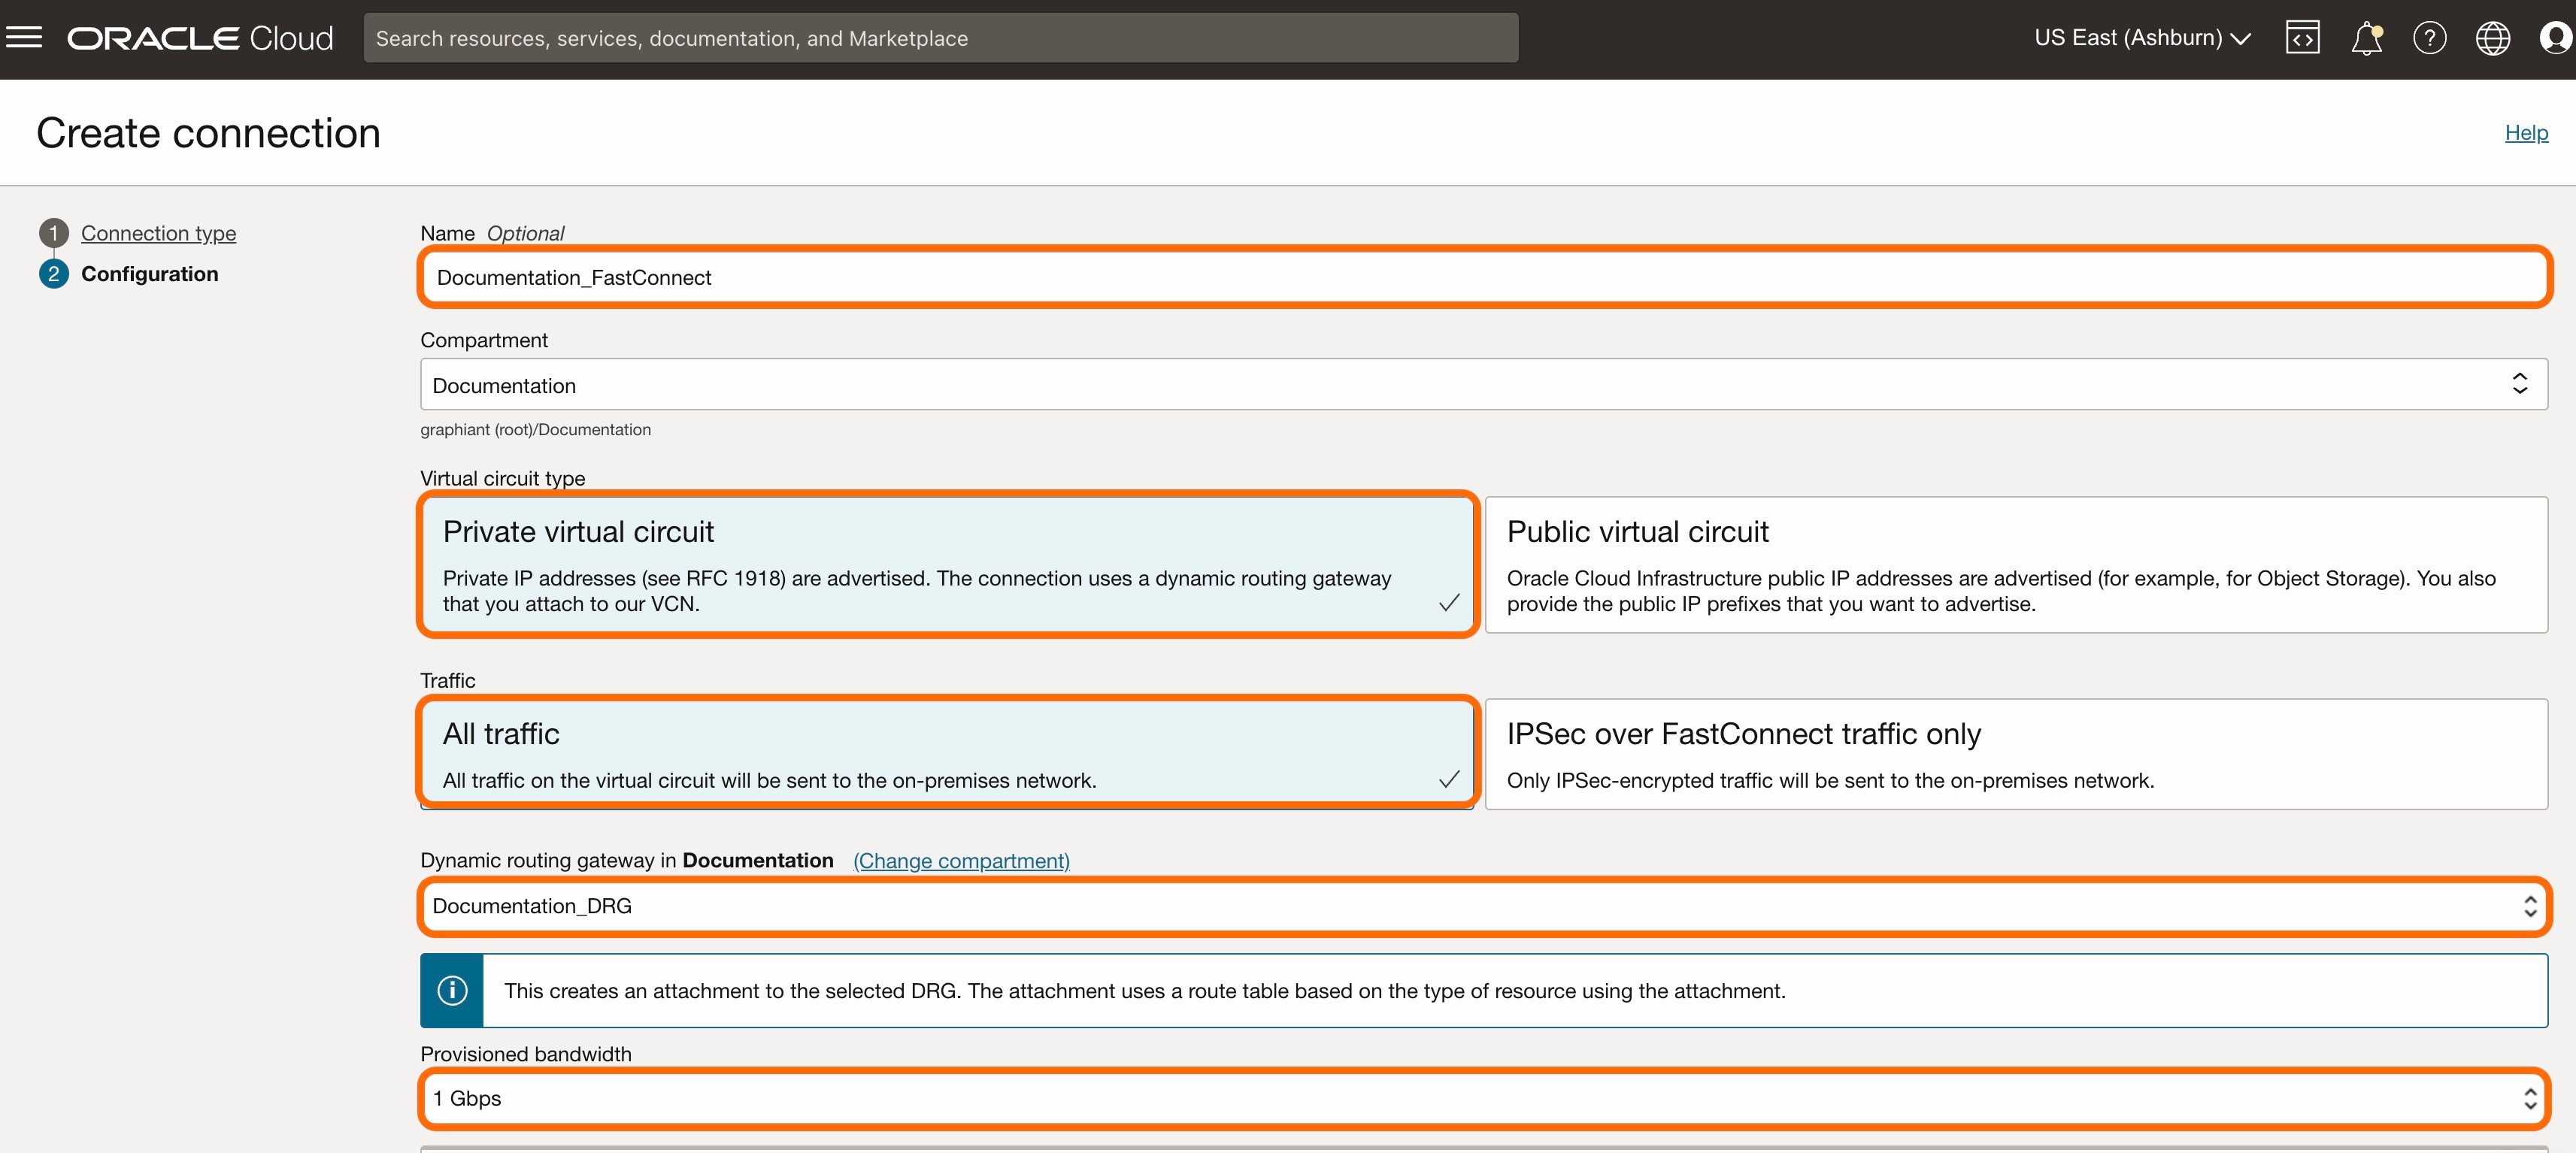
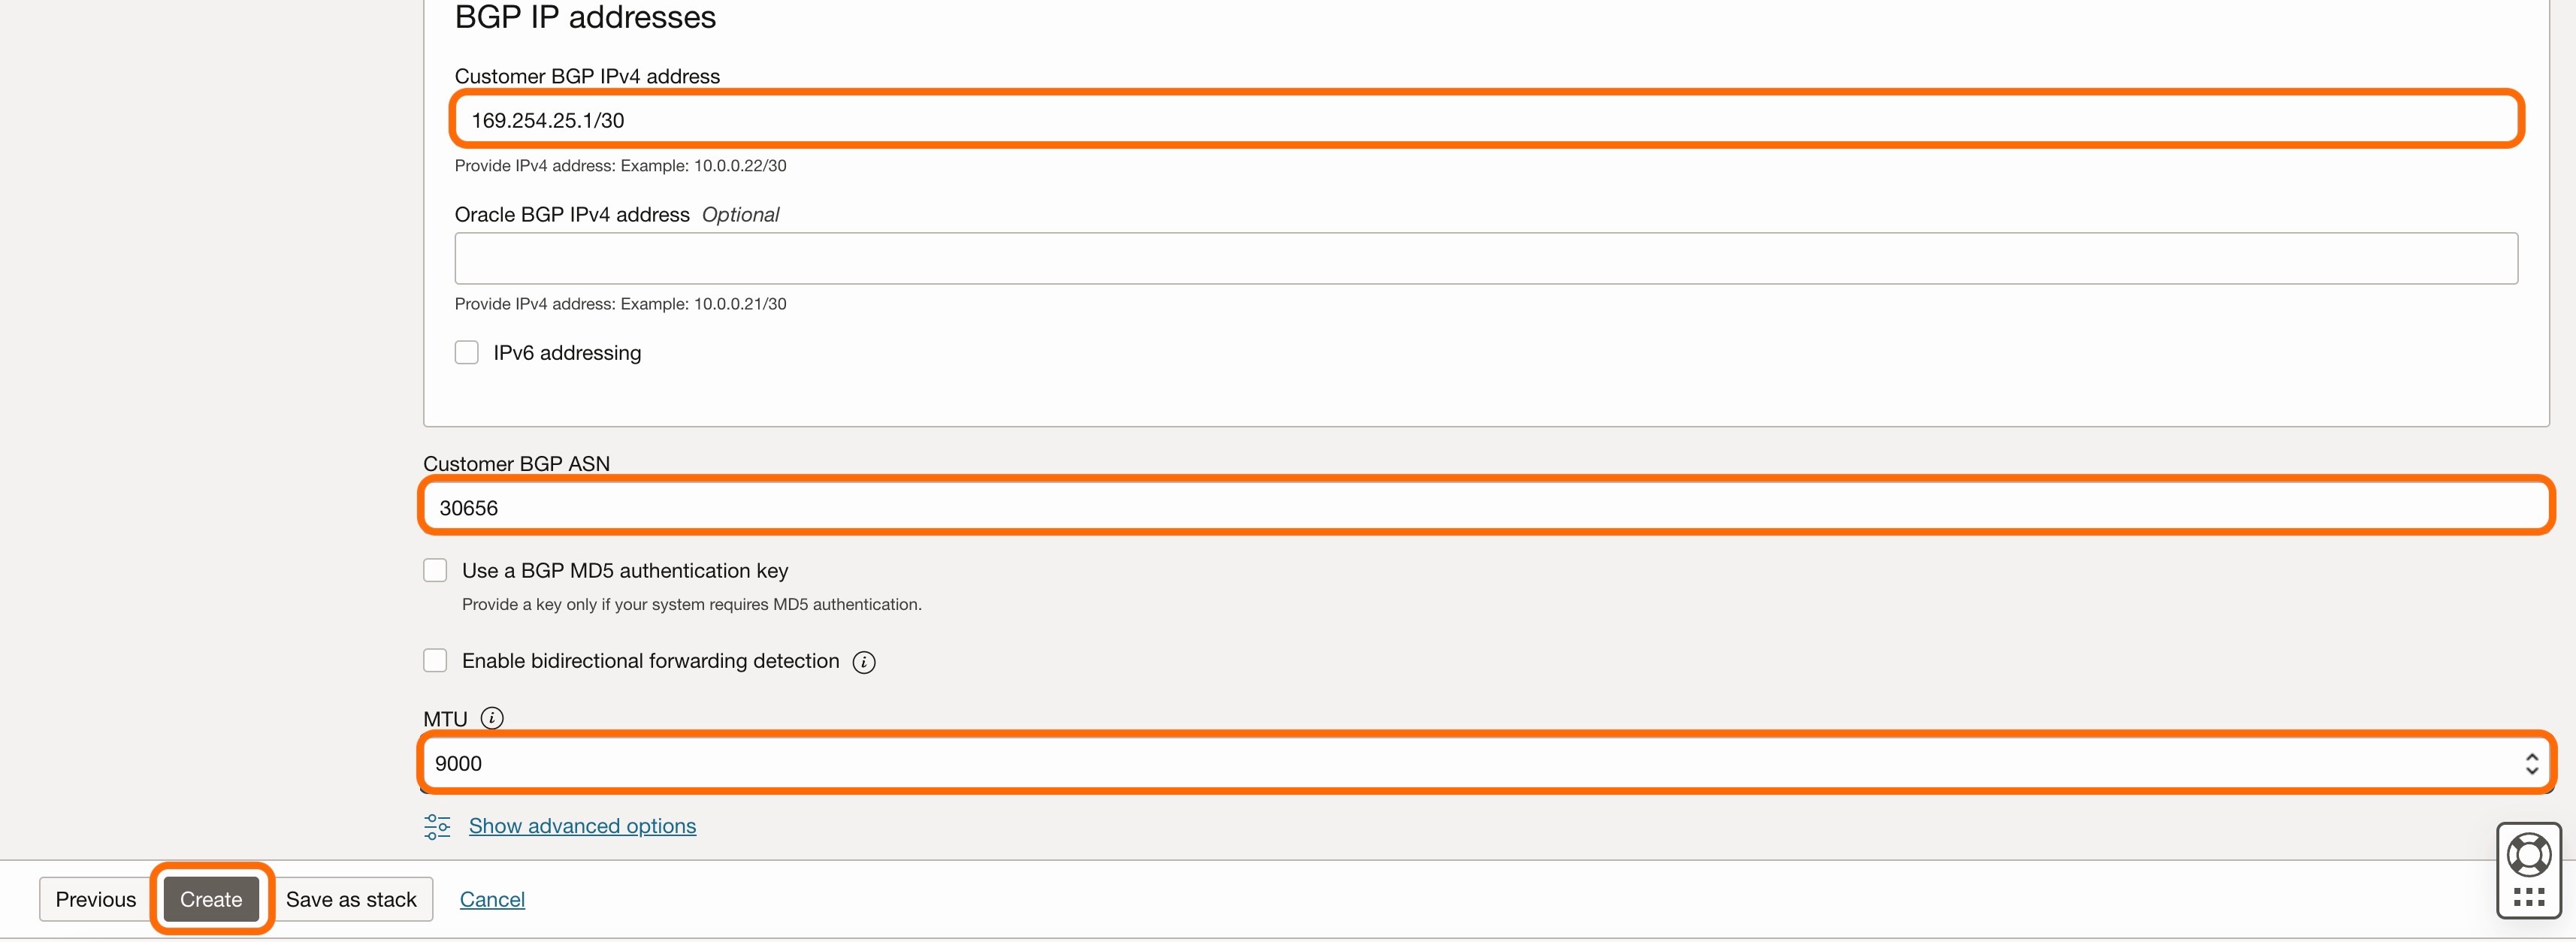
Complete the following fields:
Name: Name of the FastConnect
Virtual circuit type: Choose 'Private virtual circuit'
Traffic: Choose 'All traffic'
Dynamic routing gateway: From the drop-down, select the DRG to be connected to the FastConnect
Provisioned bandwidth: From the drop-down, select the desired bandwidth
Customer BGP IPv4 address: Enter the subnet of the BGP neighbor (in the form of "169.254.___.___" /30 Link-Local Only CIDR)
Oracle BGP IPv4 address: This field is optional; If left blank, the OCI portal will autofill the corresponding address.
Customer BGP ASN: Enter Graphiant's ASN of 30656
MTU: Enter the desired MTU from the drop-down
Note:
OCI supports Jumbo Frames up to 9000 bytes.
Click 'Create'.
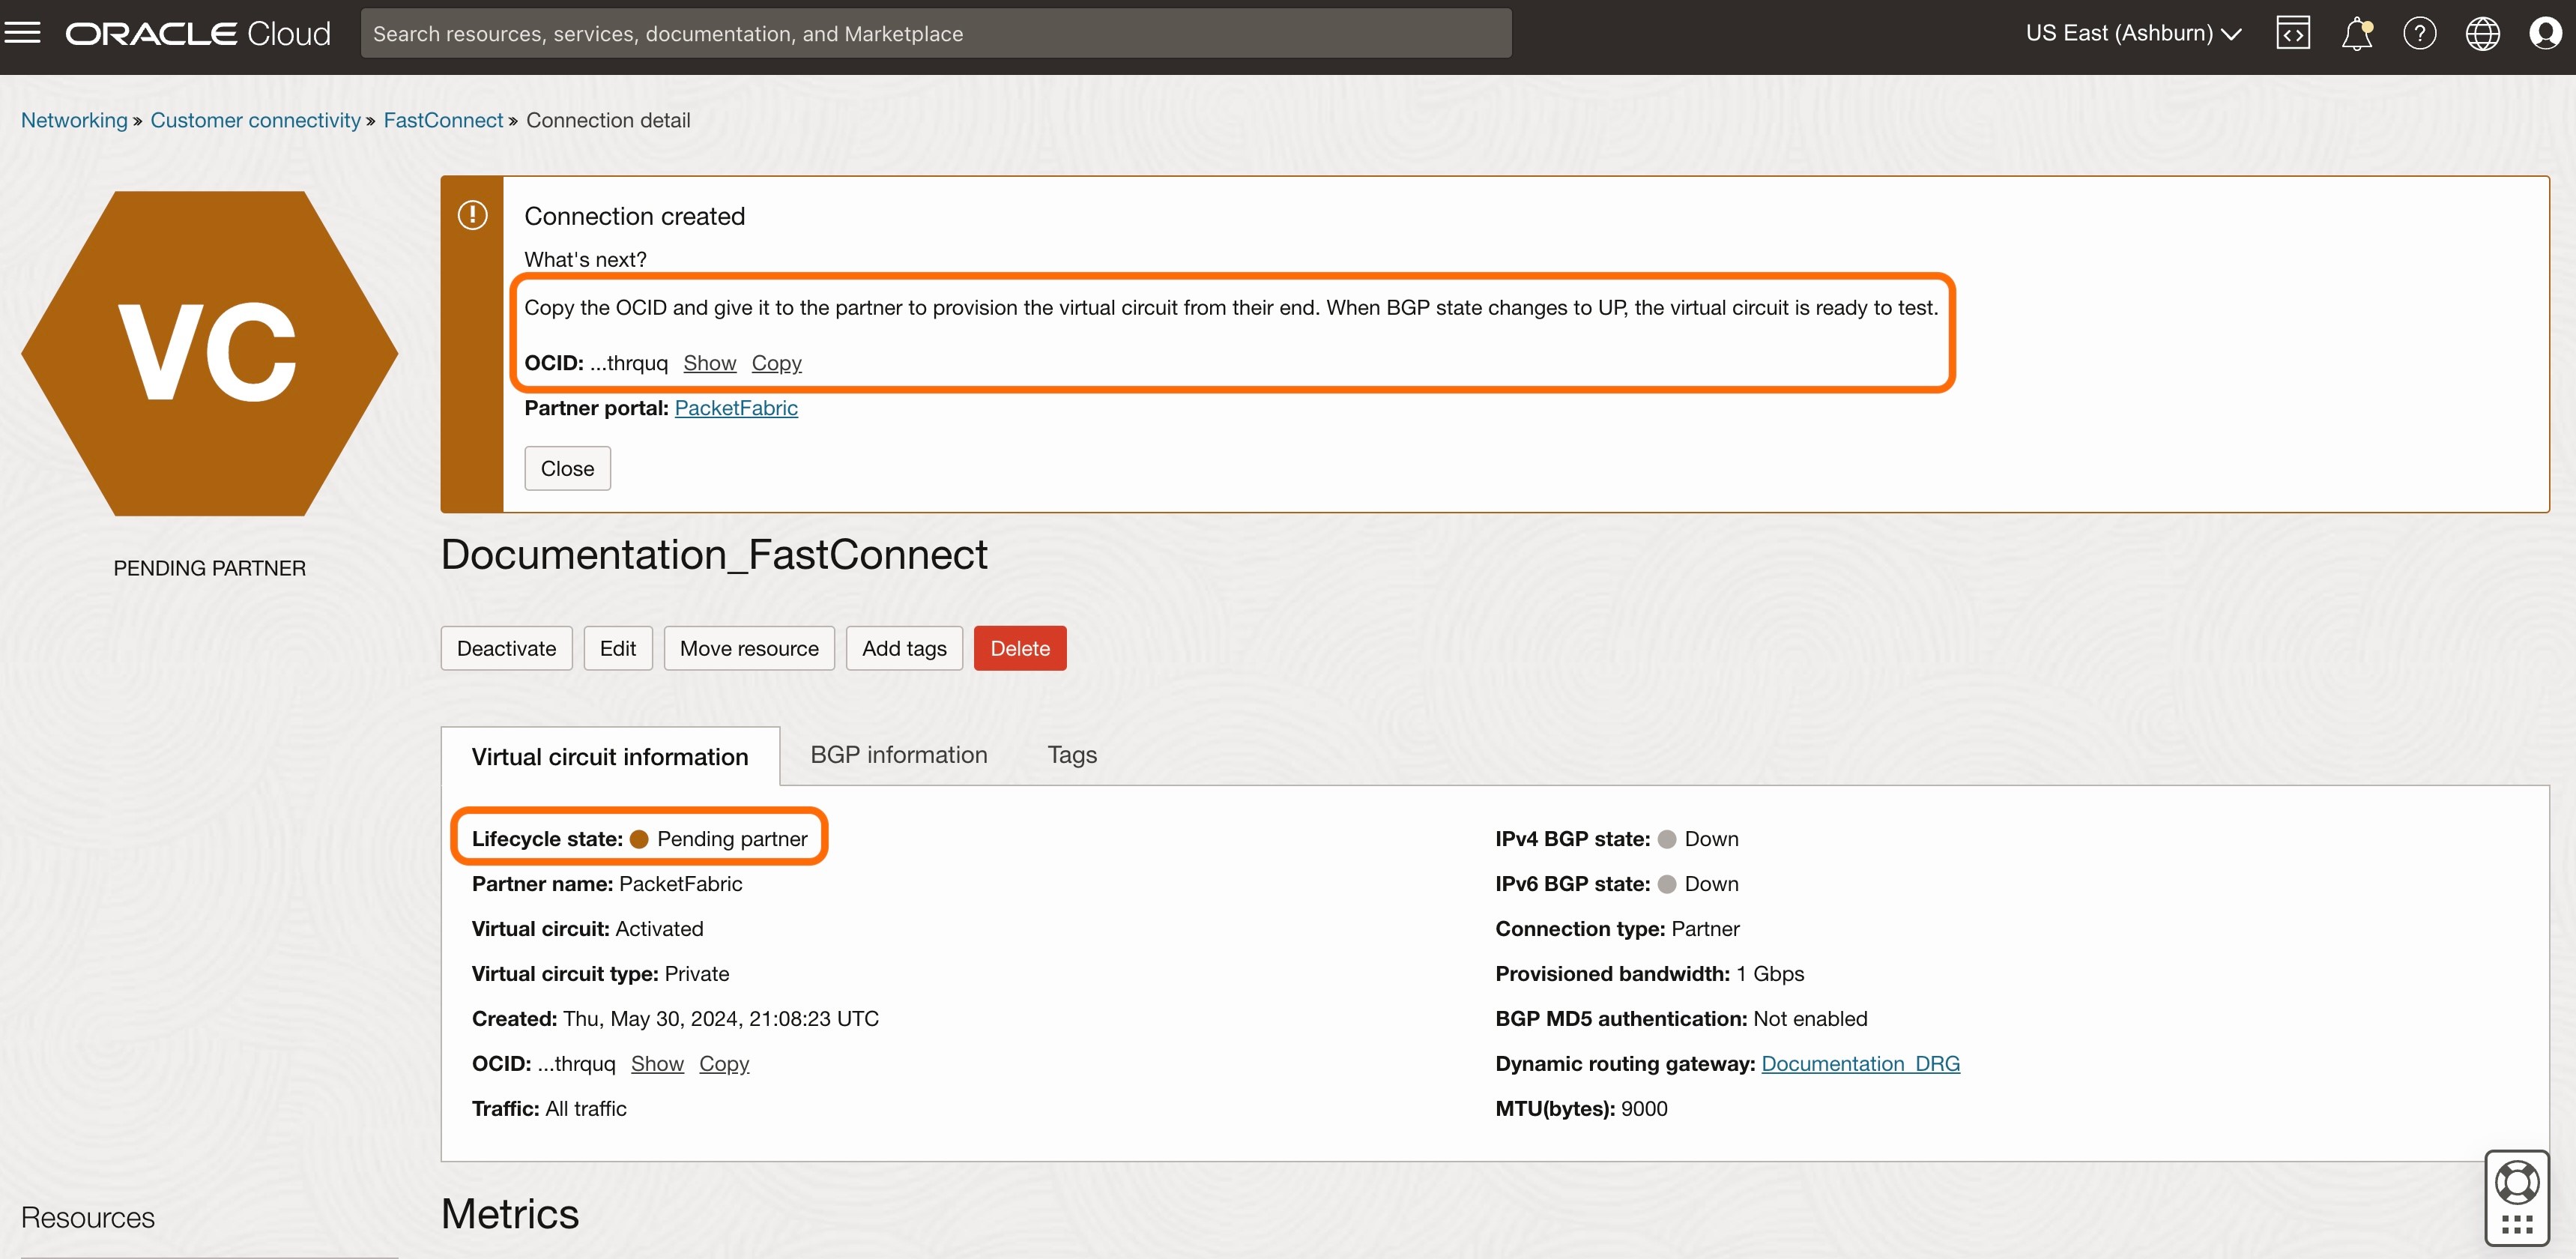
The connection has now been created.
Take note of the OCID.
Note:
Graphiant will need the OCID for connecting the FastConnect to the Graphiant Core.
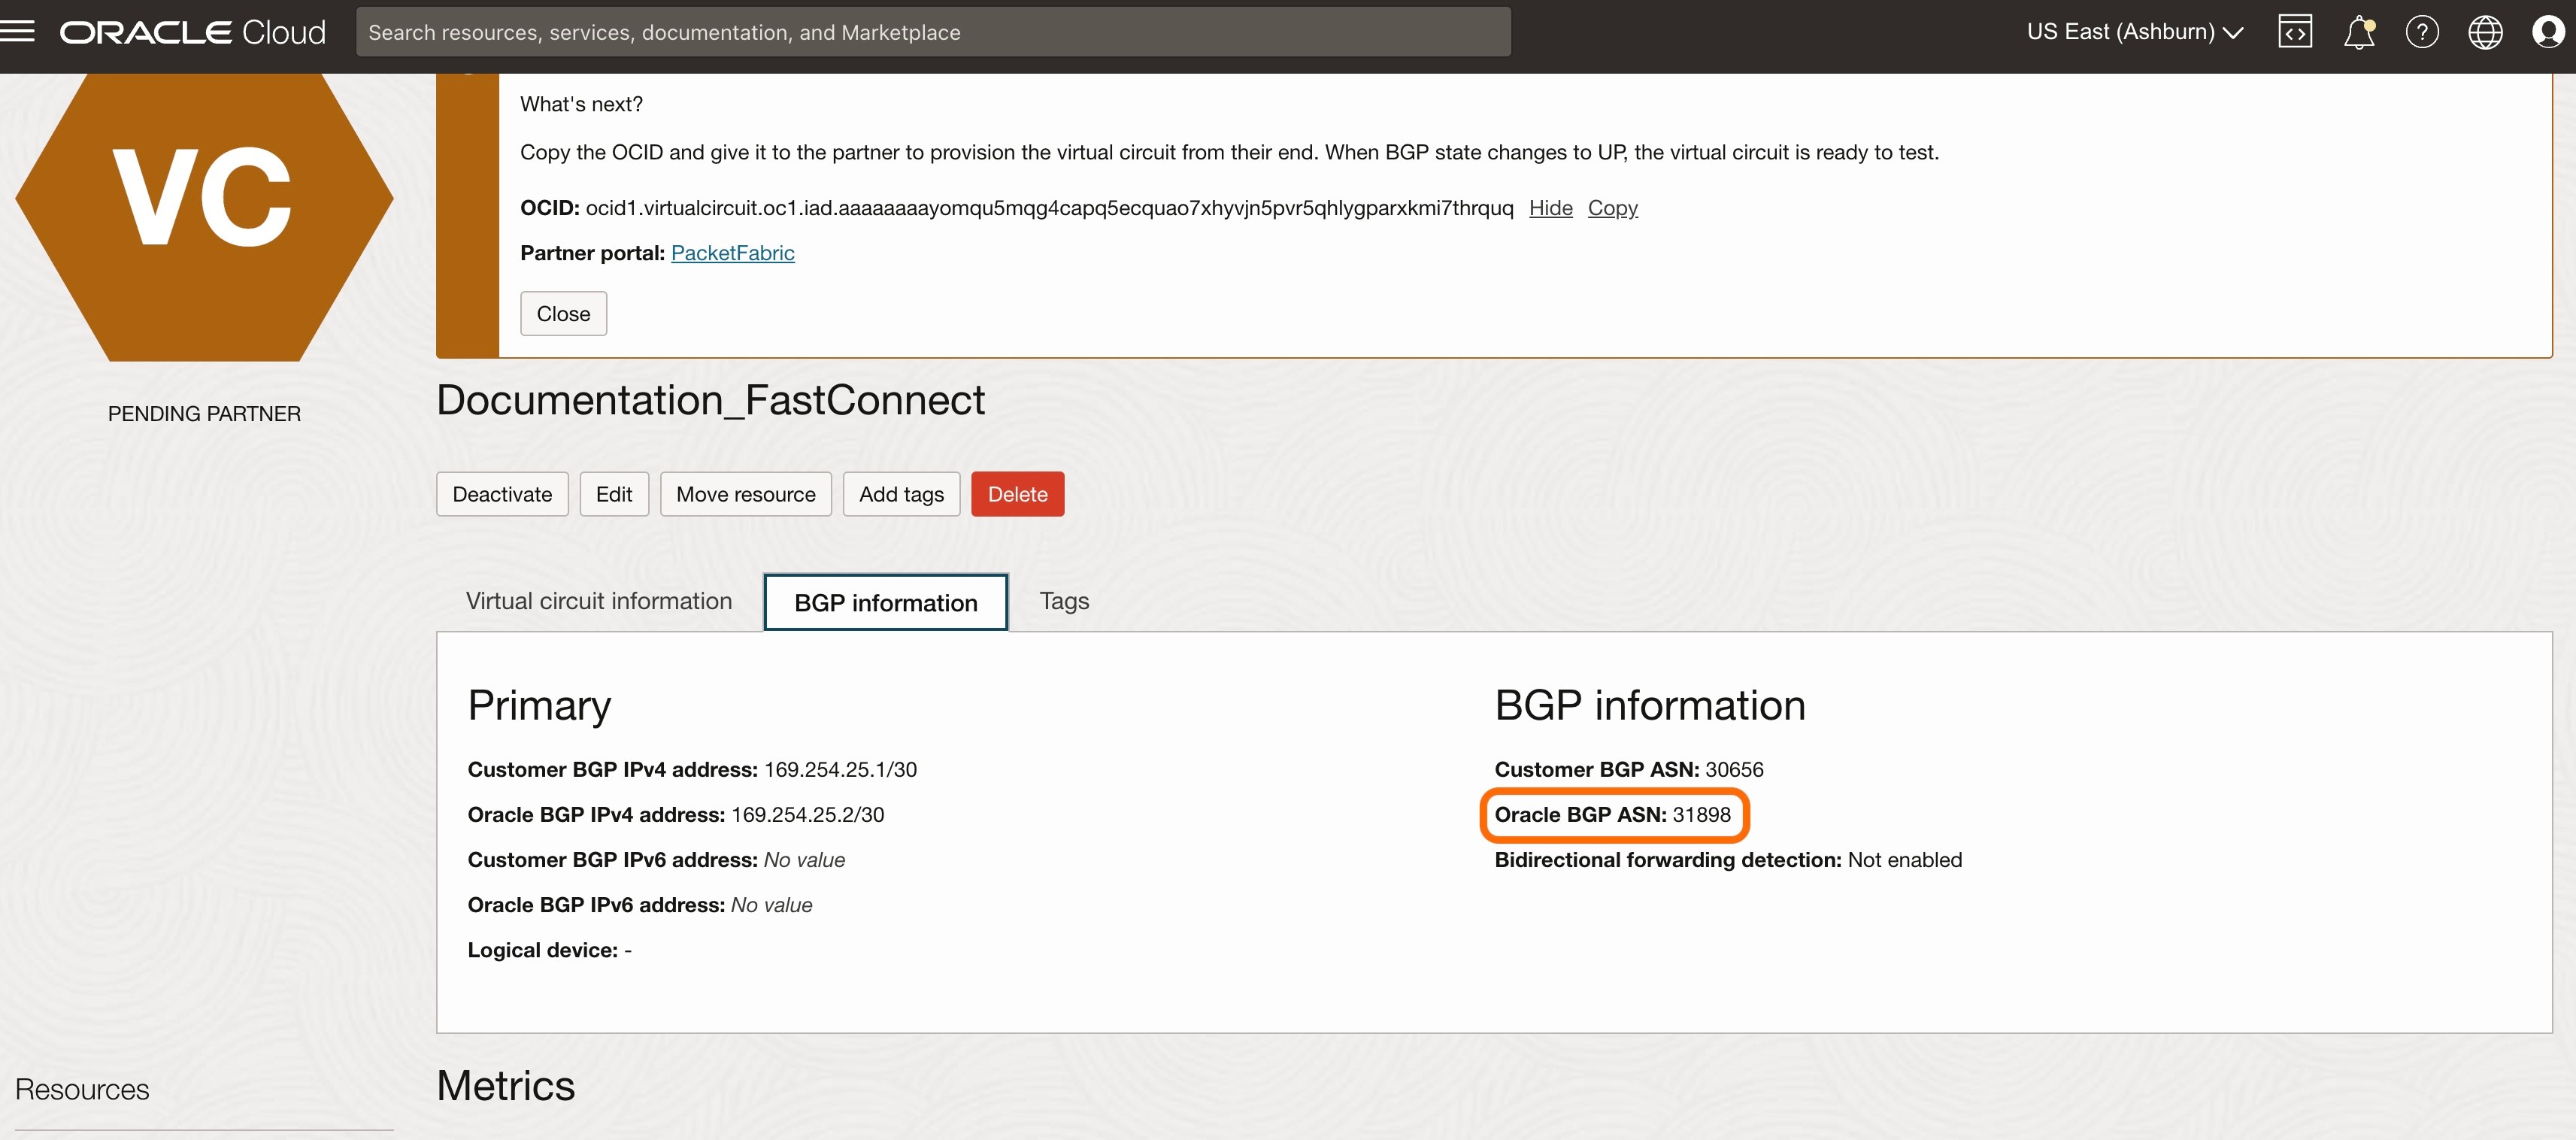
Click the 'BGP information' tab.
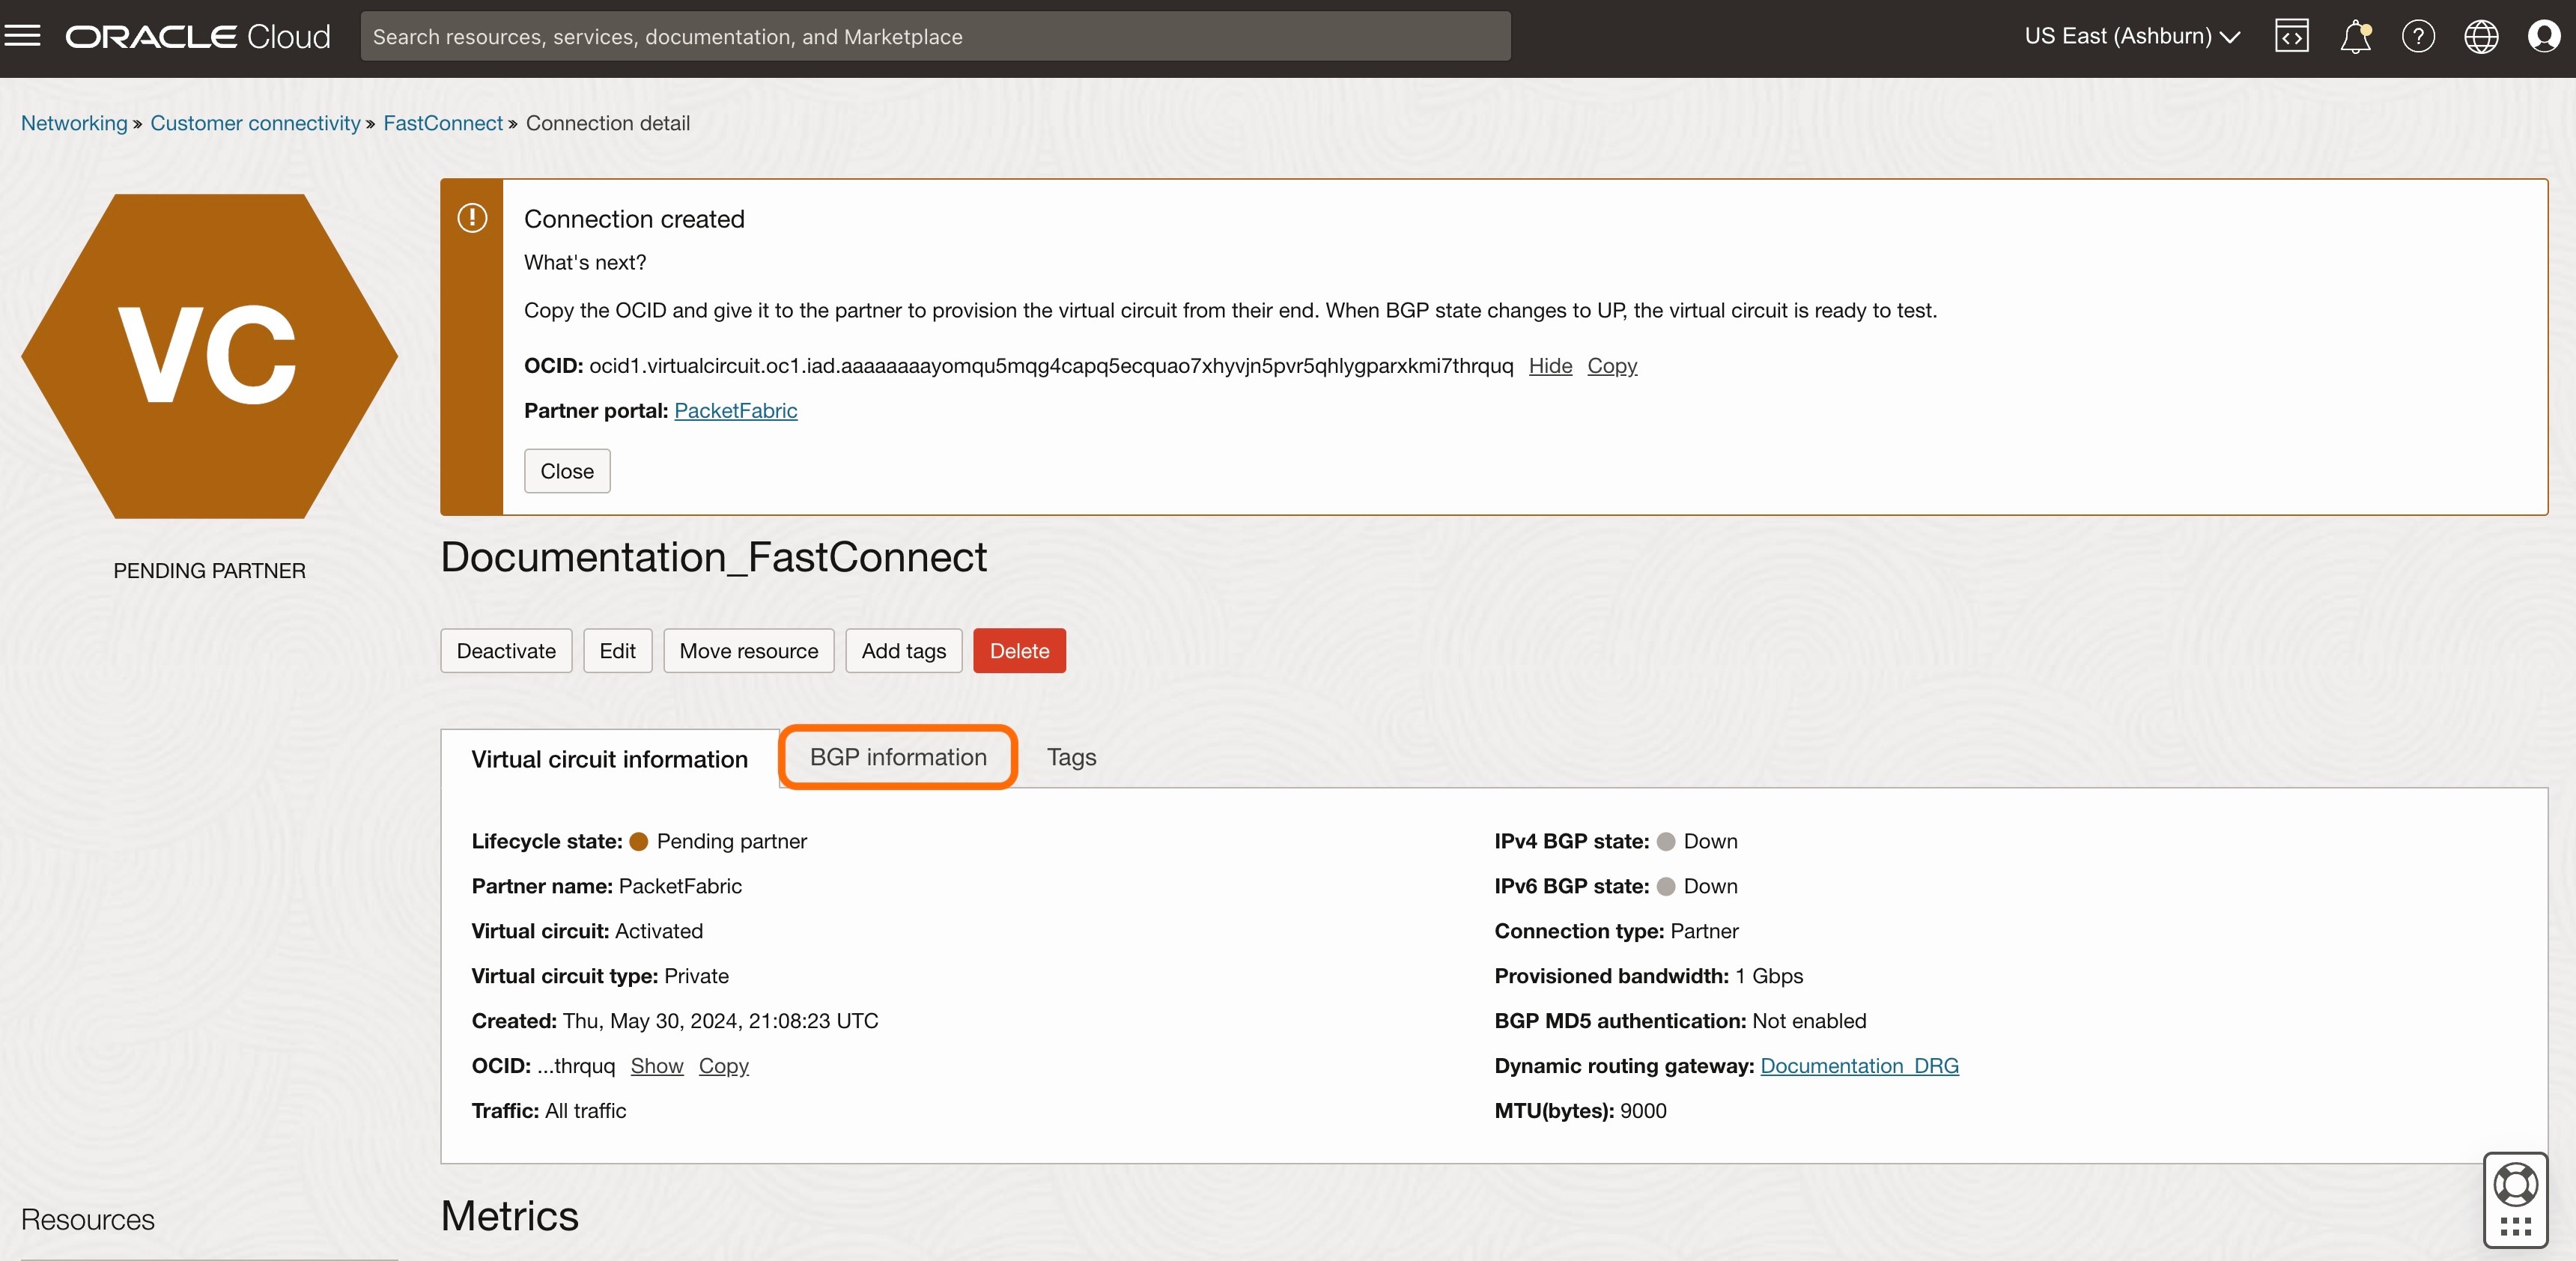
Take note of both the Oracle BGP ASN, and the BGP IPv4 addresses.
Note:
Graphiant will need these for connecting the FastConnect to the Graphiant Core.
Step 4: Adding the Dynamic Route Gateway to the VCN Route Table
From the 3 lines menu, select 'Networking'.

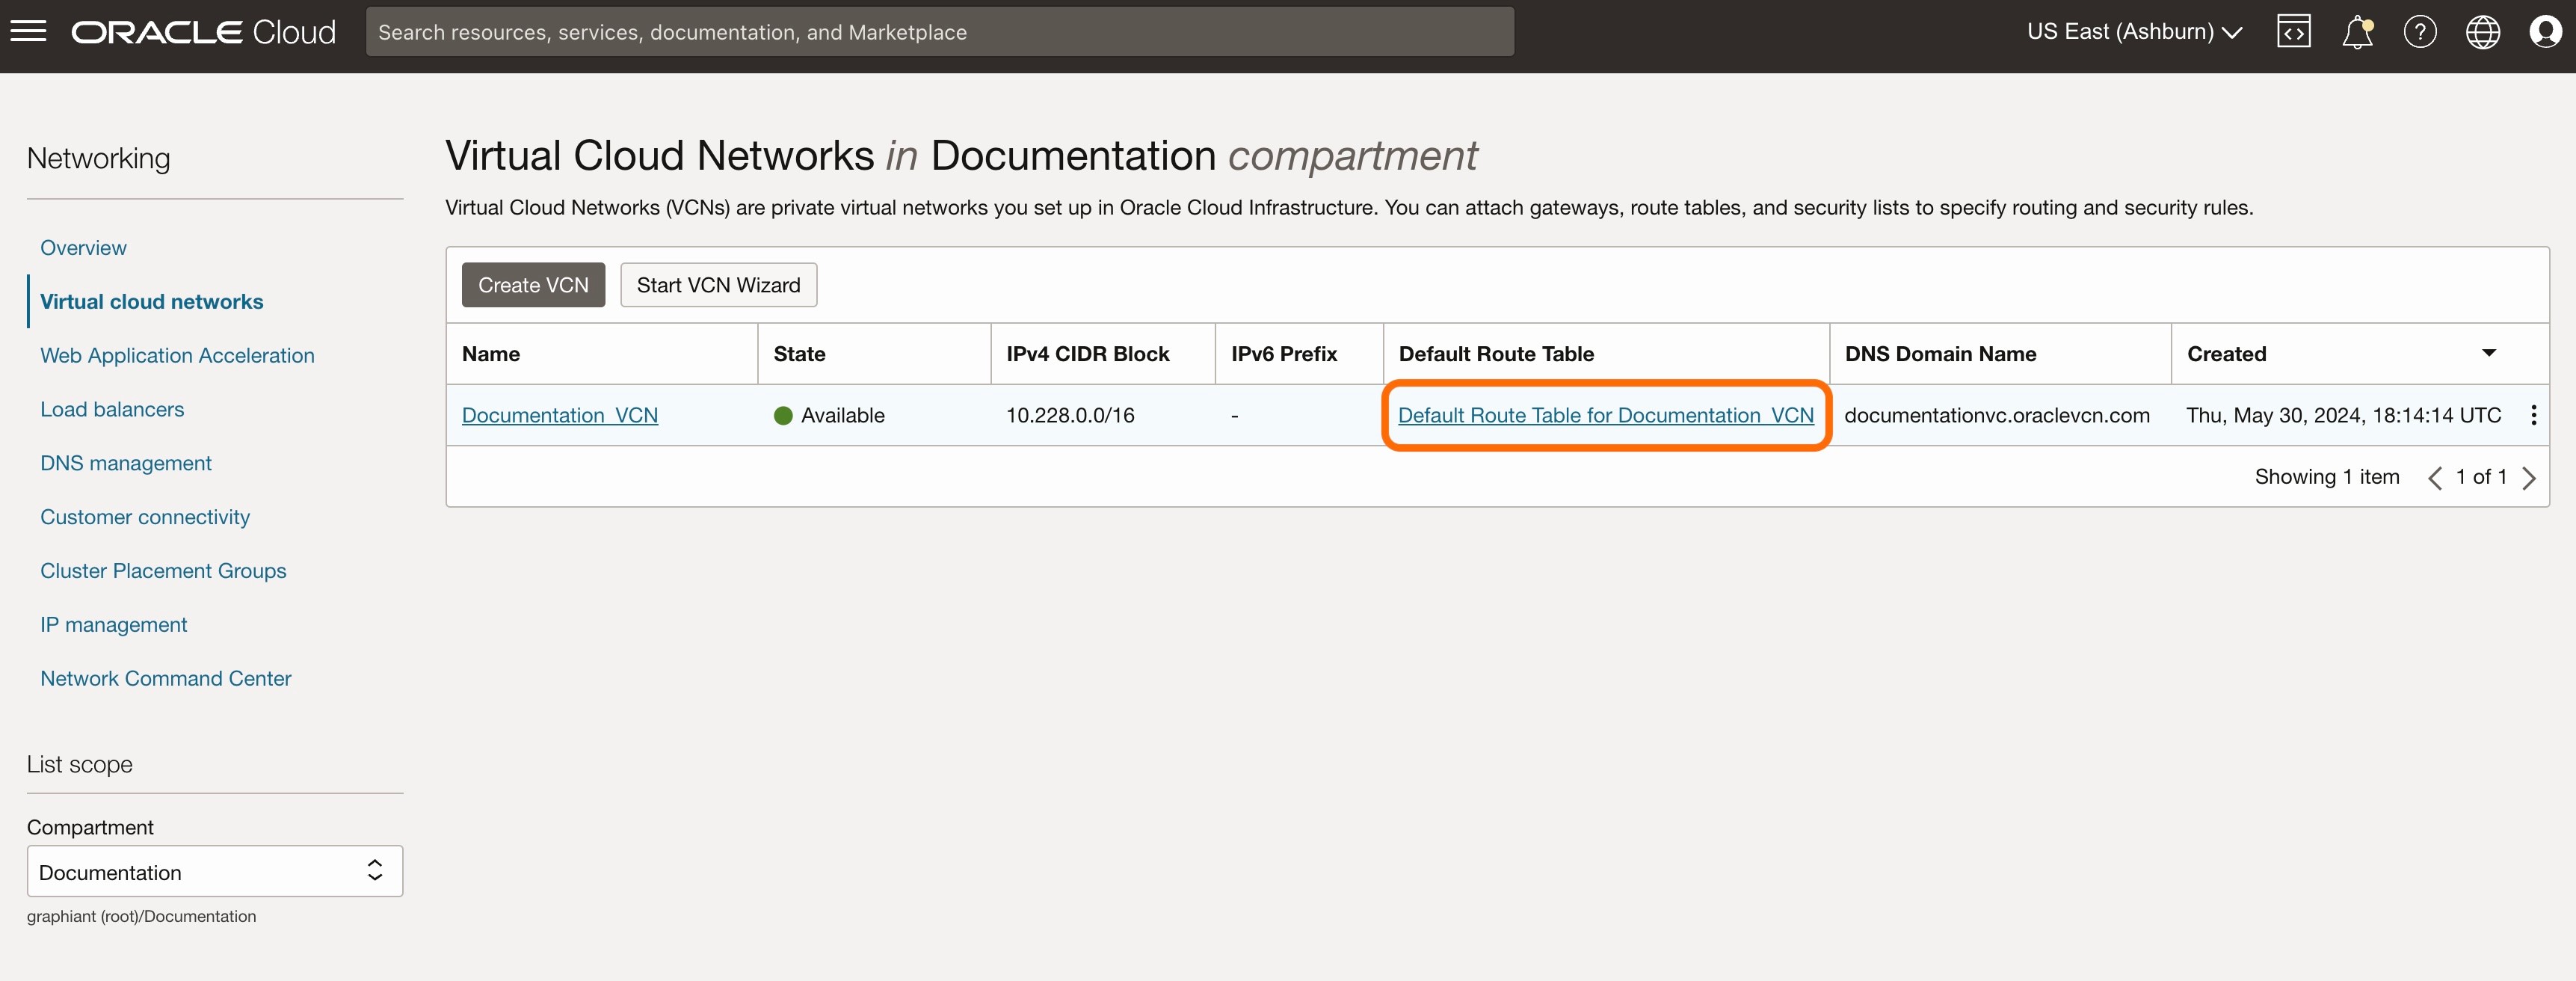
Select 'Virtual cloud networks'.

Click on the 'Default Route Table' for the VCN to which the FastConnect is connected.
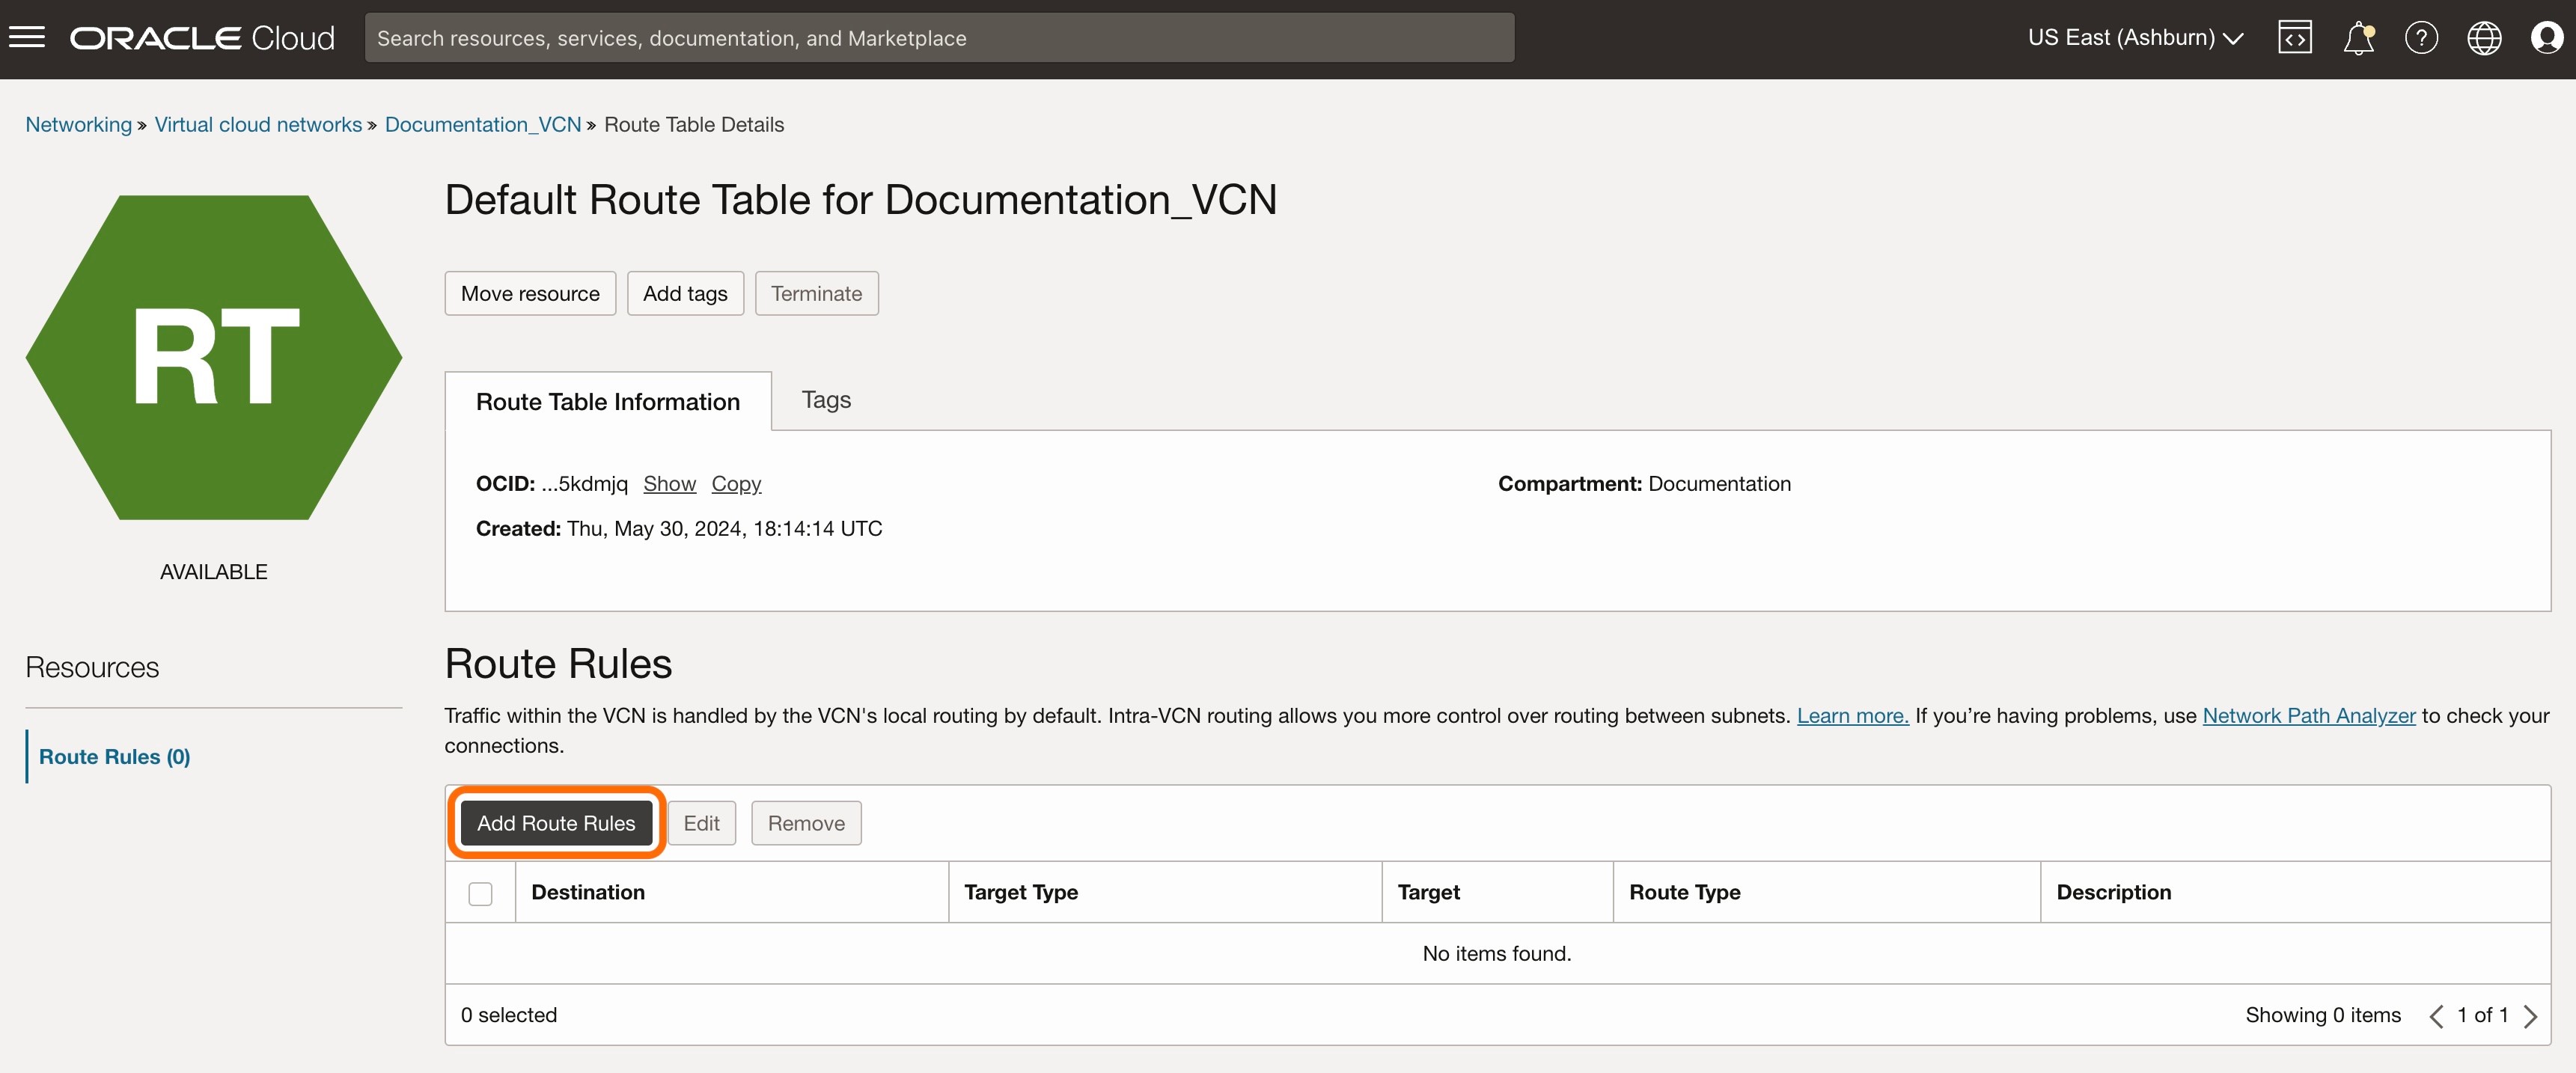
Click 'Add Route Rules'.
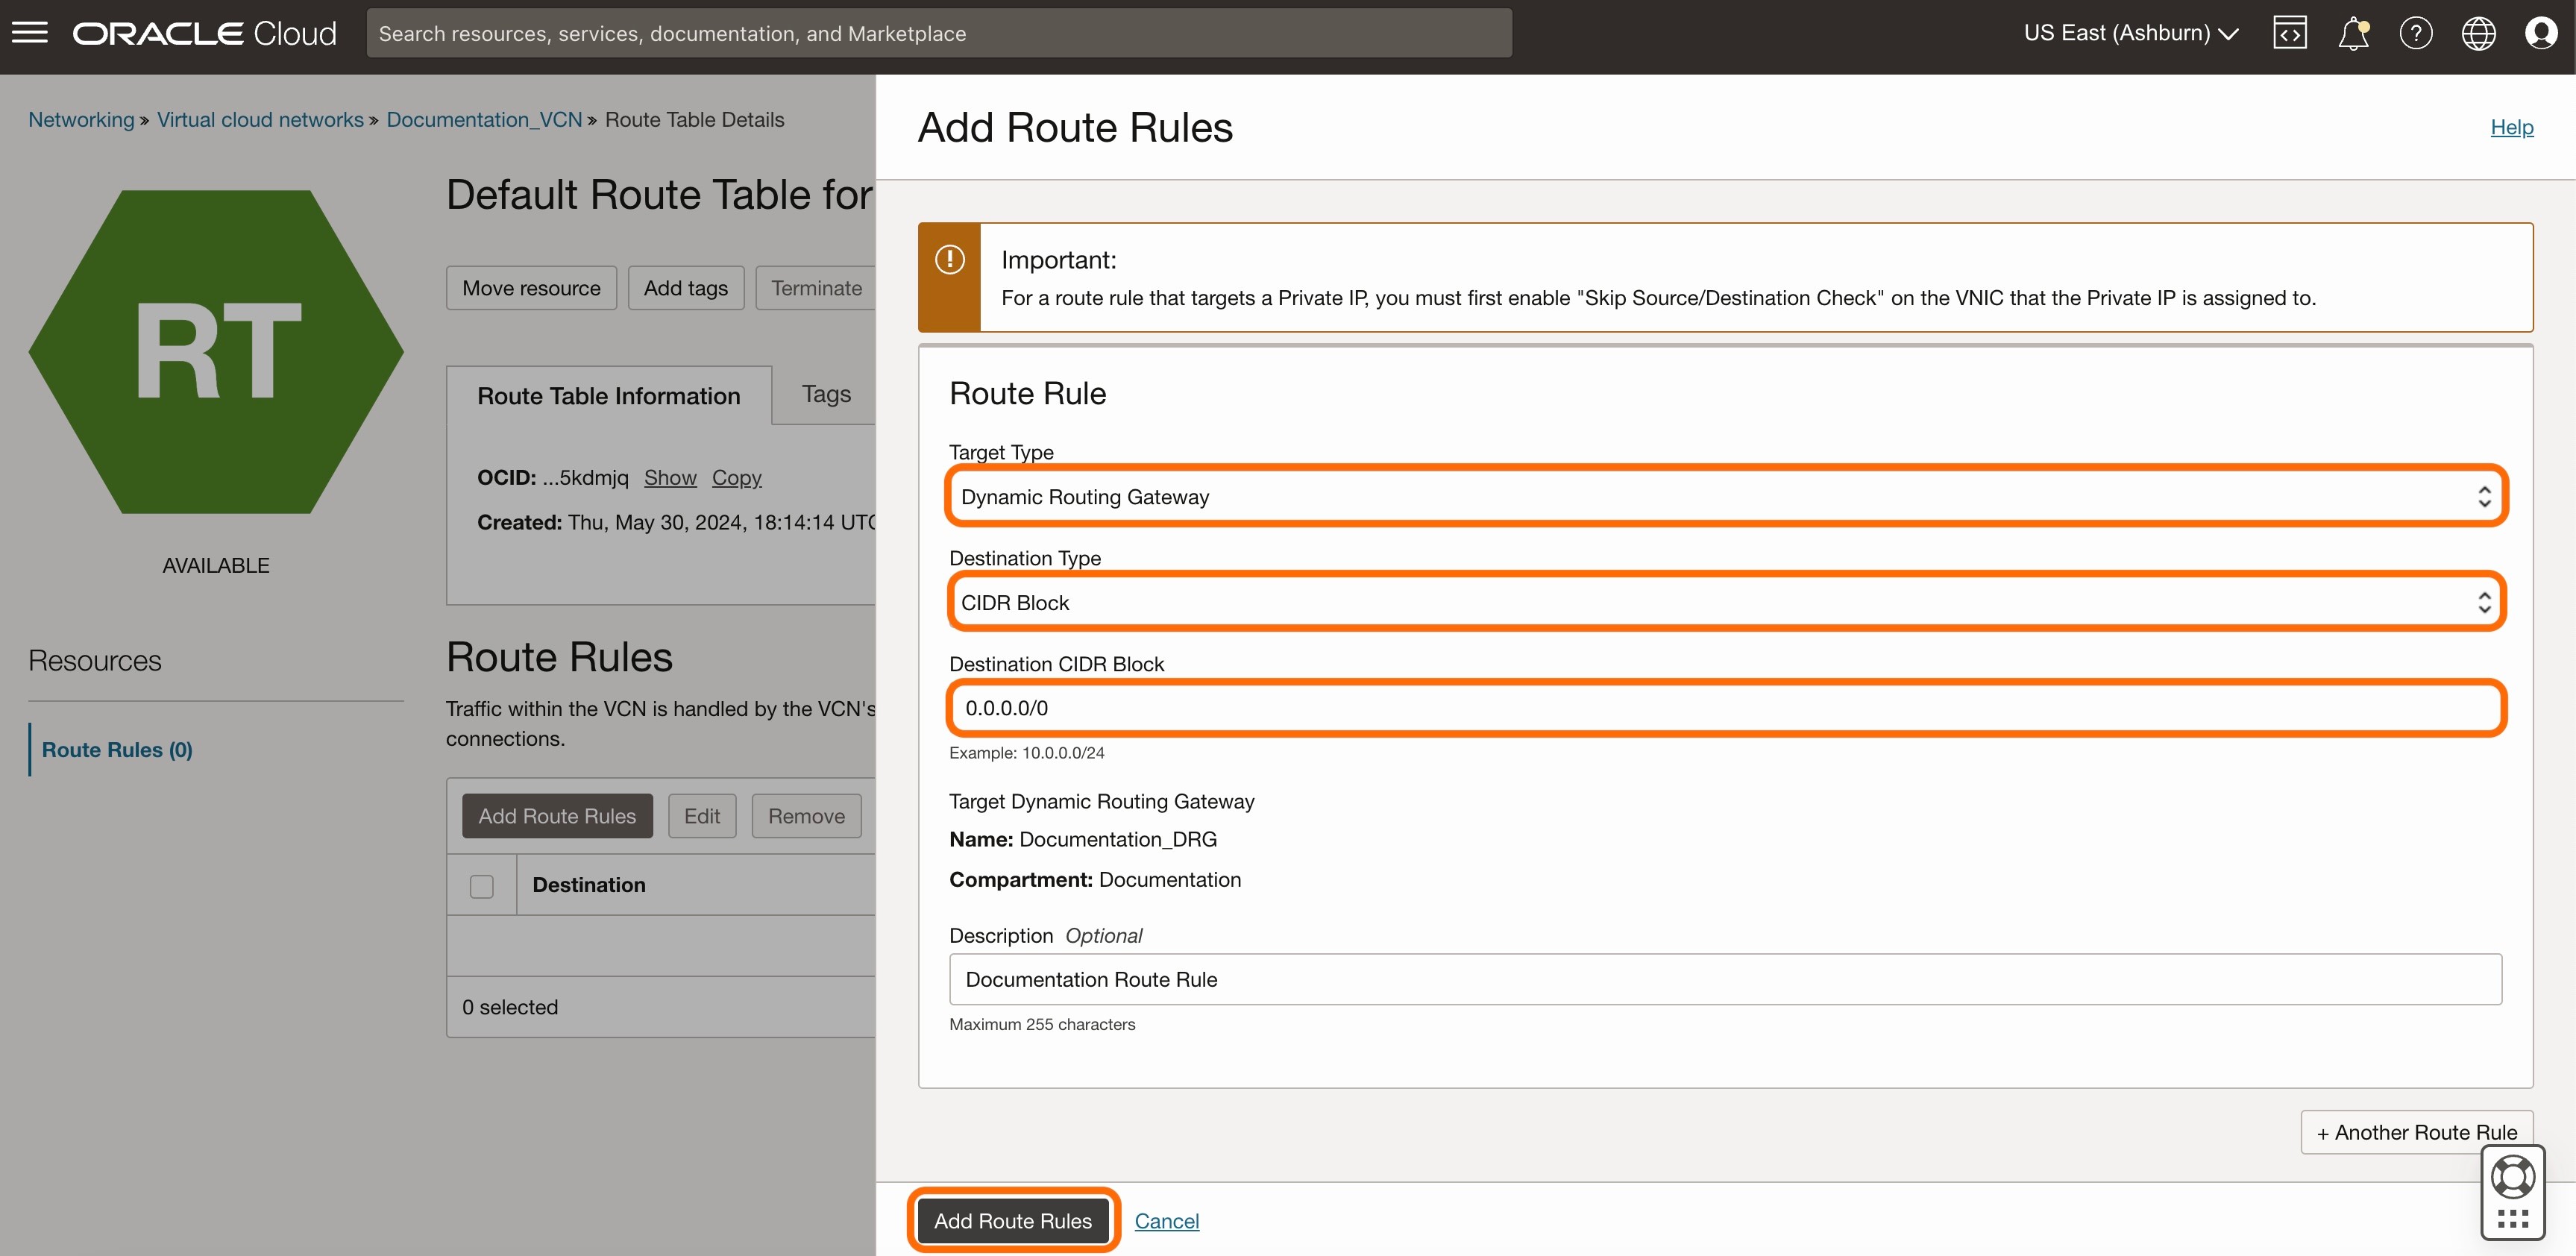
Complete the following fields:
Target type: Select 'Dynamic Routing Gateway' from the drop-down
Destination type: Leave as default of 'CIDR Block'
Destination CIDR Block: Enter "0.0.0.0/0" to ensure that the VCN has a default route to the DRG.
Click 'Add Route Rules'.
The Route Rule now appears in the Route Rule table.

The next step is to set up the gateway service for Oracle Cloud Infrastructure in the Graphiant Portal.
Gateway Service for OCI Connectivity in the Graphiant Portal
Step 1: Locating Gateway Service in the Graphiant Portal
From the Home screen, navigate to the Create Gateway Services screen by one of the following options:
Option A: Reaching the Gateway Service via Quickstart
Locate the "Quickstart" section on the left of the screen; select 'Setup Gateway Service'.
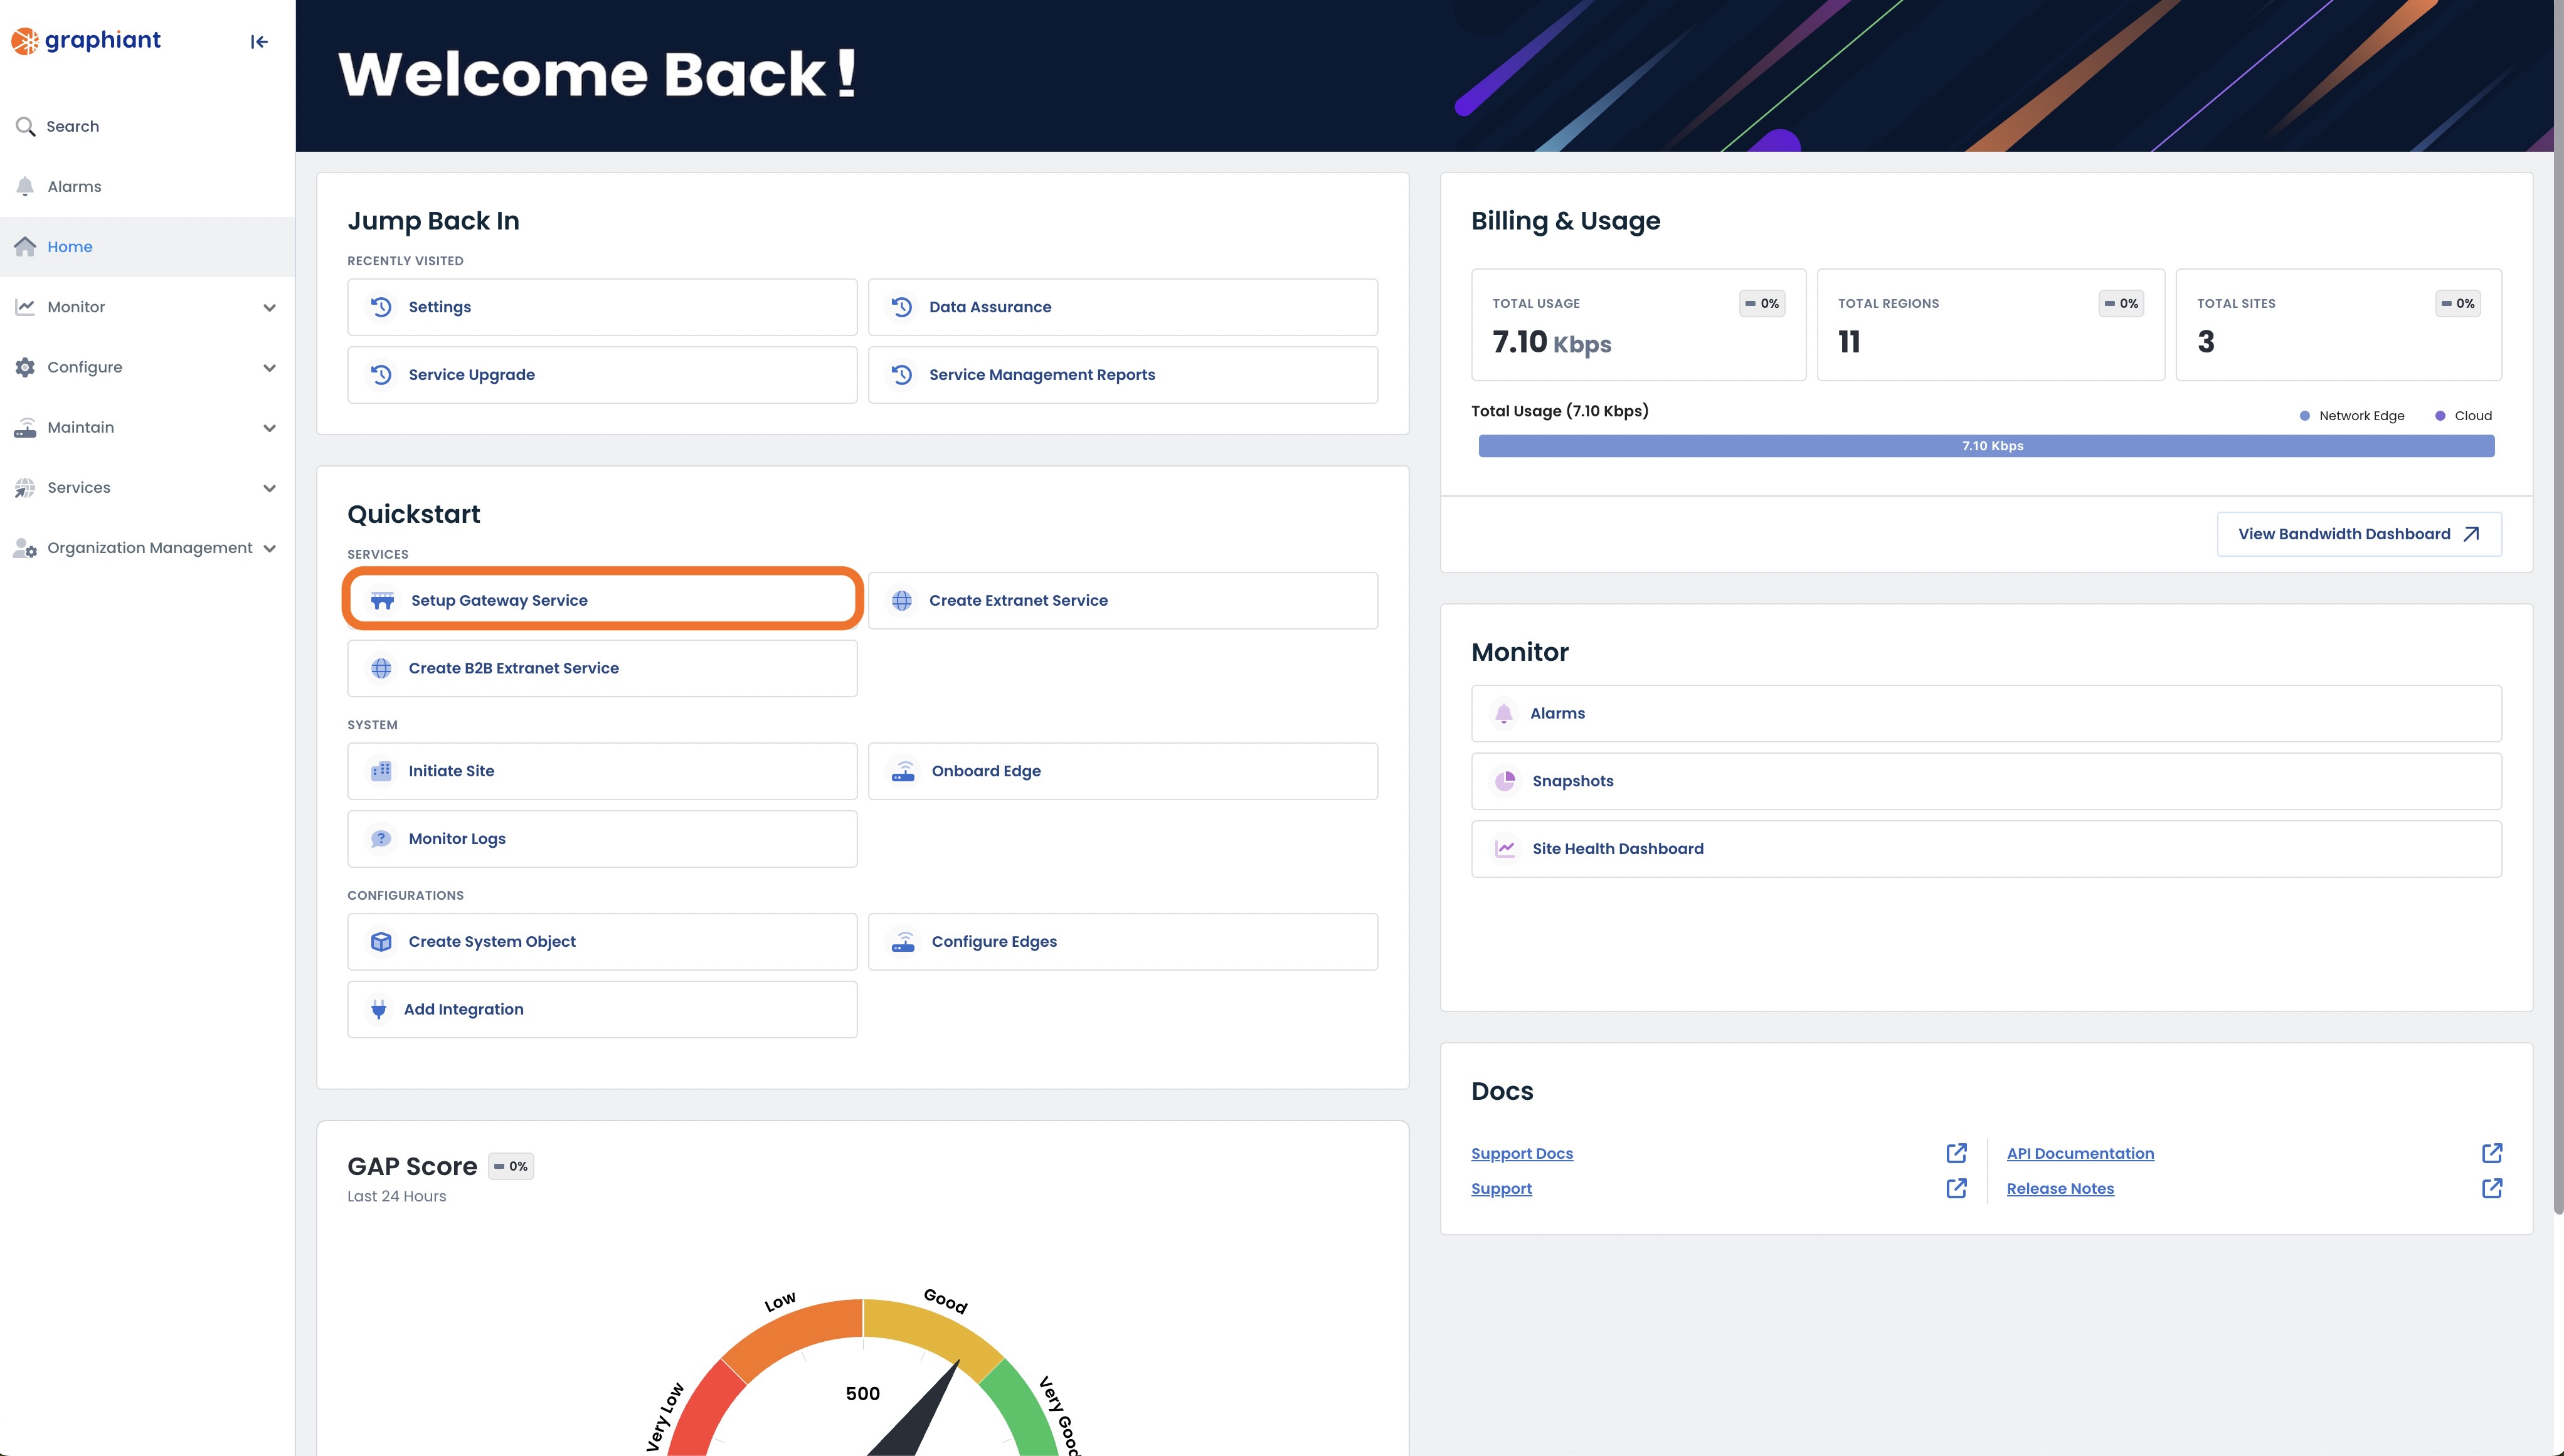
This will take you to the Gateway Services page of the Graphiant Portal where you will be able to provision a new gateway service.
.jpg)
Follow the instructions here to configure your gateway service.
Option B: Reaching the Gateway Service via the sidebar menu
Click 'Services' in the sidebar; select 'Gateway’.
.jpeg)
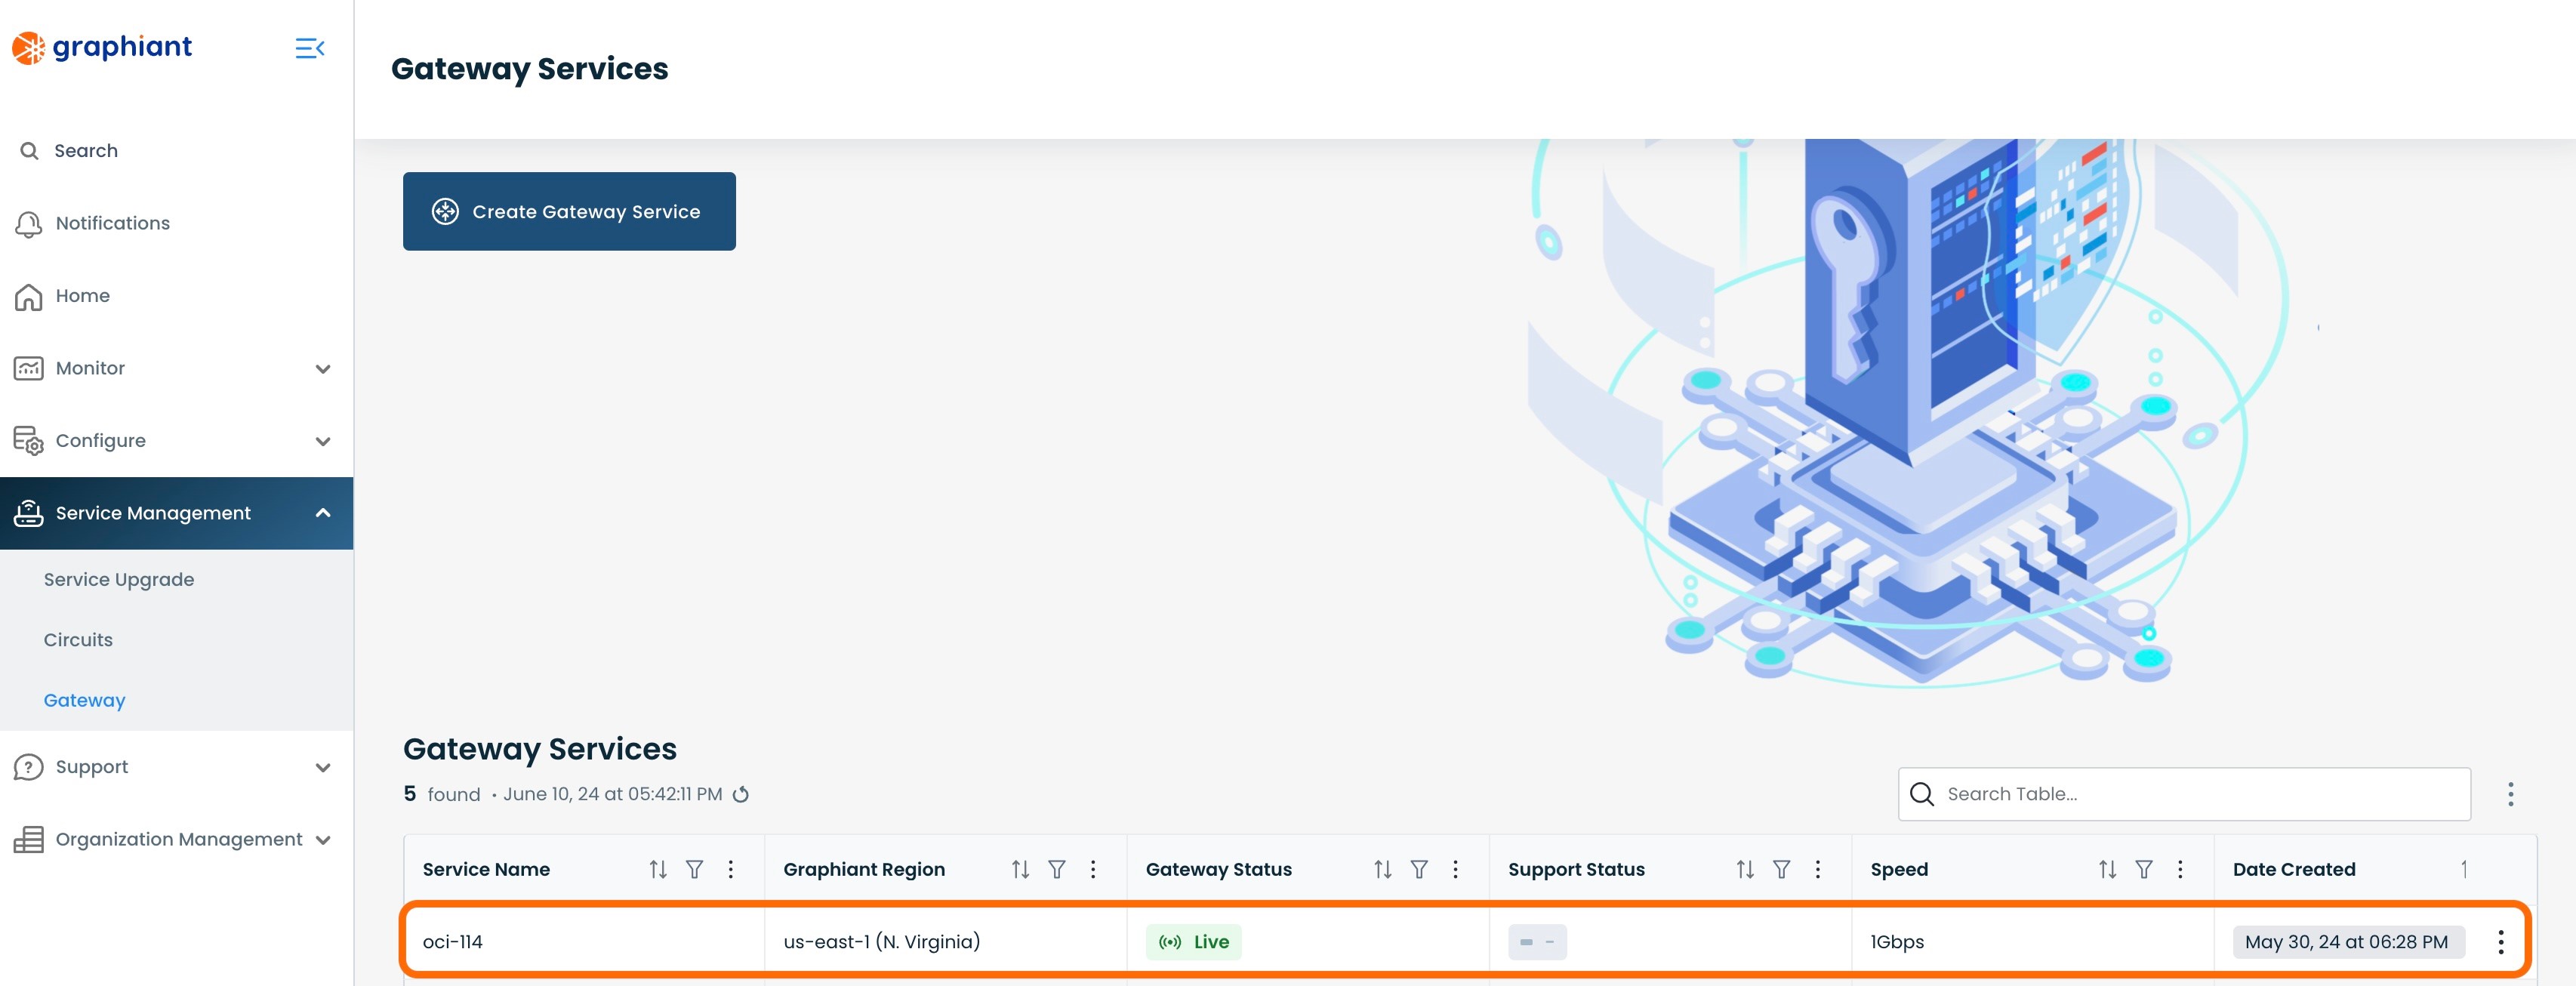
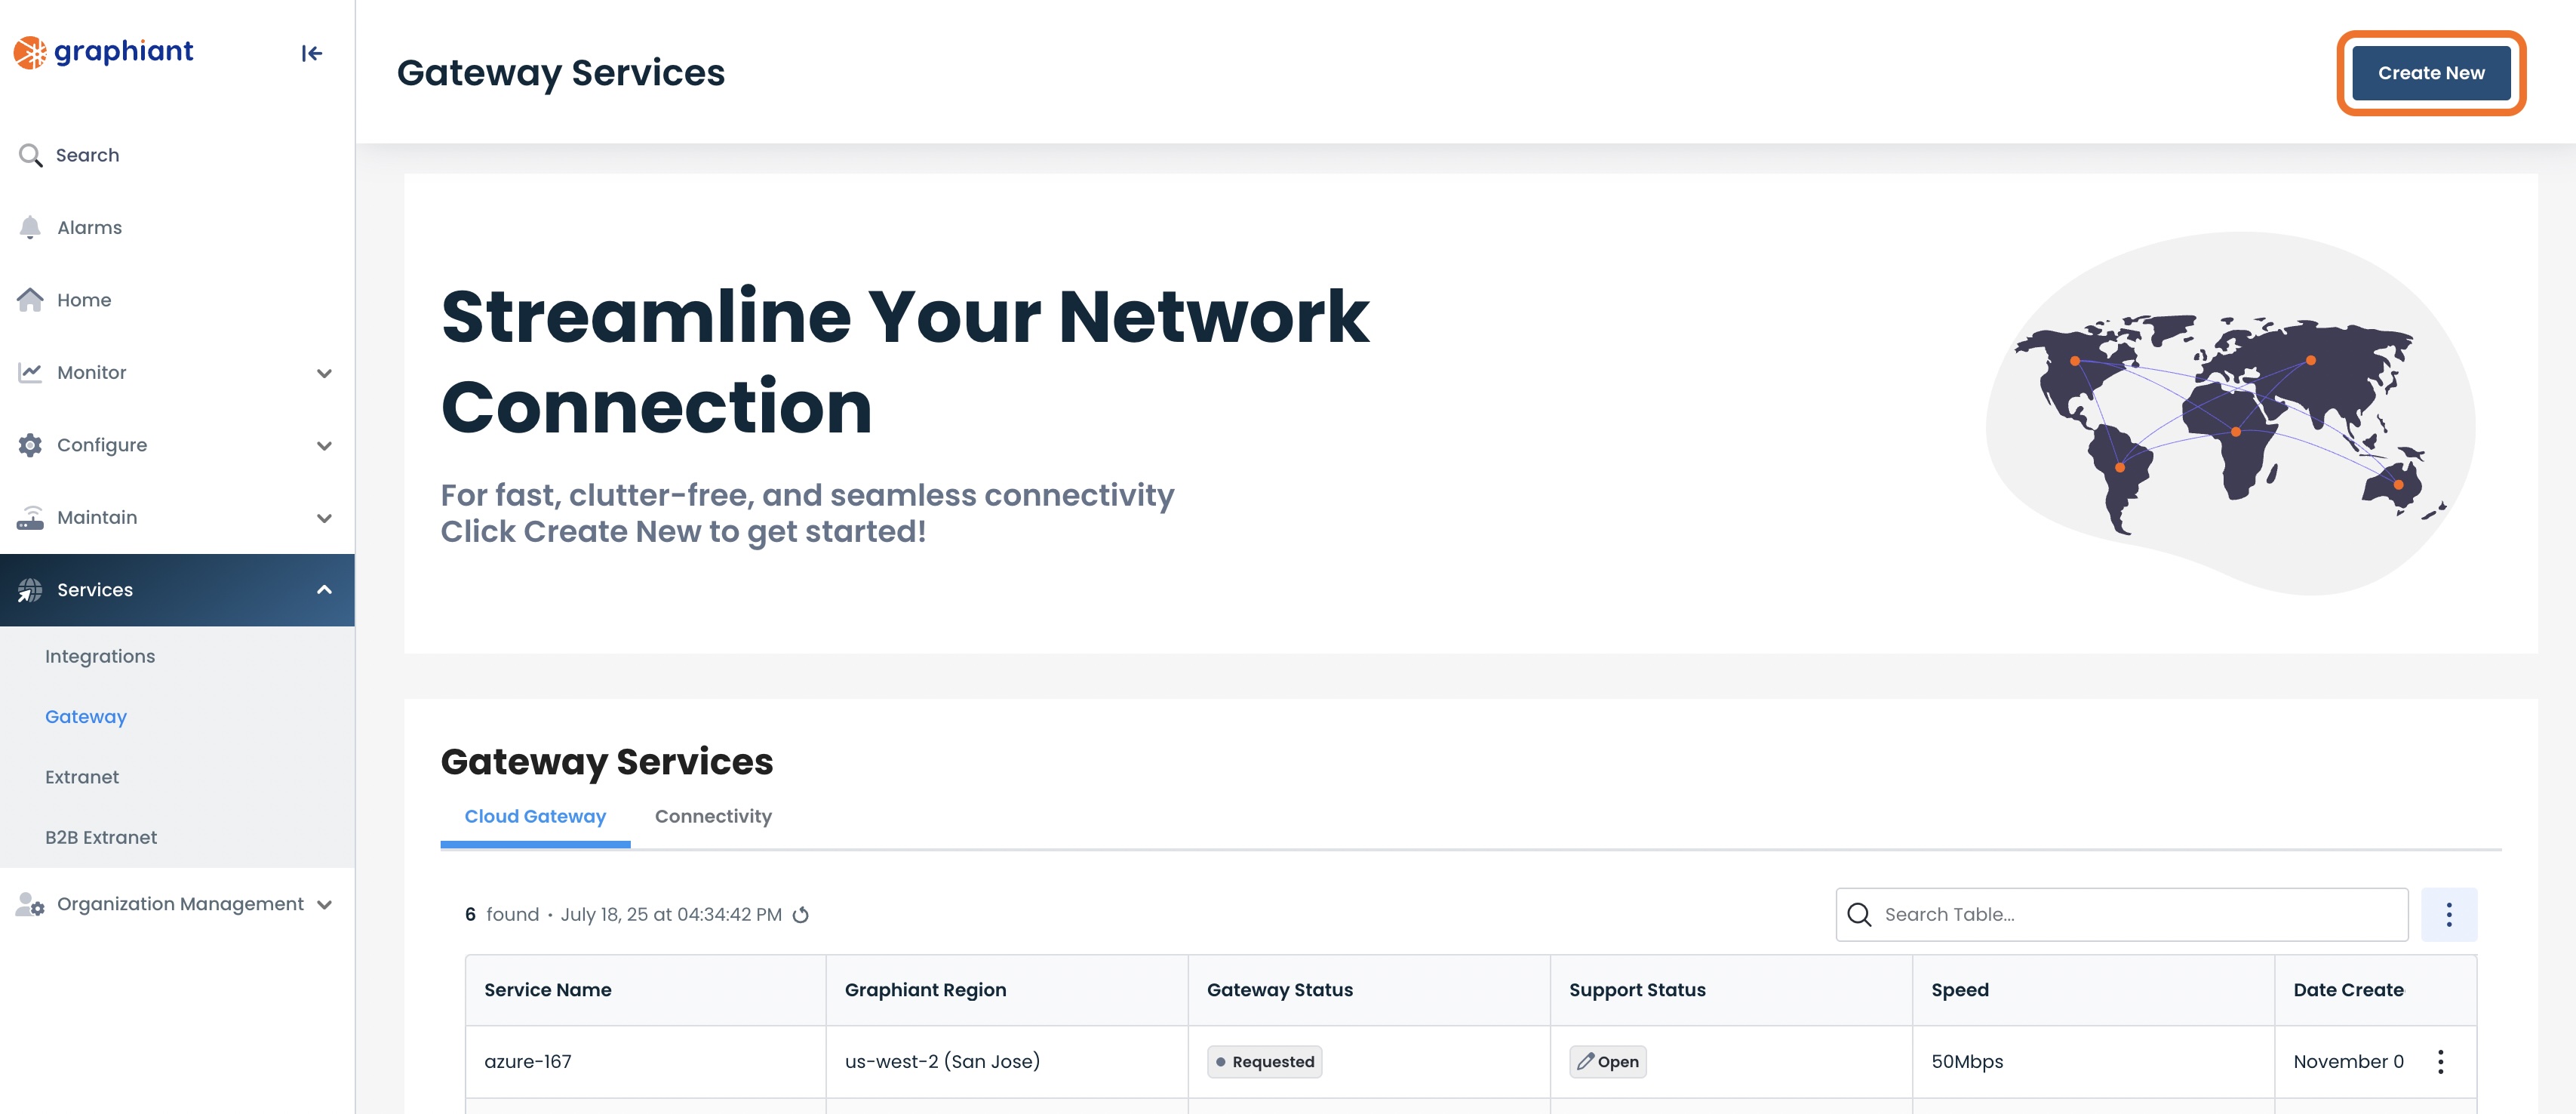
This will take you to the Gateway Services page of the Graphiant Portal where you will be able to view existing Gateway services as well as provision new ones.
.jpg)
To configure the Gateway service click the 'Create New' button.
Note:
To view an existing gateway service, simply click on the ellipses to the right of that service in the table.
This will take you to the Gateway Services page of the Graphiant Portal.
Follow these instructions to configure your gateway service.
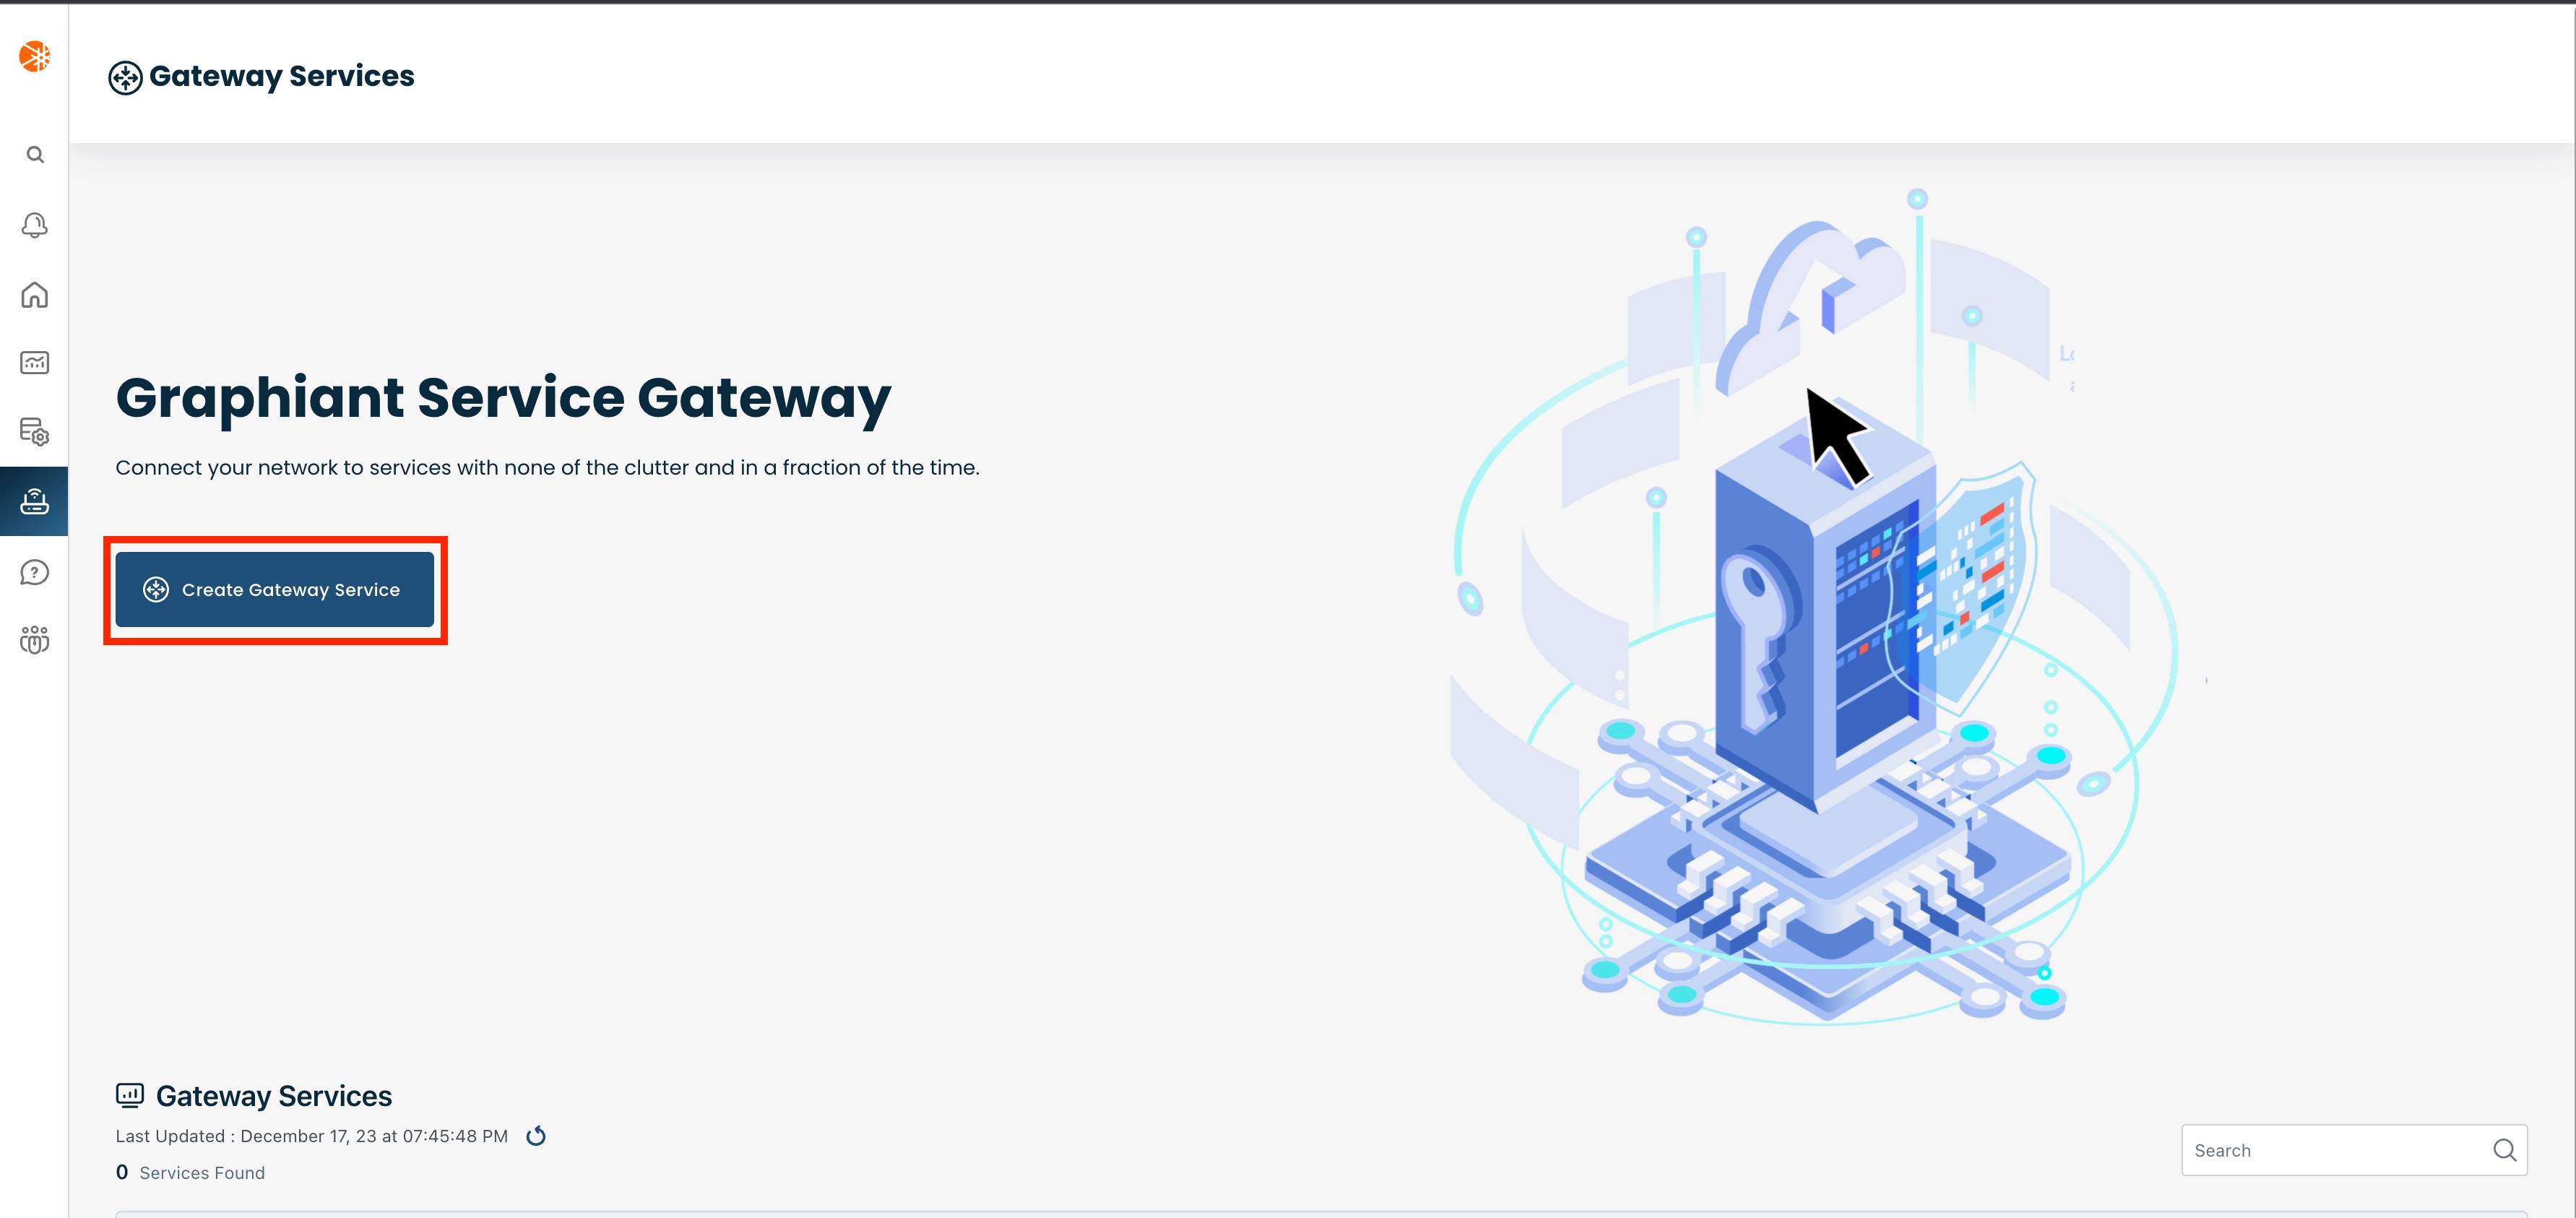
Step 2: Configuring Gateway in the Graphiant Portal
To configure the Gateway service click the 'Create Gateway Service' button.
Next select the Graphiant region where you want to deploy the gateway service. This region should be the same as the cloud region where you have your FastConnect circuit deployed.
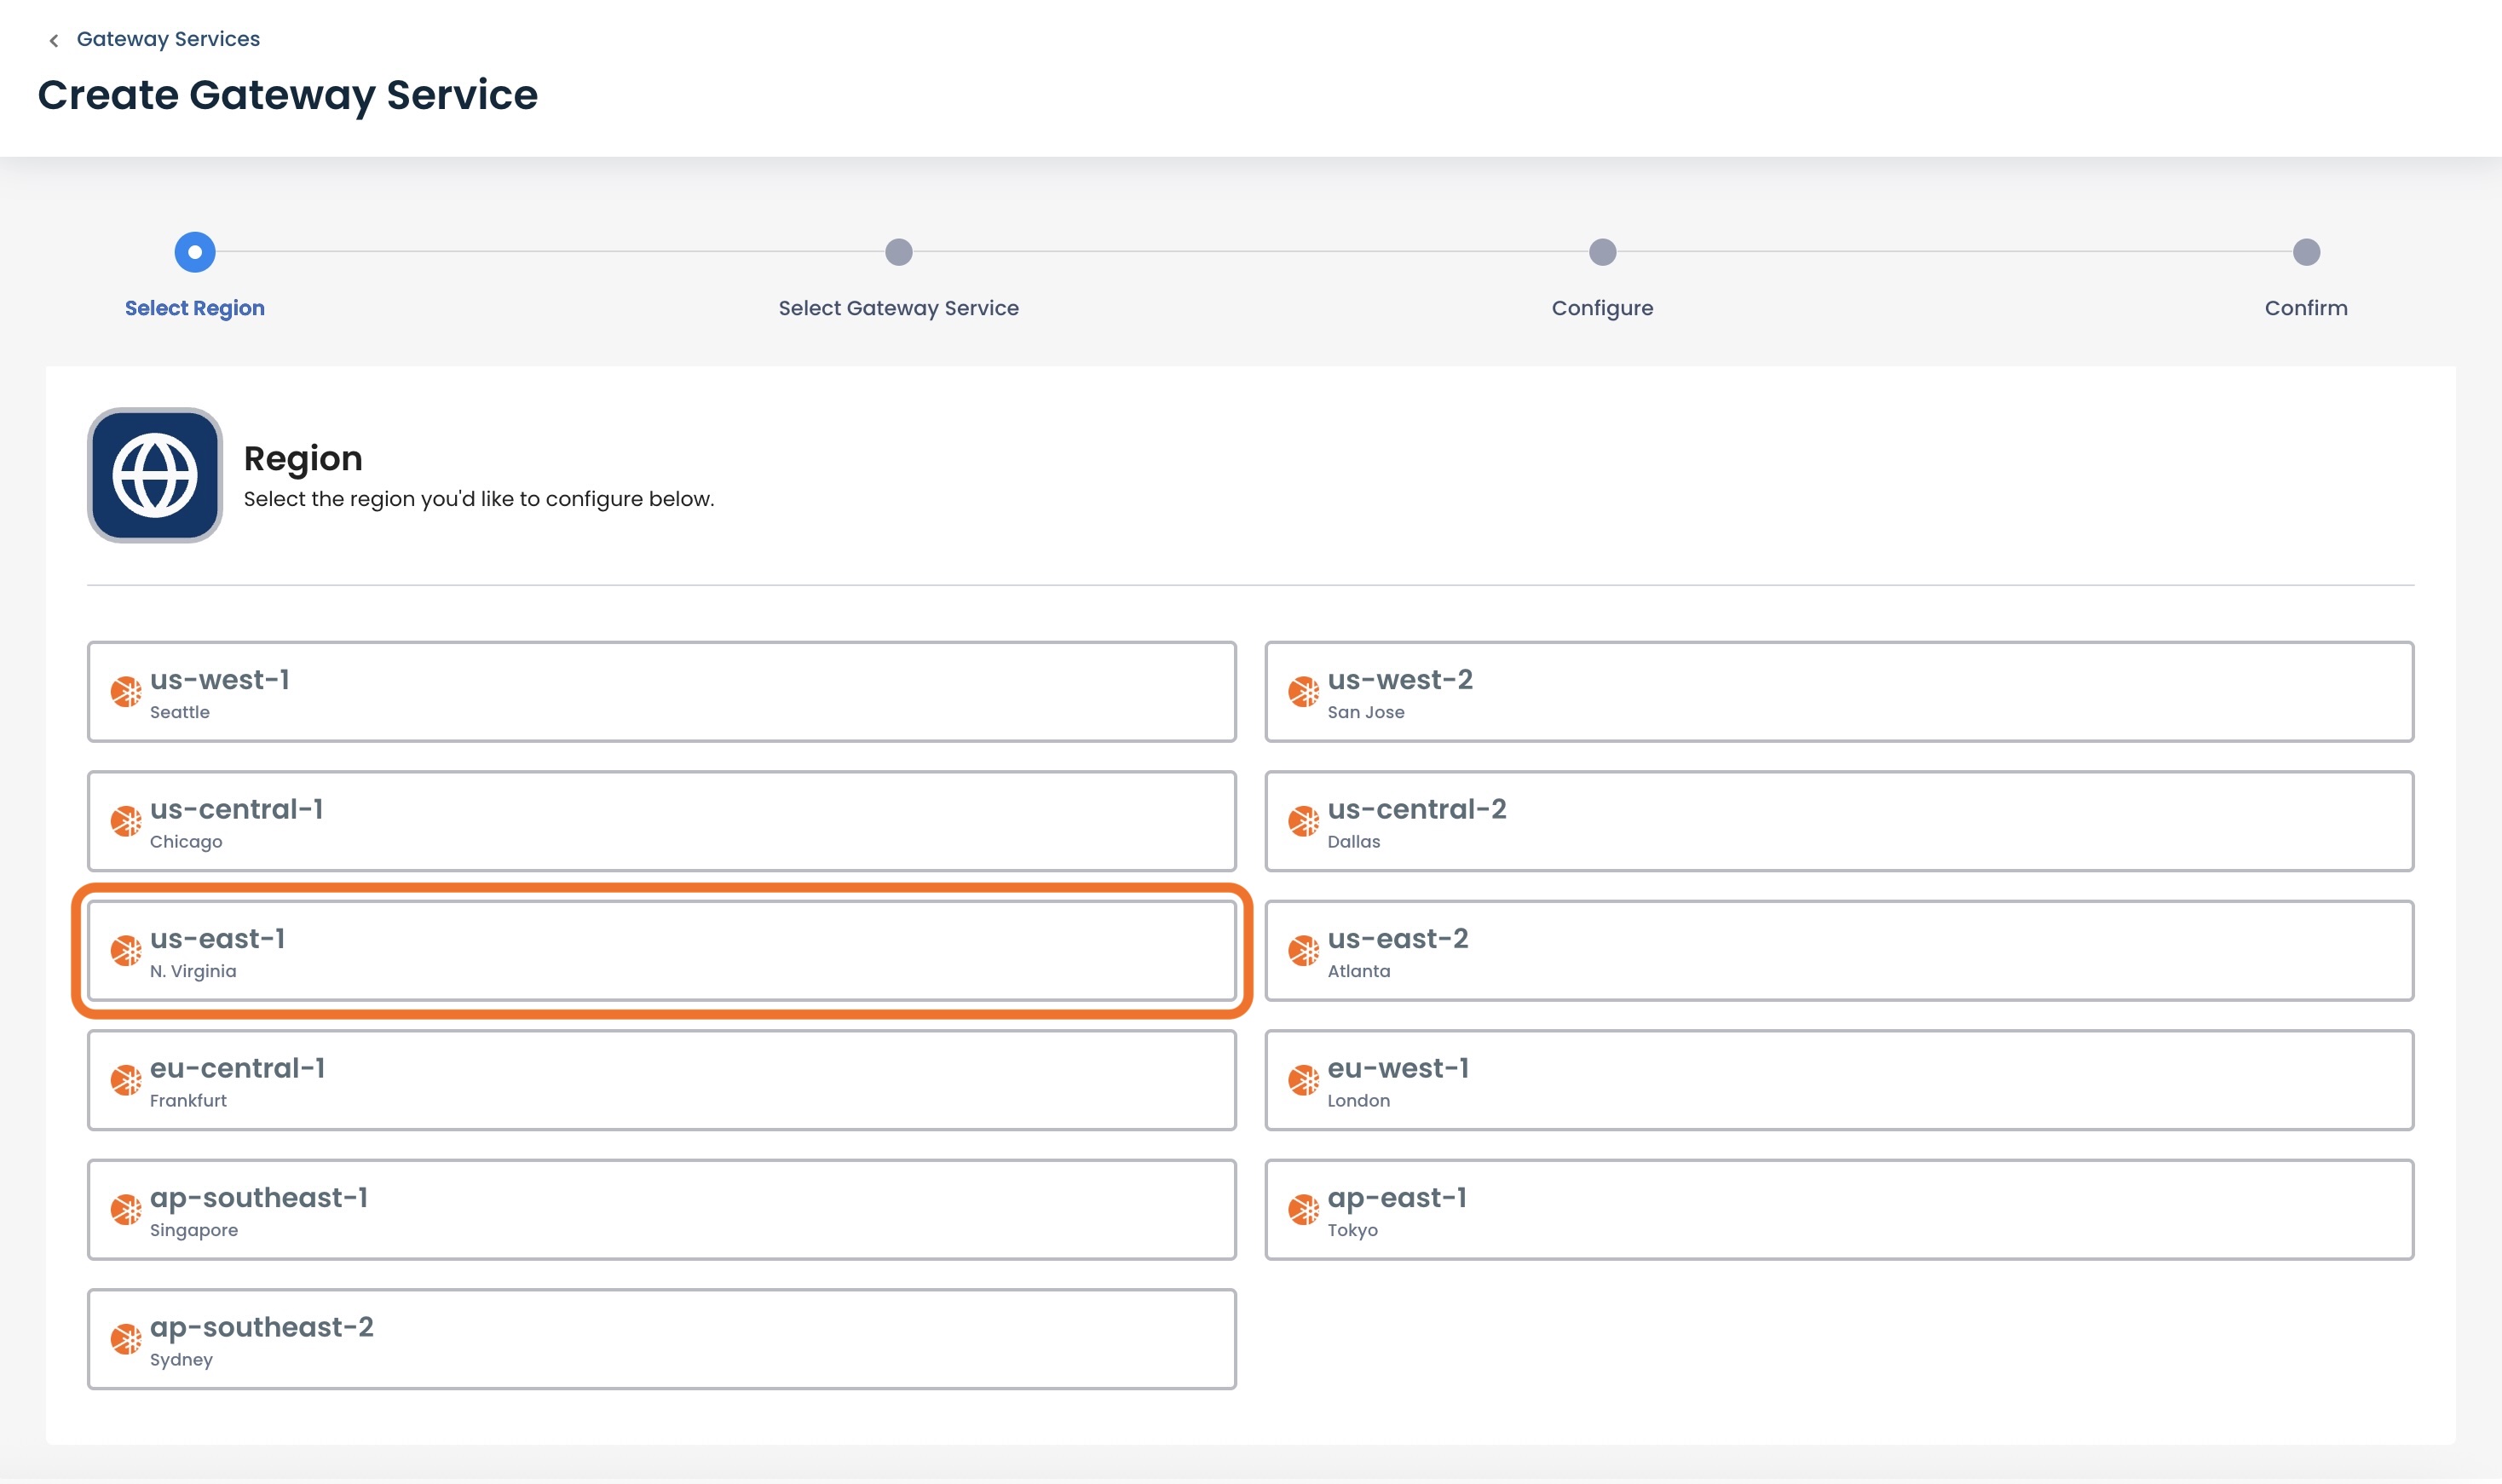
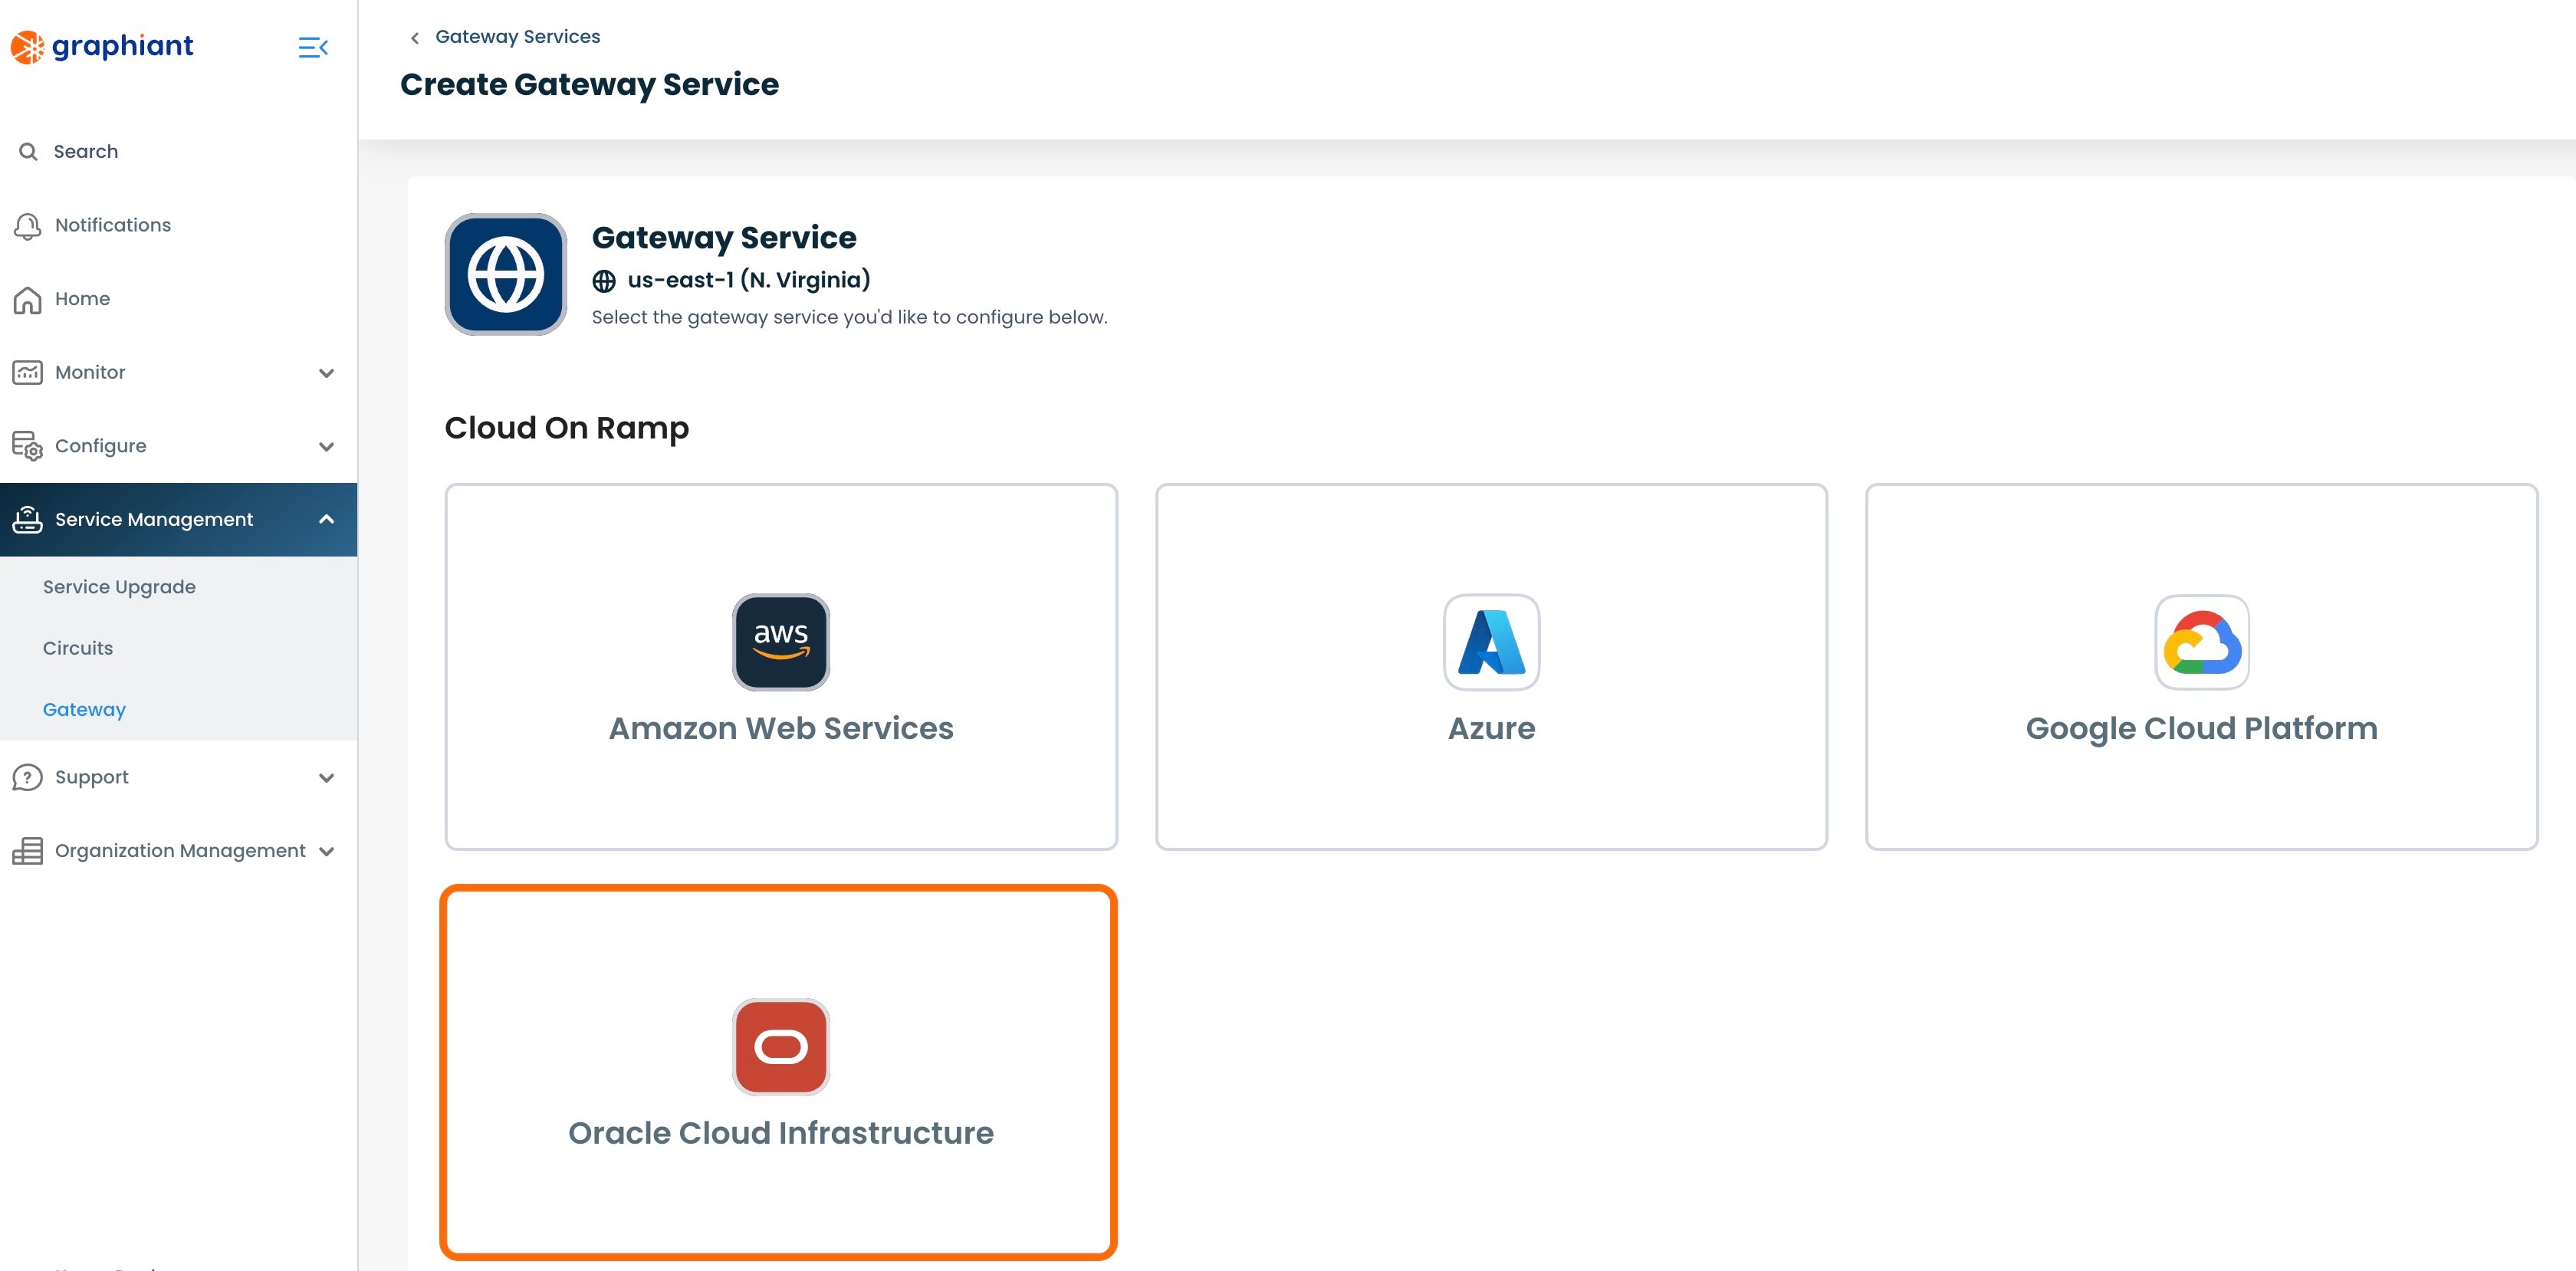
This opens the Cloud On Ramp screen.
Select 'Oracle Cloud Infrastructure'.
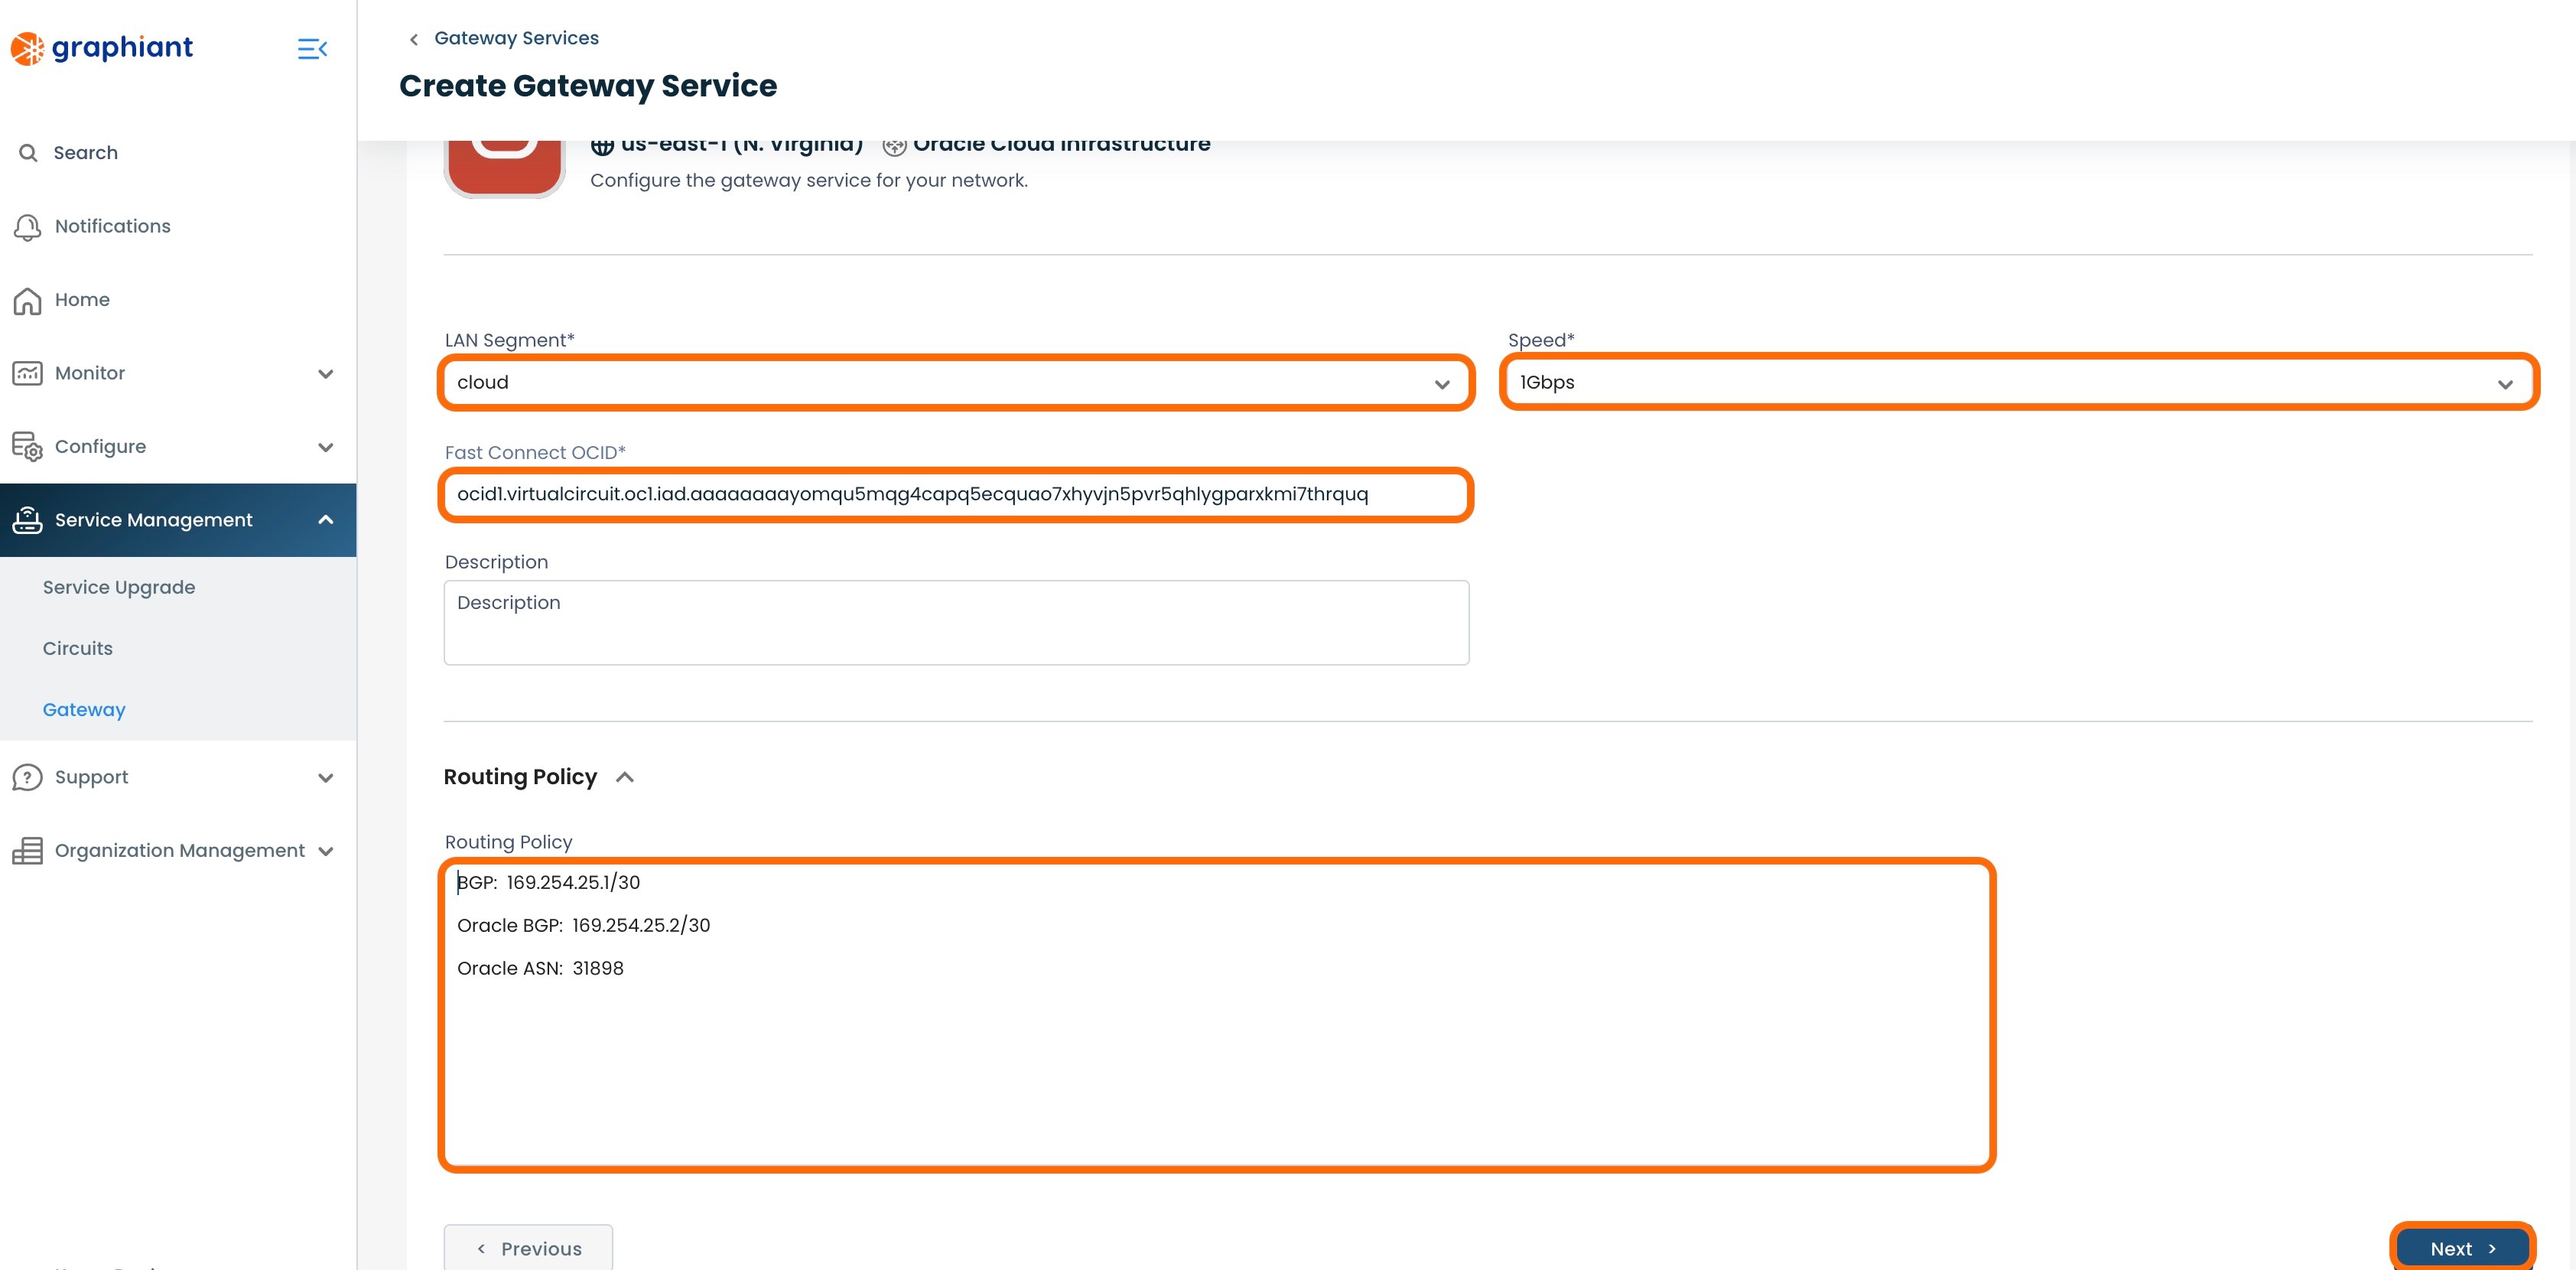
Complete the following fields:
LAN Segment: Select the desired LAN segment from the drop-down
Speed: Select the matching speed chosen in the OCI portal from the drop-down
FastConnect OCID: Enter the OCID copied from the OCI portal
Routing Policy: This is a free form text field that should include:
The subnets of the Interconnect BGP neighbor (in the form of "169.254.___.___" /30 Link-Local Only CIDR)
Any BGP policy you wish to apply to the Graphiant Gateway
The Oracle BGP ASN.
This information will be reviewed with a Graphiant Customer Support agent at a later stage and can be updated if needed.
Note:
1G is the minimum bandwidth speed for OCI. Please ensure the correct bandwidth is selected in the Graphiant Portal to match the OCI configuration selection.
Click 'Next'.
This will bring up the screen confirming the choices for the OCI gateway request.
Click 'Confirm'.
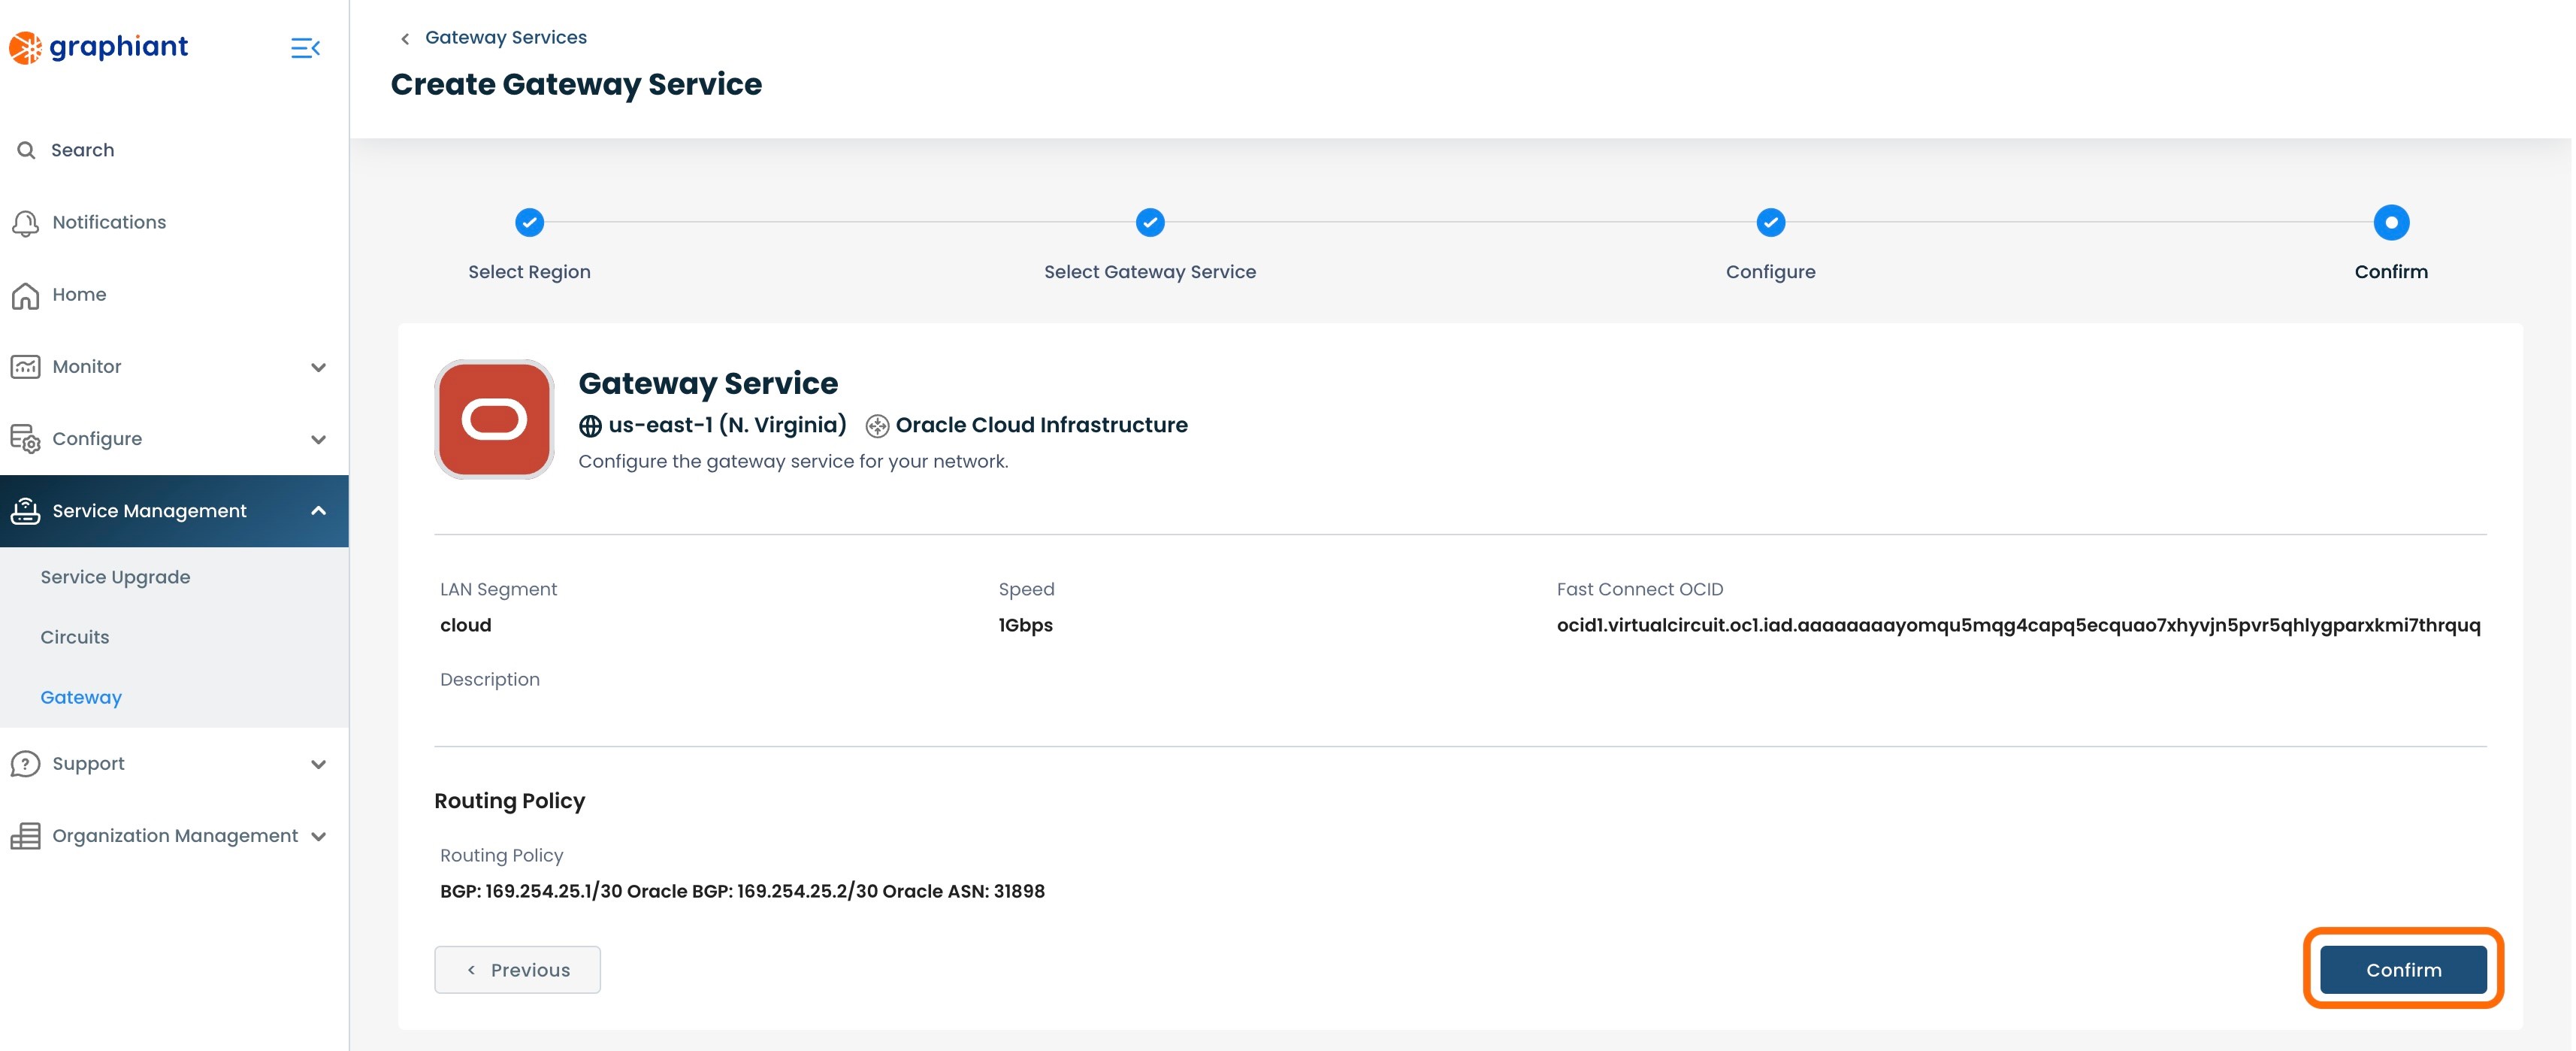
Once you click 'Confirm', it will create a request for the Graphiant Customer Support team to follow up with you to provision your Gateway Service.
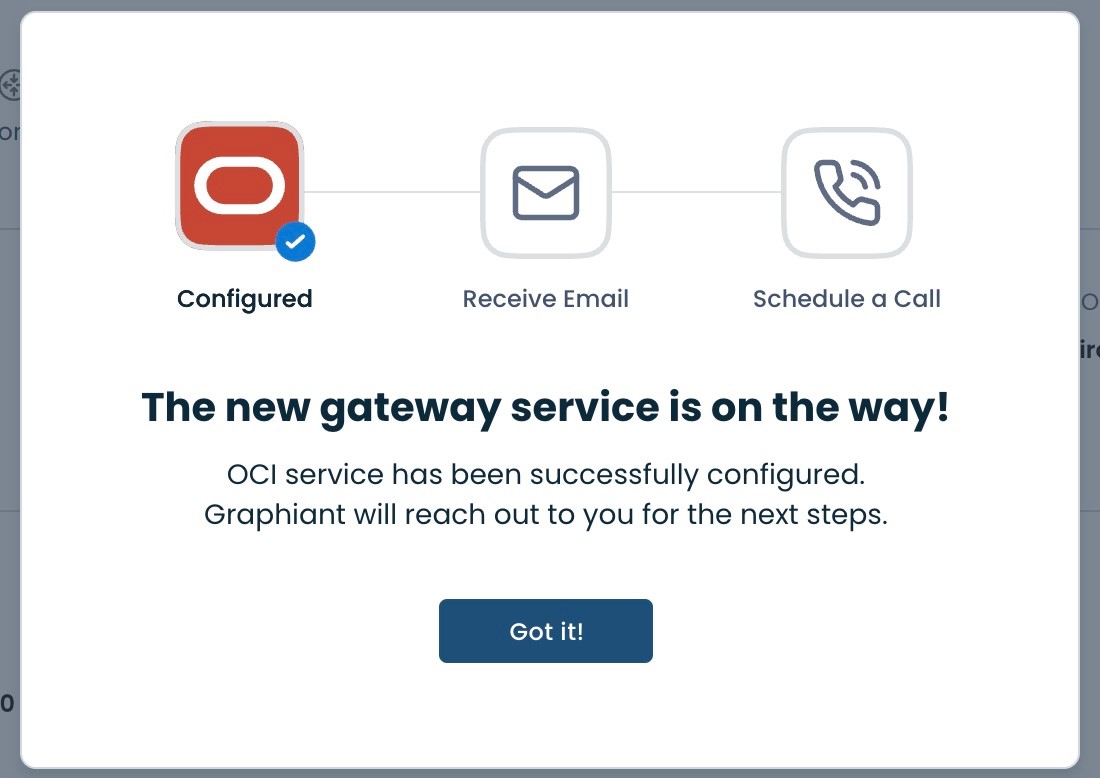
A confirmation pop-up will appear saying that Graphiant will be reaching out regarding next steps. A Graphiant Customer Support engineer will schedule a call to discuss the details of your Gateway Service.
Click ‘Got it!’.
Enabling the BGP Connection to the Graphiant Core
You can now enable the BGP neighbor connection to the Graphiant Core and complete the provisioning of your Gateway Service.
Instructions on creating the BGP neighbor connection can be found here.
After the BGP connection is enabled, the 'Gateway Status' for your Gateway Service in the Graphiant Portal will change to "Live" and it will be ready to use!
Note:
The status of "Live" is an indicator that the Gateway has been provisioned. It does not reflect the current status of the connection.