How do LAN Segments Work in System Objects?
LAN Segments in System Objects are created just once, as a System Object.
LAN Segments can then be pulled down into as many Sites that require them.
Graphiant Edges in turn will receive any needed LAN Segments through their Site's configuration.
As a System Object, LAN Segments will now have a centralized place to be created and managed.
Locating the LAN Segments Table in the Graphiant Portal
From the Graphiant Portal Home screen, navigate to System Objects by one of the following:
Locate the "Configurations" section within the top left of the screen; select 'Create System Object'.
or
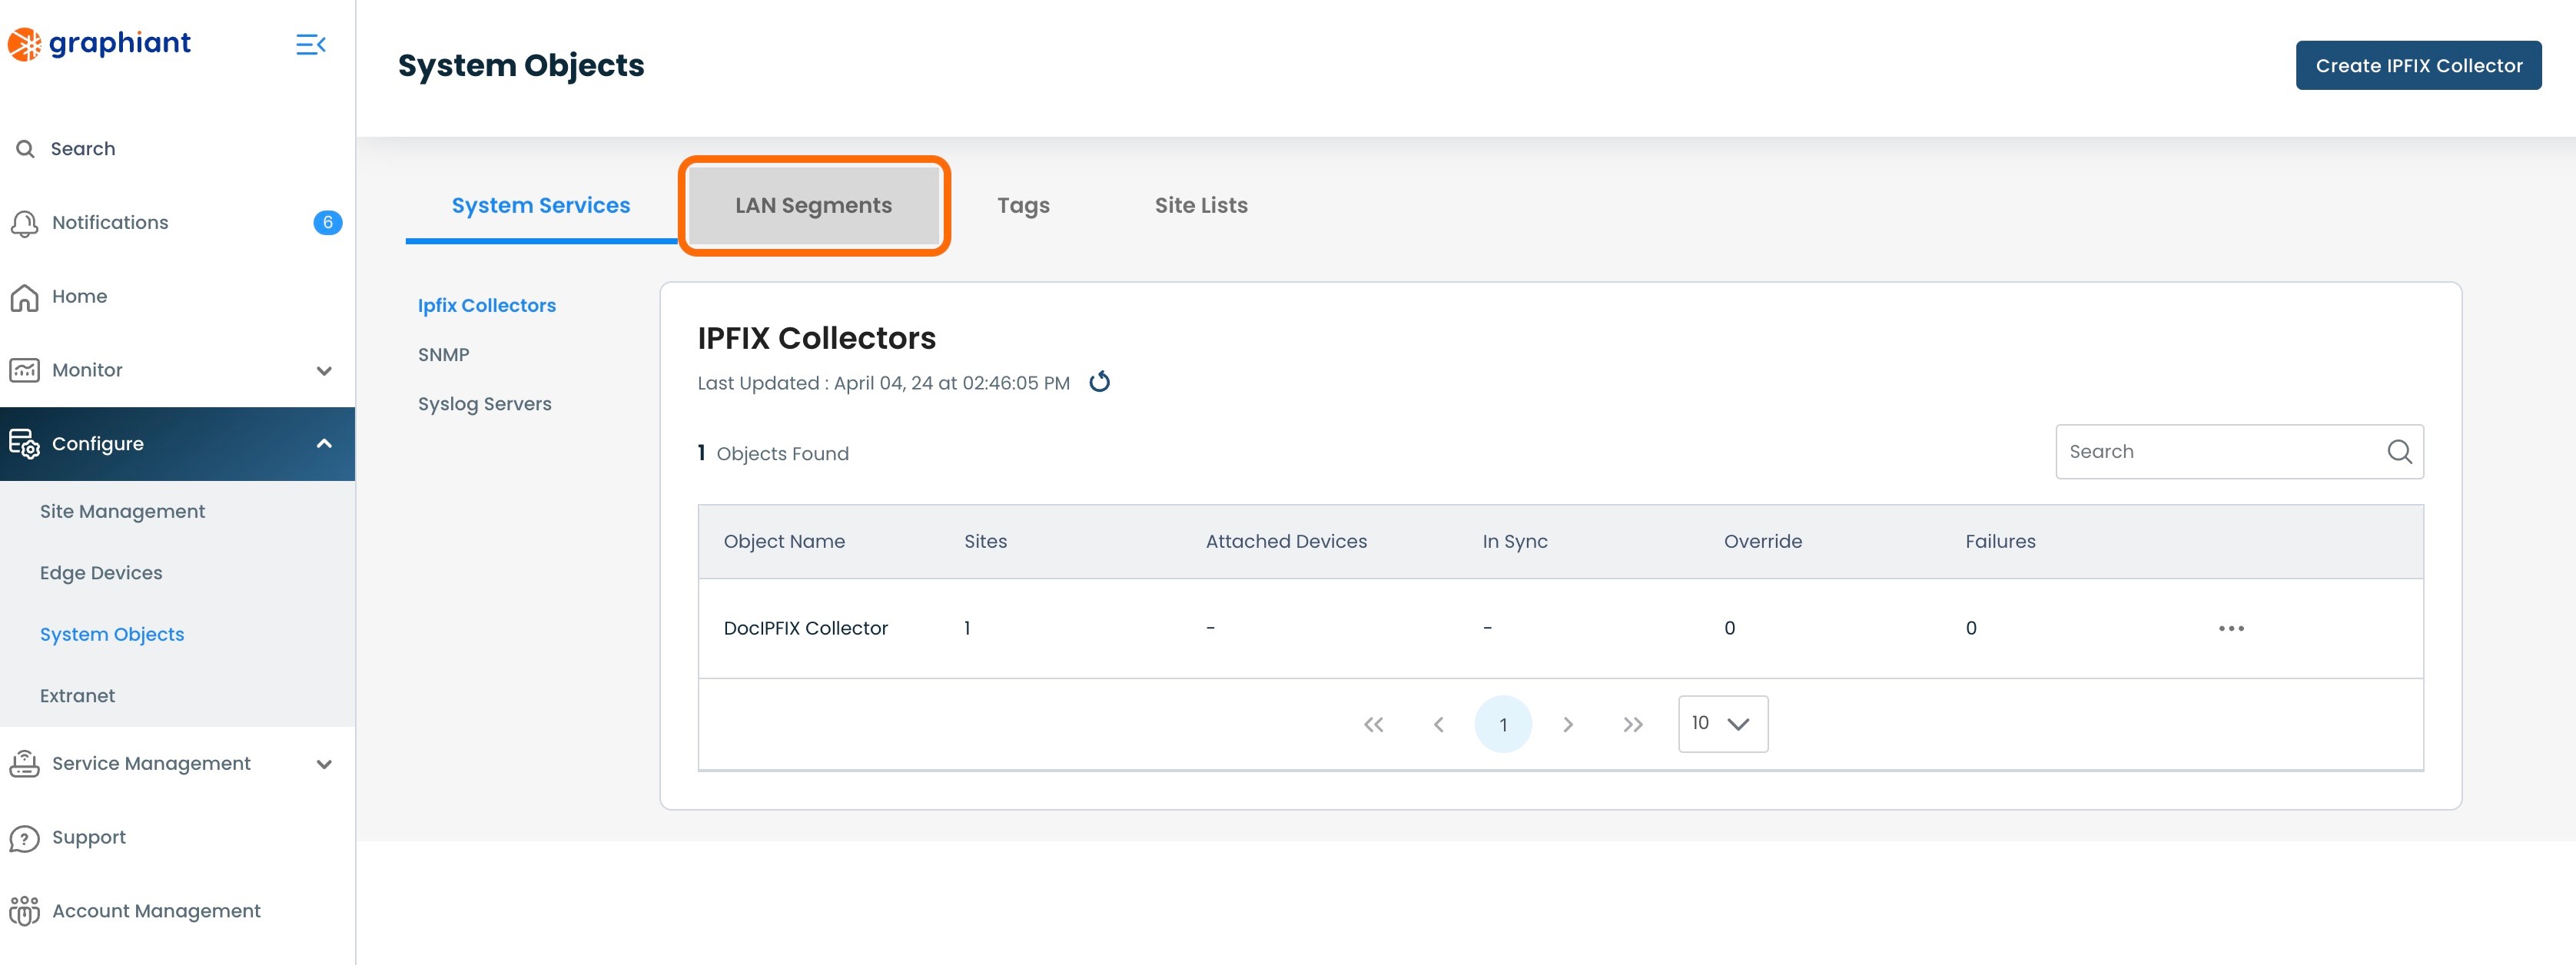
Click 'Configure' in the sidebar; select 'System Objects'.
.jpg)
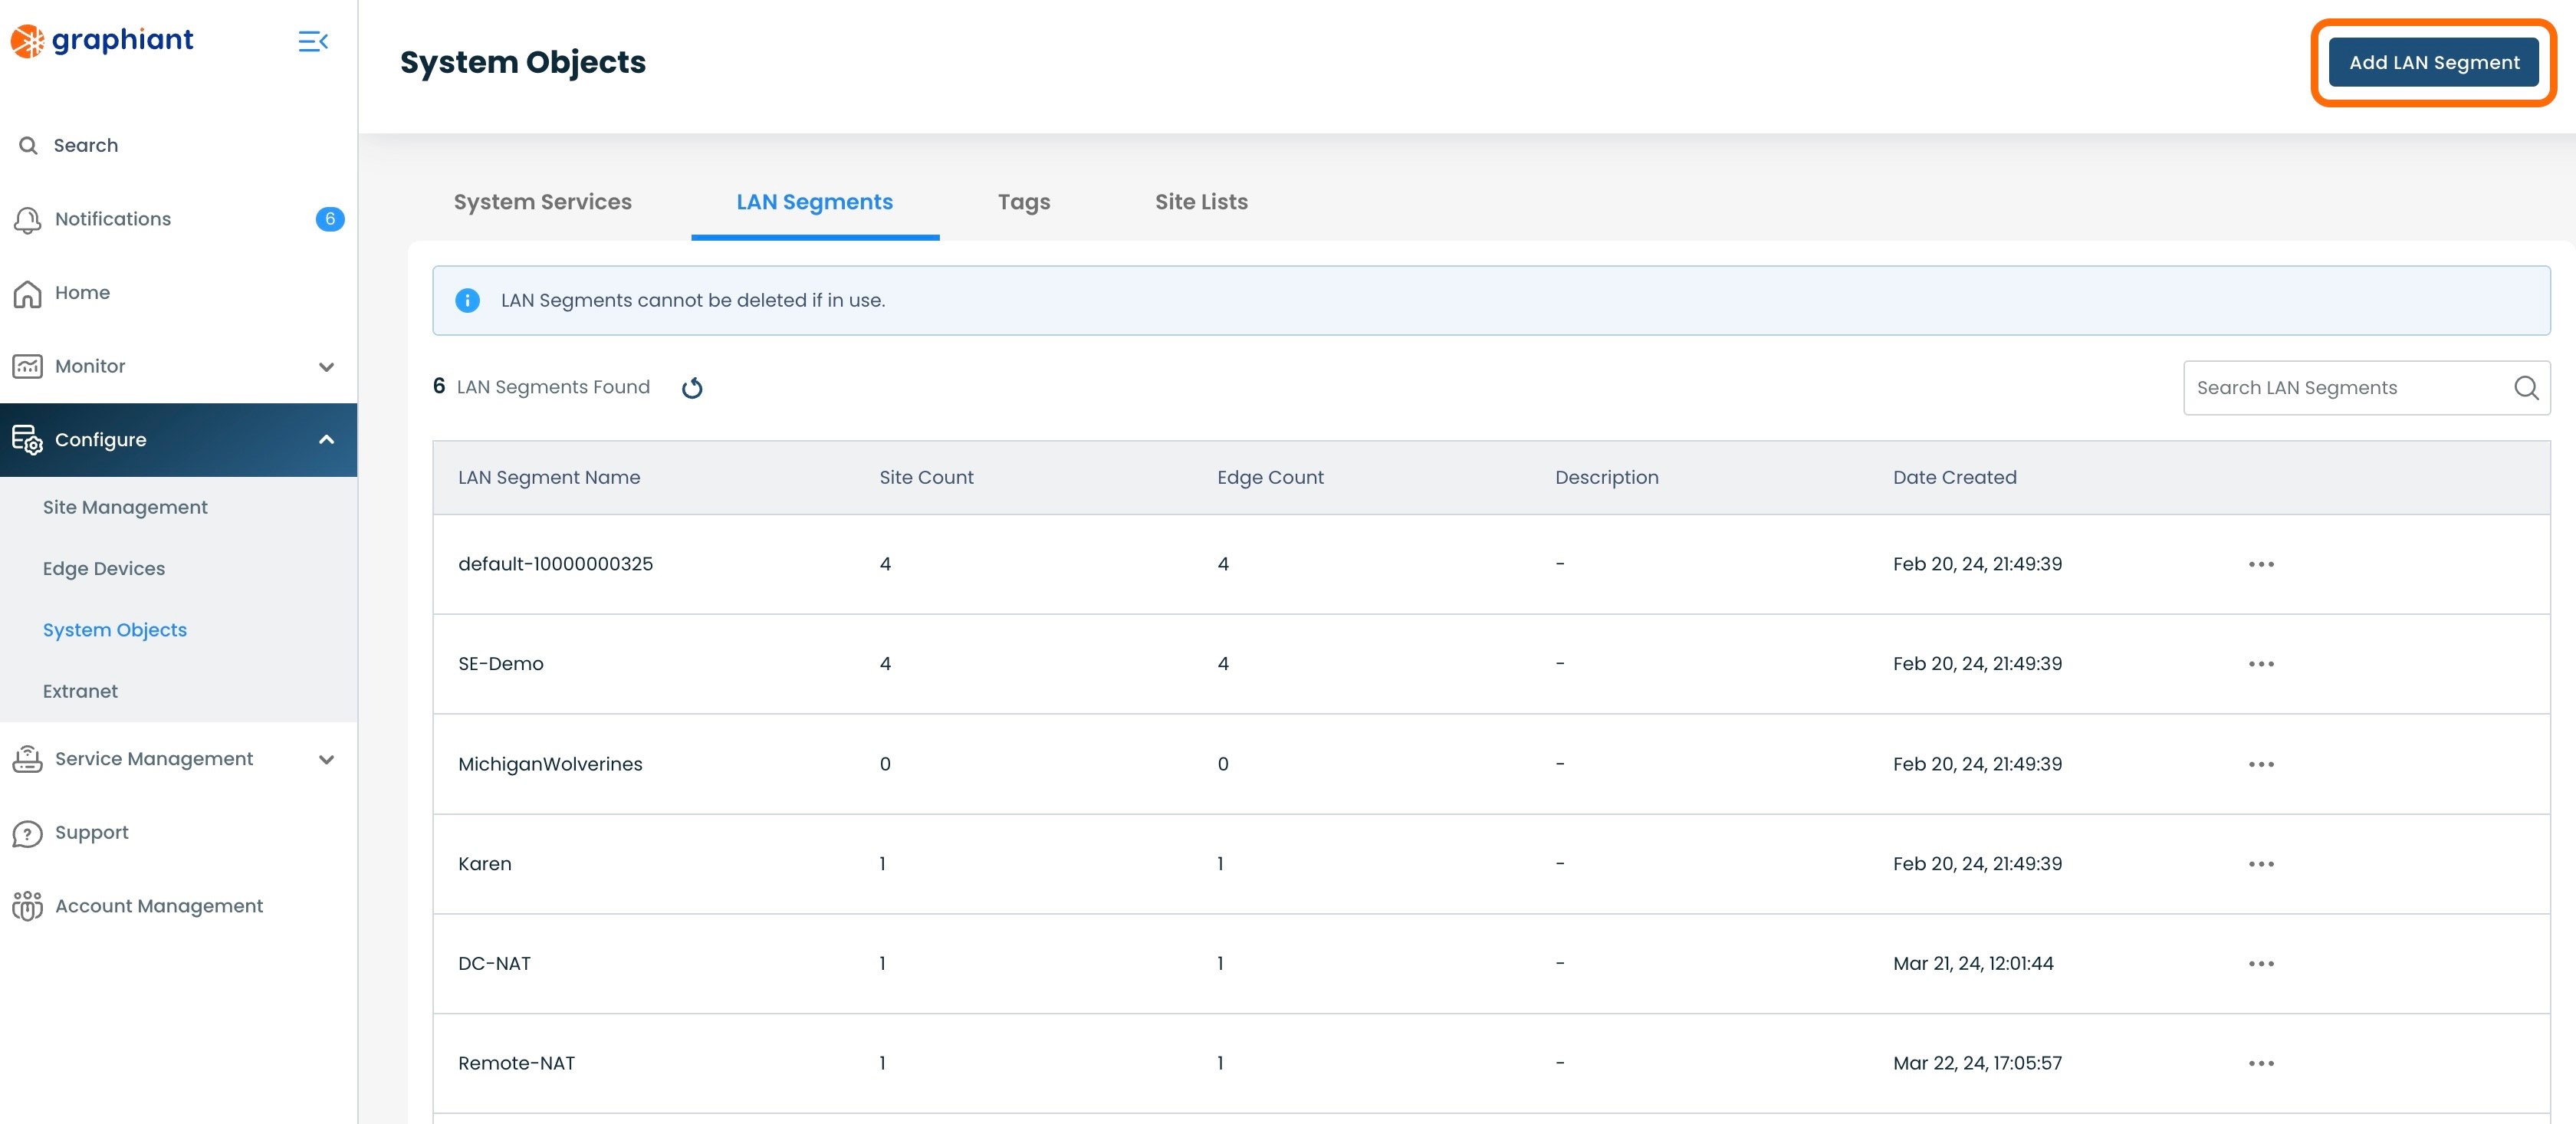
Click the 'LAN Segments' tab at the top of the screen.
Here will be a table with a centralized view of all LAN segments configured.
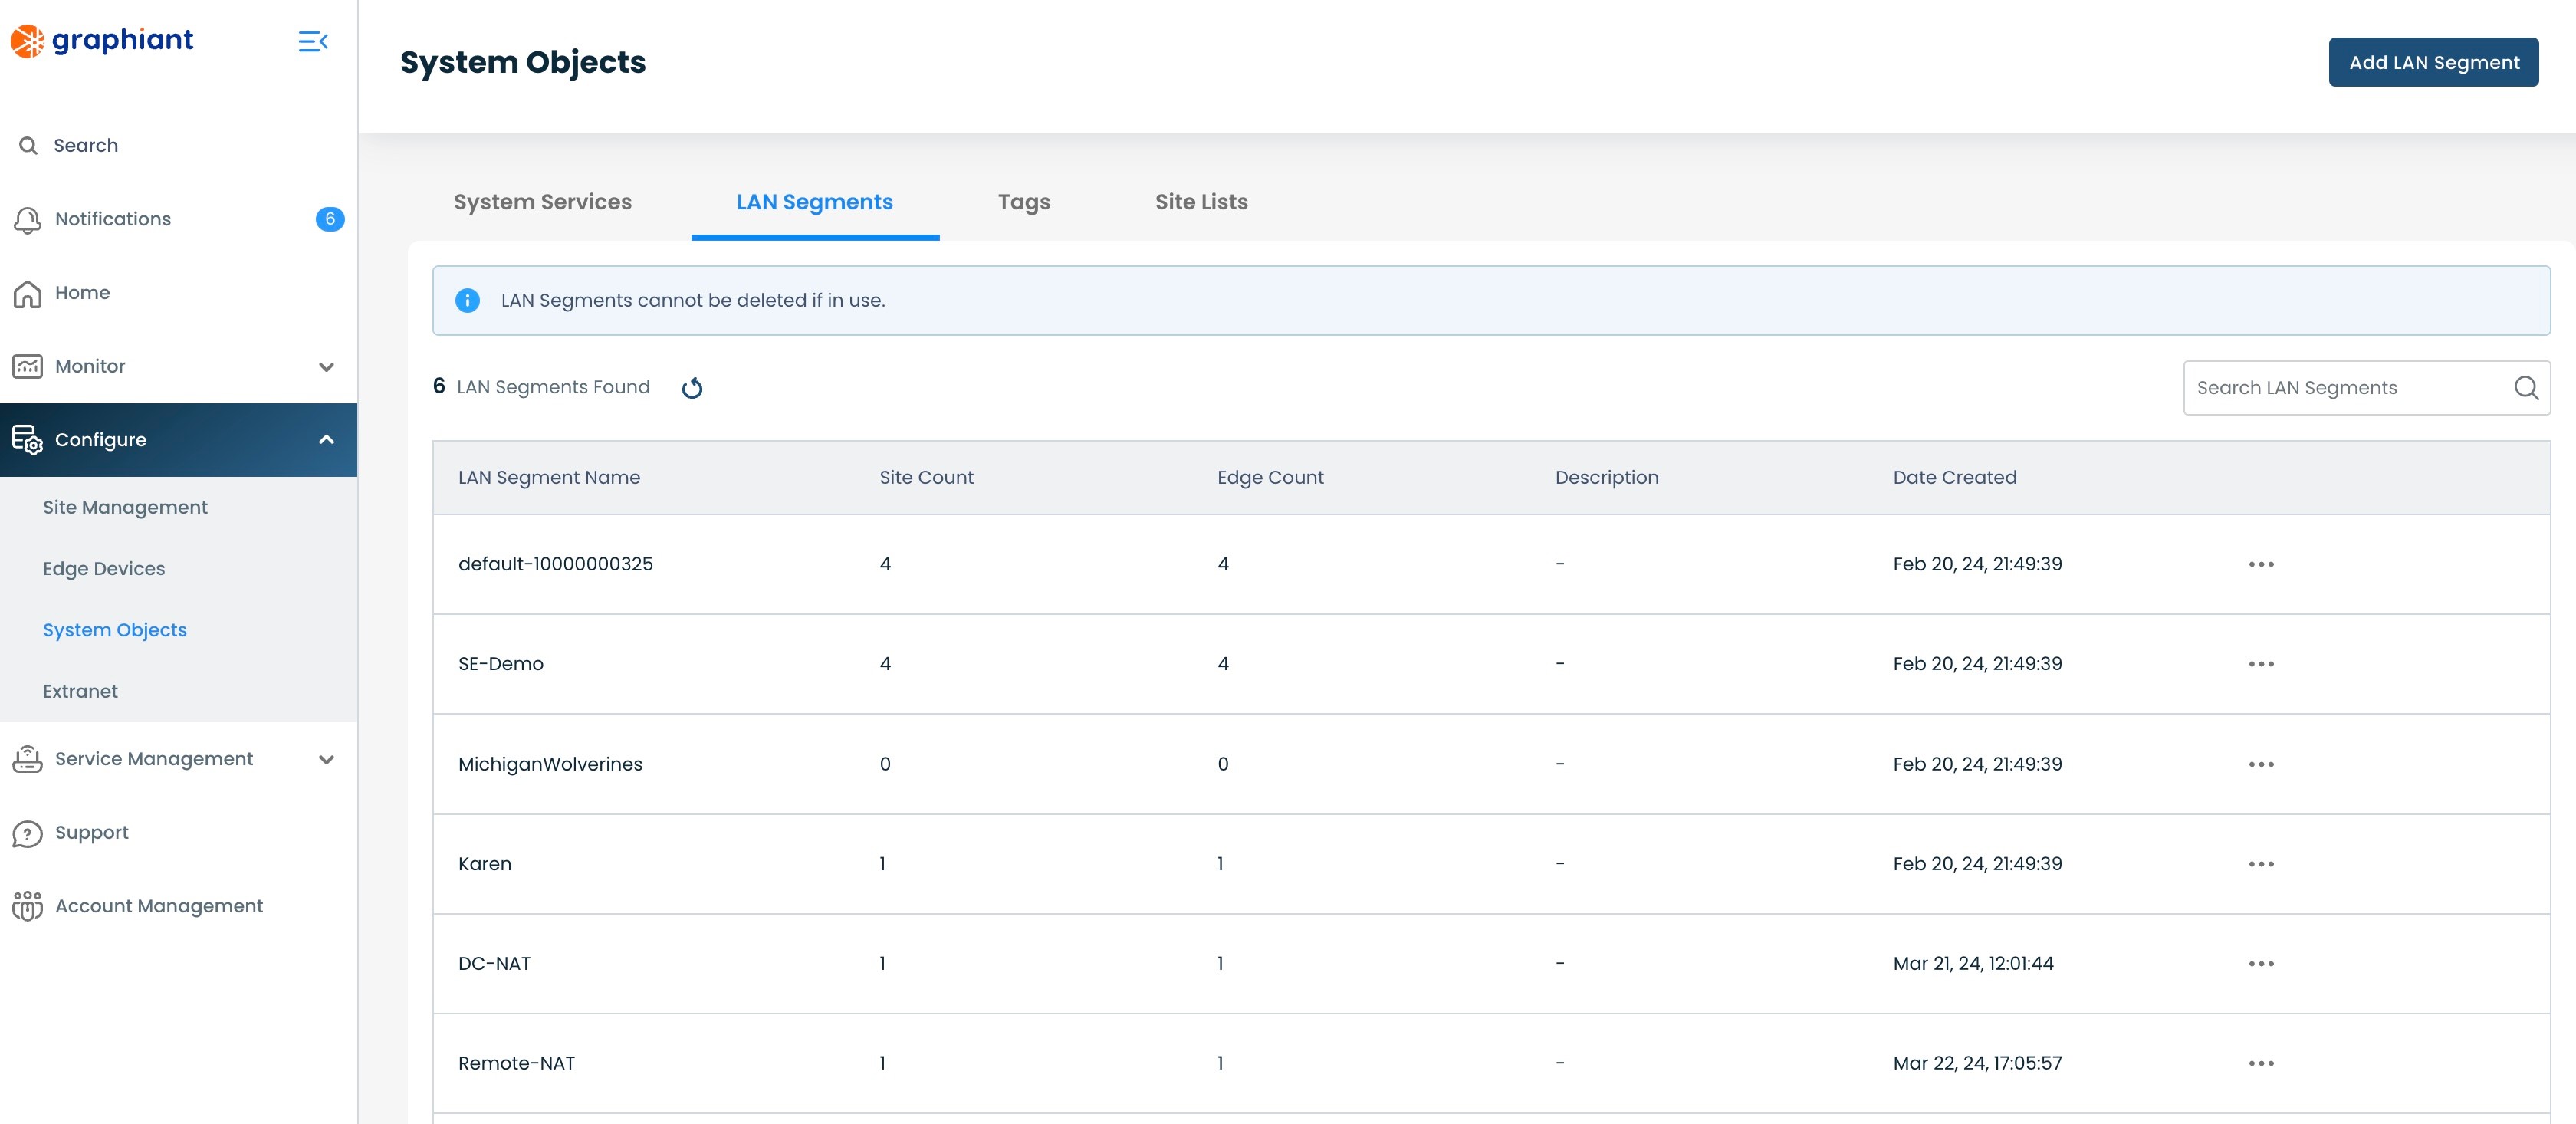
LAN Segment Summary Table
The following information can be found here:
LAN Segment Name: Each LAN Segments assigned name
Site Count: Number of Sites to which each LAN Segment is attached
Edge Count: Number of Edges to which each LAN Segment is attached
Description: Internal description originally entered for each LAN Segment
Date Created: The date each LAN Segment was created

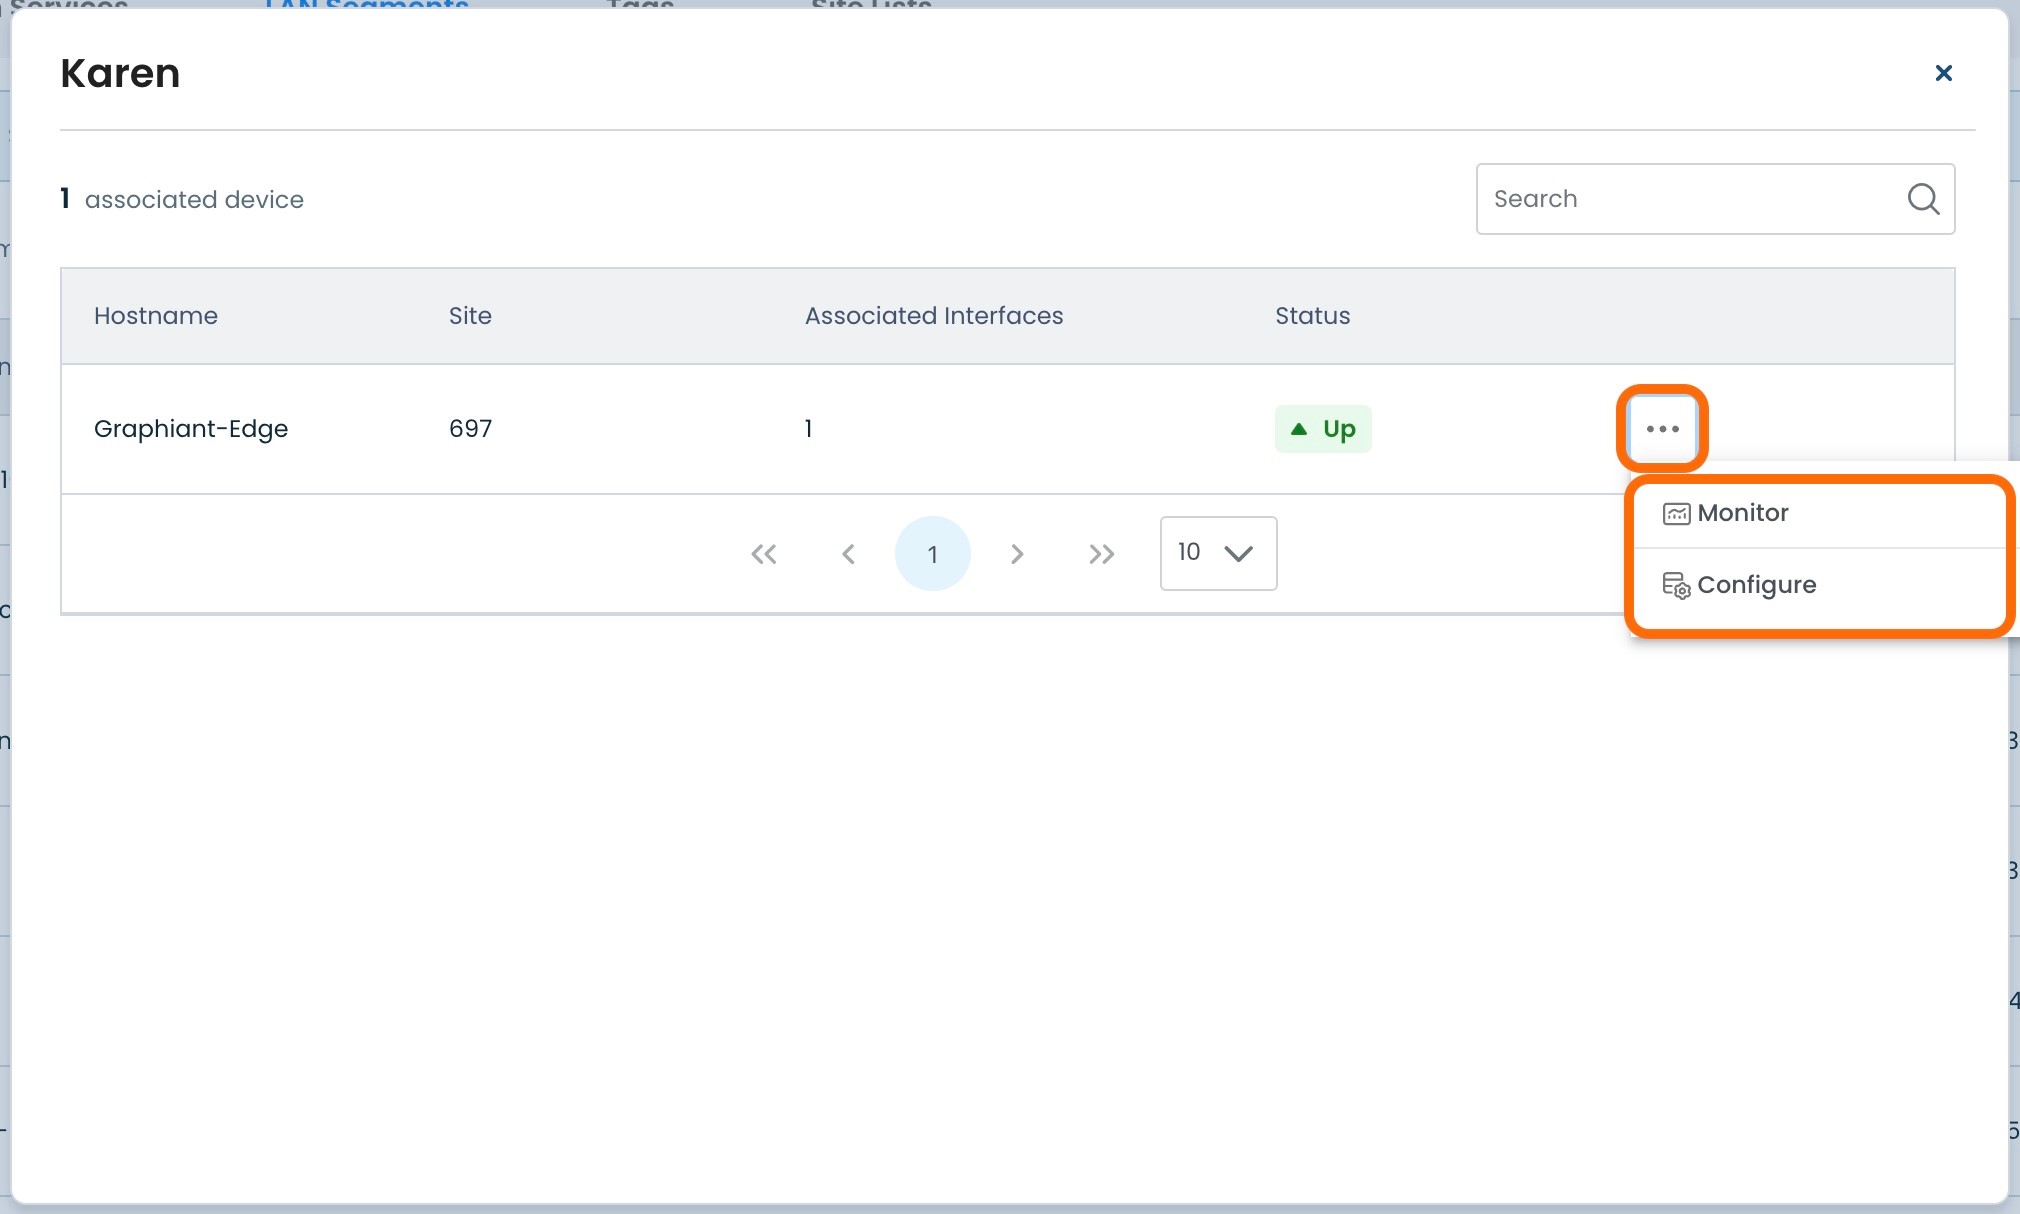
Viewing Attached Edges and Interfaces
To view the Graphiant Edges attached to a LAN Segment, along with any associated interfaces, click the 3 dots for the desired LAN Segment; select 'View Edges'.
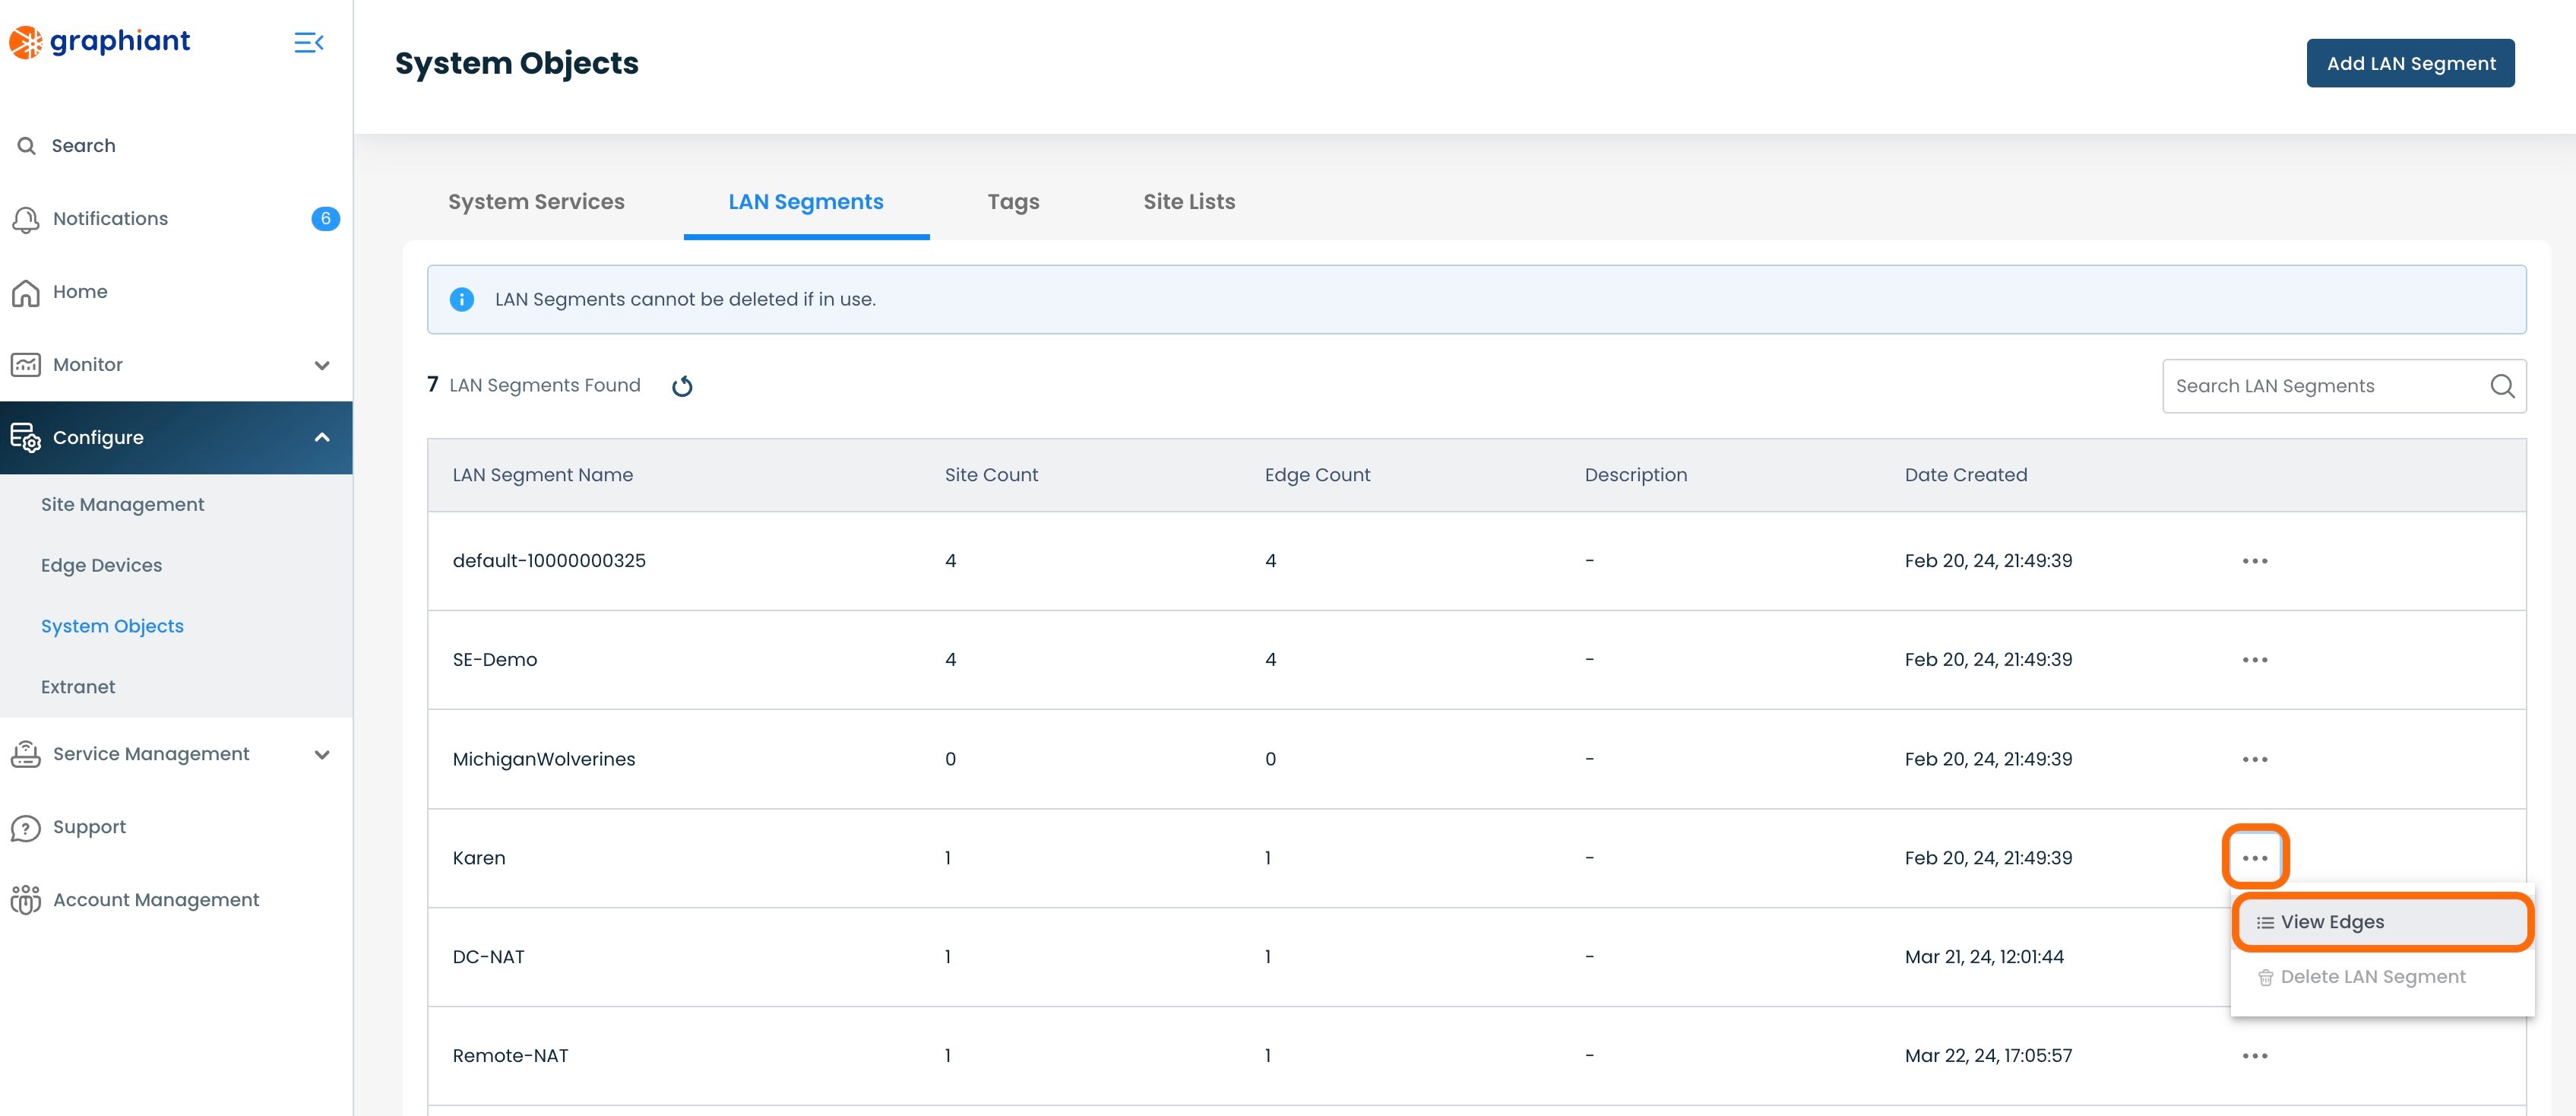
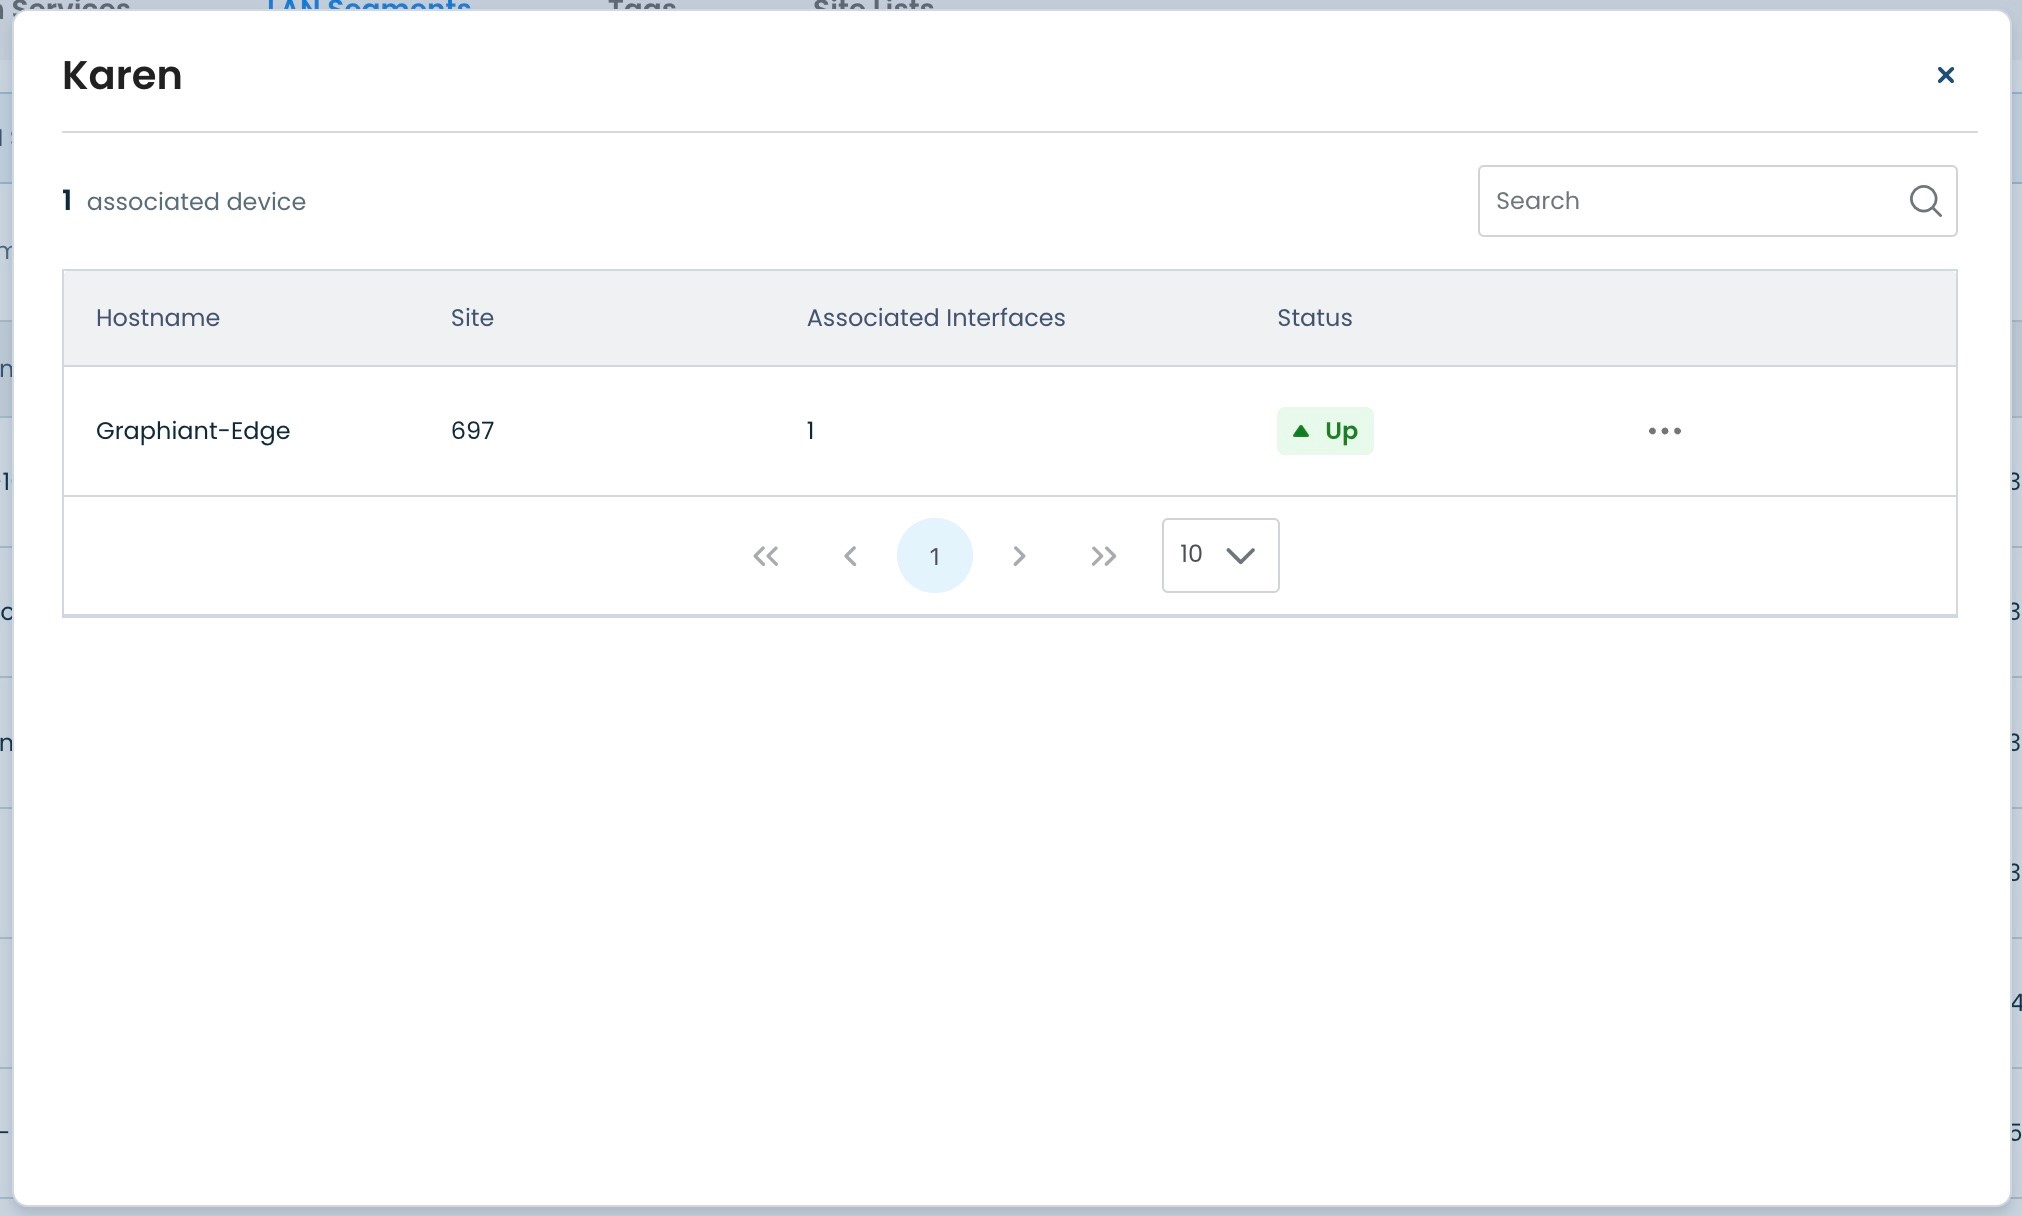
A modal will appear including the following information:
Hostname: The name of any Edge that is attached to that LAN Segment
Site: The Site to which each Edge is attached
Associated Interfaces: Any interfaces associated with each Edge
Status: Current status of each Edge
Direct Path to Edge Monitoring and Configuration
From here, it is easy to navigate to an Edge's Monitor or Configure screens if desired.
Click the 3 dots; select 'Monitor' or 'Configure'.
Adding a LAN Segment
To add a LAN Segment, navigate to the LAN Segments table.
Click 'Add LAN Segment' at the top right.
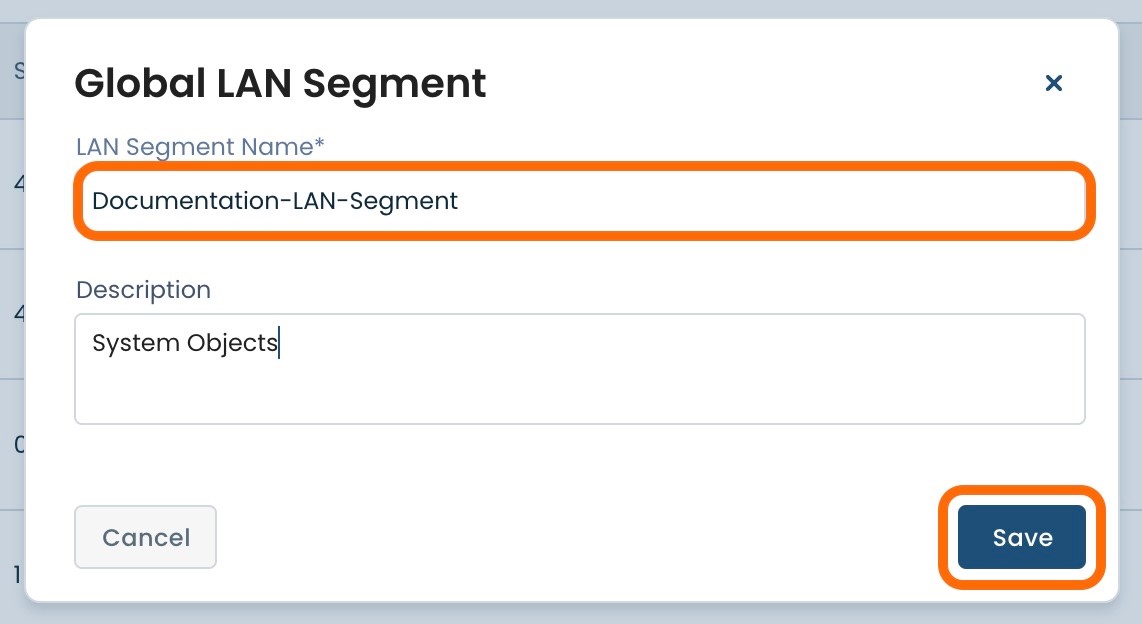
A modal will appear.
Complete the following fields:
LAN Segment Name: Name this LAN Segment will be referred to in all attachments.
Note:
A LAN Segment Name cannot contain spaces.
Description (if desired): Internal description of the LAN Segment
Click 'Save'.
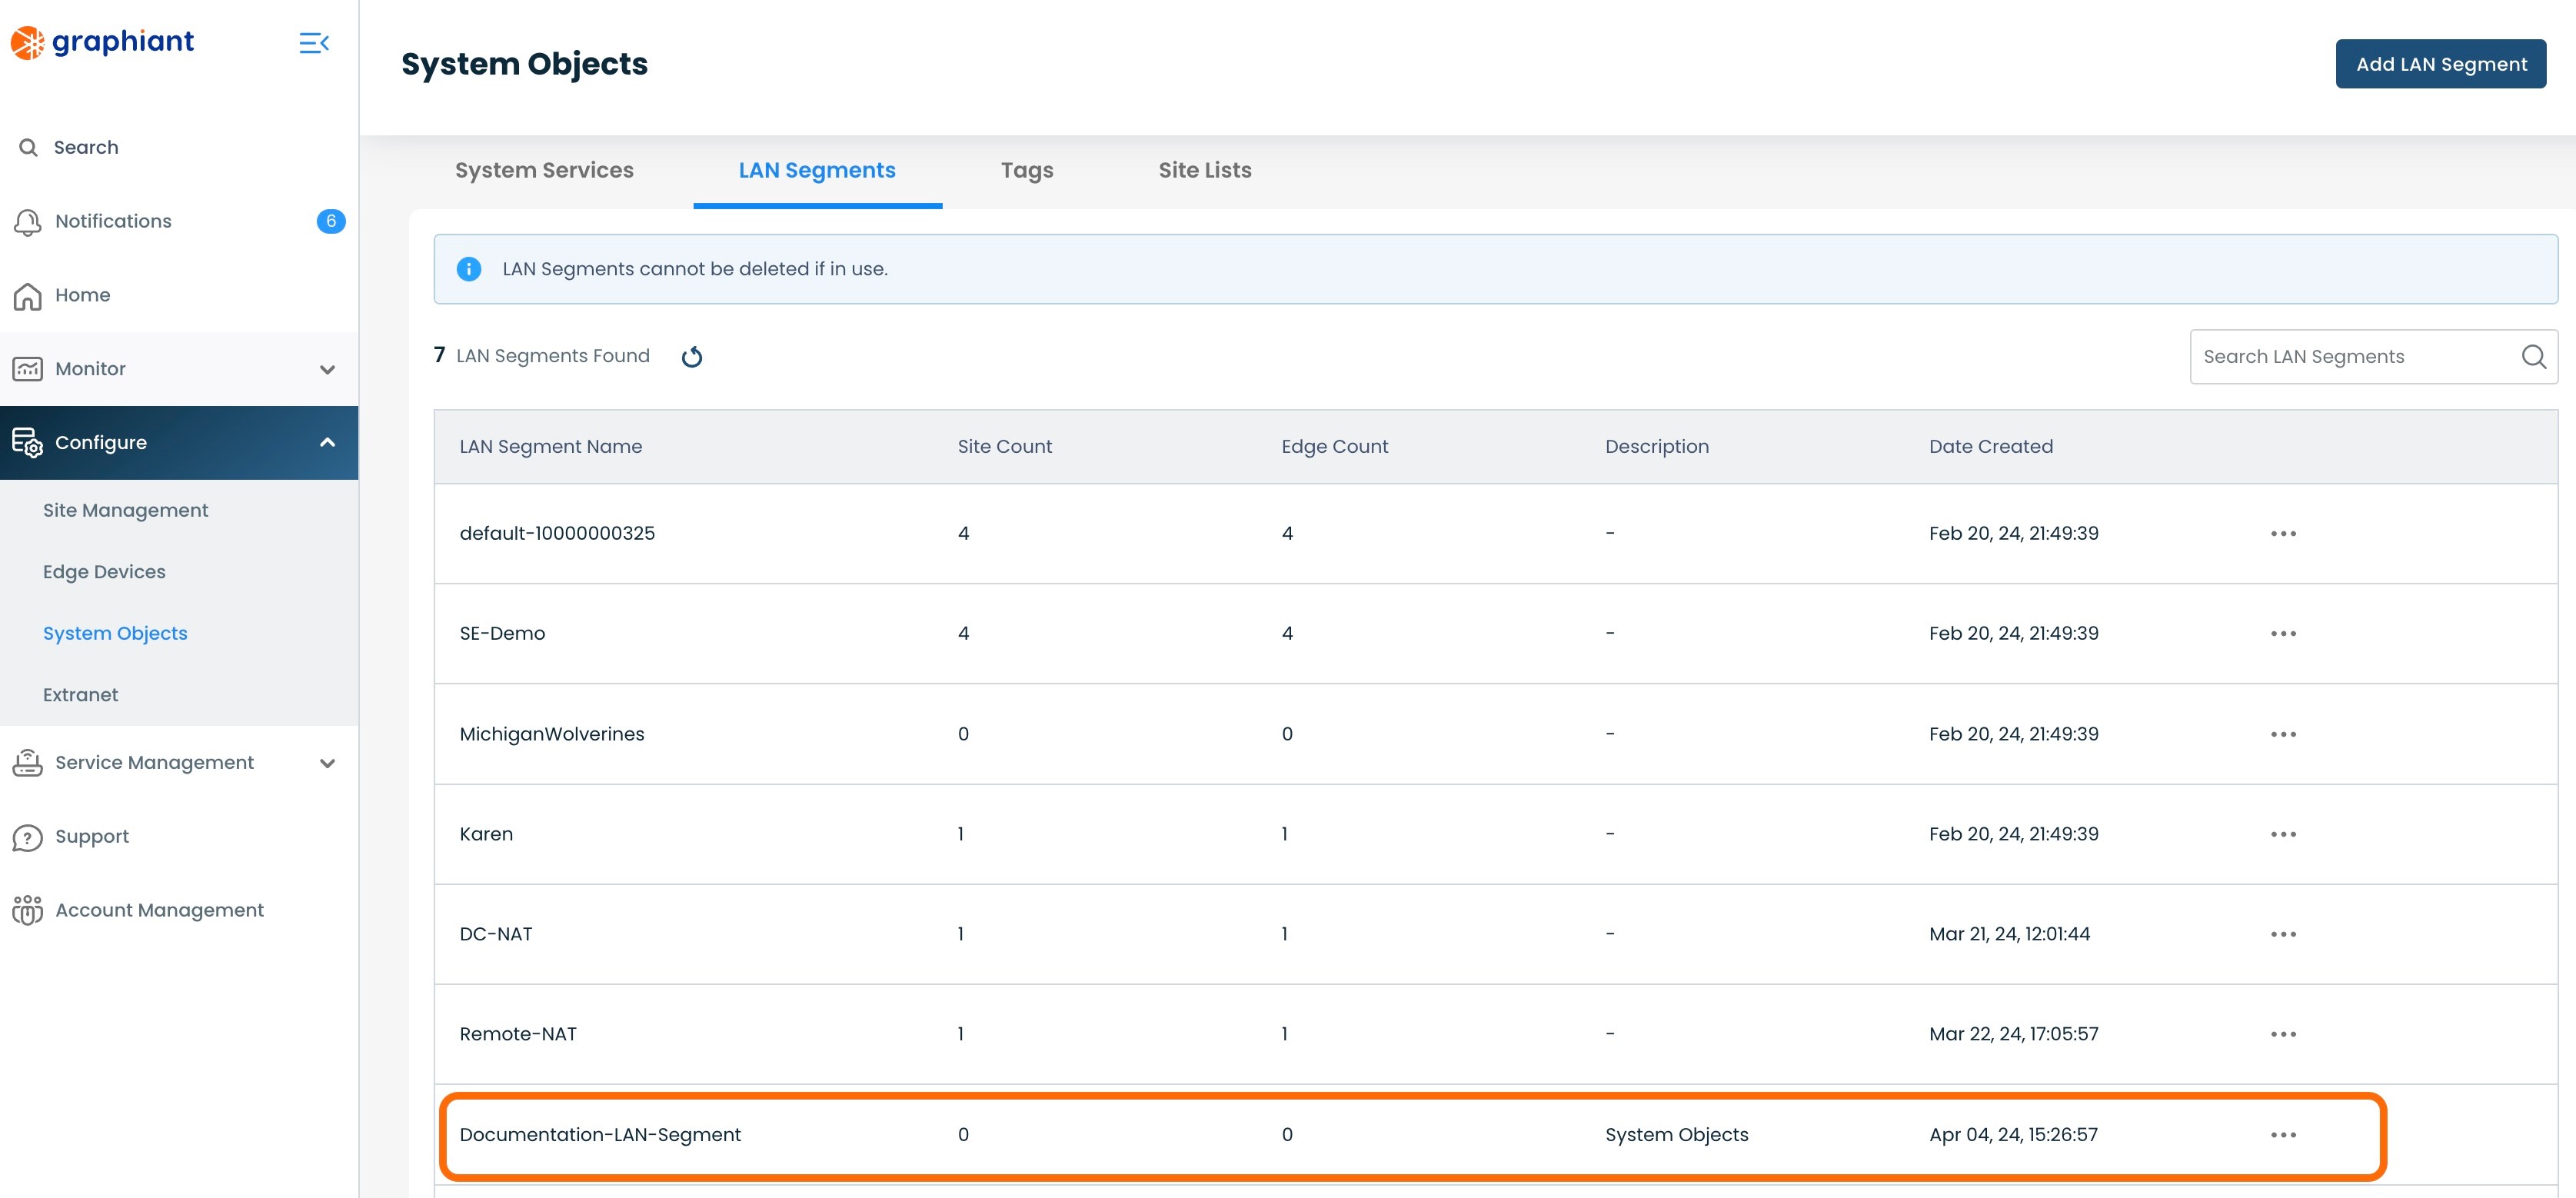
The newly added LAN Segment will now appear in the table.
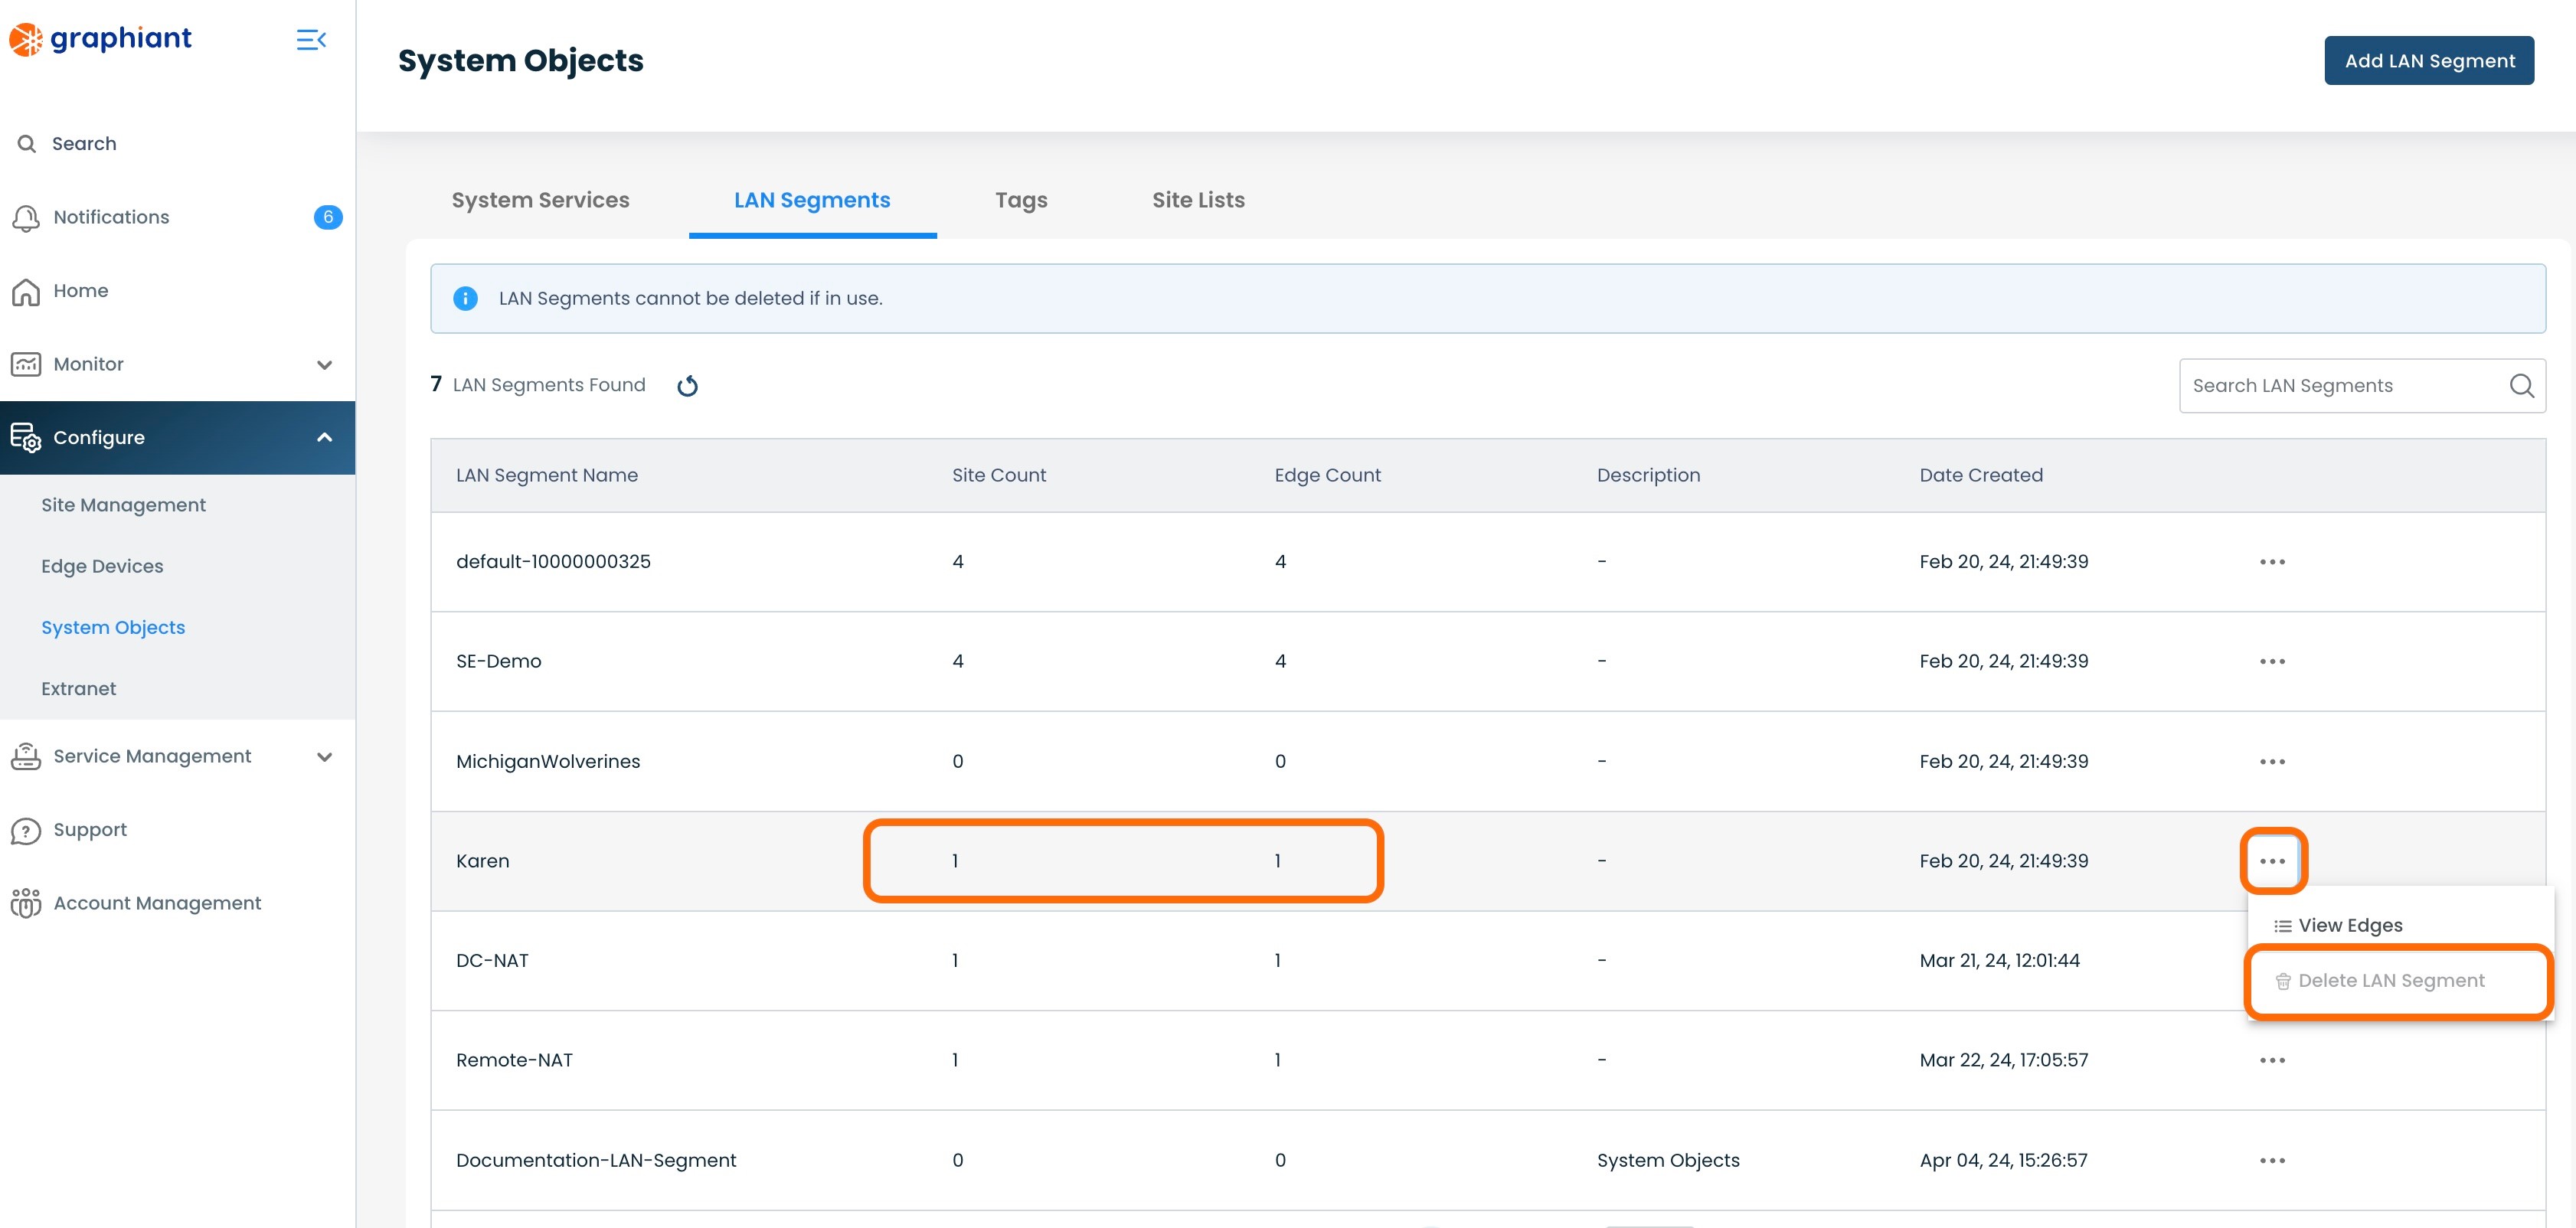
Deleting a LAN Segment
To delete a LAN Segment, navigate to the LAN Segments Table.
Note:
A LAN Segment can only be deleted if it is has no mappings; it cannot be attached to any Sites, Edges, or have any other references to it within the network.
Click the 3 dots to the right of the LAN Segment to be deleted; select 'Delete'.
A LAN Segment with no Sites or Edges attached and not referenced anywhere in the network will have a successful 'Delete' action permitted.
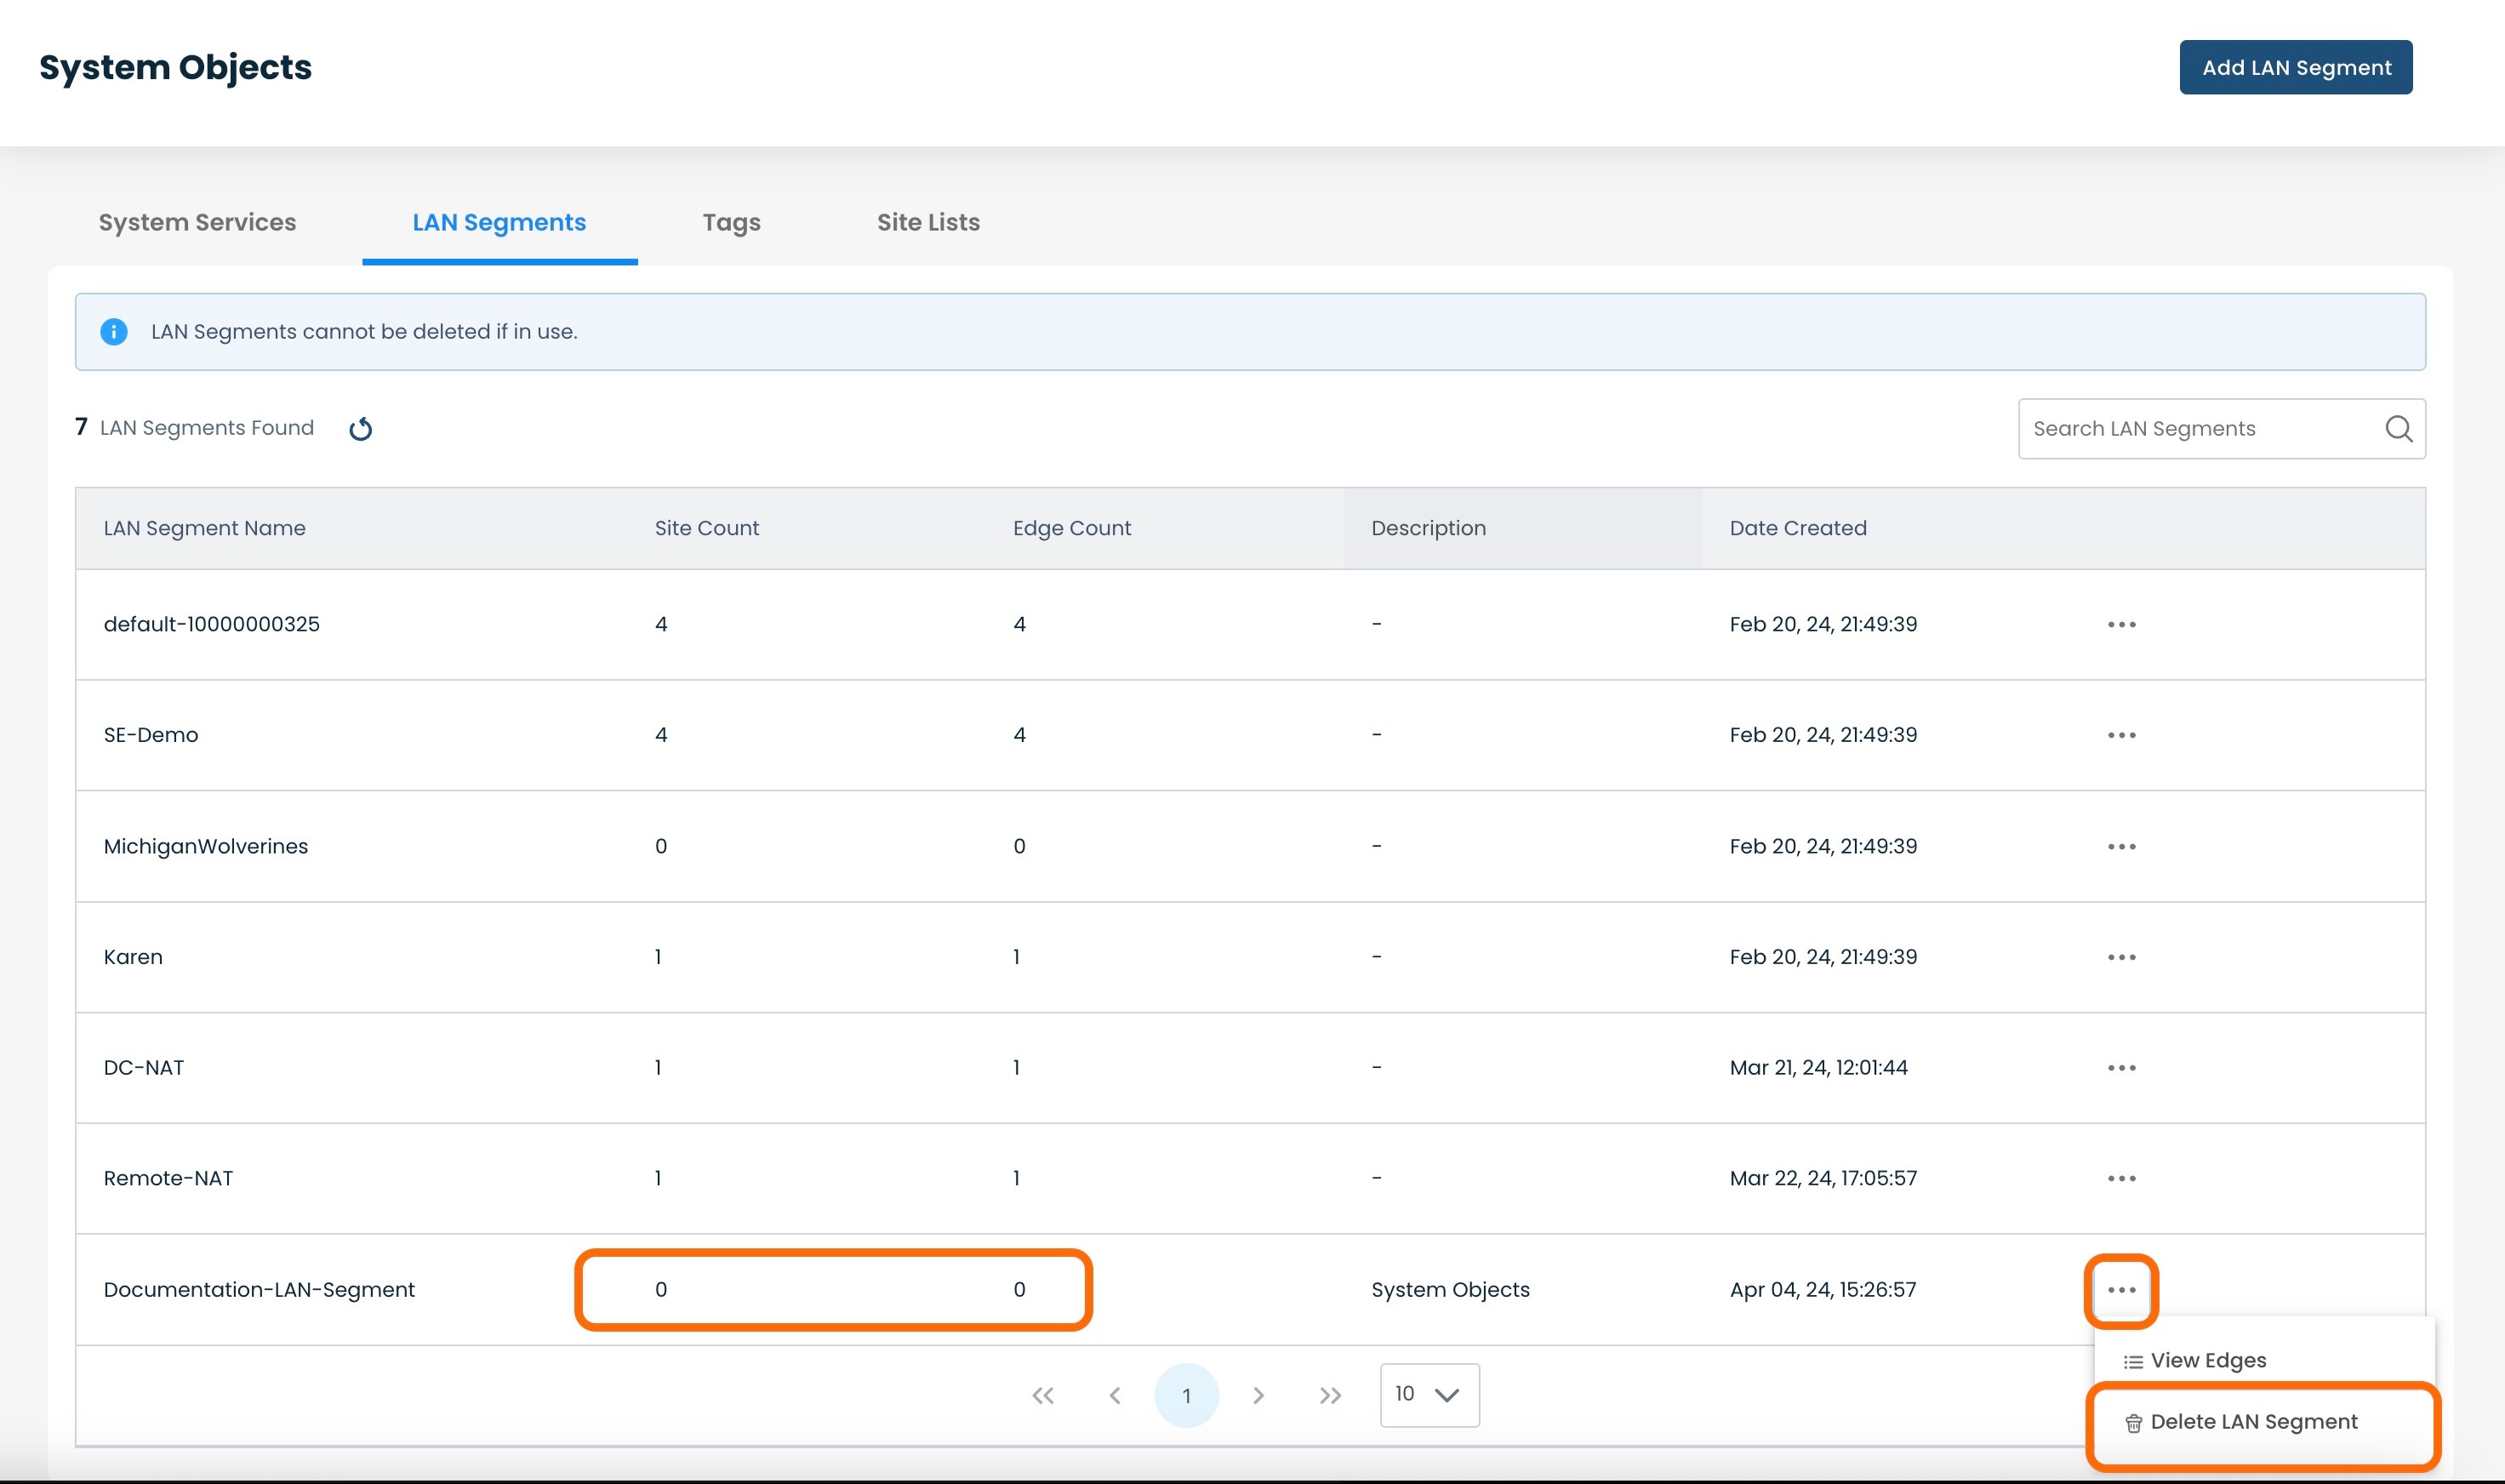
If a LAN Segment still has Sites or Edges attached to it or is referenced elsewhere in the network, the 'Delete' selection will be grayed out and the Delete action will not be permitted.
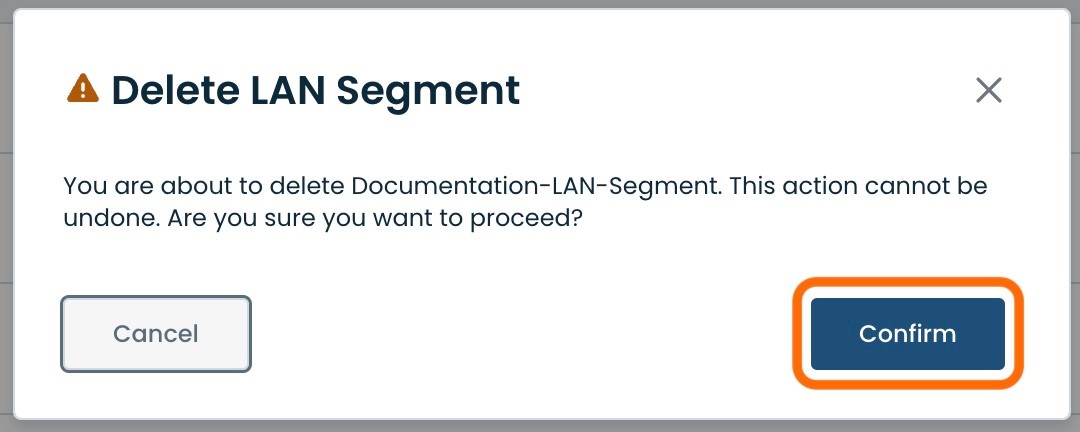
A modal will appear with a confirmation to proceed with the LAN Segment deletion.
If the LAN Segment is confirmed to be deleted, click 'Confirm'.
The LAN Segment will be removed and no longer present in the LAN Segment Table.
